Frame Hanger Project
I love old picture frames. All kinds. I’ve got a hallway of empty ones upstairs. Sometimes I fill them. Sometimes I paint them. And sometimes I do something fun with them…
This frame I once painted black with a silver line. Years ago. I was over it. (Ignore the ugly paneling in the upstairs hall we hope to rip out soon)

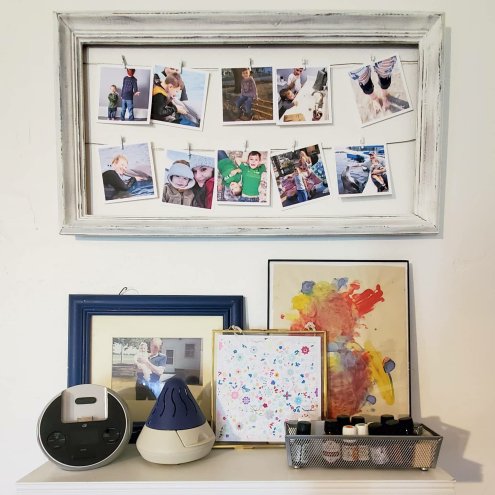
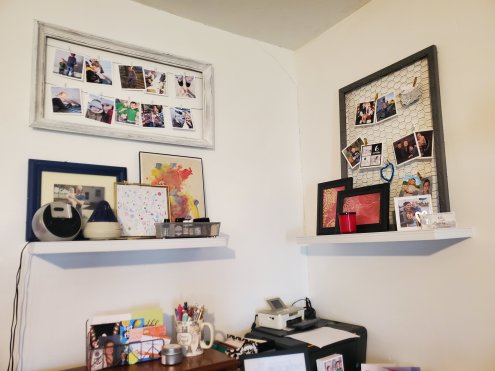
I wanted something lighter and brighter for my office. And I needed a place to hang some of my beautiful Parabo Press photos. (If you haven’t ordered from them, you must. They are gorgeous)
So first I lightly sanded the frame. Then I painted it white. I used wall paint for this project because it’s what I had. And its quarantine. And this step wasn’t super important for this project. It took 2-3 coats, but doesn’t need to be perfect.
Then I sanded with a foam sanding block. I scraped the edges and roughed up the centers. Go slowly and start lightly. Keep going until you love it.
Then, because I wanted just a little something more for this one, I used a small brush and “dry brushed” on some charcoal gray paint. This means I dipped a tiny amount on the brush and then swiped most of it off onto a paper plate. When the brush is almost dry, wipe it on the frame. It will give you just a tiny bit of paint and give a smudge-y look. I used a paper towel to rub this in as I added it too. It came out nice and weathered.

Then to add some wire. You could use twine or ribbon, or whatever you have. I had some picture hanging wire from a hanging kit. I cut it slightly longer than the width of the frame, maybe a half inch extra on each side. Then I pulled it tight across the frame and used a staple fun to staple it in place. I twisted the extra ends into a little ball to help keep it in place.

You can get tiny clothes pins on Amazon.
And viola!
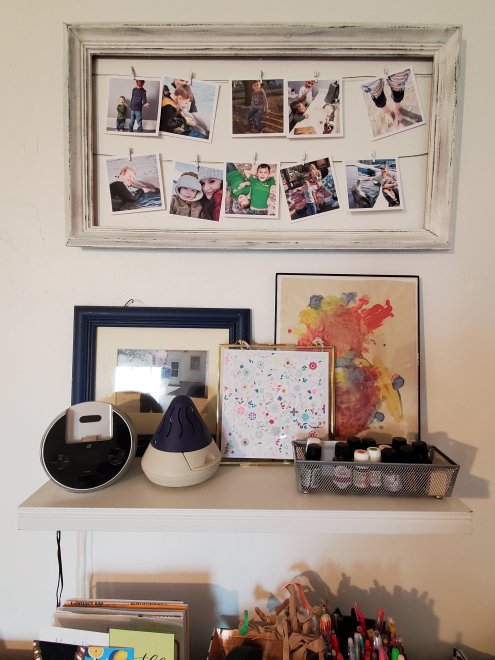
I’ve also done this before with chicken wire…

What do you think?
Doing any quarantine projects?!
XX,
Jess
Permalink Comments Off on Frame Hanger Project
Teen Bedroom Redo
So, I’ve mentioned that this new-to-us old house is in pretty ugly shape and that we have been redoing all the rooms bit by bit. One of the rooms that hadn’t gotten any love since we moved in was Jordin’s room. Check out these dingy, bland, old lady looking photos:
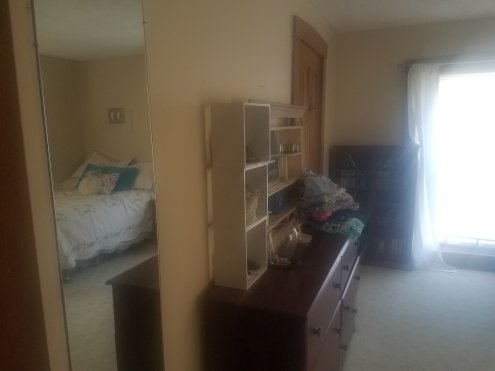
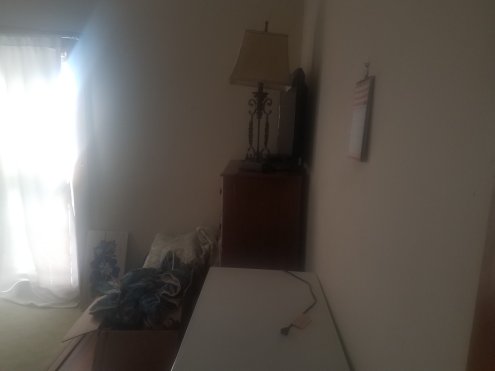
We hadn’t even hung anything on the walls because we knew we wanted to paint. Poor girl! Plus, the rooms all need to have more outlets put in (how is one outlet nearly enough?!) and overhead lights with switches added (hello?!). Needless to say, she was not thrilled in her set up. But, enter her 16th birthday, and we had the perfect excuse to make ourselves get the room beautified and surprise her with completely glammed out digs. Annnd… after:
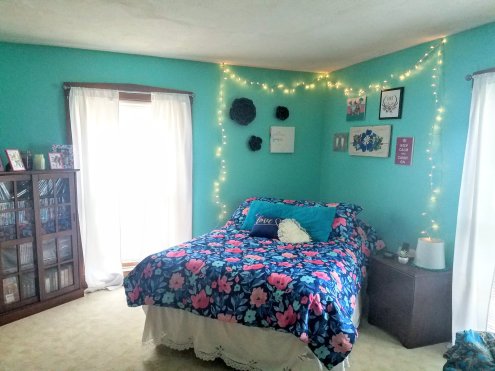
Ta da! Total teen girl. Her jaw dropped. Win!
This was the mint turquoise color she had picked for her bedroom at our previous house and she was really wanting it again. It is super pretty, and not quite as bright in person. She also loves pink and peach. I added some navy to calm and tie the colors in and some gold hints for glam factor. Sounds busy. Totally goes.
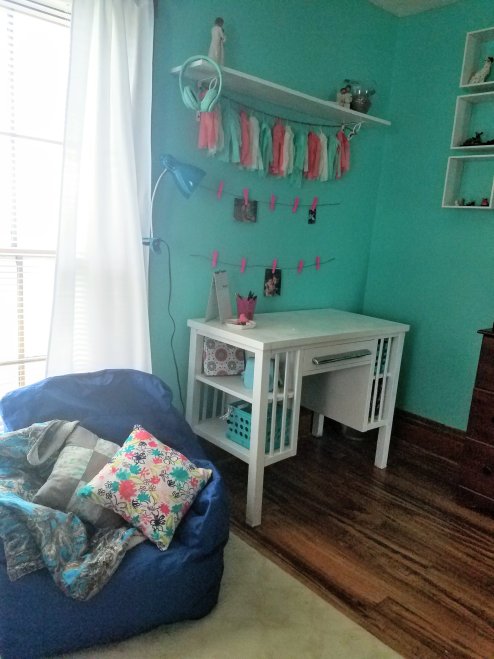

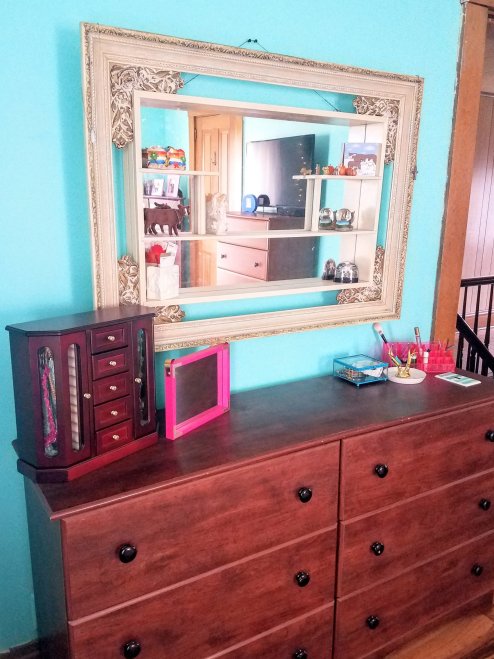
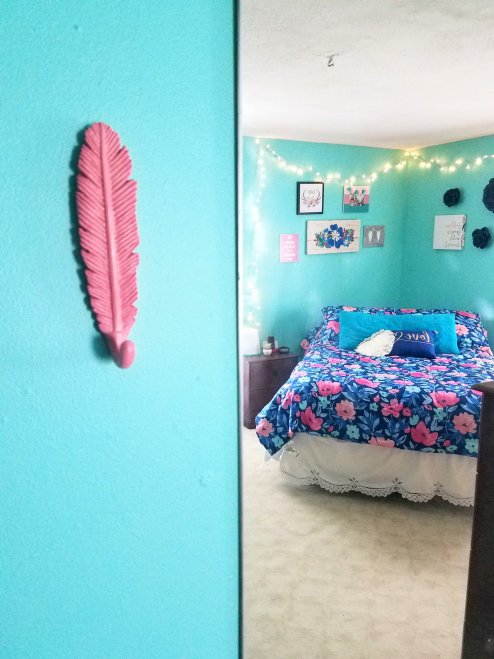

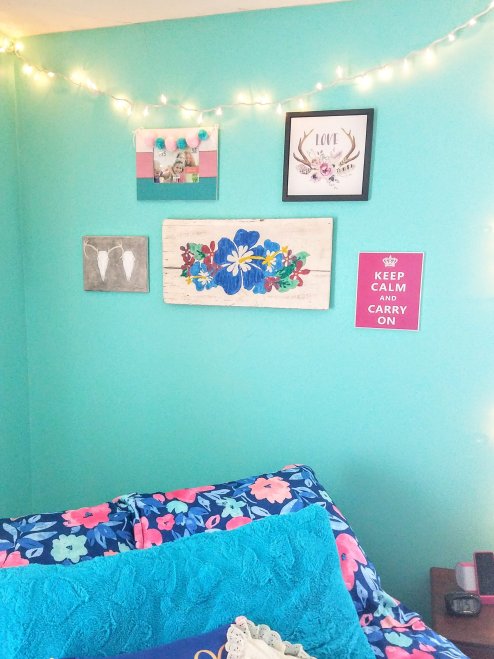
Some old, some new, plenty of Hobby Lobby help. She wanted a little girly and a little rustic. She also wanted “fairy lights” so fairy lights she got.
We can’t change the brown furniture (it was her grandmas), and new carpet isn’t going to happen just yet, so working with what you’ve got sometimes has to just work… but…
Truly I love how it turned out. Dont tell her but Santa is thinking about a rug and a chandelier, along with new knobs for the drawers. 😍
Where Have You Been, Girl?!
Hi all! Yes, yes. It’s been forever. BUT, I am back. And with lots to share.
One more kiddo and a new (to us) house have kept us very, very busy. But this new house has also given us a TON of new projects to show you while we go. So, I’m back and full of fun stuff to document.
The house. If you have been following along here for very long, you know I love me some old houses. And old projects. And old antiques. Everything with a story. Let me tell you, this house had lots of stories. Built in 1860, and sadly remodeled in the 70’s, we have our hands full, both with old stories and new ideas.
So, here she is. All potential and boring right now.

Pretty cool, right?! And a ton of work, a few headaches, blood, sweat, tears… and love. I’m excited to be getting all creative again. As the new little one allows, of course. 😂
As many of you know, this space was created years ago when I got my first house to document and share all of my remodeling and decorating ideas, trials, errors, and adventures. This is where a plan to keep most of my focus now that I am back with plenty to keep sharing. But, I also plan to share some family, kids, health, and even personal stuff. Let me know if there’s something you would like to see!
And finally, I haven’t shared about myself in a very long time. So, my name is Jessica. I am a social worker with a Bachelor’s in Psychology and a Master’s in Forensic Psychology. I love to be outdoors, camp, and travel, decorate, refinish and repurpose furniture, and and hunt for bargains and hidden gems. I live in Iowa with my significant other, Jason, my 15 year old step-daughter, Jordin, my 5 year old son, Brantley, and my 4 month old son, Barrett. Oh, and our little growing crew of pets. Every farm needs chickens and goats, right? We not only love making our new old house a home, but we also love trying out new things along the way. I hope we can inspire you!

Glad you are here! It should be fun, and a little new, so stick around!
Mom’s Dining Chairs
One of my many recent projects is refinishing my mom’s dining room chairs. And yes, I am finished with this one!
Mom has gorgeous antique wood dining chairs. But, the cushions were reupholstered many years ago, and are now raggedy and faded. So, we bought so printed leather and I set to work.
Here is one chair before:

And the after:


This was super quick and easy… and my first experience with powertools, my new staple gun! 🙂
