A Whole New Me
I did it! I left the office world for good!!
Don’t get me wrong, it didn’t all start by choice. I’ve been a social worker for 18 years. And I’d been with my last agency for over 12 years! And with this seniority, came a higher pay. But when funding for programs was cut, I was also the first to be cut, as I was “too expensive”. Wait, what?!
It really got me thinking, what is stability? When do you know you have it? And why would I ever want to give my all again for an agency that believes I’m just a number, a coat against their bottom line?!
So I decided I wasn’t going back.
I took a lot of training about digital marketing and online businesses. And I opened my own business. Now, my stability rests on me. Only me!
I’ve opened up financial freedom. And TIME freedom! What a thing to be able to be home and raise my own kids!
Now I know my calling.
So, I say this all to let you know that if you are struggling too, you can do what I did and find your freedom as well!!
I can show you how!
I follow a proven blueprint that teaches you how to work for yourself a couple of hours a day, and make money all from home. Unlimited income! And it works!
If you want more info on my courses, a proven plan to financial and time freedom, and a course you can sell for 100% profits as well, start here!!
And always let me know if you want more info or have questions! Let me mentor you! Let’s do it together!!
We can do this! 💪

Xx,
Jess
Why I Love My Cricut
This is a sponsored post written by me on behalf of <a href=”Cricuthttps://lnk2.io/wjcWg2L”>Cricut</a>. All opinions are 100% mine.
I have had my Cricut Explore Air 2 for a few months now, and to say I’m in love is an understatement! I’ve always been a crafter, but this things really helps me step up my game! Here I am going to talk about the 5 things that I love about my Cricut!
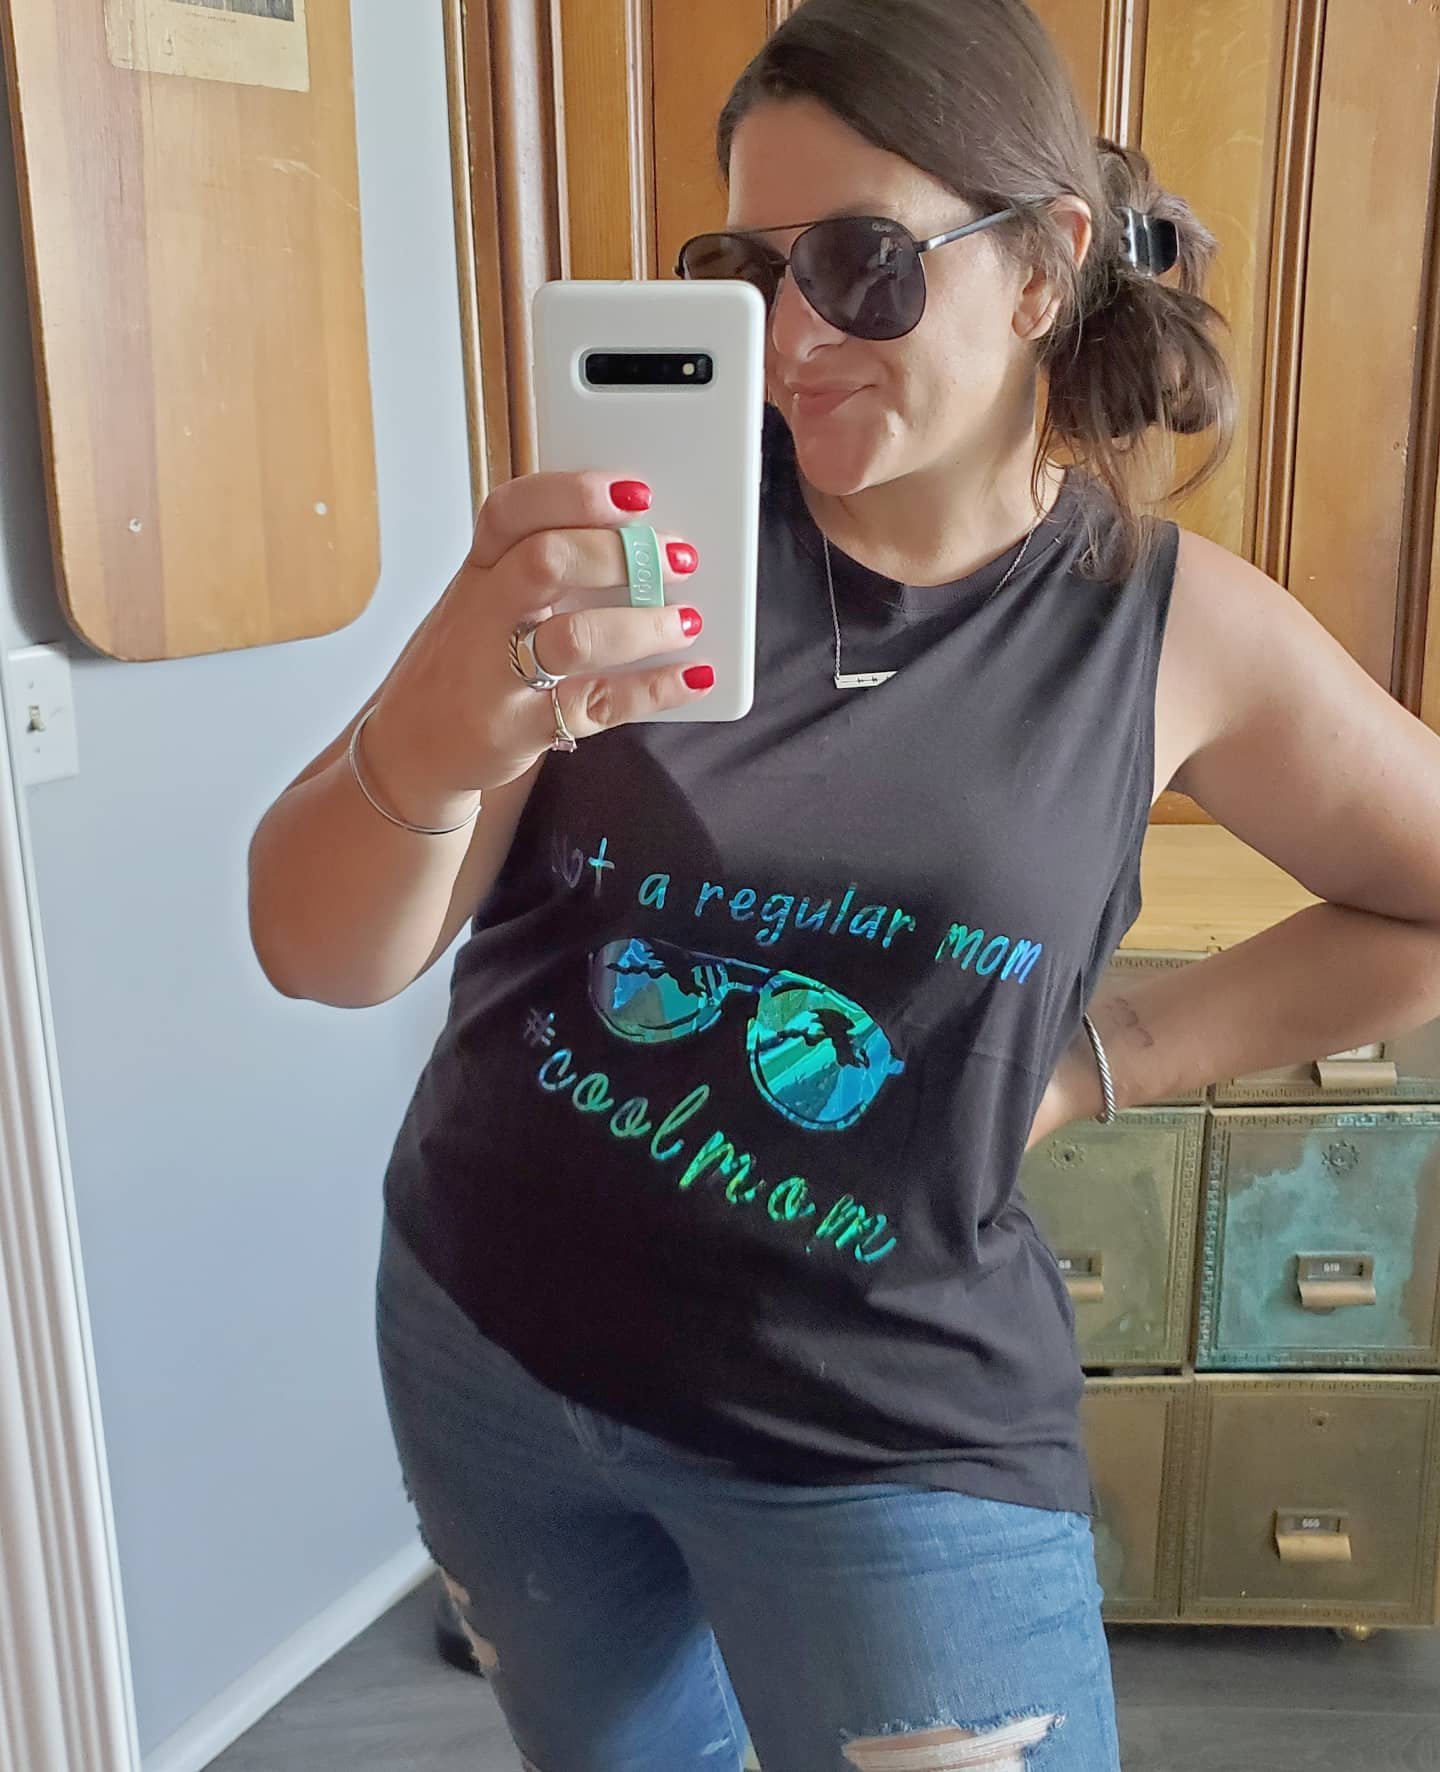
1. Its easy to use! I was truly shocked at how easy this machine is! Not going to lie, I was intimidated at first. I worried where to start and if I would be able to figure it all out. Yup. I was. Best place to start? Pick a project and jump in. They really mean it when they say their motto is “beginners luck every time.” I learn tricks and get braver each time I use my machine, but I definitely agree that picking a beginner level project and diving in head first is a great way to start and will prove to you how easy it is! Check out this shirt I made as one of my very first projects:
2. Support! That brings me to the second thing I love about my Cricut. Its like having a whole community of creators to support you. Have a question? Worried about where to begin or which type of project to do? They’ve got an answer! Not only does Cricut have a team you can email or chat with, but they have numerous pages where you can reach out to their pros or other crafters with tons of experience. They’ve all started somewhere and learned lots and are at the ready to make sure you love your machine and projects. I would know. I wasn’t sure how to customize the design I wanted to make myself for this bag, and the Facebook page group had almost immediate answers for me!

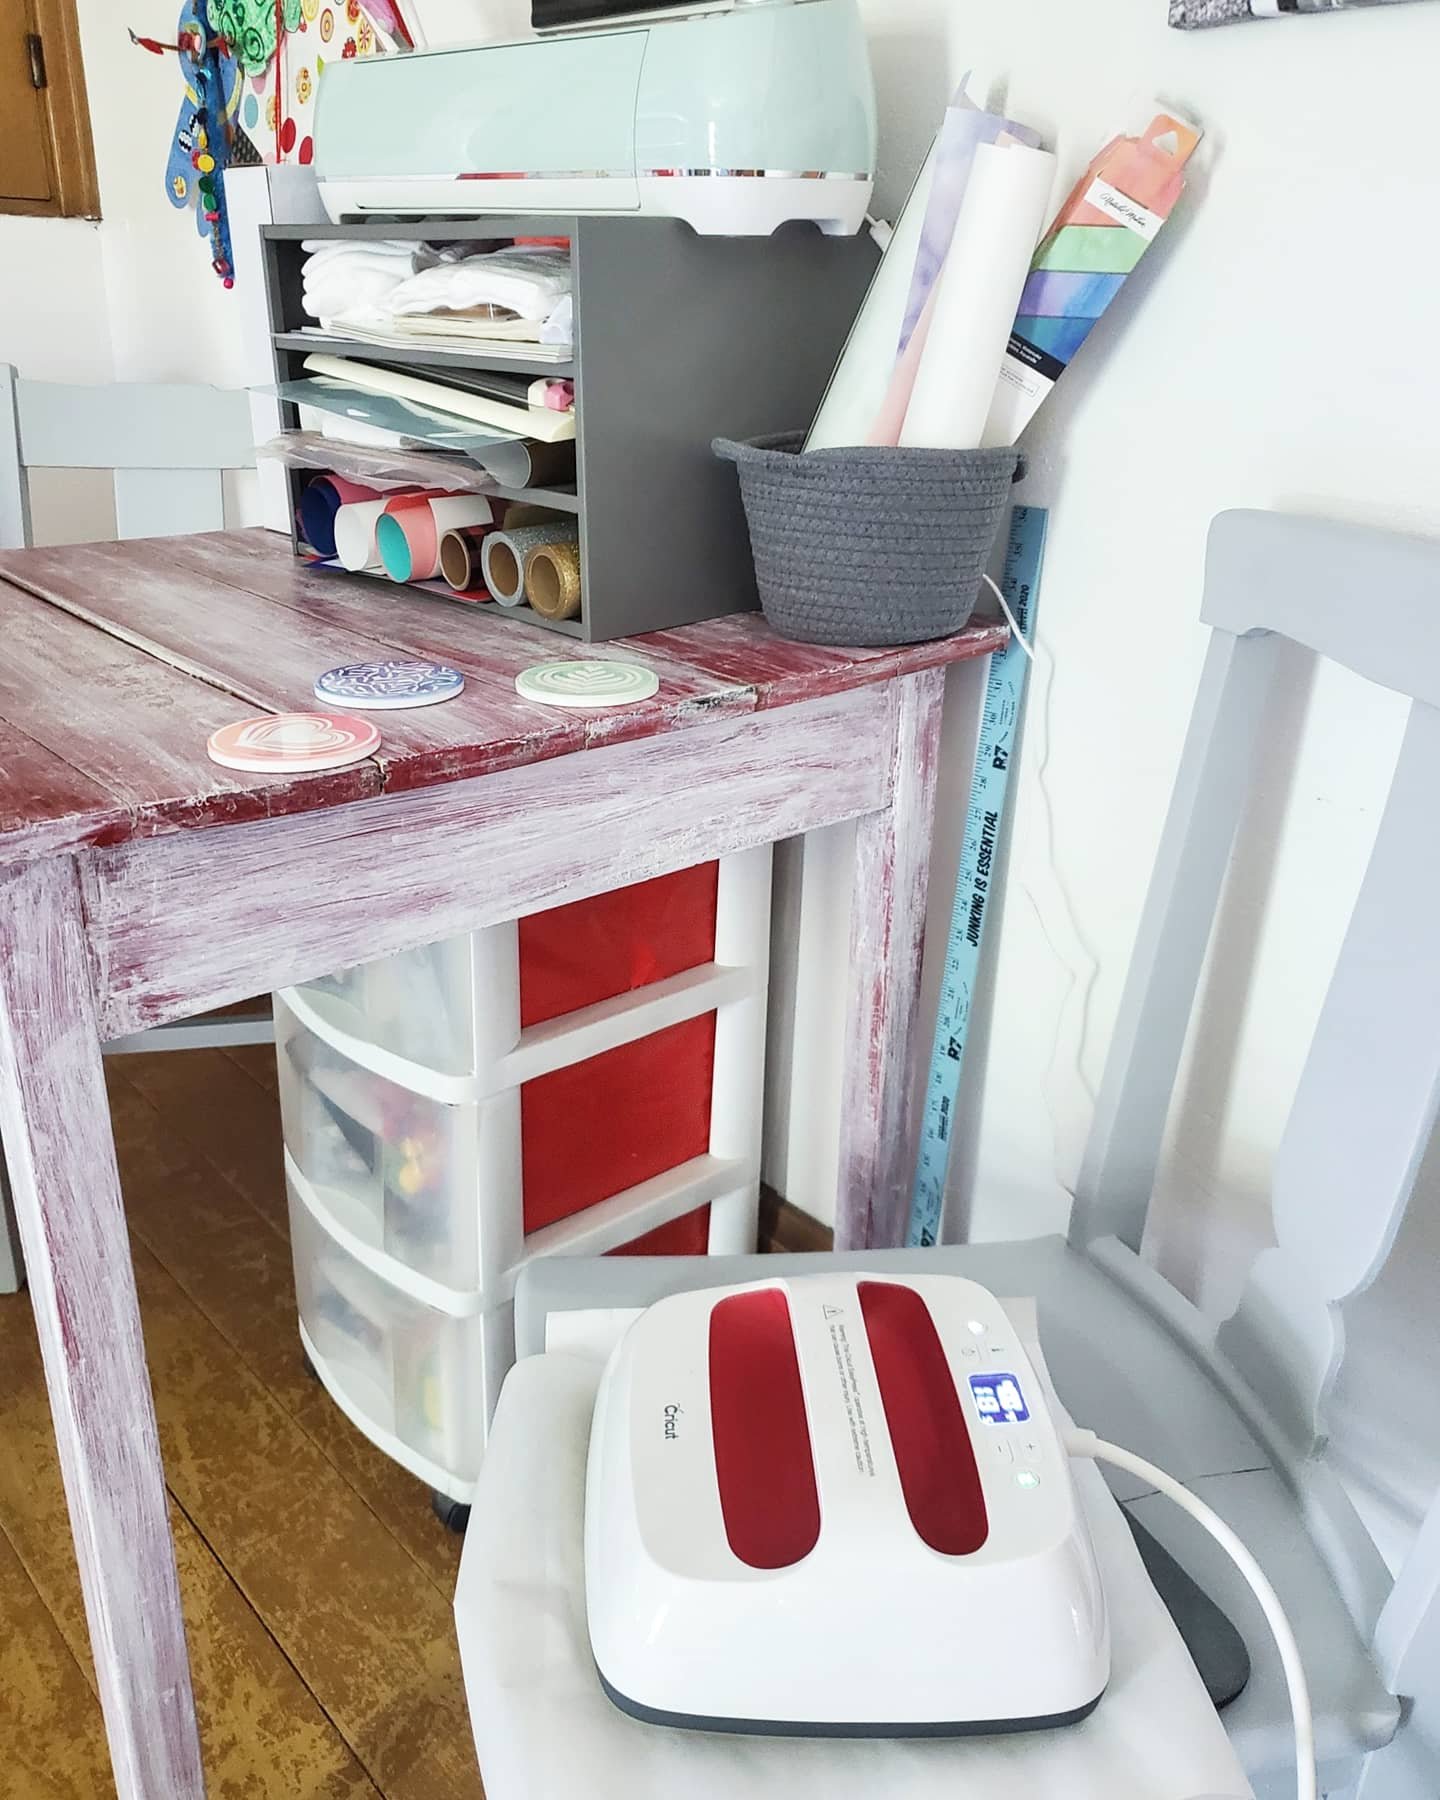
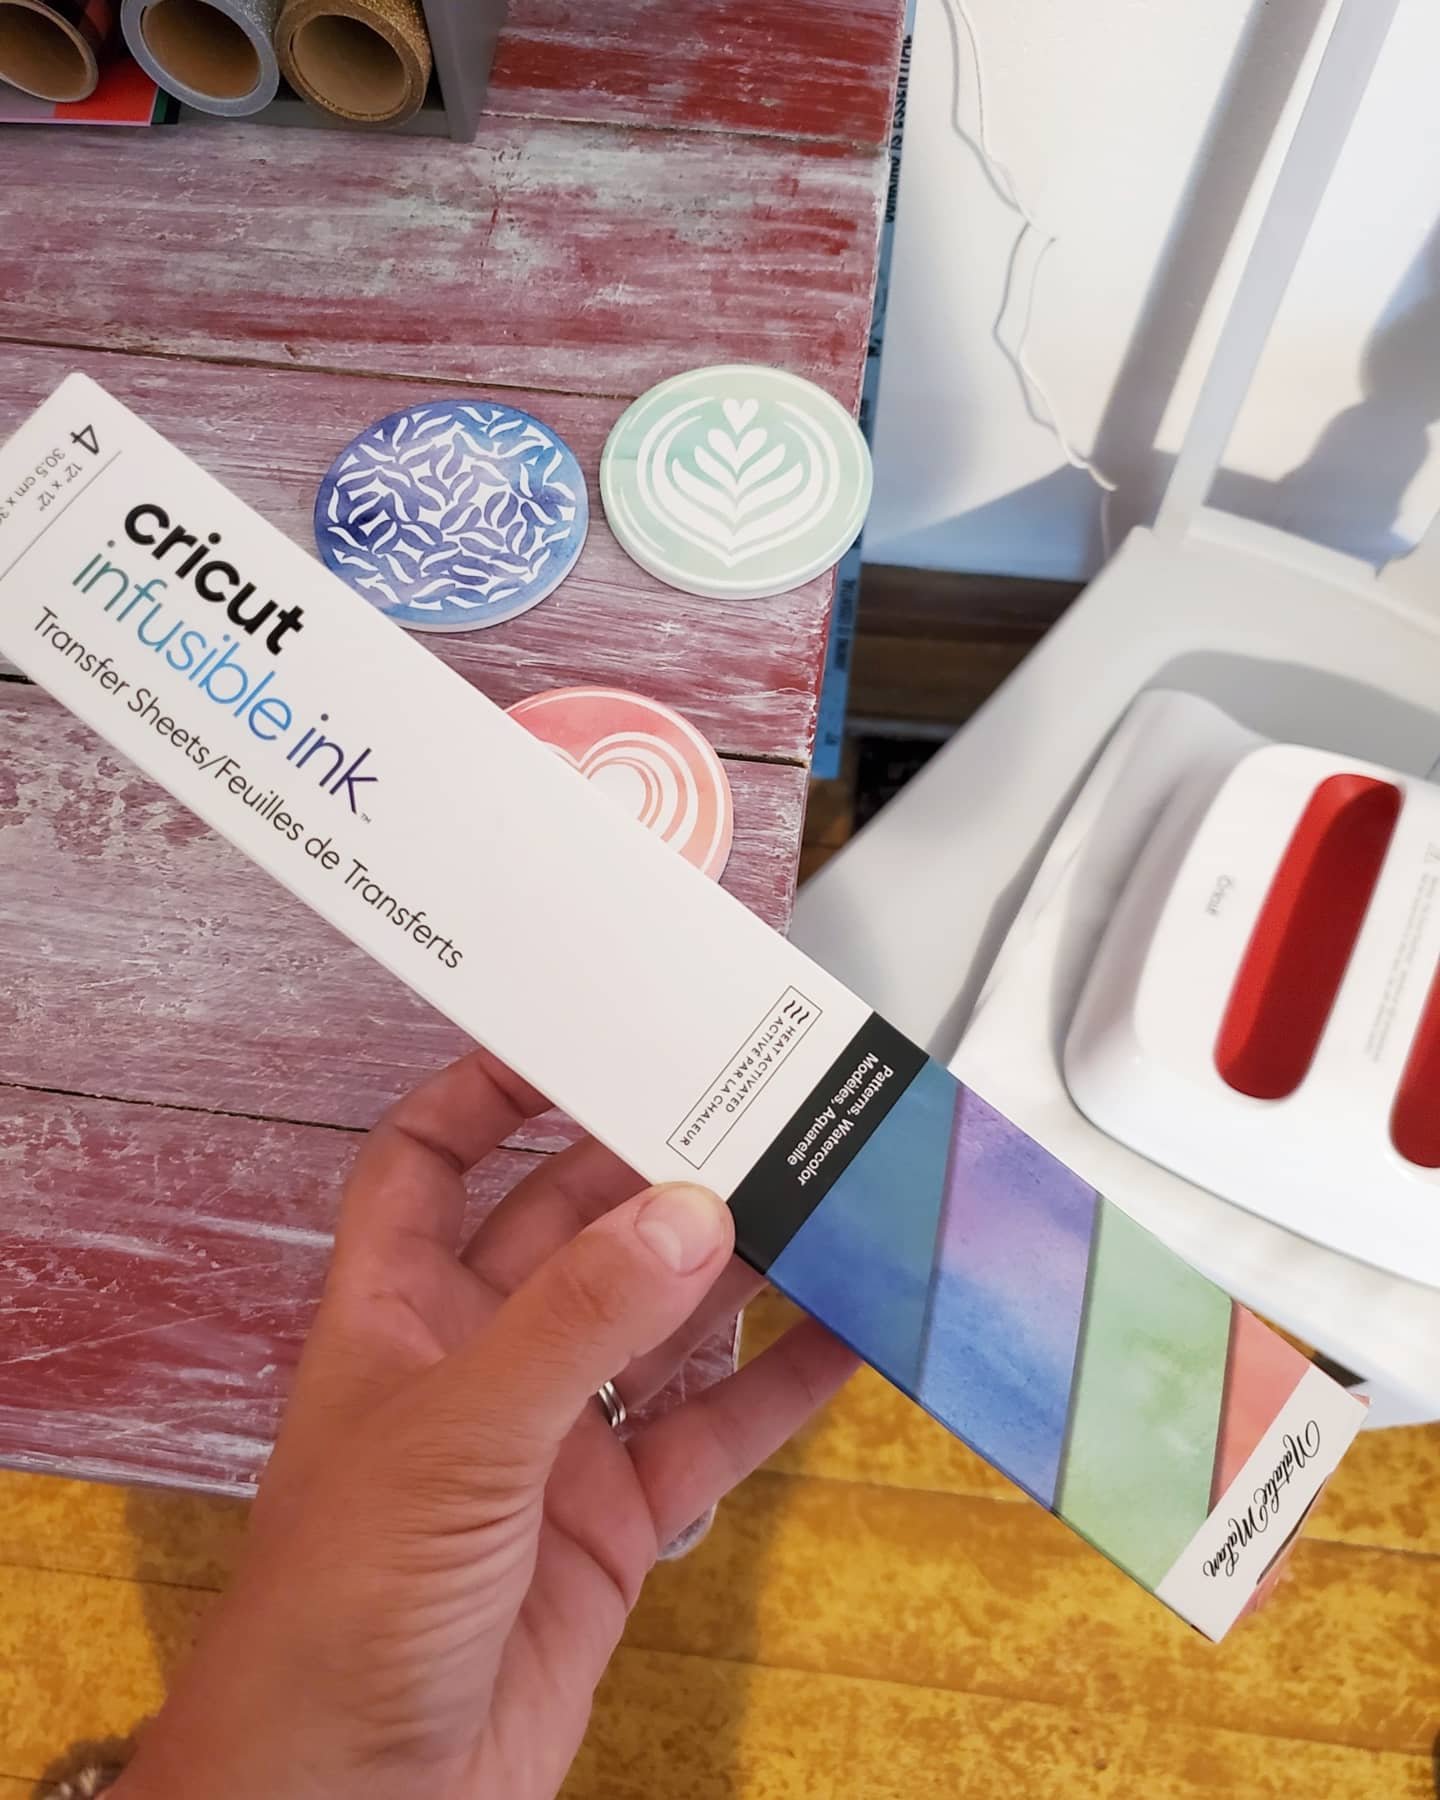
3. Ideas! This also leads me to another thing I love about Cricut, the ideas! I never worry about having a creative block. There’s no way. The ideas of projects to make are endless, for every single occasion you cak dream of. Really. You can find ideas galore on Pinterest, and Instagram, or Cricuts’s Facebook page. And my favorite place for inspiration? The Cricut emails! They send seasonal emails showing the new ideas and templates added to Design Space, their app for making. How did I know about the new infusible ink and coaster blanks to make these? One of their idea emails! Light bulb!

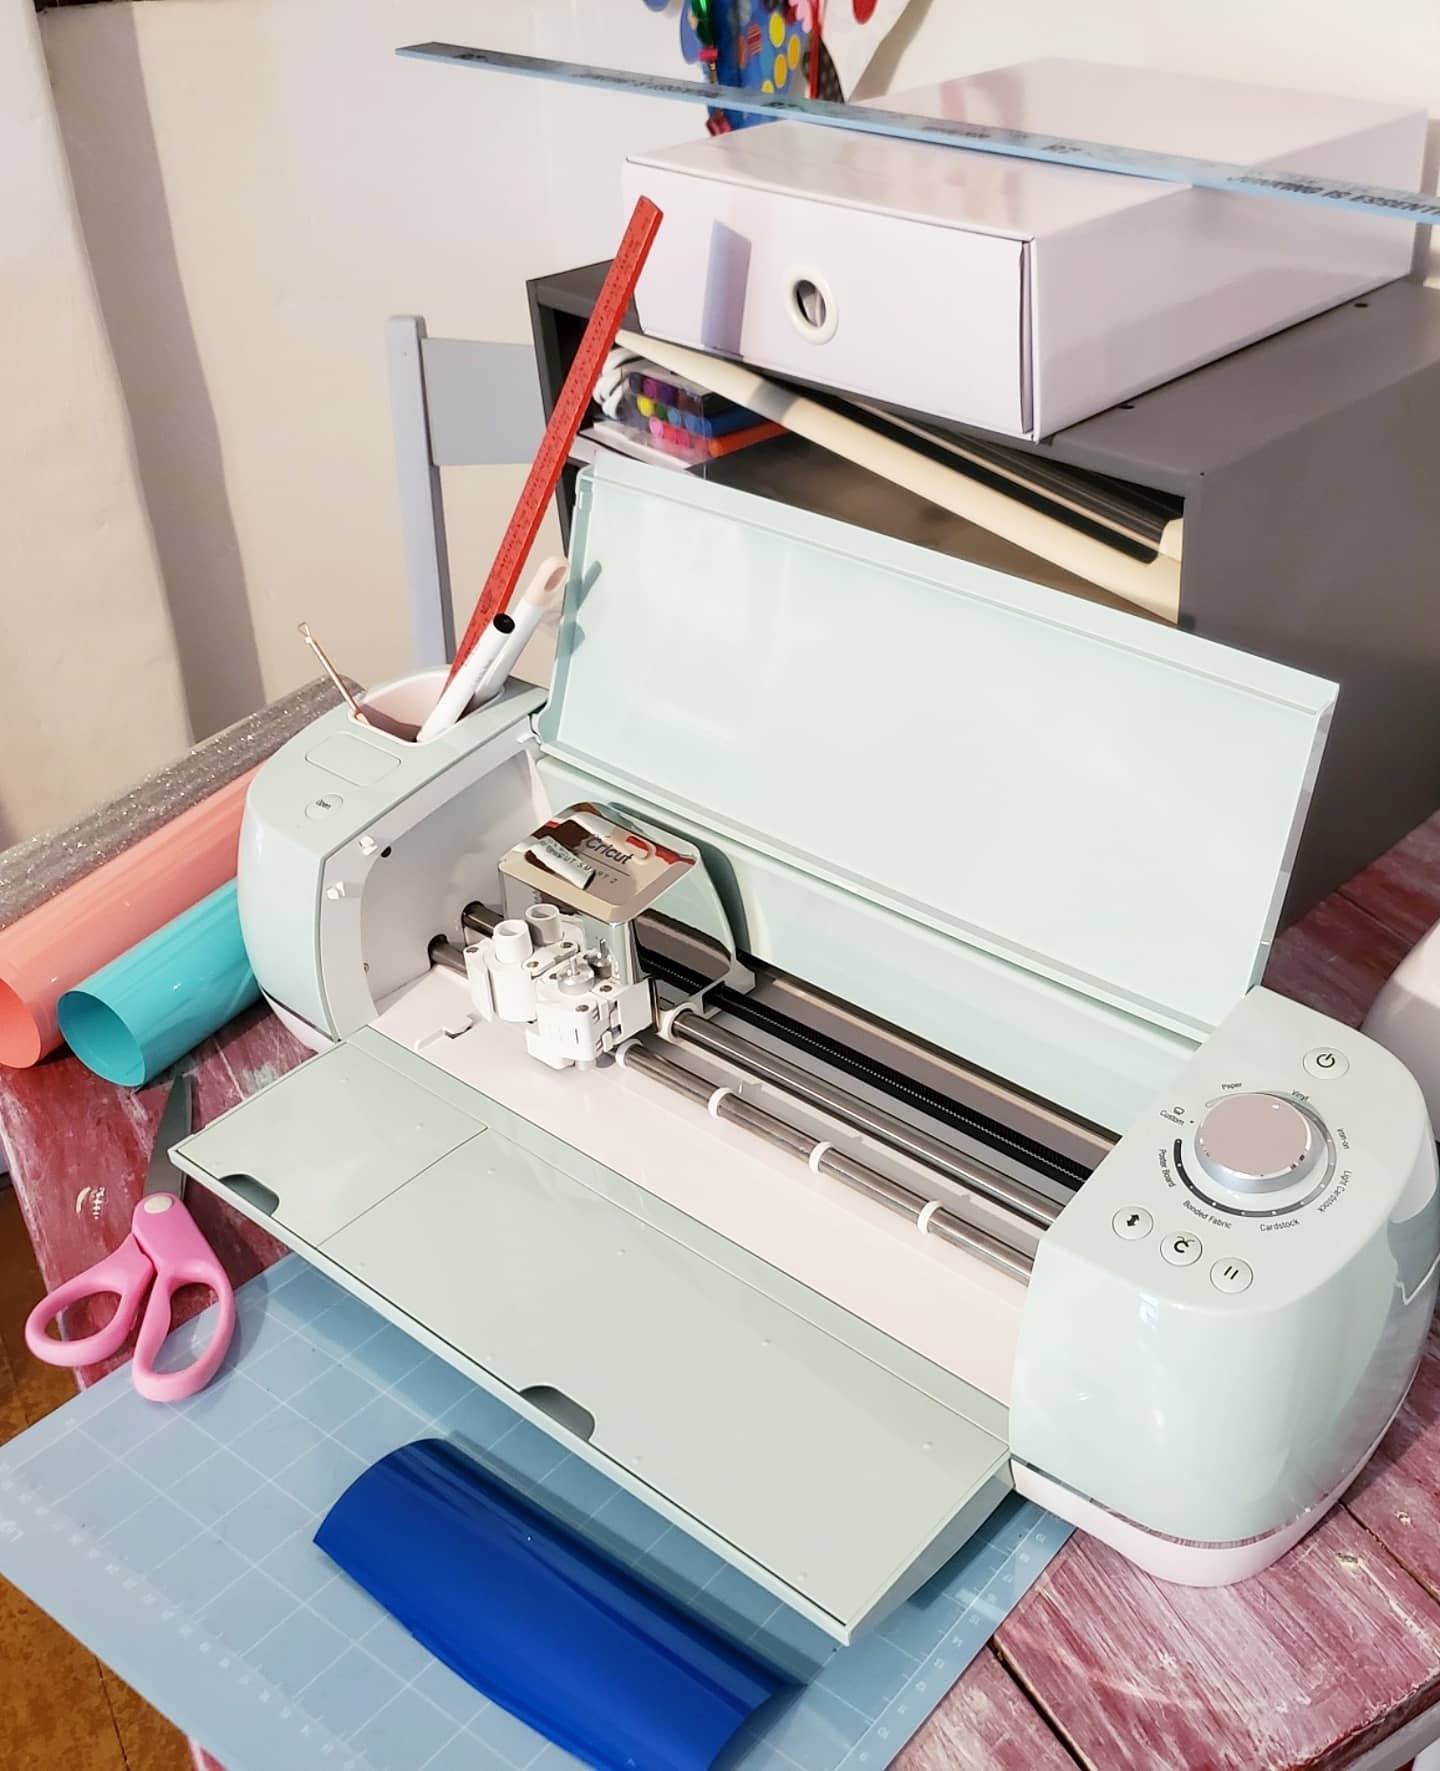
4. The options! Got a bright idea to make? You can! And Cricut can help you do it! The options they supply for you is endless. Or almost. Not only do they help with the ideas, but they make it easy to find all of the supplies you need to make visions come to fruition. They have coasters, bags, shirts, materials, pens, markers, vinyls, decals, iron ons, and the widest variety of patterns in their supplies you could imagine! Sparkles, holographics, leopard, wood grain…their possibilities are never ending! Not to mention, cricut has other machines like the EasyPress, and tools like mats, cutters, Nd weeders, to make all of the options come to life!

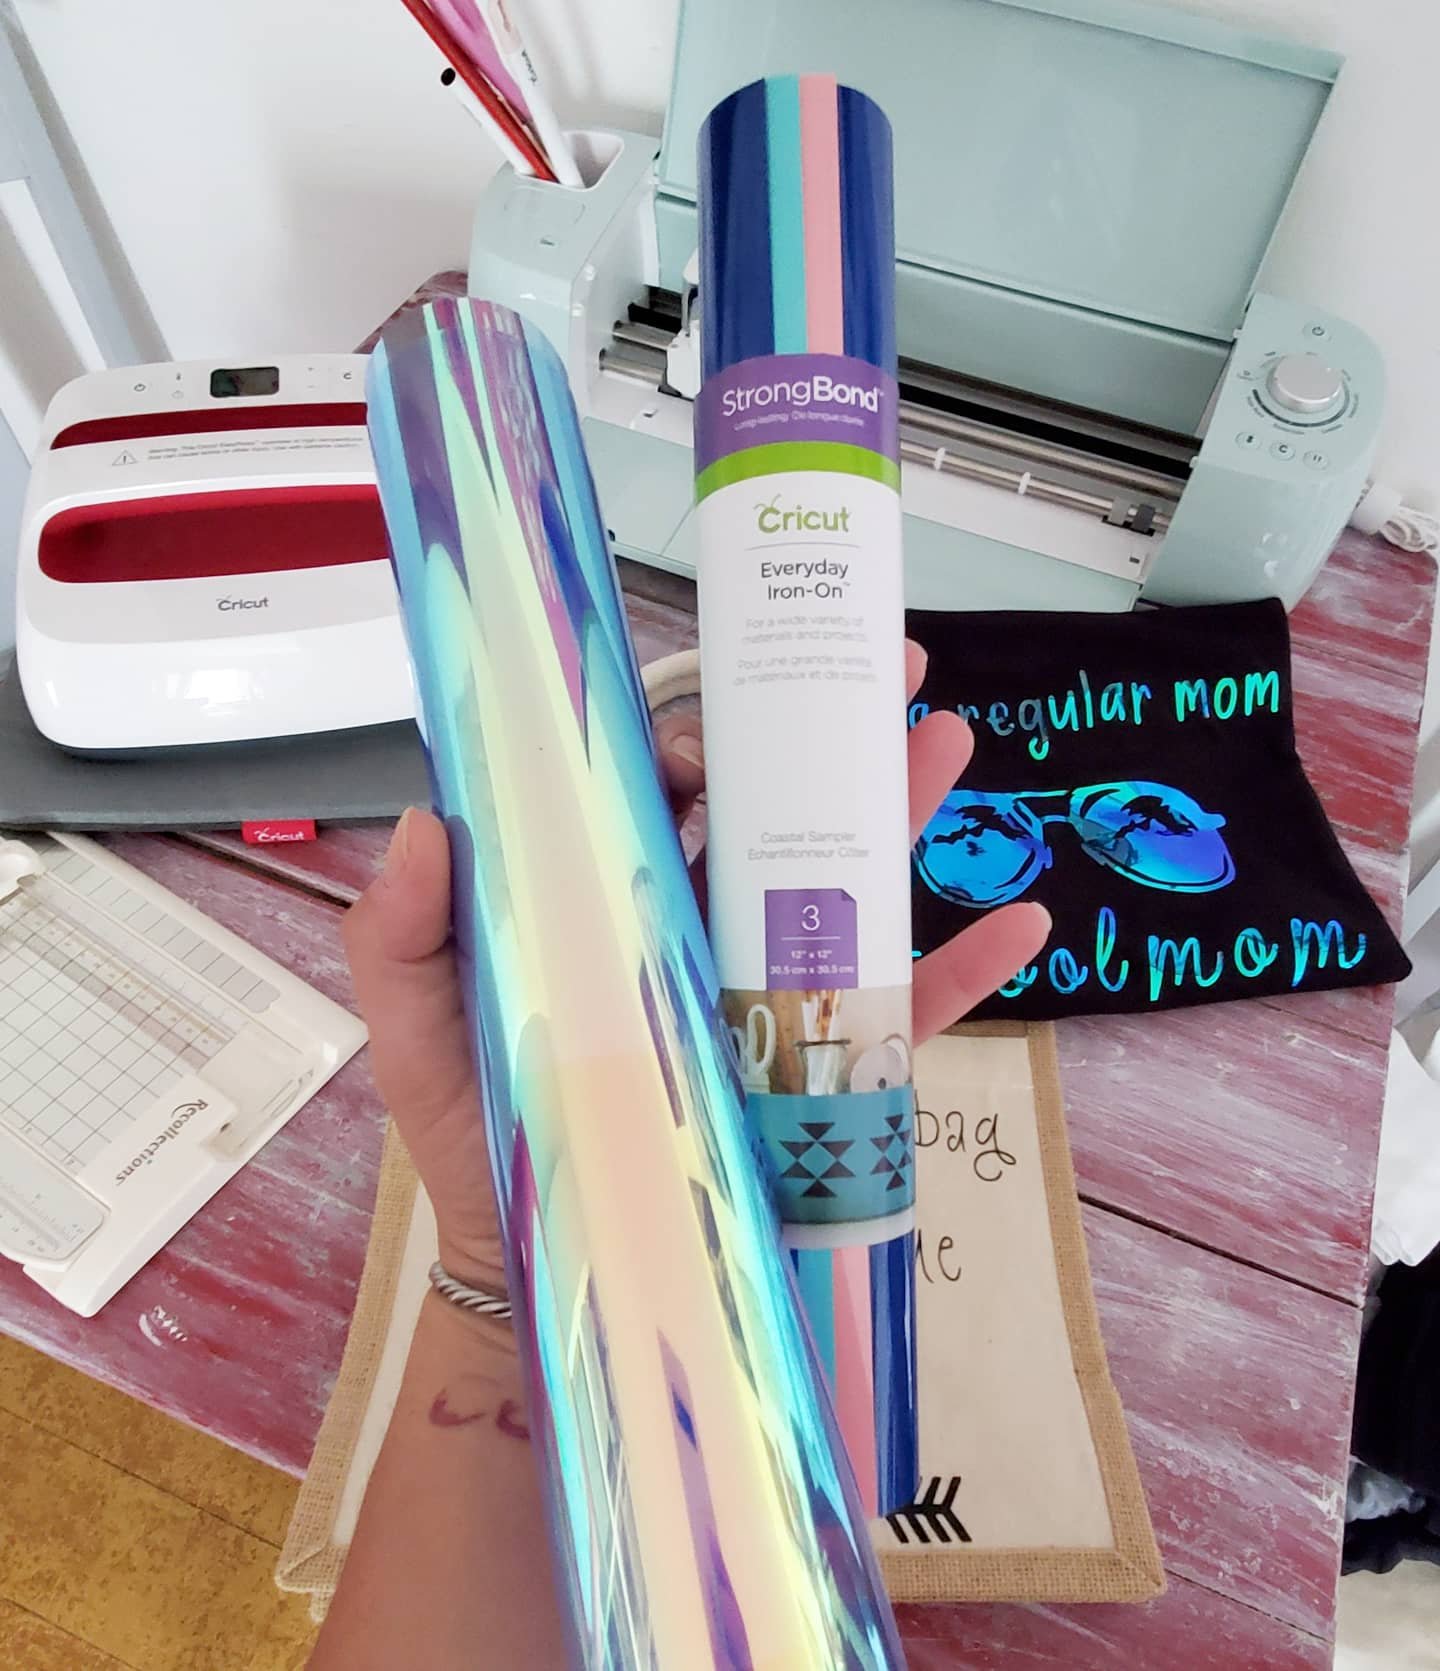
5. Capabilities! This machine not only cuts paper and vinyls. I was shocked to learn what all it really can do. Like blown away. It can cut leather, poster board, felt, fabric and even wood. But it doesn’t just cut, it can score. And it can draw! Yup! Shocked?! Me too. You can insert pens and markers into the blade holder and it can draw or write, making handmade cards, letters, signs… mind blown.
The capabilities combined with the Cricut options alone shows you that the possibilities are truly endless. I cannot wait to do another project every time I finish one! And now all of my gifts will be one of a kind made by yours truly!
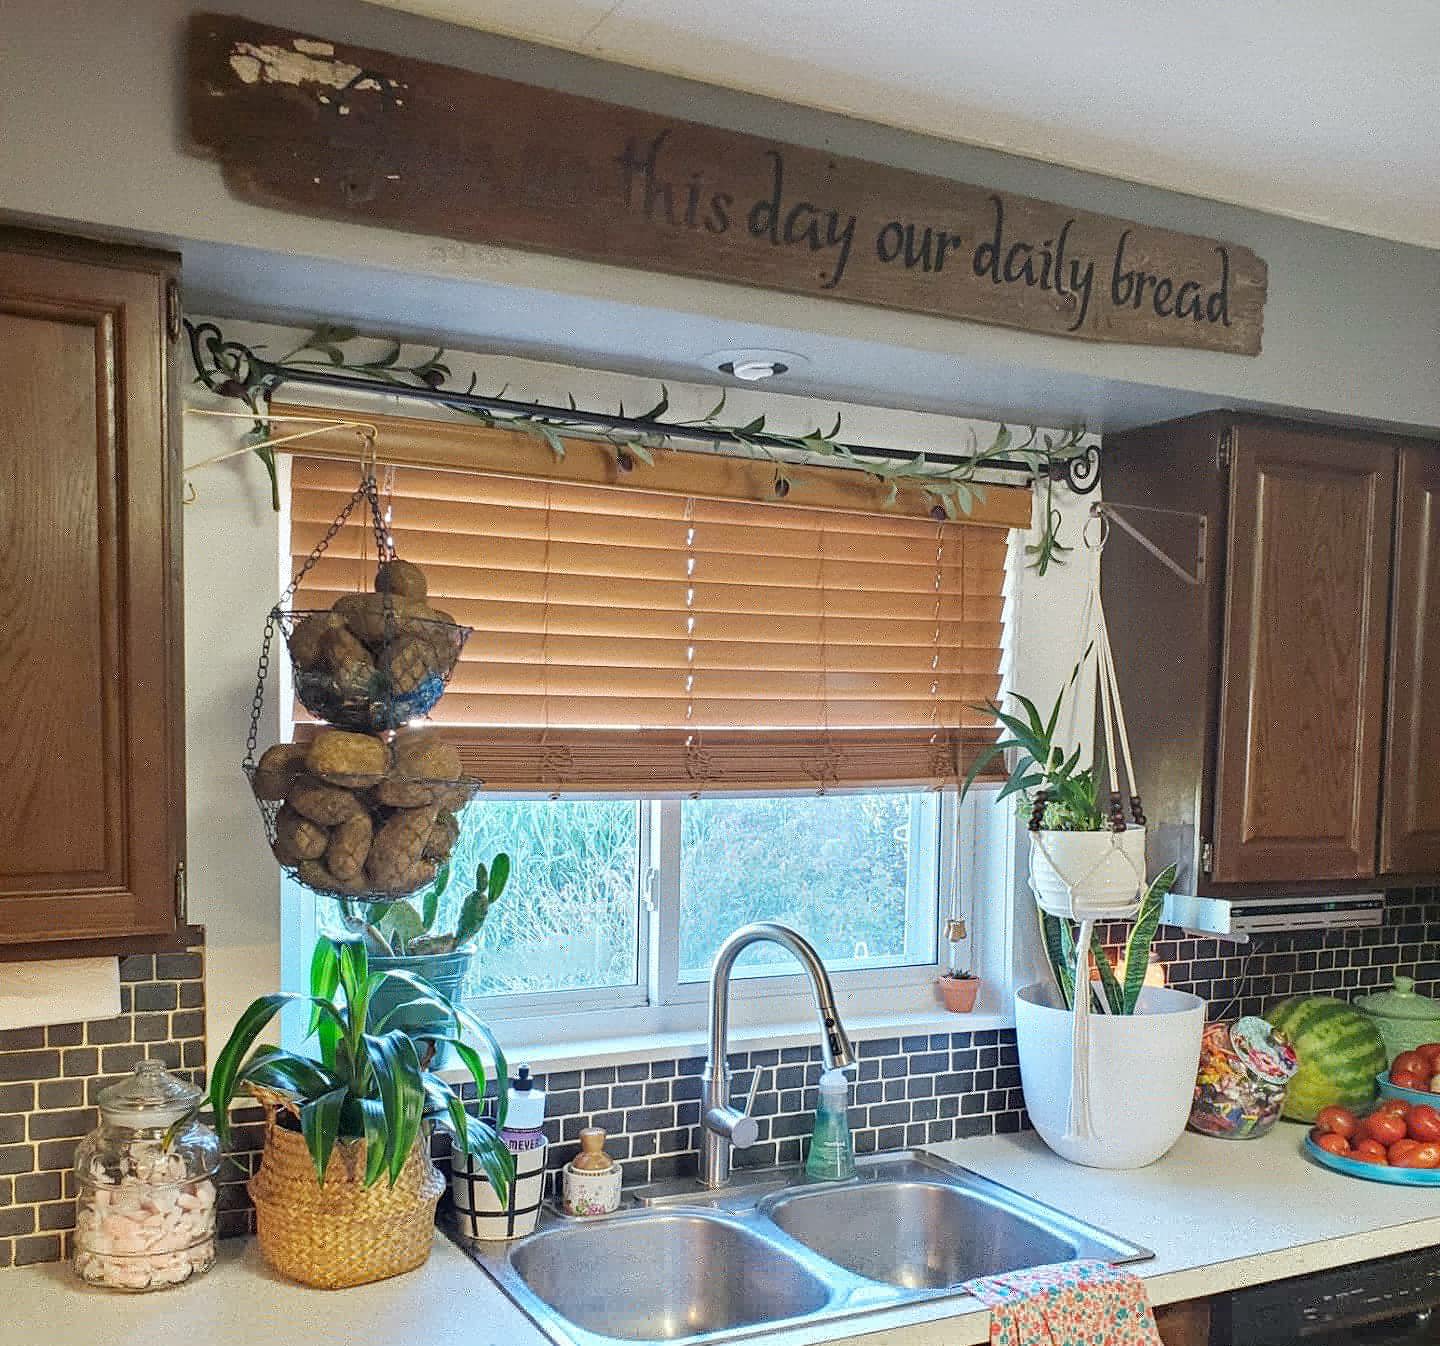
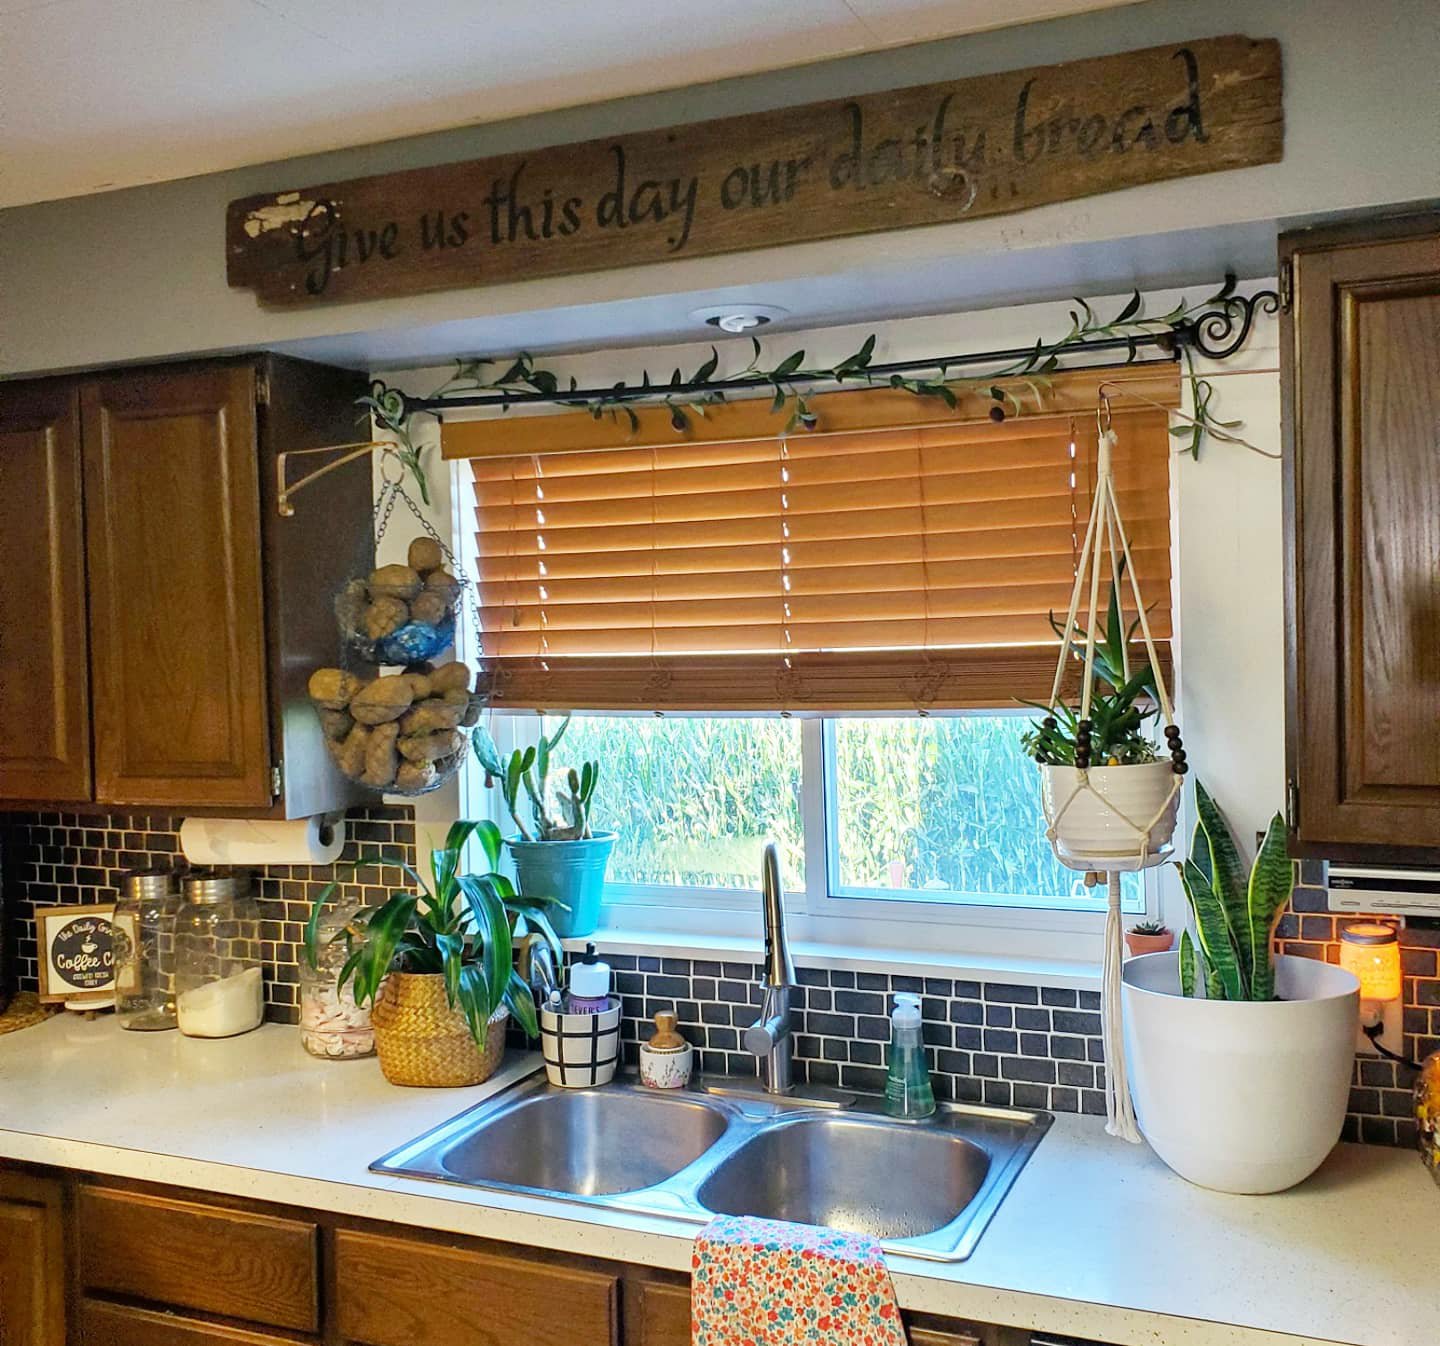
Here’s a quick breakdown of my latest project, a sign for our kitchen.
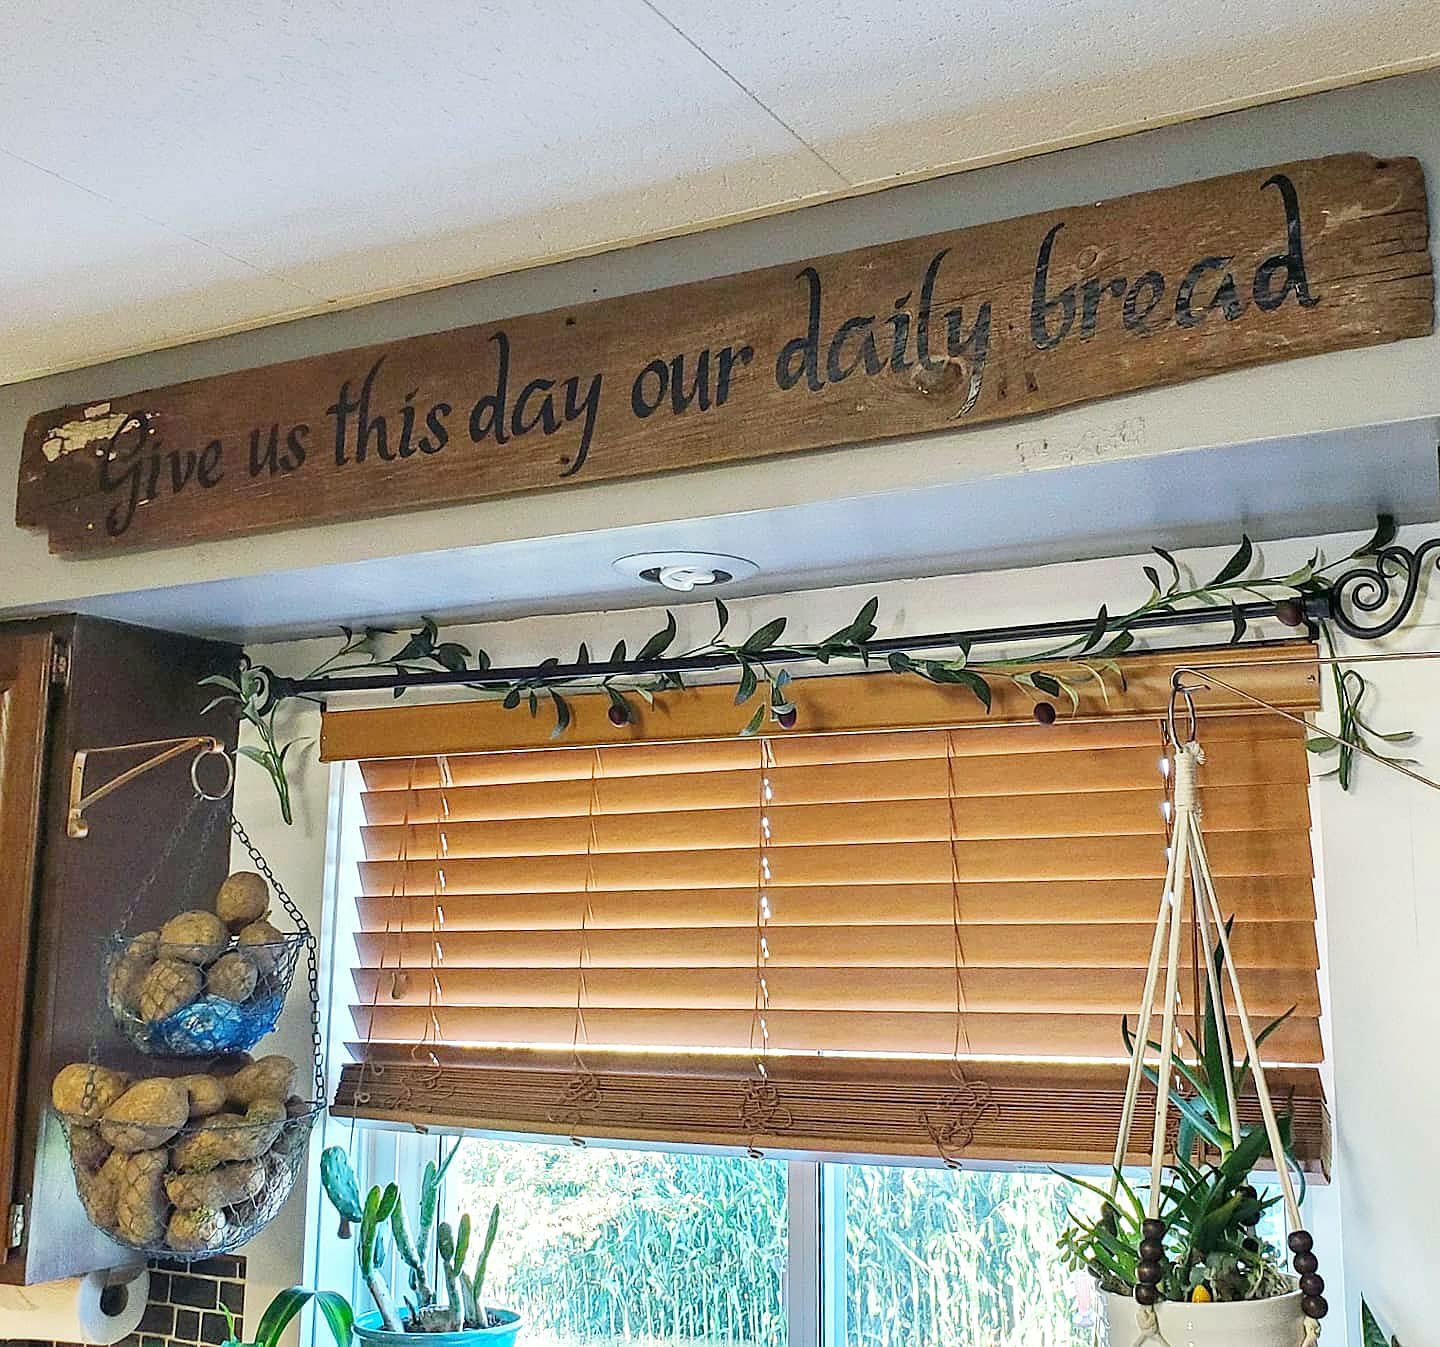
Choose a board and a quote. My board is a faded, chipped, barn board from our barn. (I’m sure to some the white paint left on one corner and the odd shape caused by years of cattle wear are not pretty, but we loved this board! 😉
Then, start on the Design Space app, and find my design template here. My board is 5ft long, but you can edit the design to adjust measurements. Once you send the design to the machine and it cuts it on vinyl, weed the excess pieces out. Use transfer tape to pick up your design and stick it down in place on your board. You could add flourishes to the ends of your quote too! You can change this design and even choose your own color vinyl. I used matte clear coat over the board to ensure no edges lift since I chose an old, rippled barn board for my project. Add a hanger or two on the back and hang. Easy peasy and a great one-of-a-kind, beginner-friendly project!
Have questions? Need help or ideas? Just ask! 😘
XX,
Jess
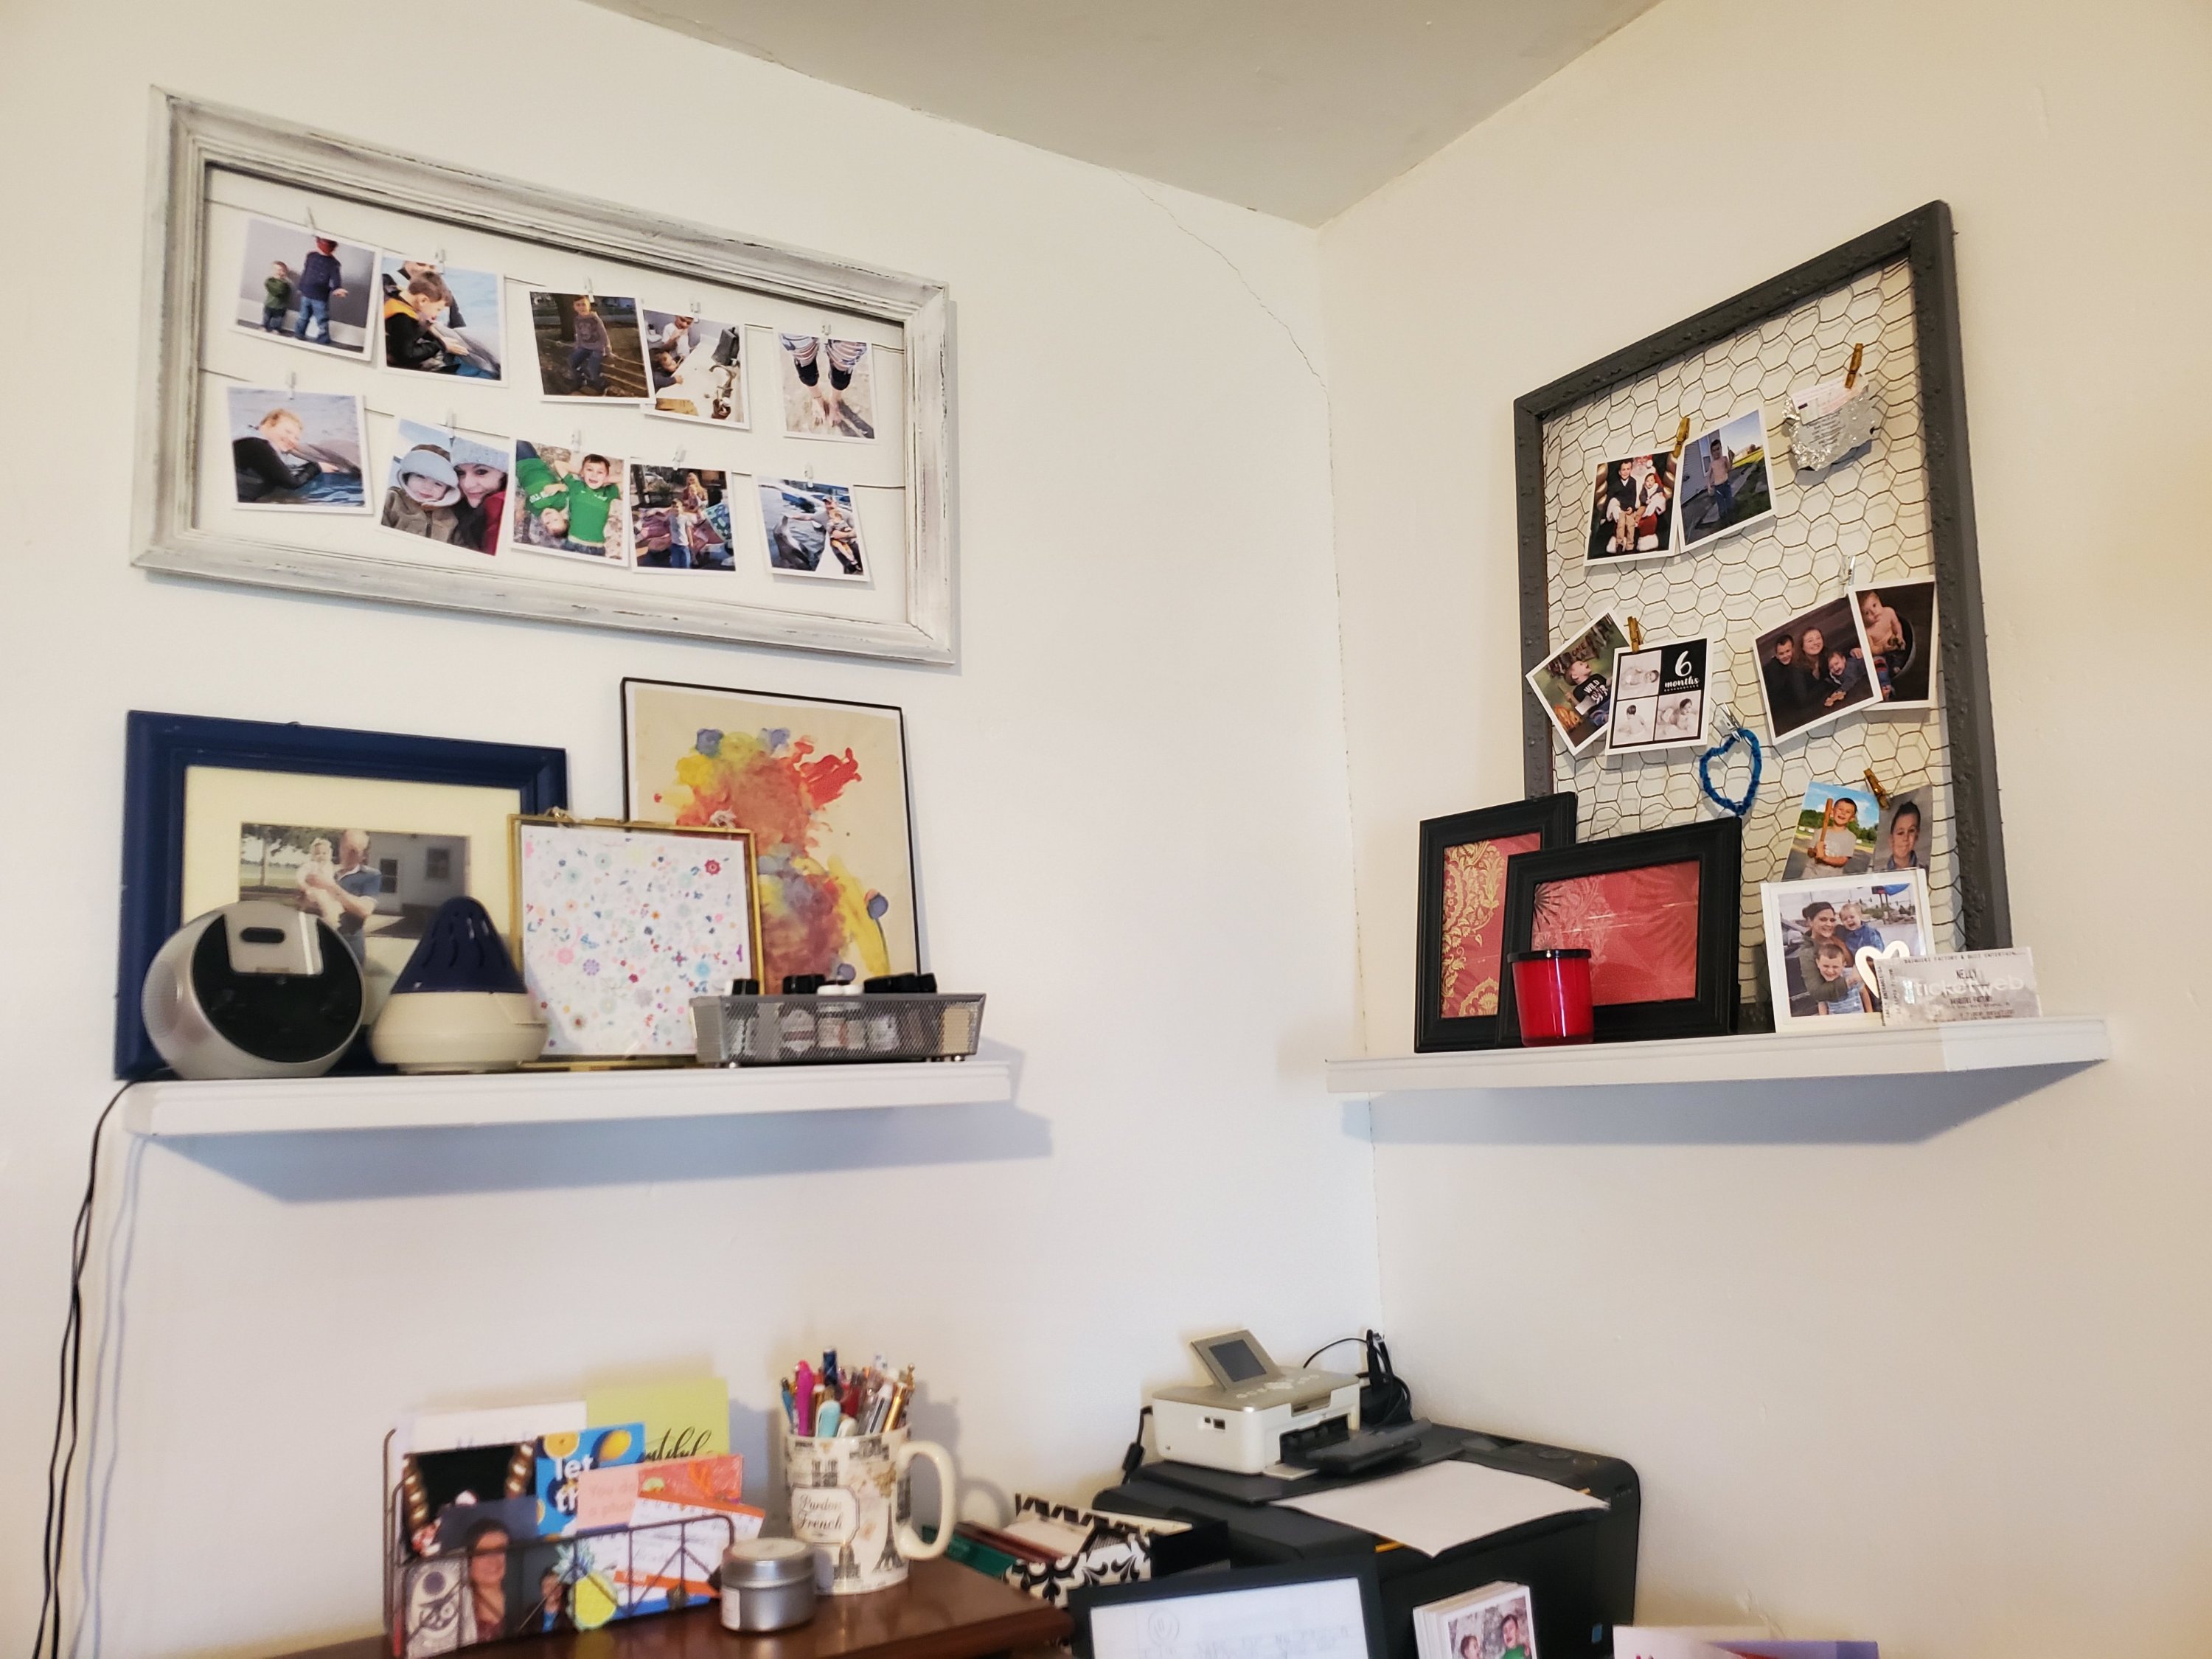
Frame Hanger Project
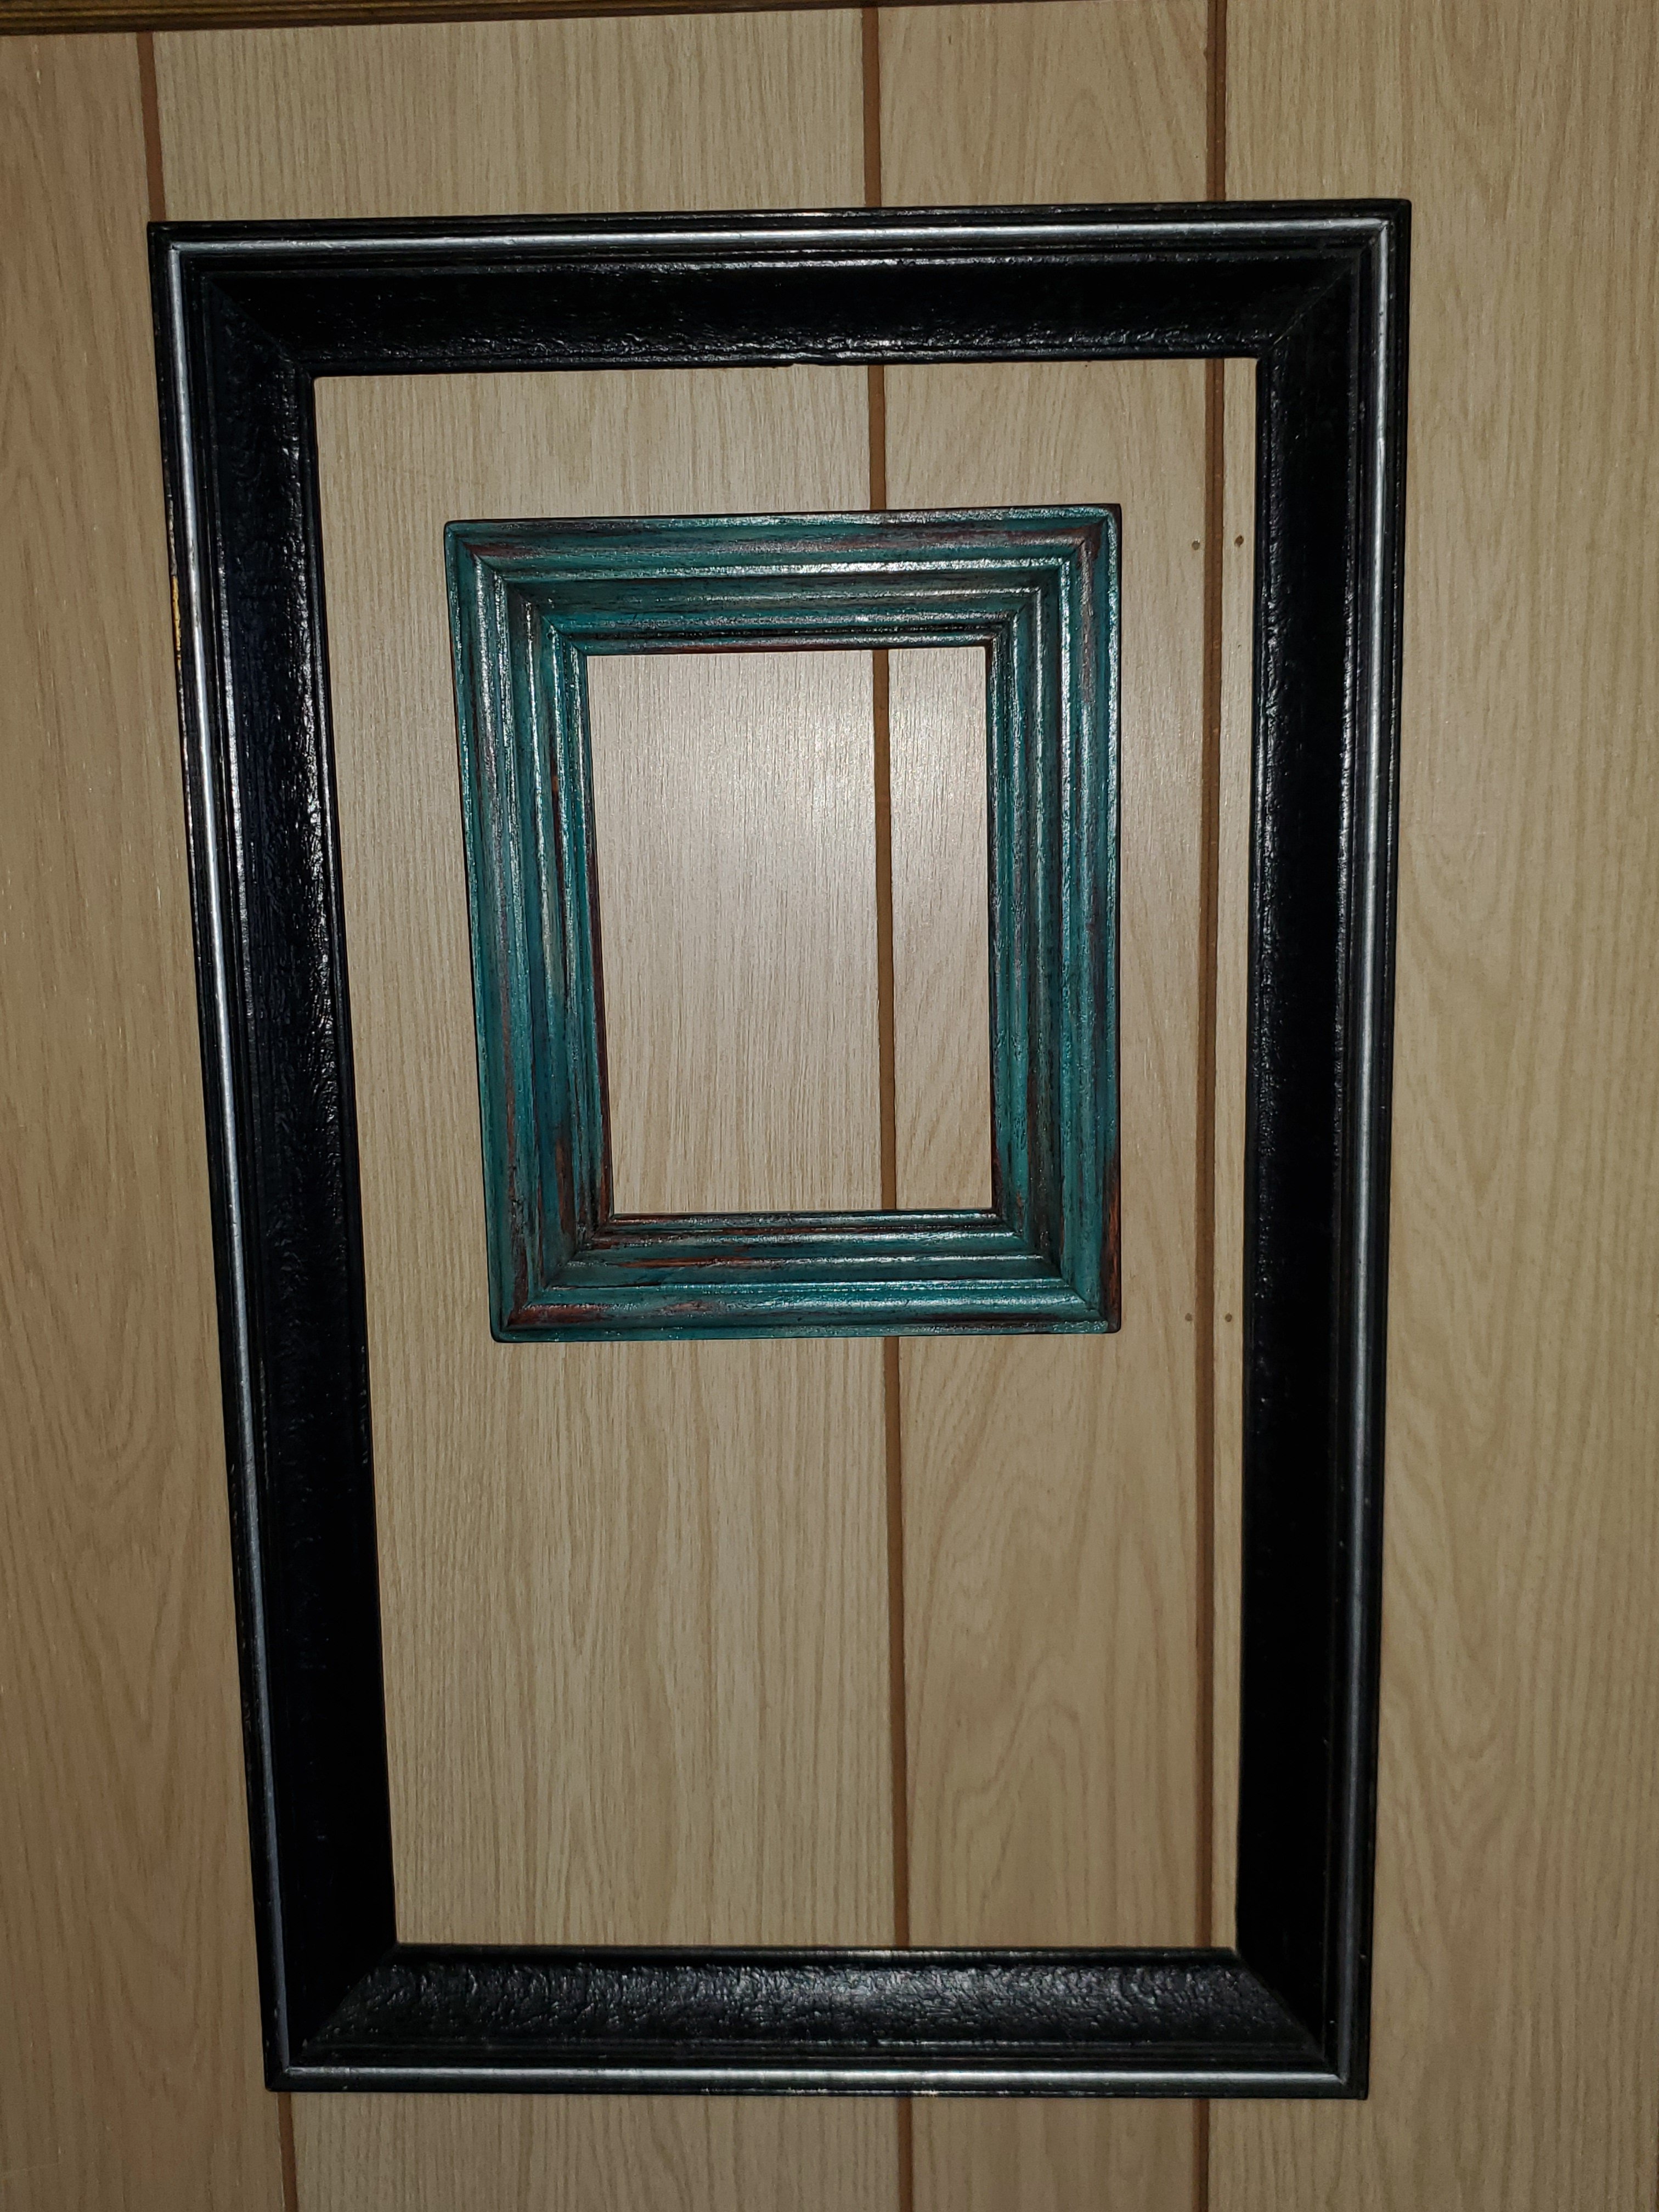
I love old picture frames. All kinds. I’ve got a hallway of empty ones upstairs. Sometimes I fill them. Sometimes I paint them. And sometimes I do something fun with them…

This frame I once painted black with a silver line. Years ago. I was over it. (Ignore the ugly paneling in the upstairs hall we hope to rip out soon)
I wanted something lighter and brighter for my office. And I needed a place to hang some of my beautiful Parabo Press photos. (If you haven’t ordered from them, you must. They are gorgeous)
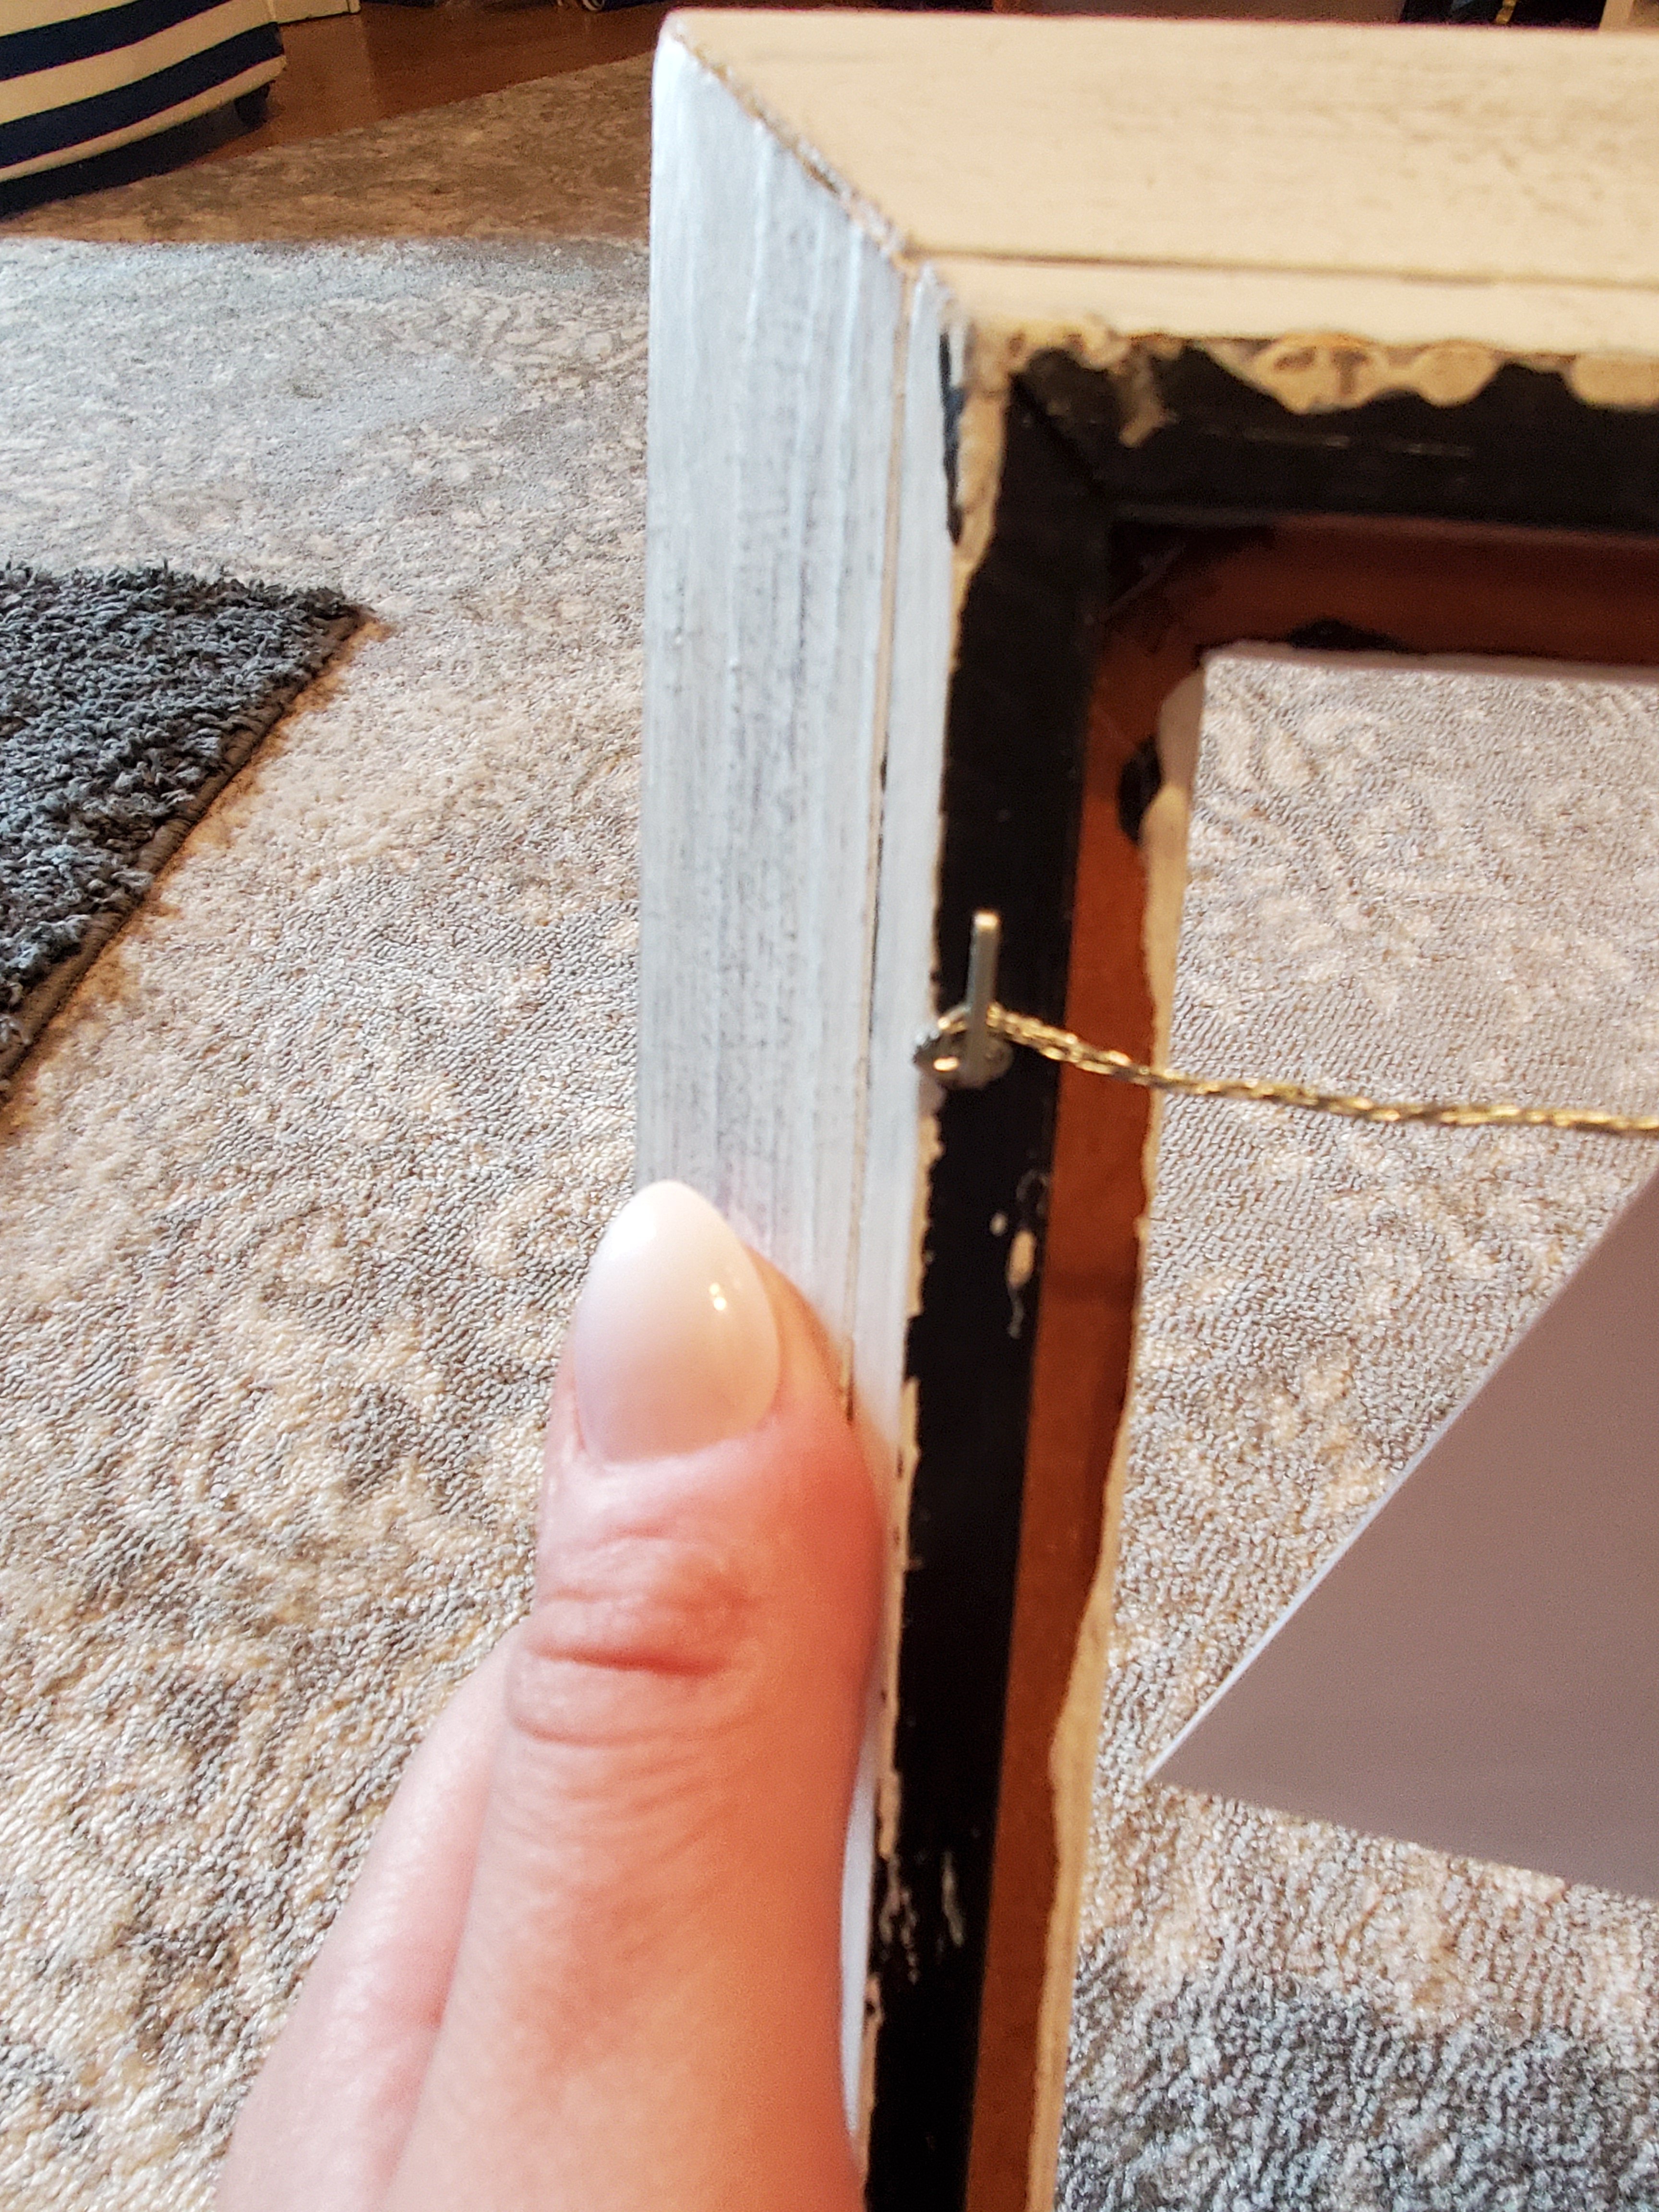
So first I lightly sanded the frame. Then I painted it white. I used wall paint for this project because it’s what I had. And its quarantine. And this step wasn’t super important for this project. It took 2-3 coats, but doesn’t need to be perfect.
Then I sanded with a foam sanding block. I scraped the edges and roughed up the centers. Go slowly and start lightly. Keep going until you love it.
Then, because I wanted just a little something more for this one, I used a small brush and “dry brushed” on some charcoal gray paint. This means I dipped a tiny amount on the brush and then swiped most of it off onto a paper plate. When the brush is almost dry, wipe it on the frame. It will give you just a tiny bit of paint and give a smudge-y look. I used a paper towel to rub this in as I added it too. It came out nice and weathered.
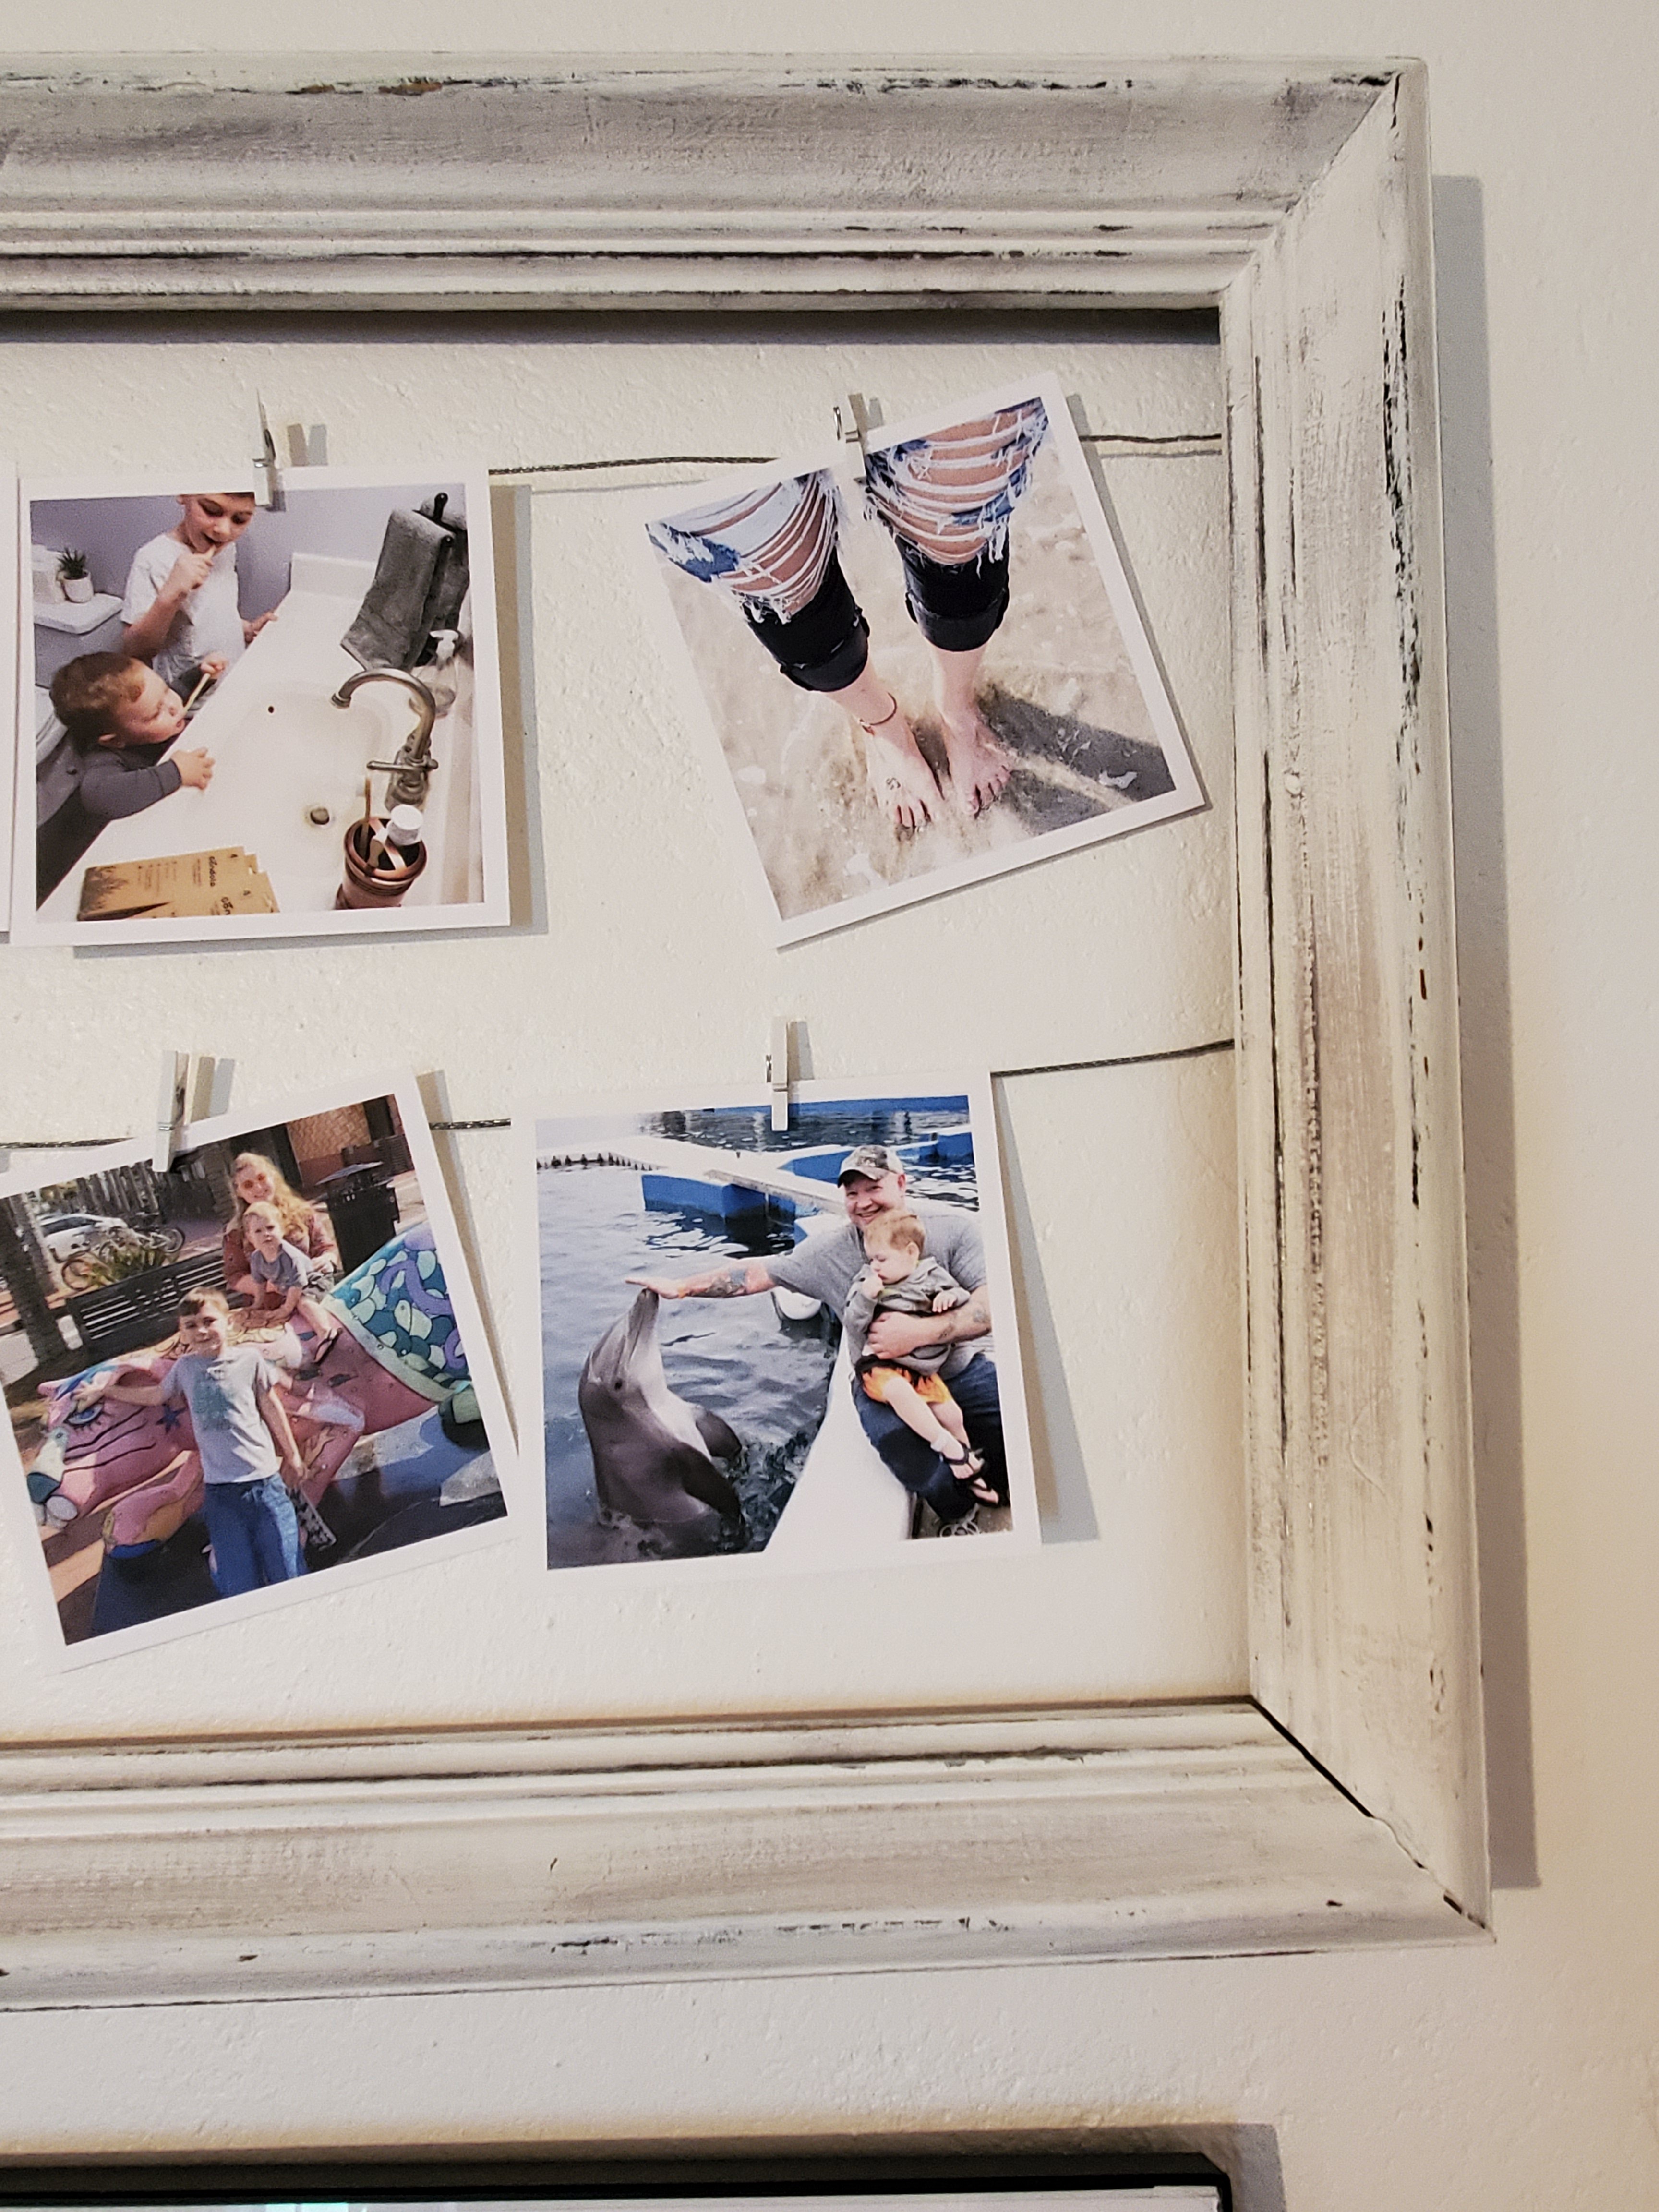
Then to add some wire. You could use twine or ribbon, or whatever you have. I had some picture hanging wire from a hanging kit. I cut it slightly longer than the width of the frame, maybe a half inch extra on each side. Then I pulled it tight across the frame and used a staple fun to staple it in place. I twisted the extra ends into a little ball to help keep it in place.
You can get tiny clothes pins on Amazon.
And viola!

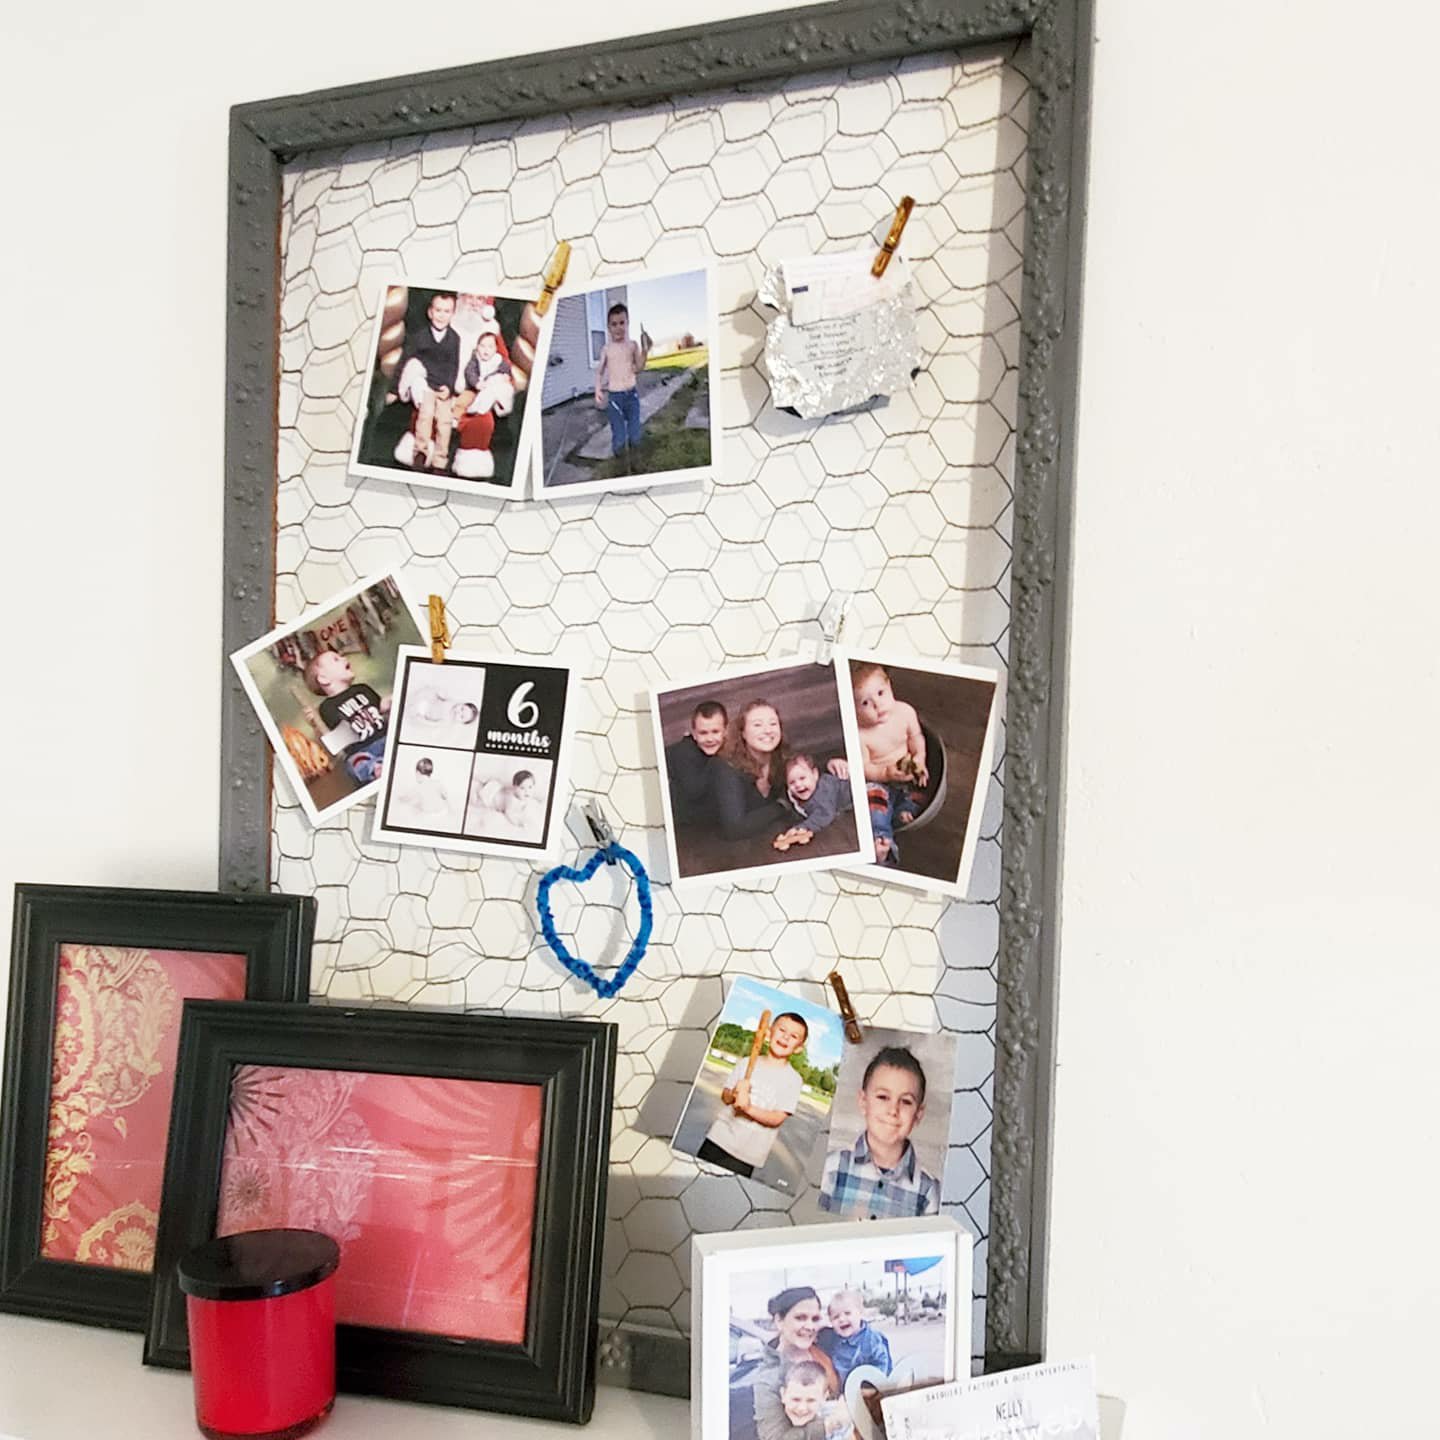
I’ve also done this before with chicken wire…
What do you think?
Doing any quarantine projects?!
XX,
Jess
Permalink Comments Off on Frame Hanger Project
Whats In Store For Next Week
Over the weekend I have a long list of fun little projects to tackle. If I get myself into gear and get them done you can plan to see updates next week. I hope to be working on the kitchen curtains, painting some pots, planting flowers, cleaning up the yard, building a fire pit, and working on redoing a headboard for the master bedroom. It sounds like a lot, I know, but I think I have most of it covered! And, my favorite little project…
Check out what I do with this ugly little pink basket!

Check back all next week for updates, photos, and how-tos of my many projects! Have a great weekend!
Protect The Camera
Yesterday was my first Thursday off now that I have started working four ten hour days and taking Thursdays off. It was a busy day and I think I may have worked harder at home that I do during a work day in my office! But, this means my house is sparkling and I even finished a few projects. Once simple one that I finally tackled was making a camera pouch! My camera travels with me almost all the time. You never know when you are going to see something blog-worthy! 🙂 This means that my camera has acquired a few scratches and dings along the way, though. To prevent this I could have bought a fancy (and probably expensive) camera bag, yes. But, other than not wanting to fork over that much cash, I think they tend to be a bit too big to lug around in my purse all the time. So, enter my simple DIY camera bag! (I’m not a very good seamstress, so believe me, this is a very simple DIY!)
I used a rectangular strip of some soft leftover leopard fabric that I had lying around the house. I folded it in half with one end a few inches longer than the other, with the leopard print facing each other (inside out). I sewed the sides together next. Then sewed a seam on the extra top flap of material. Once the sewing was done I flipped it inside out and added a bit of Velcro to keep the top flap closed. That simple!

The material and my little sewing kit (I did this little project by hand).

Finished camera pouch:

No more scratches!
DIY Photobooth
My most favorite wedding idea that I have so far is a photobooth at the reception. I have see this done and it looks like so much fun! But, renting a photobooth would probably kill our entire budget. So, I have decided to make my own. I am going to enlist the handy help of my dad and grandpa in this project, so in order to save them some confusion I made a sketch of what I am imagining. I am no artist, but here is my idea so far:


I love the idea of guests taking random photos and leavign them for us as a surprise. Our only real question with this idea is what kind of camera to use. My fist thought was to use a Polaroid camera. I am planning on using my Polaroid to photograph guests as they first walk in also. They can sign these photos to make a unique guest book. The problem with using the Polaroid for the photobooth is the actual taking of the photos. Some one would either have to man the station the whole night or you would have to try to do the self-shot, which is rarely good. I read somewhere that you can set up a digital camera with a cord and button so the people can take their own photos from further away. Now I seem to be leaning more towards this idea. Any suggestions?

Image and more how-to info found here: http://est1976.blogsome.com/2007/09/10/how-to-make-a-photo-booth-for-your-wedding/
eHow To The Rescue
My grandmother gave me a tiny cast iron skillet the other day. I know that these pans are much sought after, but have never owned one. Although this one is just a baby she said you could use it for an egg or just to hang on the wall. So, I was going to do both. But, the skillet has some rust problems. I know that you can removed rust from other metals using steel wool, but how to remove it from cast iron? I looked it up on eHow. I haven’t tried it yet, but they do have instrucitons for rust removal:

I Feel A Project Coming On
I ran accross this oh-so-cute project this morning on the Curbly website.

Even though this DIY serving tray isn’t my idea, I had to link you all with it. I am most definitely going to make this my next project in the waiting. I have been looking at trays and also thinking about how to make one. But, with my love of all things black and white and my love of all things DIY, this is the winner. Check out the full how-to and more photos here: http://www.curbly.com/DIY-Maven/posts/5902-How-to-Turn-an-Old-Cupboard-Door-into-a-Serving-Tray
Thank you for the idea DIY Maven!
