Quick and Easy Halloween DIY
Happy Spooky Season!
Maybe its that we’ve been cooped up way too long and missed too many “normal” things, I don’t know, but we are going all out extra for Halloween this year. Our house, or yard, our decor, even our snacks, have all gone completely spooky. I’m loving it!
If Halloween time is your thing, or even if it’s not so much, but you want to show the kiddos just a little festive fun, then I have a super easy and cute DIY project for you!
Faux Ghost Macrame Wall Hanging!
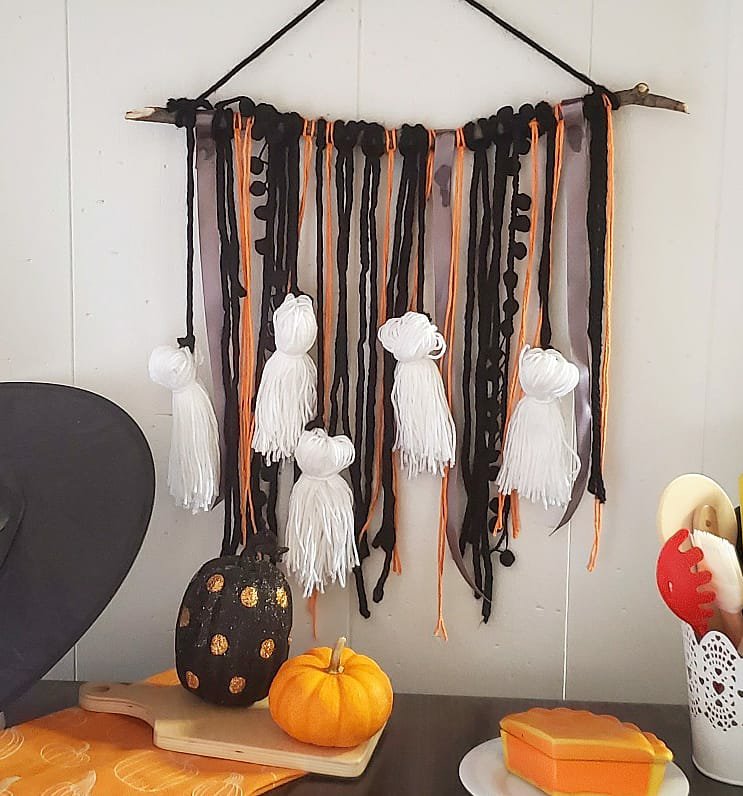
Supplies: -stick
-yarn and ribbons in various colors and textures
That’s it! Super easy, but such a cute payoff.
I cut the branch from a tree in the yard, even a dowel would work. Mine is a bit over a foot long. I started with it longer and then cut it off as I worked to make sure I knew I liked it. Decide how long you want things to hang. Mine is all random lengths, but around 14-16 inches. When you cut your pieces of yard, double this. You will fold them in half. I eyeball all of this and er on the long side. You can trim them down later.

With the piece of yarn folded in half, lay it over the stick. Bring your looped end under the stick, then stick the ends back through the loop and pull tight. Viola! I glued the ribbon together in the back around the stick instead of this method so as not to crease it. I love the ball tassel ribbon to give texture too and tied these in a knot around the stick.
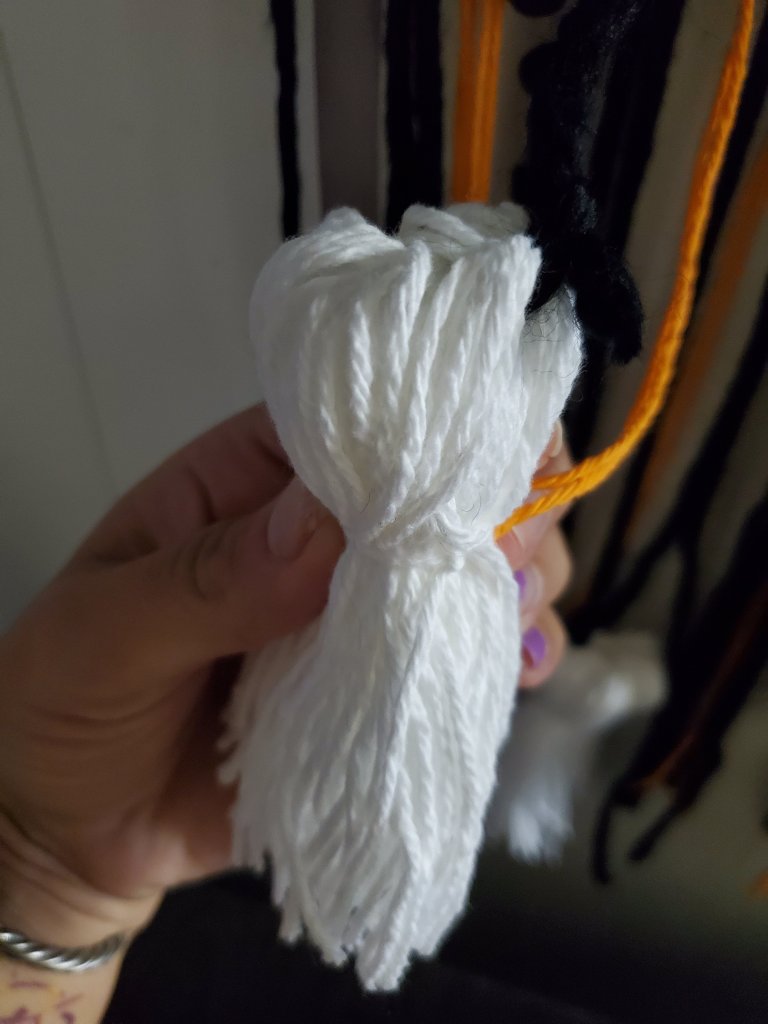
The ghosts. Also simple. Wrap white yarn around a book about 50 times. Cut the strings on each end of the book and keep them in a bunch. Fold the bunch over and tie a piece of yarn around it. I took black yarn through a small chunk of the white ghost head yarn on each side and tied this together in back and then tied the black to the stick.
There is no right or wrong with any of this! Keep it fun and super simple. You could glue eyes and mouth on the ghosts too if you want! You can add more or less pieces to the stick too.
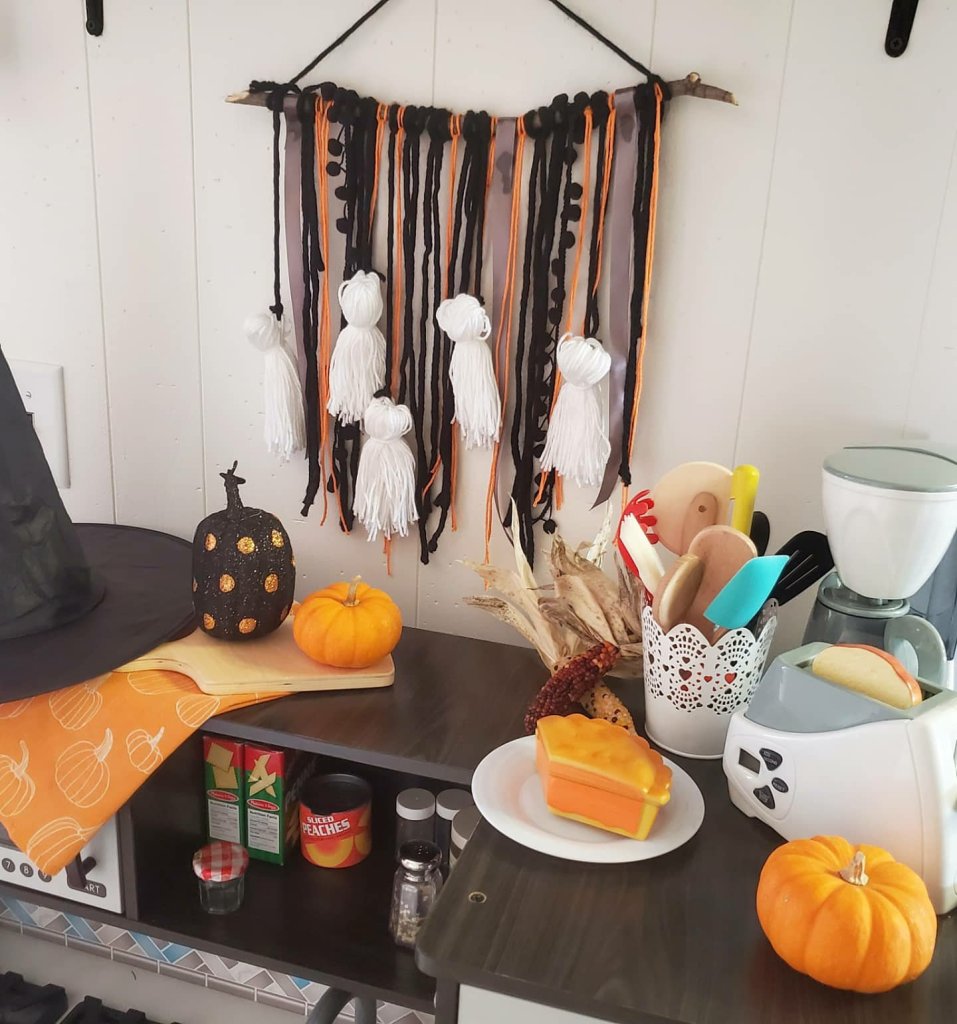
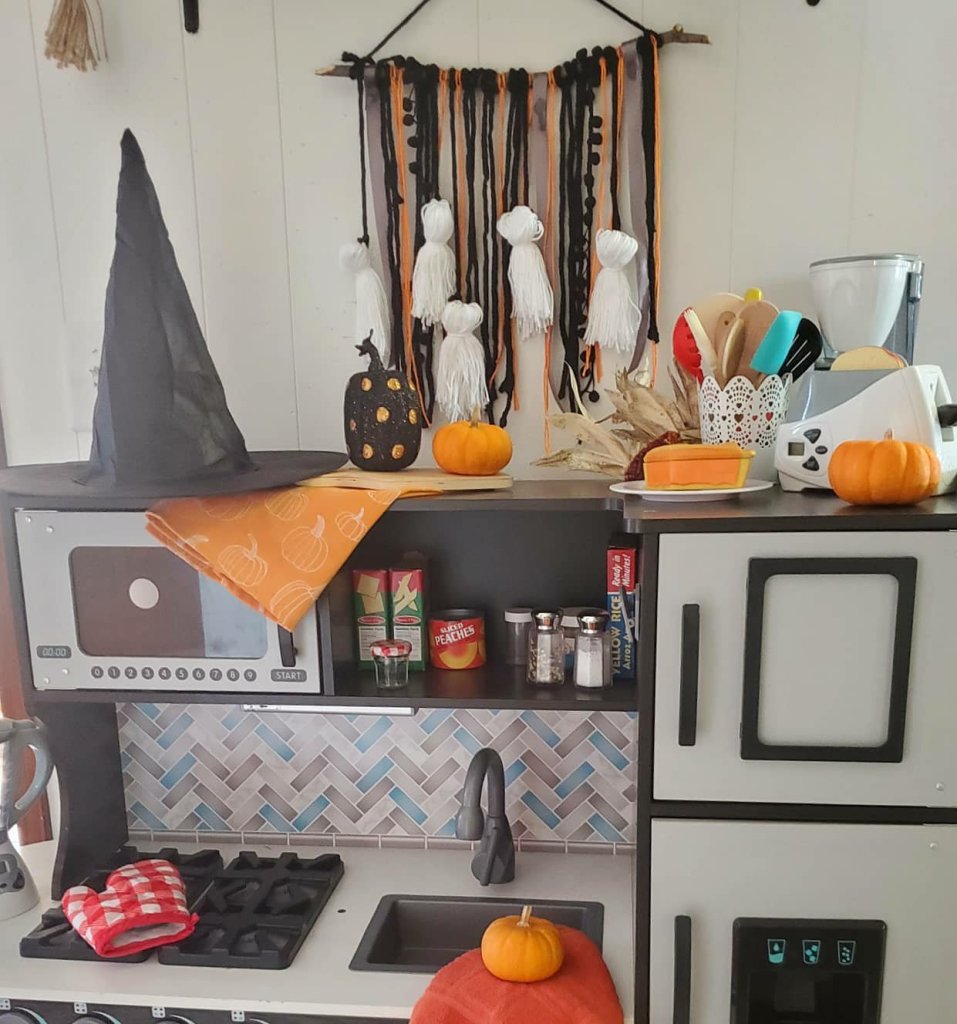
Enjoy! 😉
Xx,
Jess
Cube Redo
I have had this little storage cube since I was a kid. When new, it had a unicorn and a rainbow on it. Recently I redid the look of the cube so that it could be used in our home. I forgot all about the cube project until yesterday. There was a question posed on Apartment Therapy about recommendations for redoing a similar cube. I thought that I would let you all know how I did the project, and although I do not have any before or durring pictures, I can show you how it turned out. Here was the process:
1. I started by covering the picture areas of the cube with white contact paper. I was lucky that the sides were the same width as the paper, but I did run short of paper at the top and had to piece two pieces together. For a bigger box this is what you would have to do. Not to worry, the seem barely shows once you get the paint on the paper. Just try to line them up as exactly as possible.
2. Once the paper was on, I used an Exact-O knife to cut the contact paper around any hardware or latches. This worked well and really didn’t cause any problems as long as you work slowly and patiently.
3. After the paper was laid and cut, I painted it. I picked a dark red, and simply used wall paint from the hardware store and applied with a regular brush. I recommend this, as it was easy and inexpensive. I personally wanted an antiqued look to go with the worn metal hardware, so I only applied one coat and left it a bit streaky. If you want a smooth, more flawless finish, I think two coats would do the trick just fine.
4. To add a personal touch I used a foam stamp. I found this stamp at the hardware store on sale for about 50 cents. While the paint was still wet I pressed the dry stamp into it in a pattern I liked. When you raise the stamp it takes some of the paint off, leaving a lighter area for the design. I used a circular design that went with the antiqued look.
Viola! Finished! It really was that simple. Now this cube serves as storage for blankets in our living room. And, this has stood up to some use and abuse and even relocating a few times. It has a few small scratches in it now, but that seems to add to it’s antiqued character. If you want yours to stay looking new try using a protective clear coat on top. Here’s what ours looks like:


Some foam stamps similar to mine can be find at http://www.makingmemories.com and other scrap-booking websites.

Have fun!
eHow To The Rescue
My grandmother gave me a tiny cast iron skillet the other day. I know that these pans are much sought after, but have never owned one. Although this one is just a baby she said you could use it for an egg or just to hang on the wall. So, I was going to do both. But, the skillet has some rust problems. I know that you can removed rust from other metals using steel wool, but how to remove it from cast iron? I looked it up on eHow. I haven’t tried it yet, but they do have instrucitons for rust removal:

I Feel A Project Coming On
I ran accross this oh-so-cute project this morning on the Curbly website.

Even though this DIY serving tray isn’t my idea, I had to link you all with it. I am most definitely going to make this my next project in the waiting. I have been looking at trays and also thinking about how to make one. But, with my love of all things black and white and my love of all things DIY, this is the winner. Check out the full how-to and more photos here: http://www.curbly.com/DIY-Maven/posts/5902-How-to-Turn-an-Old-Cupboard-Door-into-a-Serving-Tray
Thank you for the idea DIY Maven!
