Quick and Easy Halloween DIY
Happy Spooky Season!
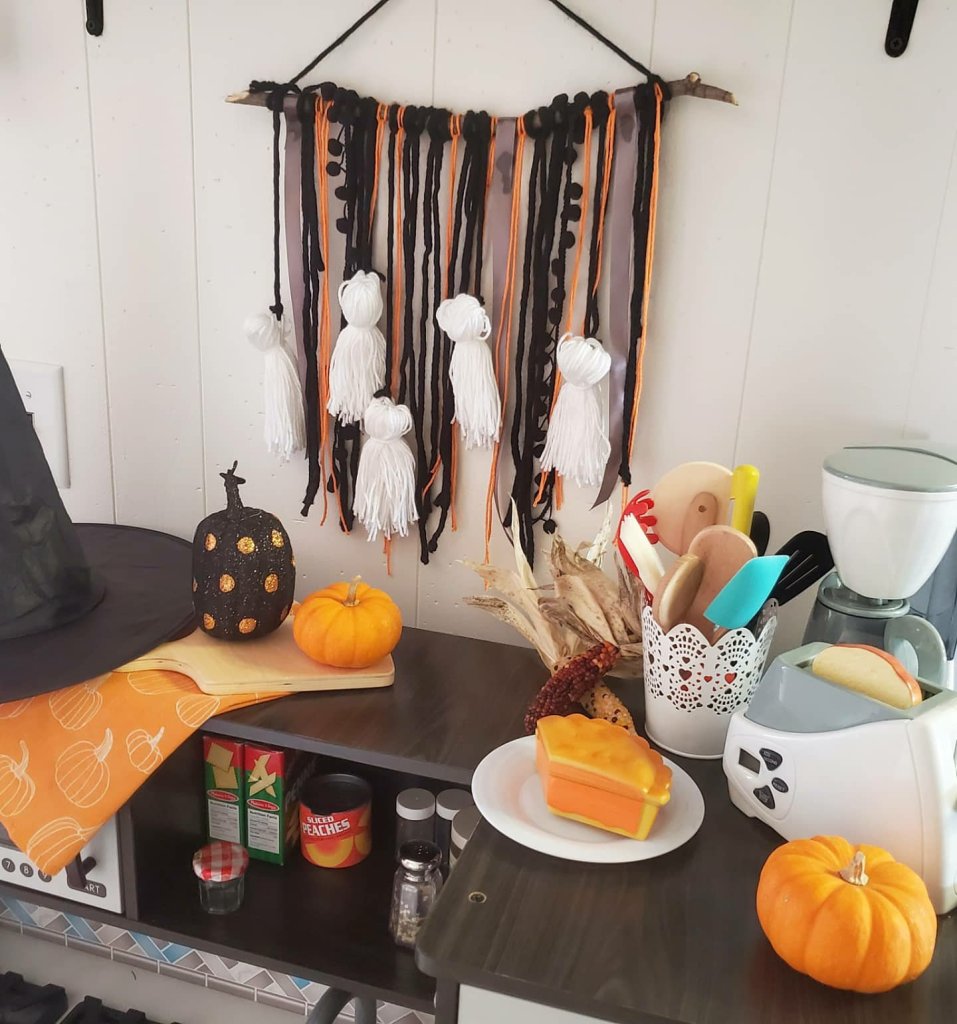
Maybe its that we’ve been cooped up way too long and missed too many “normal” things, I don’t know, but we are going all out extra for Halloween this year. Our house, or yard, our decor, even our snacks, have all gone completely spooky. I’m loving it!
If Halloween time is your thing, or even if it’s not so much, but you want to show the kiddos just a little festive fun, then I have a super easy and cute DIY project for you!
Faux Ghost Macrame Wall Hanging!
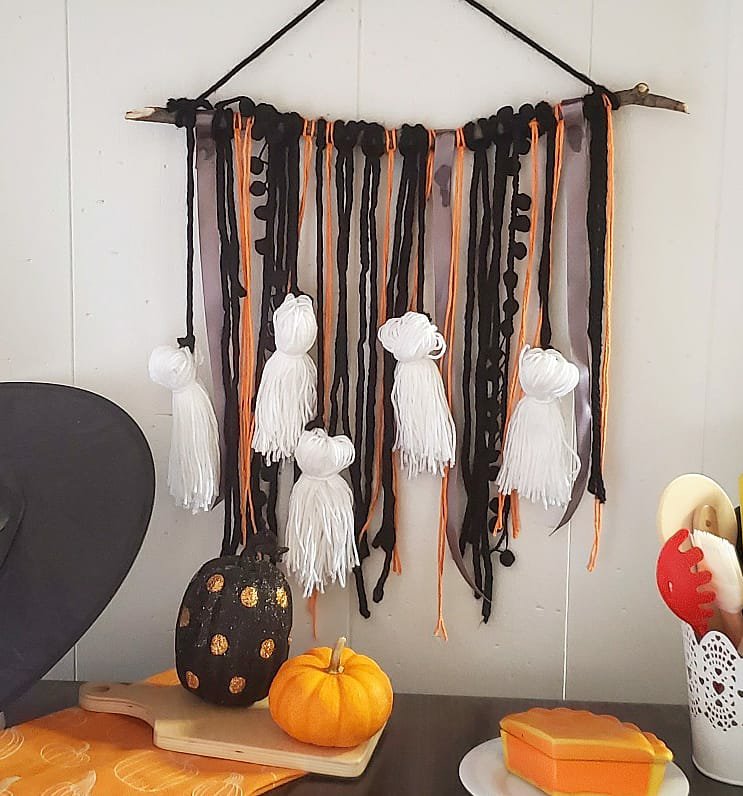
Supplies: -stick
-yarn and ribbons in various colors and textures
That’s it! Super easy, but such a cute payoff.
I cut the branch from a tree in the yard, even a dowel would work. Mine is a bit over a foot long. I started with it longer and then cut it off as I worked to make sure I knew I liked it. Decide how long you want things to hang. Mine is all random lengths, but around 14-16 inches. When you cut your pieces of yard, double this. You will fold them in half. I eyeball all of this and er on the long side. You can trim them down later.

With the piece of yarn folded in half, lay it over the stick. Bring your looped end under the stick, then stick the ends back through the loop and pull tight. Viola! I glued the ribbon together in the back around the stick instead of this method so as not to crease it. I love the ball tassel ribbon to give texture too and tied these in a knot around the stick.
The ghosts. Also simple. Wrap white yarn around a book about 50 times. Cut the strings on each end of the book and keep them in a bunch. Fold the bunch over and tie a piece of yarn around it. I took black yarn through a small chunk of the white ghost head yarn on each side and tied this together in back and then tied the black to the stick.
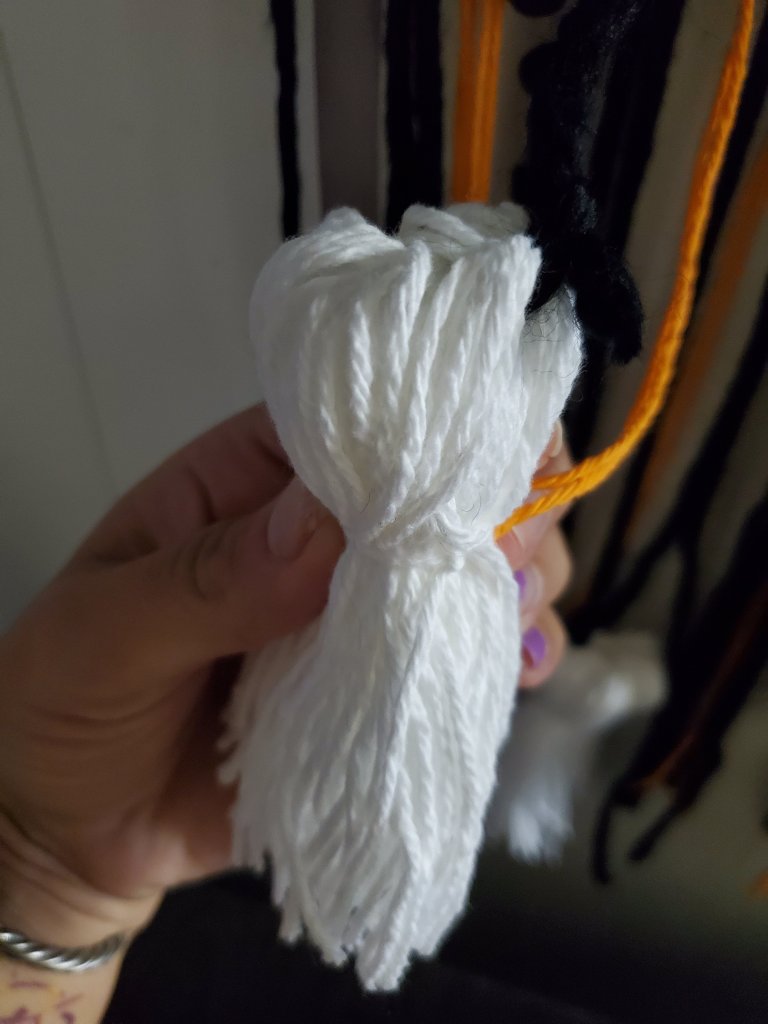
There is no right or wrong with any of this! Keep it fun and super simple. You could glue eyes and mouth on the ghosts too if you want! You can add more or less pieces to the stick too.
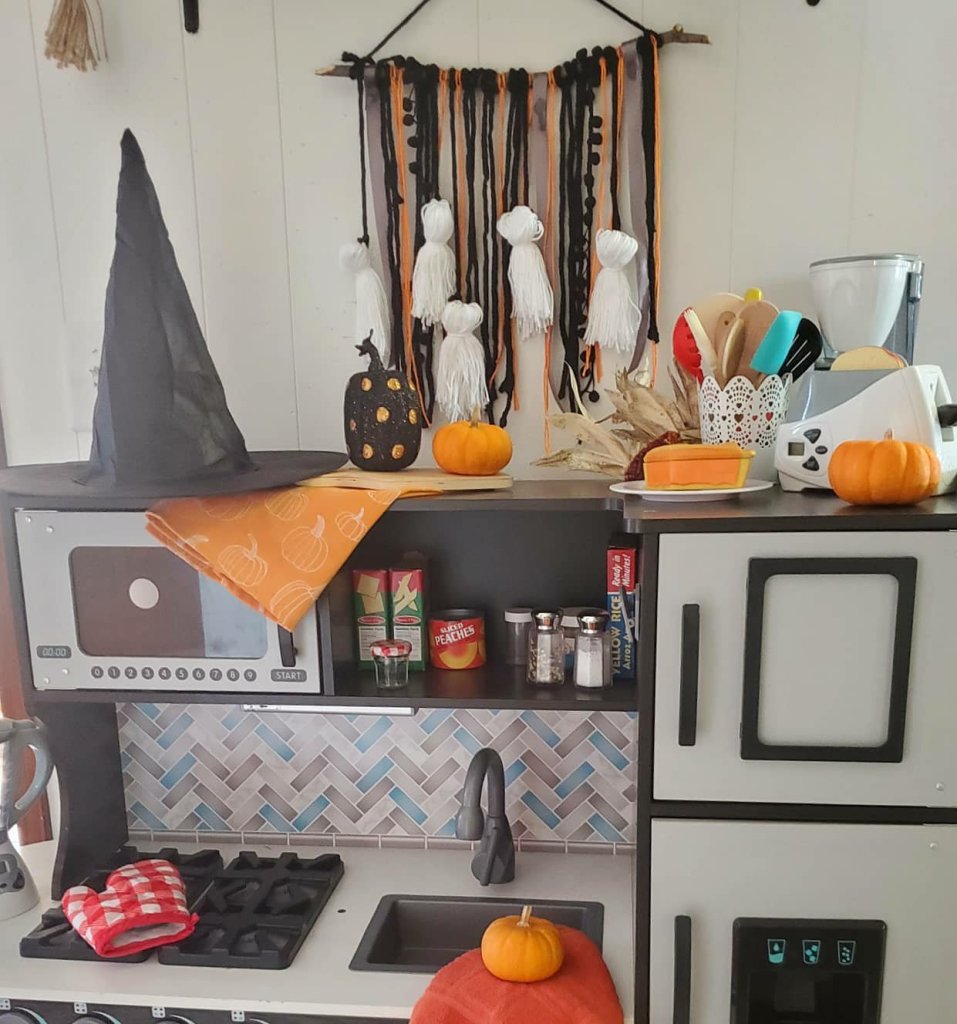
Enjoy! 😉
Xx,
Jess
DIY Wreath
Winter makes me a little stir crazy. Luckily Pinterest has many many cures for that! Enter my new wreath project. Bonus: I love a project that has quick and easy payoff! 😉
I picked up a wire wreath form at Joann craft store for a few dollars. I also grabbed a remnant of burgundy fabric and a pack of colored leaf print fabric squares. I cut tons and tons and tons of fabric strips about 5 inches long. Then I tied the oodles of strips in knots around the wire wreath form. I also added some strips of burlap to give a rustic look. Simple.

Here is a close up of my strips of fabric.

I also painted a wood letter T to hang in the center if I choose.


And for the winter season I hung a seasons greetings basket in the center that I already had. Cute, no? 🙂
Easter!
Hope you all had a wonderful Easter weekend! We sure did here. We had a small family dinner at our house and then did some yard work. Very festive, I know. I thought I would share with you our Easter table!


Notice anything different? How about that table? Yes, I finally tried the Restore on it! It worked so well, I think I’m in love! It did not removed the weird patterned spot, so the table is still not perfect, and probably never will be. But, it is so much better! The Restore really does a great job on scratches and scuffs. Anyways, how about the Easter setting? Jeremy even helped to decorate some eggs! I blew out real eggs so that we can save them for next year!
Here is one of Jeremy and I:

Here are the three generations of women in our family who came:

What did you all do for the holiday? 🙂
Our Christmas Style
Yes, it’s a little late, but I thought that I would share our Christmas decor with you. Inspiration is good anytime, right?
So, here are a few of our first tree together! (we did eventually find the perfect green skirt! ) We went with a bit of a “camo” theme with colors this year. That was my nod to Jeremy. We used golds and greens and bronzes on the tree. My photos don’t seem to do it justice, but it was really pretty.


See the antler ornaments? Shimmery pinecones helped add sparkle too!

Our rustic bronze star was really pretty too.

Camo snowmen…

My “dance in the snow” pillow…

In the dining room we displayed my grandparents’ jewelry tree. Grandpa made this out of Grandma’s old jewelry.

Here is a close up of the sparkle, as this may be the last year for this tree. I might be using the jewelry for another very special project. Might, as in I have not made up my mind to tear down this beauty. Hmmm…

The two of us spent our night alone together quietly, so here’s a peak of our simple blue table.

It was basic but cute, and also easy.

And, although there was no snow on Christmas in Iowa, I took these a bit before hand of the first snow at our new house. Come to think of it, I don’t think I have shared a view of the outside of our home, so here is the front…

The side…

And a view towards our barns…

I hope you all had a wonderful holiday!
Some Fall Decor
It’s getting a bit late in the season, but I thought I’d share our fall spirit with you.
This is a basket we bought at the Threshers this year. We agreed on it because of the antlers! lol

I filled the basket with gourds. To keep them up towards the top of the basket I stuffed it first with tissue paper. I also kept the tag on the basket to remember who the craft vendor was!

We also each got a pumpkin, which we kept on the porch…

One of our black kittens on the porch too. Meet Patch…
Here’s how our carved pumpkins turned out…

John Deere and a scary laughing face. lol

Happy fall ya’ll!
