Quick and Easy Halloween DIY
Happy Spooky Season!
Maybe its that we’ve been cooped up way too long and missed too many “normal” things, I don’t know, but we are going all out extra for Halloween this year. Our house, or yard, our decor, even our snacks, have all gone completely spooky. I’m loving it!
If Halloween time is your thing, or even if it’s not so much, but you want to show the kiddos just a little festive fun, then I have a super easy and cute DIY project for you!
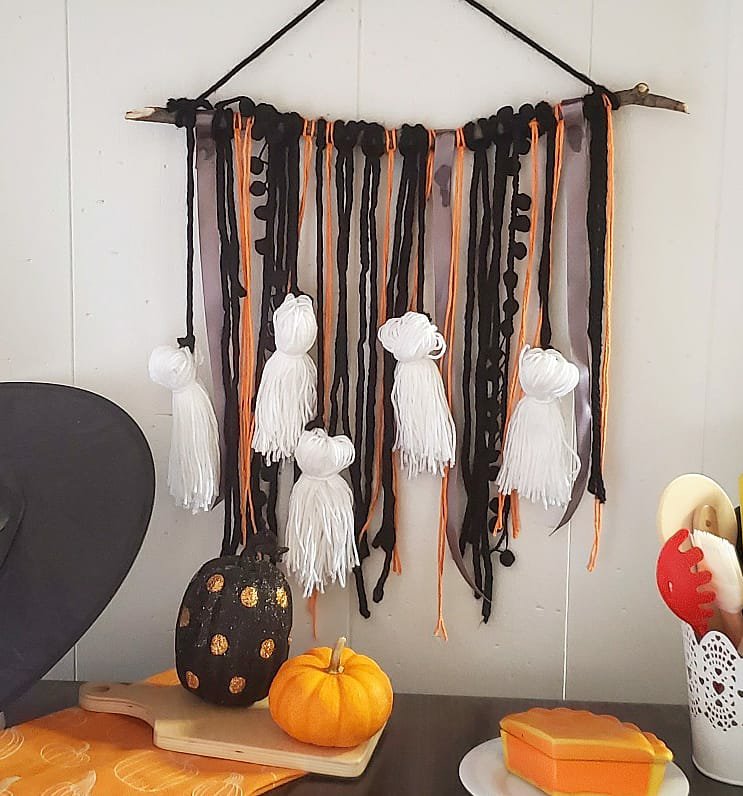
Faux Ghost Macrame Wall Hanging!
Supplies: -stick
-yarn and ribbons in various colors and textures
That’s it! Super easy, but such a cute payoff.
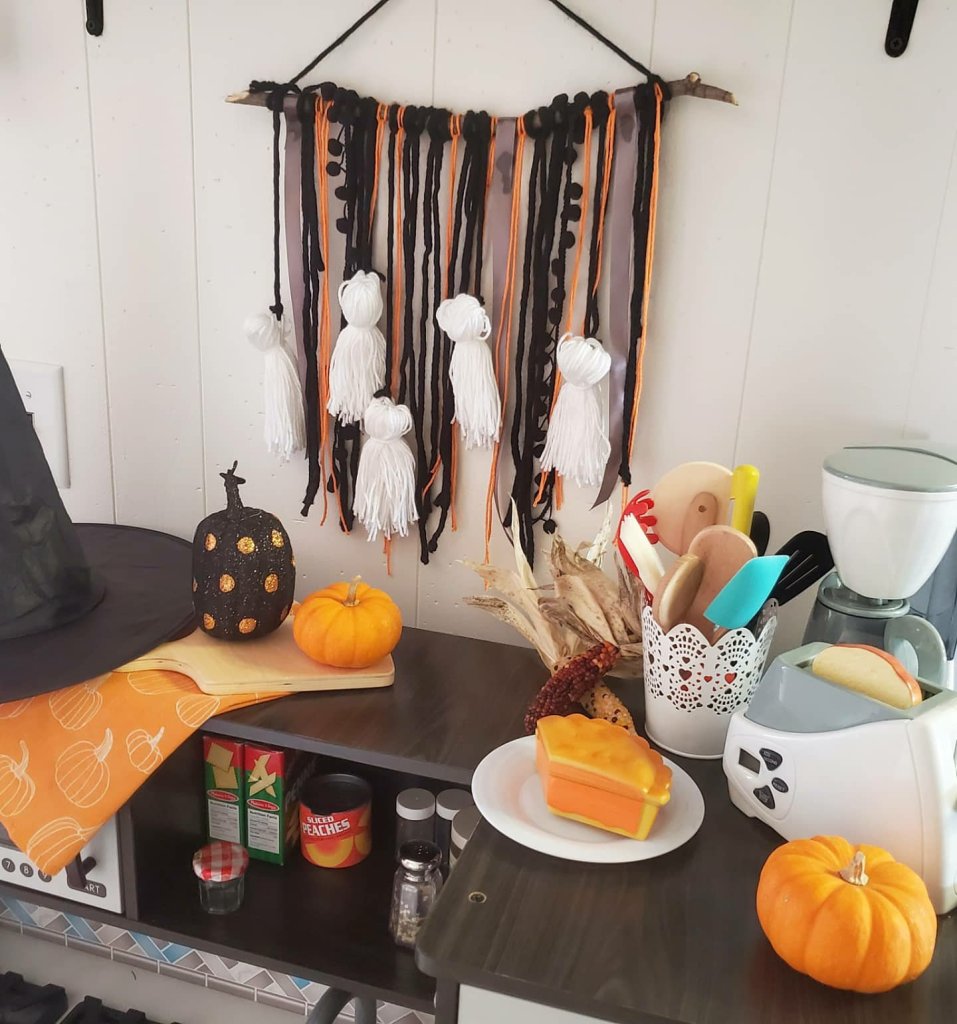
I cut the branch from a tree in the yard, even a dowel would work. Mine is a bit over a foot long. I started with it longer and then cut it off as I worked to make sure I knew I liked it. Decide how long you want things to hang. Mine is all random lengths, but around 14-16 inches. When you cut your pieces of yard, double this. You will fold them in half. I eyeball all of this and er on the long side. You can trim them down later.

With the piece of yarn folded in half, lay it over the stick. Bring your looped end under the stick, then stick the ends back through the loop and pull tight. Viola! I glued the ribbon together in the back around the stick instead of this method so as not to crease it. I love the ball tassel ribbon to give texture too and tied these in a knot around the stick.
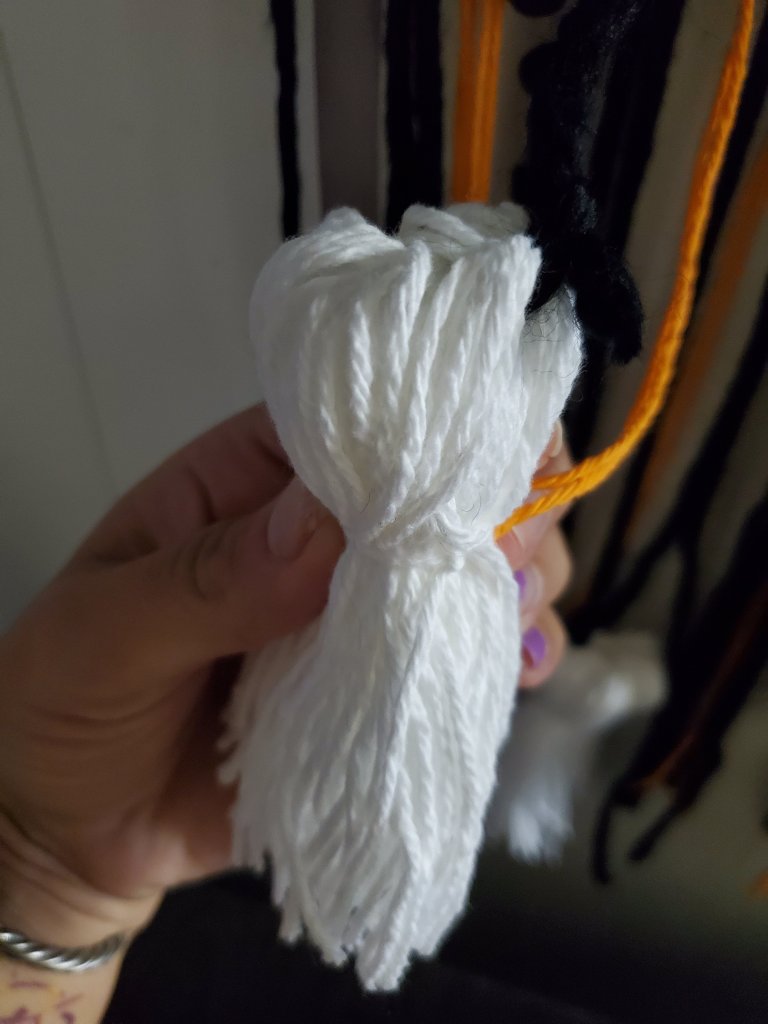
The ghosts. Also simple. Wrap white yarn around a book about 50 times. Cut the strings on each end of the book and keep them in a bunch. Fold the bunch over and tie a piece of yarn around it. I took black yarn through a small chunk of the white ghost head yarn on each side and tied this together in back and then tied the black to the stick.
There is no right or wrong with any of this! Keep it fun and super simple. You could glue eyes and mouth on the ghosts too if you want! You can add more or less pieces to the stick too.
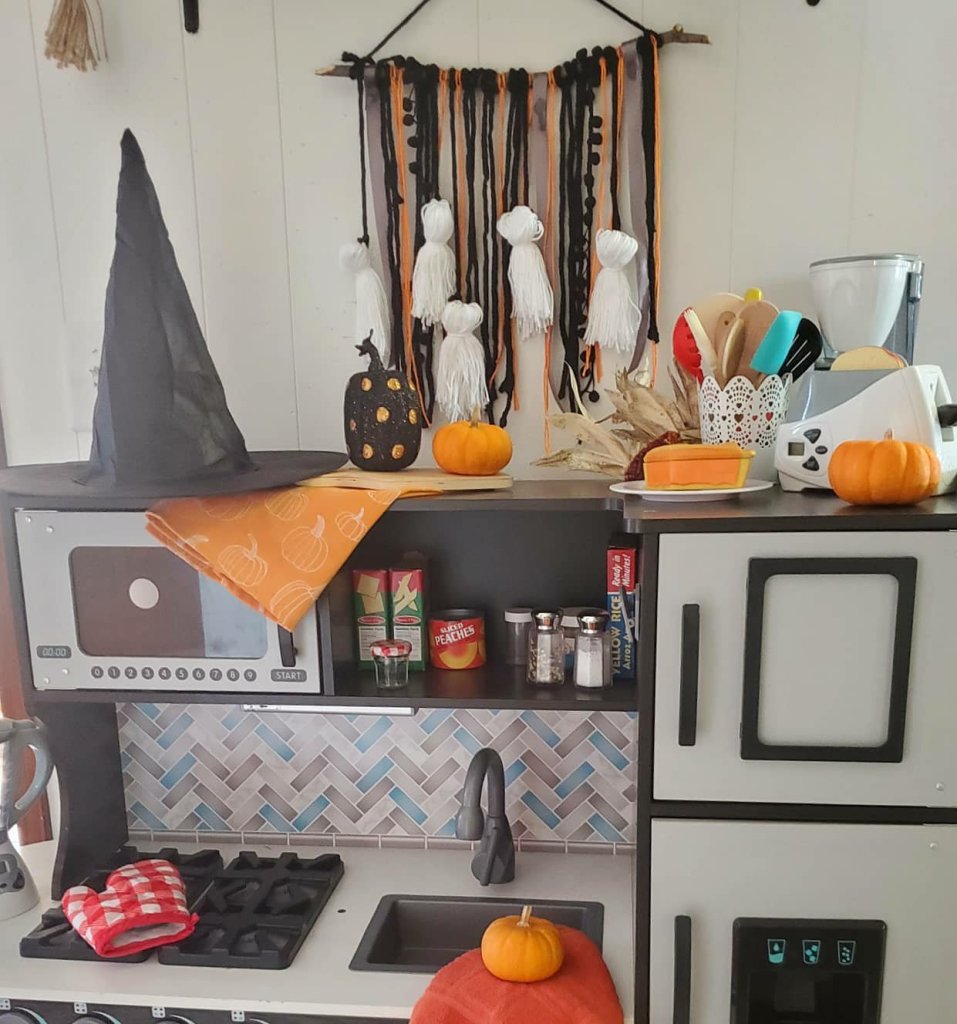
Enjoy! 😉
Xx,
Jess
Why I Love My Cricut
This is a sponsored post written by me on behalf of <a href=”Cricuthttps://lnk2.io/wjcWg2L”>Cricut</a>. All opinions are 100% mine.
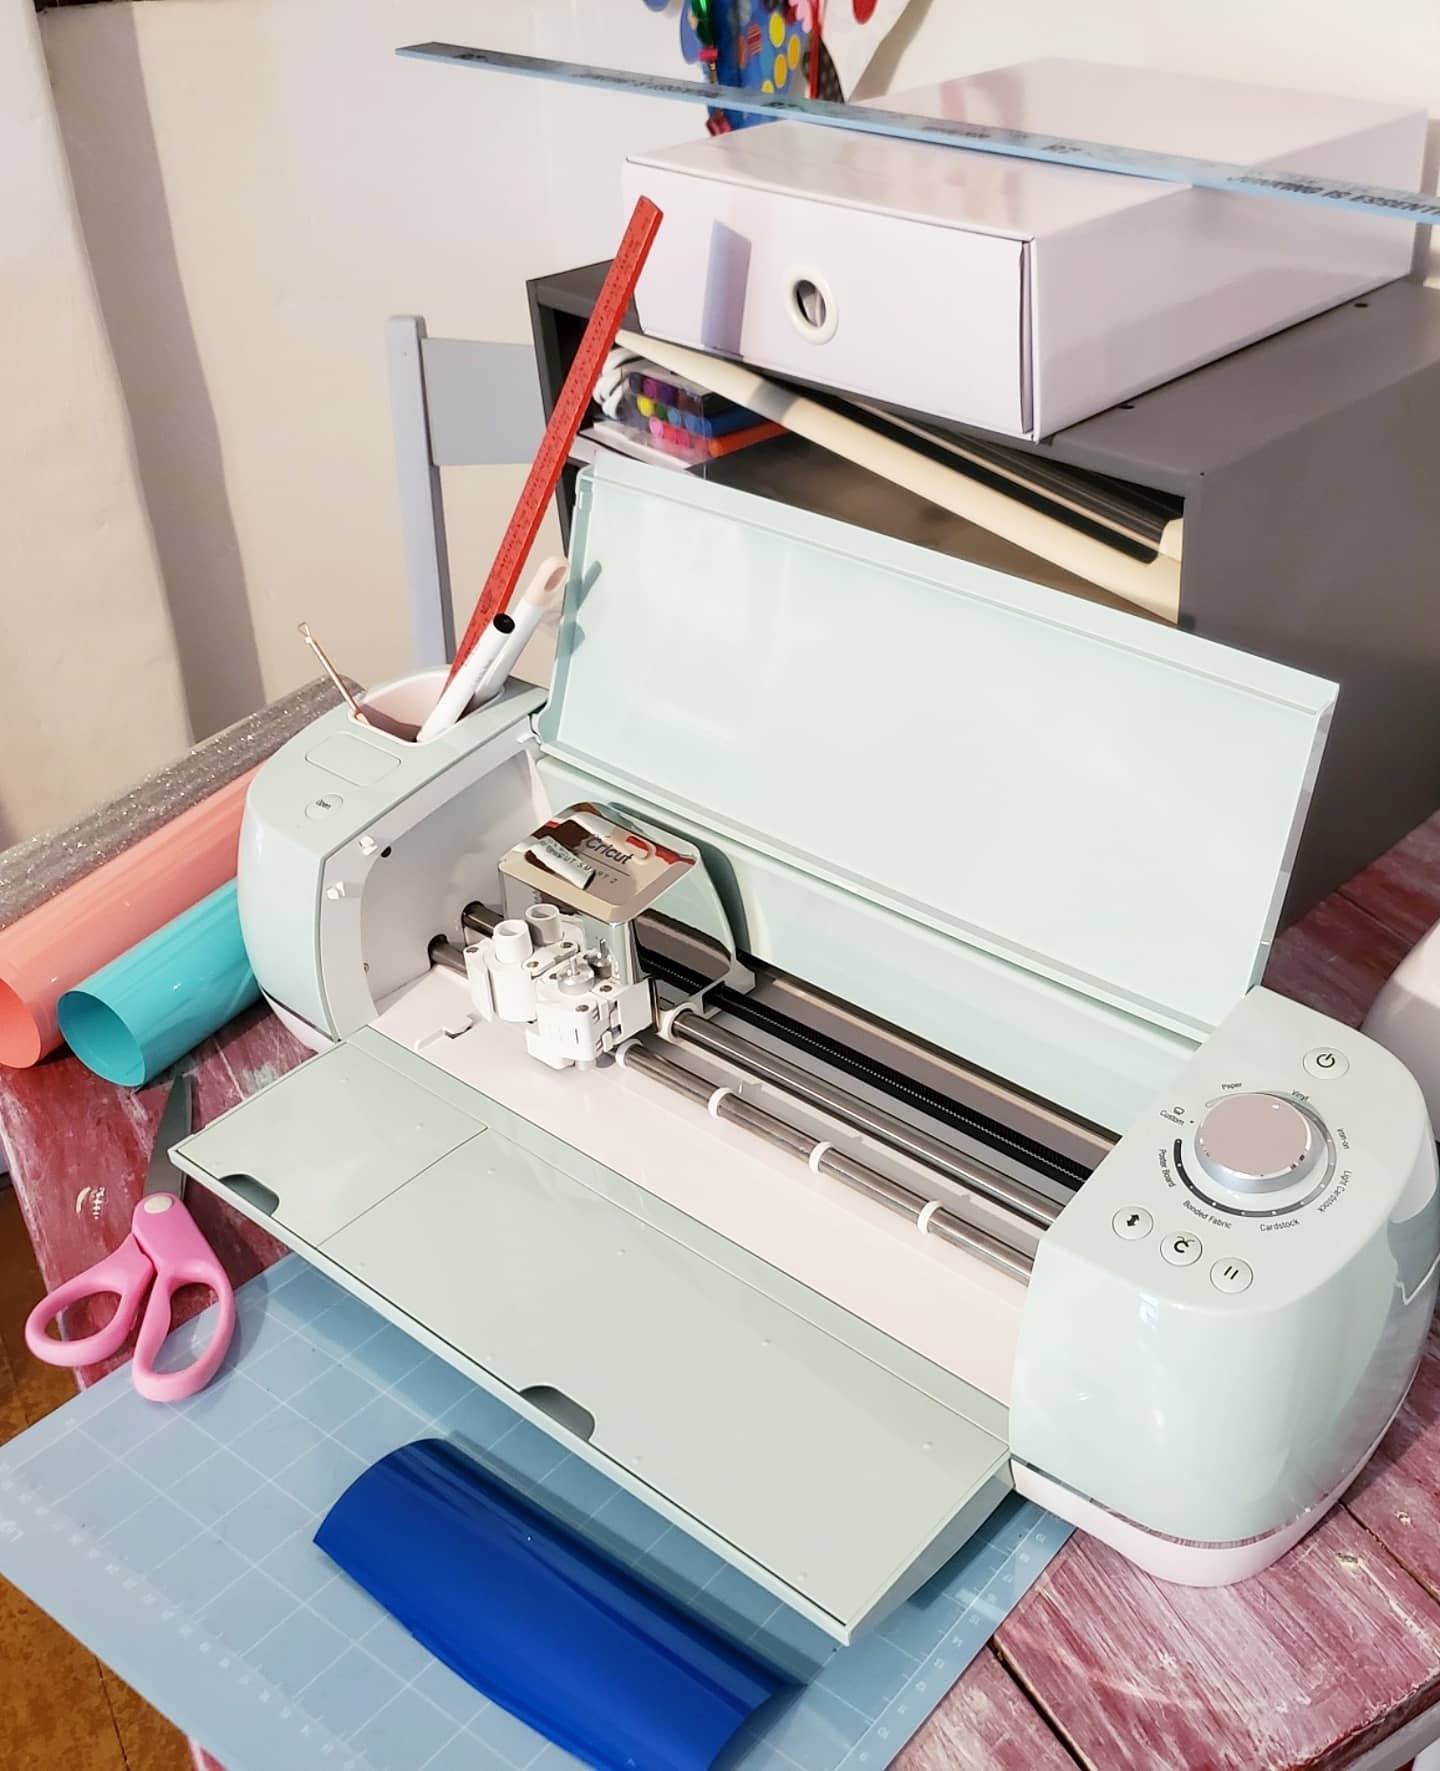
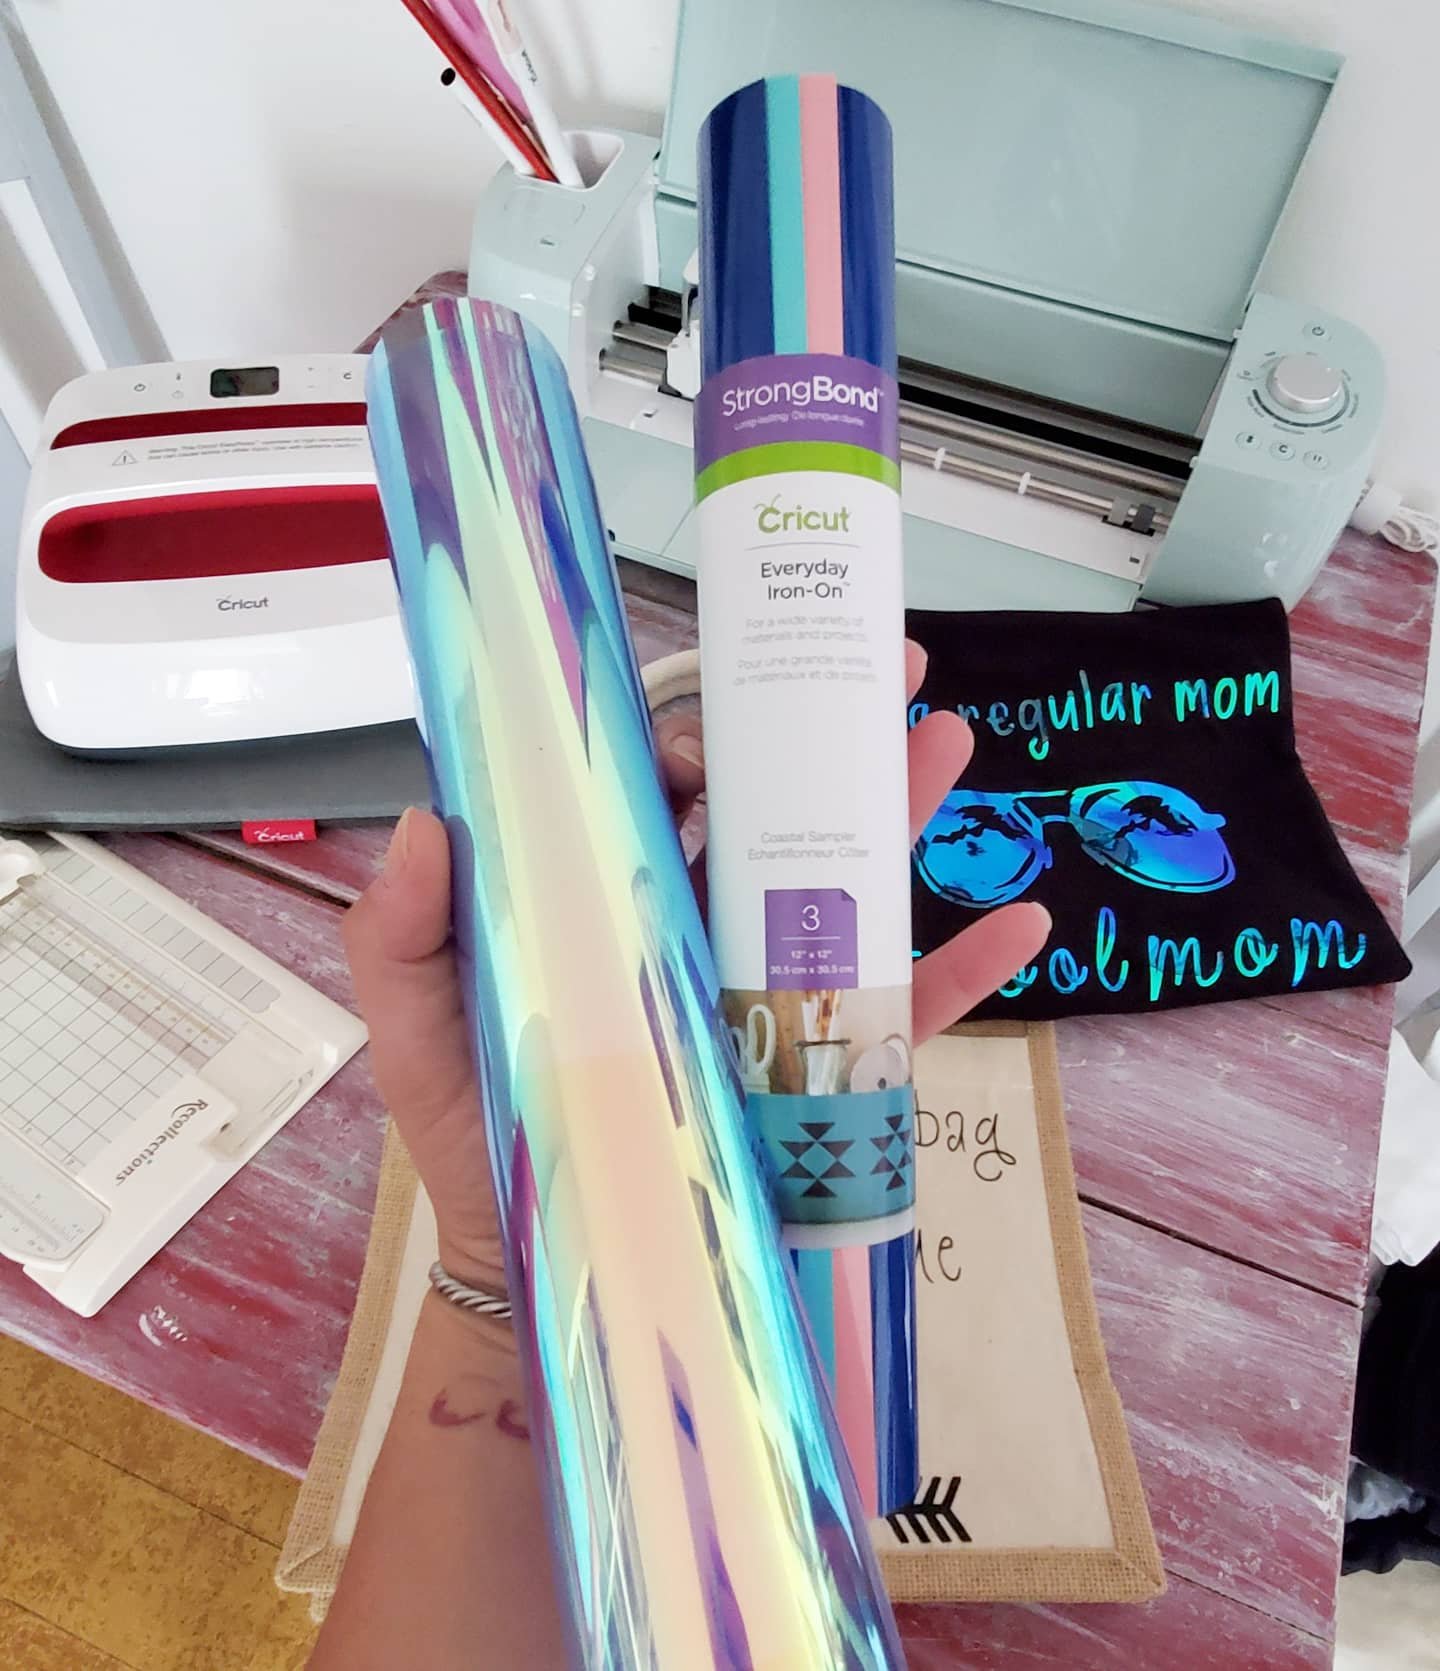
I have had my Cricut Explore Air 2 for a few months now, and to say I’m in love is an understatement! I’ve always been a crafter, but this things really helps me step up my game! Here I am going to talk about the 5 things that I love about my Cricut!
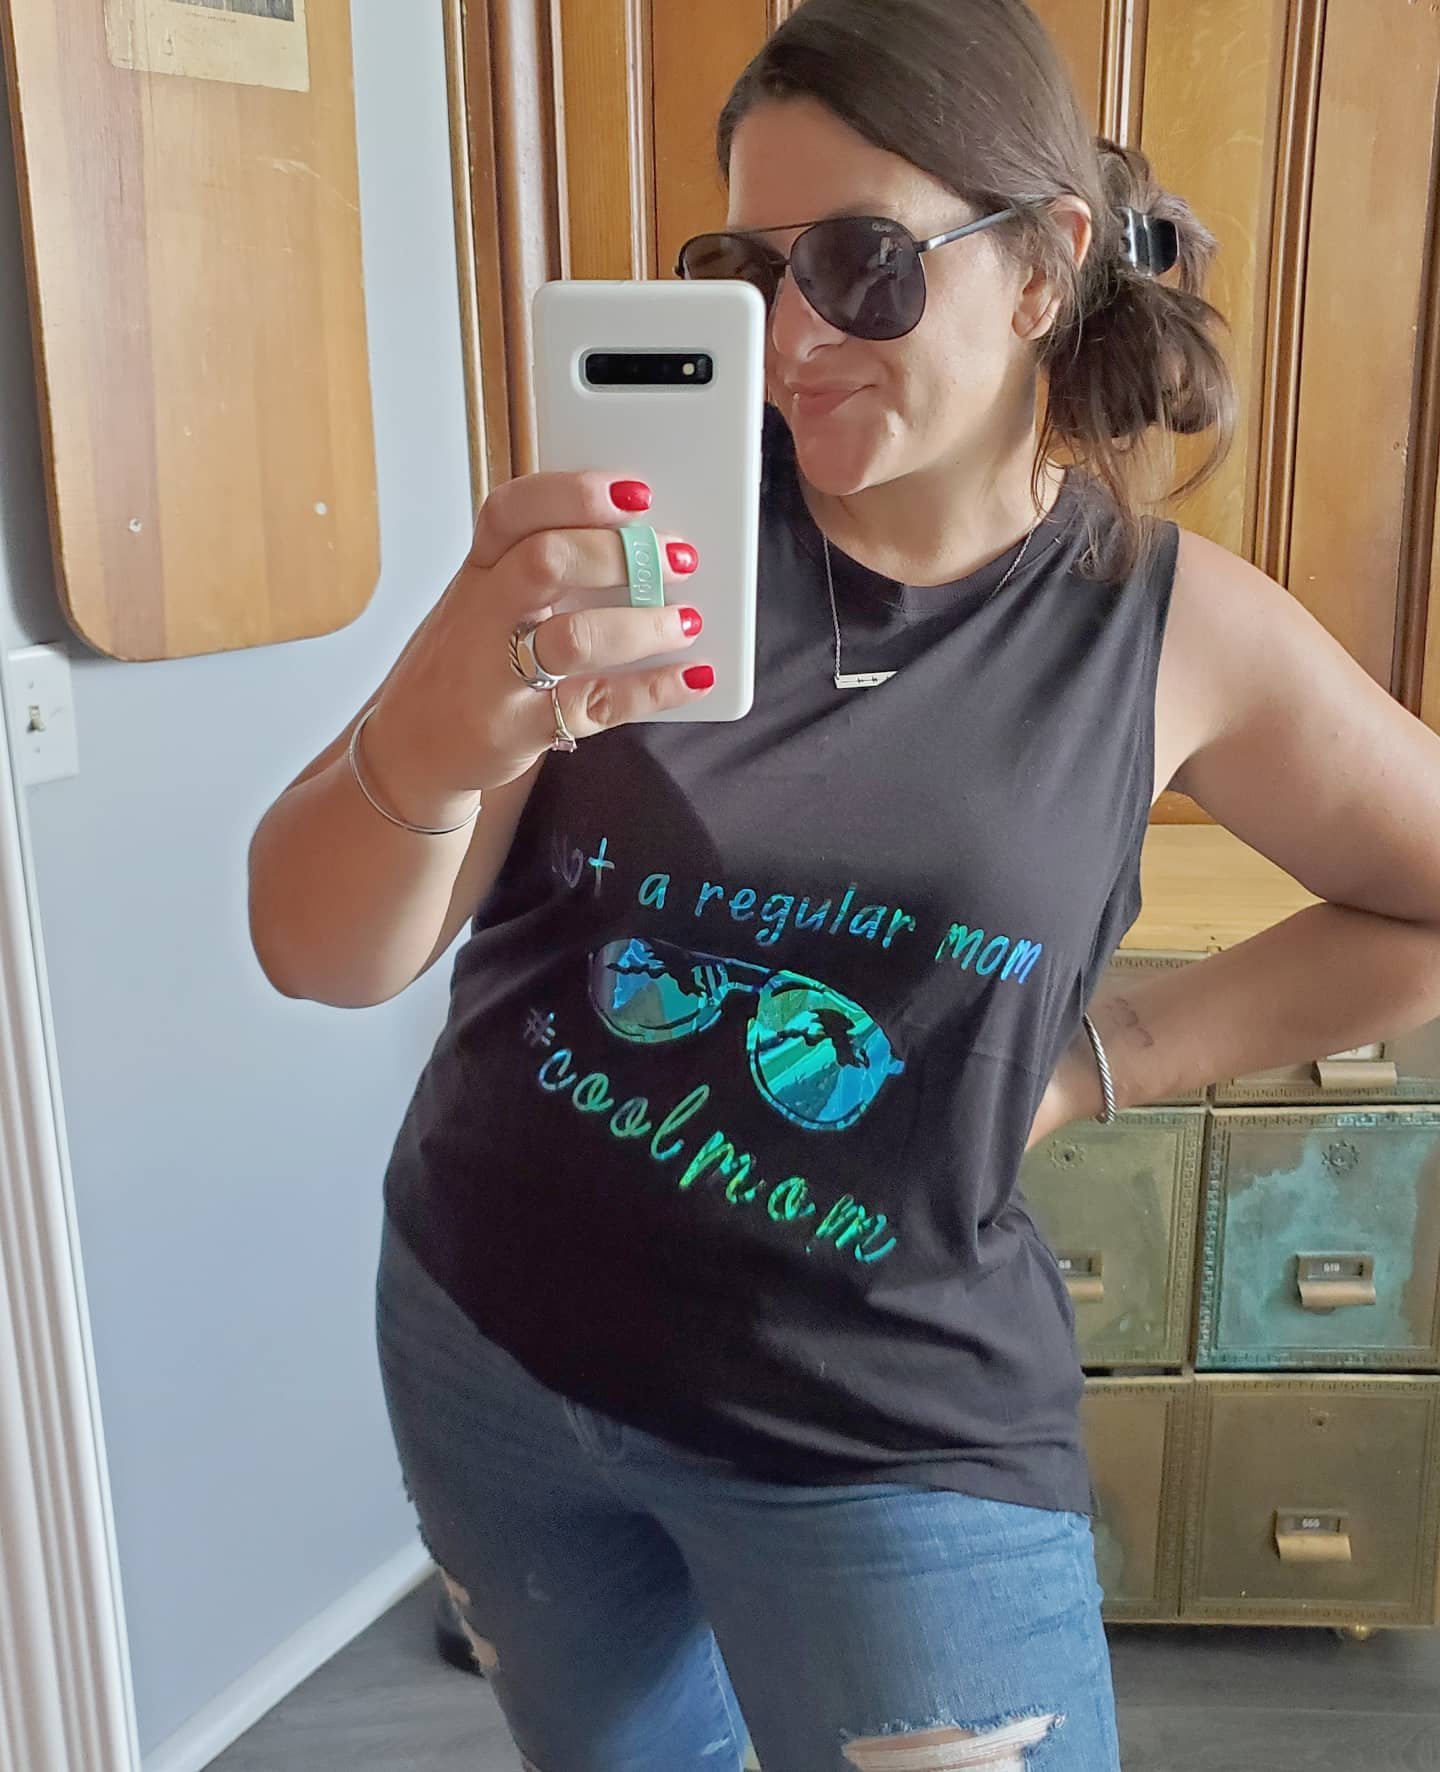
1. Its easy to use! I was truly shocked at how easy this machine is! Not going to lie, I was intimidated at first. I worried where to start and if I would be able to figure it all out. Yup. I was. Best place to start? Pick a project and jump in. They really mean it when they say their motto is “beginners luck every time.” I learn tricks and get braver each time I use my machine, but I definitely agree that picking a beginner level project and diving in head first is a great way to start and will prove to you how easy it is! Check out this shirt I made as one of my very first projects:
2. Support! That brings me to the second thing I love about my Cricut. Its like having a whole community of creators to support you. Have a question? Worried about where to begin or which type of project to do? They’ve got an answer! Not only does Cricut have a team you can email or chat with, but they have numerous pages where you can reach out to their pros or other crafters with tons of experience. They’ve all started somewhere and learned lots and are at the ready to make sure you love your machine and projects. I would know. I wasn’t sure how to customize the design I wanted to make myself for this bag, and the Facebook page group had almost immediate answers for me!

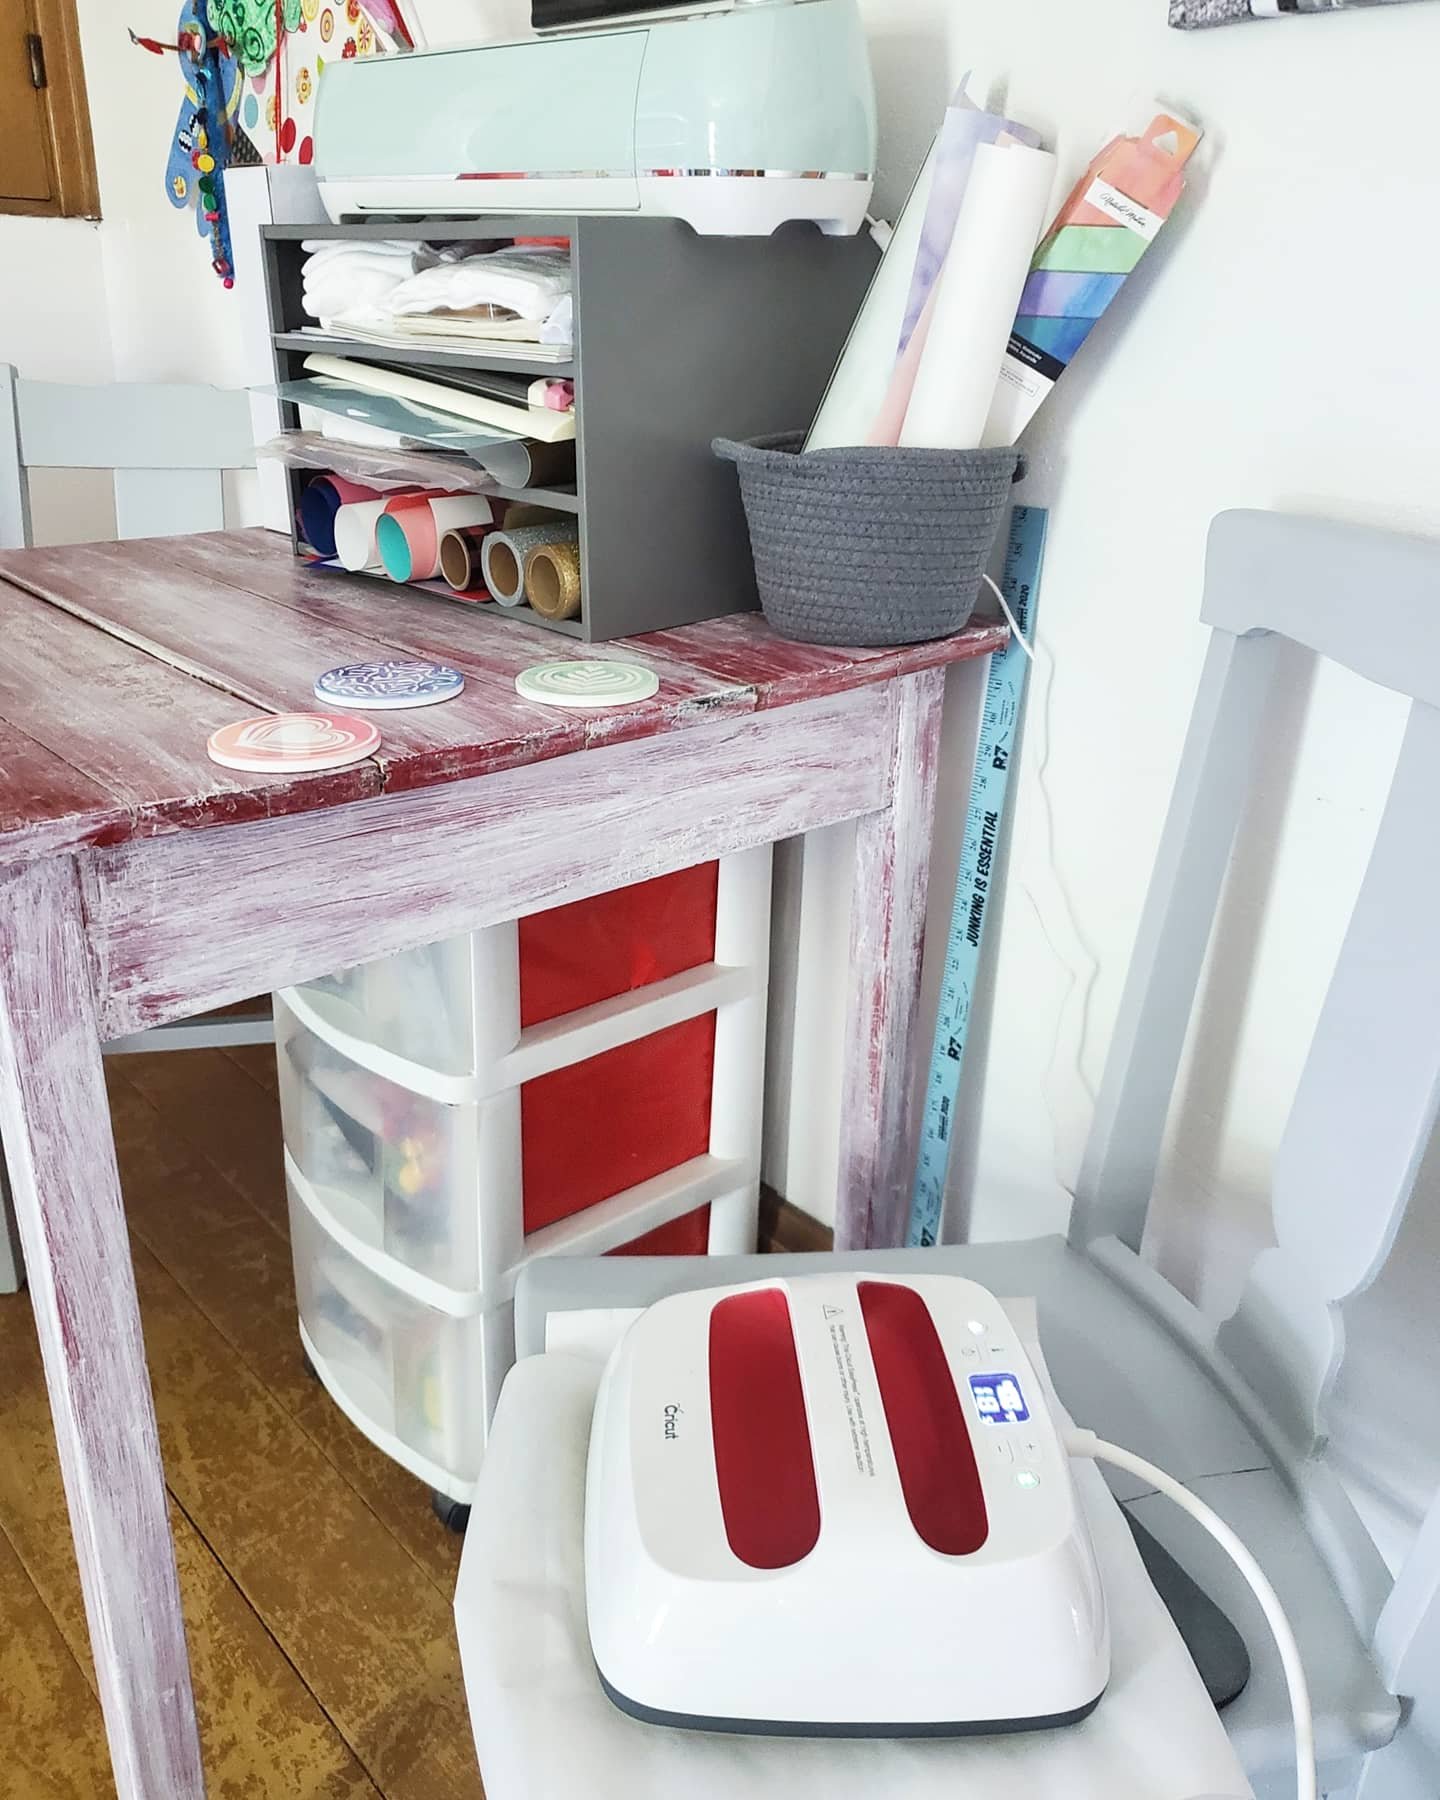
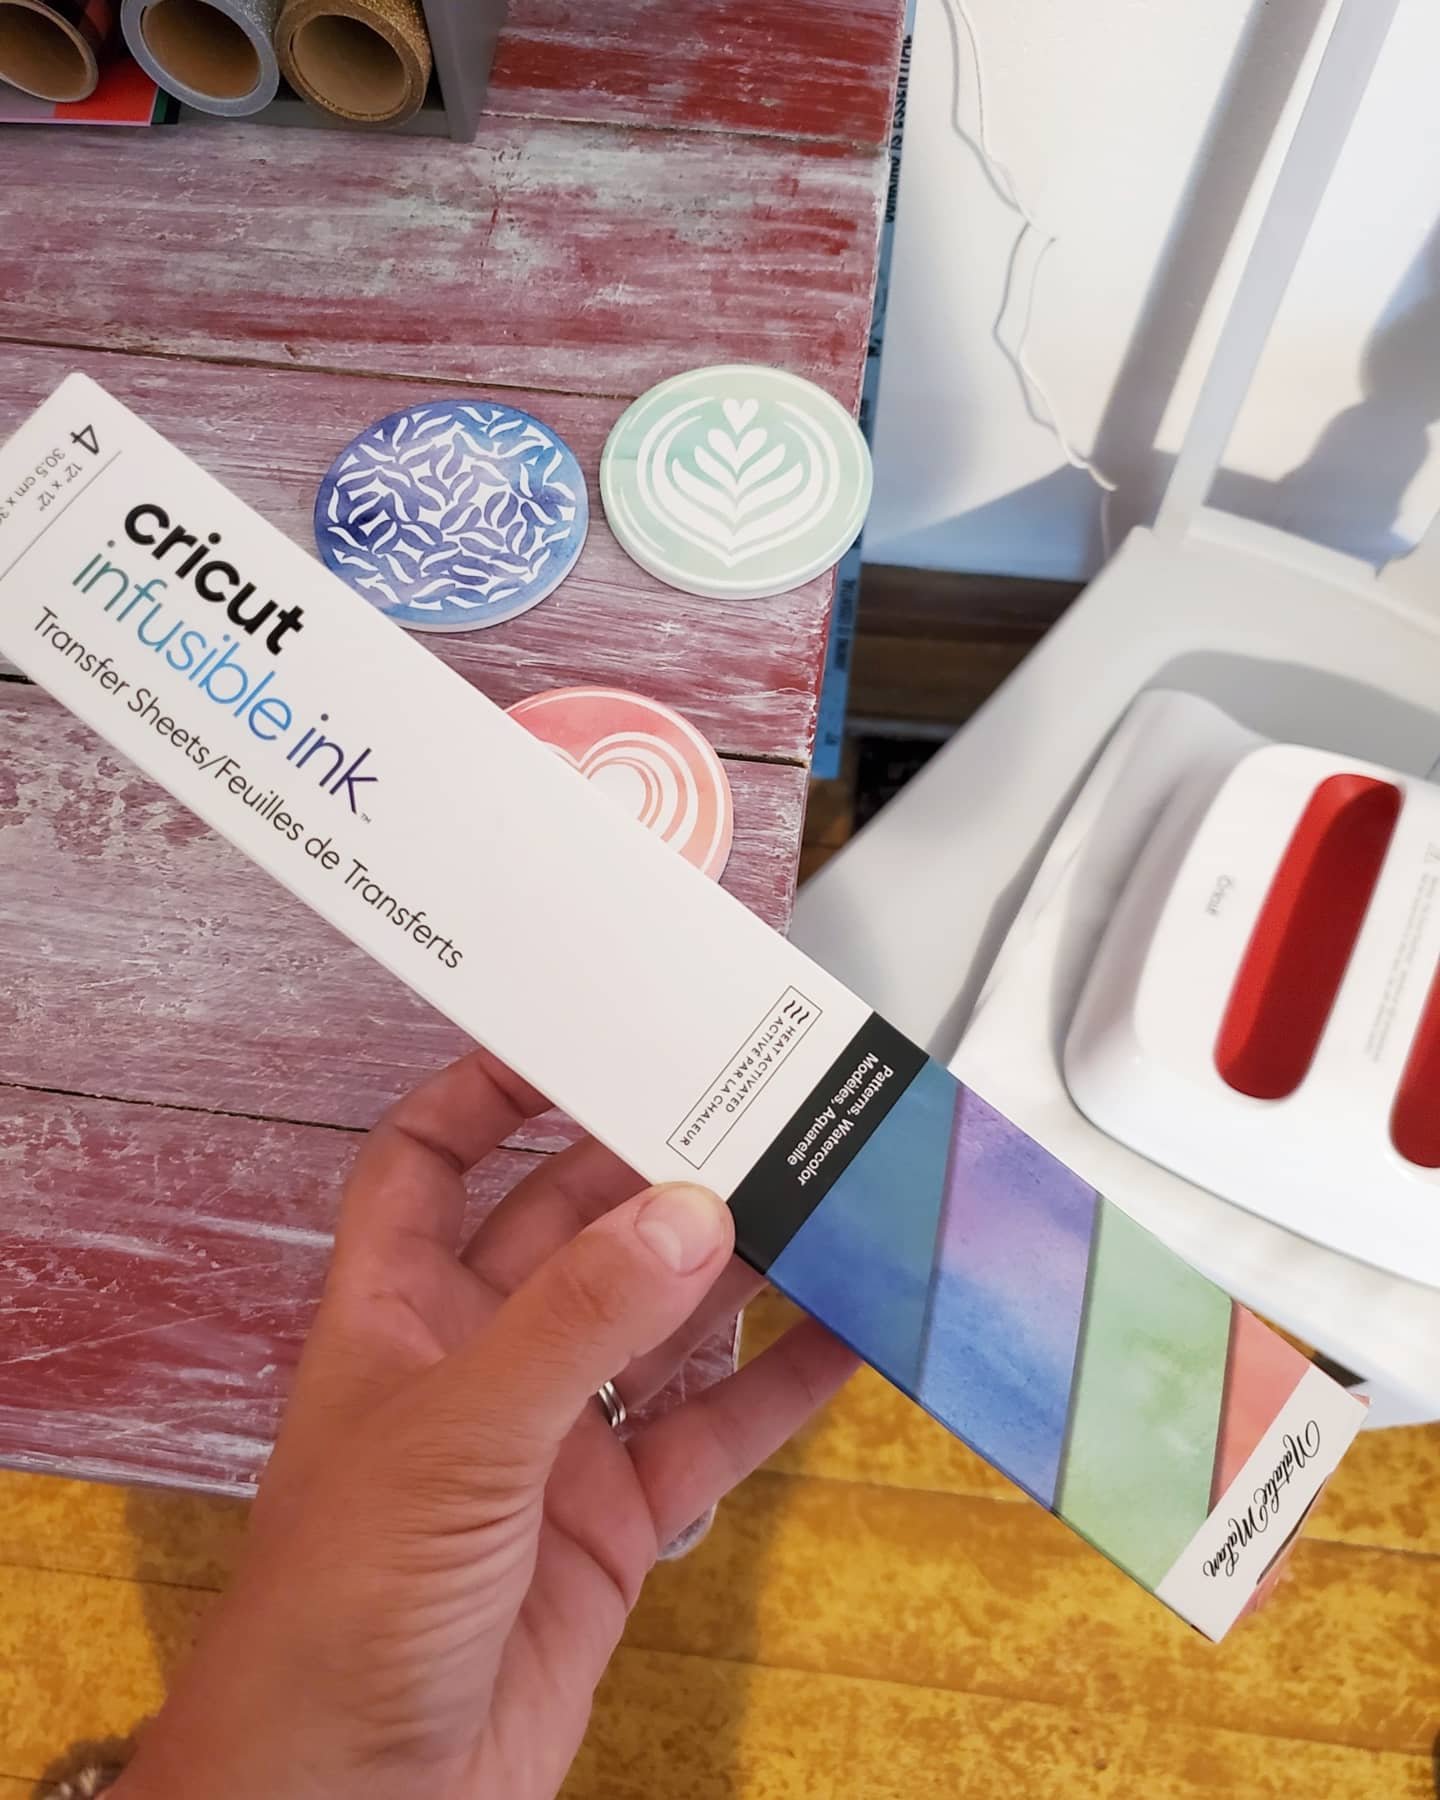
3. Ideas! This also leads me to another thing I love about Cricut, the ideas! I never worry about having a creative block. There’s no way. The ideas of projects to make are endless, for every single occasion you cak dream of. Really. You can find ideas galore on Pinterest, and Instagram, or Cricuts’s Facebook page. And my favorite place for inspiration? The Cricut emails! They send seasonal emails showing the new ideas and templates added to Design Space, their app for making. How did I know about the new infusible ink and coaster blanks to make these? One of their idea emails! Light bulb!

4. The options! Got a bright idea to make? You can! And Cricut can help you do it! The options they supply for you is endless. Or almost. Not only do they help with the ideas, but they make it easy to find all of the supplies you need to make visions come to fruition. They have coasters, bags, shirts, materials, pens, markers, vinyls, decals, iron ons, and the widest variety of patterns in their supplies you could imagine! Sparkles, holographics, leopard, wood grain…their possibilities are never ending! Not to mention, cricut has other machines like the EasyPress, and tools like mats, cutters, Nd weeders, to make all of the options come to life!

5. Capabilities! This machine not only cuts paper and vinyls. I was shocked to learn what all it really can do. Like blown away. It can cut leather, poster board, felt, fabric and even wood. But it doesn’t just cut, it can score. And it can draw! Yup! Shocked?! Me too. You can insert pens and markers into the blade holder and it can draw or write, making handmade cards, letters, signs… mind blown.
The capabilities combined with the Cricut options alone shows you that the possibilities are truly endless. I cannot wait to do another project every time I finish one! And now all of my gifts will be one of a kind made by yours truly!
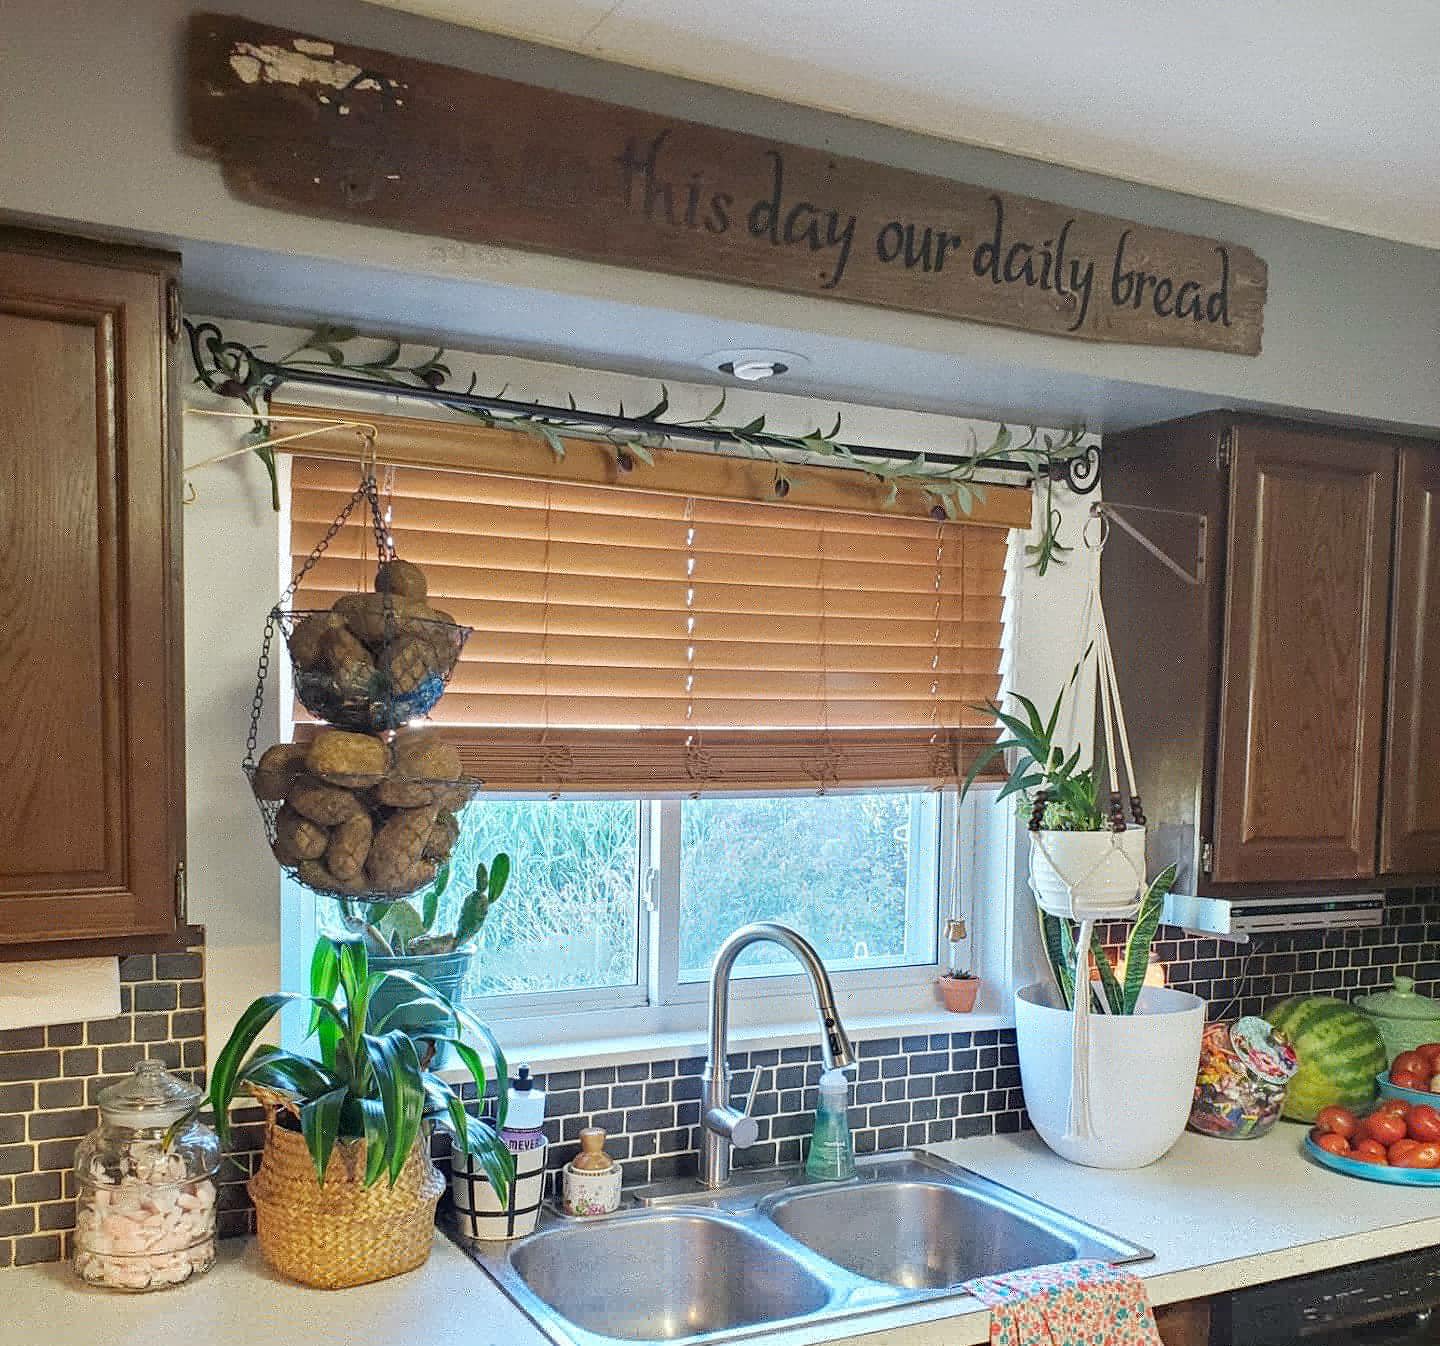
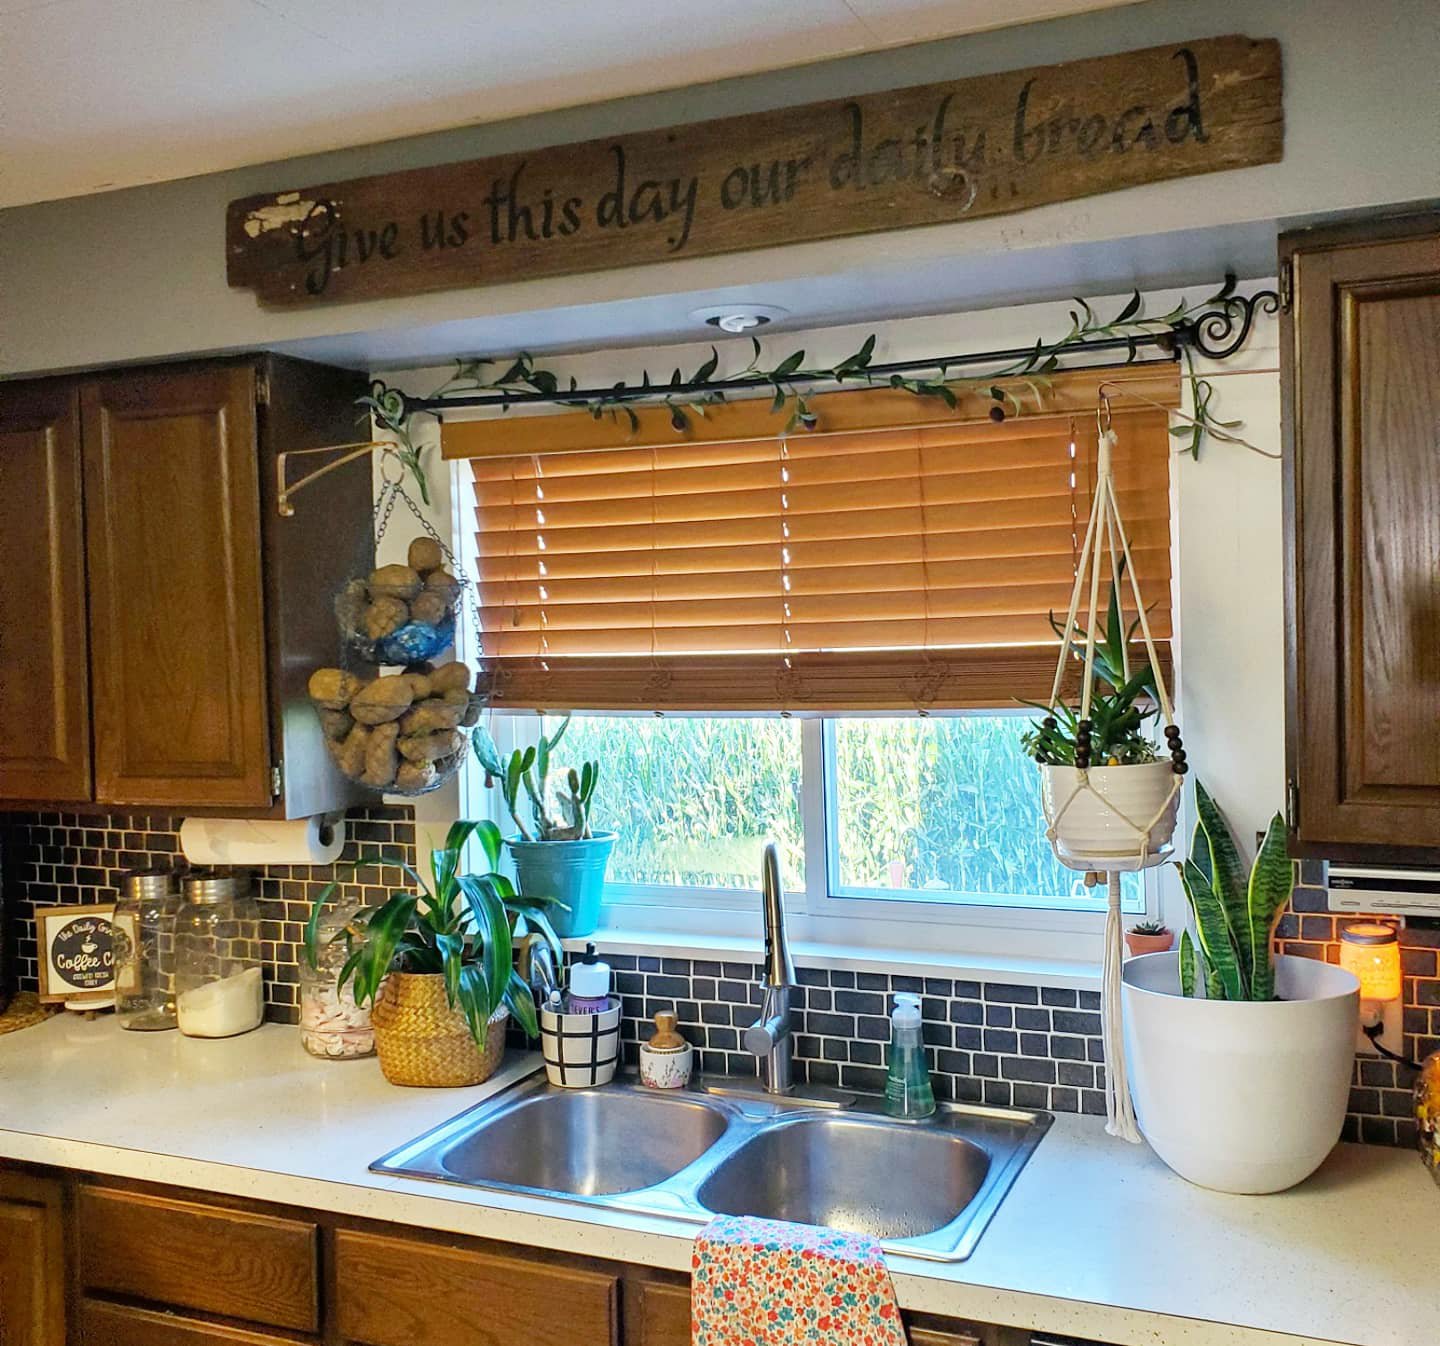
Here’s a quick breakdown of my latest project, a sign for our kitchen.
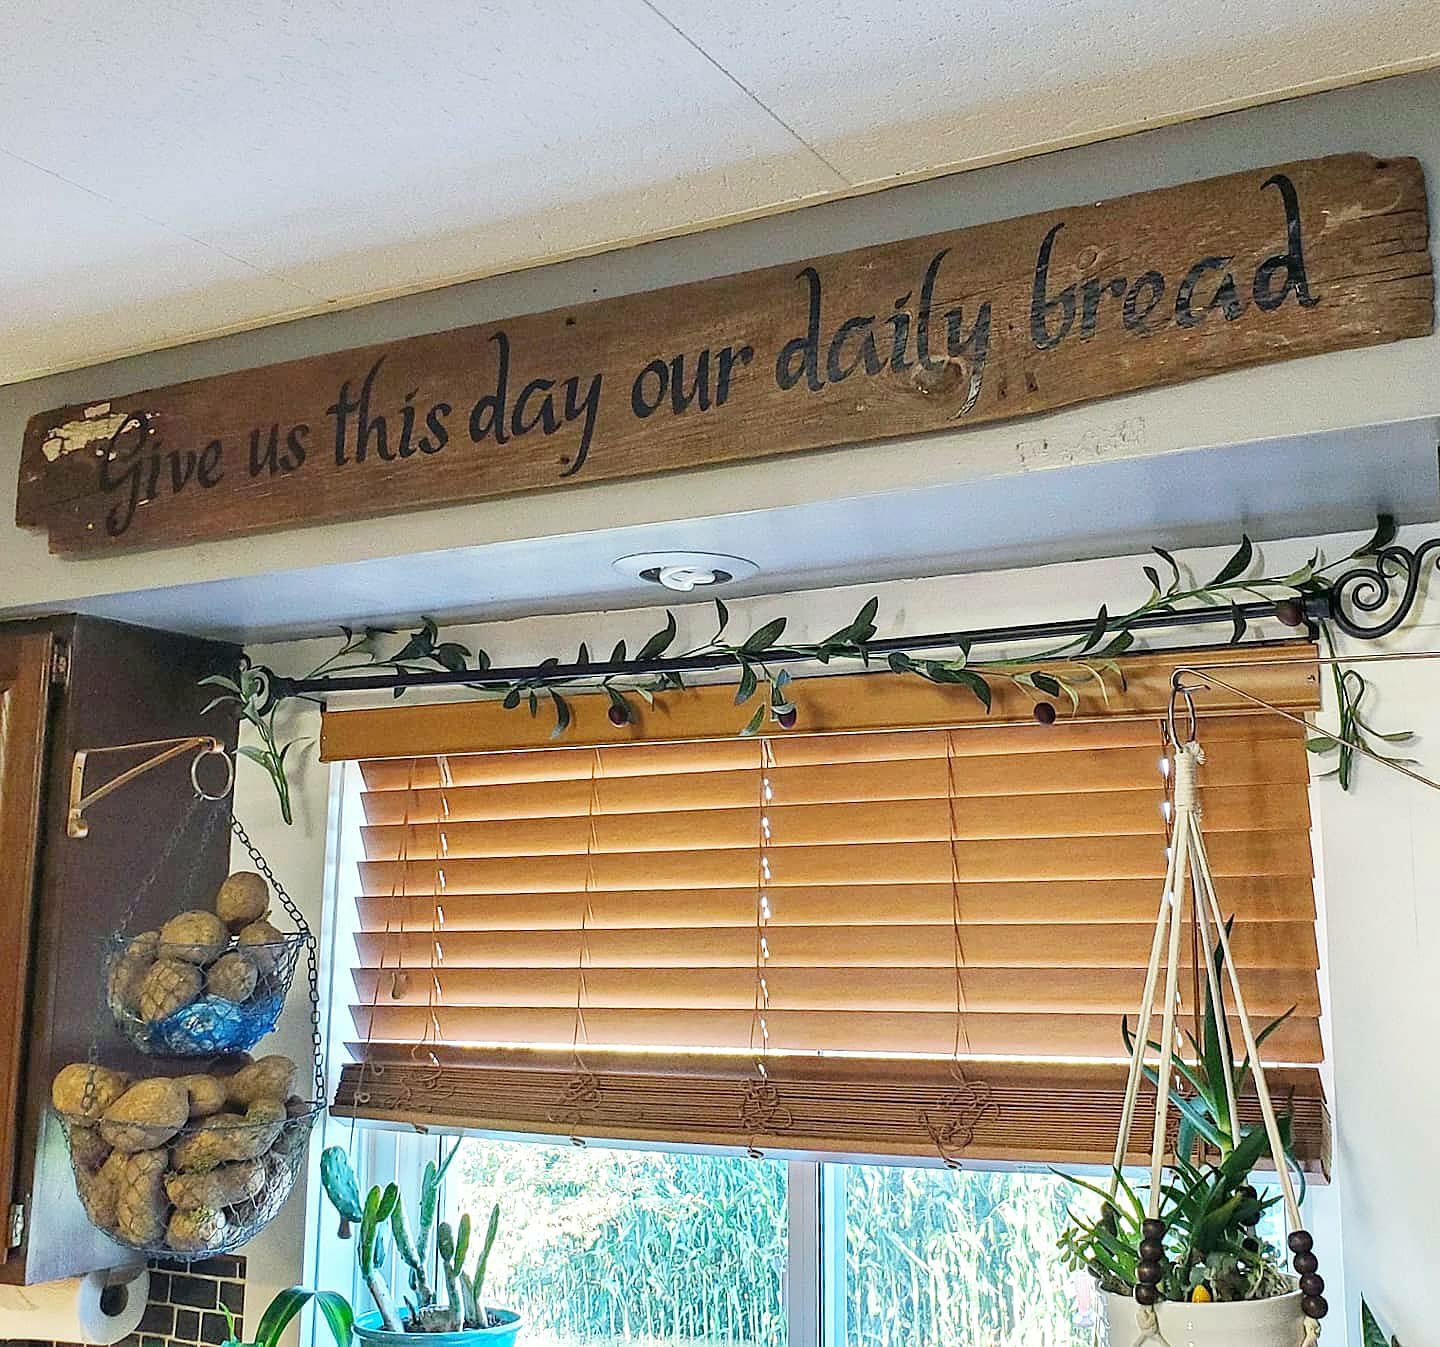
Choose a board and a quote. My board is a faded, chipped, barn board from our barn. (I’m sure to some the white paint left on one corner and the odd shape caused by years of cattle wear are not pretty, but we loved this board! 😉
Then, start on the Design Space app, and find my design template here. My board is 5ft long, but you can edit the design to adjust measurements. Once you send the design to the machine and it cuts it on vinyl, weed the excess pieces out. Use transfer tape to pick up your design and stick it down in place on your board. You could add flourishes to the ends of your quote too! You can change this design and even choose your own color vinyl. I used matte clear coat over the board to ensure no edges lift since I chose an old, rippled barn board for my project. Add a hanger or two on the back and hang. Easy peasy and a great one-of-a-kind, beginner-friendly project!
Have questions? Need help or ideas? Just ask! 😘
XX,
Jess
Frame Hanger Project
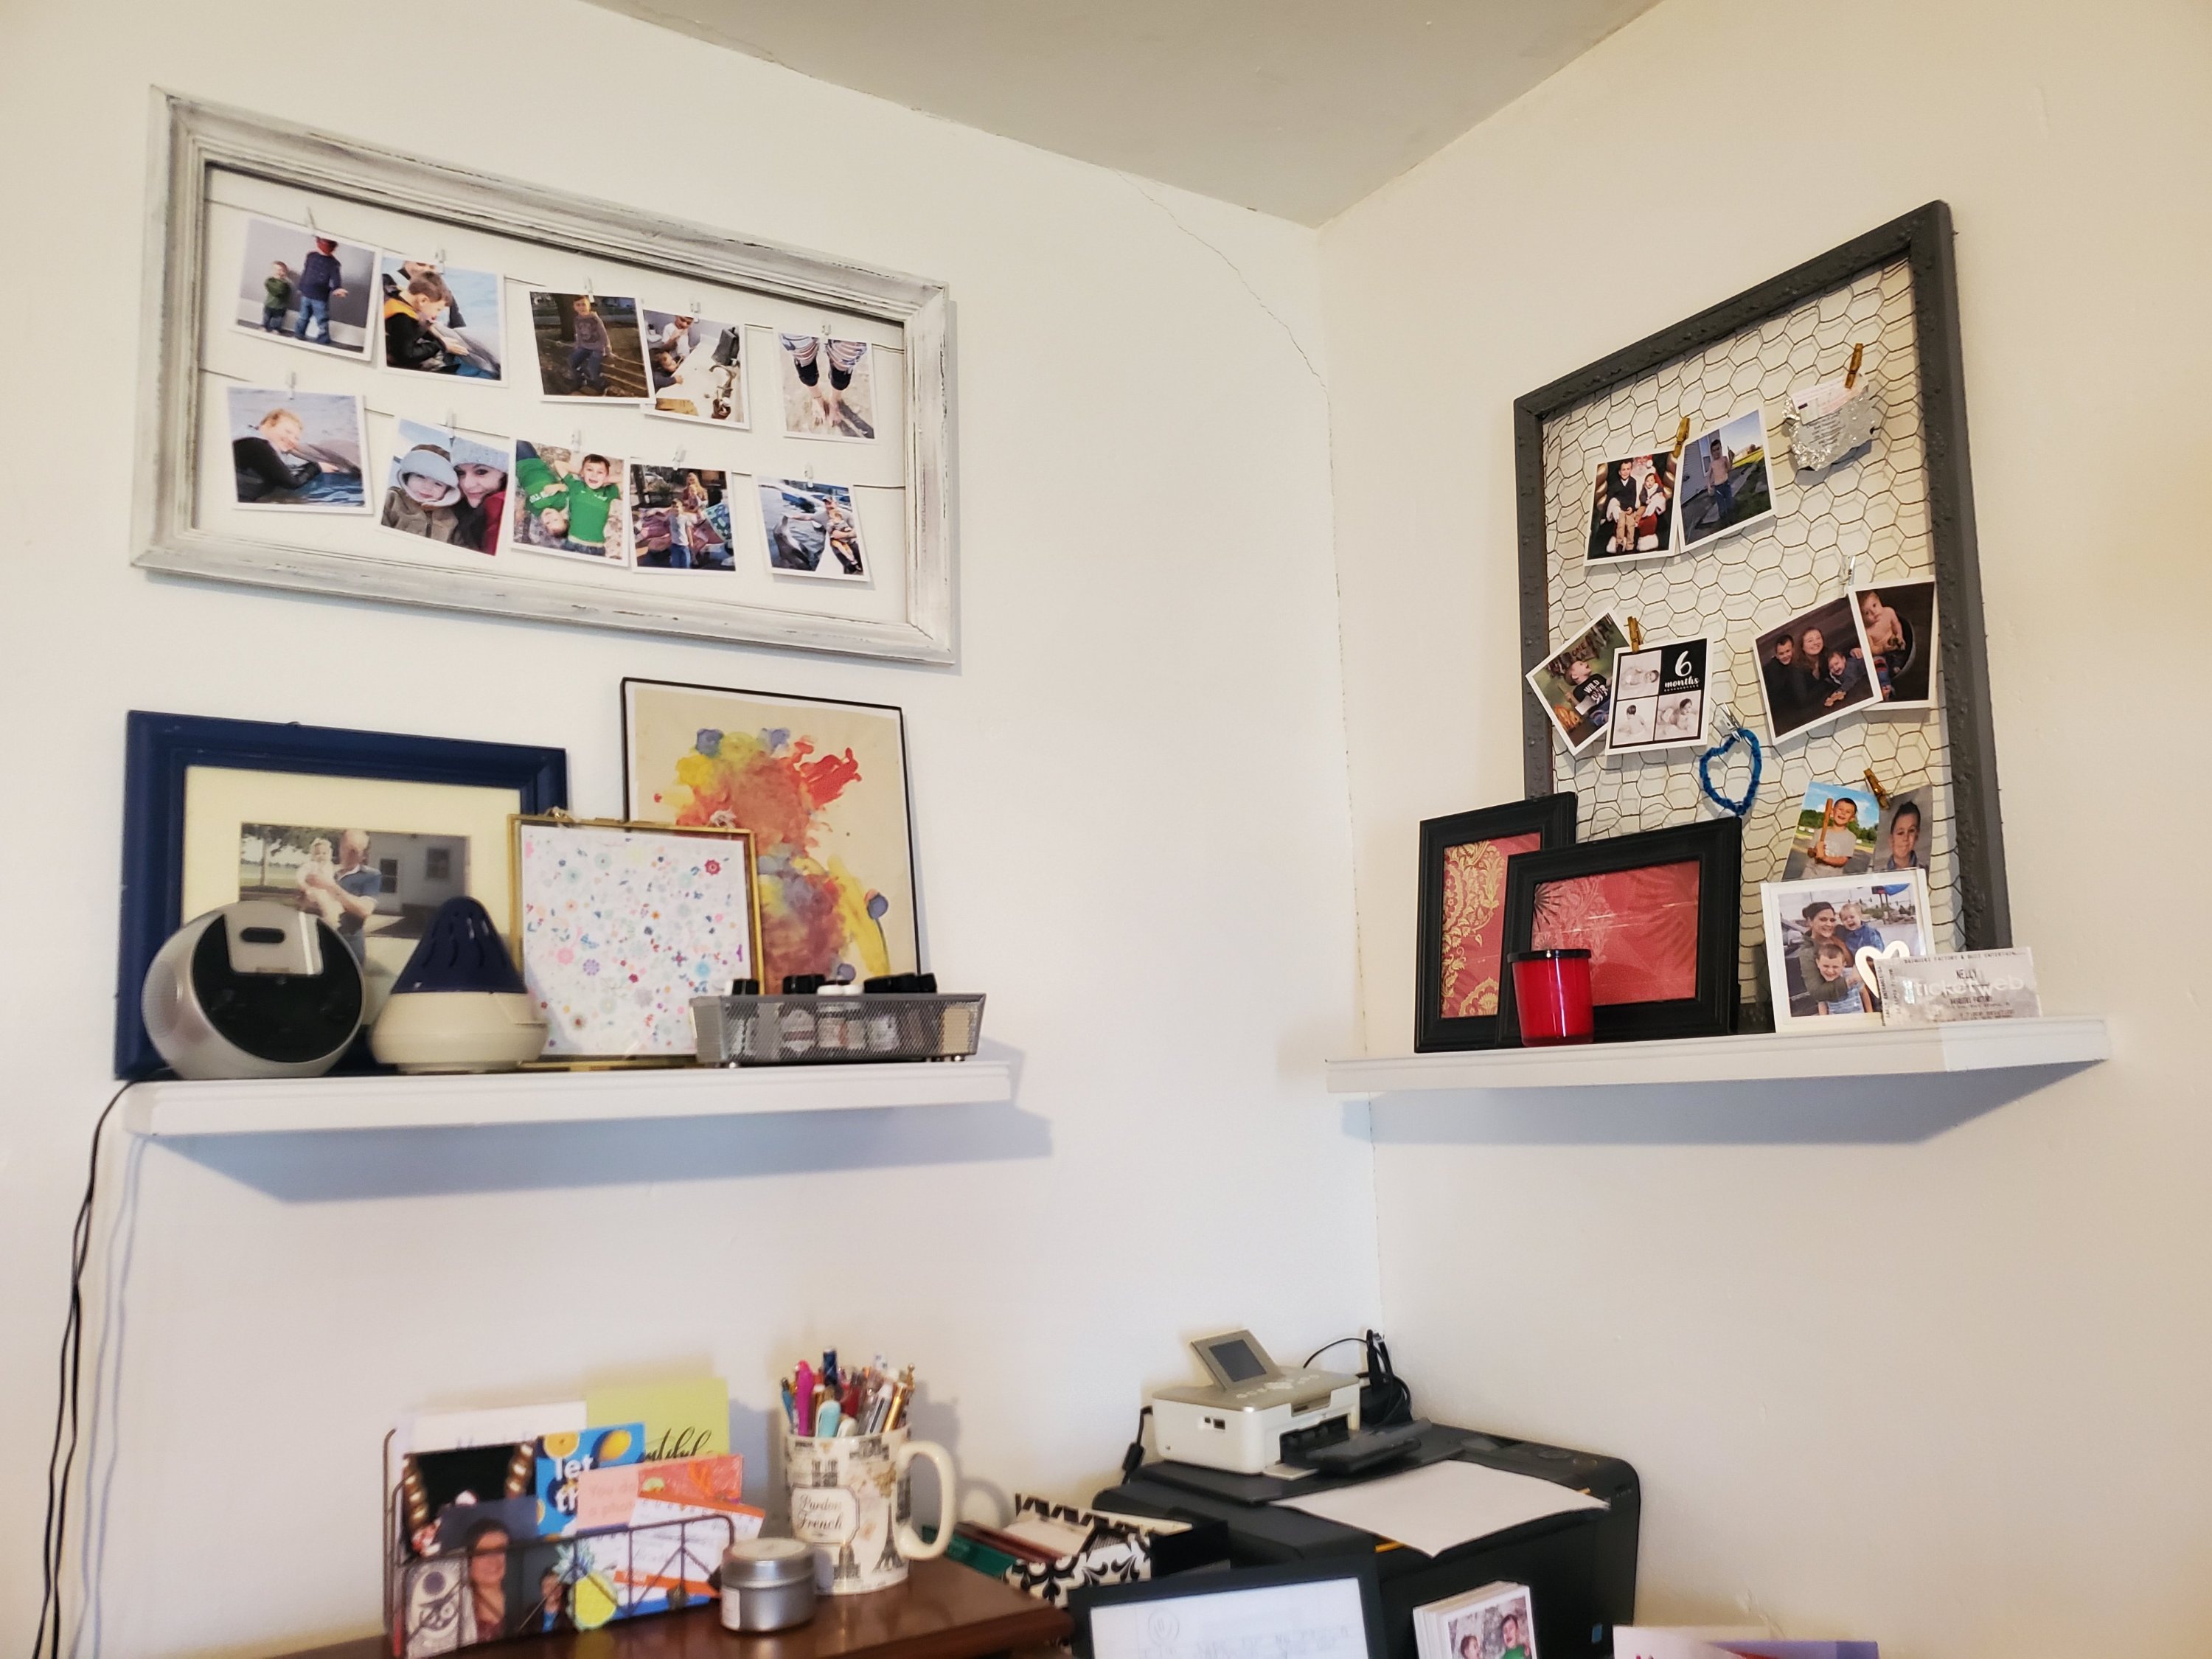
I love old picture frames. All kinds. I’ve got a hallway of empty ones upstairs. Sometimes I fill them. Sometimes I paint them. And sometimes I do something fun with them…

This frame I once painted black with a silver line. Years ago. I was over it. (Ignore the ugly paneling in the upstairs hall we hope to rip out soon)
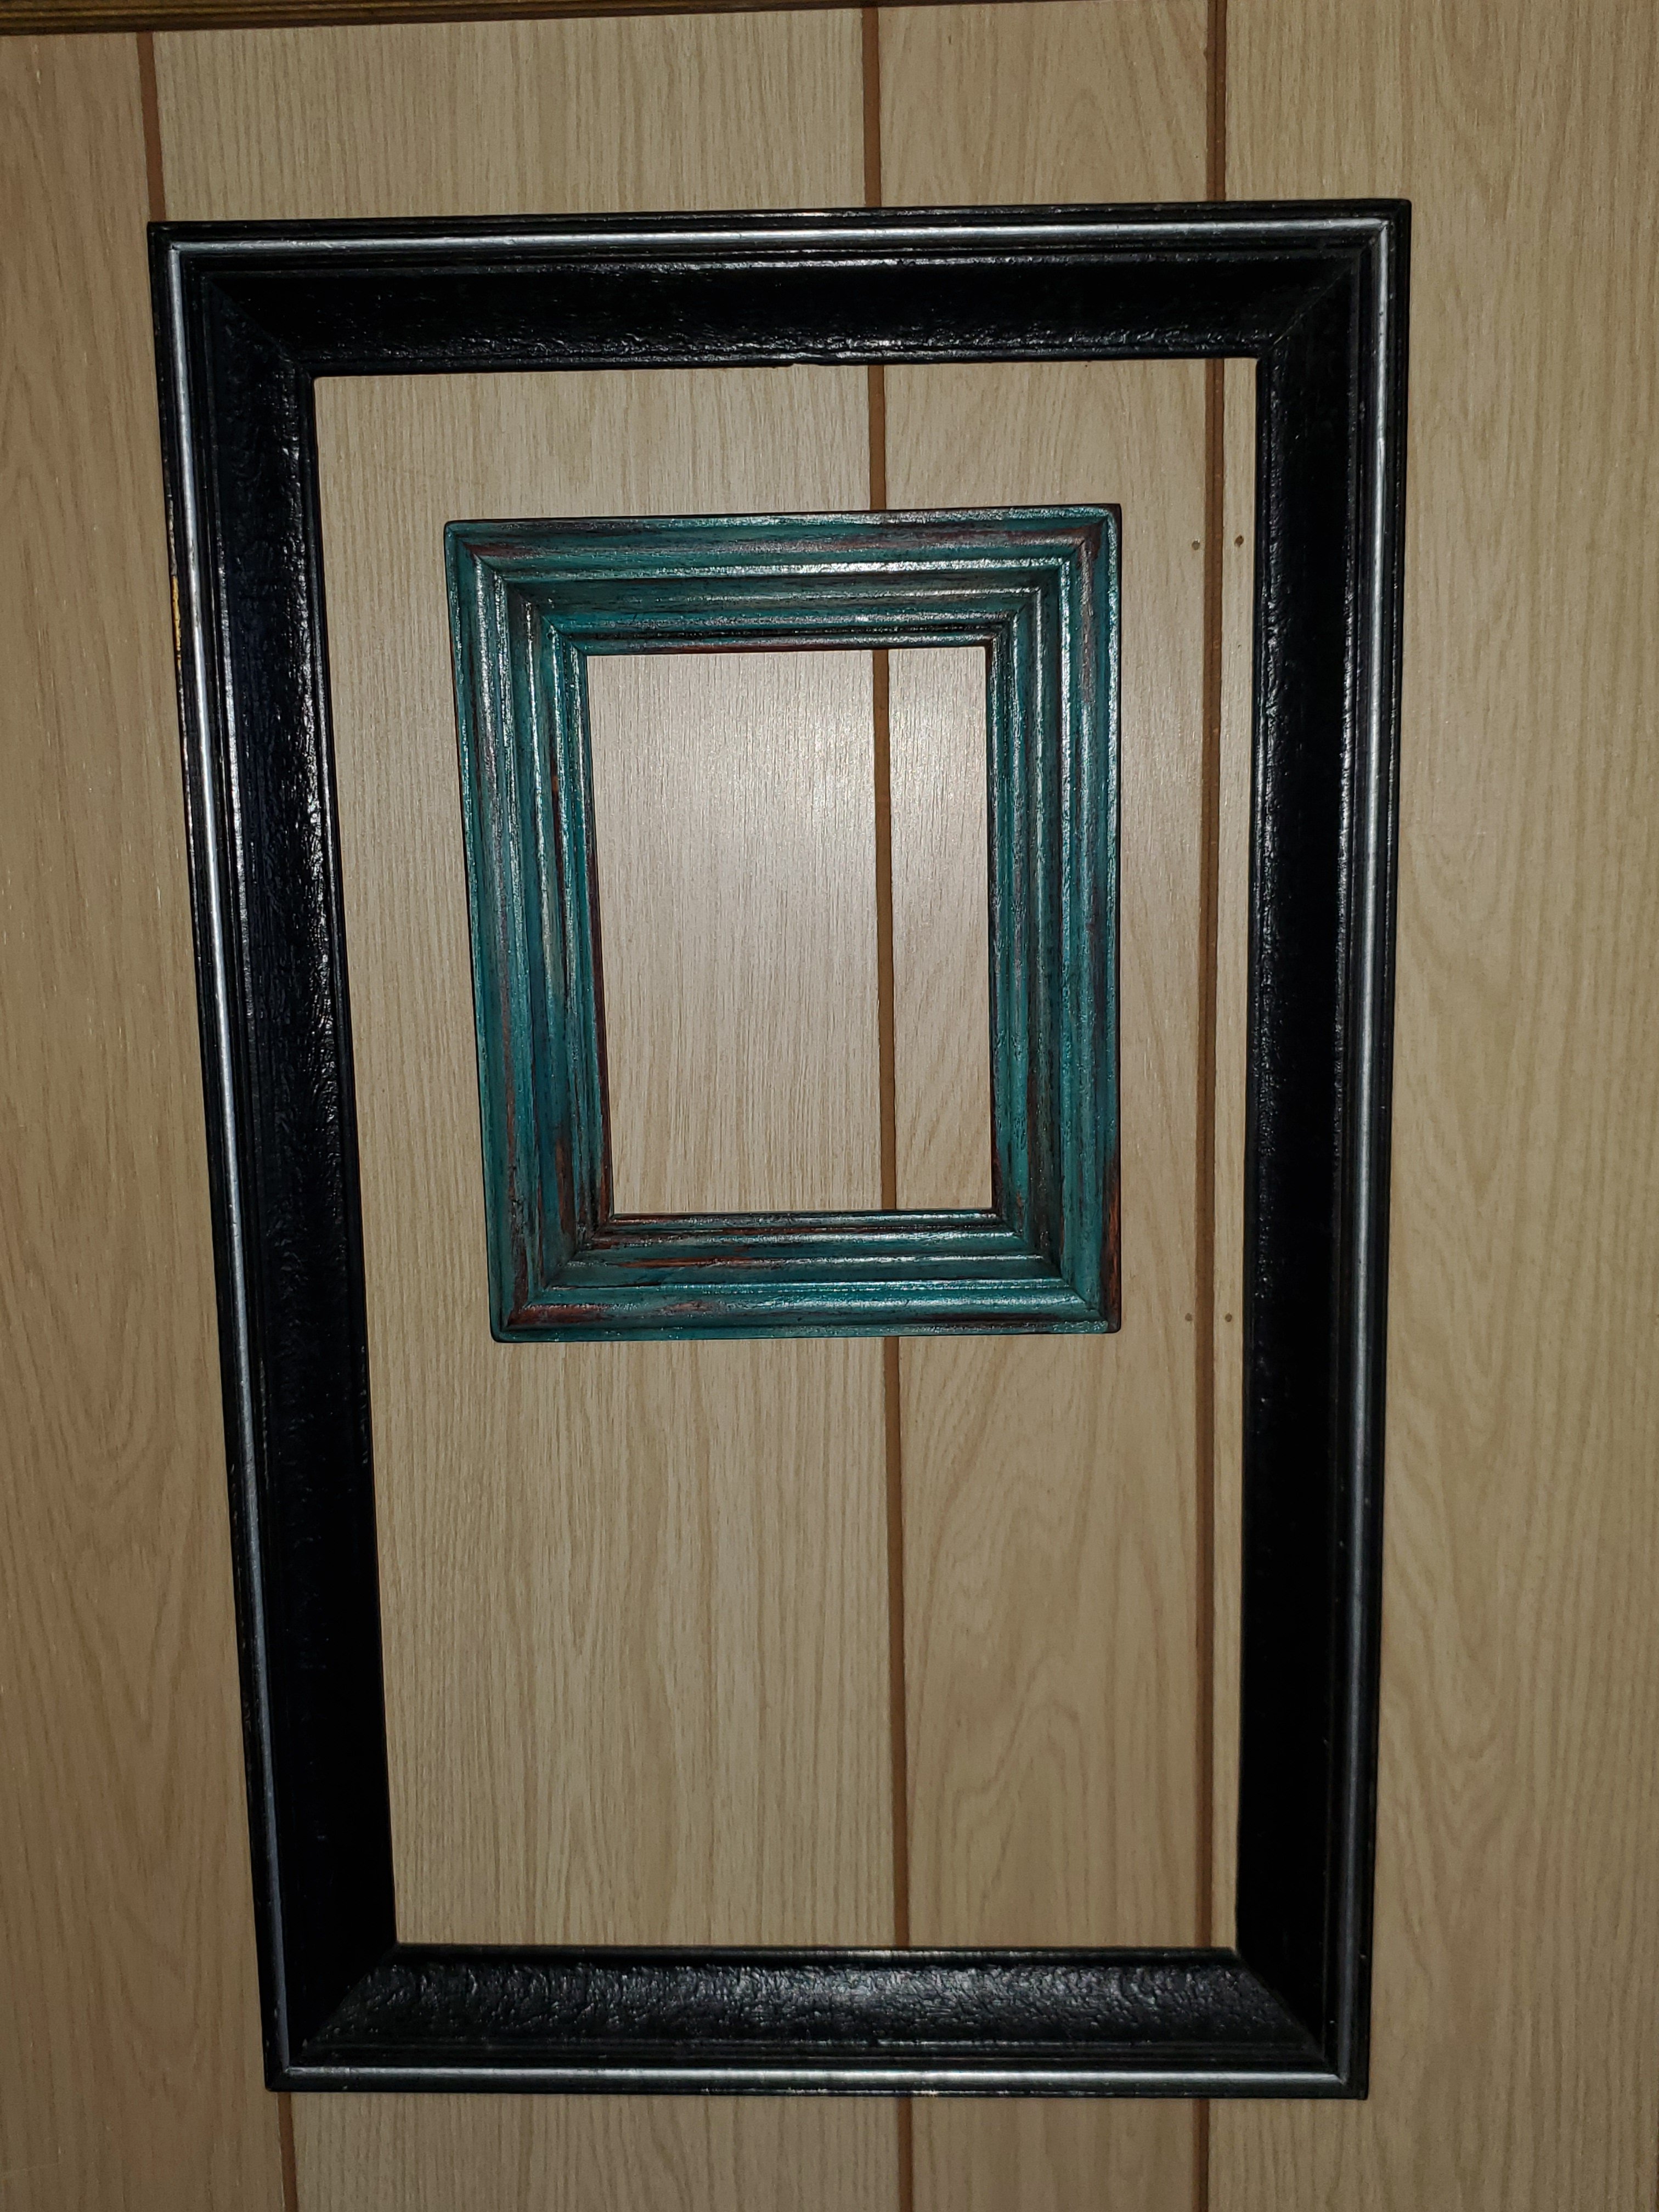
I wanted something lighter and brighter for my office. And I needed a place to hang some of my beautiful Parabo Press photos. (If you haven’t ordered from them, you must. They are gorgeous)
So first I lightly sanded the frame. Then I painted it white. I used wall paint for this project because it’s what I had. And its quarantine. And this step wasn’t super important for this project. It took 2-3 coats, but doesn’t need to be perfect.
Then I sanded with a foam sanding block. I scraped the edges and roughed up the centers. Go slowly and start lightly. Keep going until you love it.
Then, because I wanted just a little something more for this one, I used a small brush and “dry brushed” on some charcoal gray paint. This means I dipped a tiny amount on the brush and then swiped most of it off onto a paper plate. When the brush is almost dry, wipe it on the frame. It will give you just a tiny bit of paint and give a smudge-y look. I used a paper towel to rub this in as I added it too. It came out nice and weathered.
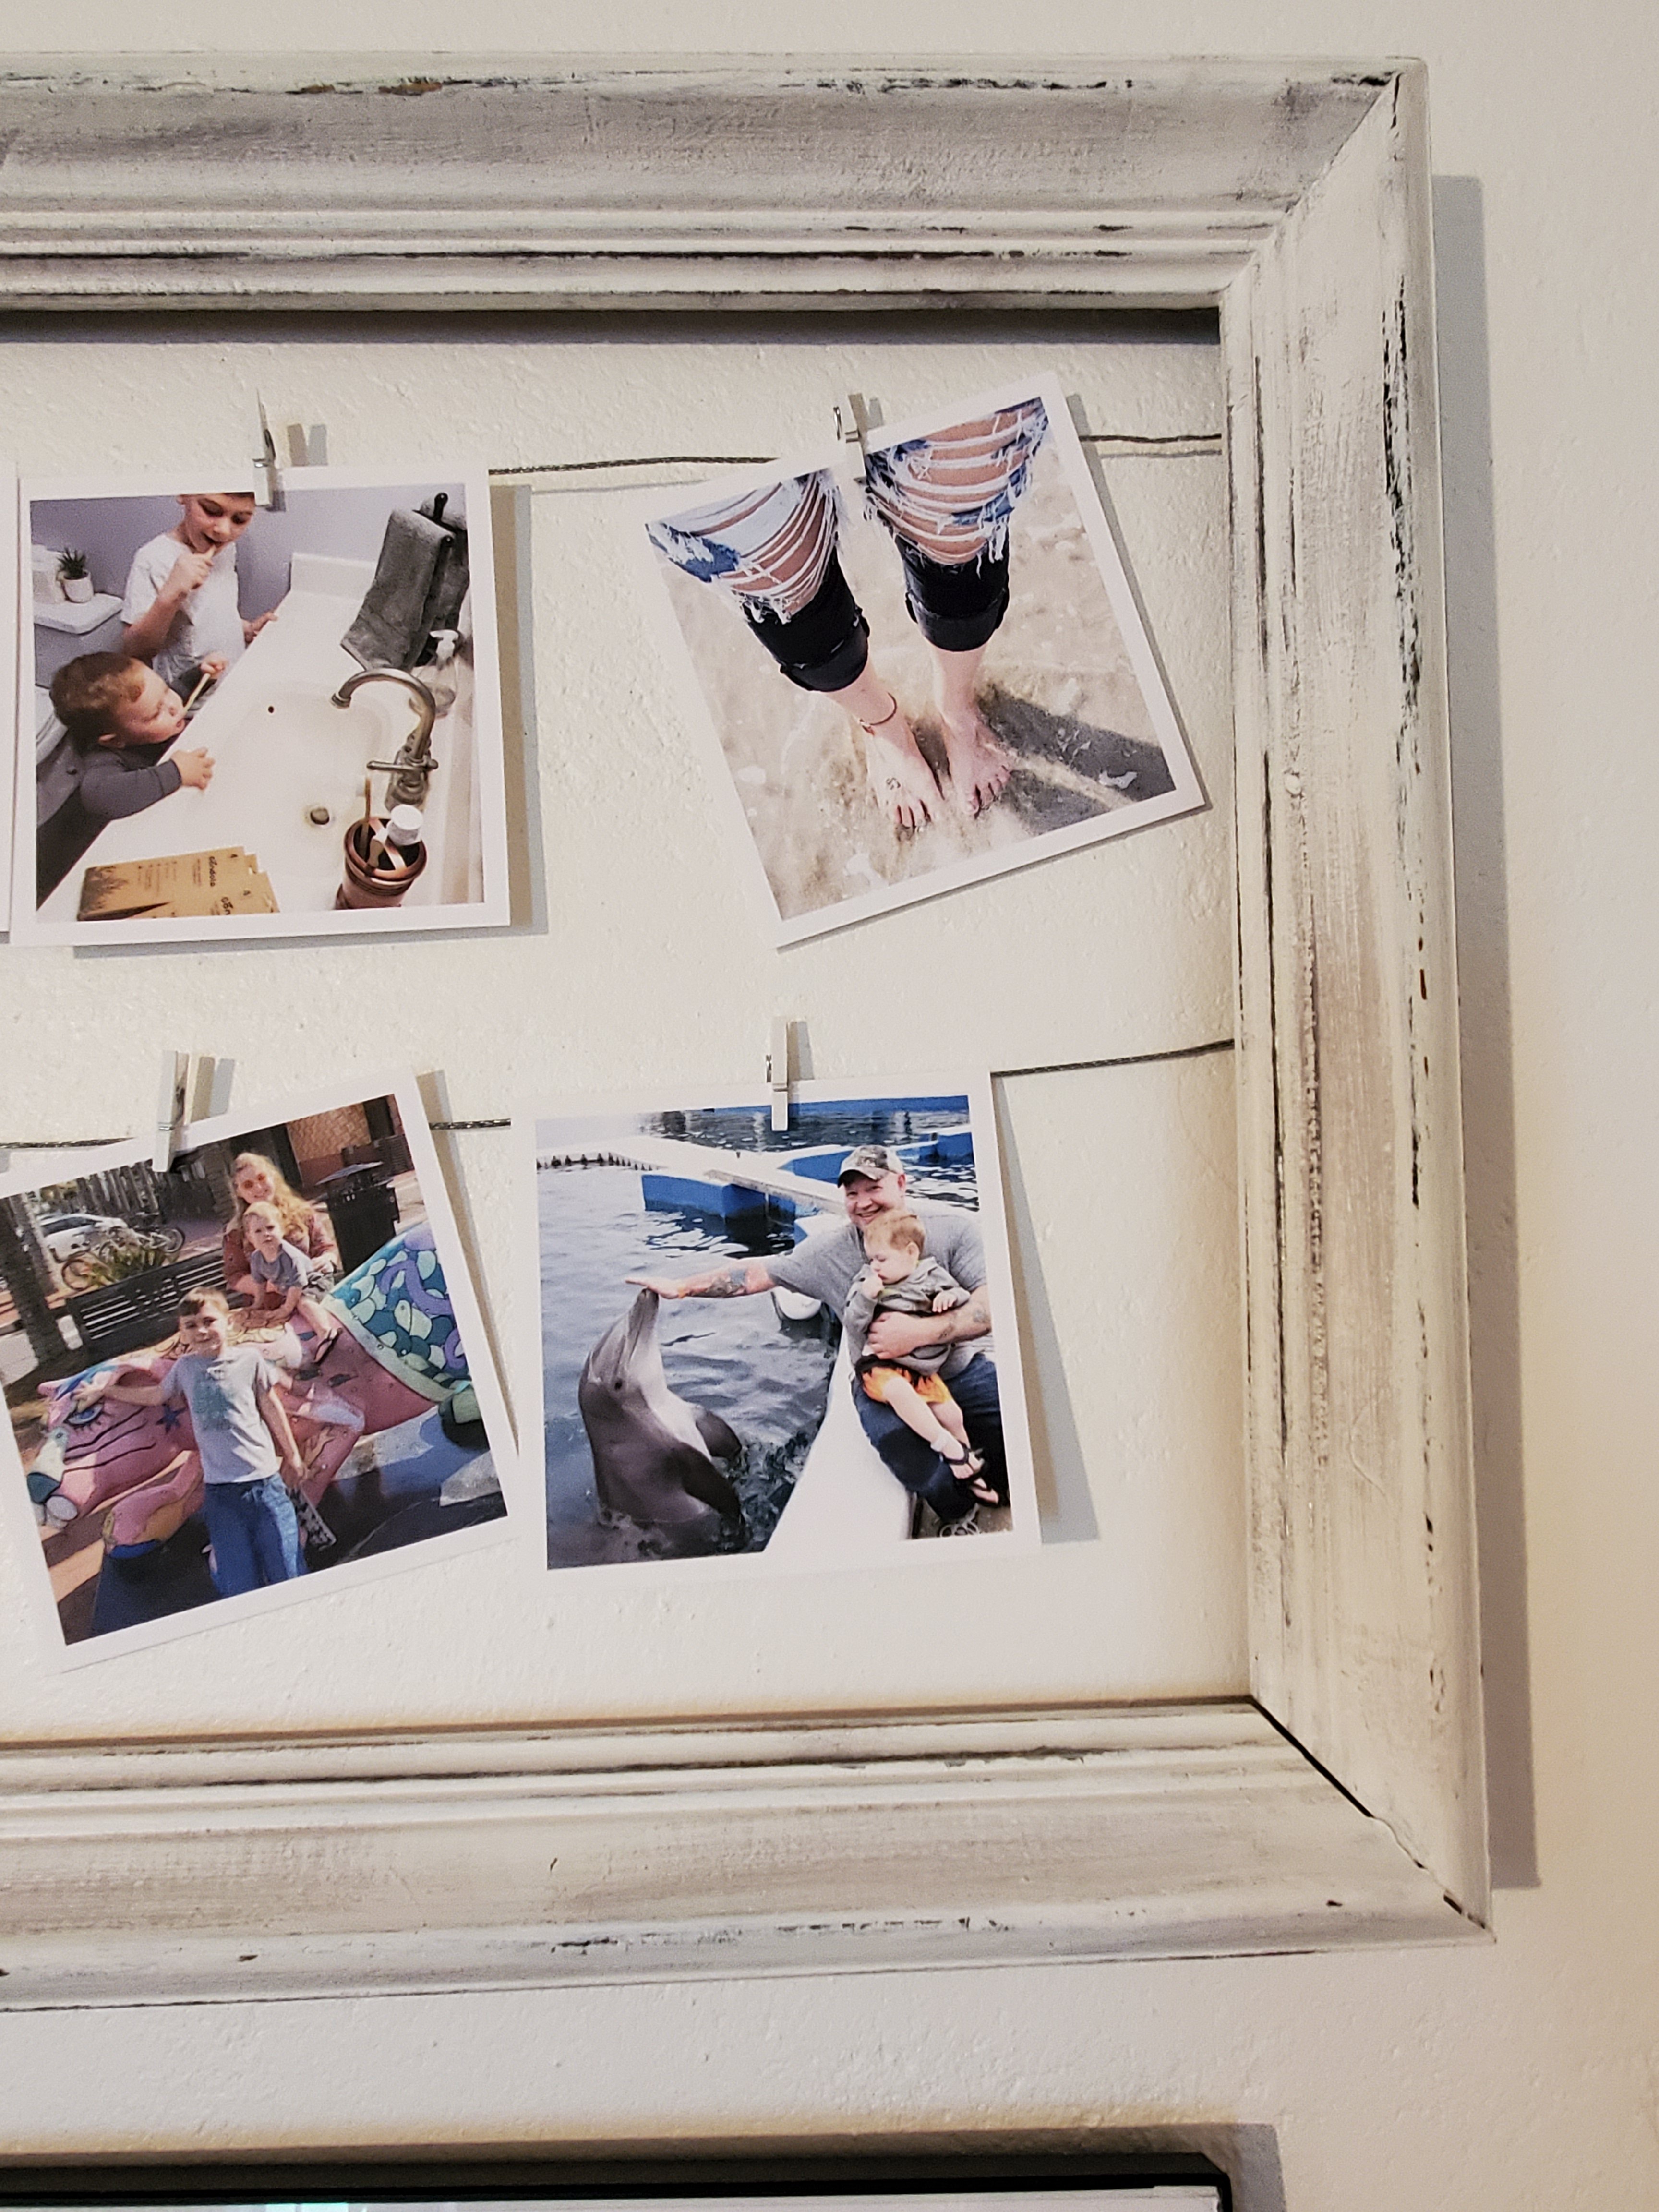
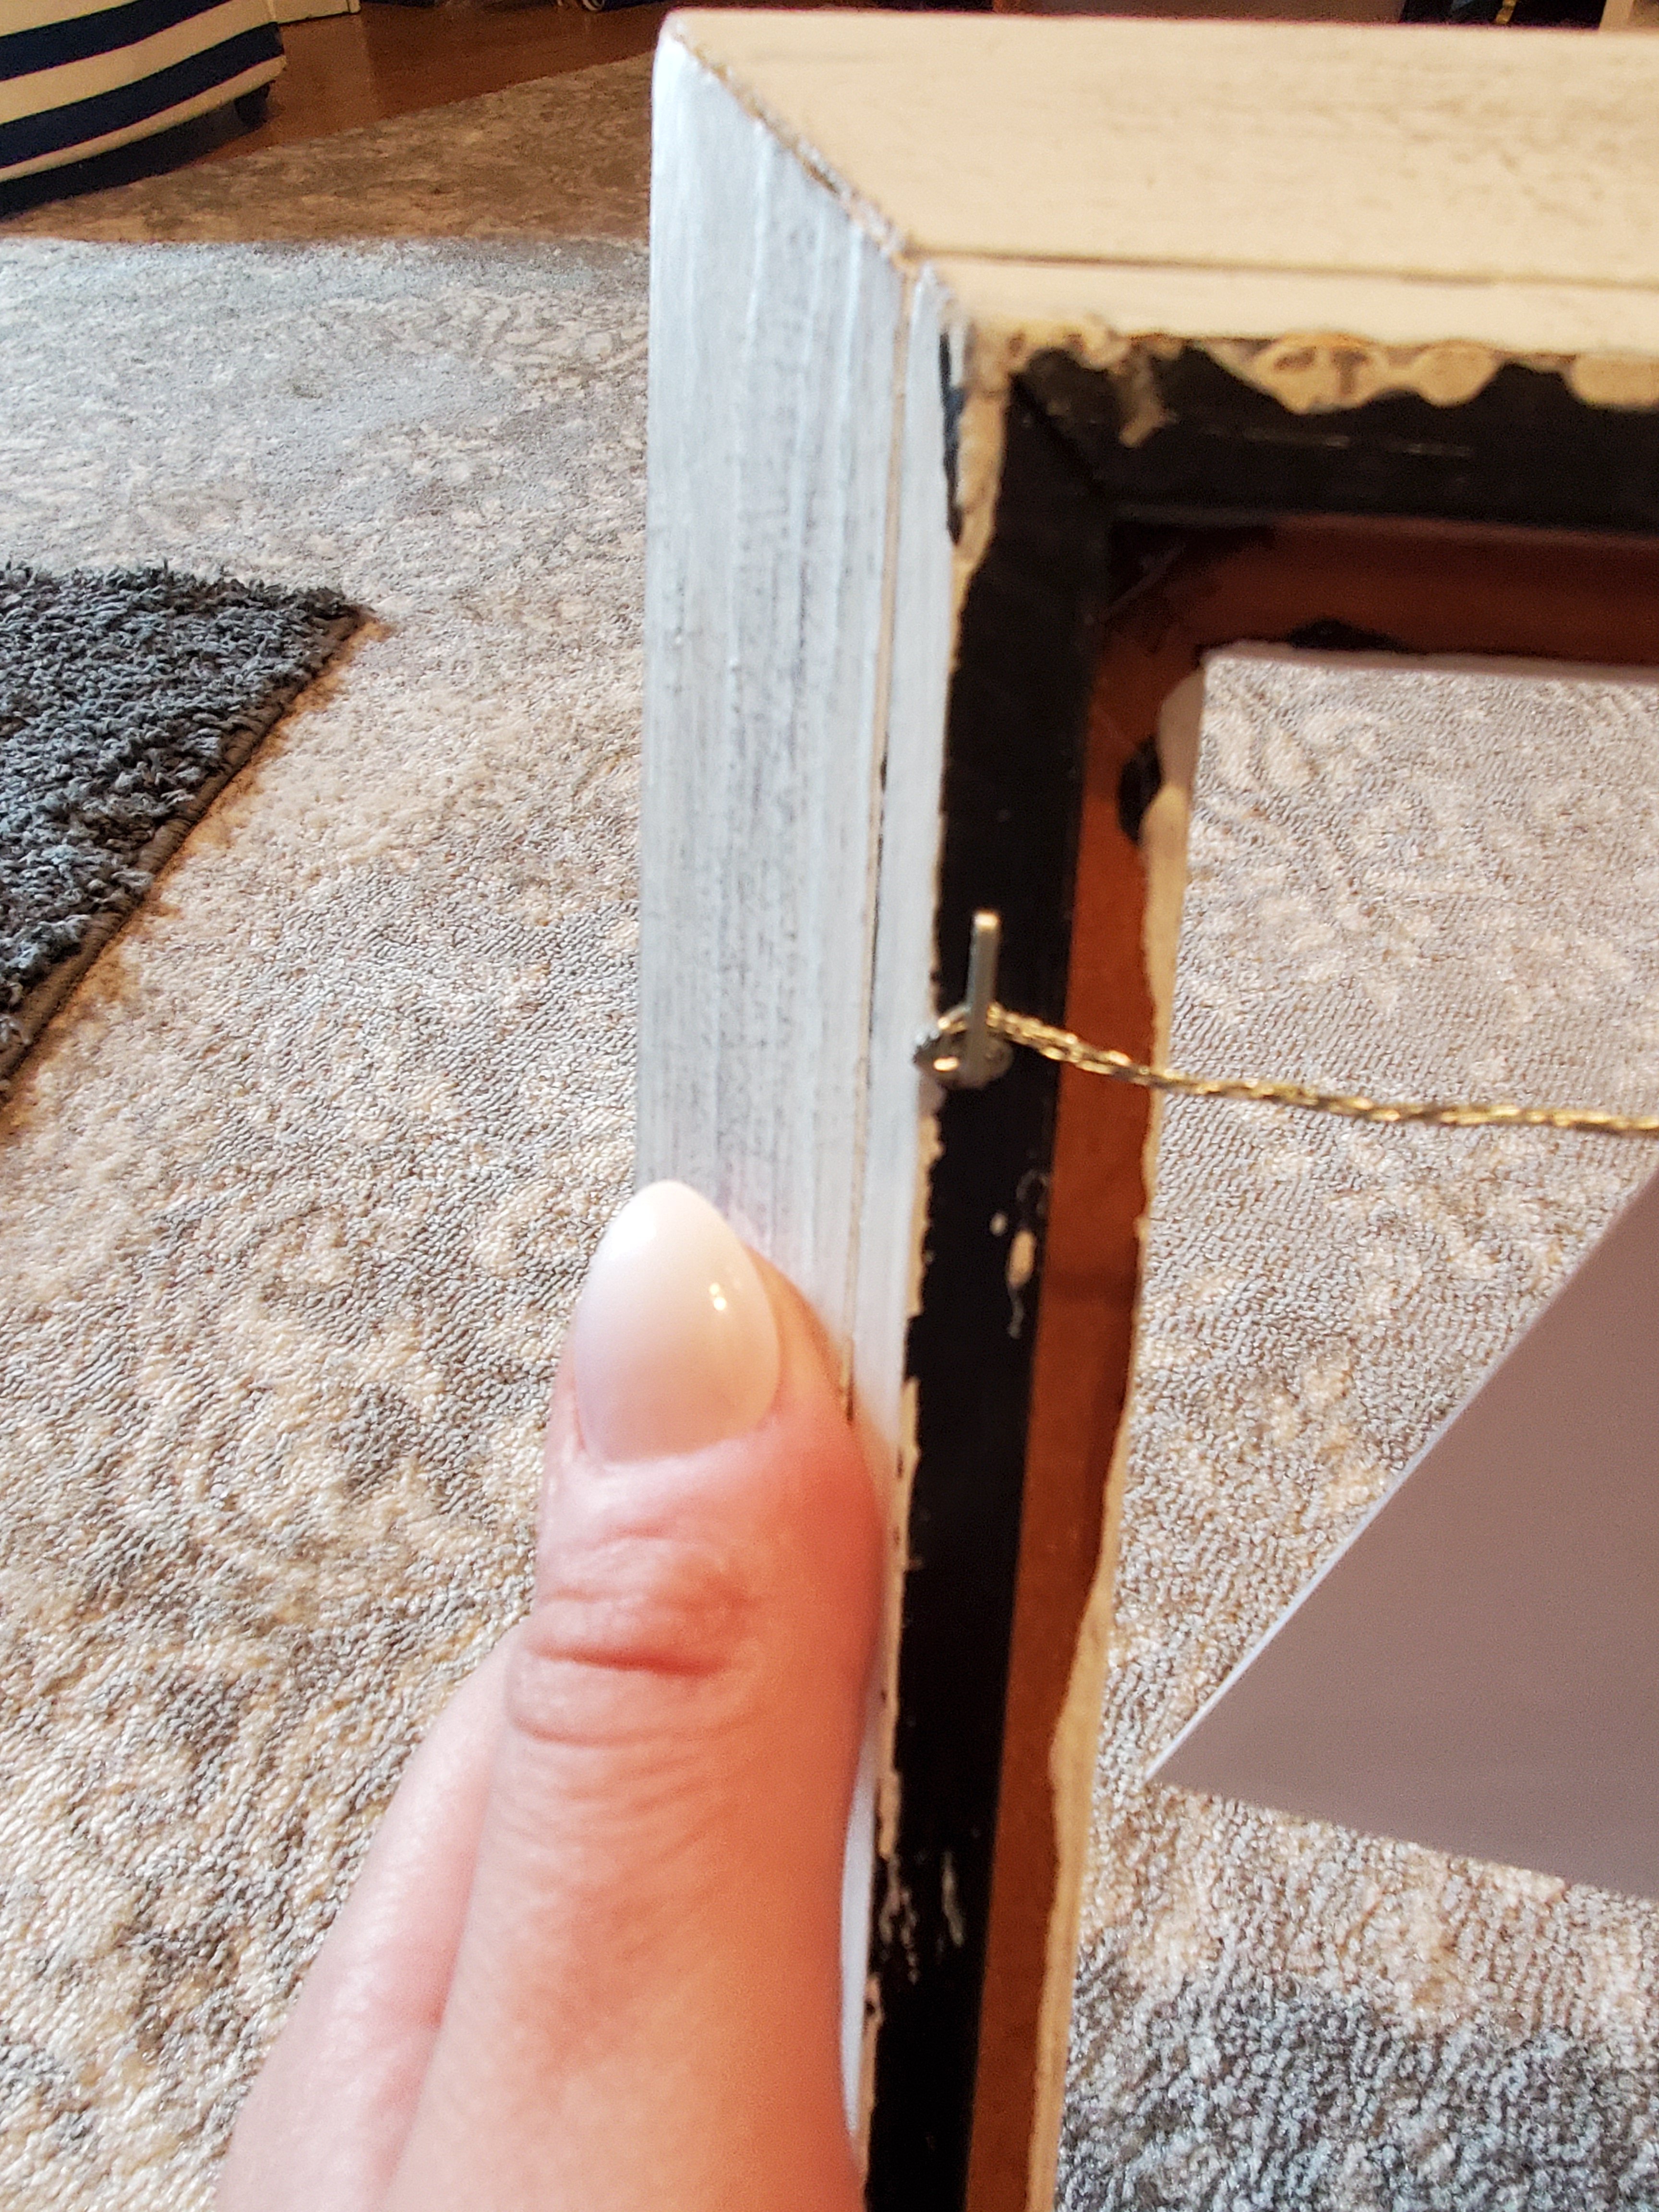
Then to add some wire. You could use twine or ribbon, or whatever you have. I had some picture hanging wire from a hanging kit. I cut it slightly longer than the width of the frame, maybe a half inch extra on each side. Then I pulled it tight across the frame and used a staple fun to staple it in place. I twisted the extra ends into a little ball to help keep it in place.
You can get tiny clothes pins on Amazon.
And viola!

I’ve also done this before with chicken wire…
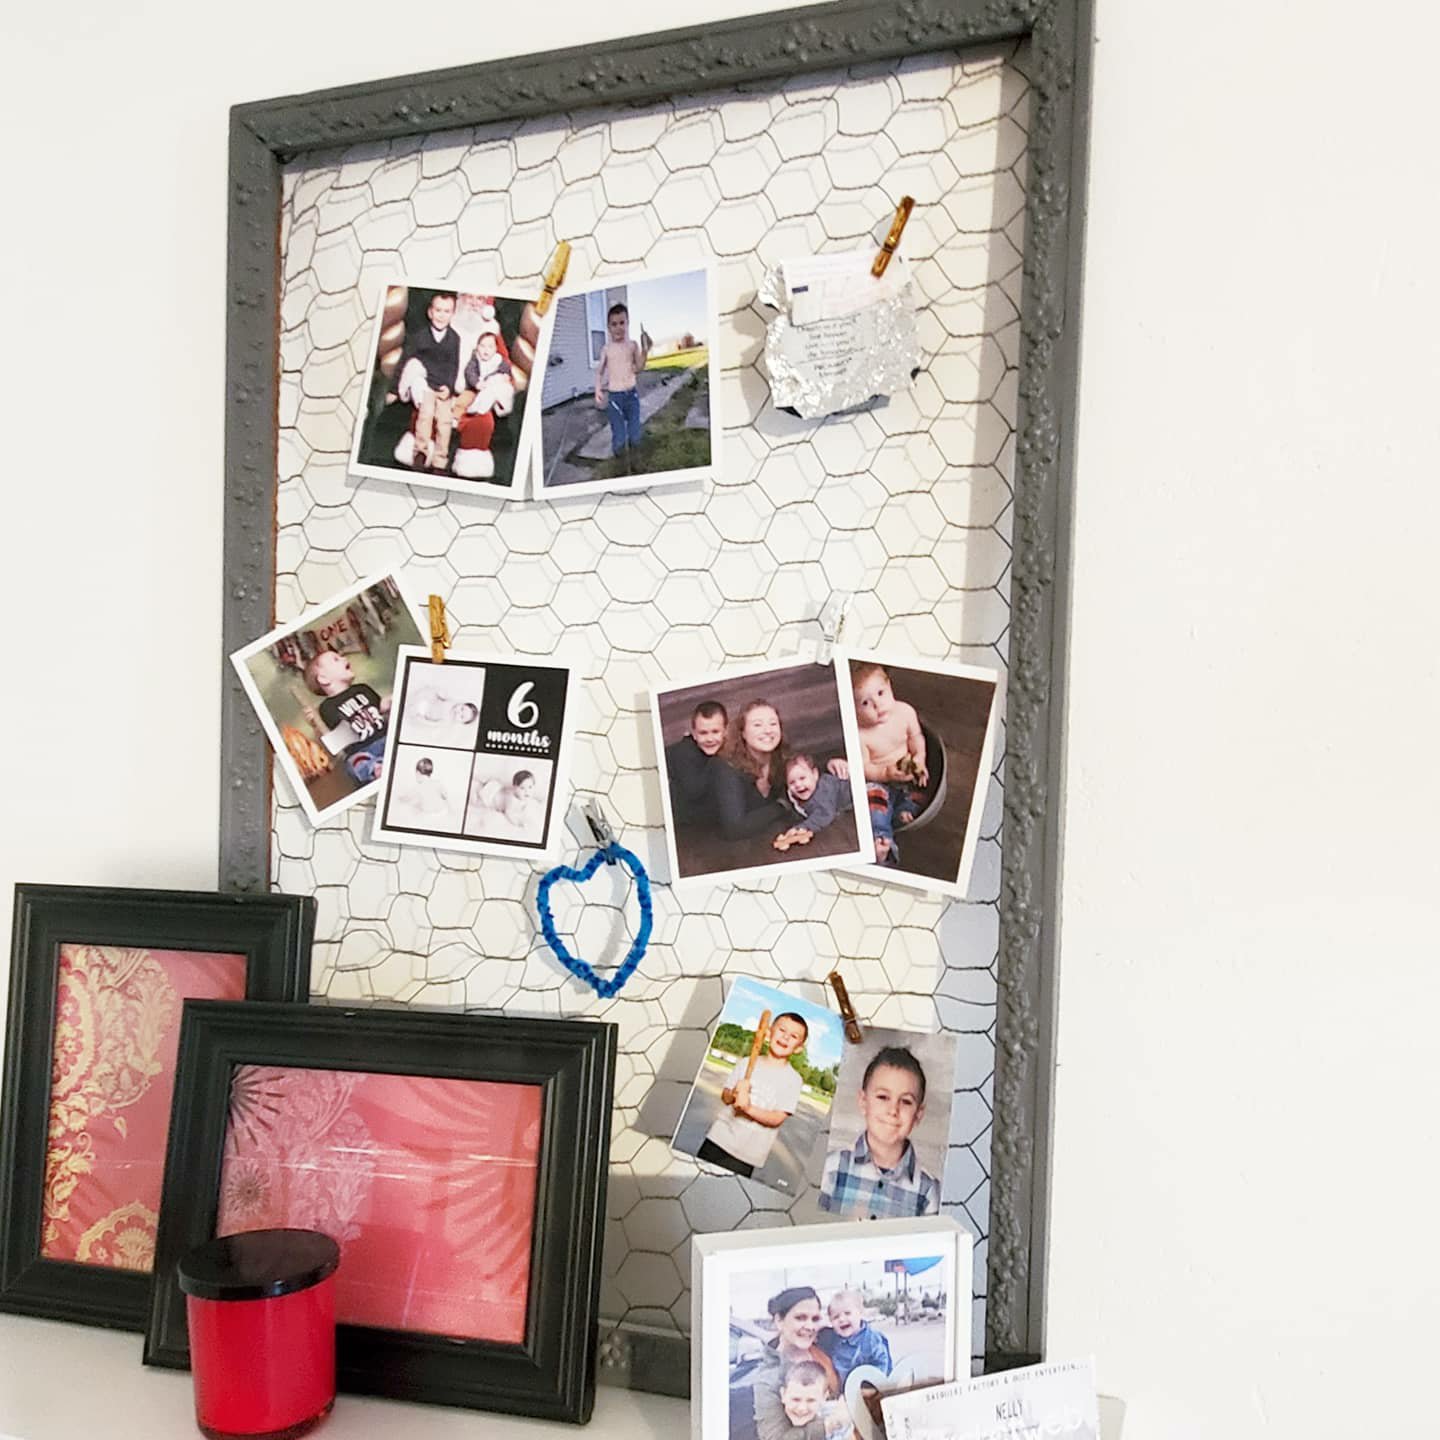
What do you think?
Doing any quarantine projects?!
XX,
Jess
Permalink Comments Off on Frame Hanger Project
Quick and Easy Valentine’s DIY
I made these fabric hearts last year and loved them so much I put them out again this year!
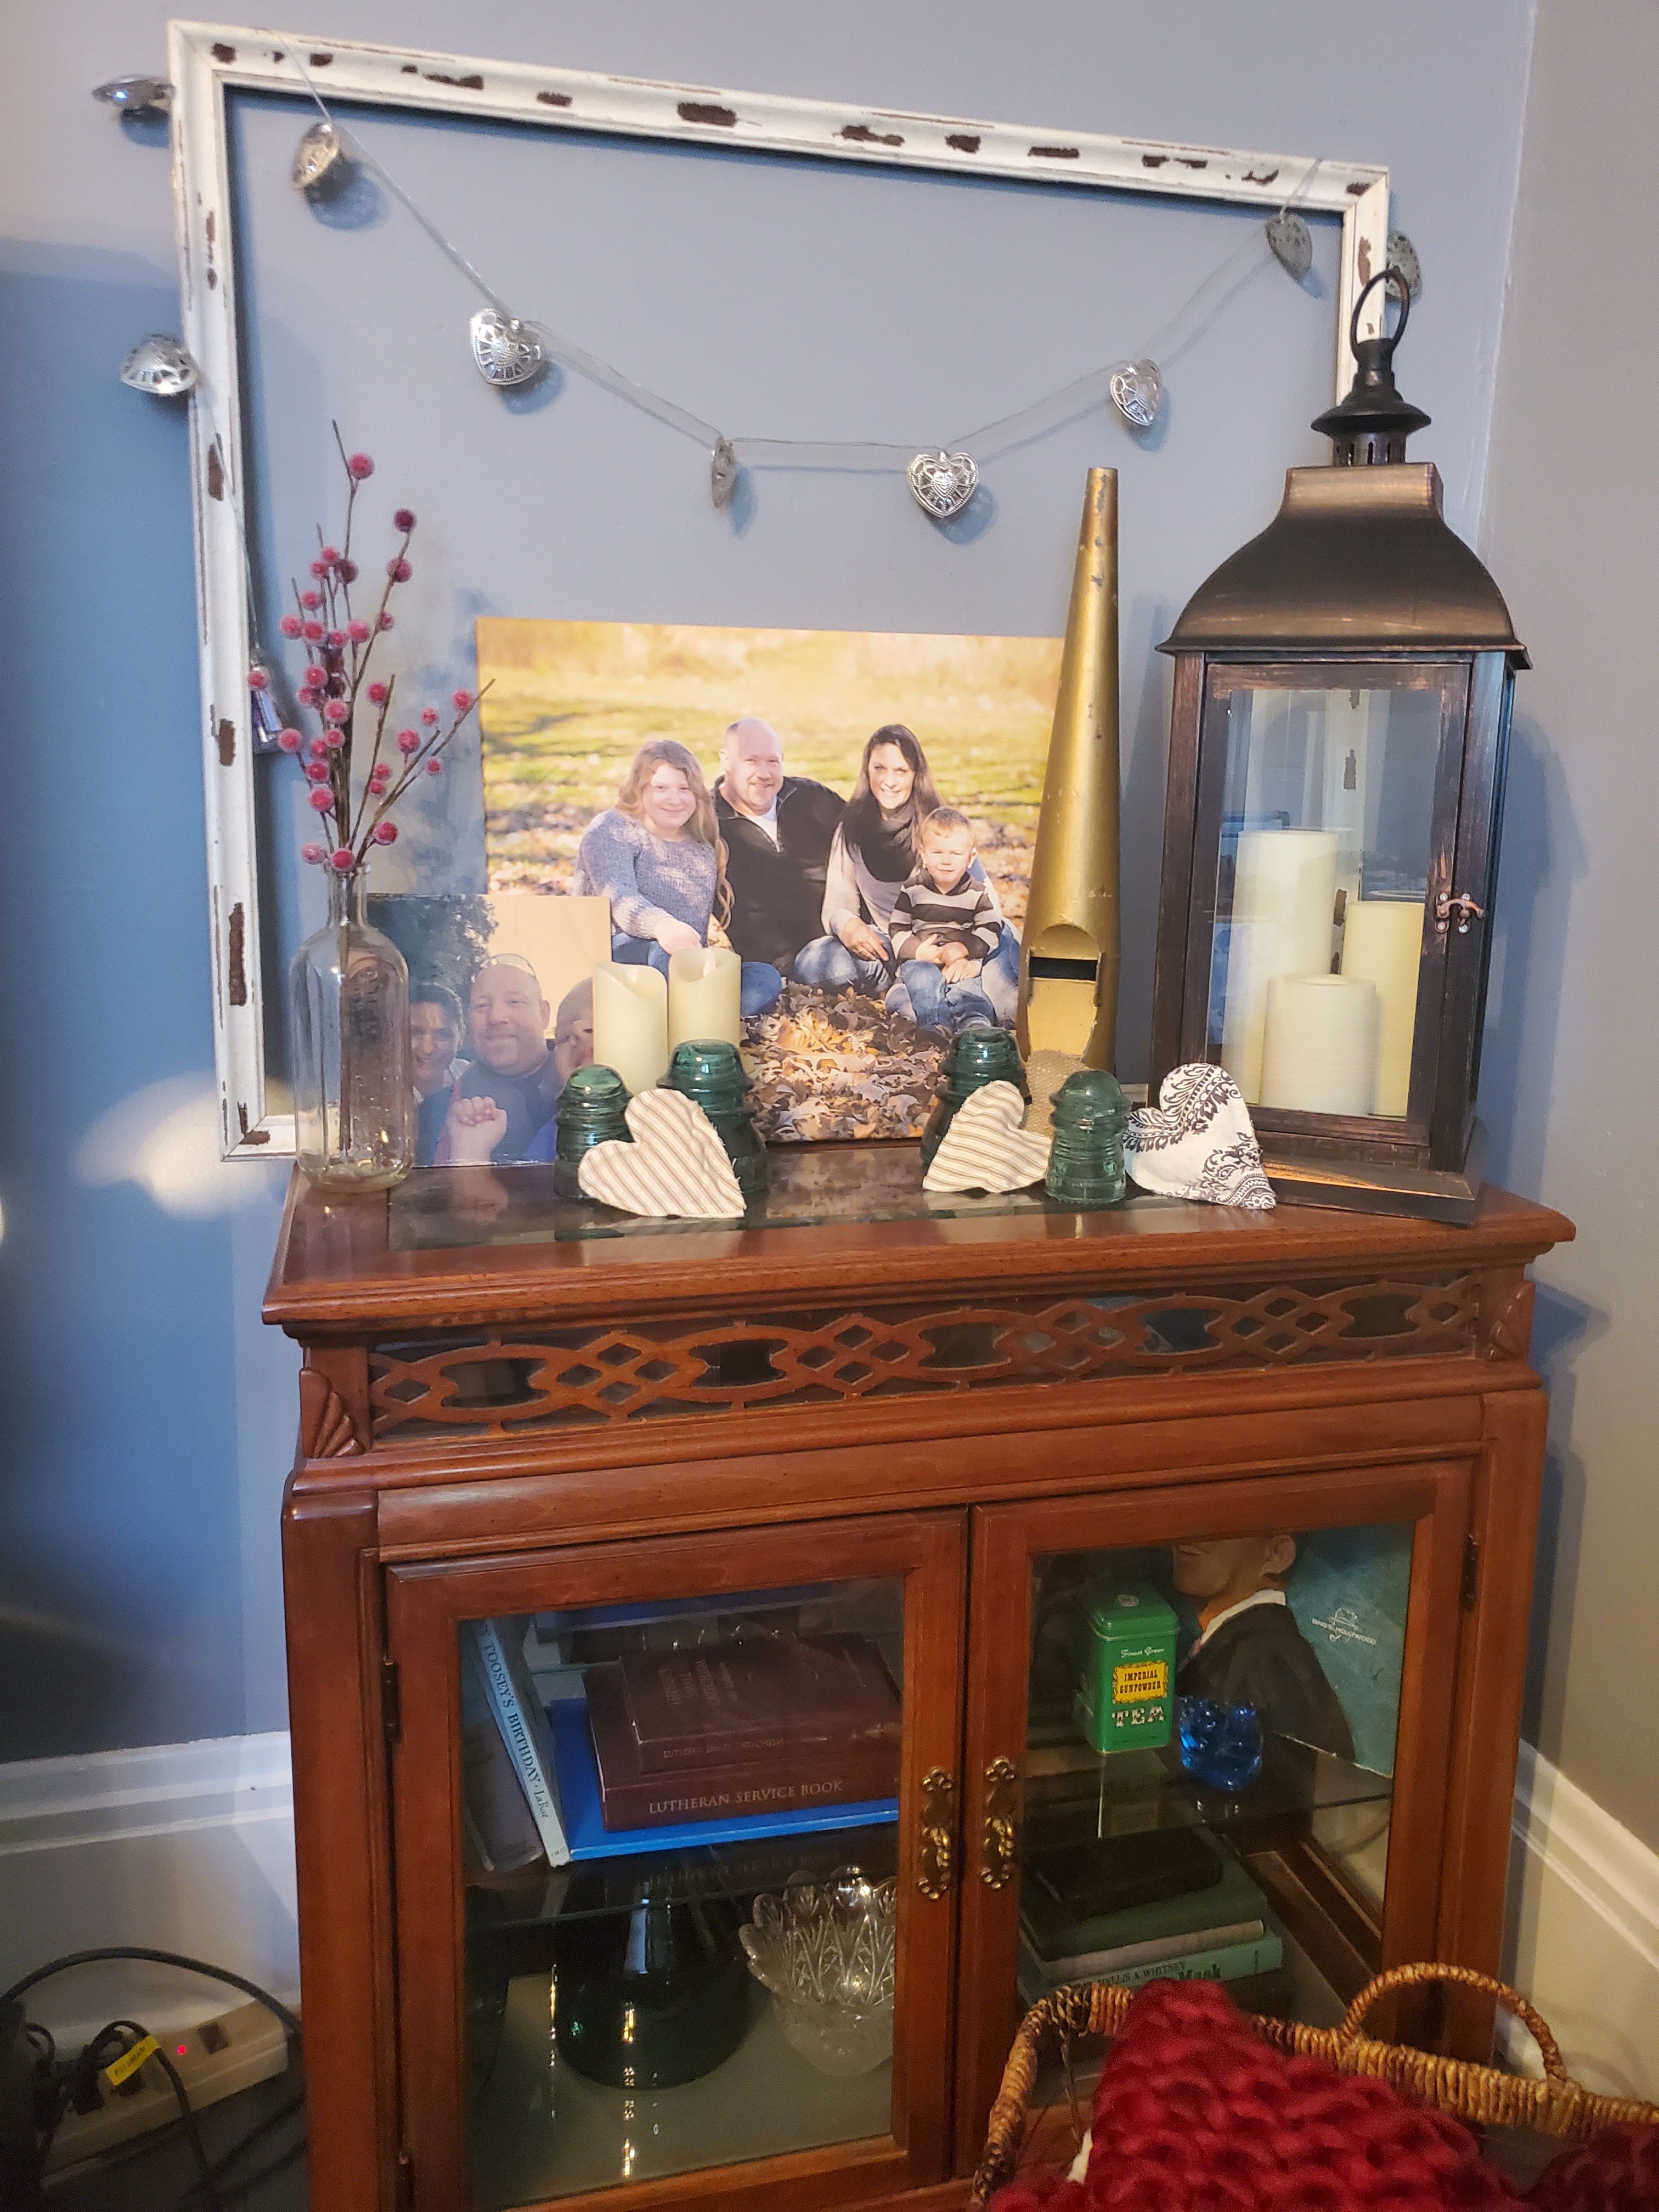


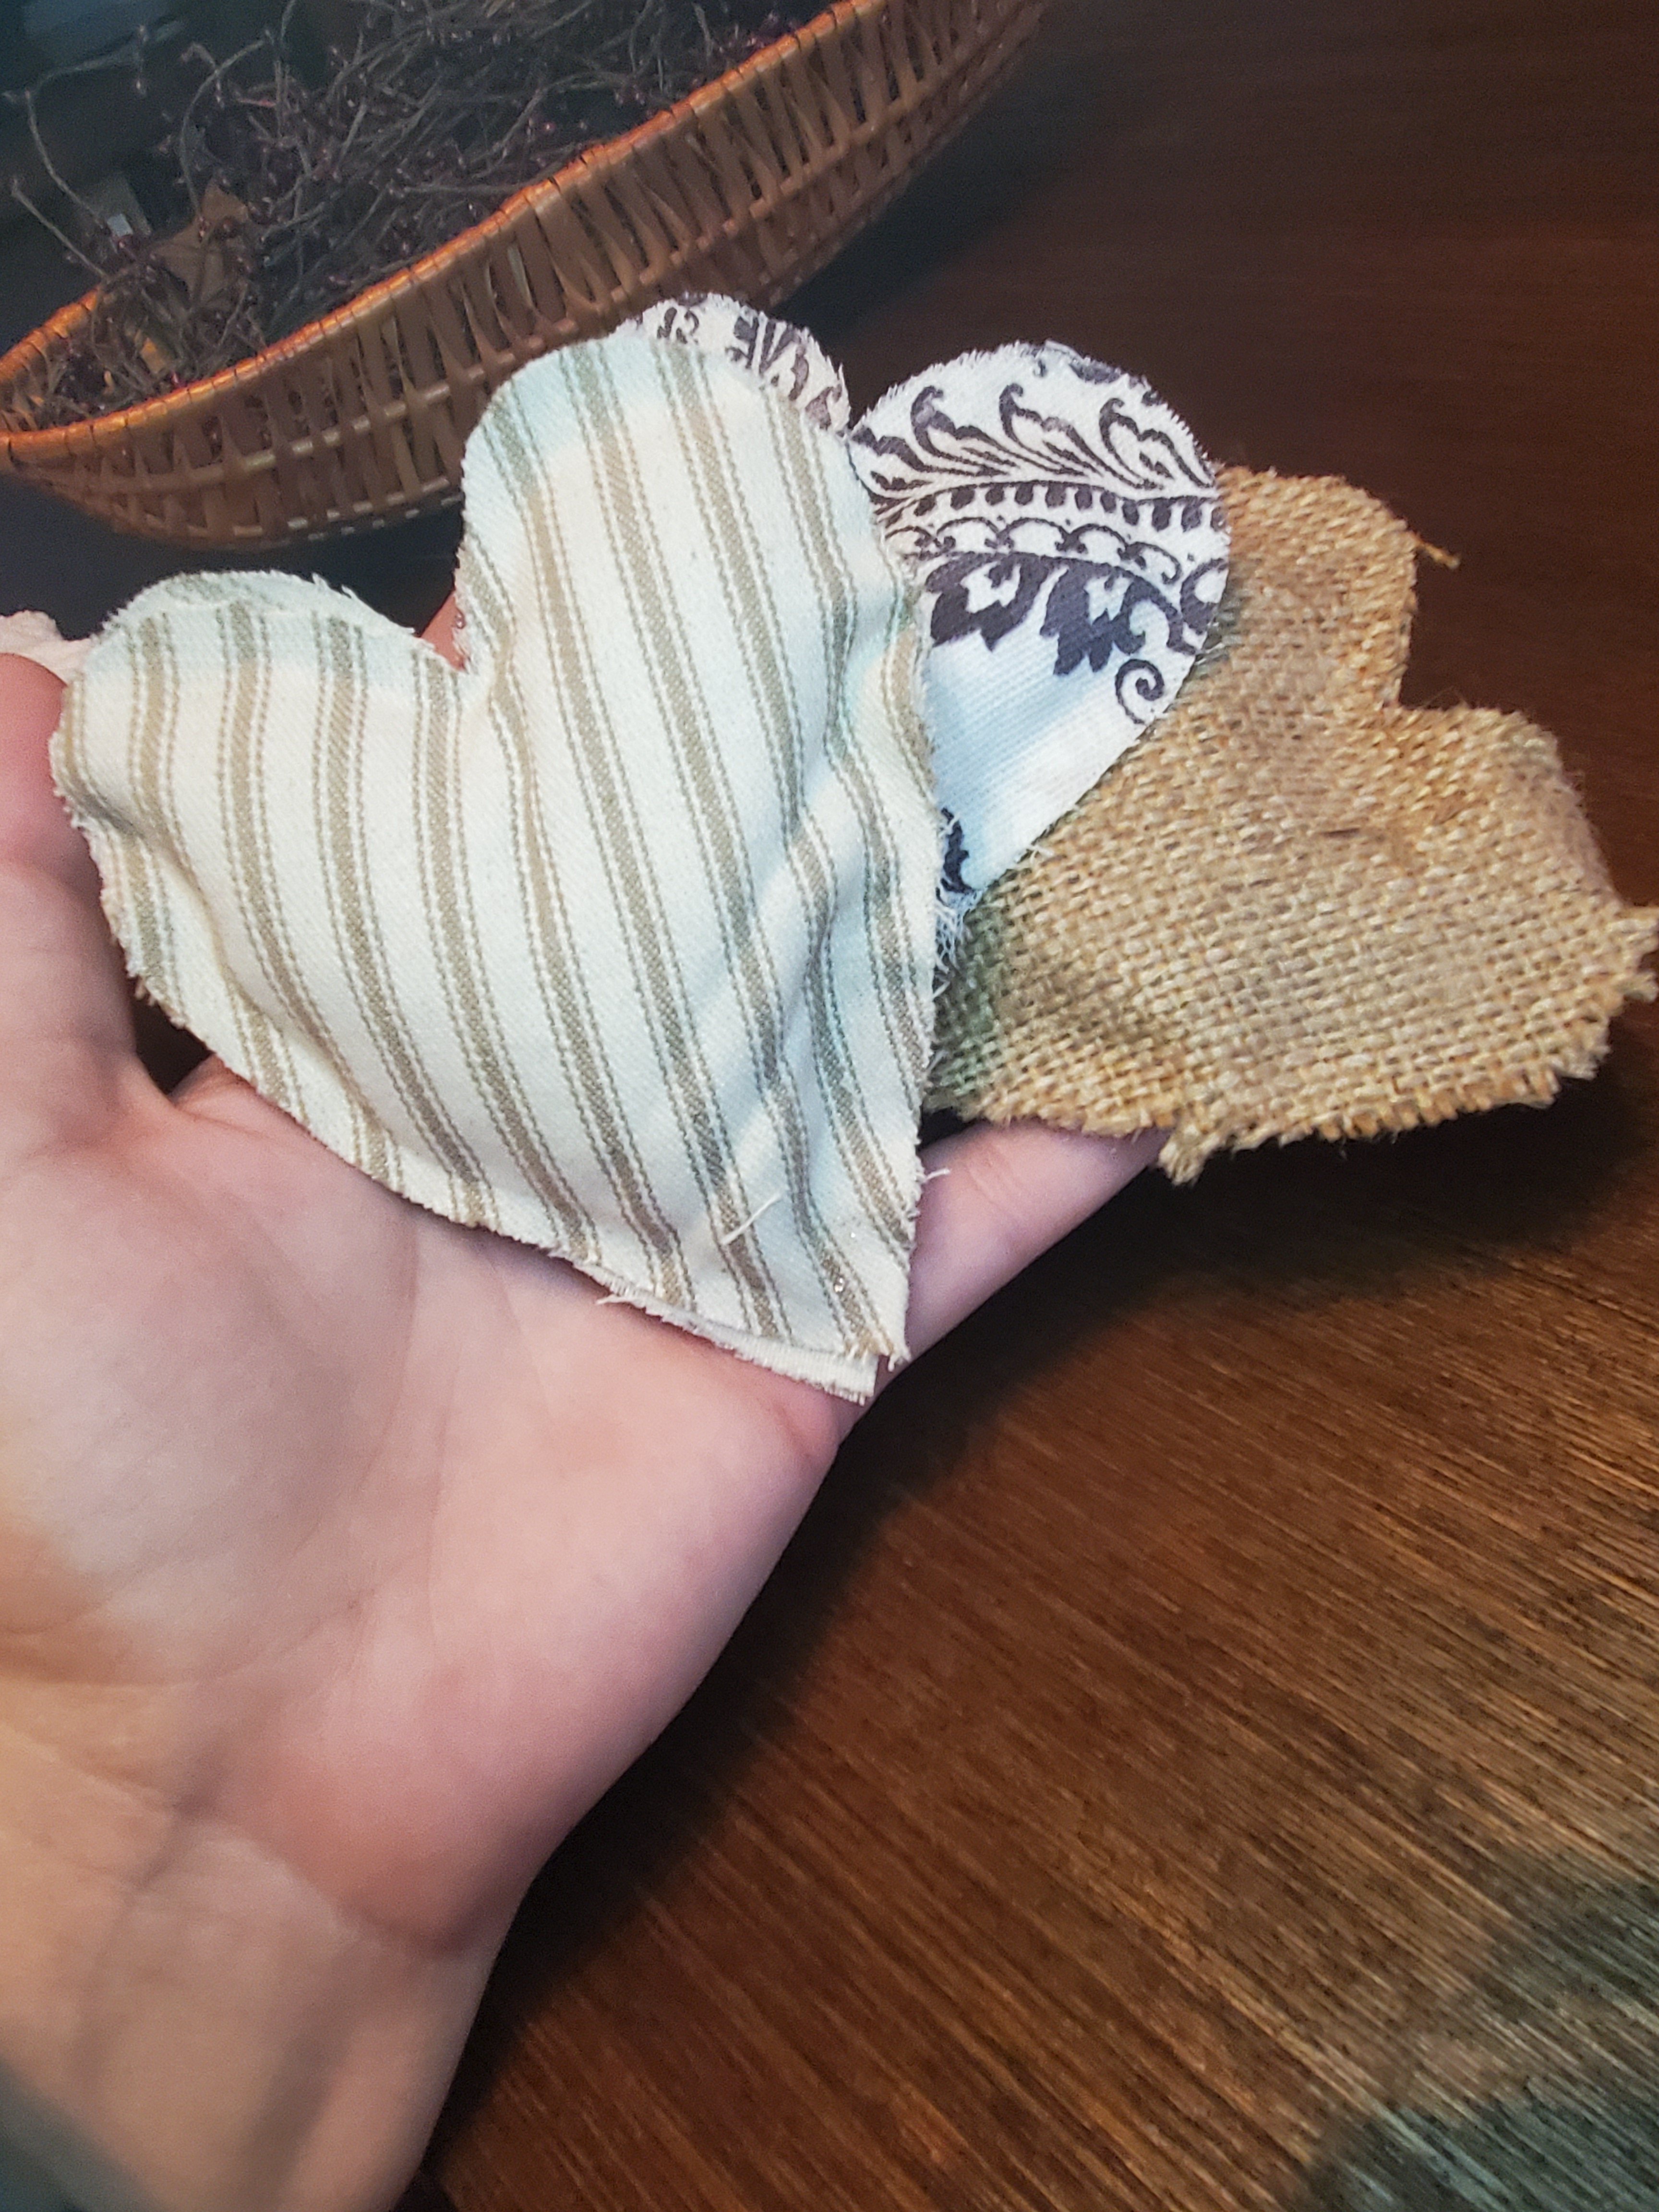
It’s so simple that it doesn’t require much instruction, but a fun project for anyone because there are so many possibilities! I used scrap fabric that I had on hand, making this super inexpensive too! I picked a couple fabrics that complimented one another and had a rustic vibe. You could use anything at all! The only other supplies you need are liquid stitch (always handy to have a tube on hand!) and some stuffing. You can get both of these at your local craft store or a Walmart. The stuffing sold here at our Walmart was in too large of a bag and I knew I didn’t want a ton. So, quick fix was to buy a small pillow insert at Walmart. This was about $4 and I have plenty left for more projects.

Start by drawing a heart on cardboard. Try a cereal or cracker box! Then trace this heart onto the backside of your fabric. Do sets of two hearts in matching fabric. Then run a bead of the fabric glue around the heart. Leave a few inches unglued. I left a quarter inch or so around the edge. I used a few binder clips to hold these while drying. You could also set a book on them. When they are dry, stuff fabric into them. Doing it in this order allows you to fill them full and puffy without ungluing. Now add glue to the last few inches and clip to dry. You could always add sequins, embellishments, ribbon, or any extras too.

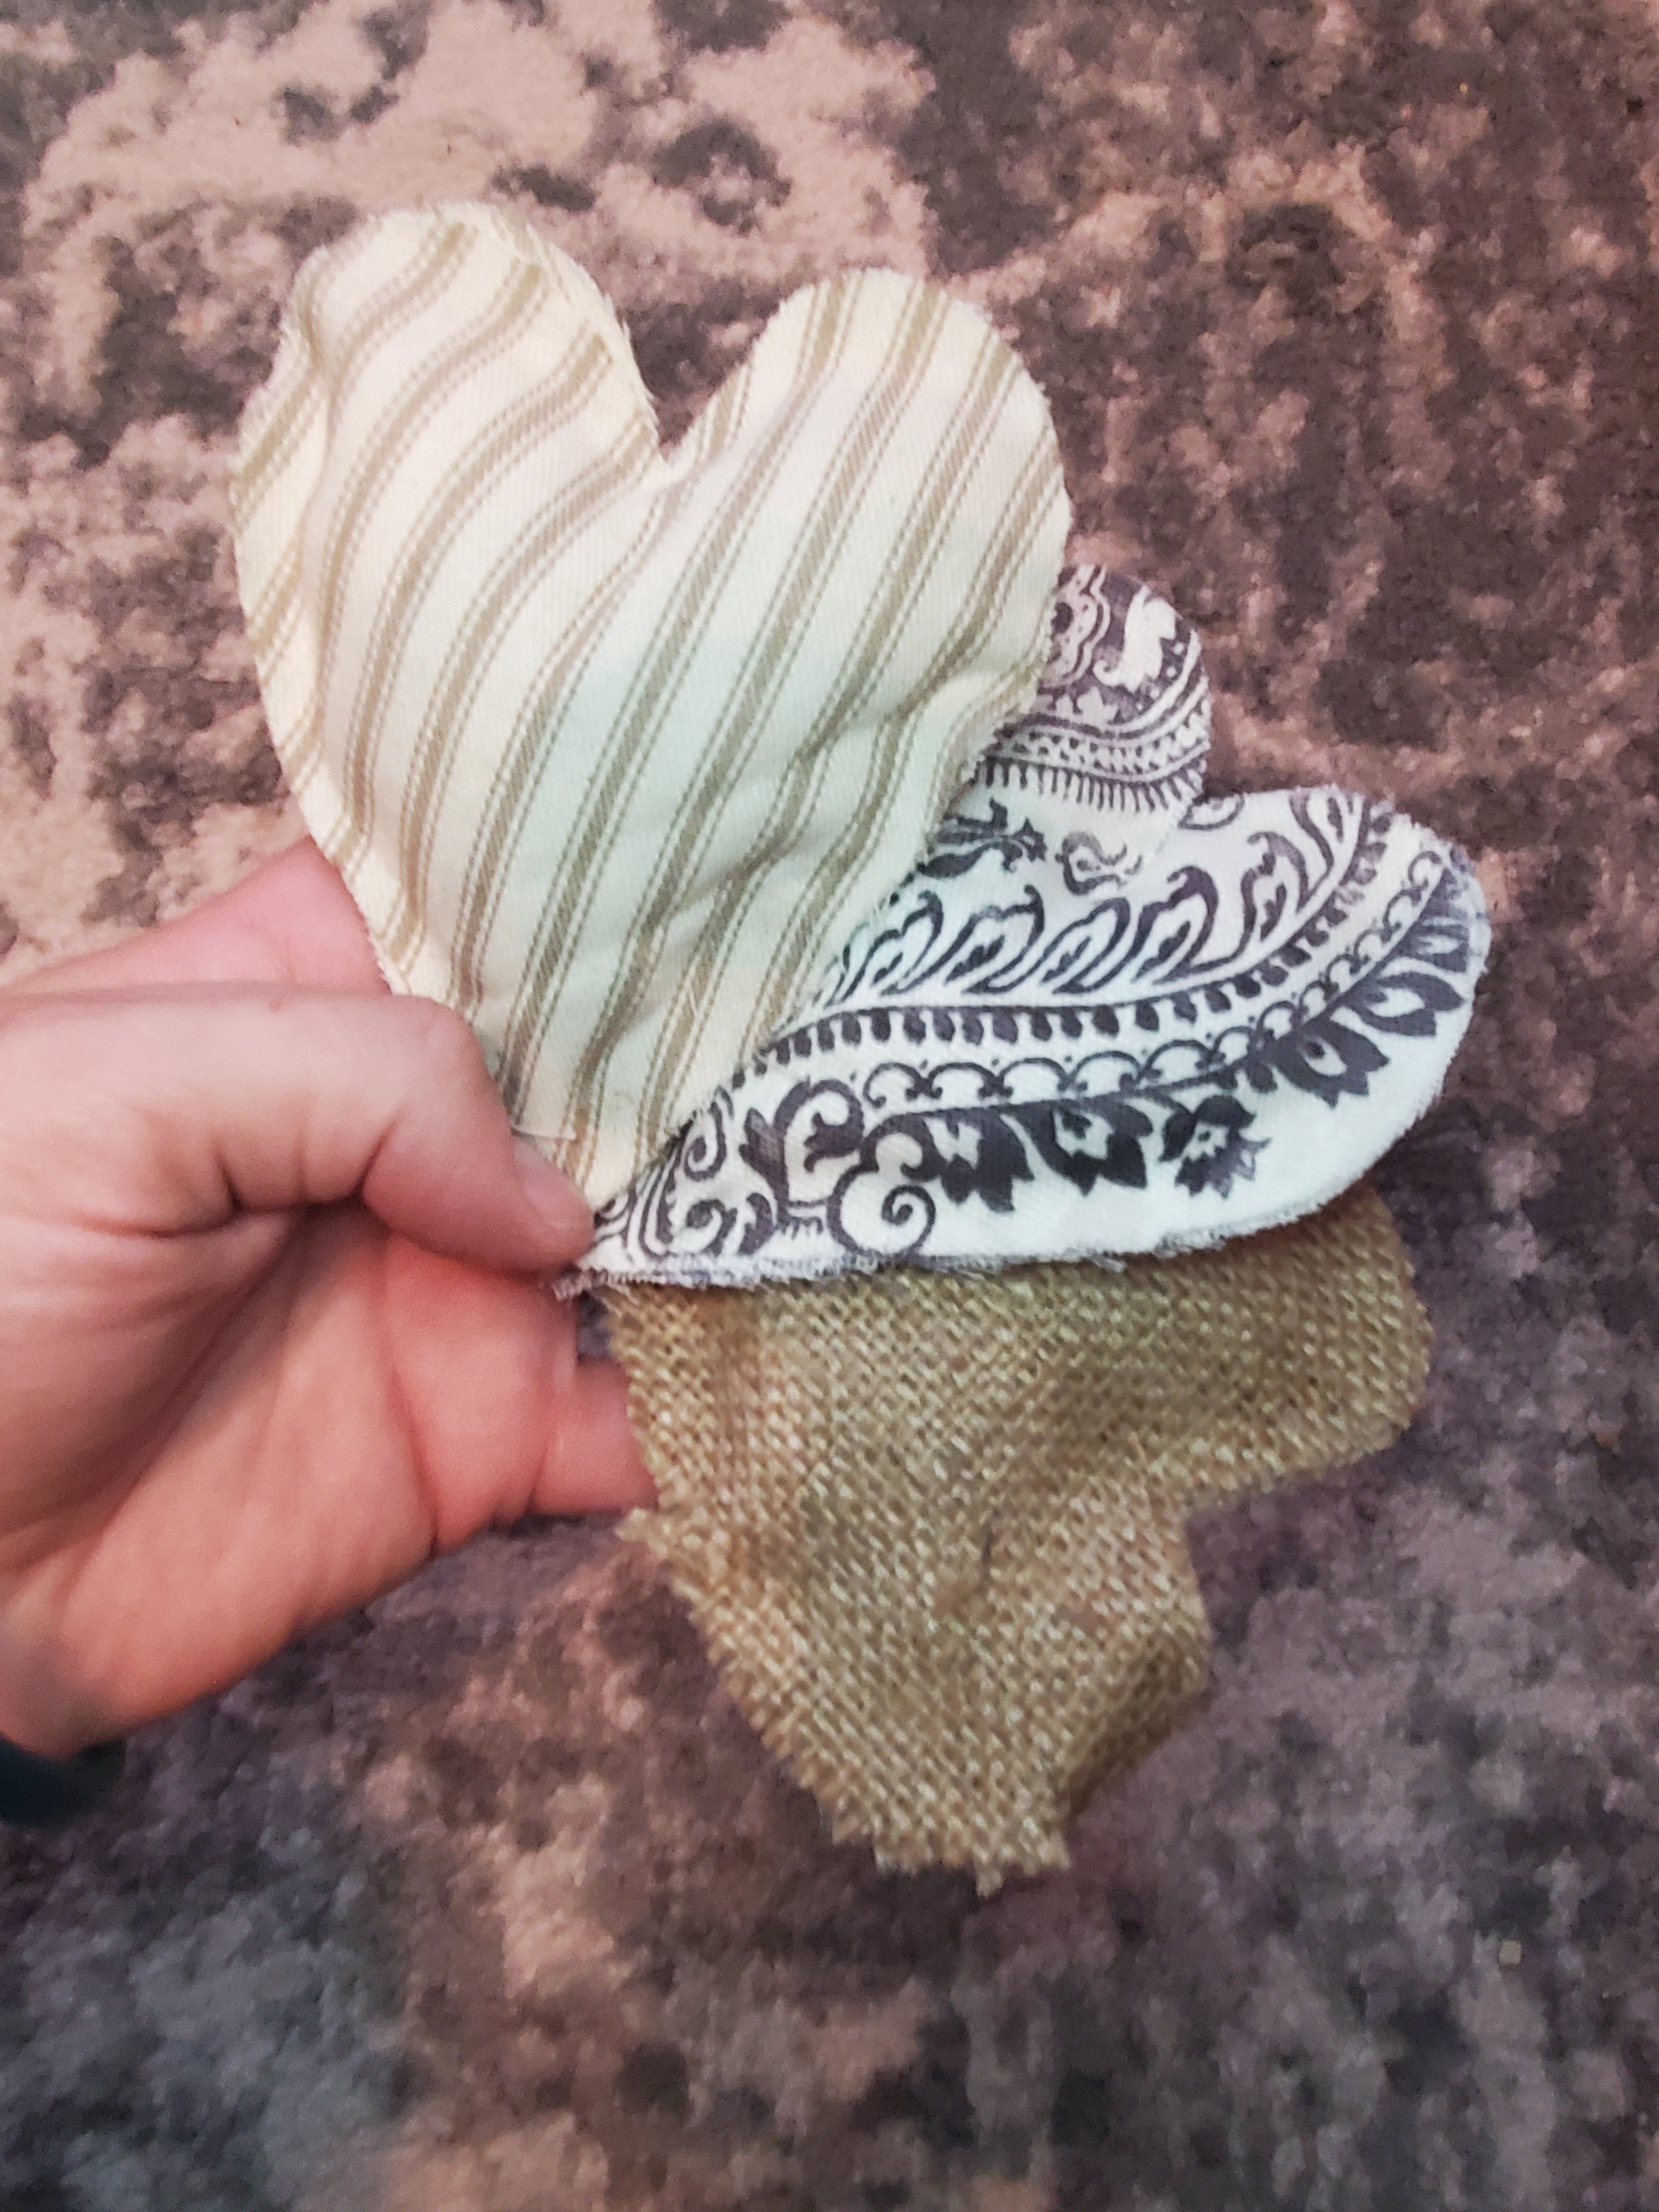
The other little white heart was super simple too. I used a cardboard hear, made little cuts around the outside, and wrapped yard around the heart. The cuts helps hold the yarn in place for the first layer of wrapping. Wrap all different directions. Glue with the fabric glue. Simple!

Viola! Hope you enjoy this quick and easy project!
Xx,
Jess
Permalink Comments Off on Quick and Easy Valentine’s DIY
Little Side Table Project
Hi all! I want to share some wedding projects and some other big news very soon, but for today I wanted to stop by with a quick project.
We found this little side table at a garage sale for .50 cents. Yup, .50 cents.
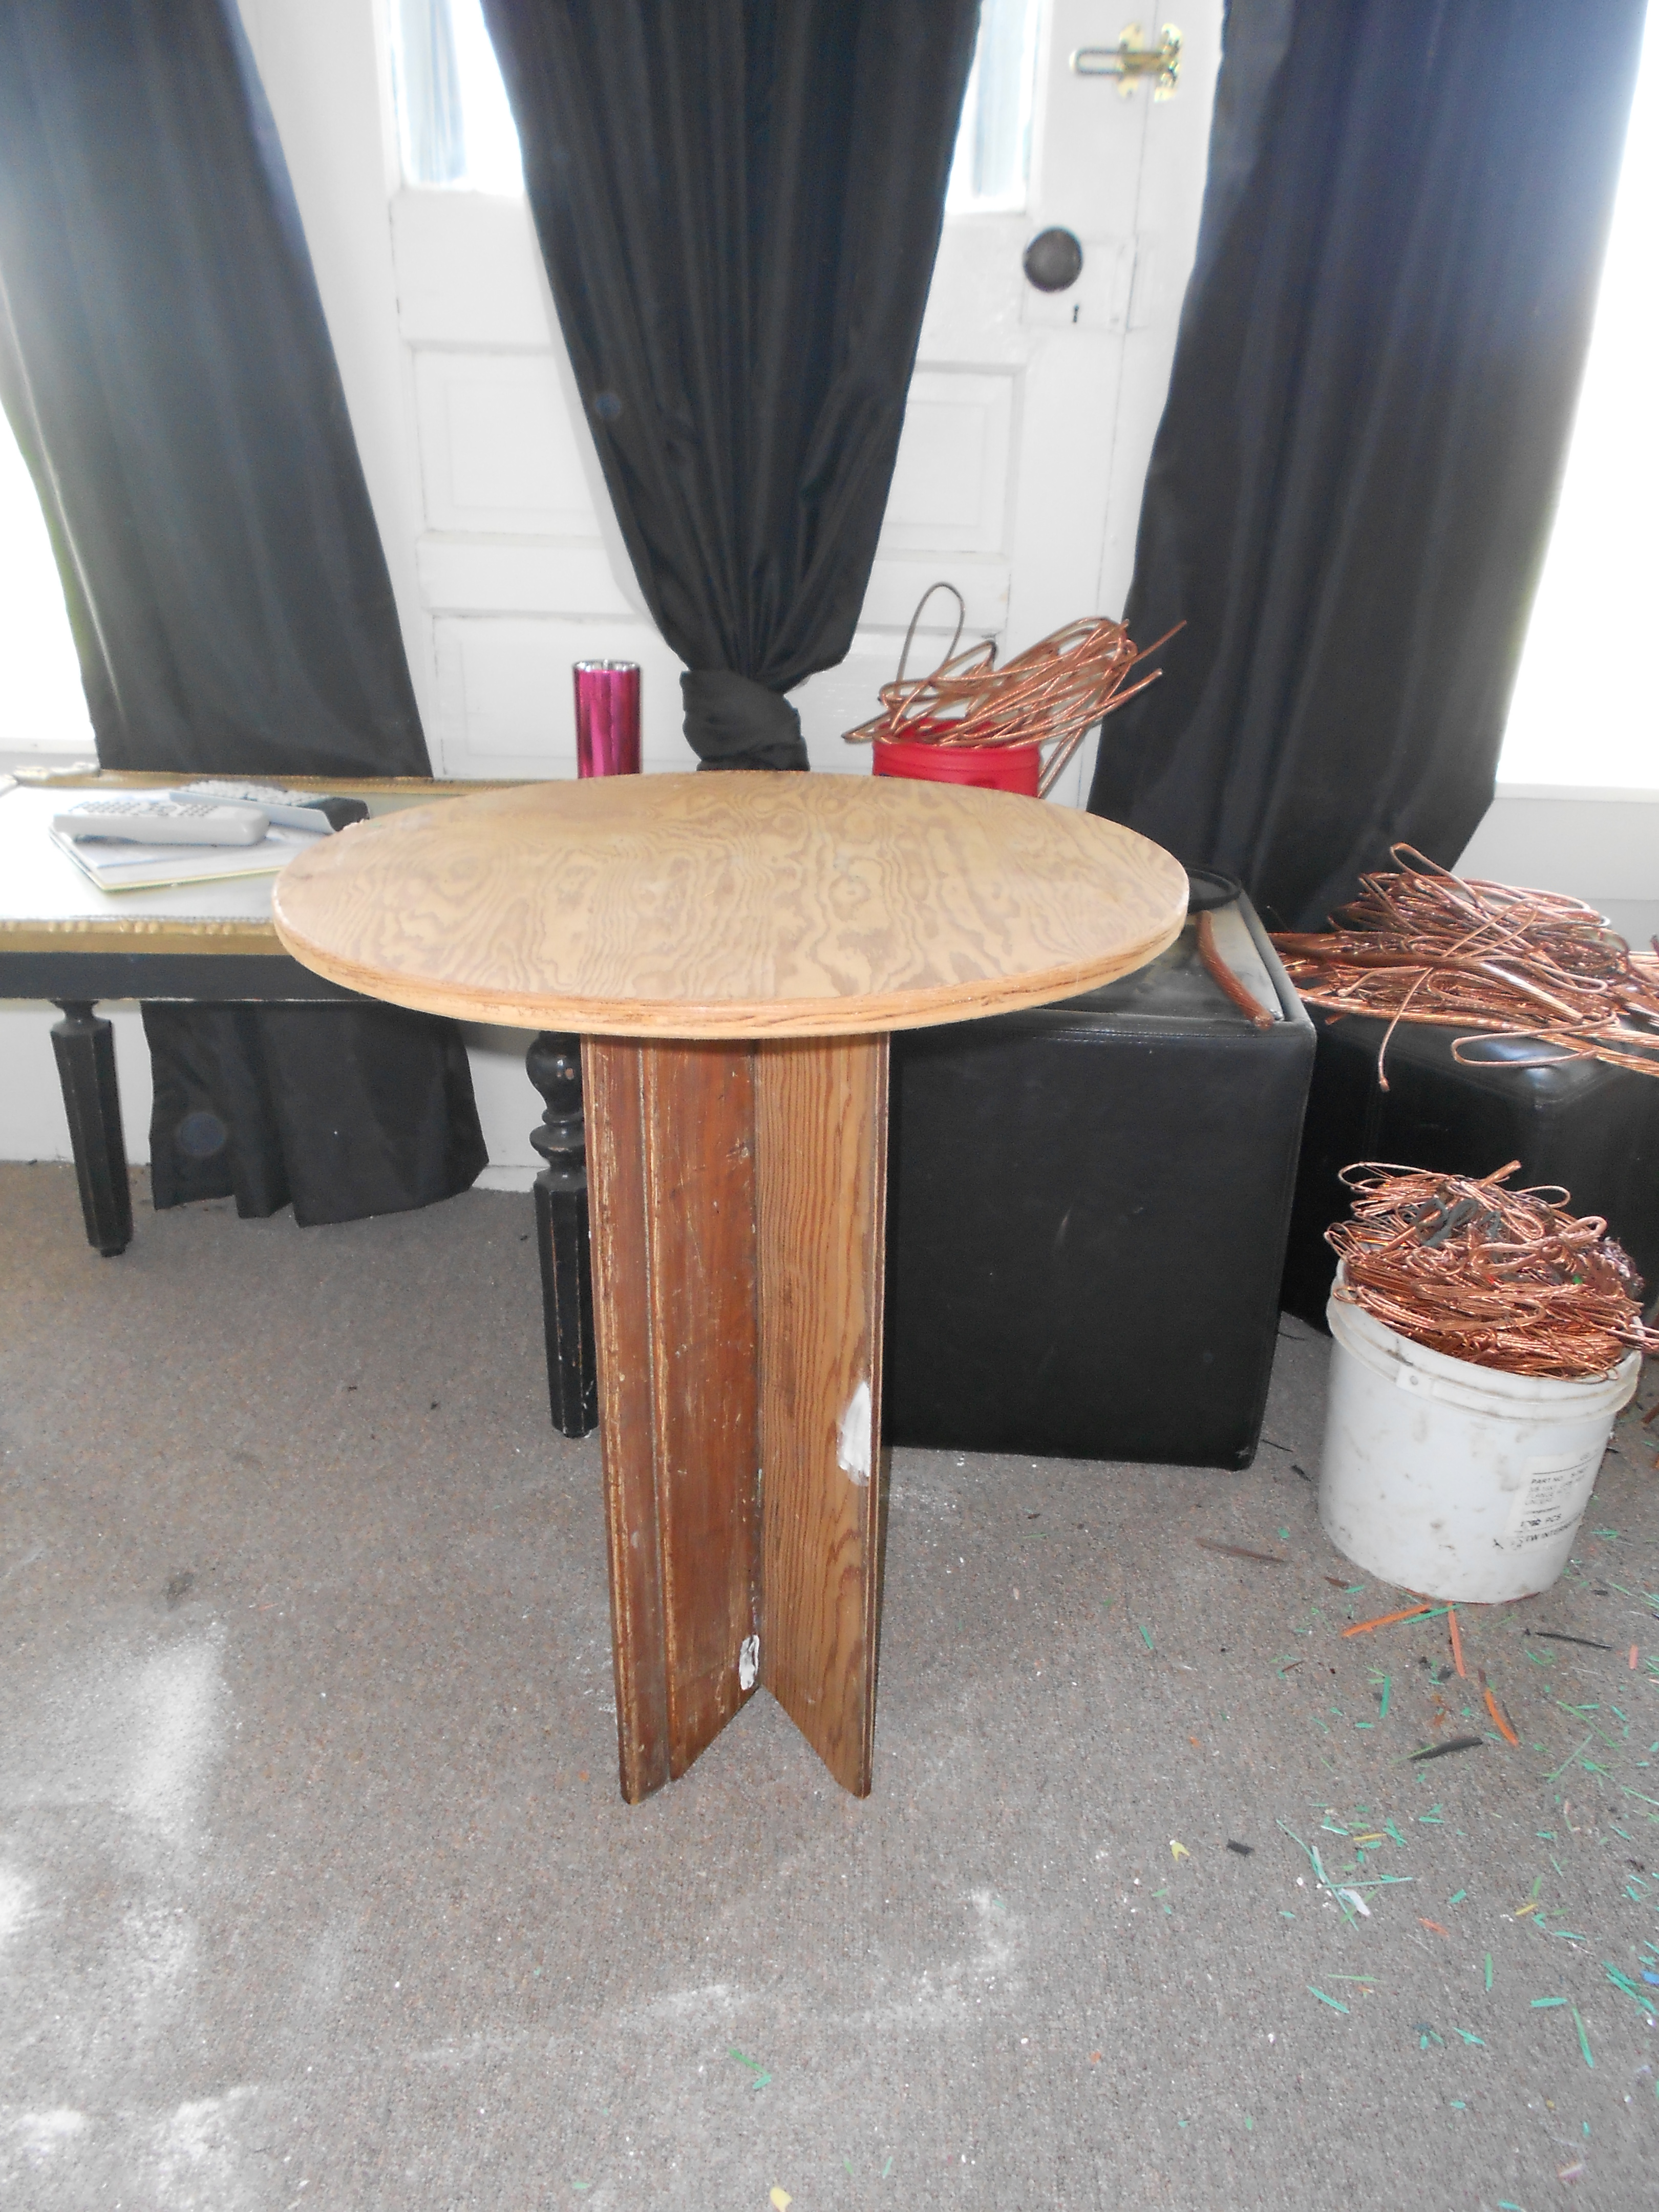
Shabby, yes, a bit. But, I loved the round shape and primitive pedestal. So, I patched, sanded and painted. I picked a burgundy-ish color and then I stenciled my favorite paisley on the top in silver. I thought this was a bit modern to mix with this little table. I roughed up the edges and faded out the design on the top. I think it turned out really cute!
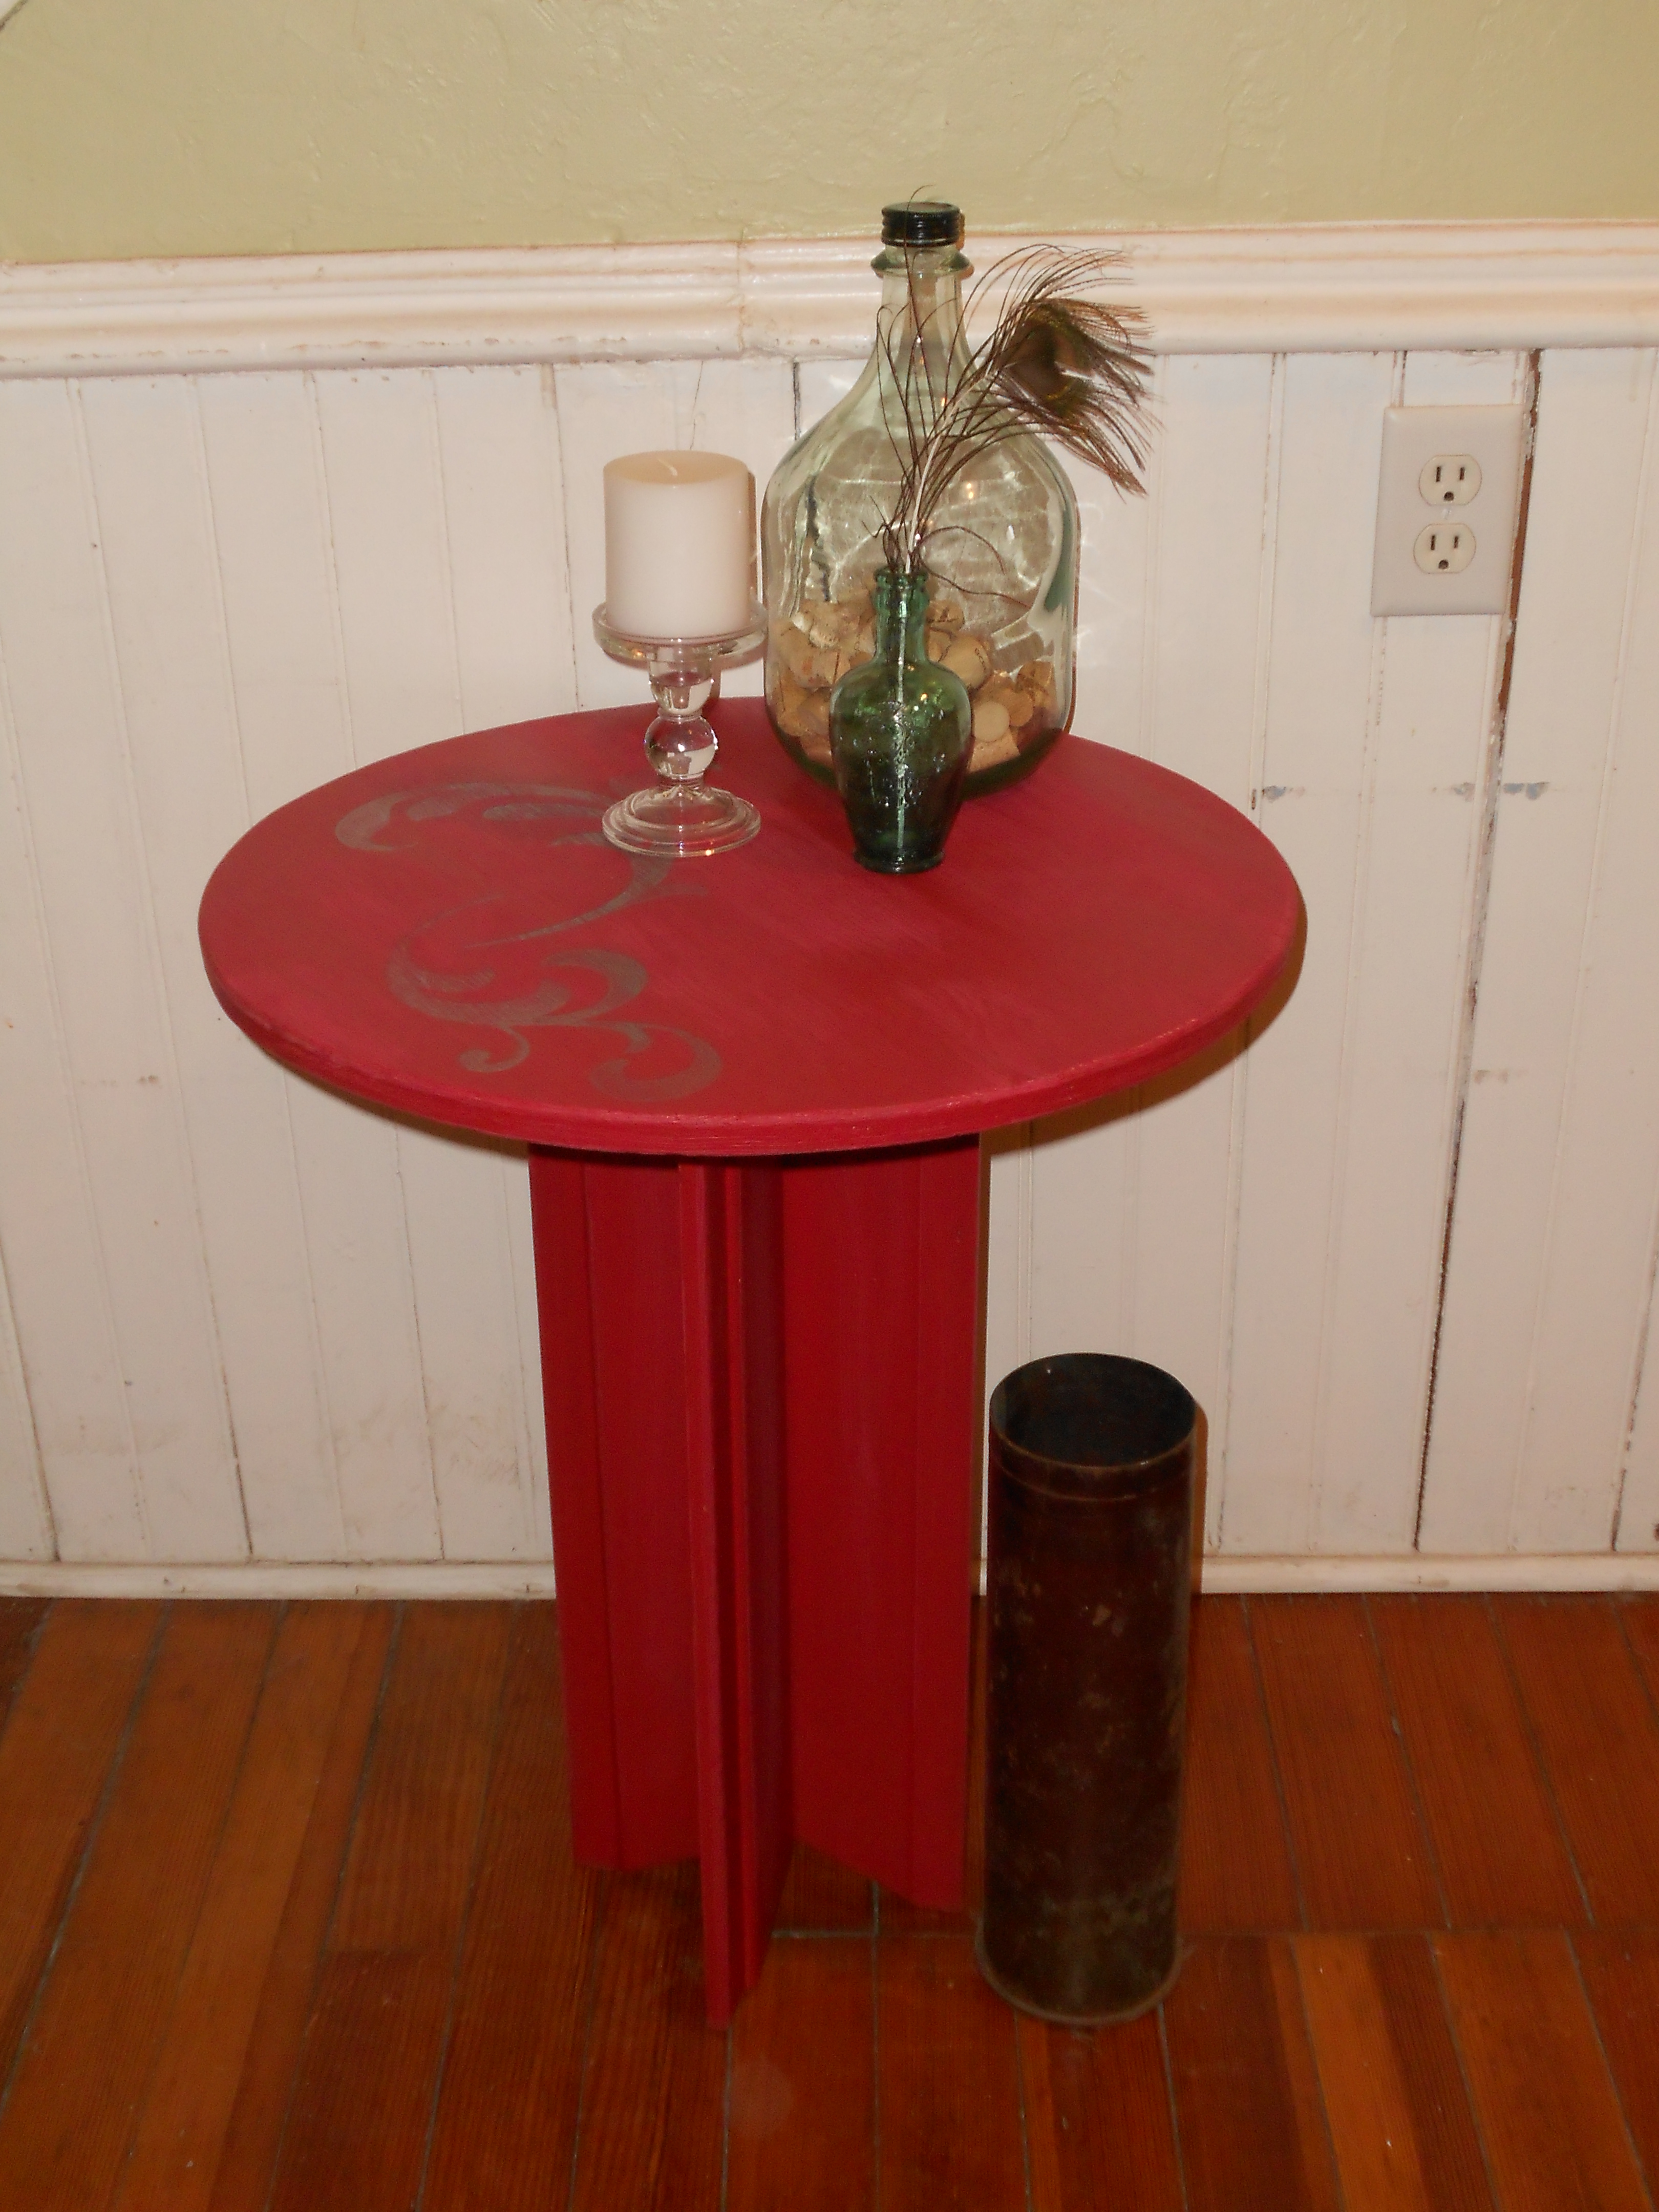

What do you think? Well, this little guy already found a new happy home 🙂
Some Fall Decor
It’s getting a bit late in the season, but I thought I’d share our fall spirit with you.
This is a basket we bought at the Threshers this year. We agreed on it because of the antlers! lol

I filled the basket with gourds. To keep them up towards the top of the basket I stuffed it first with tissue paper. I also kept the tag on the basket to remember who the craft vendor was!

We also each got a pumpkin, which we kept on the porch…

One of our black kittens on the porch too. Meet Patch…
Here’s how our carved pumpkins turned out…

John Deere and a scary laughing face. lol

Happy fall ya’ll!
A Quick Doorstop Project
The main level in our new house has a small bathroom in the laundry area (yes!), which is super handy, but sometimes a bit wierd. We like to leave the door at least half open so that you know the room is not occupied, but you also dont want the door flung wide open to see everything (let’s face it, even when clean, bathrooms just aren’t that appealing!).
So, to stop the door from flopping about annoyingly, I made a doorstop. Cost? Free!
I went out to the barn and grabbed an old brick, then cleaned it off. I used some soft, thick, scrap fabric I had on hand, and wrapped the brick like a present. I secured the fabric with a glue gun. Last, I added ribbon trim, also scrap, to the seam for a finished look… Viola!


Nothing fancy, or groundbreaking, but it was cheap and does the job. I don’t think it looks half bad either, if I do say so myself! And, you get a sneak peak of the bathroom/laundry room! Just a note, if you are thinking about a project like this, it works great! I love how this thick, soft fabric slides easily and quietly on the tile floor with a scoot of the foot. I recommend!
A Gift Basket
I work for a non-profit agency and part of our yearly activity is to do a bit of fundraising to help out. This year we decided to make gift baskets and then auction them off. I volunteered to make a gift basket and then of course panicked, not knowing what to put in it!
So, I decided to make a basket of hot cocoa and coffees and all the fixins. I got this idea because a while back in a magazine I saw some antique spoons coated with chocolate and given as a gift with some drinks as stirers. I started off with some vintage silver spoons and some chocolate…


Then I wrapped these cuties up. I added some cute vintage mason jars and a tag for the cocoa…


I think it turned out pretty well, and it was super easy! Hope it raises some money! 🙂
An Awesome DIY Project
This chandelier is completely awesome! I drool everytime I look at this picture. Someday I hope I can work up the courage to attempt this DIY project. For now I call it inspiration and stare longingly at the photo each day.

Christmas Decor For 2009
This year’s Christmas decor at our house is looking pretty similar to last year. But, I did add one project, which didn’t turn out quite as planned, so I need all of your help!
Here is our tree, similar to last year, but always fun!

Here is the feather boa wreath- also always fun!

And the new project for the year was clear ornaments with the blue and peacock feathers in them for the table. (Very cute when Rachel Ray did it!) My problem is that the ornaments were too large to fit more than a few in the cake stand. Also, the feather look a bit blah to me. What do you all think? Hunt down smaller ornaments? Different feathers? New vase/plate? Hmm…


Let me know what you think!
