Bathroom Update
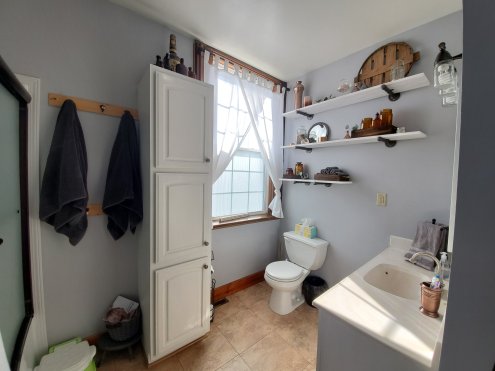
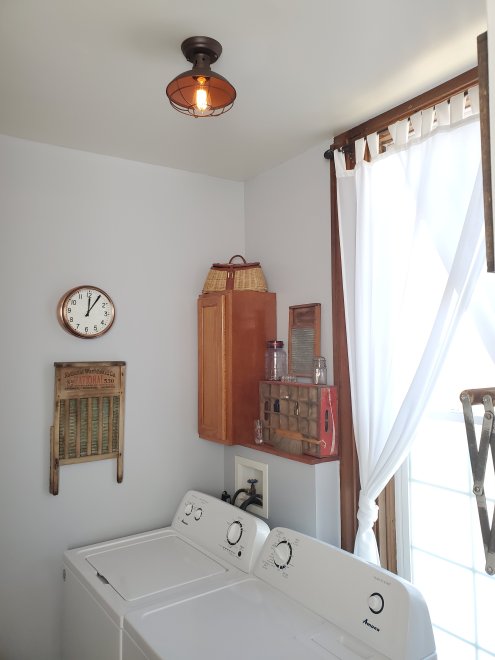
I thought we were going to live with the 85% bathroom update for a while. But we got a little shove to take it to 98% done now. 🤣 What this means is that we redid the flooring! Yay! And we added a mirror and a couple more custom shelves in the laundry room.
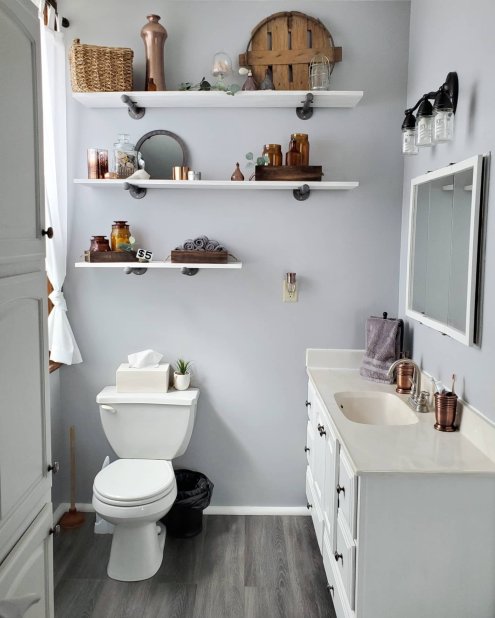

We used snap-in wood and vinyl flooring and it was super easy! Except for dealing with the uniqueness of an antique house with crooked walls and missing trim, etc, but we managed and it’s been amazing and seems super durable already. We ended up going with large quarter round as trim because we need to hide some of those flaws from a very old house. But I love the look here!


The ONLY thing left is to replace the faucet. Soon. We are going to live with the sink and counter top for a while, but I can deal with that.
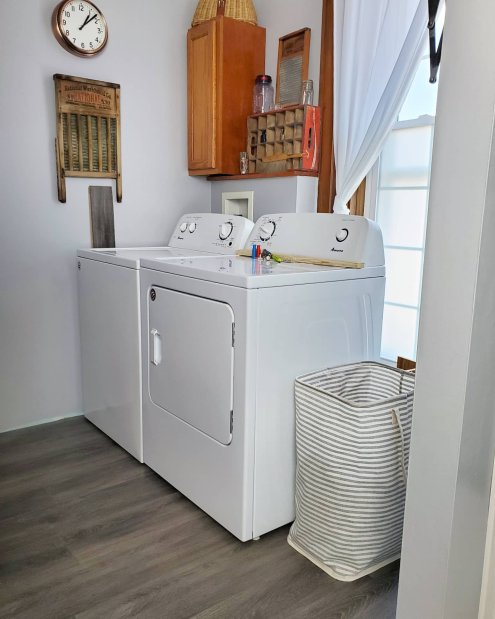
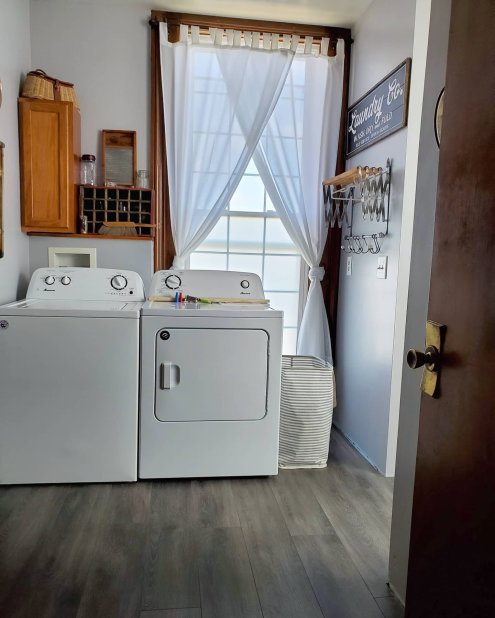
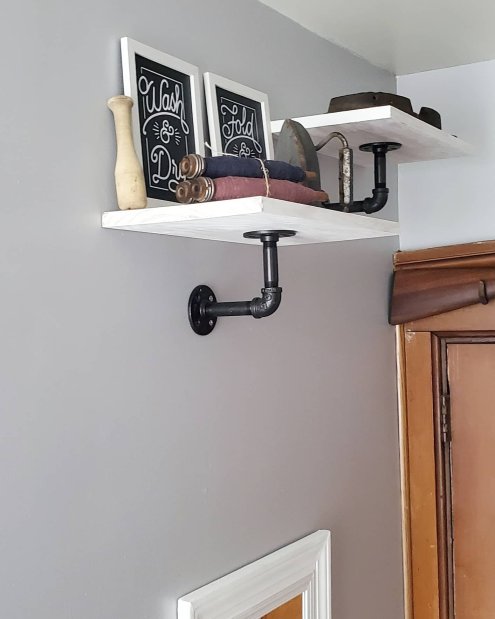
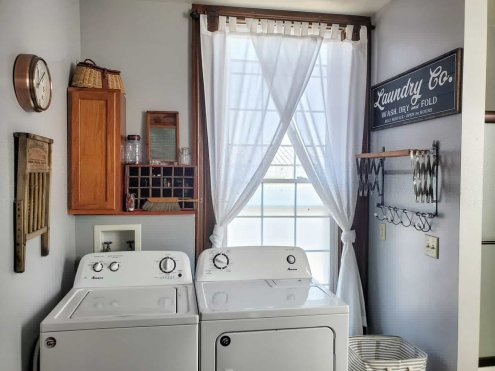
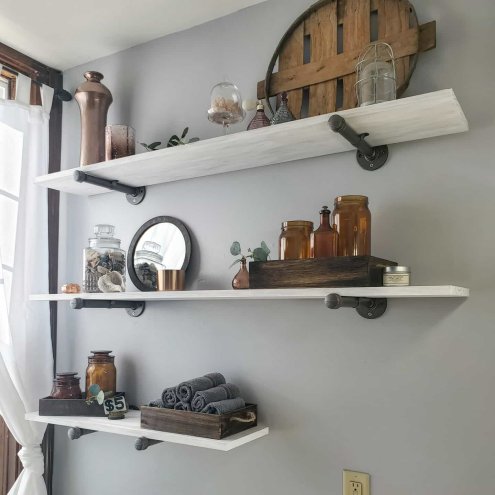
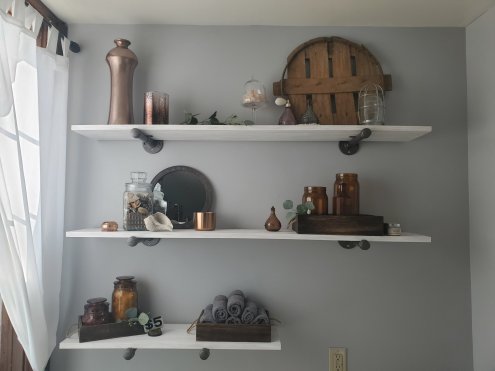
How cute are the little shelves holding laundry items?! We made them the same way, with plumbing pipes and hand whitewashed boards.


Remember, this is a mini refresh, (see the before shots, yikes, 2 posts back!) not a total overhaul, so this girl will still have to dream of one day having a stacking washer and dryer and wall cabinetry. This is gorgeous to me for now! 😉
Xx,
Jess
Permalink Comments Off on Bathroom Update
Bath/Laundry Room Update
We knew we wanted a fixer-upper, and we sure got it with this one! But we are enjoying putting in the work and making it into what we want for a home. The bathroom was no exception. We can’t afford a complete gut and overhaul of every room (I wish!), so this is a little refresh.
Before:
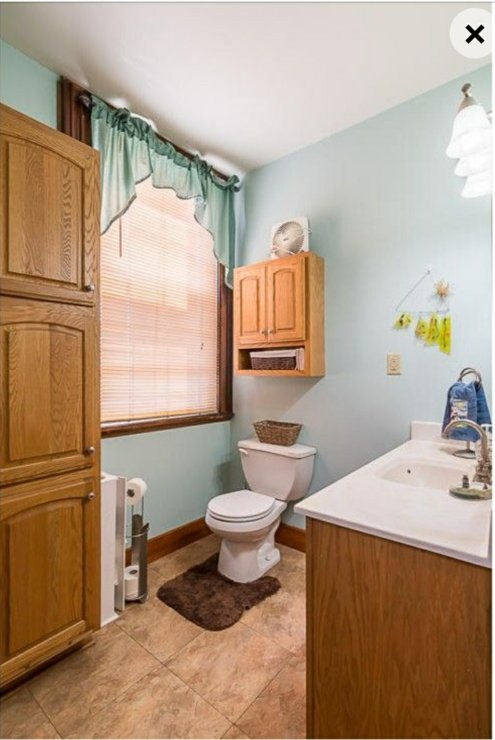

After:

We will put a new faucet in soon and plan to redo the bath and laundry room floors in a few months. But for now, wow. Its clean. Its peaceful. I’m in love.
We made the bathroom hook boards because in old houses you are at the mercy of where the studs may or may not be when hanging things. Attach the hooks in the spacing you want and then attach the boards to the wall where the studs allow.
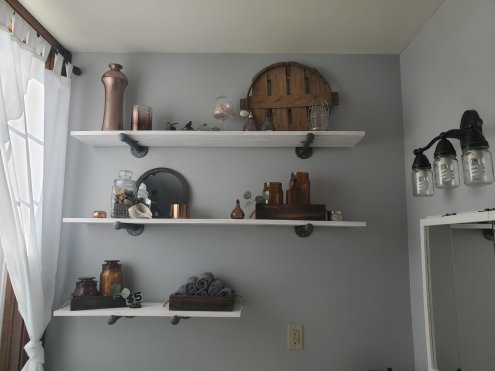
We also made the shelves ourselves and hand “grayed” the boards by smearing white paint with fingers. Tedious but so worth it. The brackets are plumbing hardware and can be found at Mendards. We painted the parts with a light oil rubbed bronze spray paint.
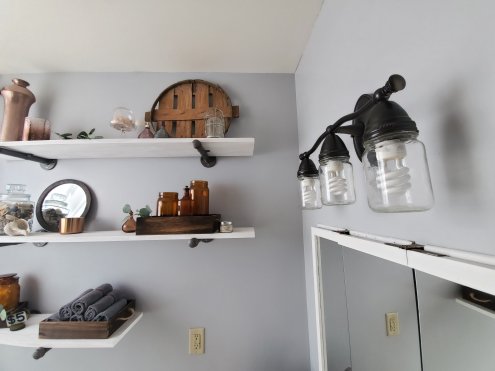
We made the jar light fixture by painting the old silver fixture with oil rubbed bronze paint and adding the jars. We took solid jar lids and made holes in them to fix the jars to the fixture. Once it’s all painted you can’t see what method you used to attach them.
All on a budget for a quick fix up. We did add a new shower, as ours was a walk in when we bought the house and we needed a tub for the kids. Paint and curtains, and especially shelving, make a huge, but affordable difference!
Here are some fun detail shots.


A few detail links:
What do you think? Any recommendations?
Xx,
Jess
Permalink Comments Off on Bath/Laundry Room Update

Mini Paint Project
I have finally completed a tiny project that has bugging me on my to-do list forever now!
Remember the little downstairs bathroom with the cute antique cupboard… (tiny room = bad photos, sorry!)

Well, here is the very sad, and a little scary inside of this cupboard…

So, a little paint and some pretty things to make the cupboard useful, and… viola!

The cupboard is antique, and therefore has many bumps and cracks, so it will never be “perfect,” but now its not such an eyesore. When company is over I will not be so embarrassed to let them reach in for another roll of toilet paper or necessity!

I even did a bit of decorating to the necessities in the cupboard. These antique jars got new fun lids. And a small box got a bright cover to hold small things.


Aah, much better! What do you think? More projects on the way too! 🙂
Spring Chair Love, And A Break
Spring is here! I am so excited, and my yard proves it! I have been working every spare moment in the yard and rock gardens to start fixing some of the weed-y damage left by the previous owners. Not always fun, but it is rewarding.
I am taking this free moment to gaze longingly at some relaxing pictures, like this one of the gorgeous chair and peaceful bathroom! Let me tell you what all has been keeping me so busy! To start, we got chickens! Oh, and there is my new job, getting ready for some painting and other home and yard projects, and planning the WEDDING! Yes, we are finally in full planing mode! It has been keeping me BUSY!! We are so excited, but definitely get no breaks as of late!
Also, the onset of spring and this gorgeous weather has reminded me that there is no place I’d rather be! No matter what anyone else thinks my life should be, I accomplished my dream, and we are living it right here. That is what keeps me going each day when there is so much to be done. Just thought I’d share! Now enjoy this lovely room, and check back soon for more projects around our place! 🙂

A Quick Doorstop Project
The main level in our new house has a small bathroom in the laundry area (yes!), which is super handy, but sometimes a bit wierd. We like to leave the door at least half open so that you know the room is not occupied, but you also dont want the door flung wide open to see everything (let’s face it, even when clean, bathrooms just aren’t that appealing!).
So, to stop the door from flopping about annoyingly, I made a doorstop. Cost? Free!
I went out to the barn and grabbed an old brick, then cleaned it off. I used some soft, thick, scrap fabric I had on hand, and wrapped the brick like a present. I secured the fabric with a glue gun. Last, I added ribbon trim, also scrap, to the seam for a finished look… Viola!


Nothing fancy, or groundbreaking, but it was cheap and does the job. I don’t think it looks half bad either, if I do say so myself! And, you get a sneak peak of the bathroom/laundry room! Just a note, if you are thinking about a project like this, it works great! I love how this thick, soft fabric slides easily and quietly on the tile floor with a scoot of the foot. I recommend!
Farm House Tour- The Upstairs
I have been wanting to show a mini tour of the new farm house, and finally got started! These are “semi-before” photos, as we already have our things moved in, but these our not our paint colors and mostly not our curtains. There will be many more changes to come, and I wanted a way to show the progress and changes. So, lets start with the upstairs!
Here is the view at the top of the stairs.


There are some frames in the hallway and the book shelf I redid…

At the end of the stairwell is an old antique wash cabinet from my granparents…

The view back towards the stairwell…

Next is the room on the left of the stairwell, next to the old wash cabinet. We call this the “kid room,” which used to be a little girl’s room…

The other side of the room…

And on the wall by the door there is a chalk drawing of Dora! lol

The door in the last photo goes to what we call the “baby room,” which will one day be a nursery…

The other side of the room has chalk spiderwebs, which were for a little boy…

Here is the view back towards the “kid room”…

Next is my walk through closet that leads the master bedroom. This is across the stairwell from these rooms…

I still can’t wait to have the time to paint the closet the dark navy I have picked out!


The jewelry area…

Next you walk through the closet door and into our sunken bedroom…

The walls are currently yellow, which is fine, but we plan to paint them a nice gray at some point. The little white shabby dresser was found in the back of the house and makes a perfect TV stand for us…

The wooden shelf above the chair is a barn board we found…

Recognize the blue chair from the old office? It was too big. The next photo is of the antique dresser from my grandparents that matches out bed…

Our bed…


The shelf by my side of the bed we made out of another barn board that we call the “cow board,” because its front is smooth and wavy due to cows rubbing on it…

Our stained glass window and exposed rustic beams…

Next is the main bathroom. This shot is a view in the doorway from the closet…

The blue and flooring aren’t really our first picks, but they will make due until we can paint and spruce…


Well, thats the upstairs. What do you think so far? A lot to do, but so far we love it! 🙂
Busy With The Move, And A Good Idea
Sorry for the lack of posts this past week. Getting ready for the big move has got me super busy. And, with everything packed I have gotten very few projects done at all. I do, however, have a bunch of ideas going around in my head for things to work on once we get to the new house! Less than a week!
When I came accross this poto on Apartment Therapy I thought it was gorgeous. Upon reading further I discovered that it was also a handy idea.

This little shelf is above a door. And in our little bathroom(s) at the new house, this may be very helpful! Head over to Home Depot for the tutorial on how to make one. I know we will be trying it out!
Inspiration and Big News
After being out of town, and a little out of touch, most of last week, I am finally catching up. Reading through a backlog of blogs today I ran across the most gorgeous farm house tour on Apartment Therapy.
The details of this home struck a cord with me, because we happen to have just bought an 1891 farm house. Yes, one more move! We close in about two weeks. We are anxious, nervous, excited, and very busy. This is the first time I will really be moving away, although not far, just to Iowa. This is our dream home, and we are very excited to remodel and decorate once there. Pictures soon to come!
But for now, here are two of my favorite images from Shannan and Cory’s home tour. Check out the rest here.

I love that light fixture! And the pillow is gorgeous! I am so excited to put some of this inspiration to use in the new place!

This was one of my favorite photos because of the crate used to hold towels. We found an old crate of glass bottles at a garage sale for a few dollars, and had planned to use the bottles as wedding decor. Little did we realize that the crate had a Tipton, IA business emblem on the side, which is where we later bought the house! I would love to incorporate our crate in a useful way like this!
What do you think?
DIY Art for a Bathroom
Once I got my budget bathroom remodel completed I was pondering how to add a bit of art that was also inexpensive, but unique. I then came across a box my grandmother had given me. In it I found a set of vintage metal hair rollers. Light bulb! I had the idea to frame the curlers in a shadow box with a funky background or bright colors to match the room.
The curlers I found:
 A little hot glue, some magazine cut outs, scrap book paper, and a basic shadow box frame…

 Simple and within budget, but funky and vintage! What do you think?
