Gorgeous Wedding Decor!
We did it! We got hitched! And it only took us 9 years!
But 9 years later, and we have a home and a family, and the wedding budget was small. So, I’m here to share a few things we did to throw a gorgeous wedding, but on a budget!
First, if you are a planner like me, buy an actual planner and skip hiring one. I used a basic wedding planner from Amazon and tracked everything myself. It’s definitely doable!
Next, buy what you can, don’t rent, and resell when you are done. It was actually cheaper to buy tablecloths and runners than it was to rent them!
Third, pick a venue you like, but if you find a budget friendly option, don’t worry if it needs a little boost to get wedding gorgeous! I used Rent My Wedding and transformed our very inexpensive, albeit dated and bland venue to a gorgeous spot, on a budget!
Before:
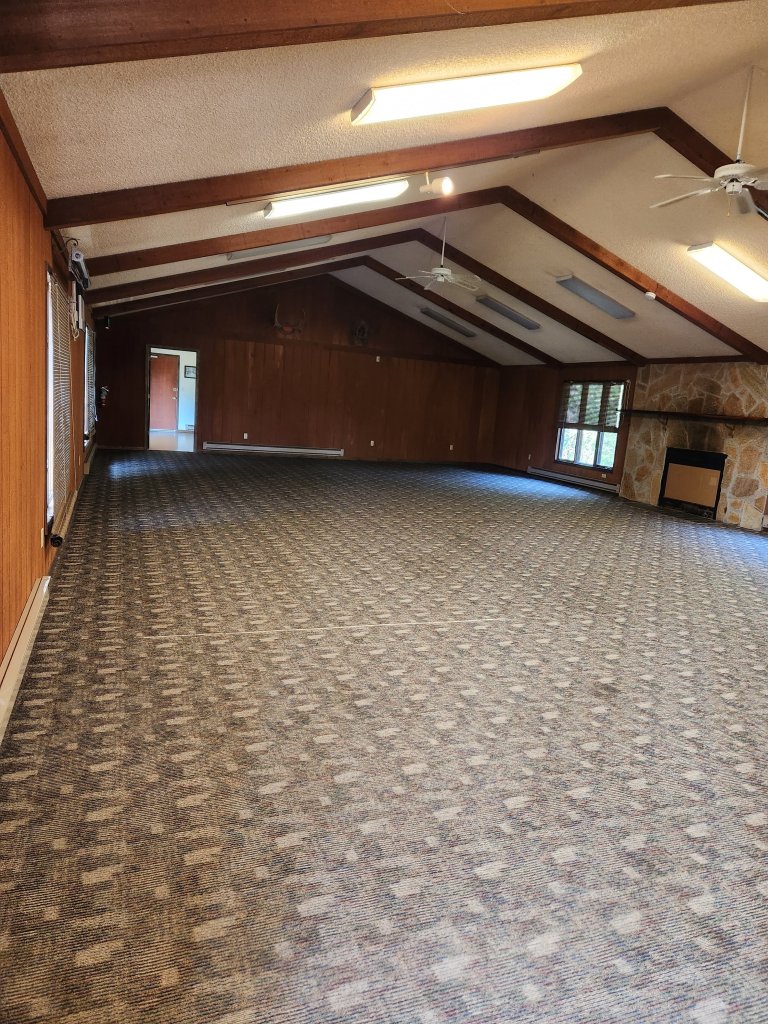
Blah, drab, dated. But cheap. Enter Rent My Wedding.
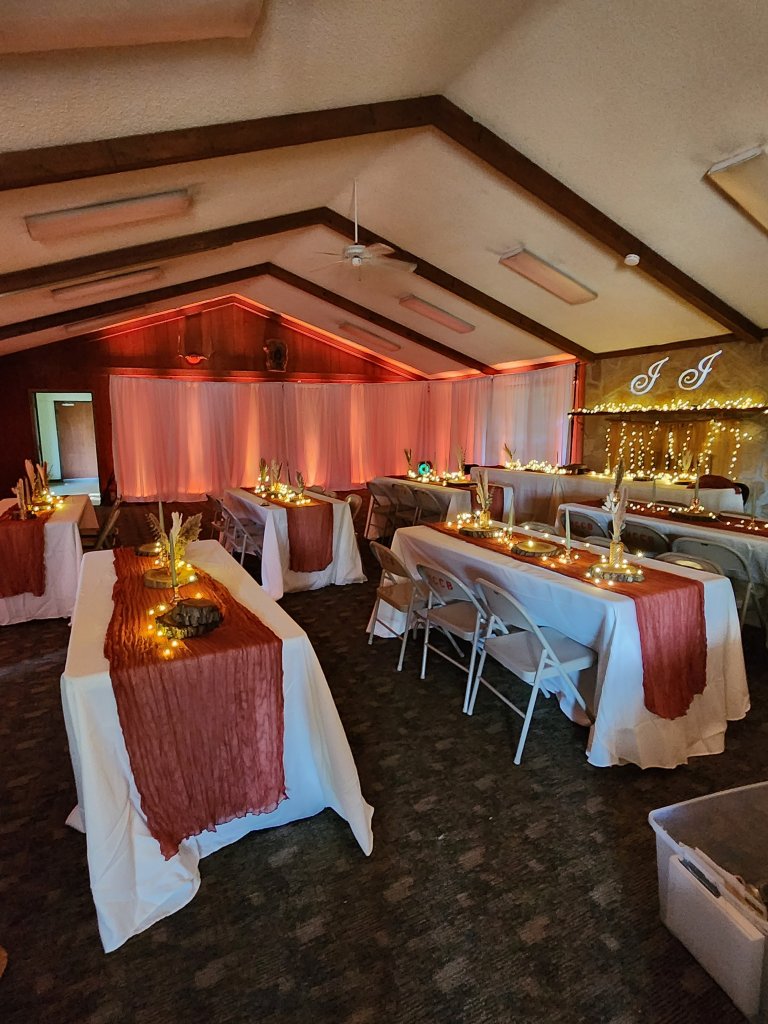
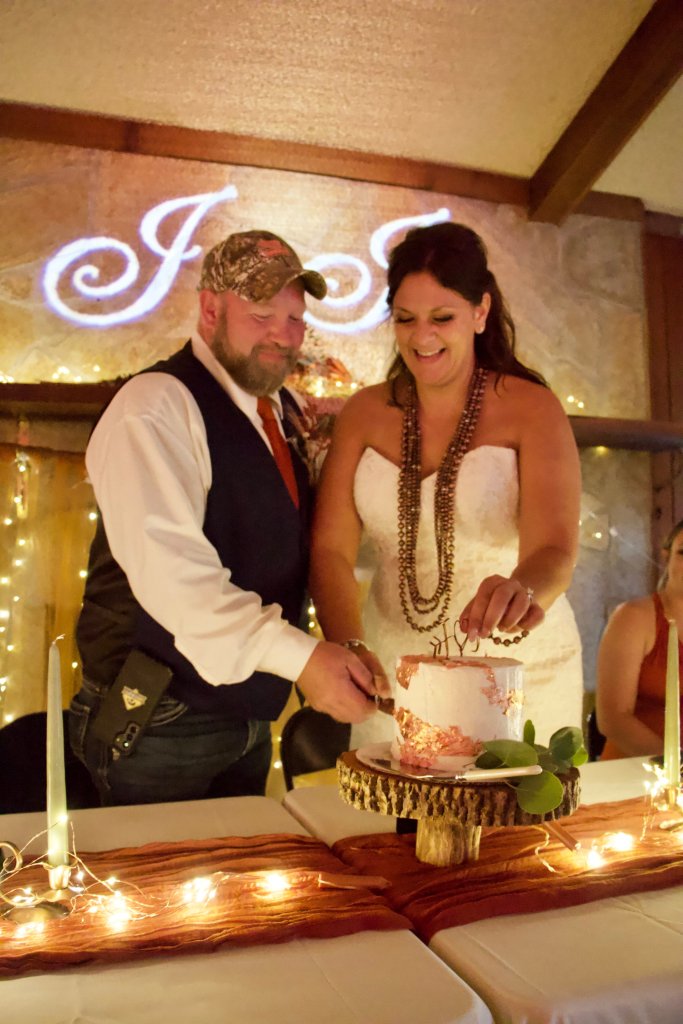
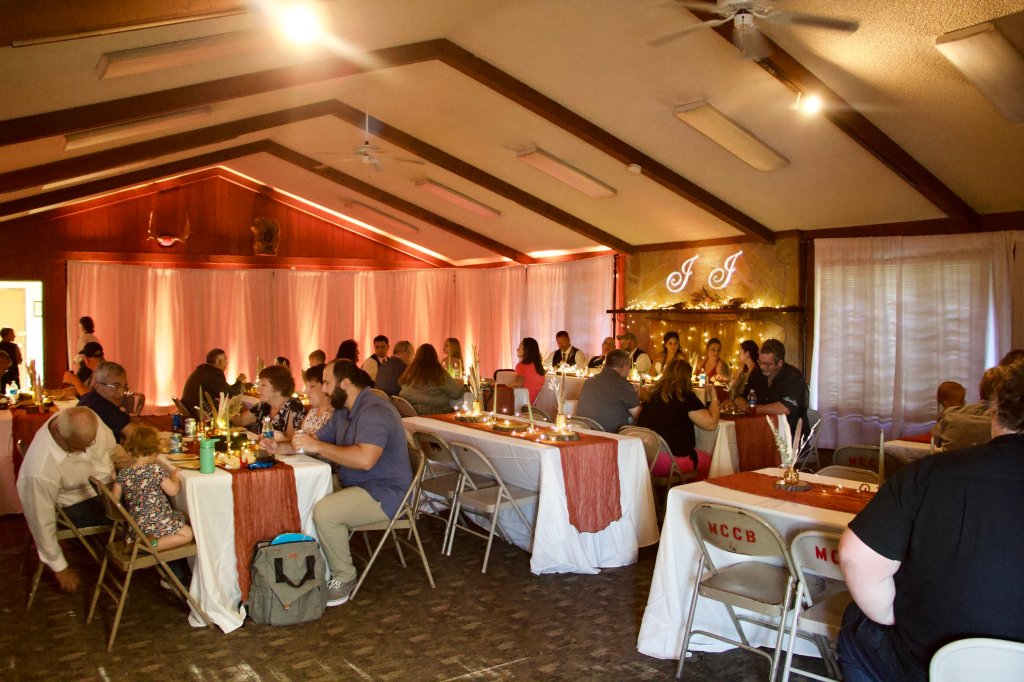
We used white drape walls and uplighting to make the glow. We also added the custom monogram behind our table. It all turned our venue into our rustic glam dream spot!


The whole rental process was super simple too. It can all be chosen and rented online, and customer service is super helpful! Everything is shipped right to you. The directions made it all very easy to assemble and decorate. Then you pack in back up and ship back with the included labels. We even a scheduled a shipping pick up! Boom. We highly recommend Rent My Wedding!
Xx,
Jess

Beauty Must Haves
Mom life may keep me super busy, but I still have a few beauty essentials that are must use, no matter how busy.
First, kids, business and stress may add to my wrinkles, and I believe in aging gracefully, but there are still few things I can do to combat early aging. Good skincare. No, it doesn’t have to be expensive. It just has to have the right ingredients.
My favorite skincare brand is Dime Beauty! I use every single product from them and have better skin now than I did in my 20’s! They use clean, safe ingredients and are cruelty free, plus affordable and EFFECTIVE!
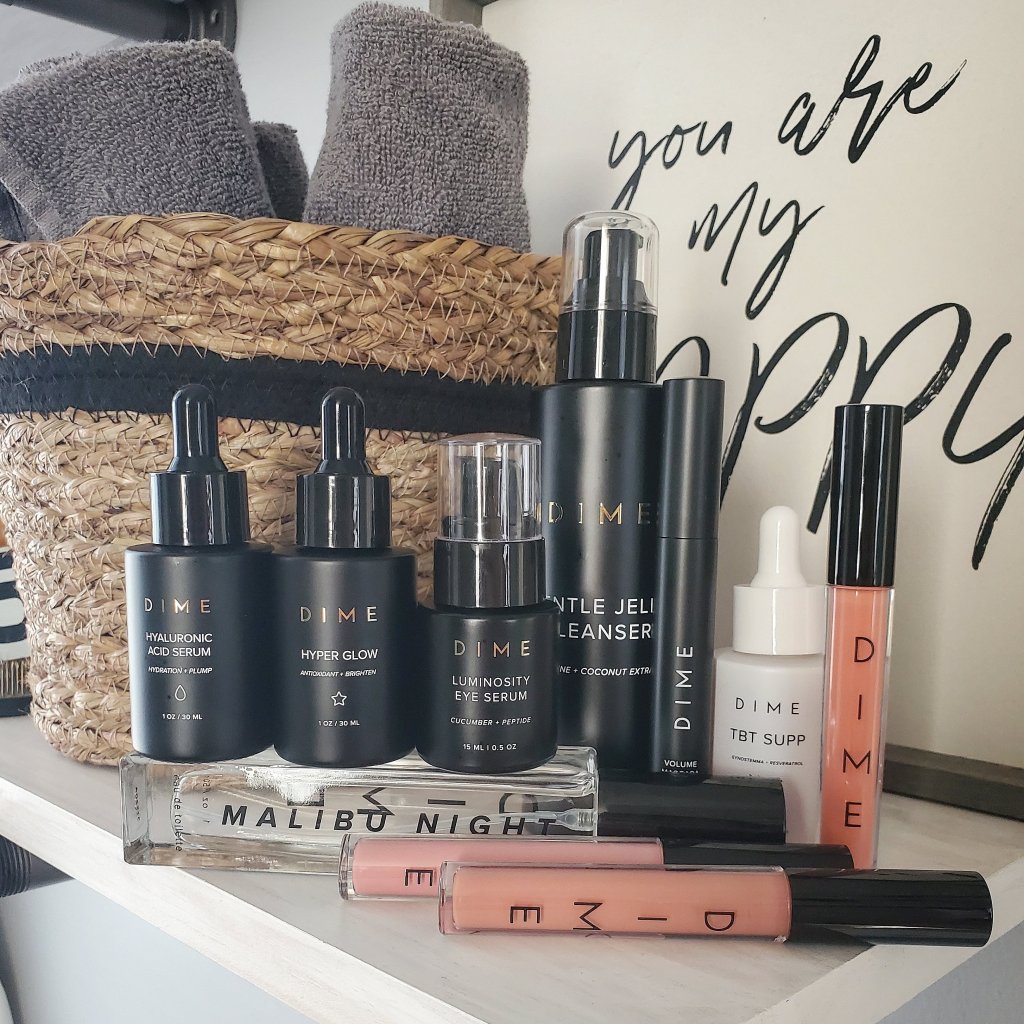
This is my holy grail morning and night trio!
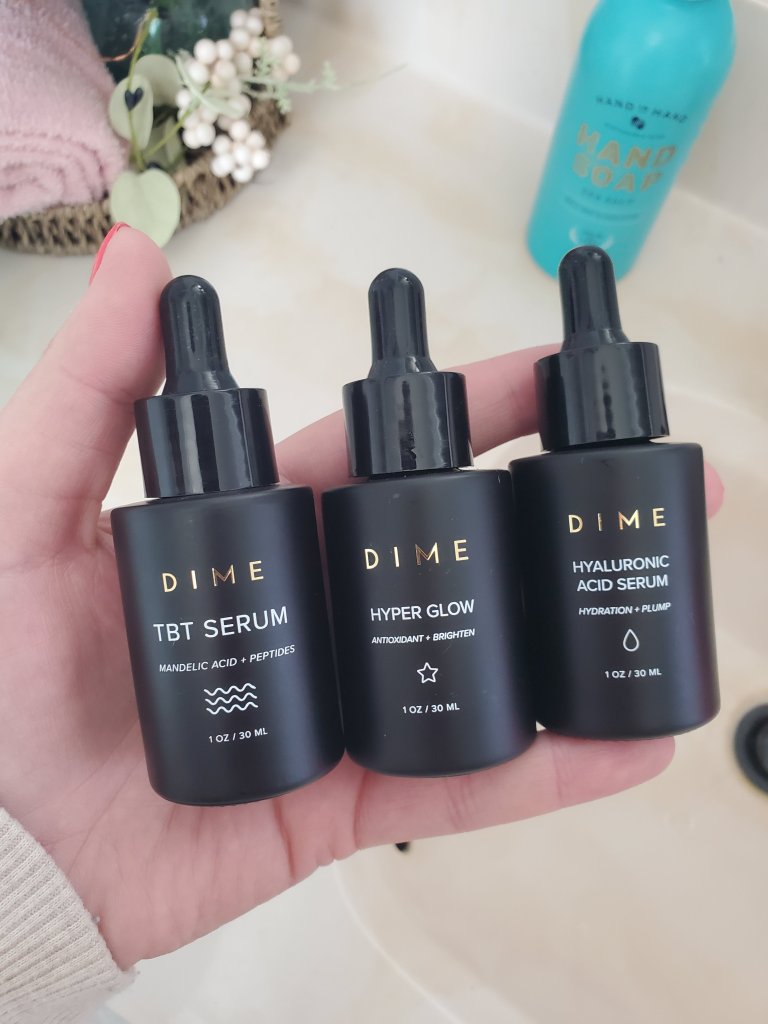
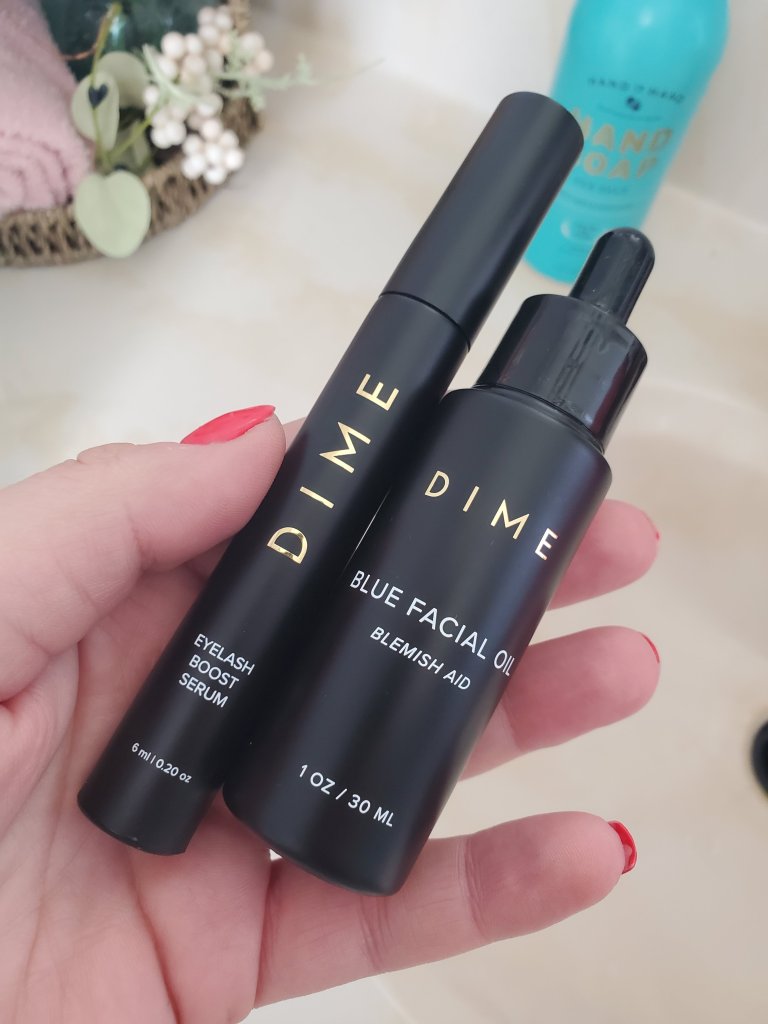
The eyelash boost serum has been amazing! And the blue facial oil saves me from break outs!
Use code JessicaM20 at Dime too!
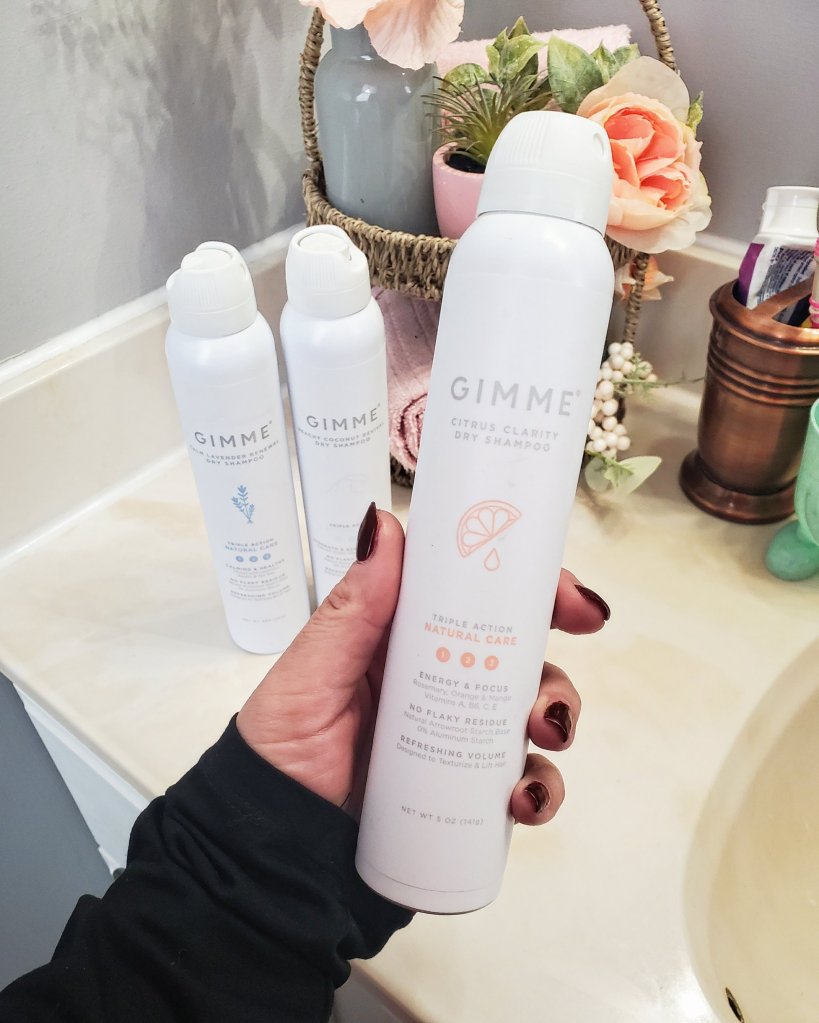
Another must have for me is dry shampoo. No brainer. Life is crazy. Sometimes I don’t have the time to wash, dry, and style my hair. But I do have a quick second to dry shampoo. It refreshes my style, eliminates oils, and volumizes. Win!!
Gimme Beauty dry shampoo is my favorite. They use safe and natural ingredients, like arrowroot, and it leaves my hair soft and fresh. They have a citrus to pick you up the morning, a coconut with UV protection for daytime, and a lavender scent to be calming at night. I truly love them all.
Use code JESSICALAING50 for 50% off your first subscription order at Gimme. (Cancel anytime)

One more thing that I highly recommend and totally don’t want to live without… my Ellavive gel nail system. Manicures are great. But often time consuming and expensive. A super quick and affordable option saves my nails!

This is the fastest system, and 1 minute per coat under the UV light, and it lasts me so long!
You can use code EA20JLAING at Ellavive too!

What do you think? Anything else you would add?
XX,
Jess
A New Mud Room
Check out this horrible mud room!

I know it doesn’t show it well, but behind the open back door is a small closet and then a sink. Yuck.
It is an old farm house, so once upon a time the sink had a purpose. Now it was just wasting space. Valuable space. We knew this room could be better utilized. Little did we know, we would, as usual, open a giant can of worms…
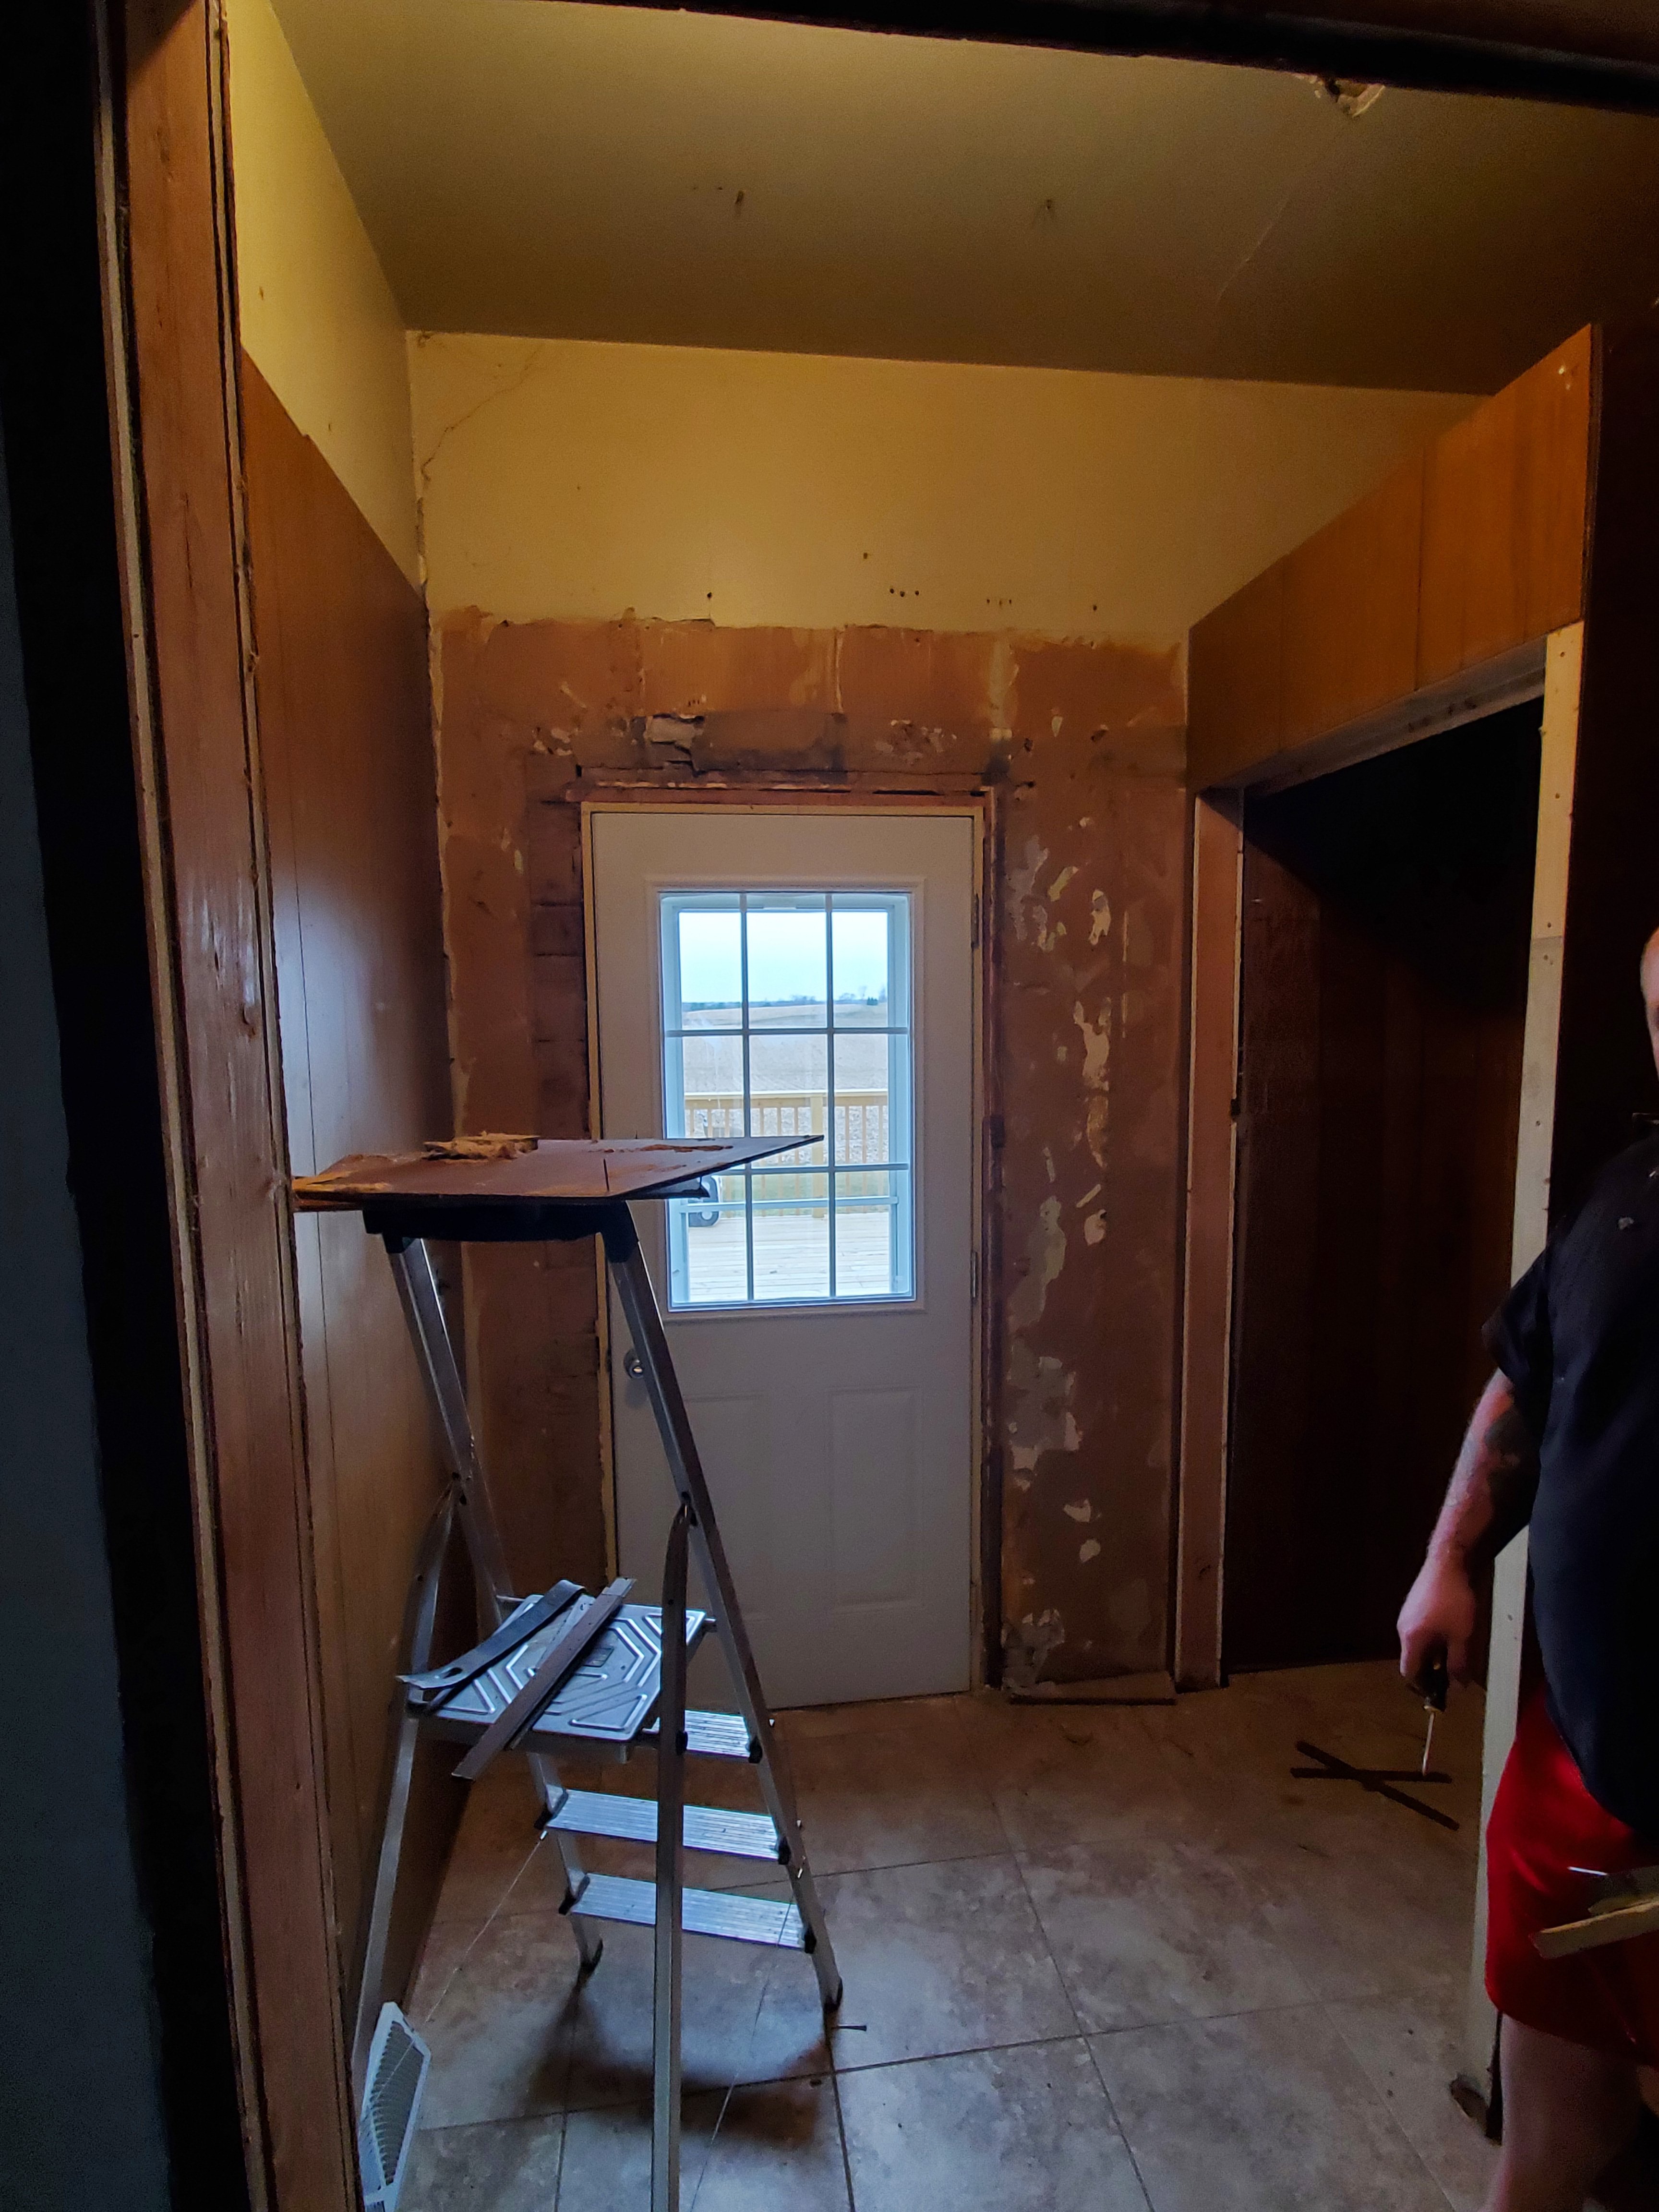
We thought we’d tear out the sink and old paneling, paint, add barn doors and call it a day. No.
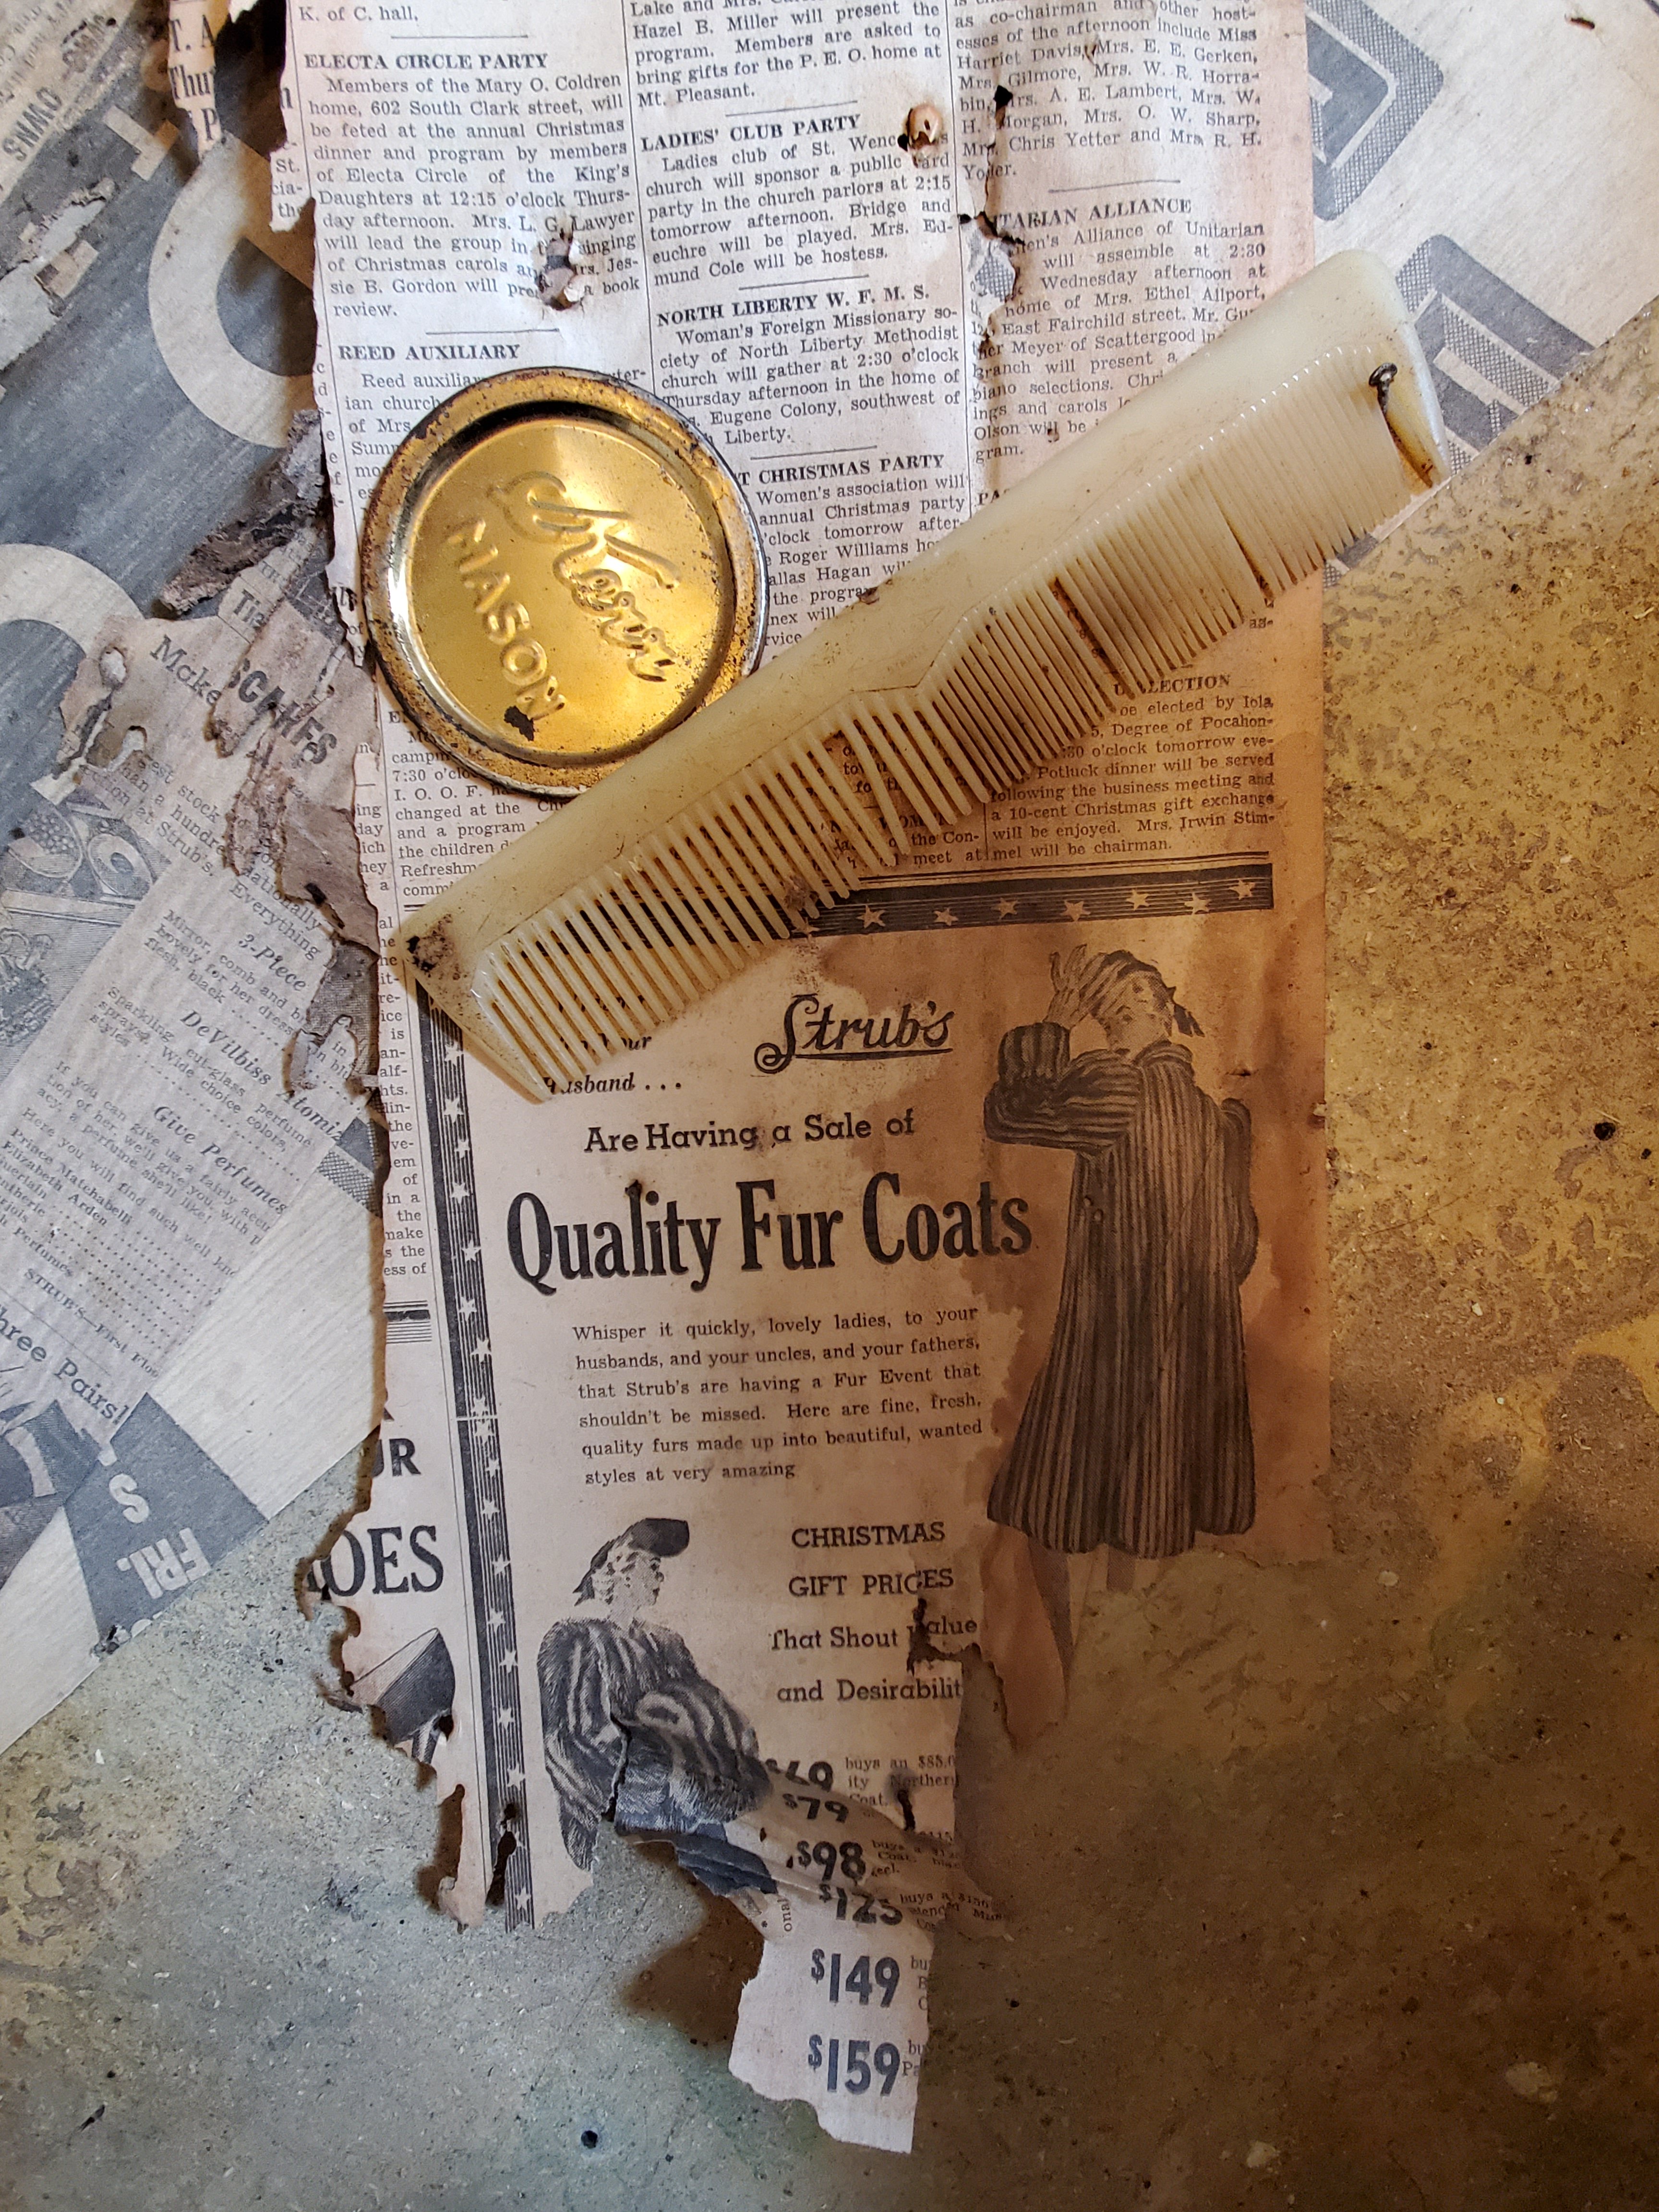
The walls had to be redone down to the studs. A new false wall had to be added above the closet, since we were taking out the drop ceiling. Then we found that the paneling went behind the flooring. This removal ruined the flooring (not sad about it) and in removing the tile we found we had a rotten spot and needed to even replace subflooring. The house is 1862, but still, whew!

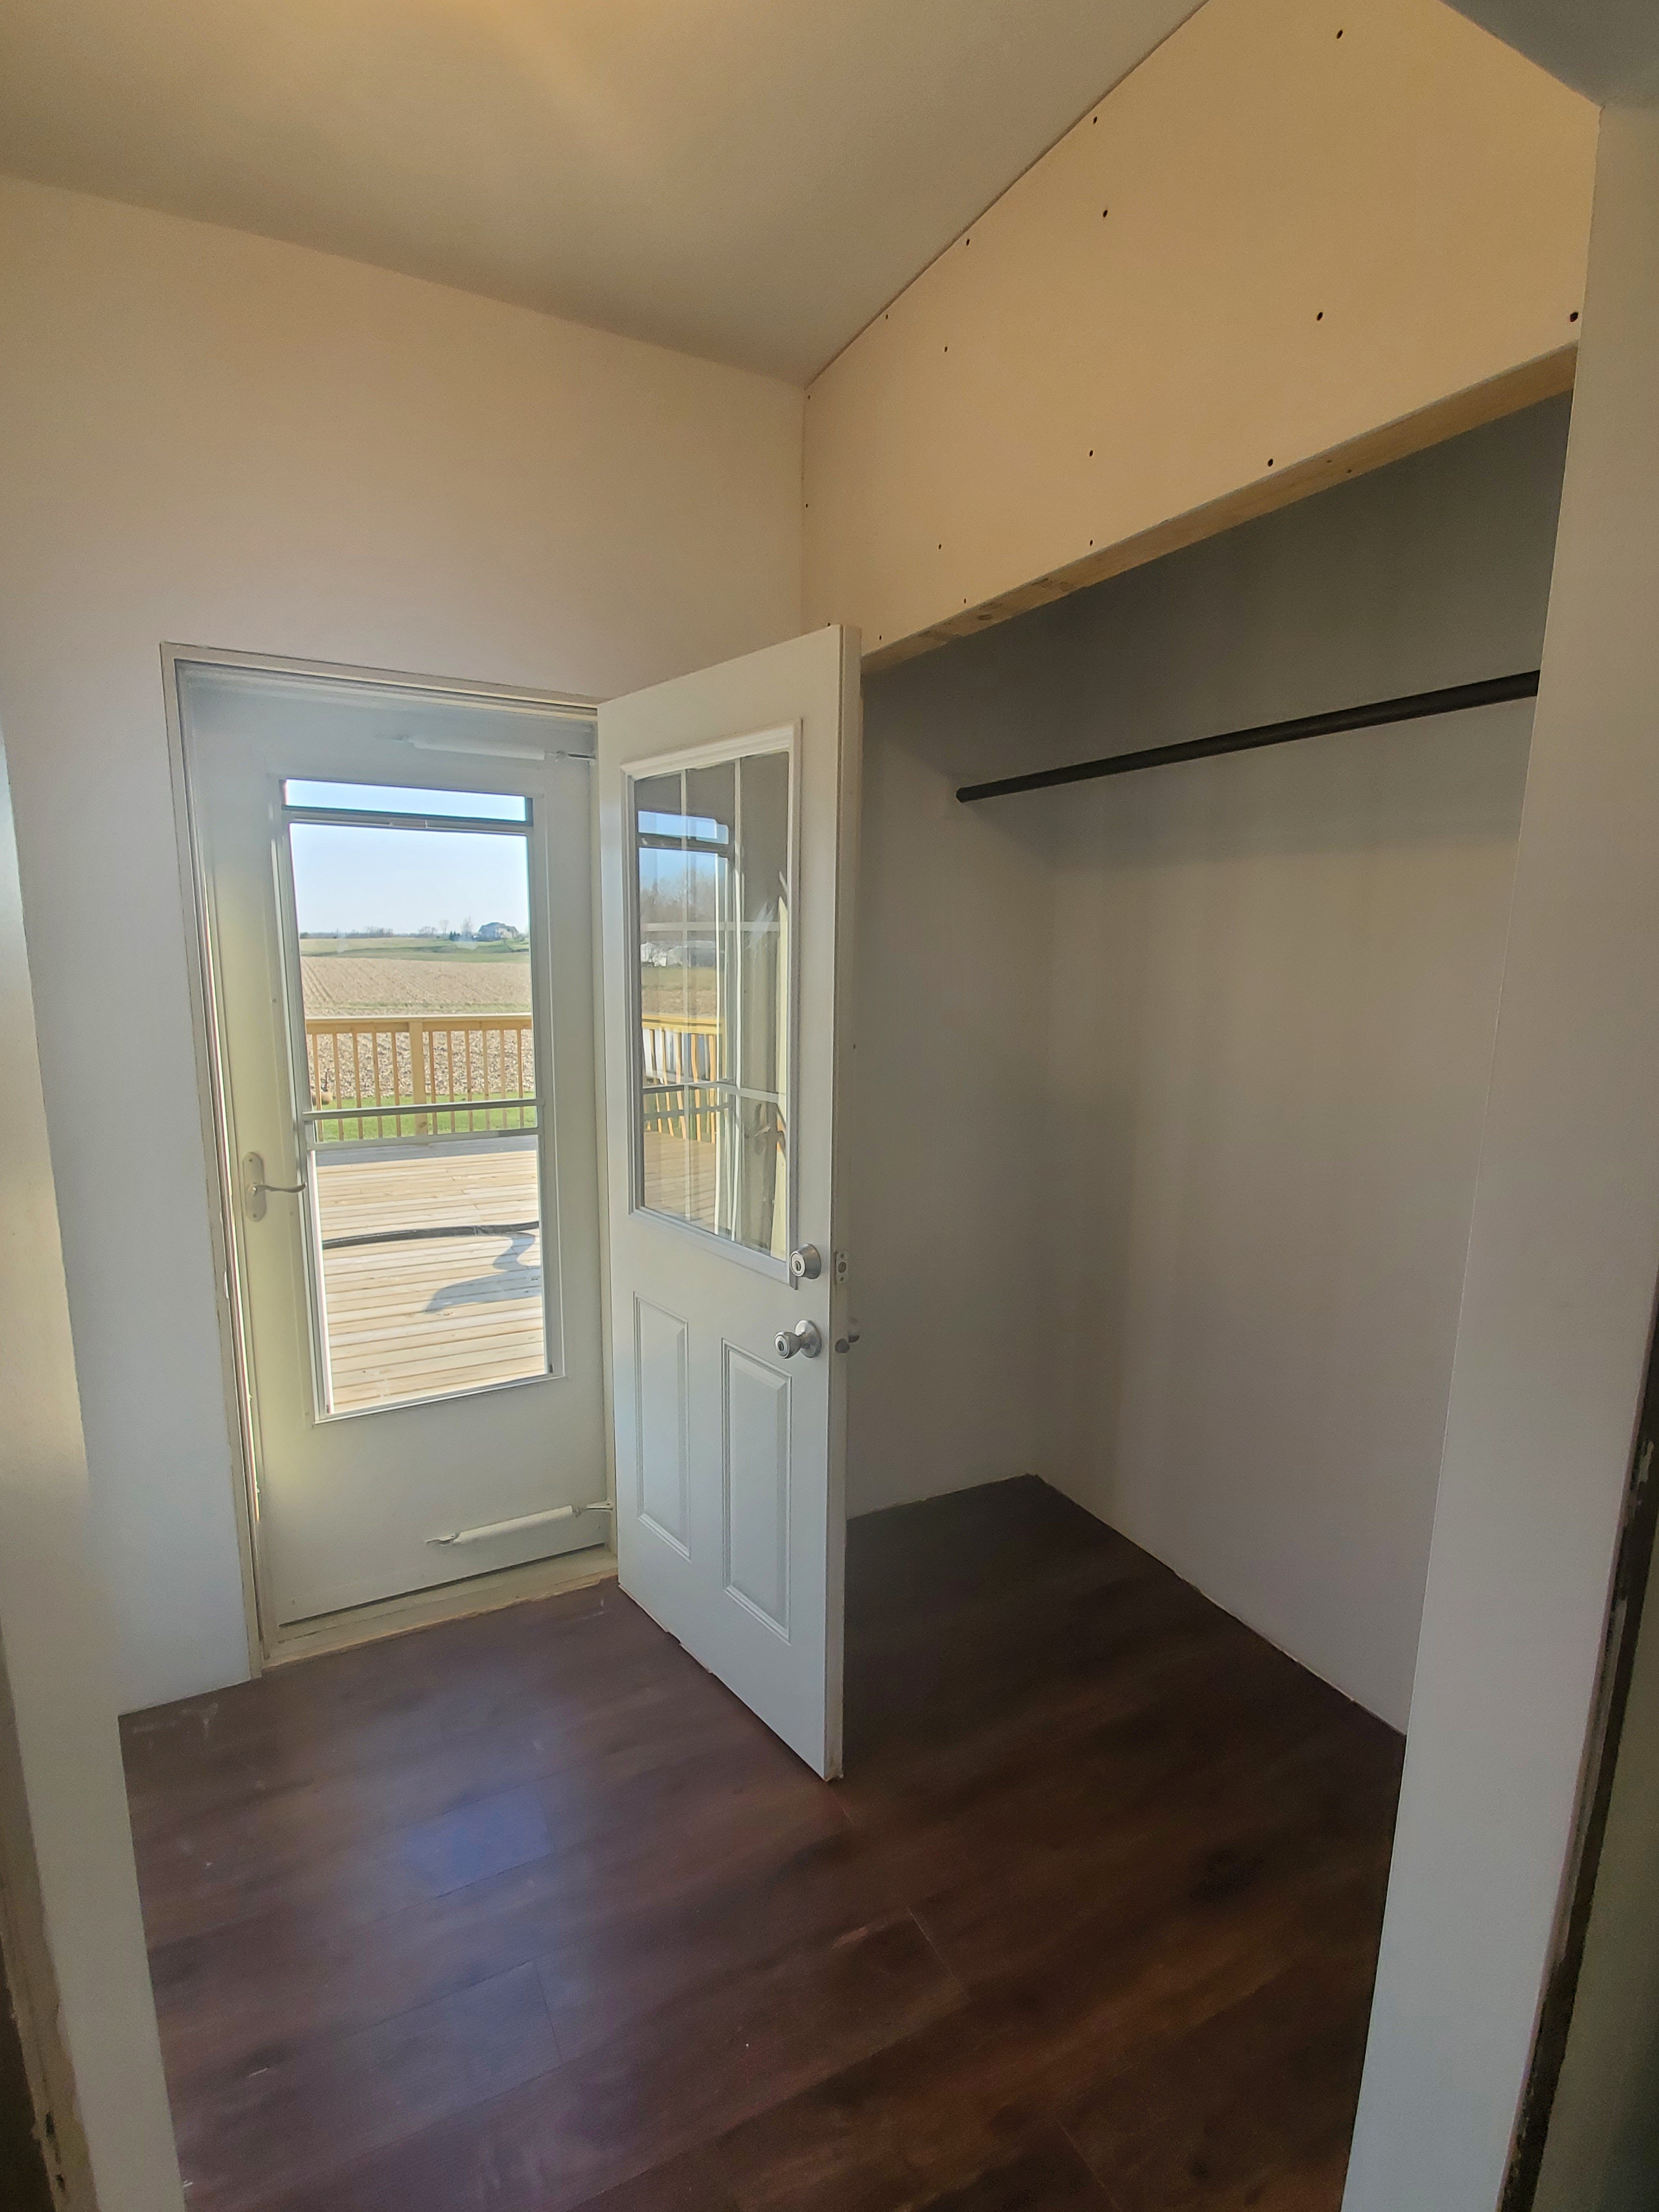

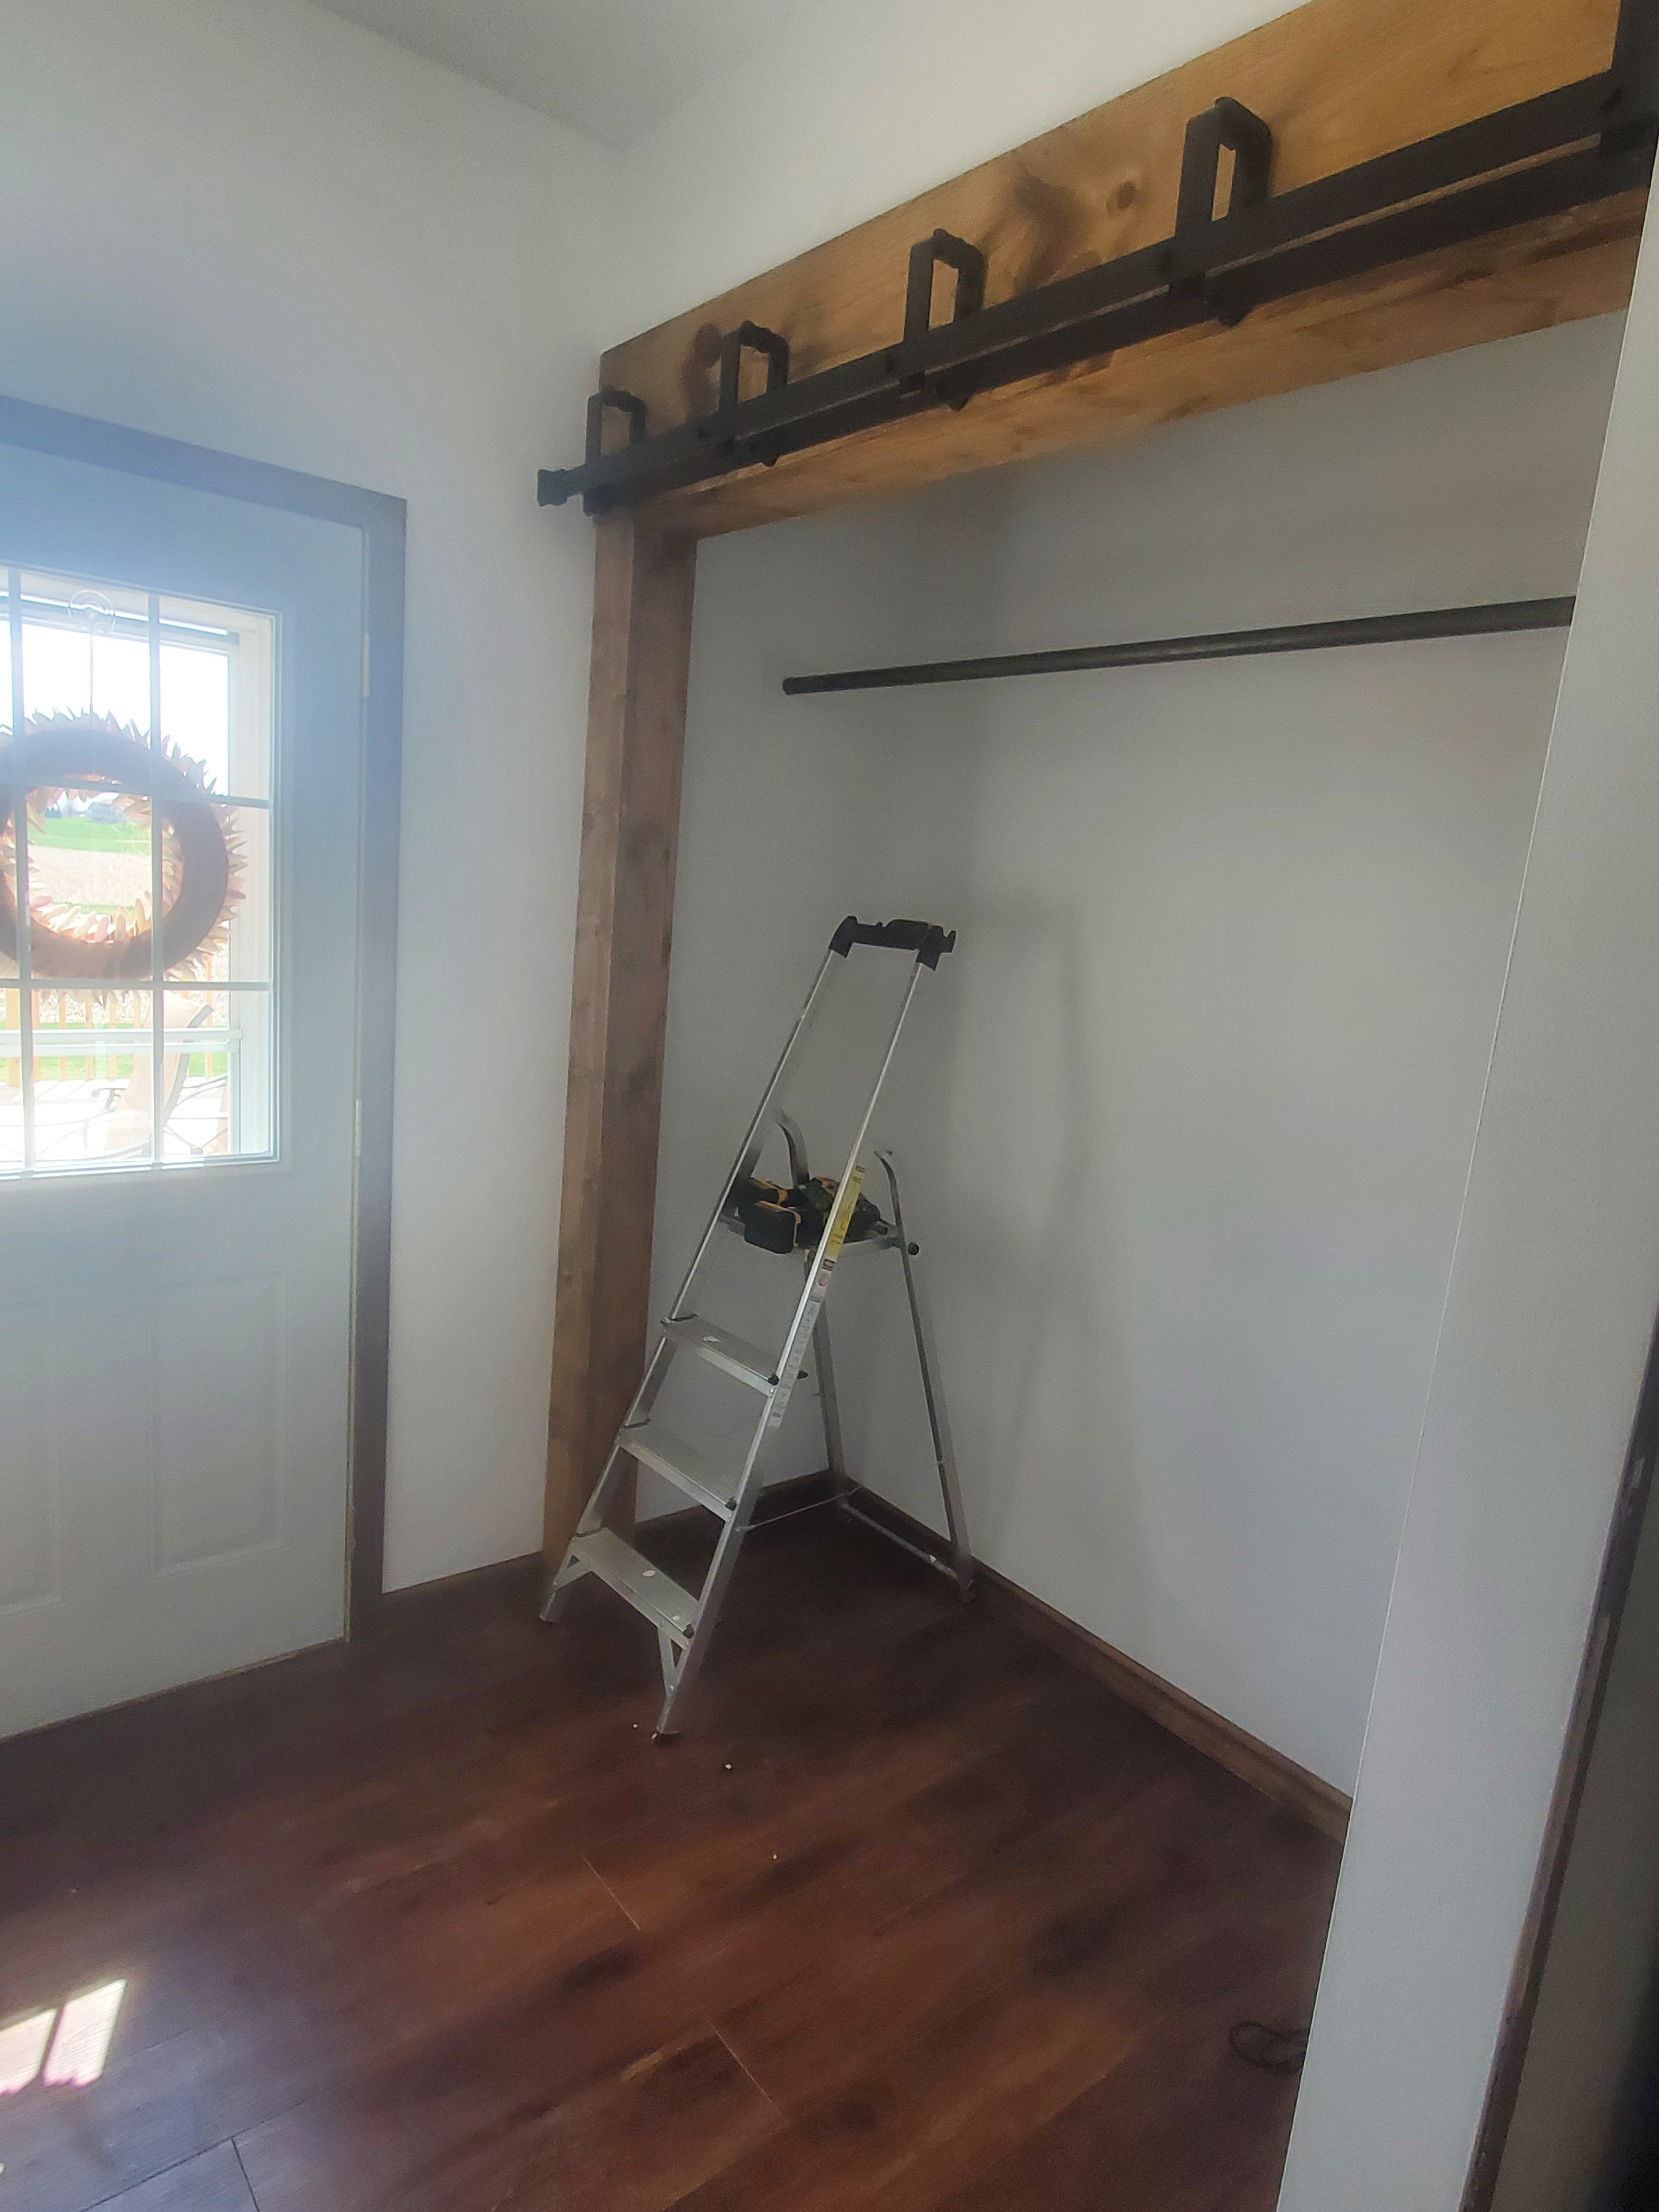
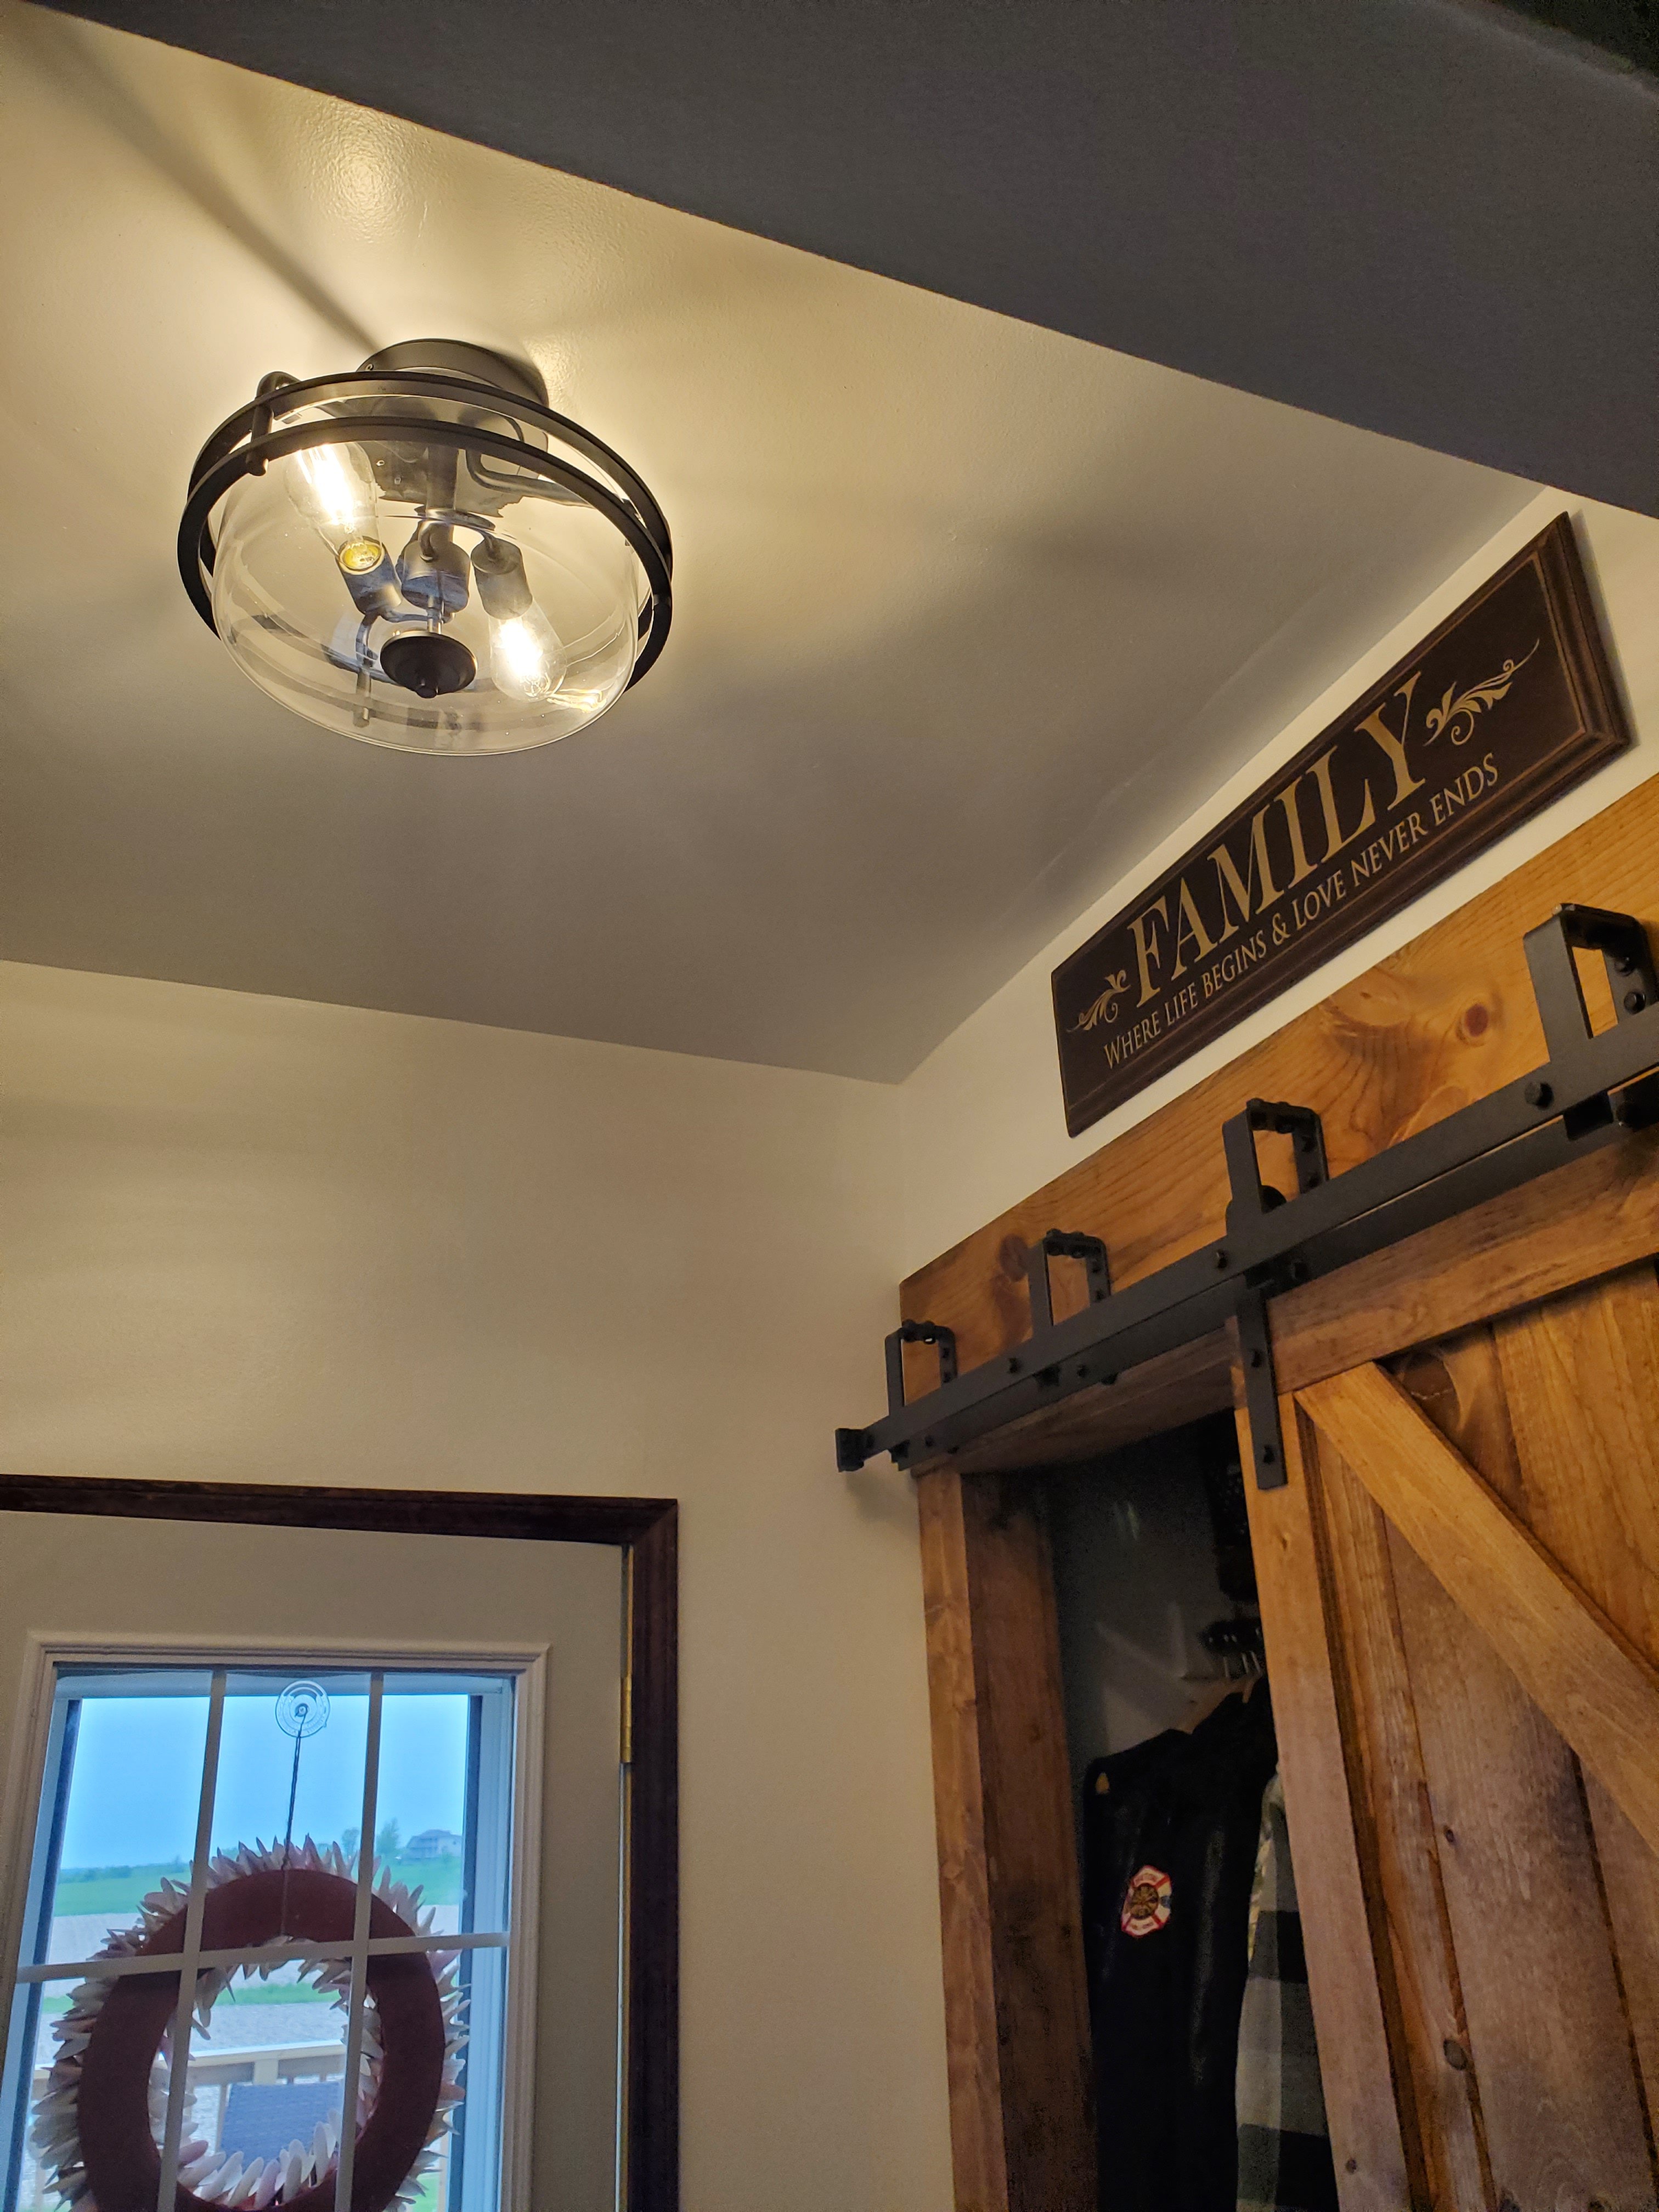
We did make the closet go all the way across the space and Jason built custom barn doors and trim. Gorgeous!
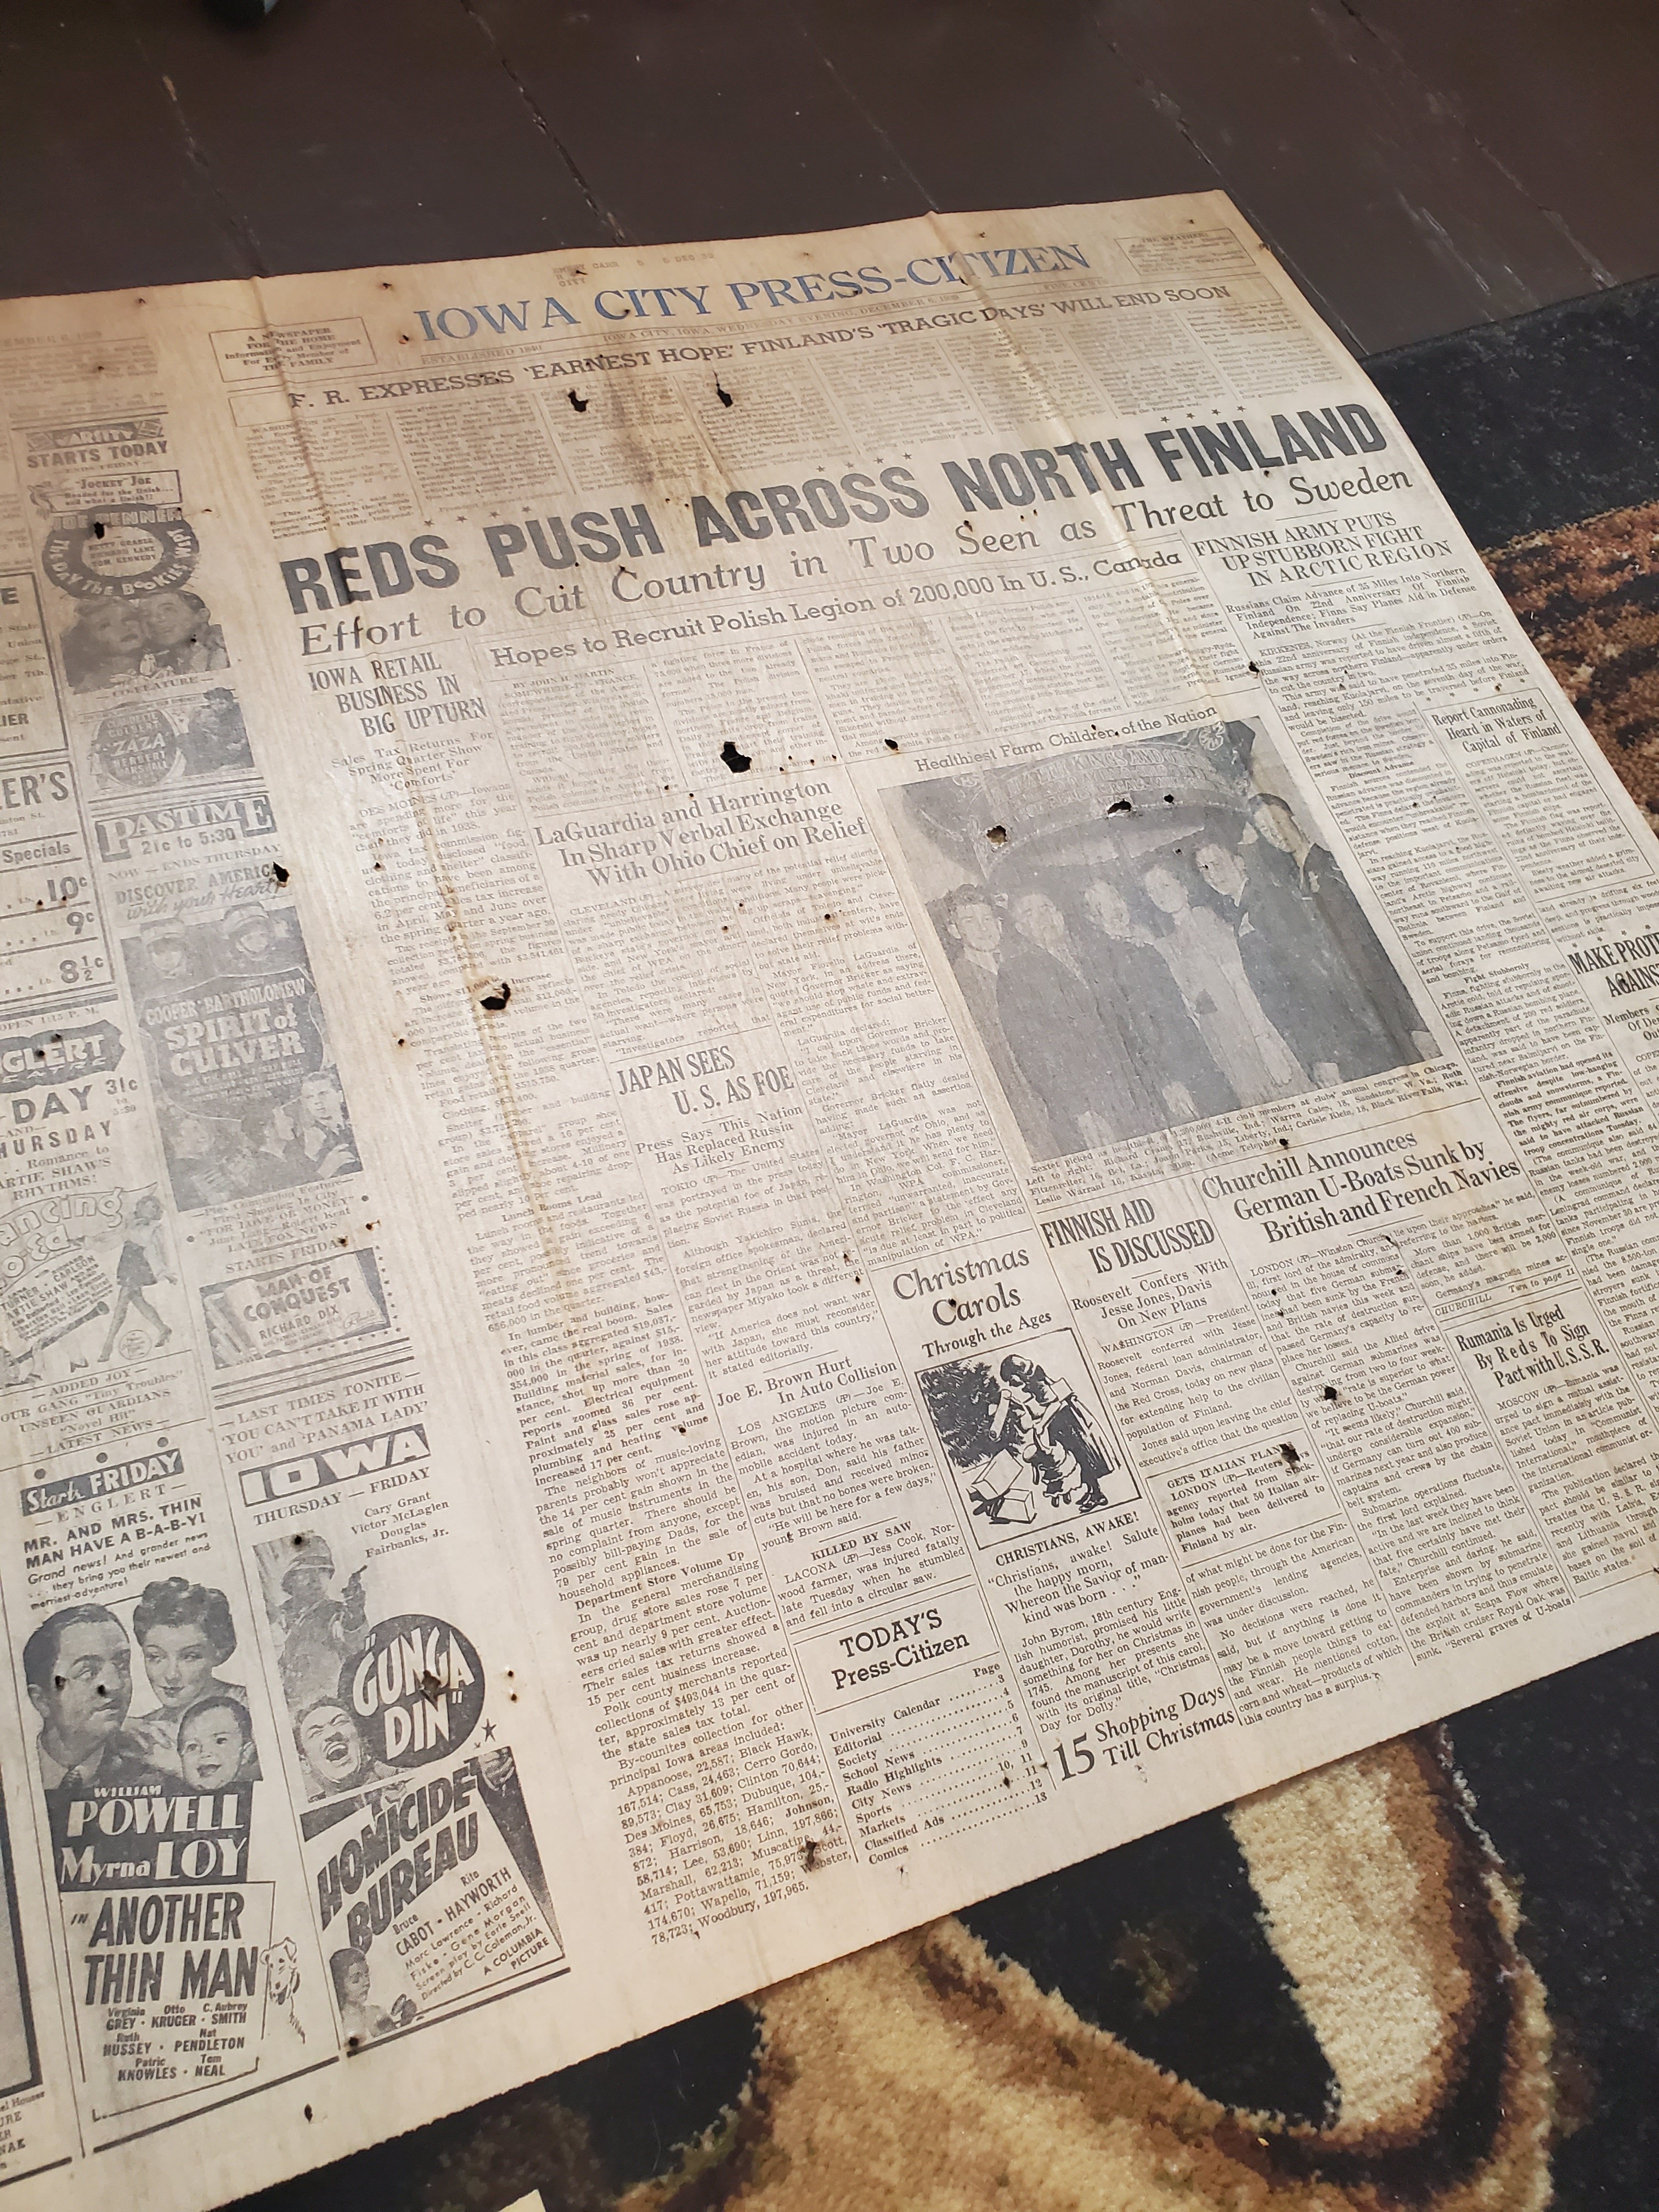
Look what we found under the flooring! Lots of these old papers from the 40s!
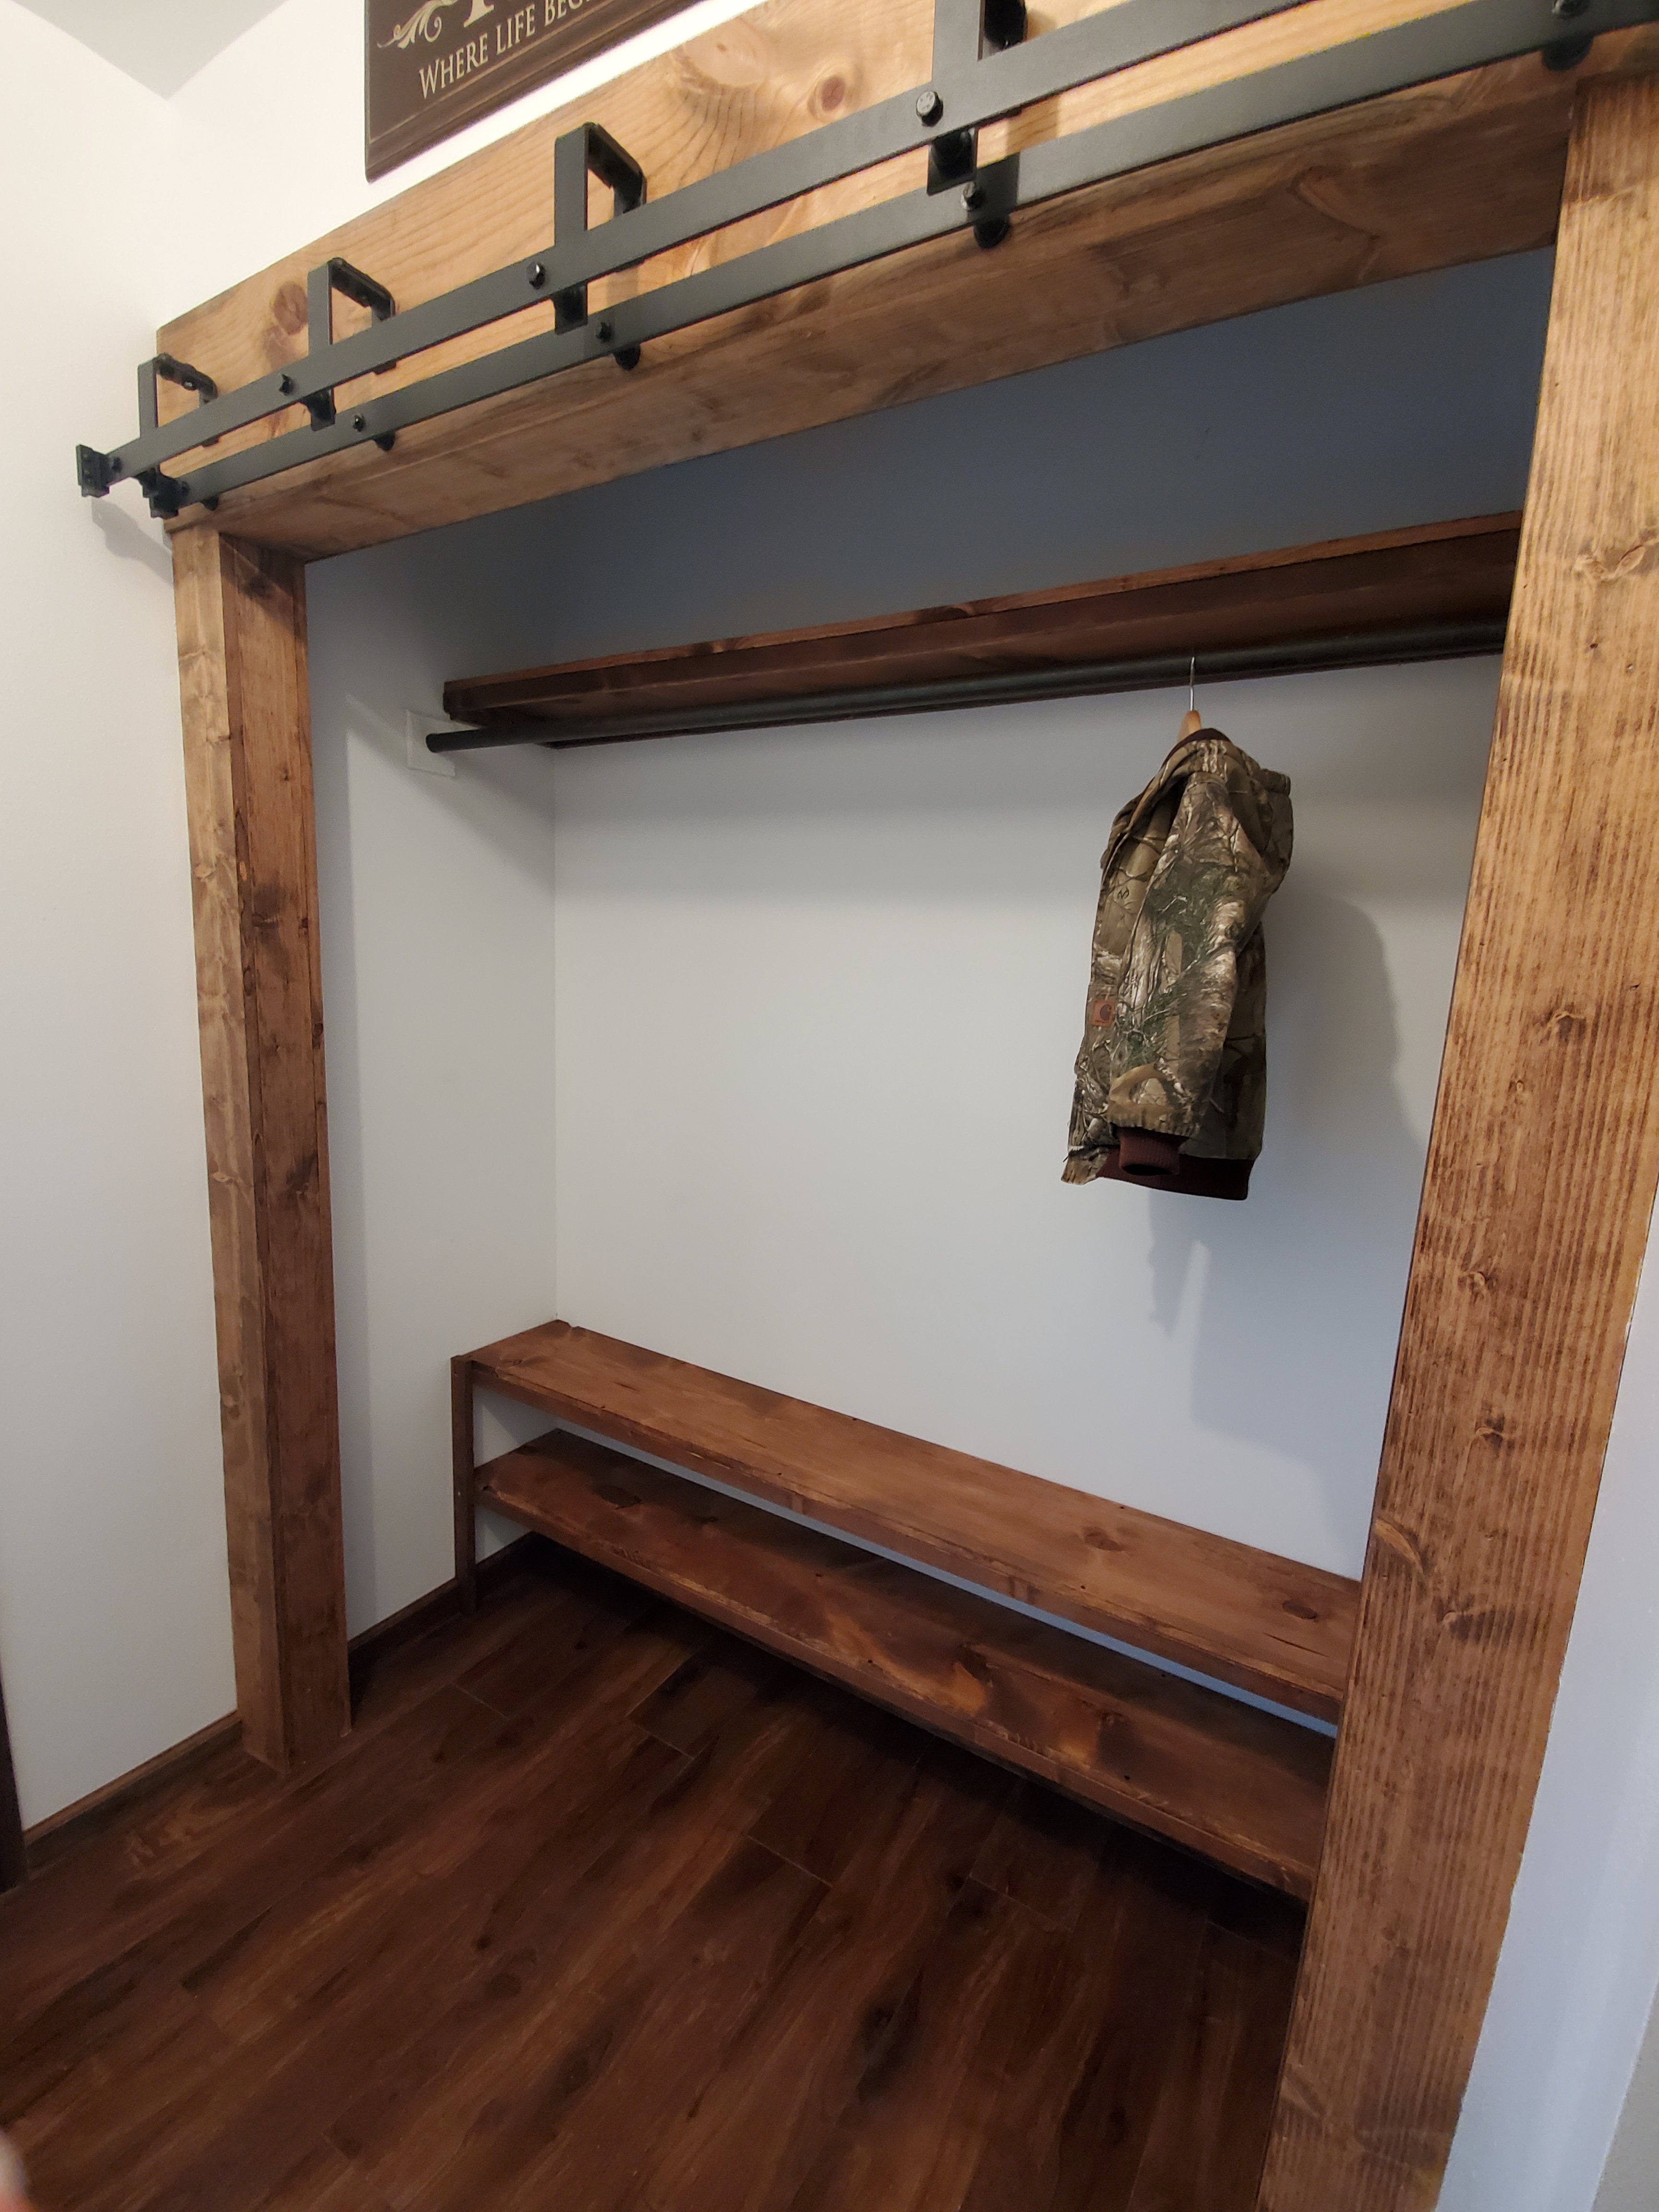
But now… she’s about done. (I say about, because we do still have an antique flag we are making a custom frame for to hang about the coat rack, but still, very close)


What do you think?! I think I love it so much that I need to add a chair for company. Come in further and you will see the dining room and hallway that we need to do the same too. 🤣
XX,
Jess
Quick and Easy Halloween DIY
Happy Spooky Season!
Maybe its that we’ve been cooped up way too long and missed too many “normal” things, I don’t know, but we are going all out extra for Halloween this year. Our house, or yard, our decor, even our snacks, have all gone completely spooky. I’m loving it!
If Halloween time is your thing, or even if it’s not so much, but you want to show the kiddos just a little festive fun, then I have a super easy and cute DIY project for you!
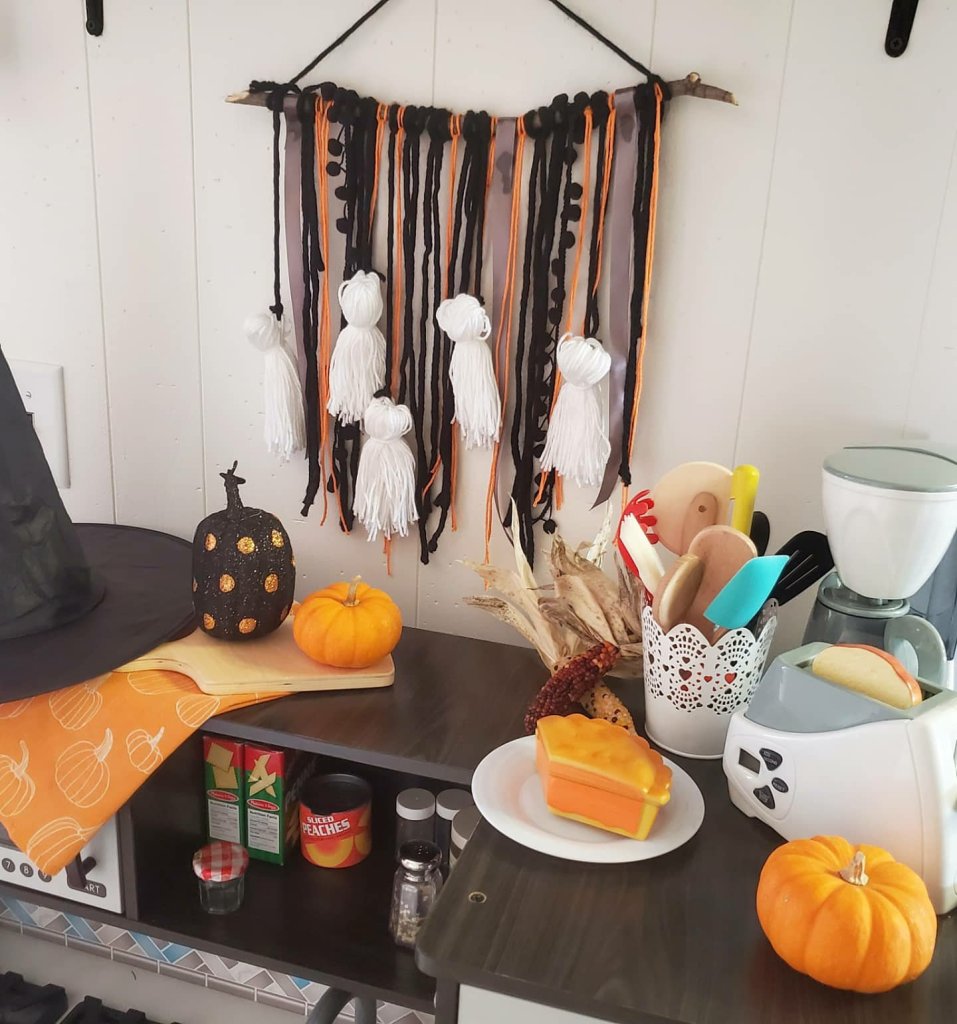
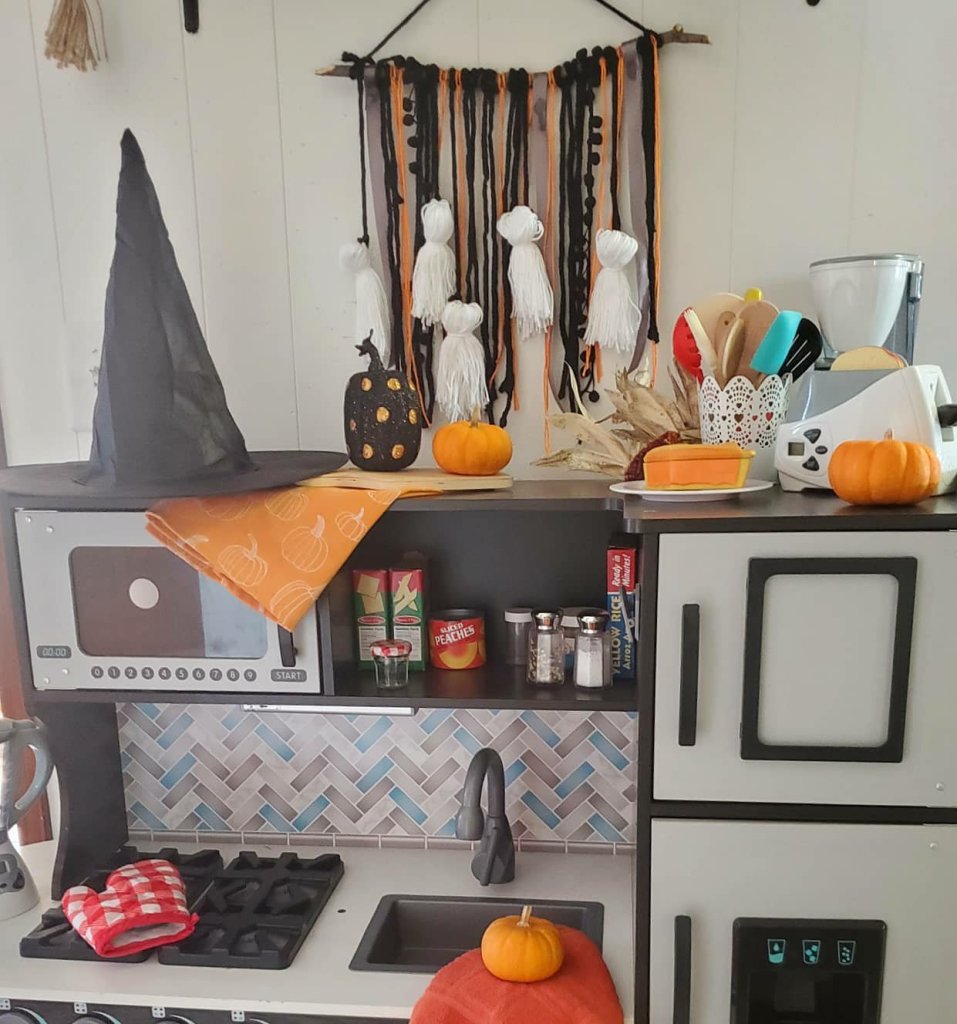
Faux Ghost Macrame Wall Hanging!
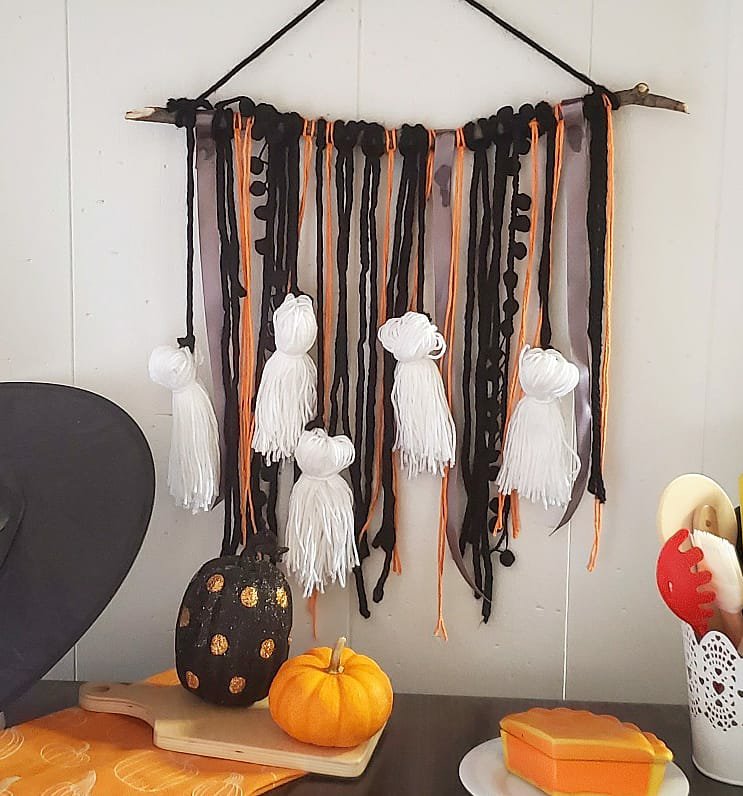
Supplies: -stick
-yarn and ribbons in various colors and textures
That’s it! Super easy, but such a cute payoff.
I cut the branch from a tree in the yard, even a dowel would work. Mine is a bit over a foot long. I started with it longer and then cut it off as I worked to make sure I knew I liked it. Decide how long you want things to hang. Mine is all random lengths, but around 14-16 inches. When you cut your pieces of yard, double this. You will fold them in half. I eyeball all of this and er on the long side. You can trim them down later.

With the piece of yarn folded in half, lay it over the stick. Bring your looped end under the stick, then stick the ends back through the loop and pull tight. Viola! I glued the ribbon together in the back around the stick instead of this method so as not to crease it. I love the ball tassel ribbon to give texture too and tied these in a knot around the stick.
The ghosts. Also simple. Wrap white yarn around a book about 50 times. Cut the strings on each end of the book and keep them in a bunch. Fold the bunch over and tie a piece of yarn around it. I took black yarn through a small chunk of the white ghost head yarn on each side and tied this together in back and then tied the black to the stick.
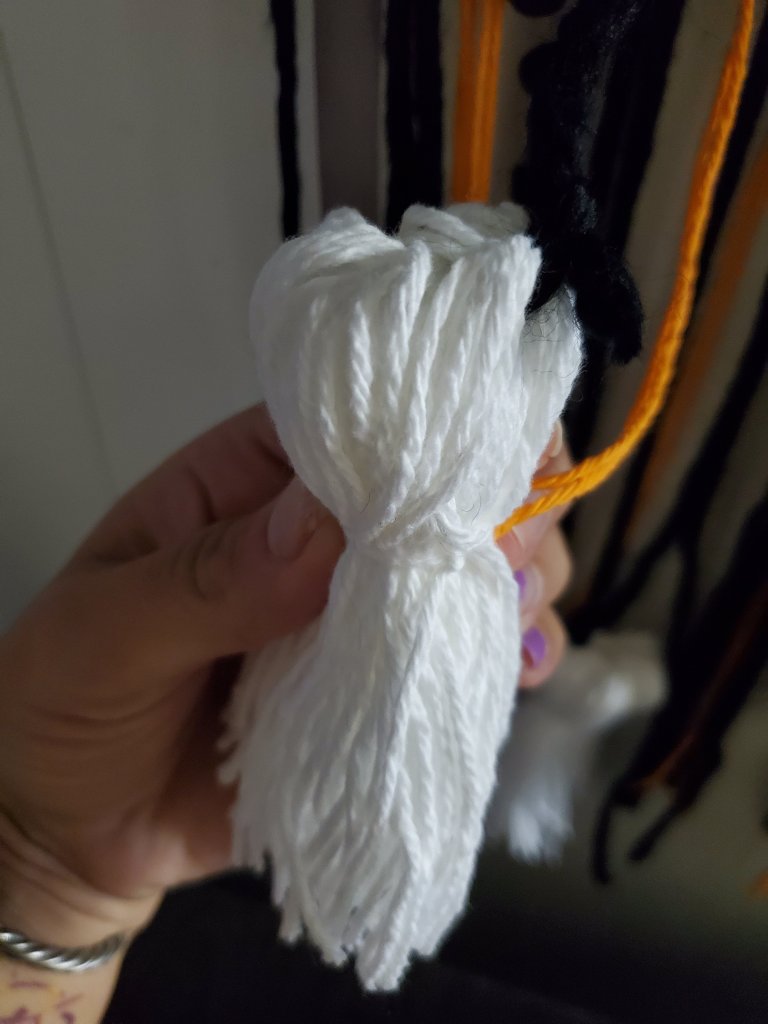
There is no right or wrong with any of this! Keep it fun and super simple. You could glue eyes and mouth on the ghosts too if you want! You can add more or less pieces to the stick too.
Enjoy! 😉
Xx,
Jess
Why I Love My Cricut
This is a sponsored post written by me on behalf of <a href=”Cricuthttps://lnk2.io/wjcWg2L”>Cricut</a>. All opinions are 100% mine.
I have had my Cricut Explore Air 2 for a few months now, and to say I’m in love is an understatement! I’ve always been a crafter, but this things really helps me step up my game! Here I am going to talk about the 5 things that I love about my Cricut!
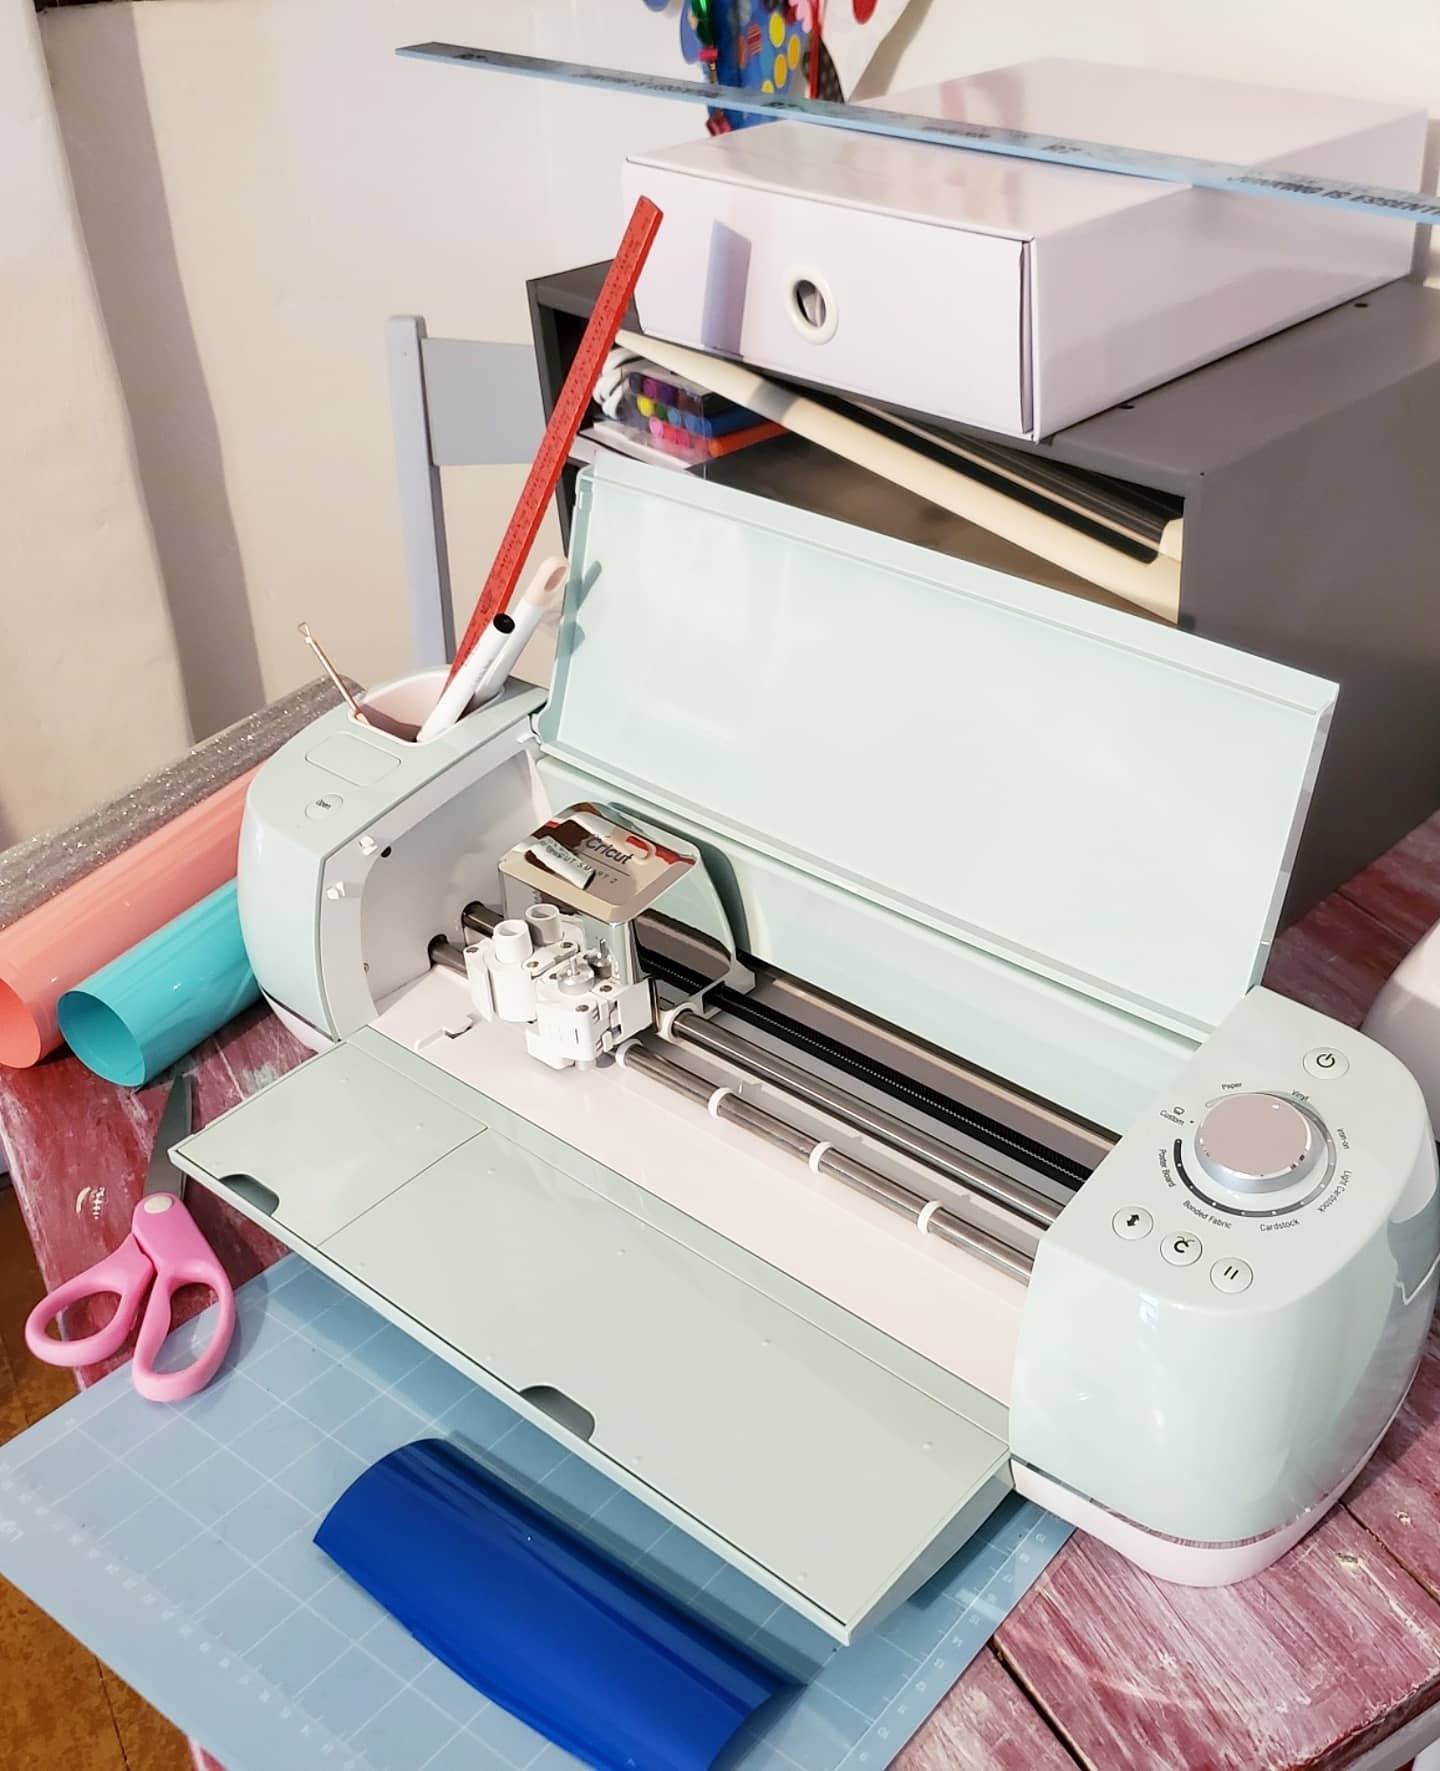
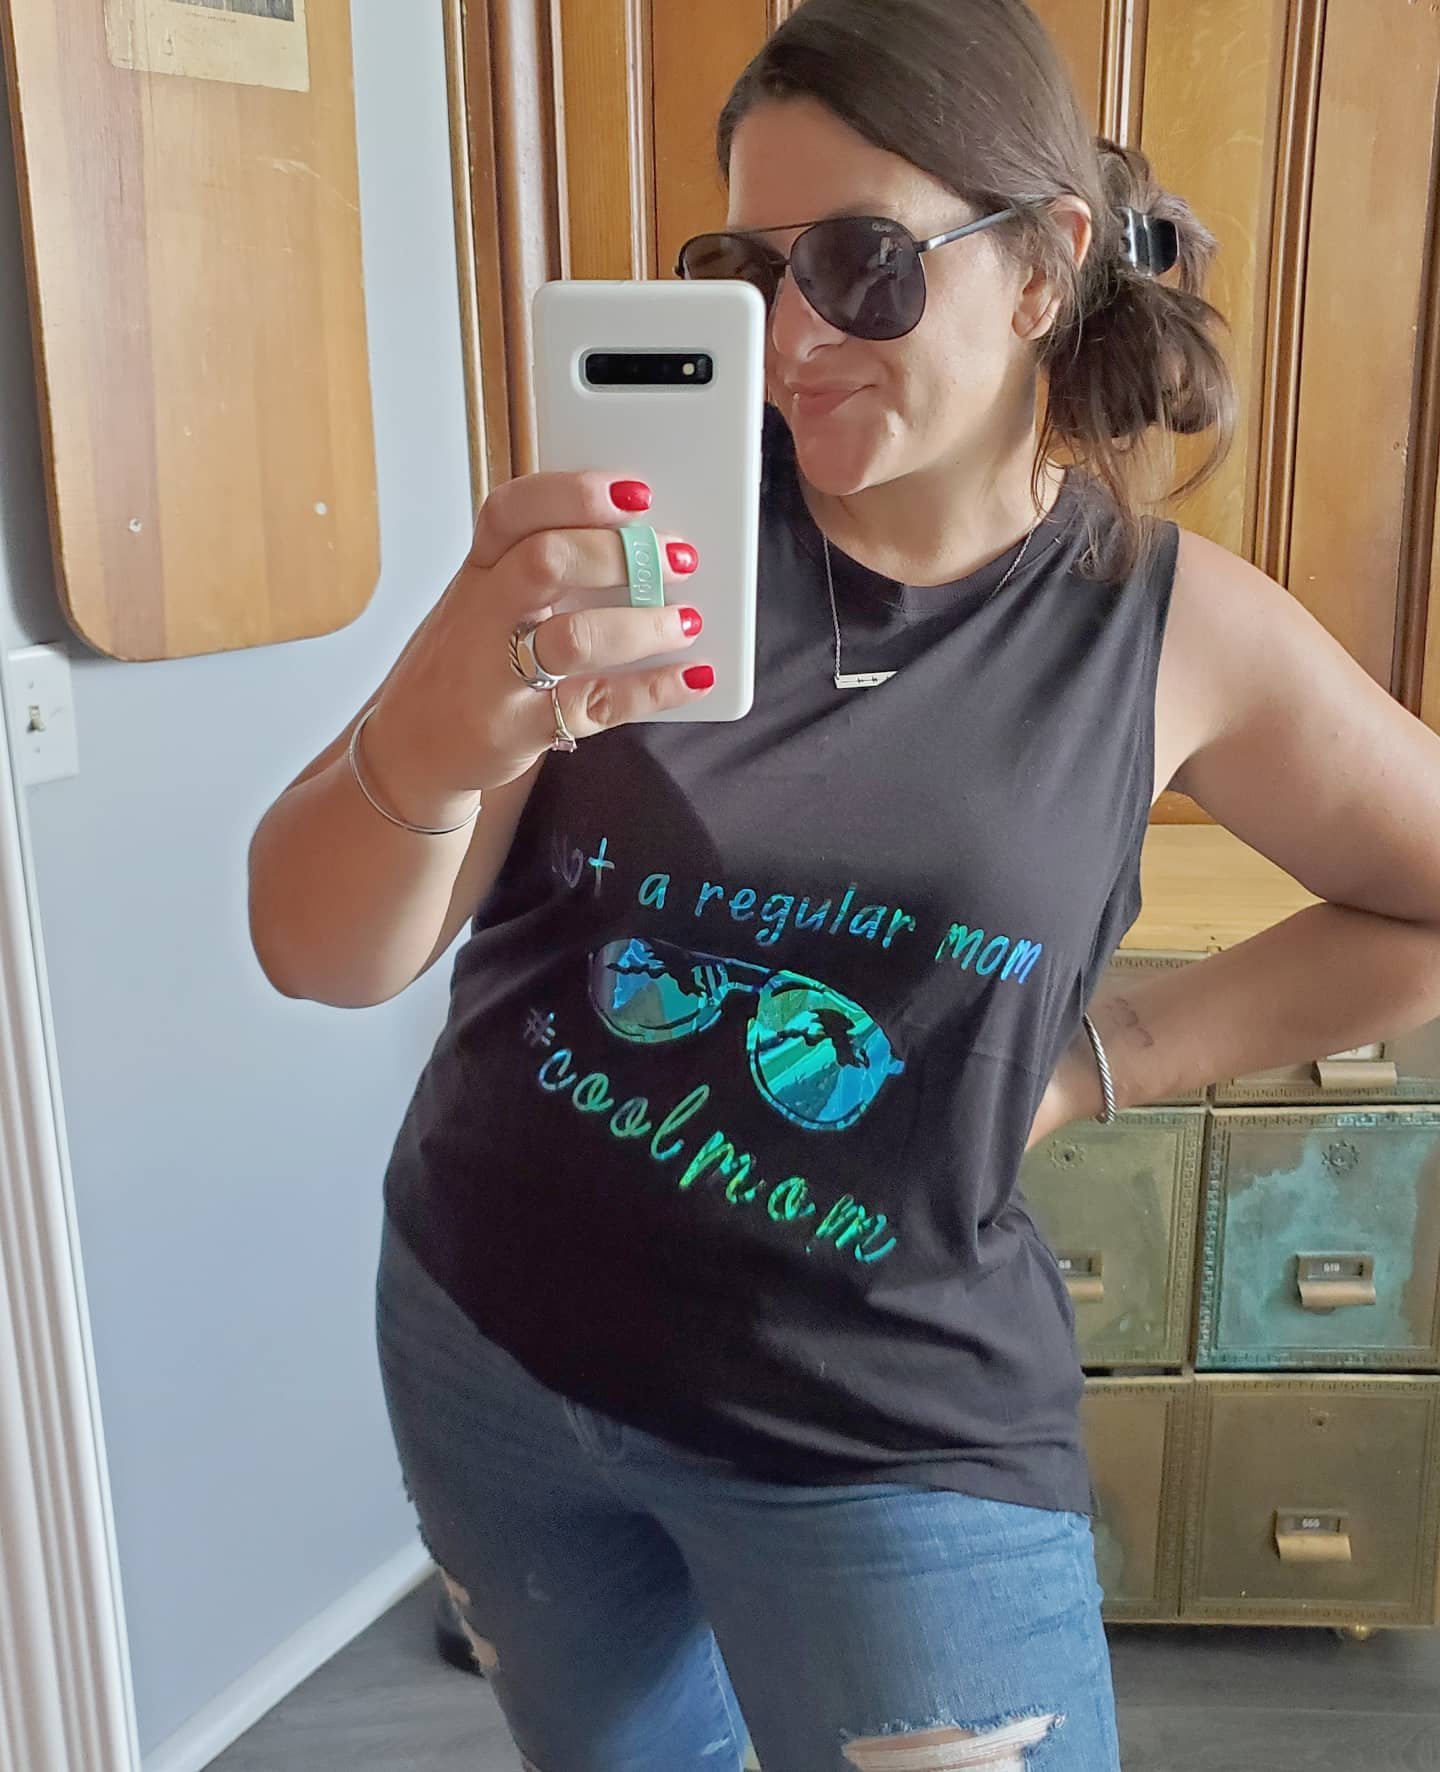
1. Its easy to use! I was truly shocked at how easy this machine is! Not going to lie, I was intimidated at first. I worried where to start and if I would be able to figure it all out. Yup. I was. Best place to start? Pick a project and jump in. They really mean it when they say their motto is “beginners luck every time.” I learn tricks and get braver each time I use my machine, but I definitely agree that picking a beginner level project and diving in head first is a great way to start and will prove to you how easy it is! Check out this shirt I made as one of my very first projects:
2. Support! That brings me to the second thing I love about my Cricut. Its like having a whole community of creators to support you. Have a question? Worried about where to begin or which type of project to do? They’ve got an answer! Not only does Cricut have a team you can email or chat with, but they have numerous pages where you can reach out to their pros or other crafters with tons of experience. They’ve all started somewhere and learned lots and are at the ready to make sure you love your machine and projects. I would know. I wasn’t sure how to customize the design I wanted to make myself for this bag, and the Facebook page group had almost immediate answers for me!

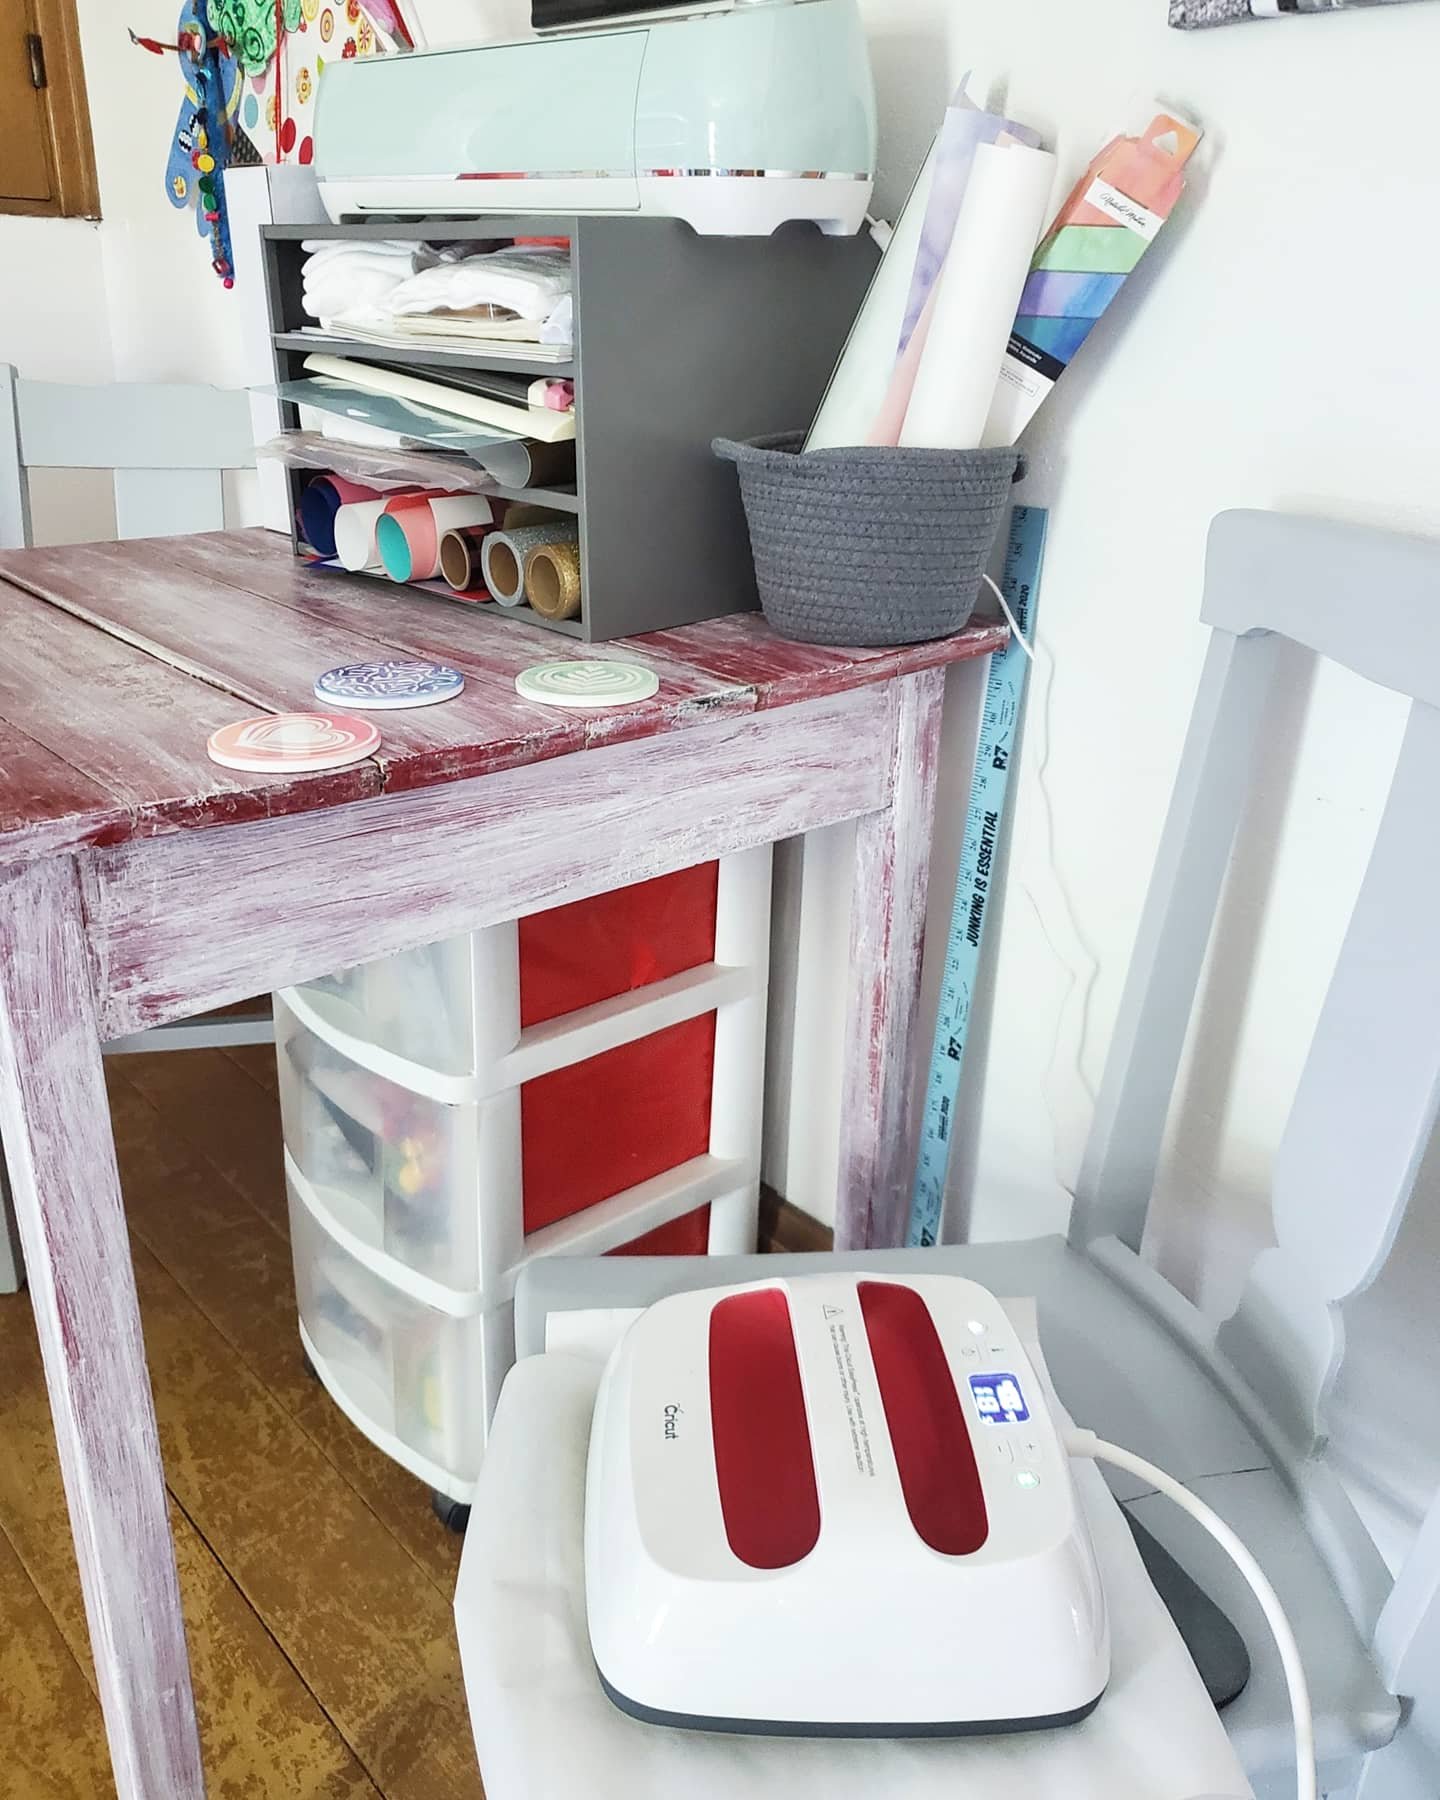
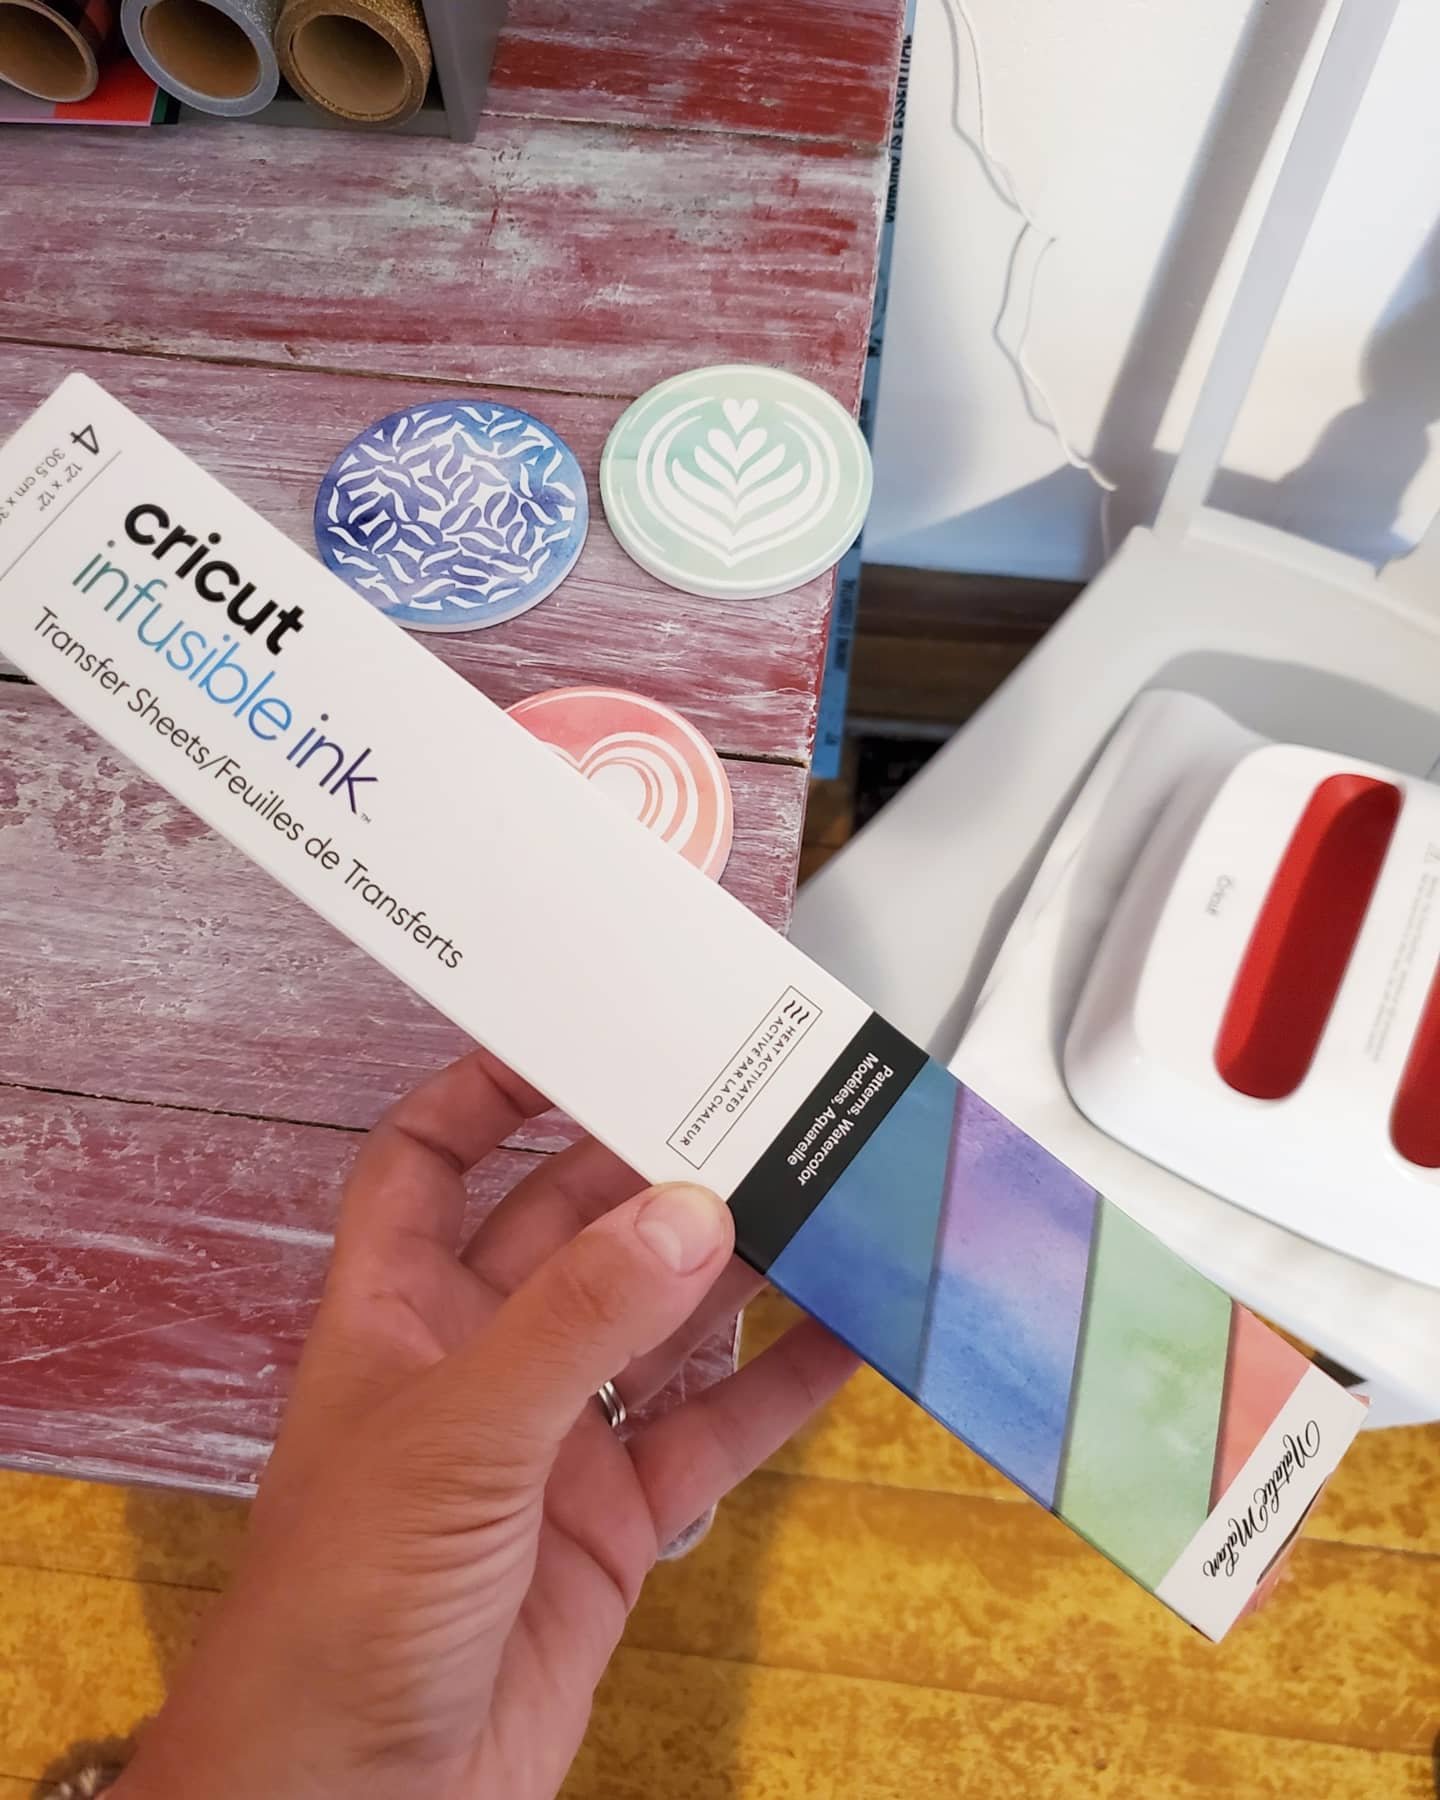
3. Ideas! This also leads me to another thing I love about Cricut, the ideas! I never worry about having a creative block. There’s no way. The ideas of projects to make are endless, for every single occasion you cak dream of. Really. You can find ideas galore on Pinterest, and Instagram, or Cricuts’s Facebook page. And my favorite place for inspiration? The Cricut emails! They send seasonal emails showing the new ideas and templates added to Design Space, their app for making. How did I know about the new infusible ink and coaster blanks to make these? One of their idea emails! Light bulb!

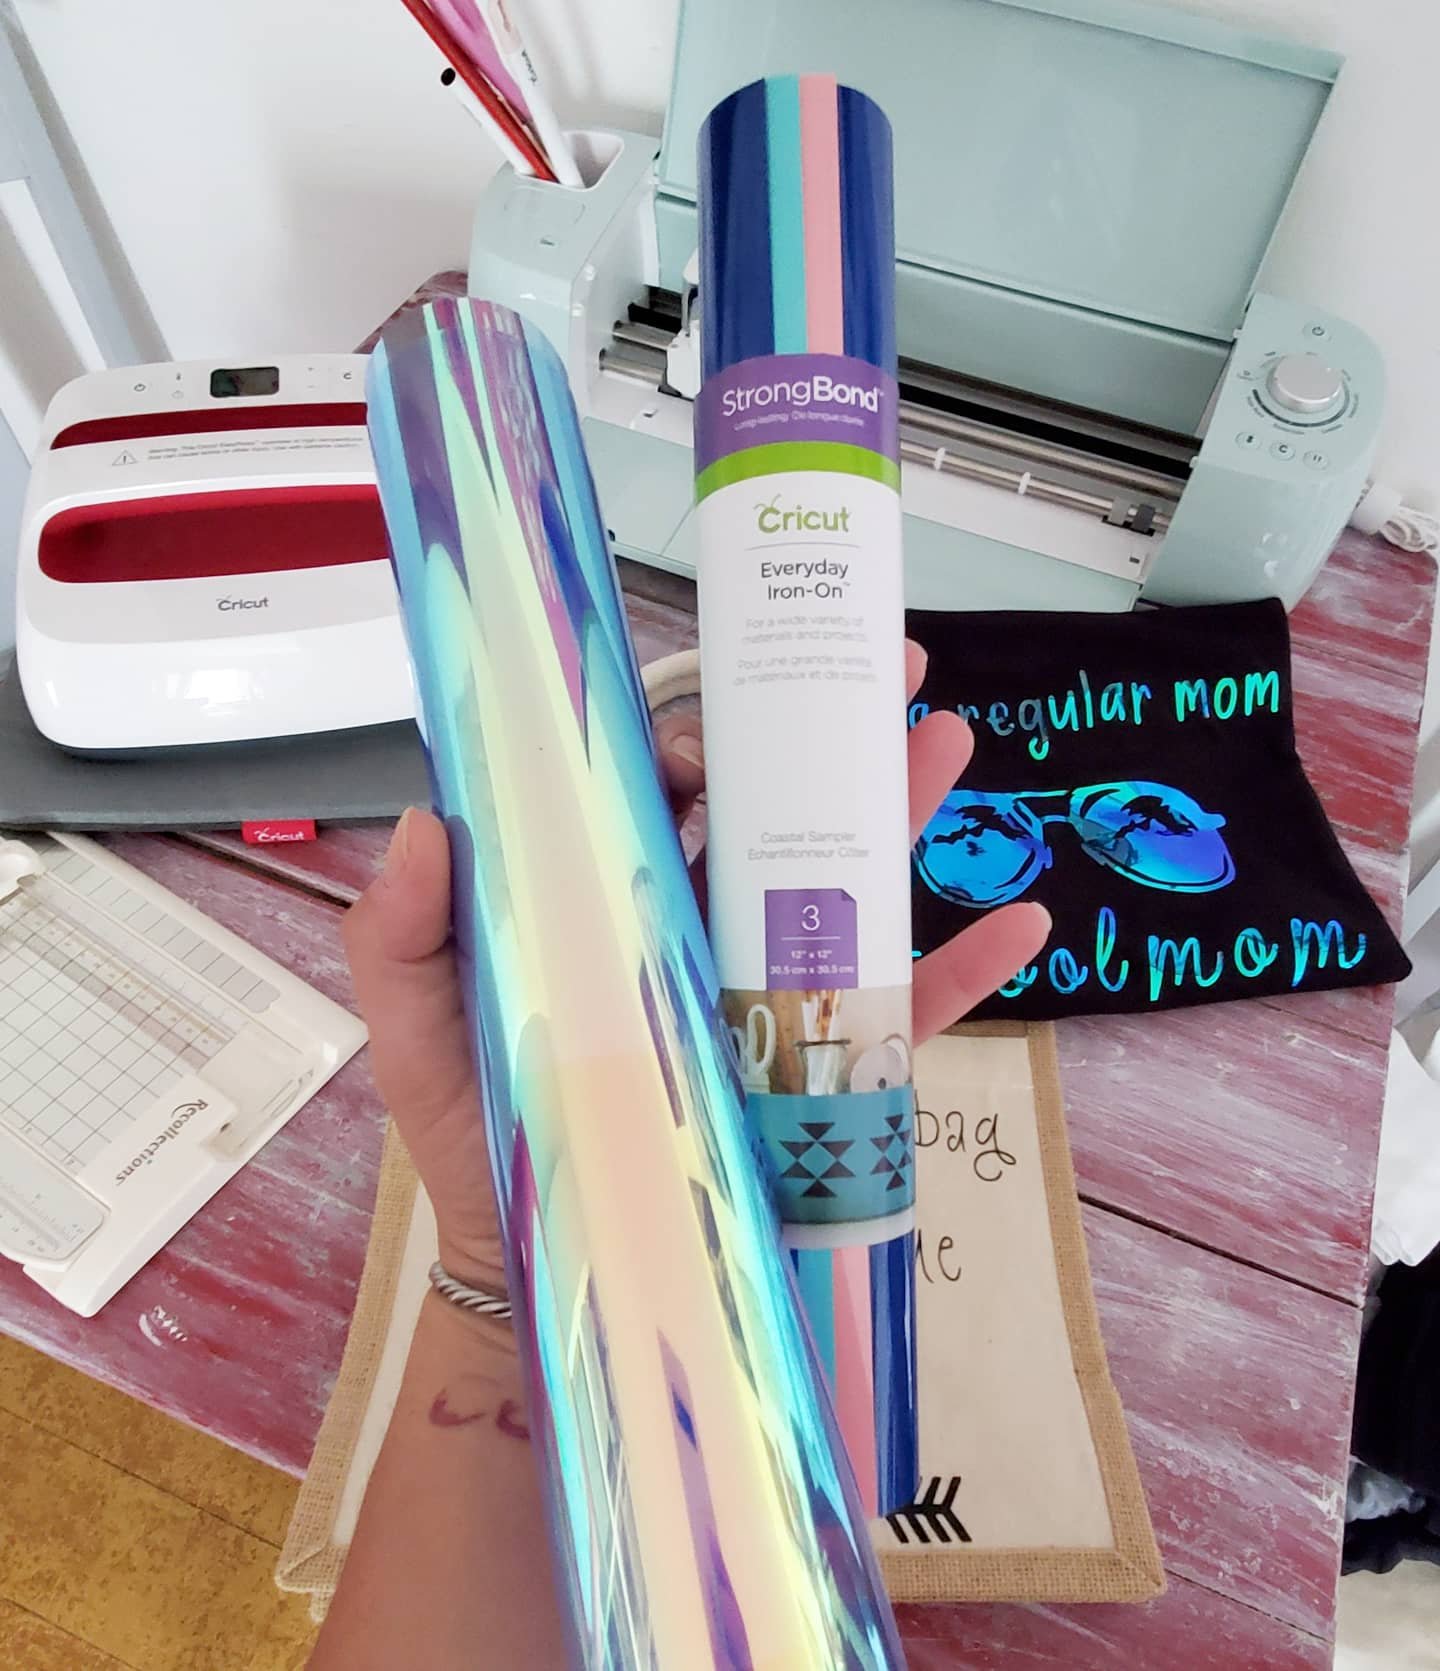
4. The options! Got a bright idea to make? You can! And Cricut can help you do it! The options they supply for you is endless. Or almost. Not only do they help with the ideas, but they make it easy to find all of the supplies you need to make visions come to fruition. They have coasters, bags, shirts, materials, pens, markers, vinyls, decals, iron ons, and the widest variety of patterns in their supplies you could imagine! Sparkles, holographics, leopard, wood grain…their possibilities are never ending! Not to mention, cricut has other machines like the EasyPress, and tools like mats, cutters, Nd weeders, to make all of the options come to life!

5. Capabilities! This machine not only cuts paper and vinyls. I was shocked to learn what all it really can do. Like blown away. It can cut leather, poster board, felt, fabric and even wood. But it doesn’t just cut, it can score. And it can draw! Yup! Shocked?! Me too. You can insert pens and markers into the blade holder and it can draw or write, making handmade cards, letters, signs… mind blown.
The capabilities combined with the Cricut options alone shows you that the possibilities are truly endless. I cannot wait to do another project every time I finish one! And now all of my gifts will be one of a kind made by yours truly!
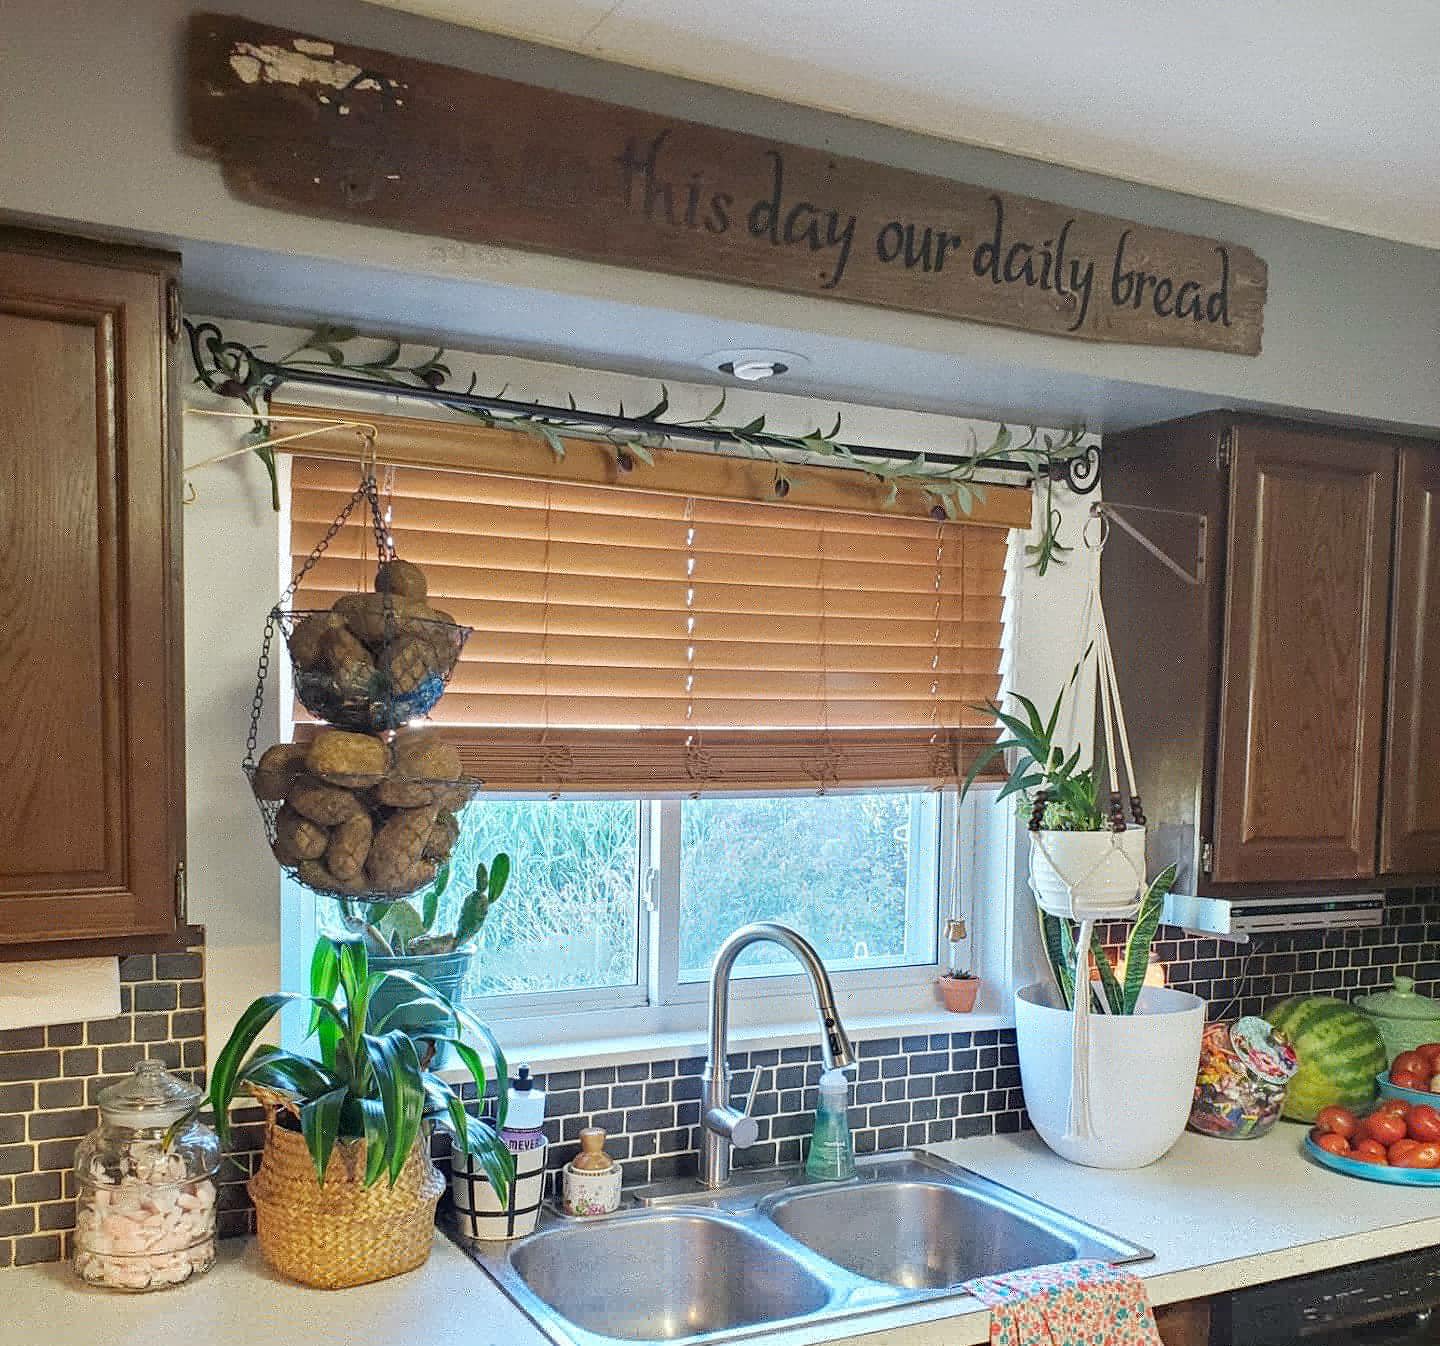
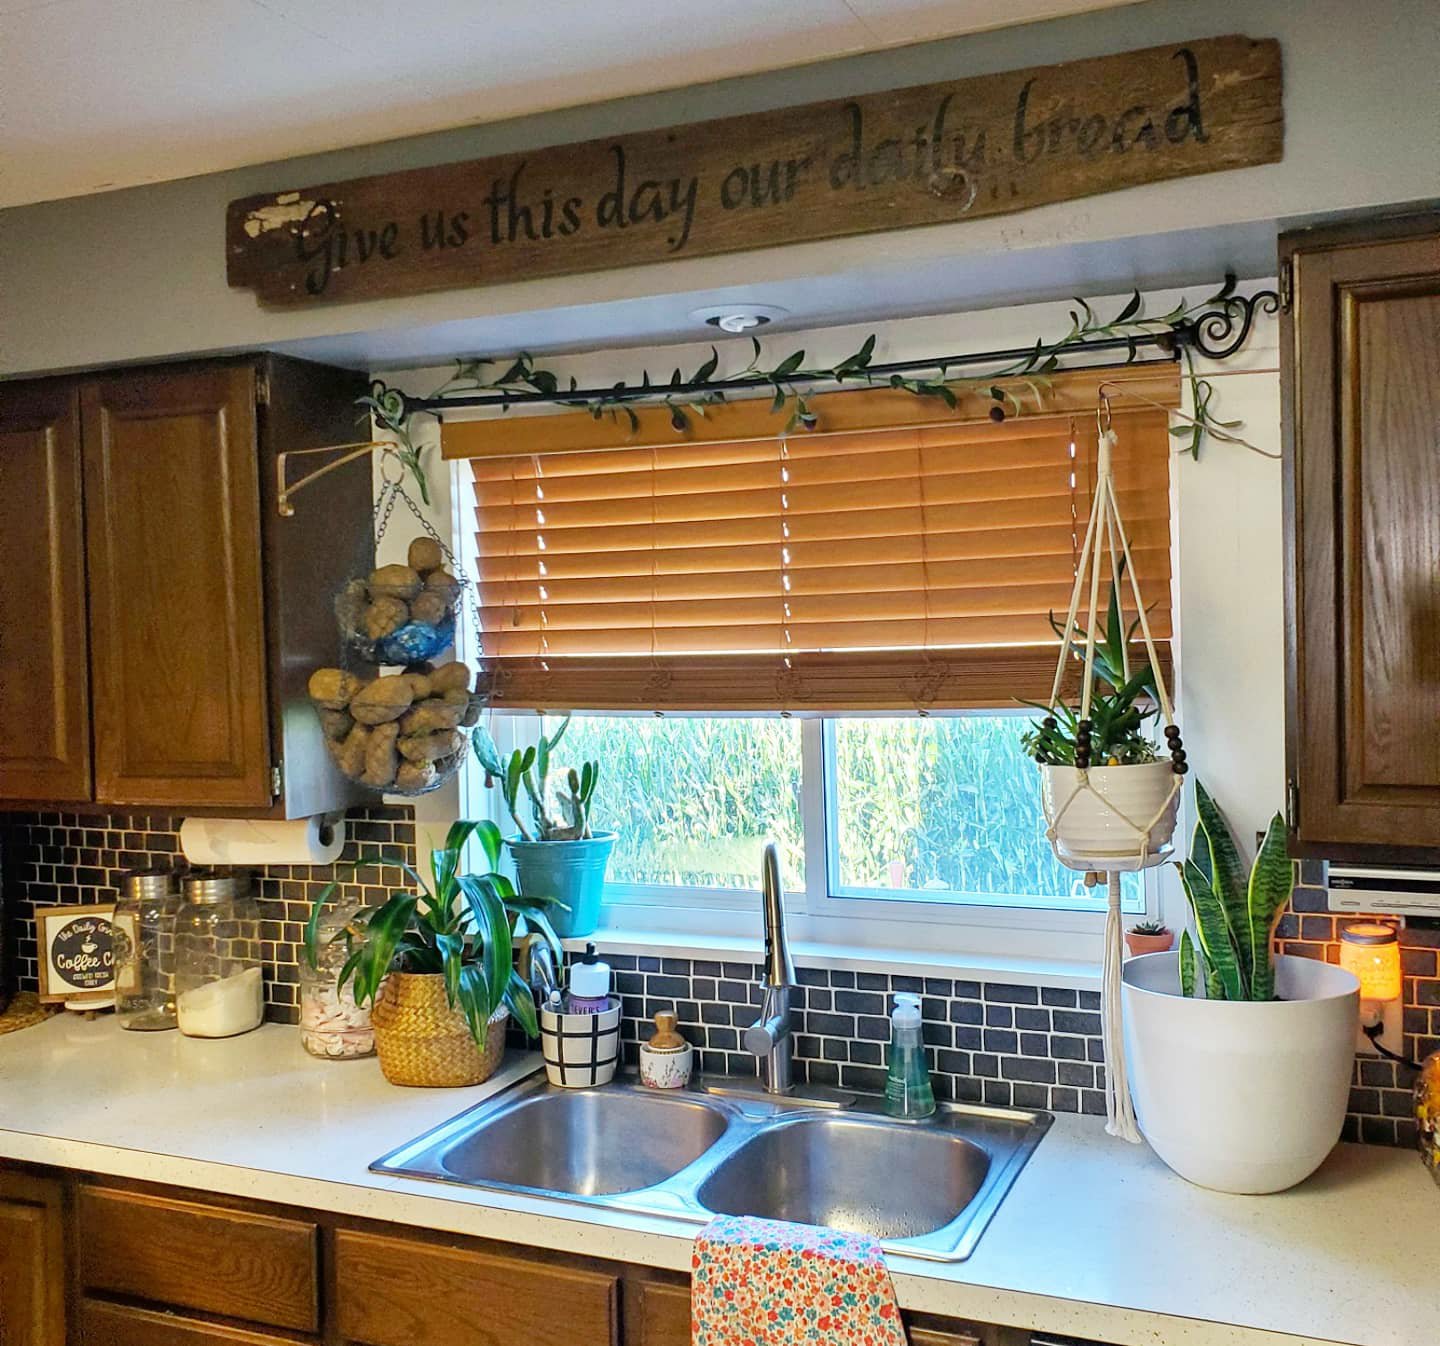
Here’s a quick breakdown of my latest project, a sign for our kitchen.
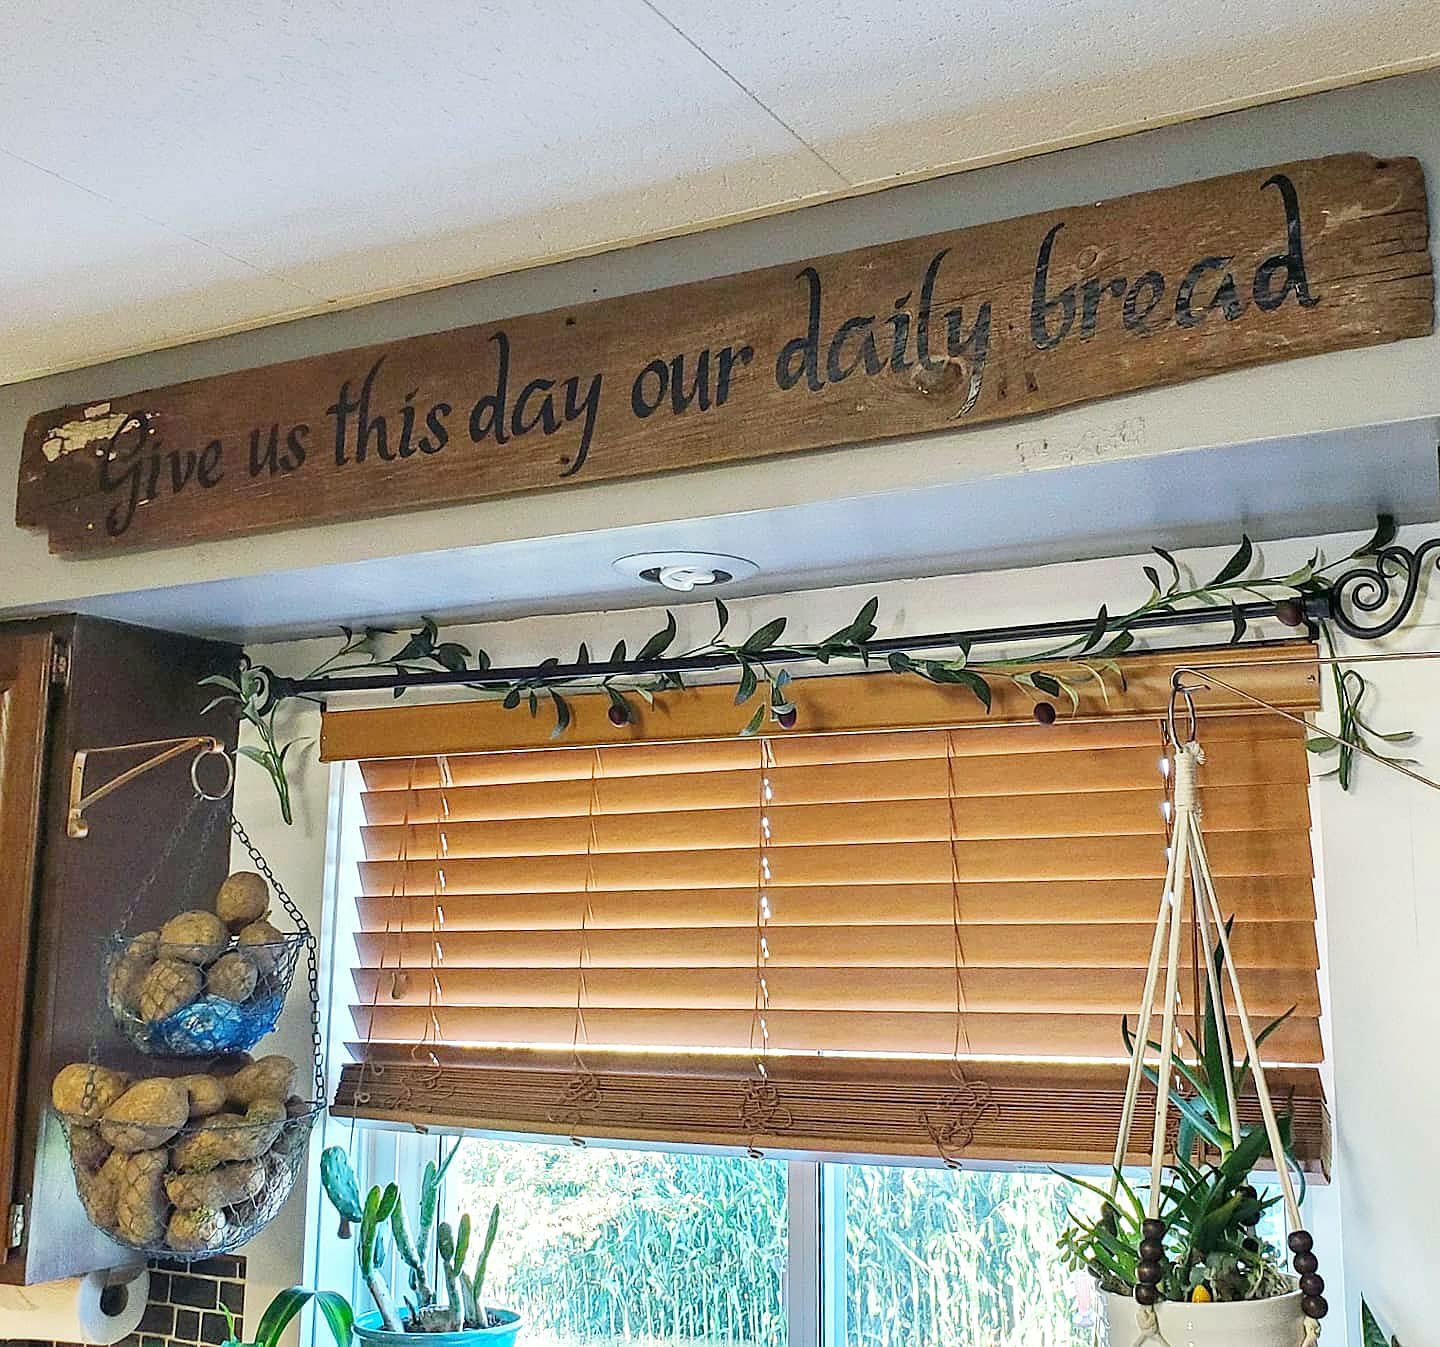
Choose a board and a quote. My board is a faded, chipped, barn board from our barn. (I’m sure to some the white paint left on one corner and the odd shape caused by years of cattle wear are not pretty, but we loved this board! 😉
Then, start on the Design Space app, and find my design template here. My board is 5ft long, but you can edit the design to adjust measurements. Once you send the design to the machine and it cuts it on vinyl, weed the excess pieces out. Use transfer tape to pick up your design and stick it down in place on your board. You could add flourishes to the ends of your quote too! You can change this design and even choose your own color vinyl. I used matte clear coat over the board to ensure no edges lift since I chose an old, rippled barn board for my project. Add a hanger or two on the back and hang. Easy peasy and a great one-of-a-kind, beginner-friendly project!
Have questions? Need help or ideas? Just ask! 😘
XX,
Jess
Quarantine Ideas
We remind the kids every day that we are “safe at home”, not “stuck at home”. And truly, we are blessed. But, sometimes it can be a little overwhelming having everyone here full time. I want to keep them all entertained, educated, occupied, happy…
Here are just a few ideas that may help during this time!
1. Follow my craft idea board on Pinterest! I add ideas to it as I see them, so check it out for some of the things we have tried and some we still hope to try!
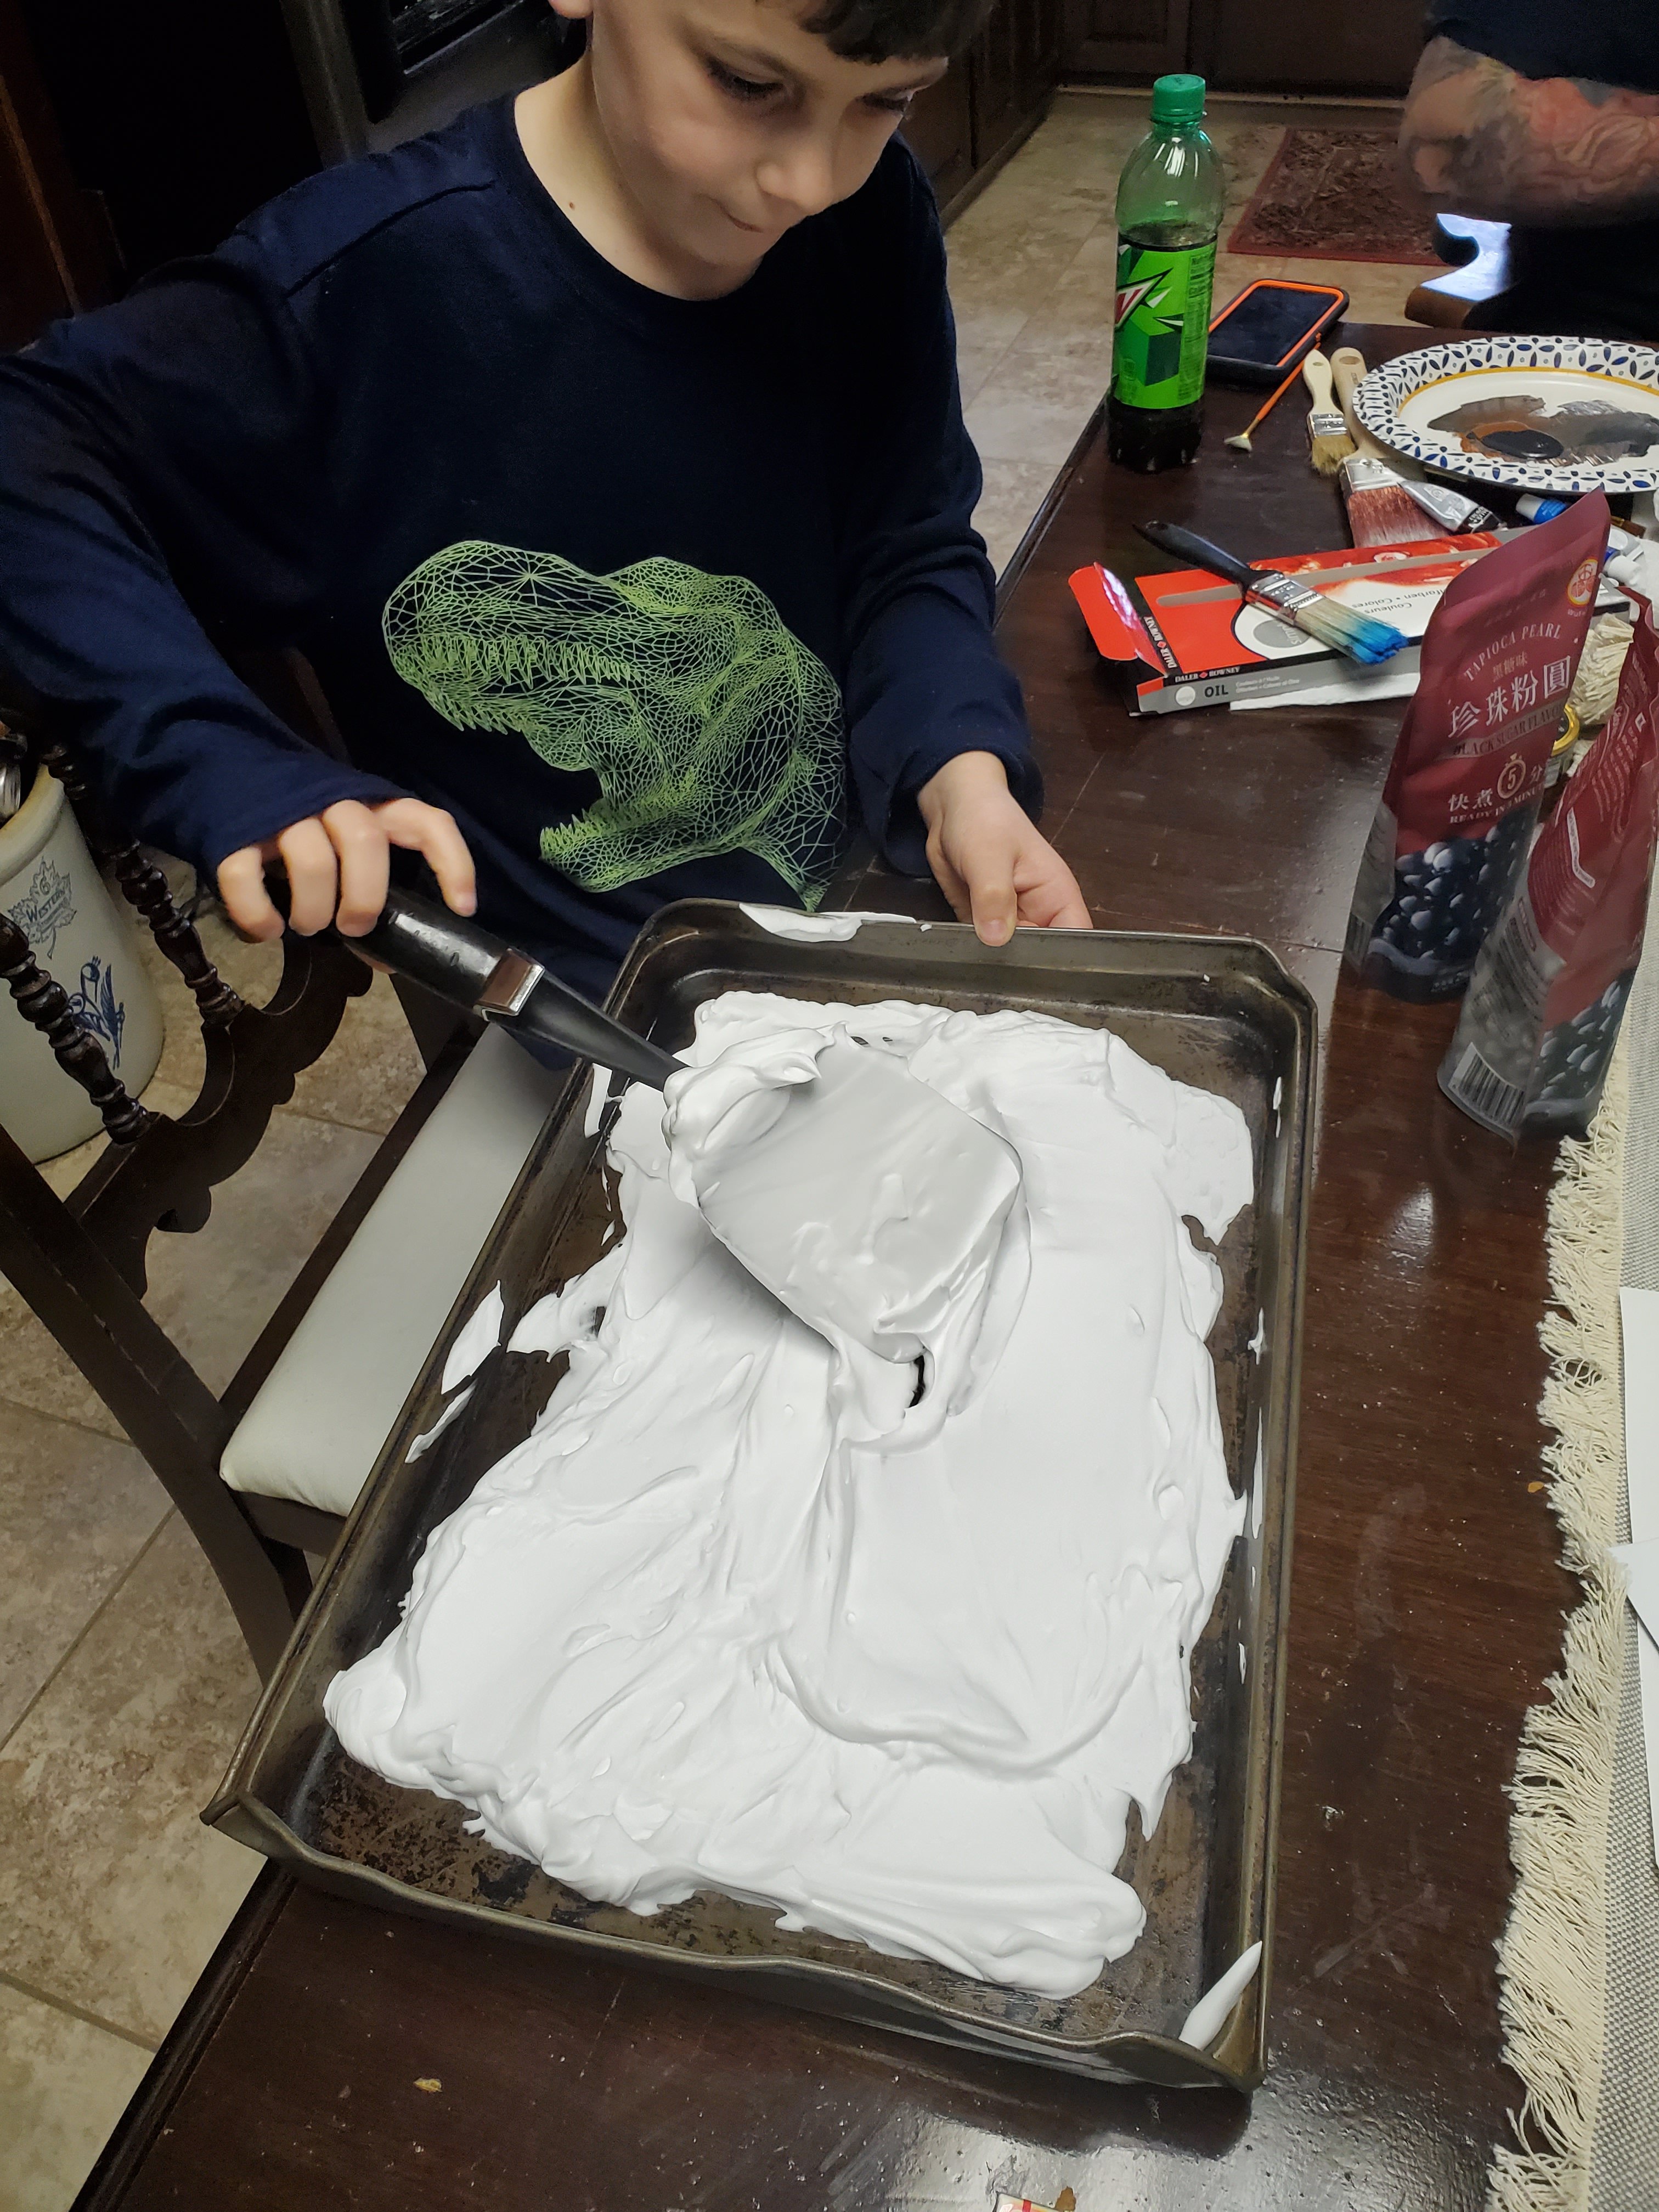
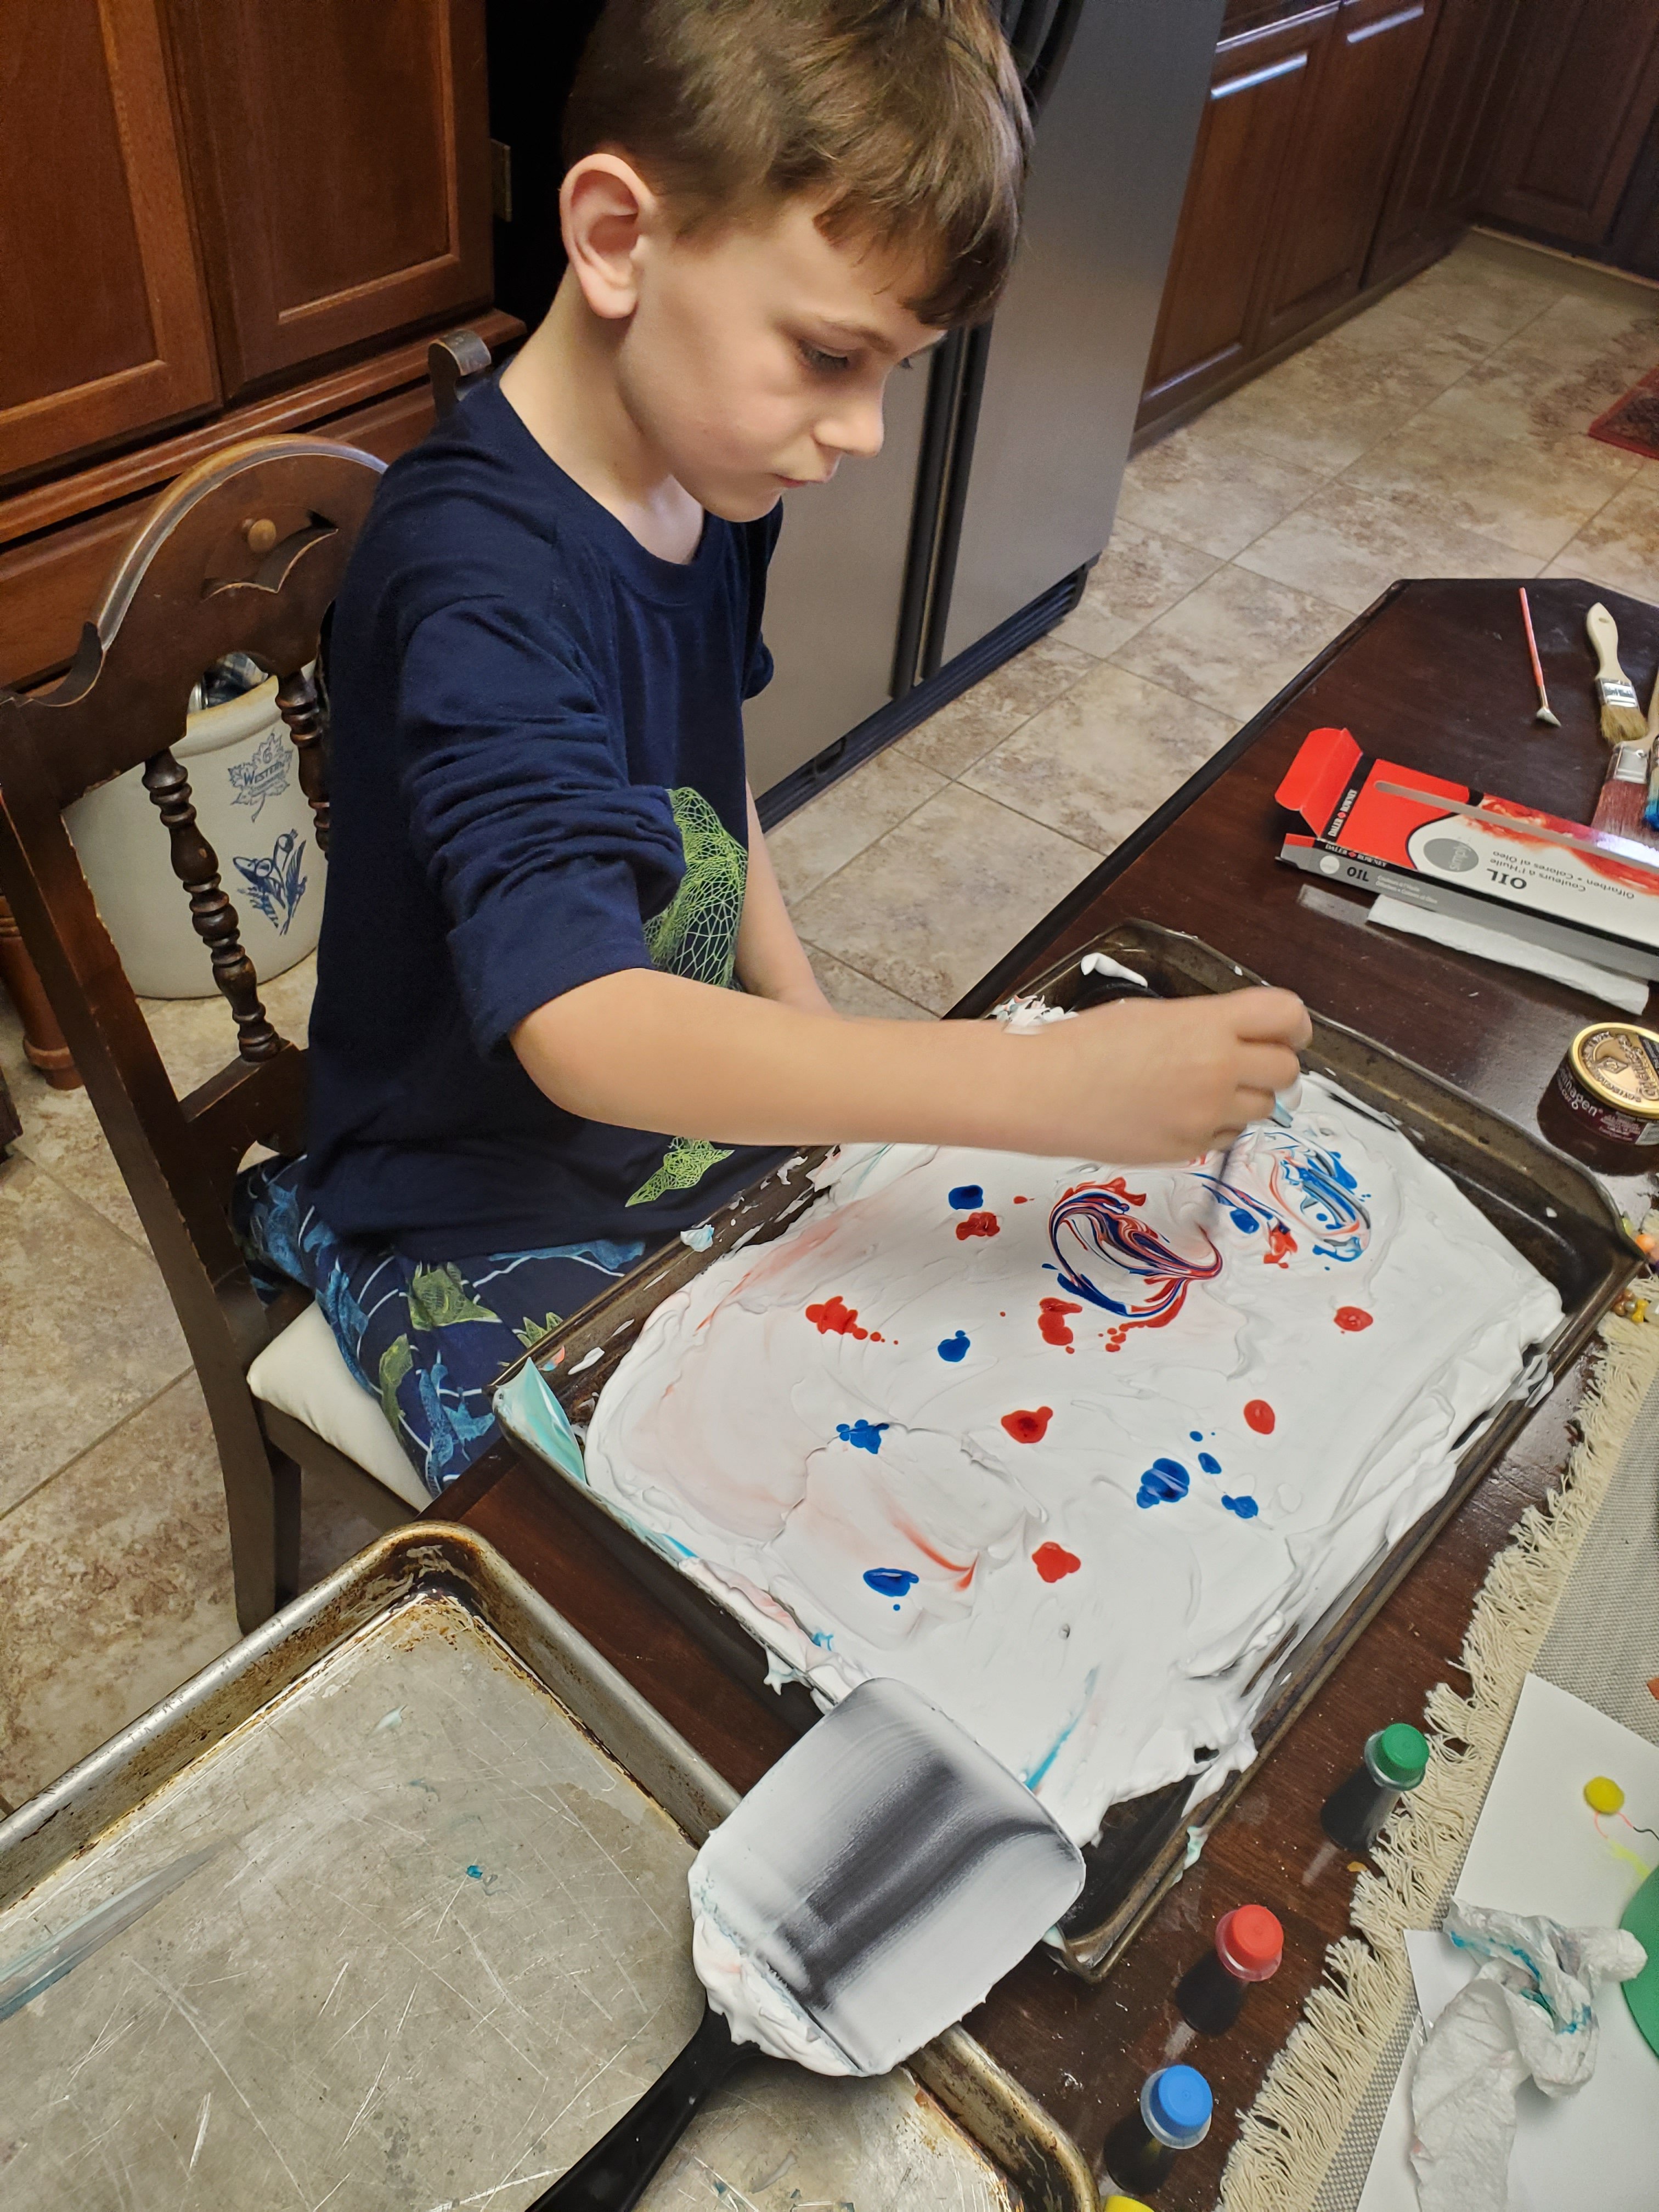
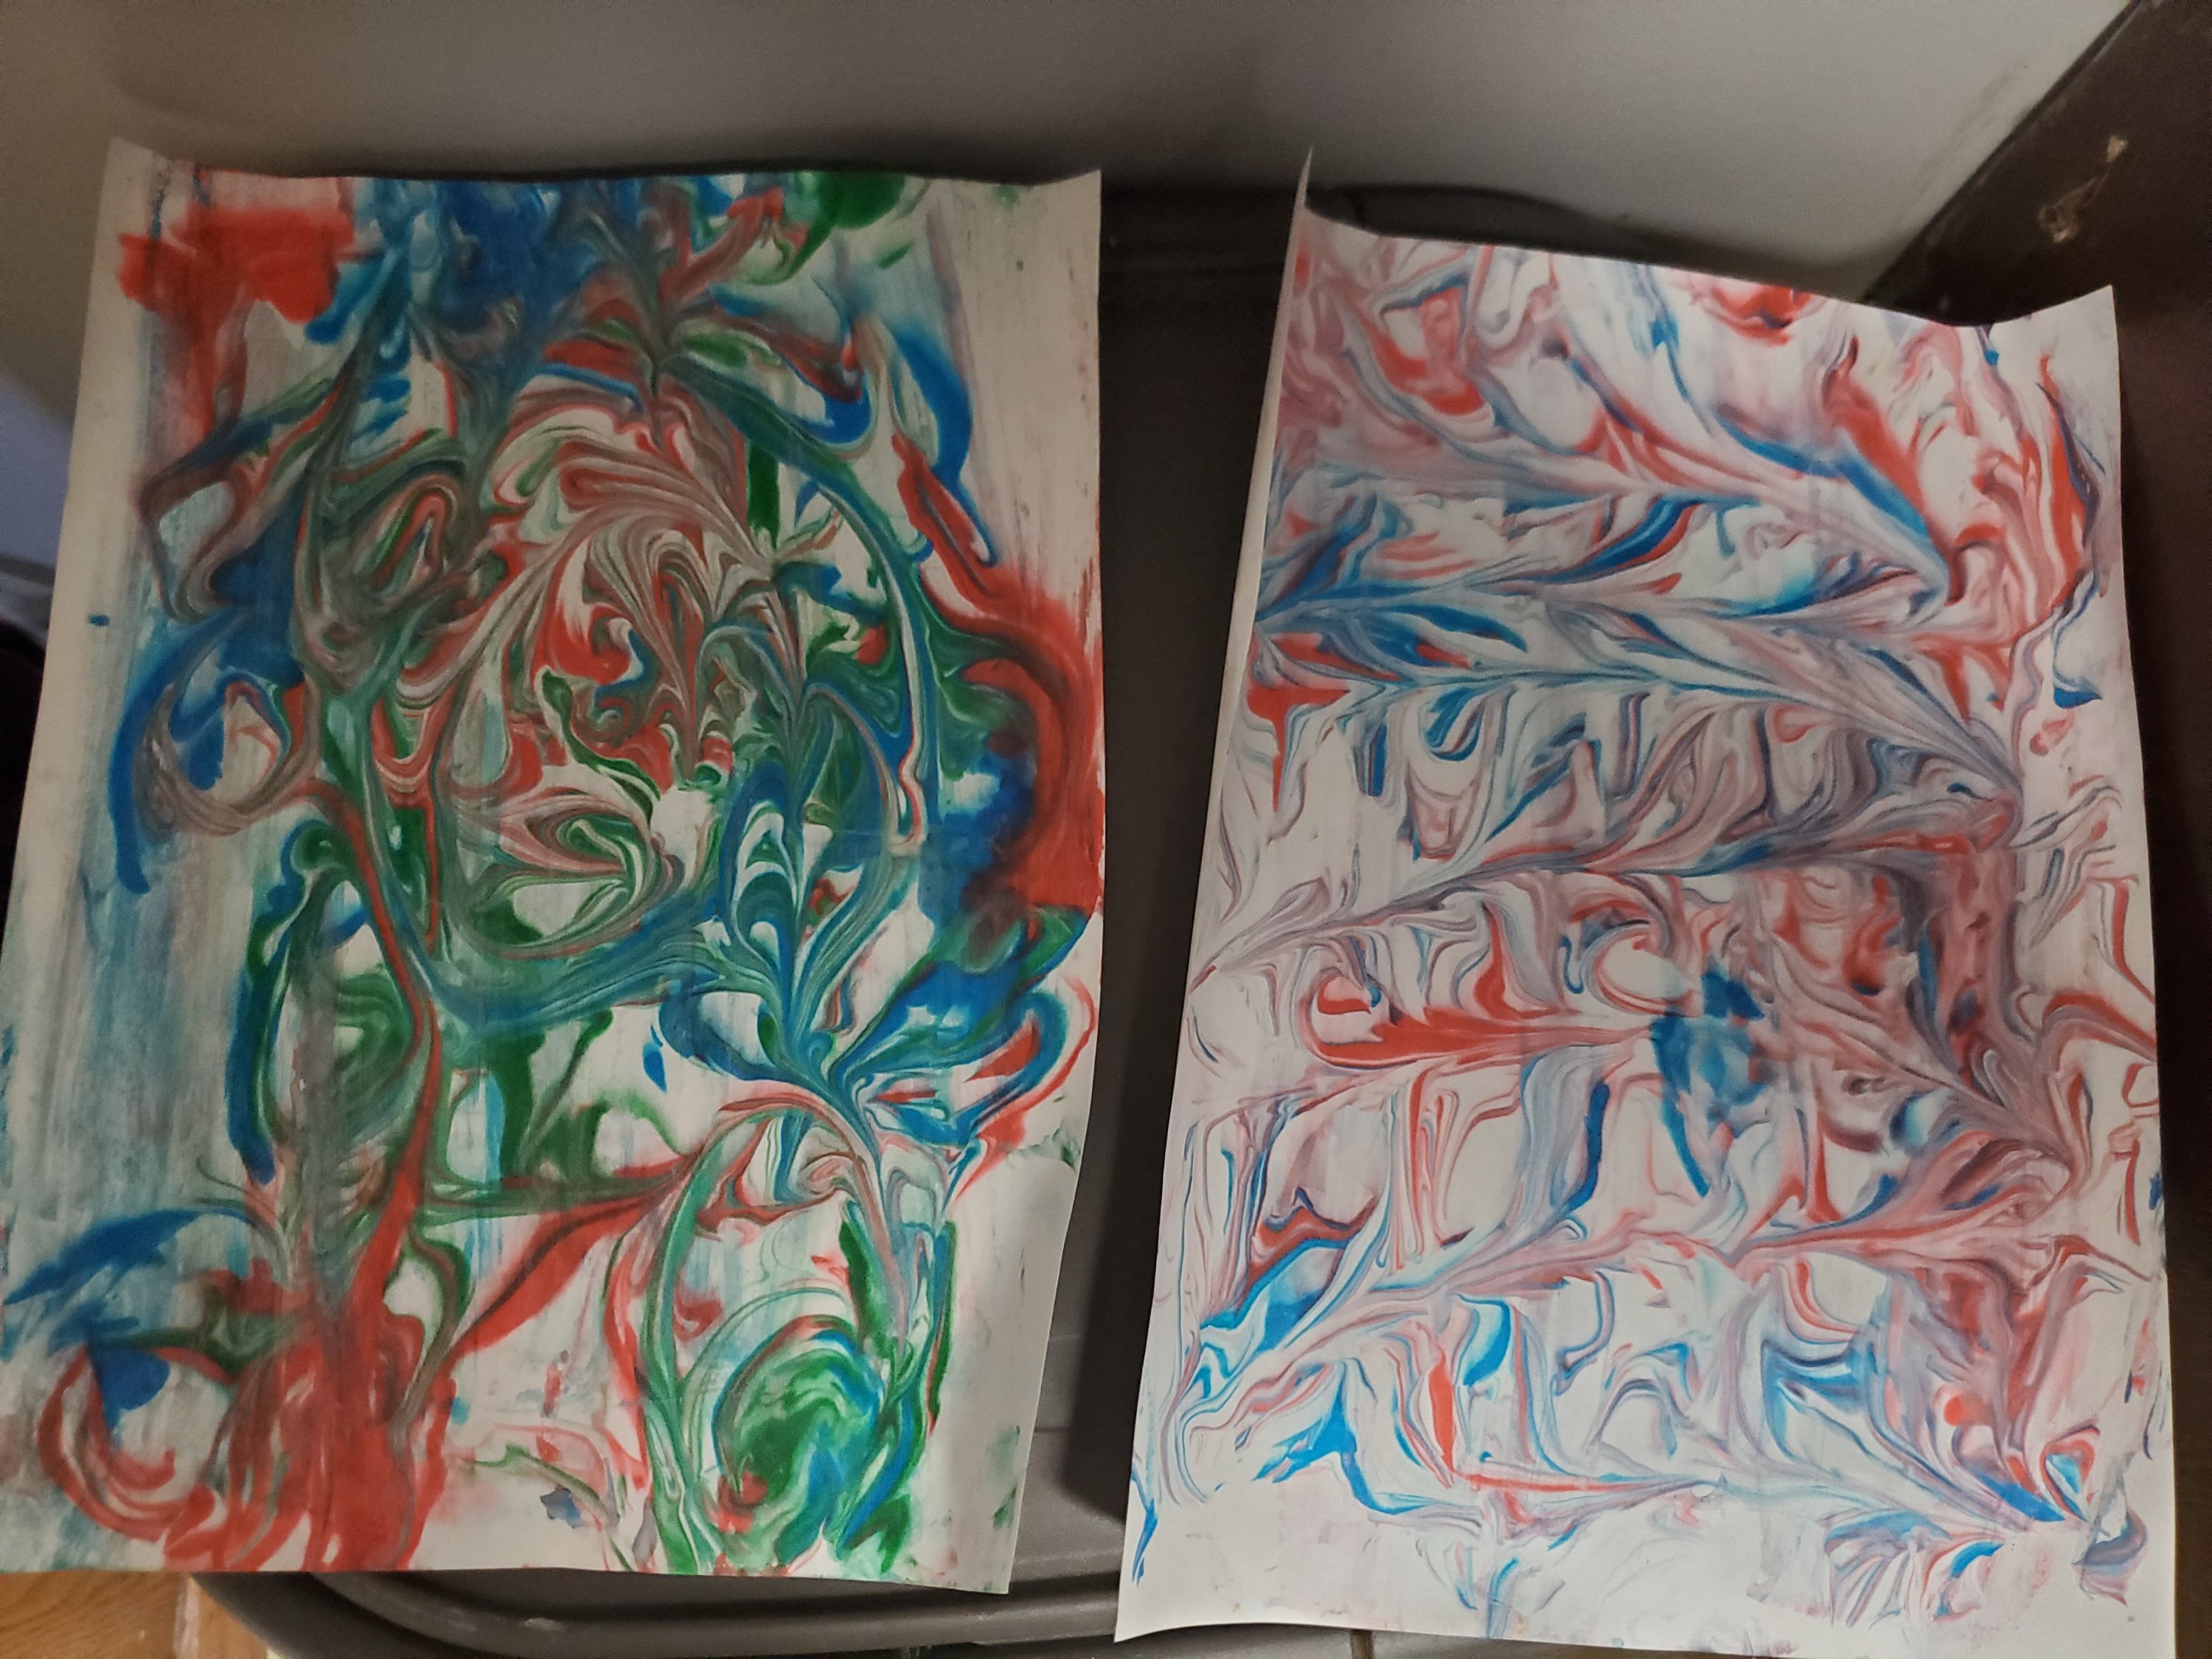
We have loved some of these! One true favorite was shaving cream art! Smear down shaving cream in a pan, add drops of food coloring and swirl them in any pattern with the end of a paintbrush. Lay a thick piece of paper on the colored cream and press. Lift up and scrape cream off the paper with a spatula. Look what it leaves behind!
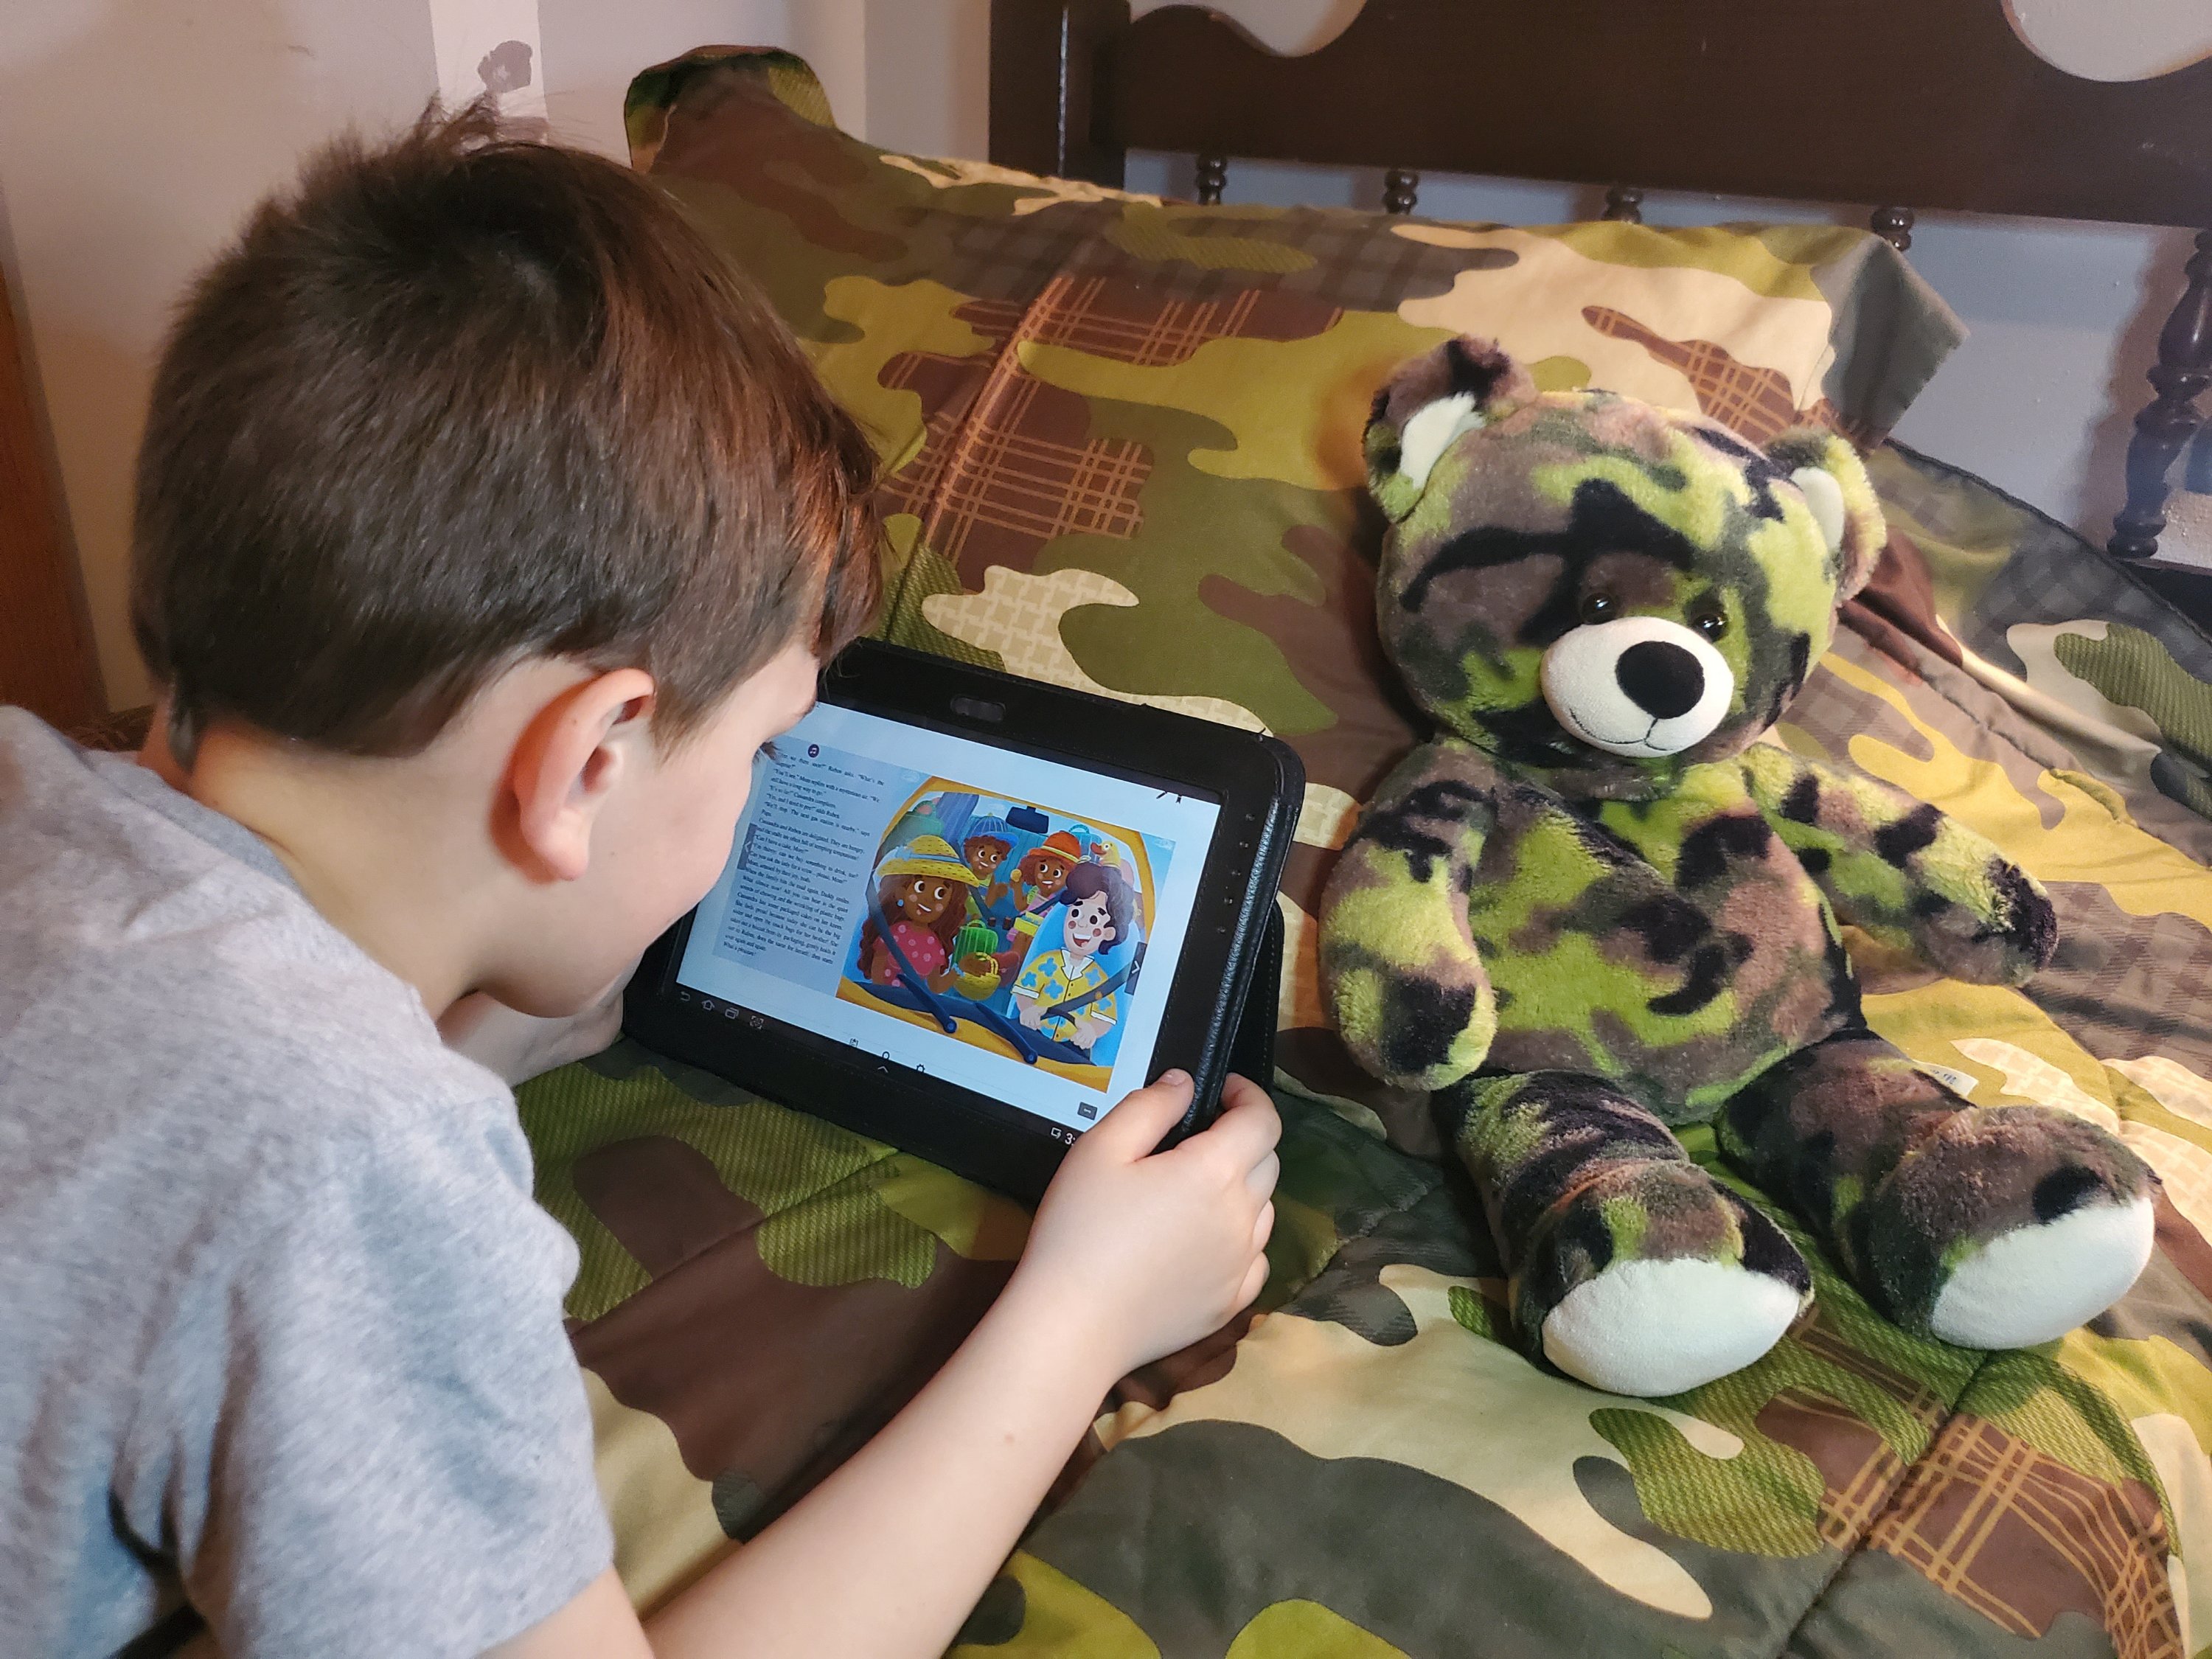
2. Educational apps that make learning fun! I know we all try to limit screen time. But we all need a break and a little help too! There are several we love, but one that the 6 year old can use by himself is Book Prunelle. It’s an ebook platform for kids , featuring powerful stories to inspire them to become the next generation of conscious kids. They tackle challenging topics in an entertaining and child-friendly way to help kids grown mindful and kind-hearted. Cool, right?!
You pay for a subscription by month or year, but right now you can try the first month for free! And you can use the code JESSIMARIEL5 off of either subscription too!
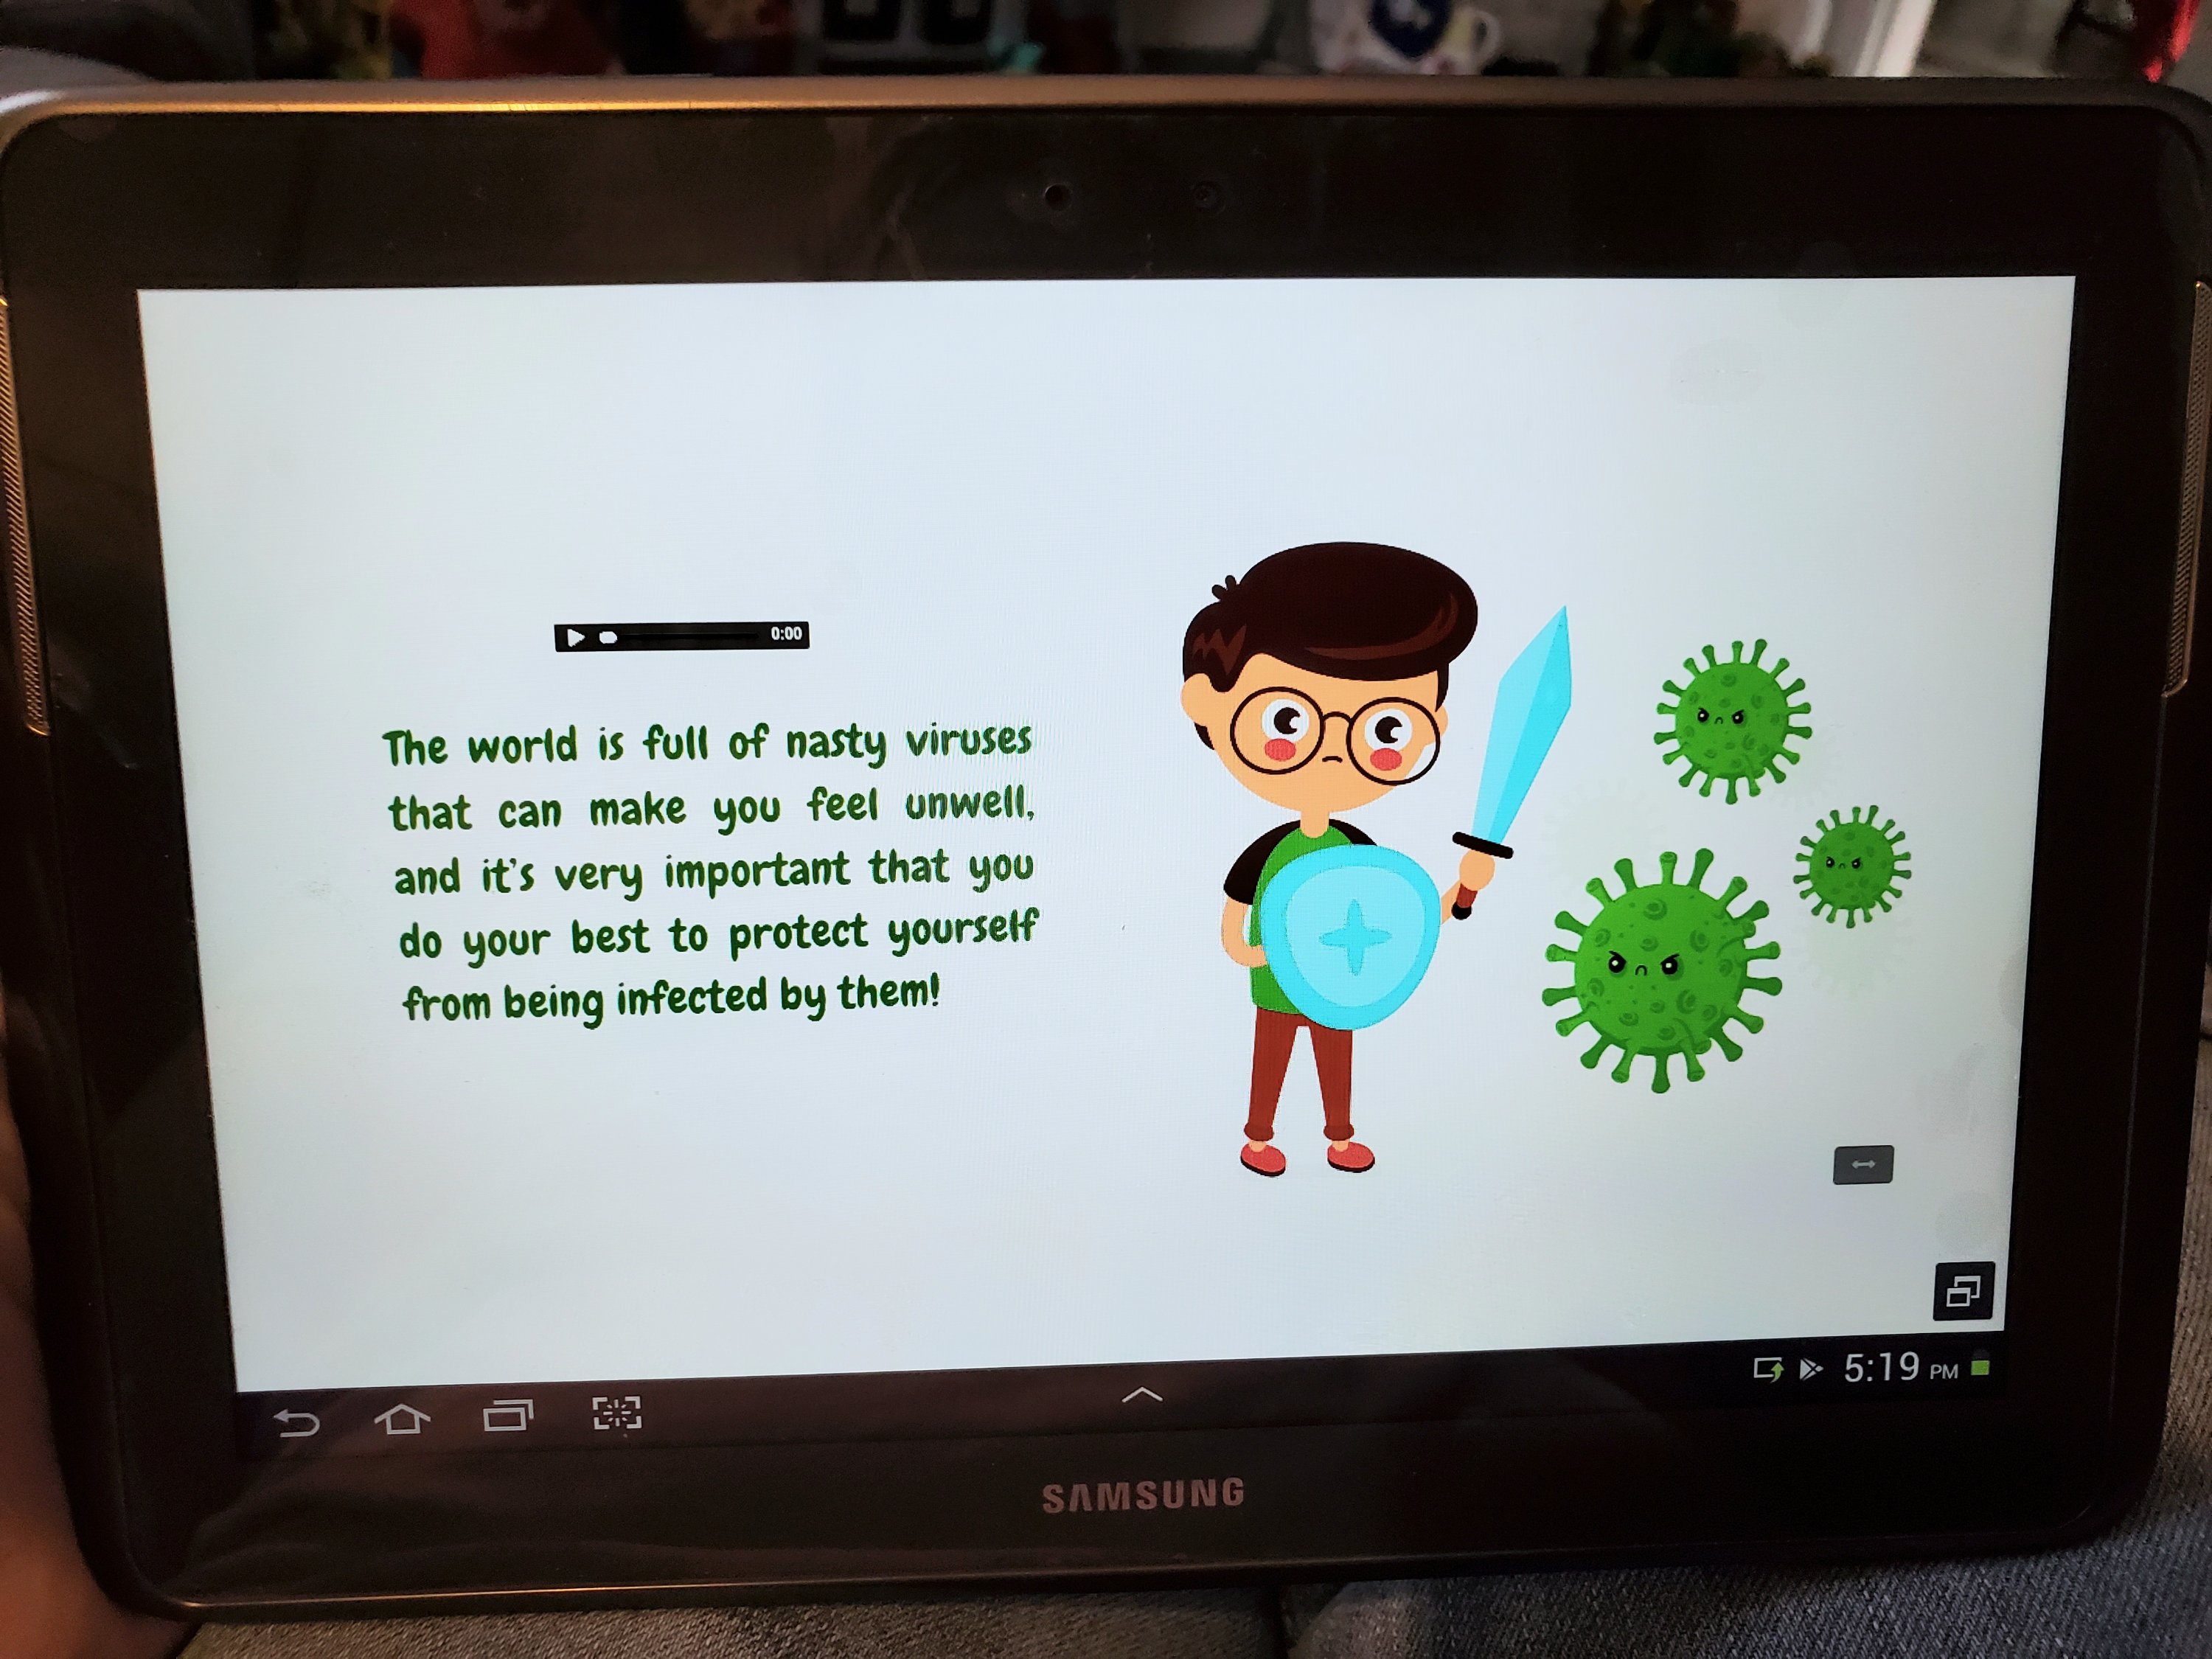
They have books like this one explaining the Corona Virus in terms kids understand!
3. Read with Dolly on Thursdays! The boys both loved this for some reason! Dolly Parton reads a story live on YouTube every Thursday and saves it to her channel to watch anytime. The boys were glued. And mom cleaned the kitchen! 😉
4. Duo appto facetime anyone. Maybe you knew about this? I did not, but was so happy to learn! With this app, any type of phone can video call one another. Now the kids can video call with grandma and grandpa!
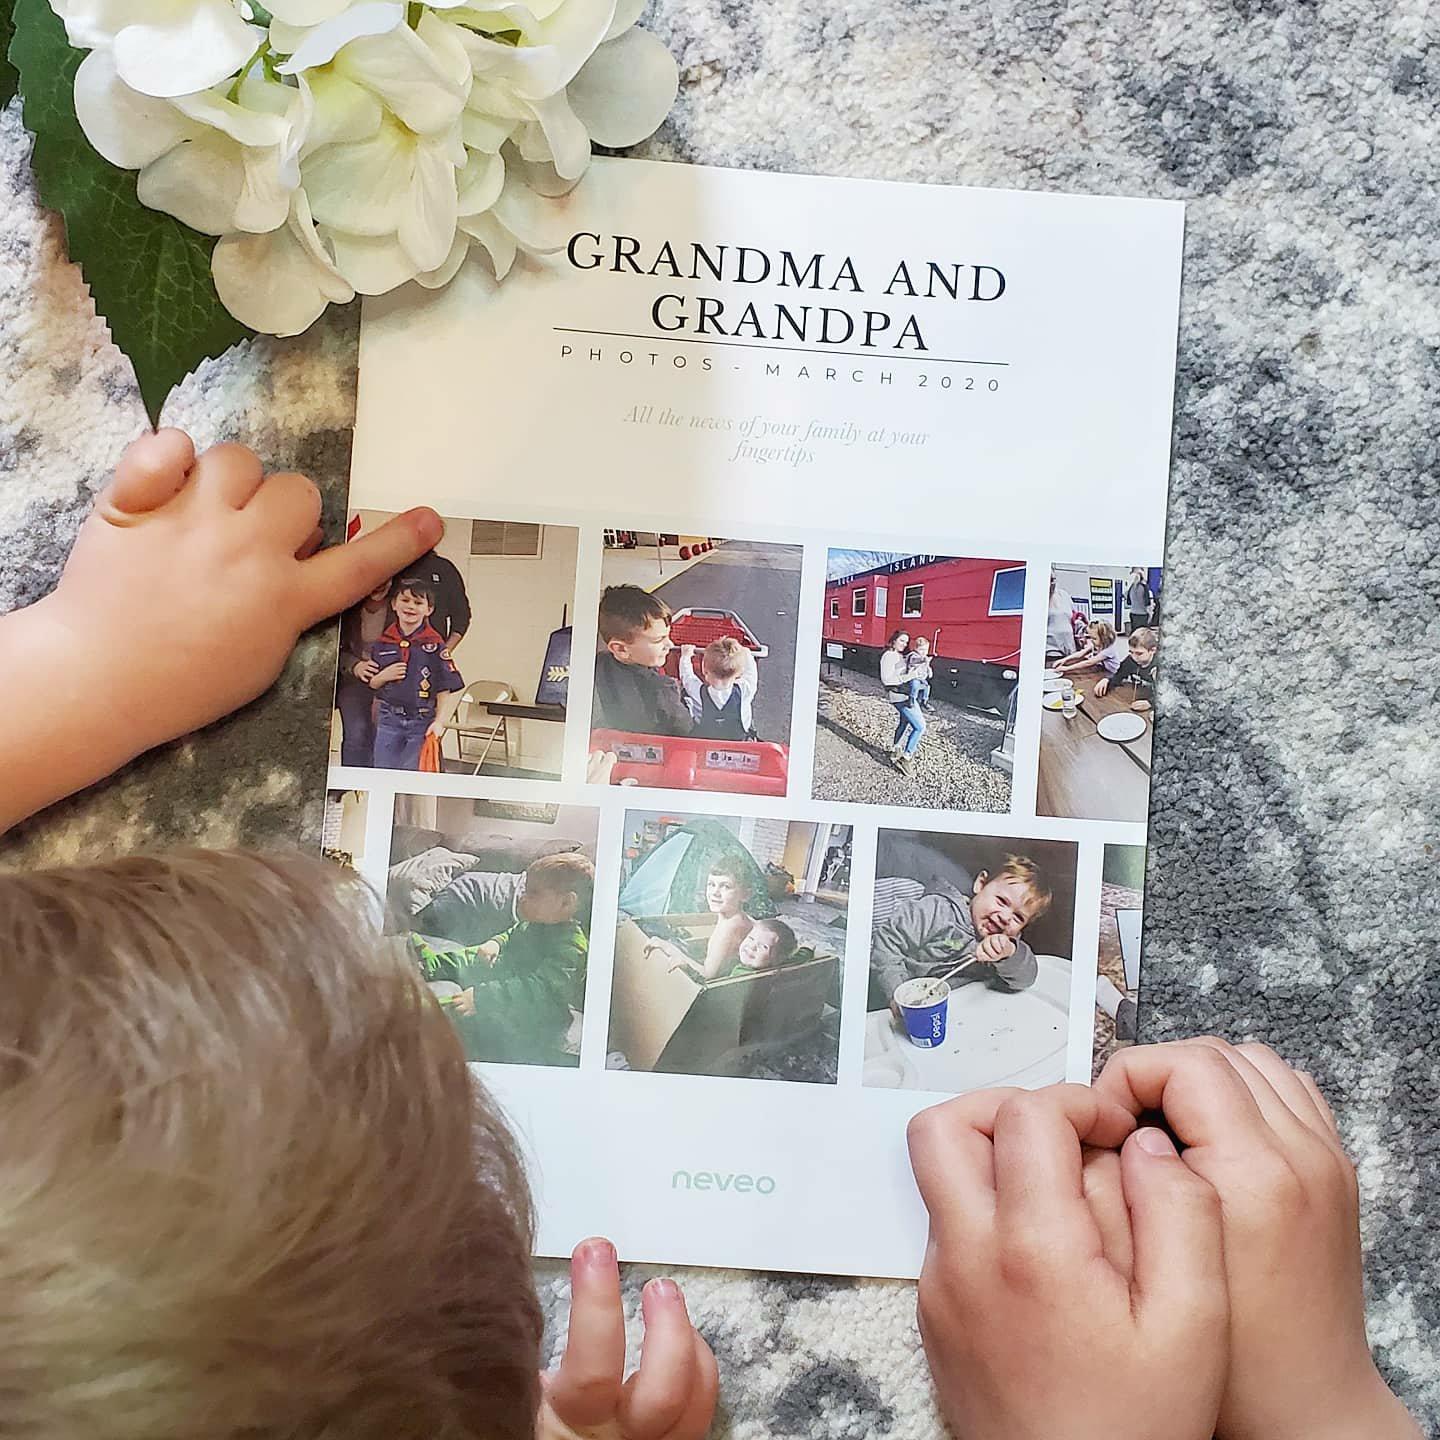
5. Neveo journal making! Neveo lets you add photos all month to an app and at the end of the month they put together your pictures and captions into a journal to be send to grandparents, friends, etc. So helpful for keeping up with some of those seniors that can’t get out right now! Use the code SUPPORT for two free months of 50 photo journals!
I hope these little ideas help even a tad bit. Hang in there. Give yourself grace. We’ve got this.
XX,
Jess
Permalink Comments Off on Quarantine Ideas
The Landing Strip
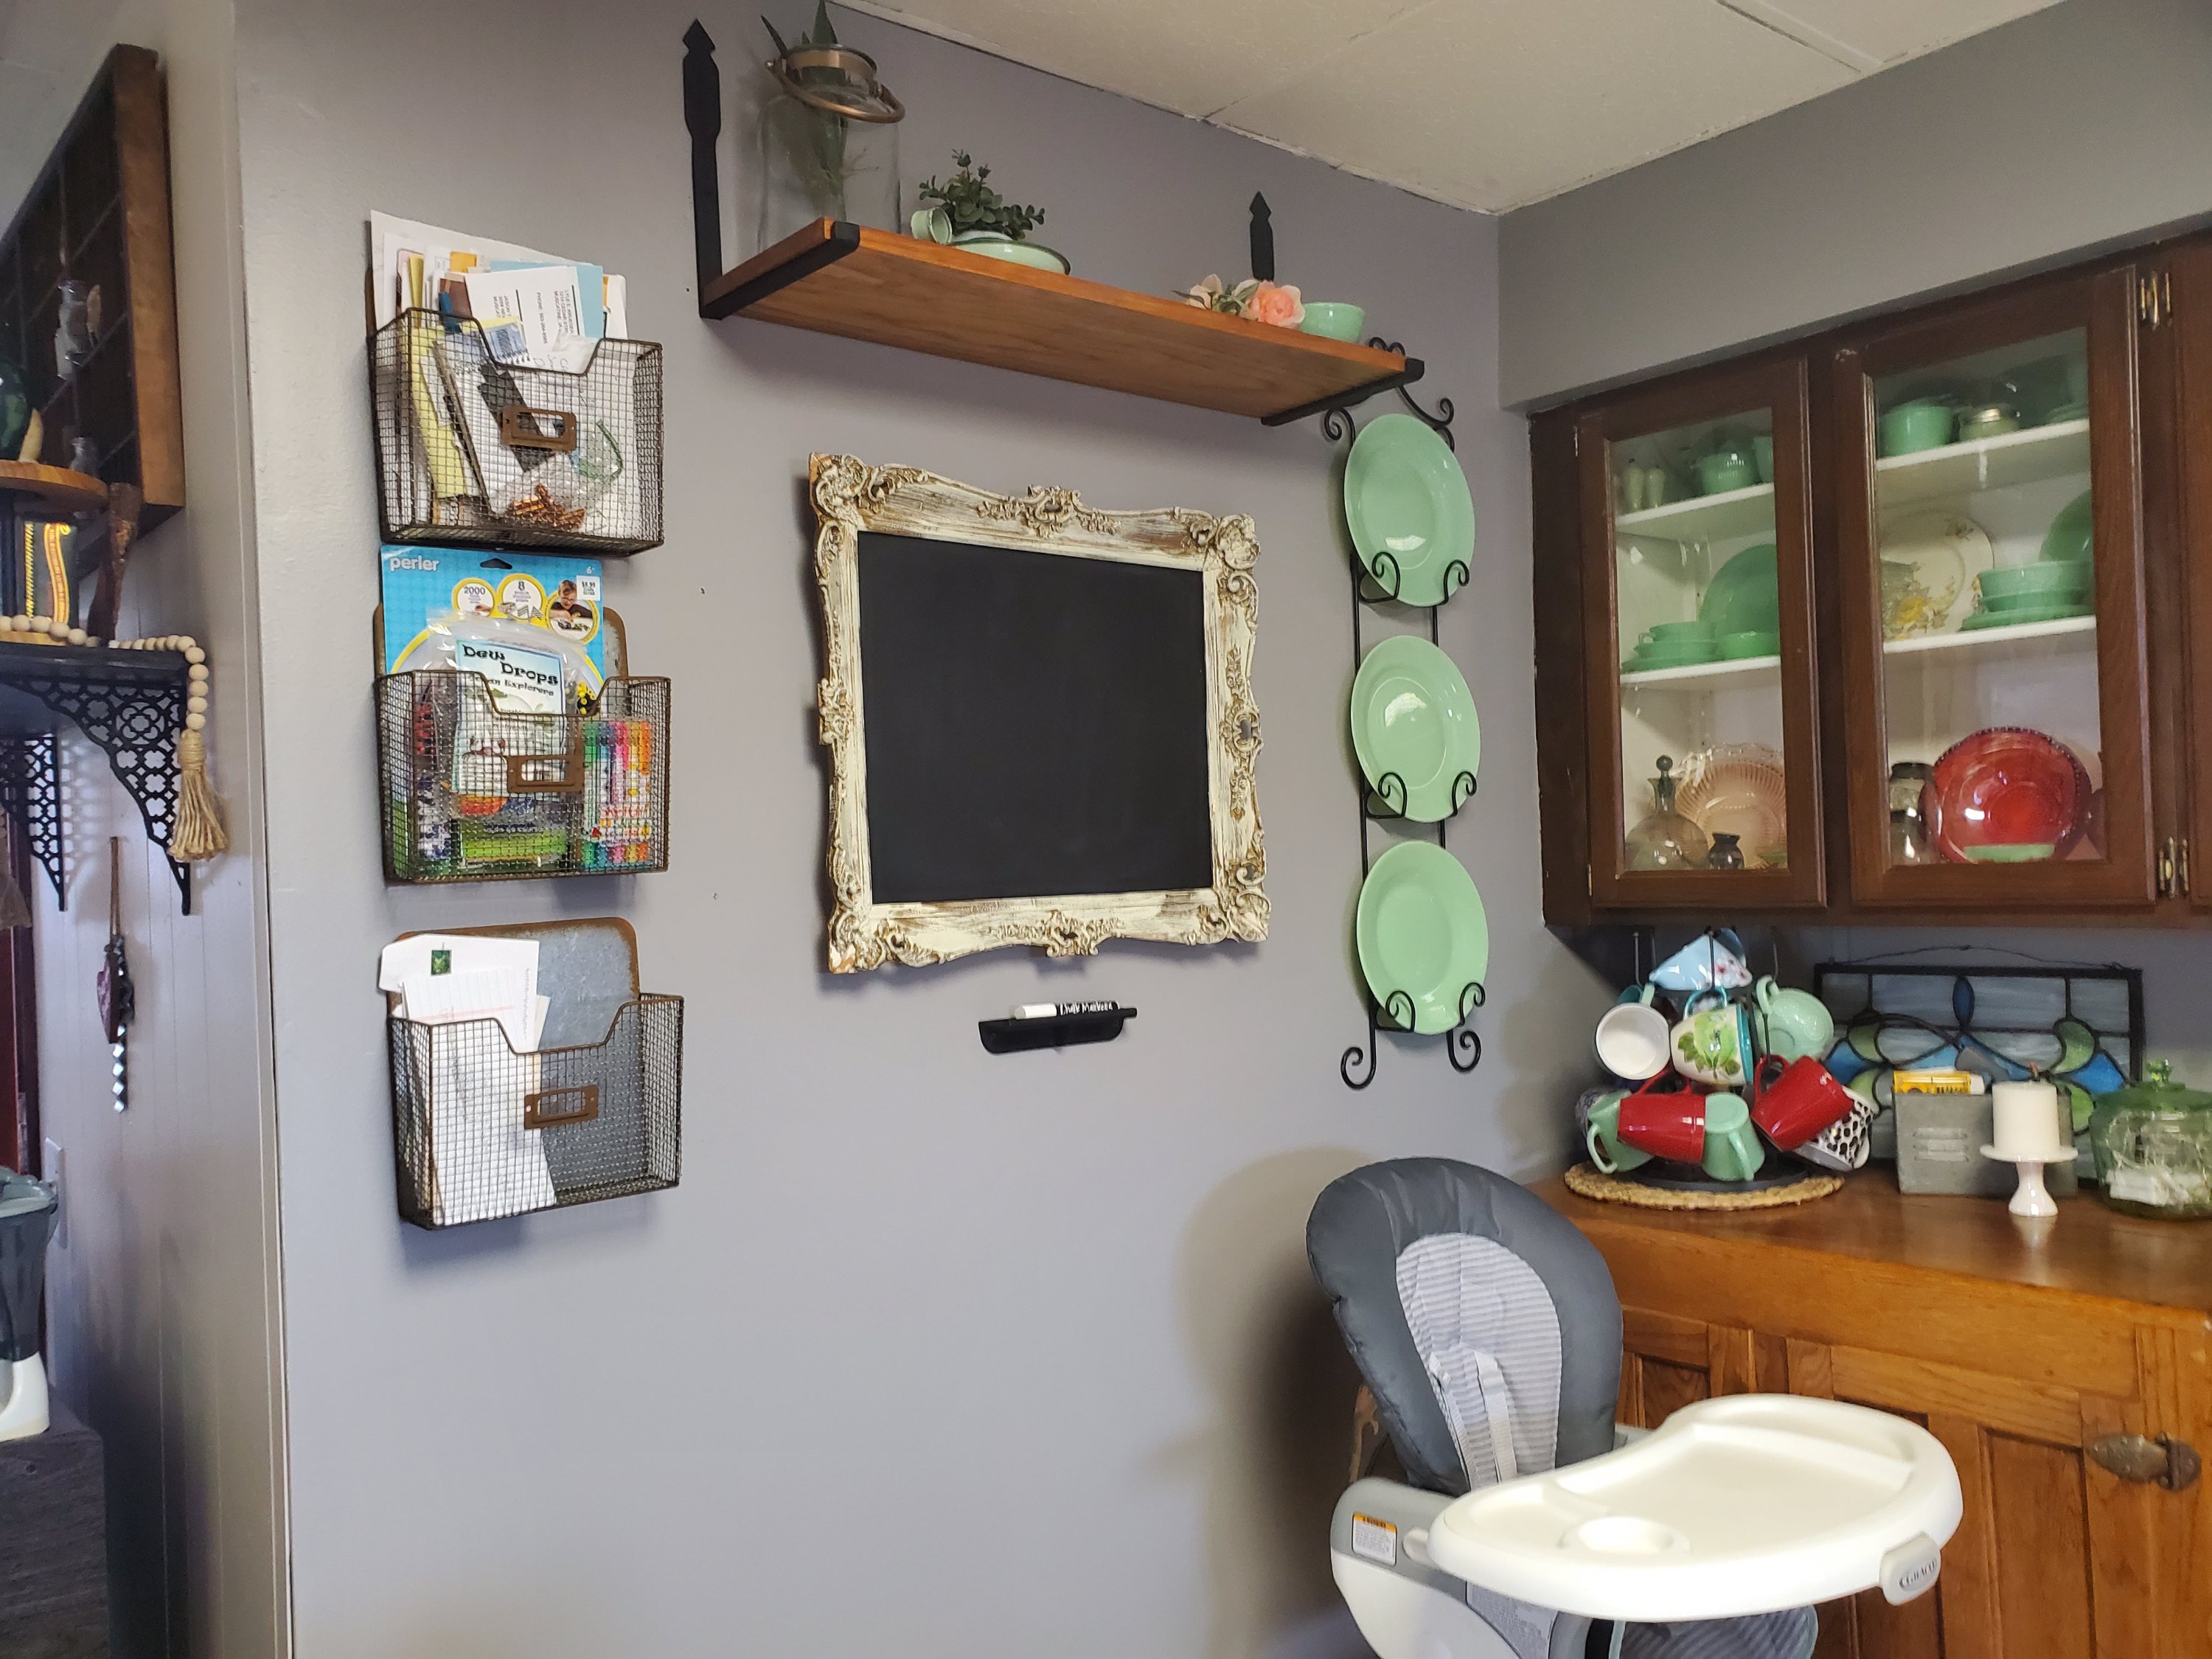
A landing strip, a command center, the drop spot. No matter what you call it, every house should have one. It’s a place for all the family “stuff”.
I call it a landing strip. In this house we actually have it split up a little, but it’s whatever works for you! When you come in our backdoor, we have hooks for each family member. Bag and coat go there. There’s a little hook station for car keys. And we have a small rack holding bug spray, sunscreen, sunglasses, wireless speaker, etc. But there’s still other “stuff” that accumulates. What do you do with it?! Enter our landing strip.
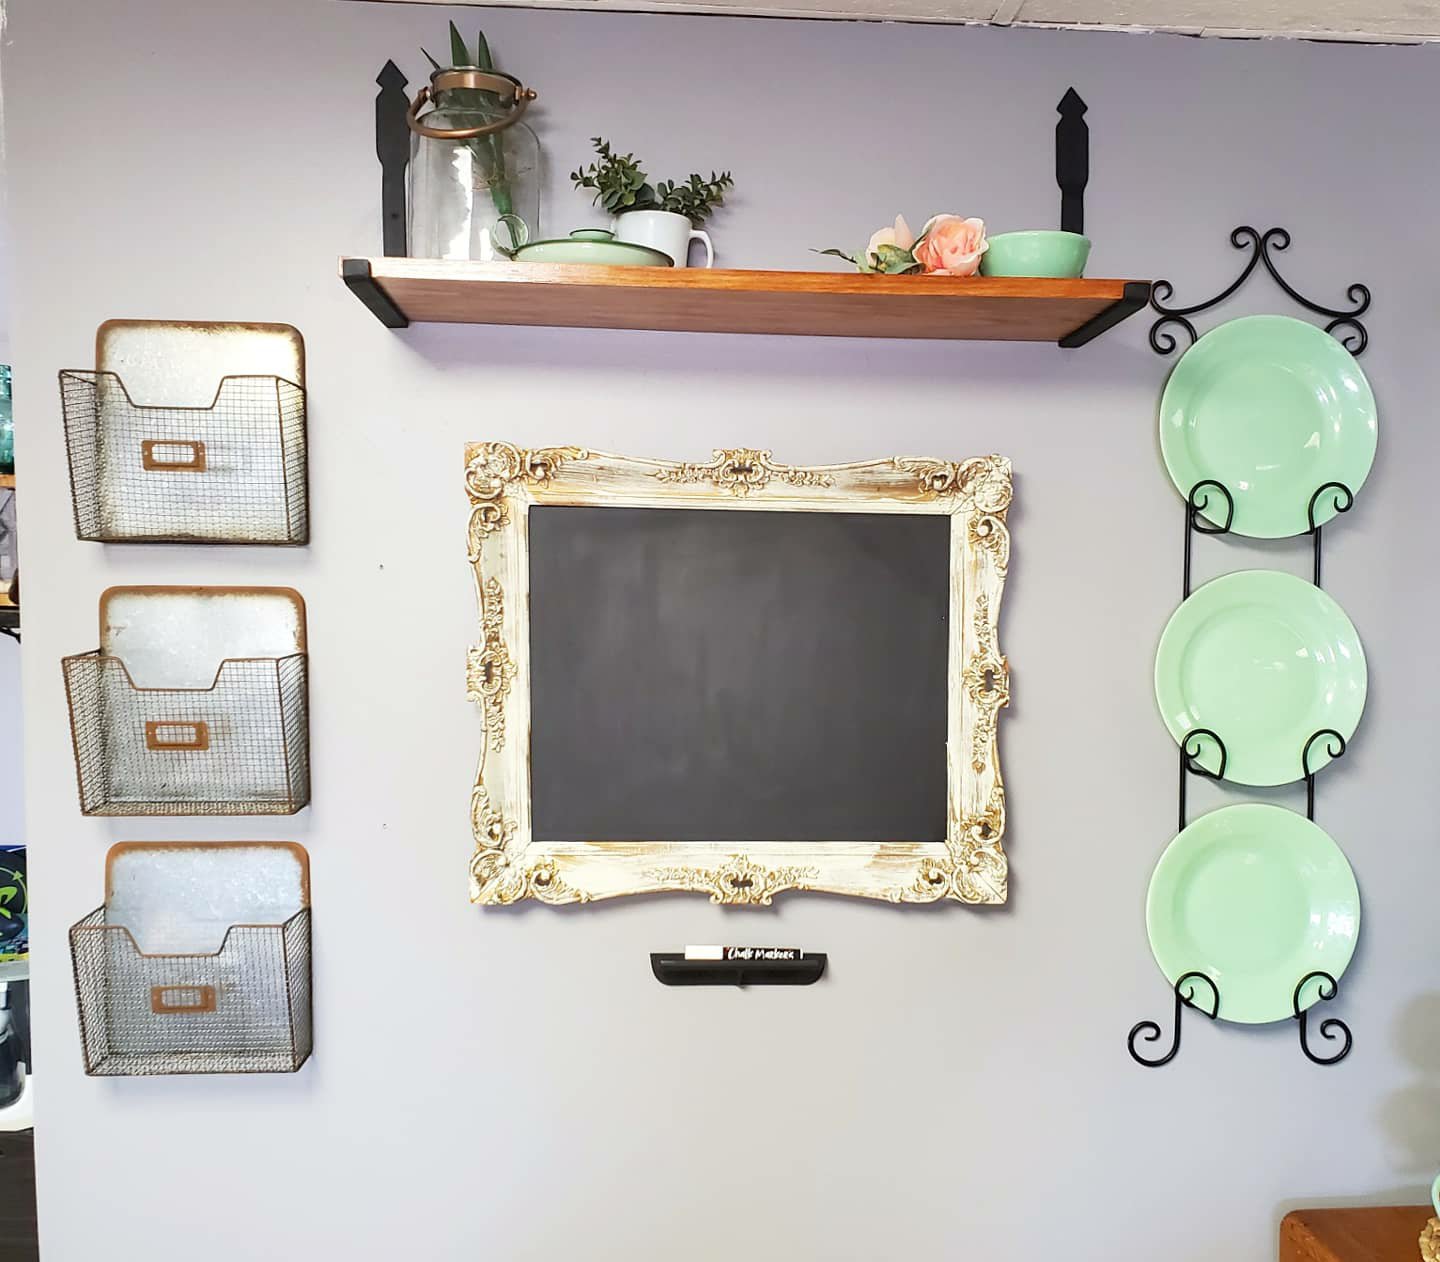
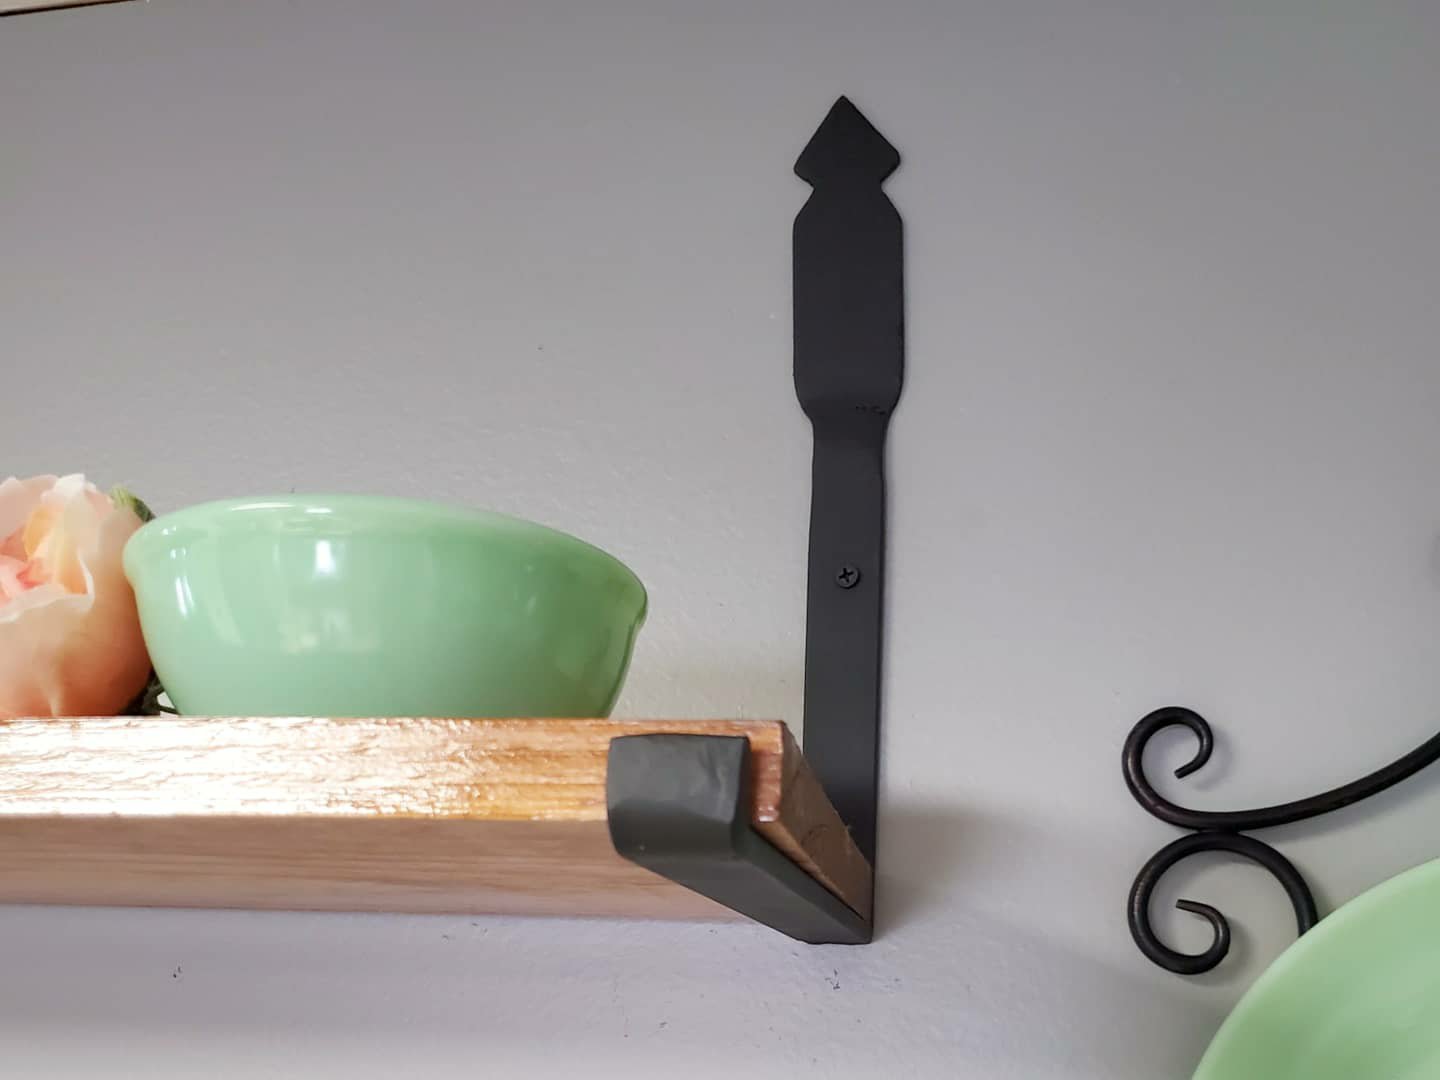
He we have a stash spot for everything else so that we stay organized and don’t lose important things! We use the chalk board for calendar notes and grocery lists. And each of the boys and mom and dad have a basket. We put bills in ours. The boys put homework and such in theirs. I keep a pen jar on the shelf. Here is stash stamps, a candle lighter, a marker, and pens. If you need more than that they you have to go upstairs to the office. 😆
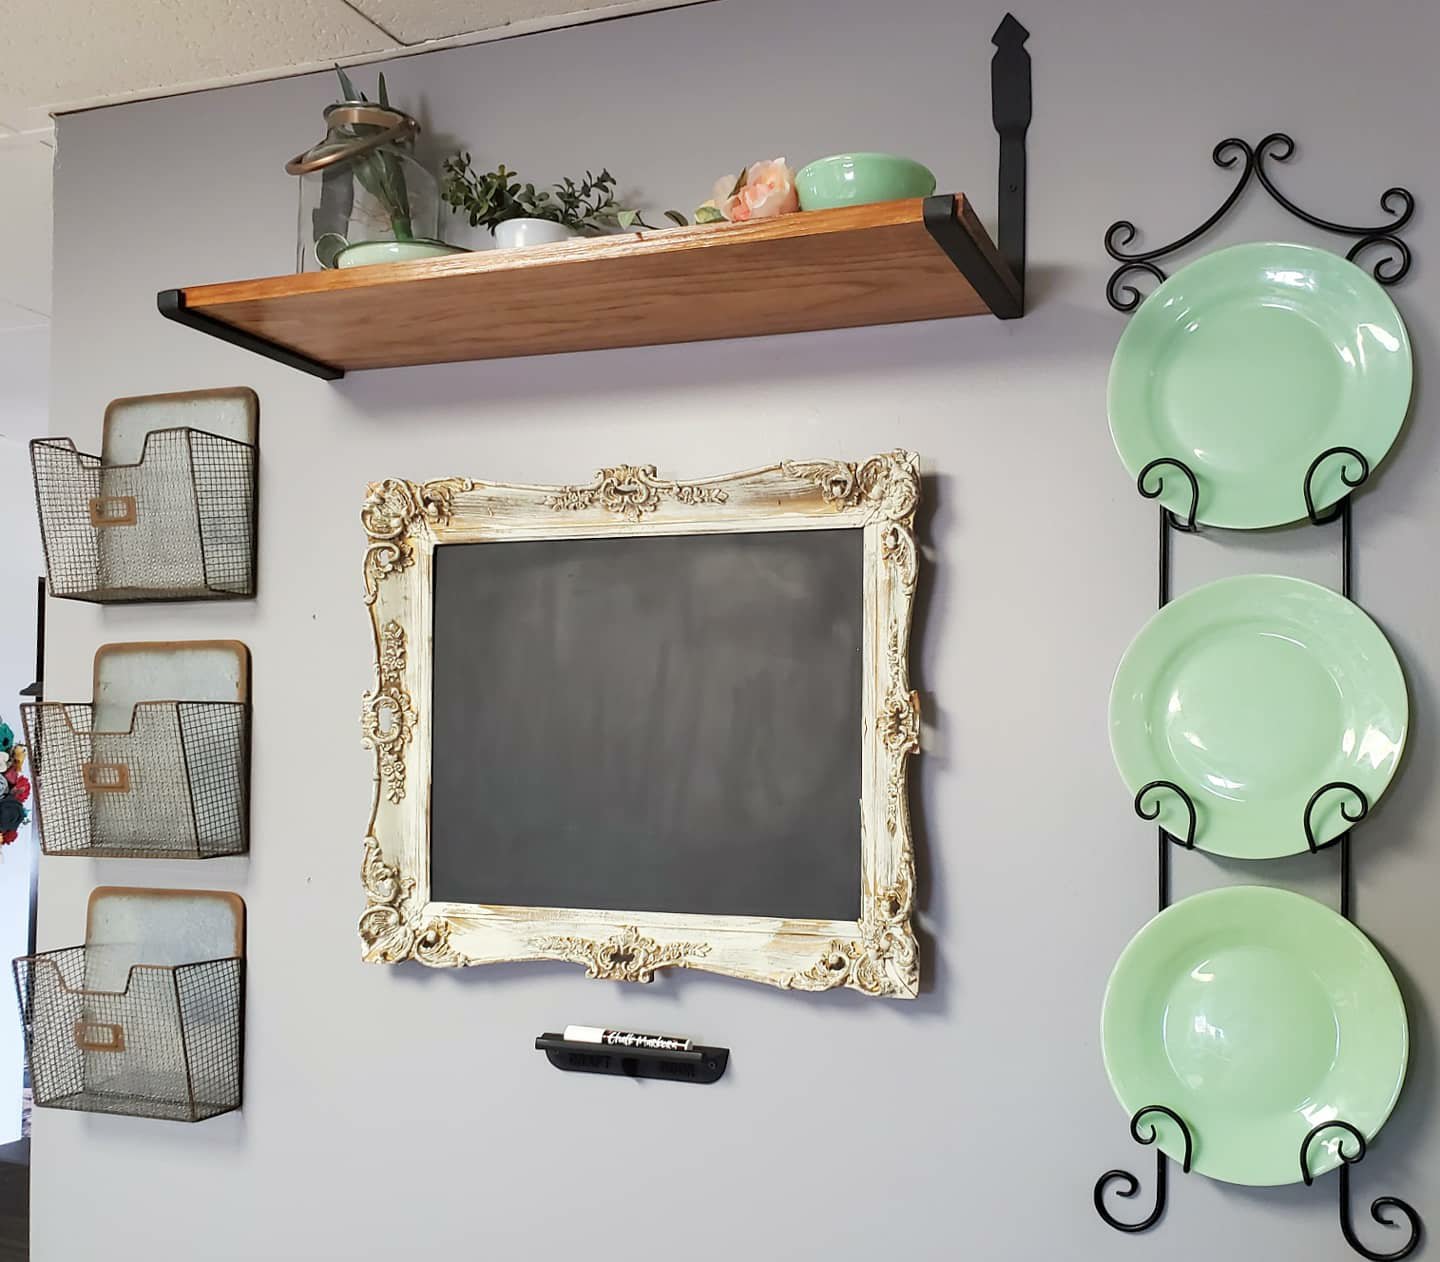

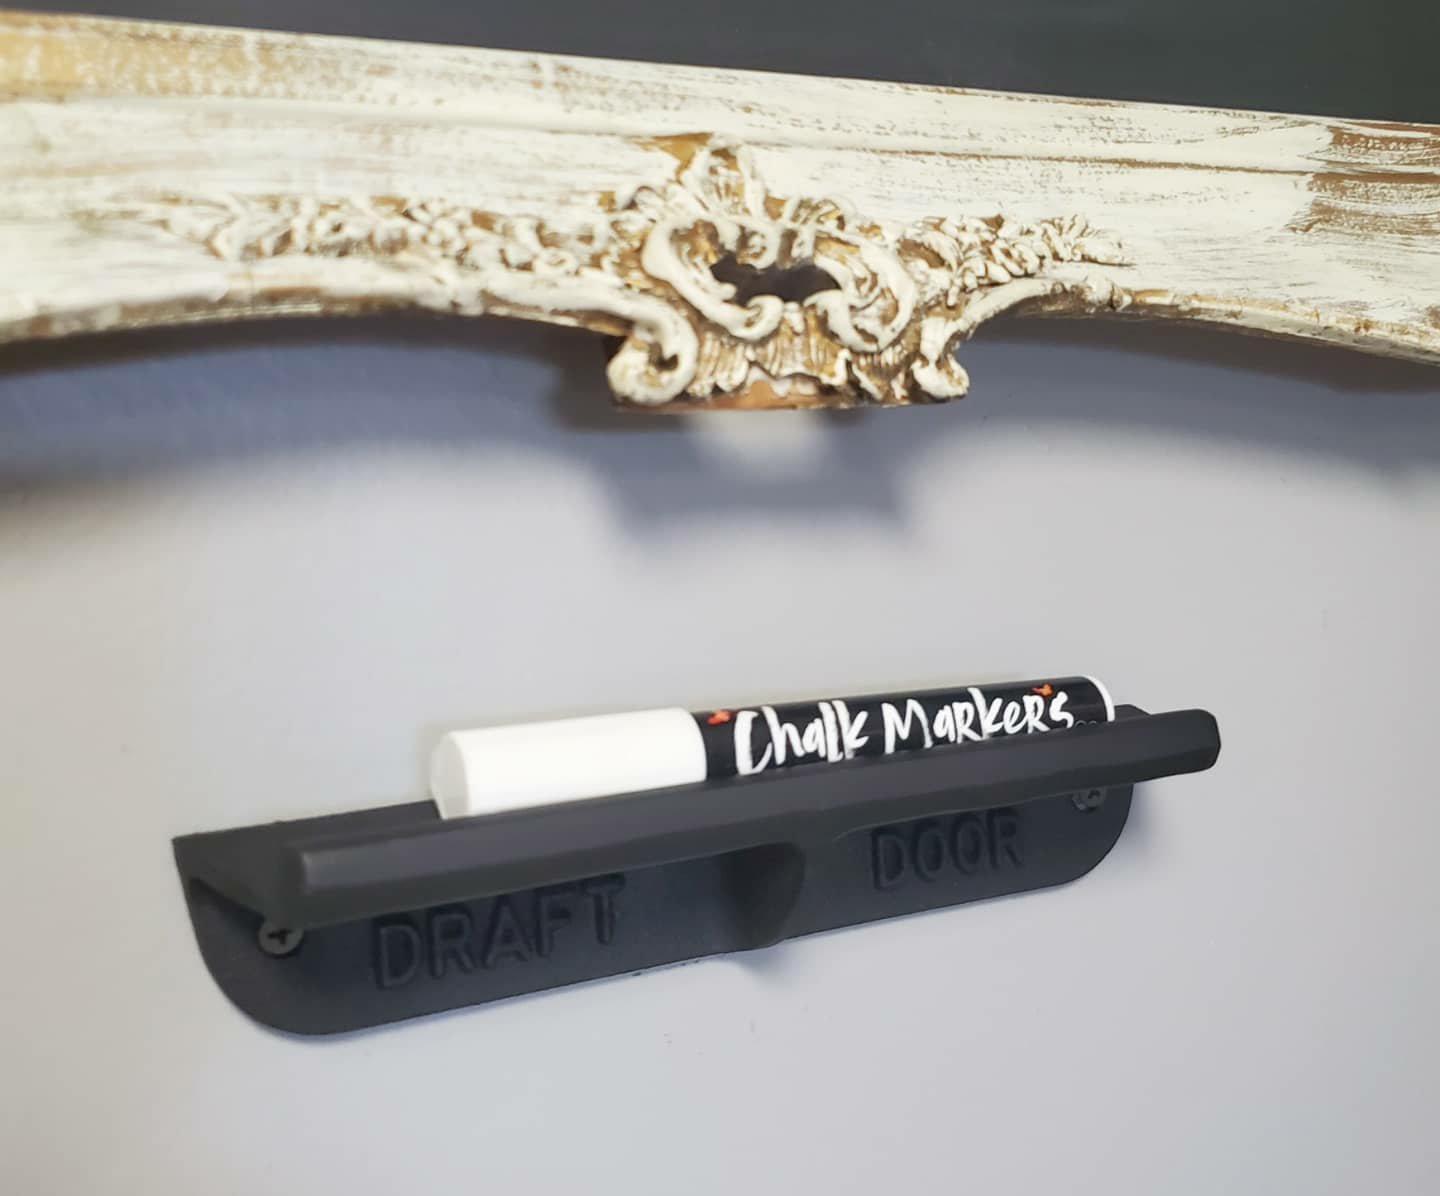
The antique mirror got a metal insert painted with chalk paint. The little chalk marker tray below it is an antique door stop out of an old barn. The baskets are from Hobby Lobby. The shelf is a custom design I requested from Jason. He added and welded the flourish at the top of the brackets.

Here’s my tid bit of advice. Have a place for the “stuff”, whatever you may call it. I truly believe in “a place for everything and everything in its place.” Even if you don’t organize that far, at least set up a zone with a calendar and pens and notepad. Have a spot where you put mail and homework. Always put your keys in the same location. I promise you that these tricks will prevent you from losing important things or searching frantically for the lost items!
And just for fun, here’s a shot of what it looks like more often than not. 😉
Anything else you would add?
XX,
Jess
Permalink Comments Off on The Landing Strip
Frame Hanger Project
I love old picture frames. All kinds. I’ve got a hallway of empty ones upstairs. Sometimes I fill them. Sometimes I paint them. And sometimes I do something fun with them…

This frame I once painted black with a silver line. Years ago. I was over it. (Ignore the ugly paneling in the upstairs hall we hope to rip out soon)
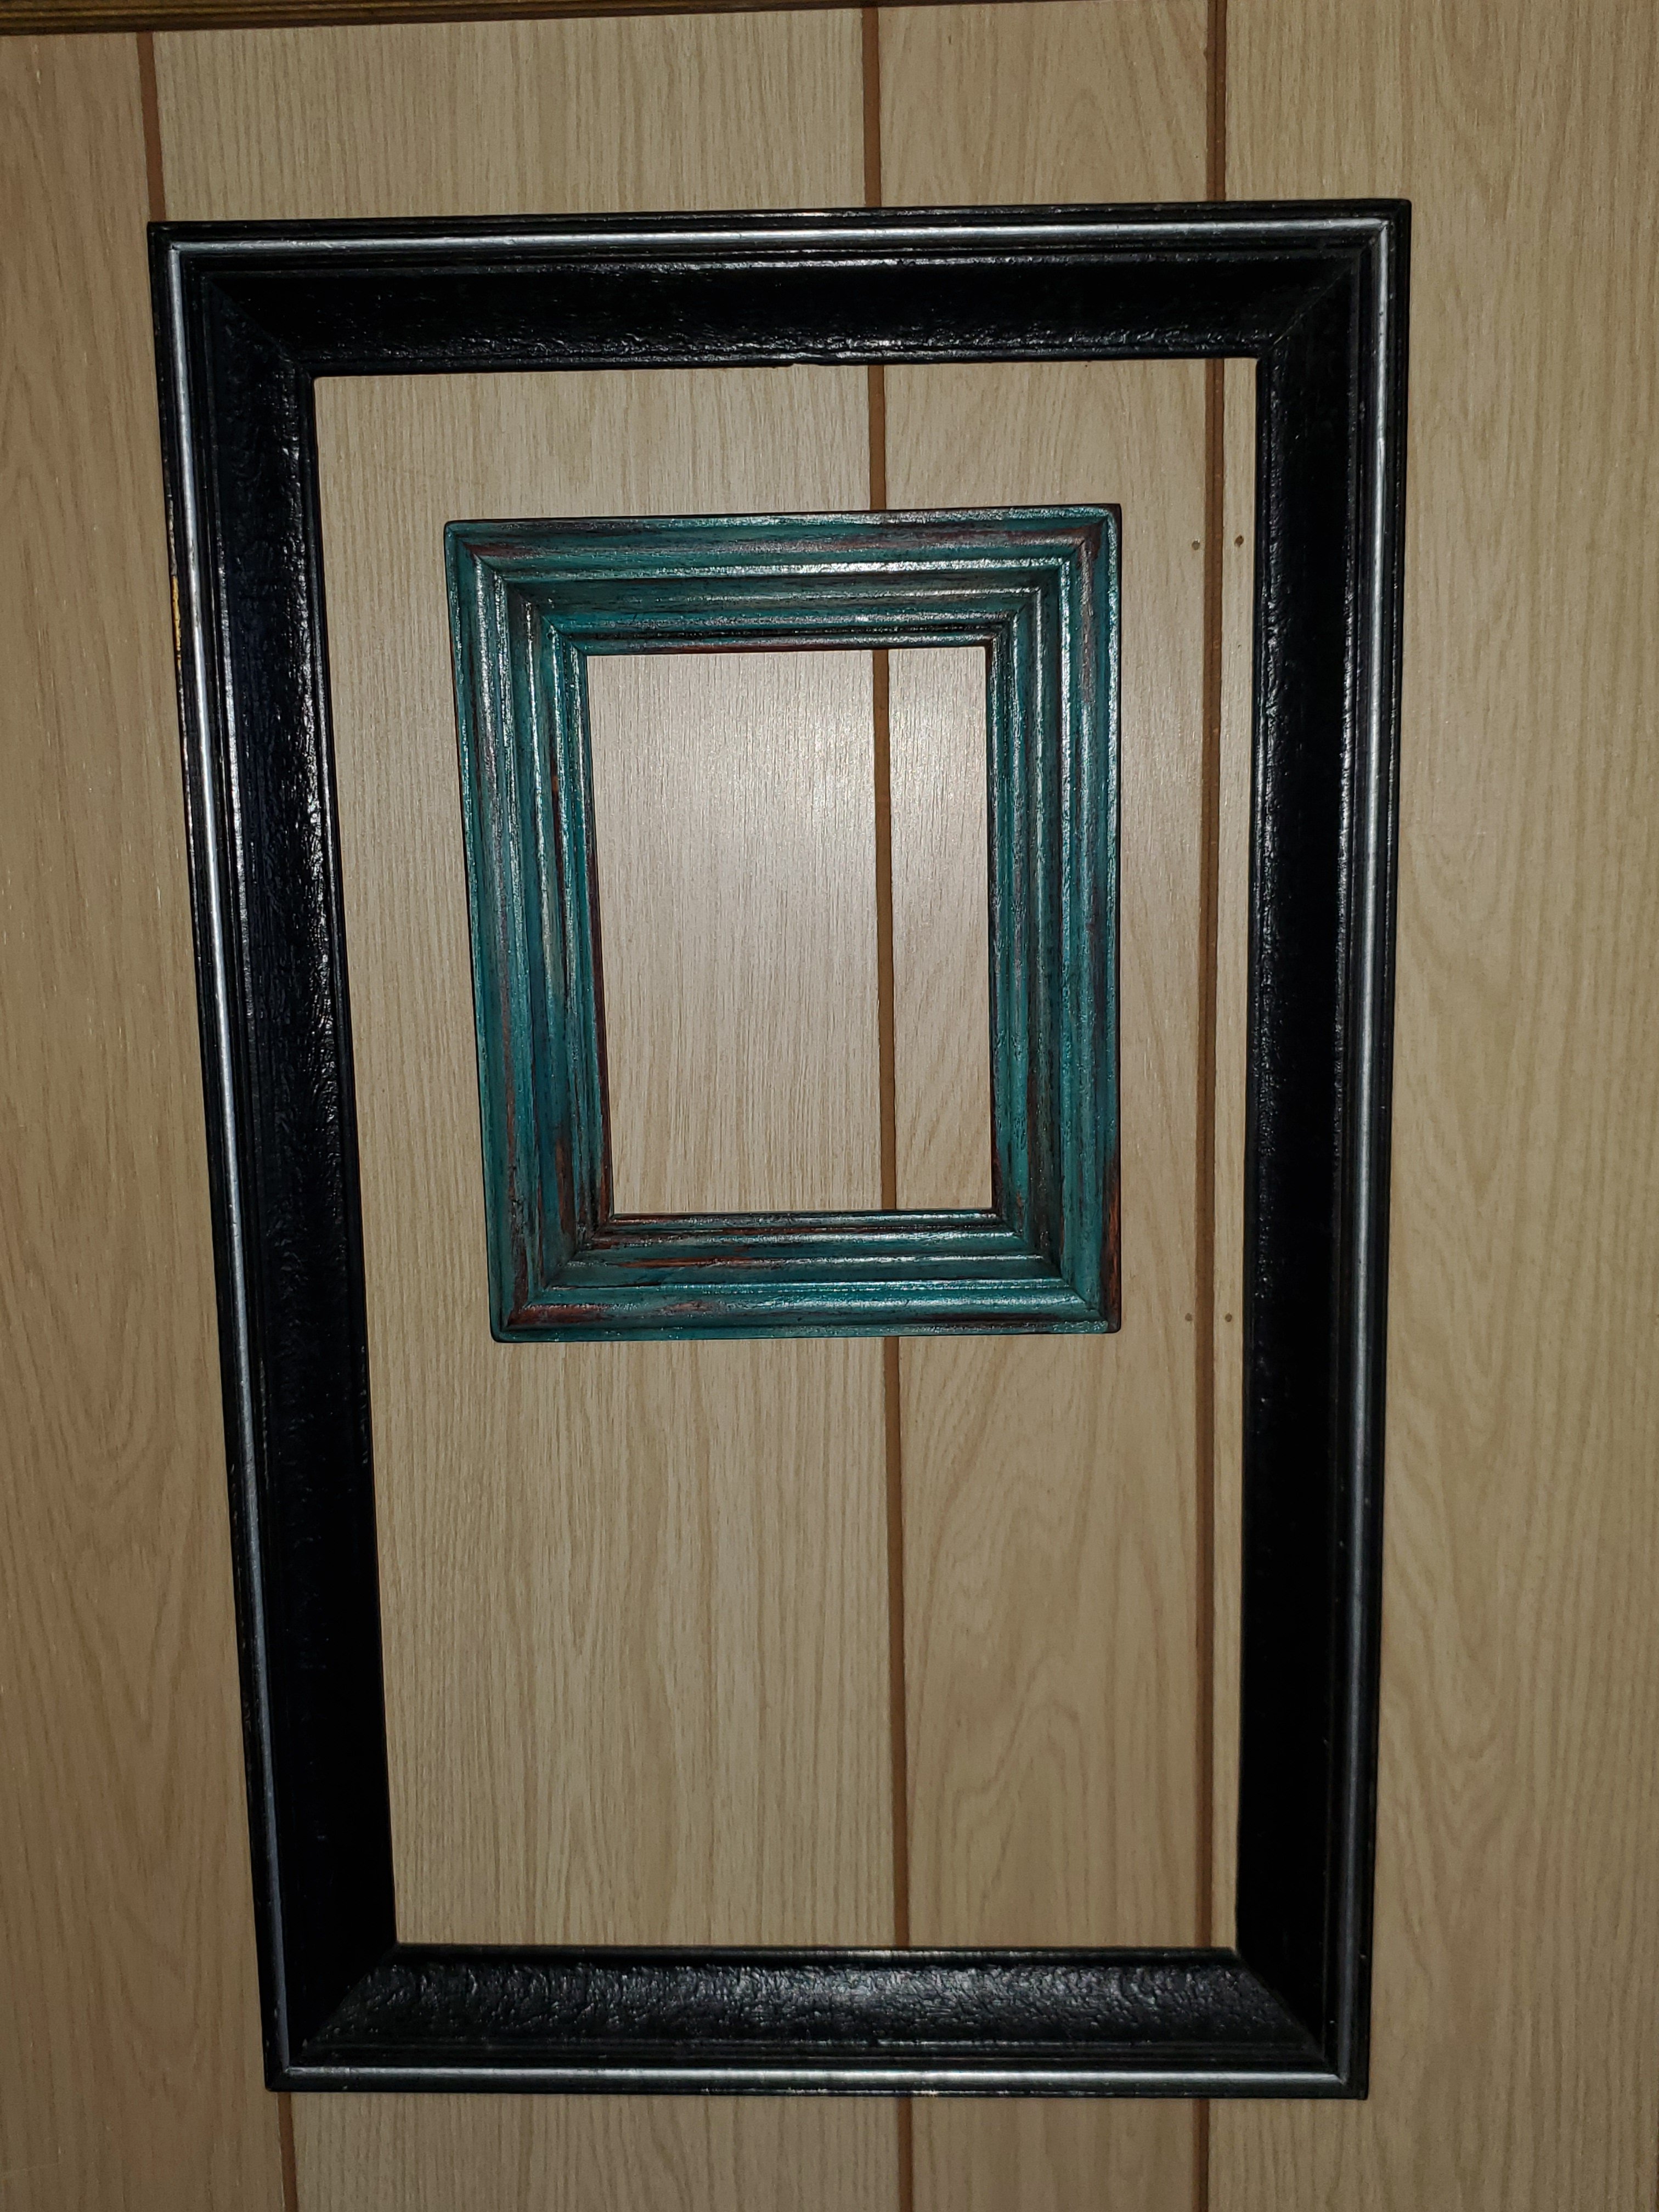
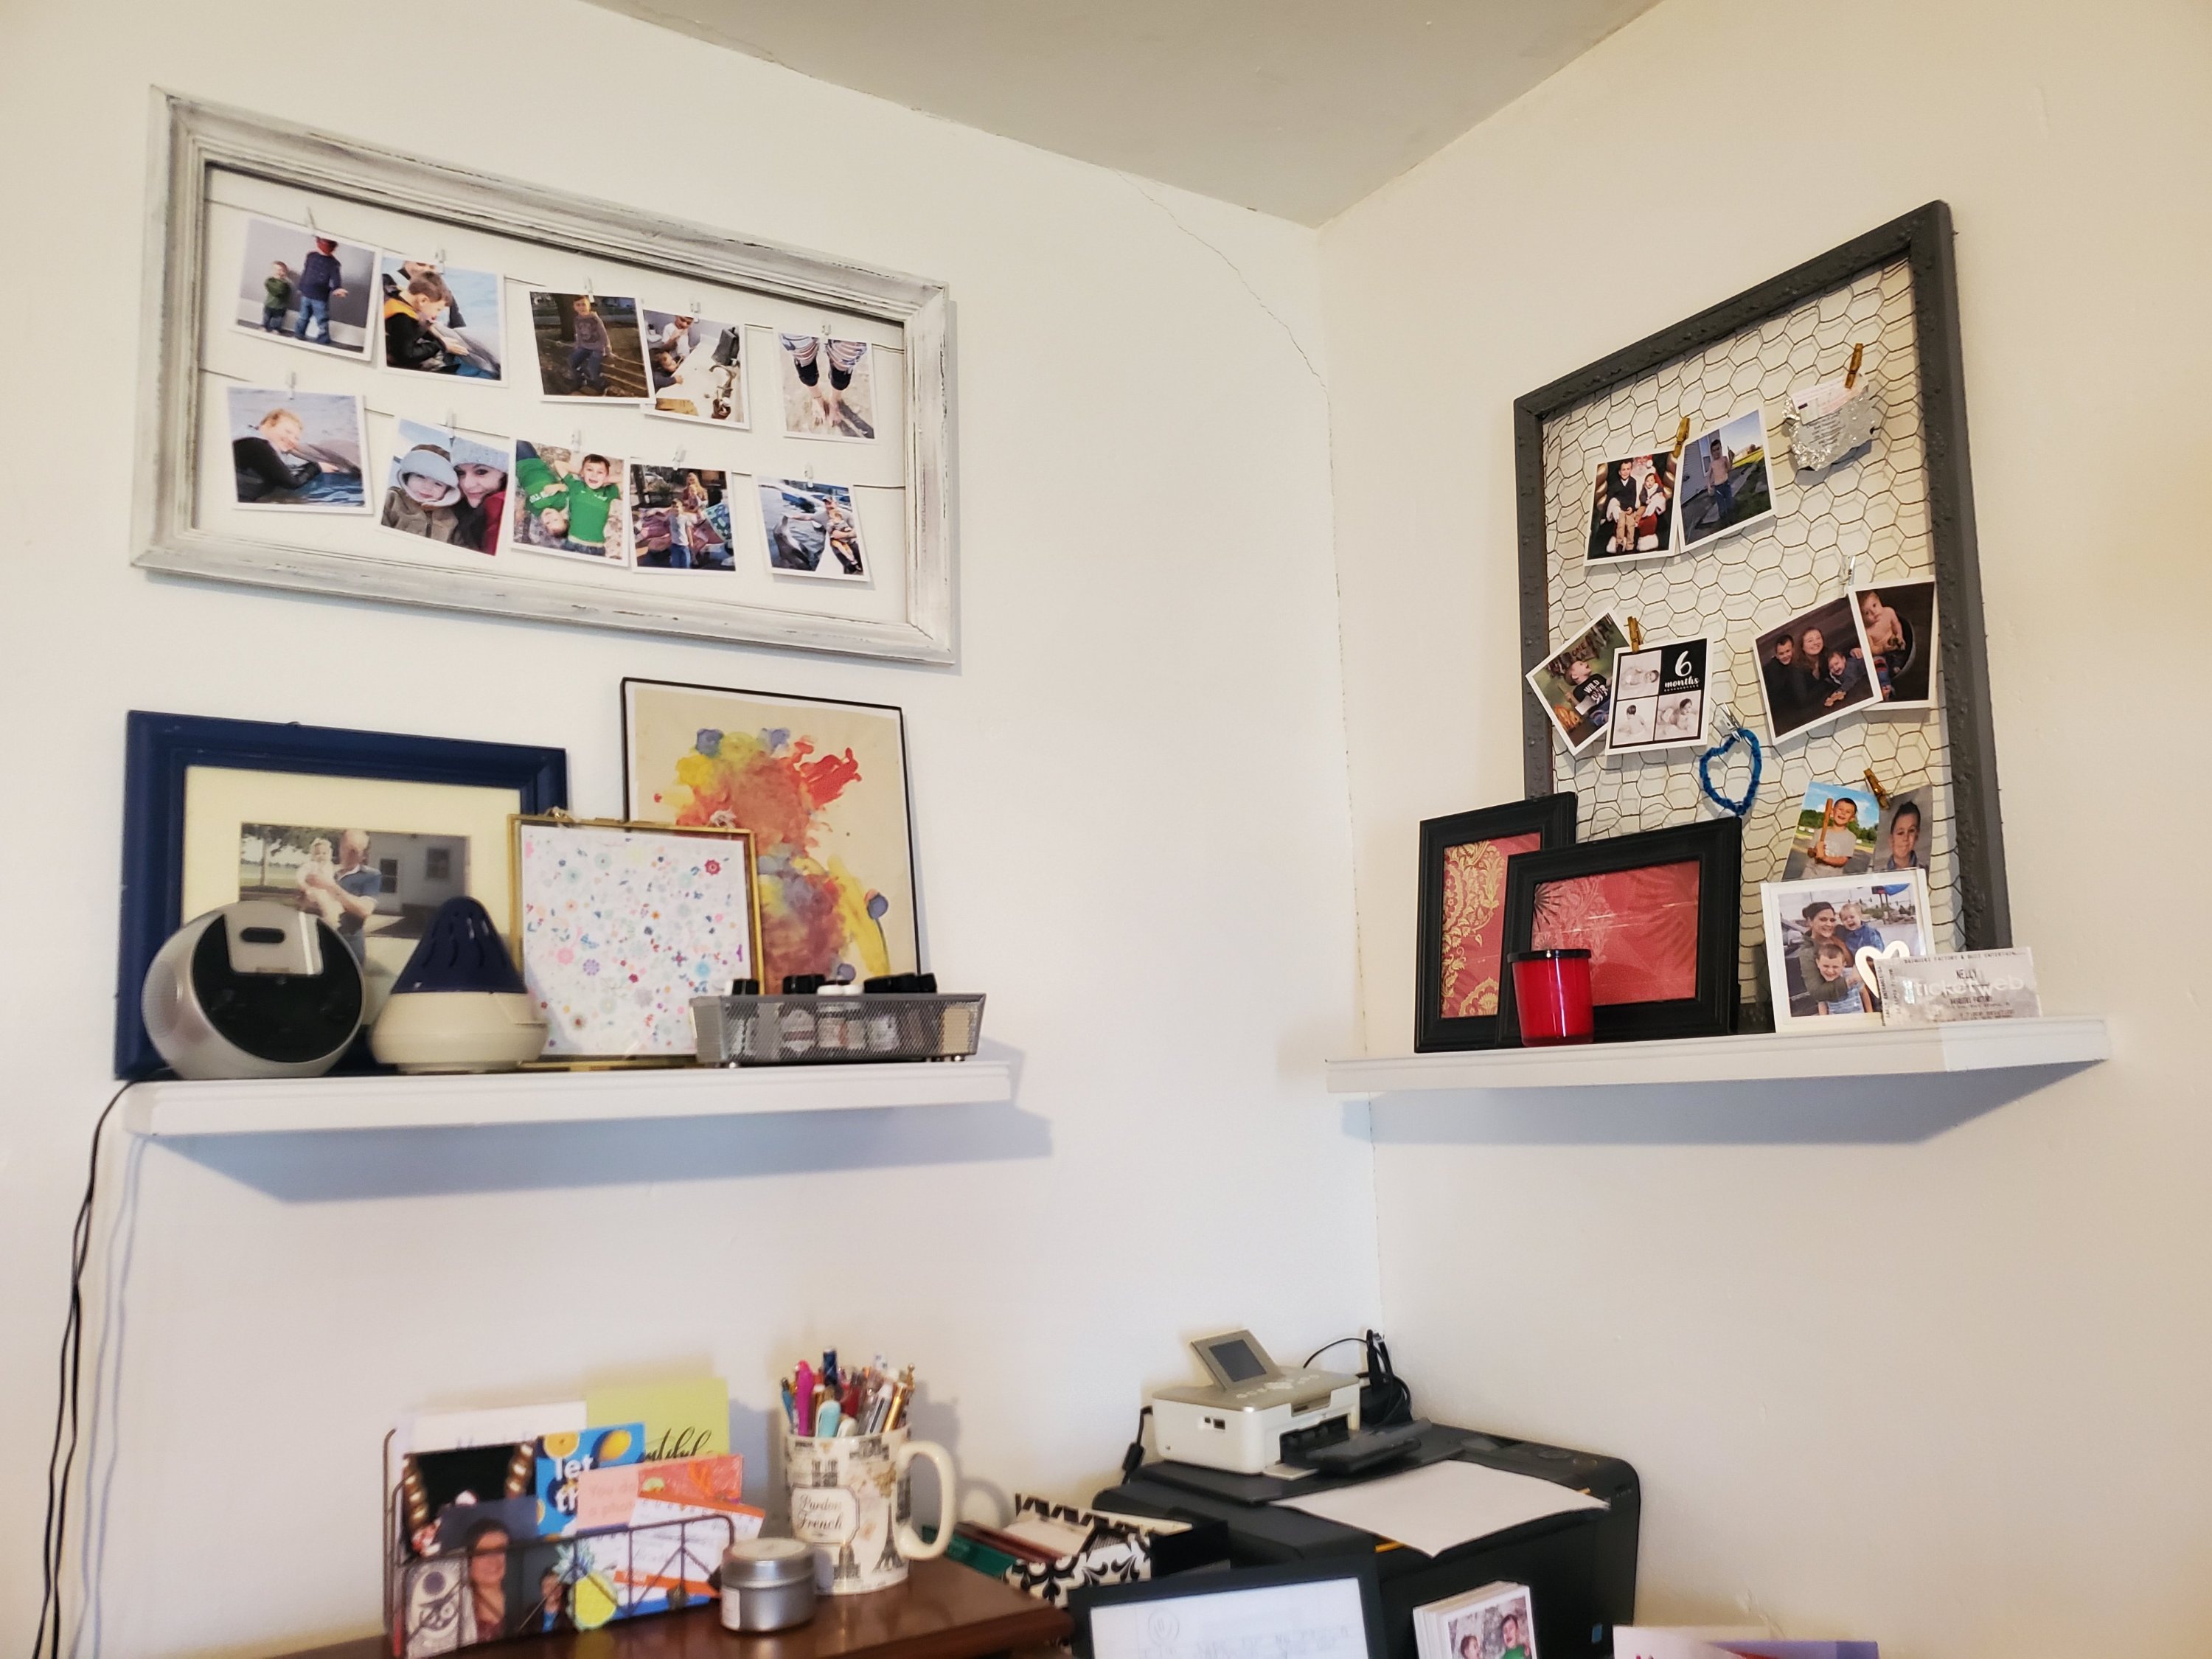
I wanted something lighter and brighter for my office. And I needed a place to hang some of my beautiful Parabo Press photos. (If you haven’t ordered from them, you must. They are gorgeous)
So first I lightly sanded the frame. Then I painted it white. I used wall paint for this project because it’s what I had. And its quarantine. And this step wasn’t super important for this project. It took 2-3 coats, but doesn’t need to be perfect.
Then I sanded with a foam sanding block. I scraped the edges and roughed up the centers. Go slowly and start lightly. Keep going until you love it.
Then, because I wanted just a little something more for this one, I used a small brush and “dry brushed” on some charcoal gray paint. This means I dipped a tiny amount on the brush and then swiped most of it off onto a paper plate. When the brush is almost dry, wipe it on the frame. It will give you just a tiny bit of paint and give a smudge-y look. I used a paper towel to rub this in as I added it too. It came out nice and weathered.
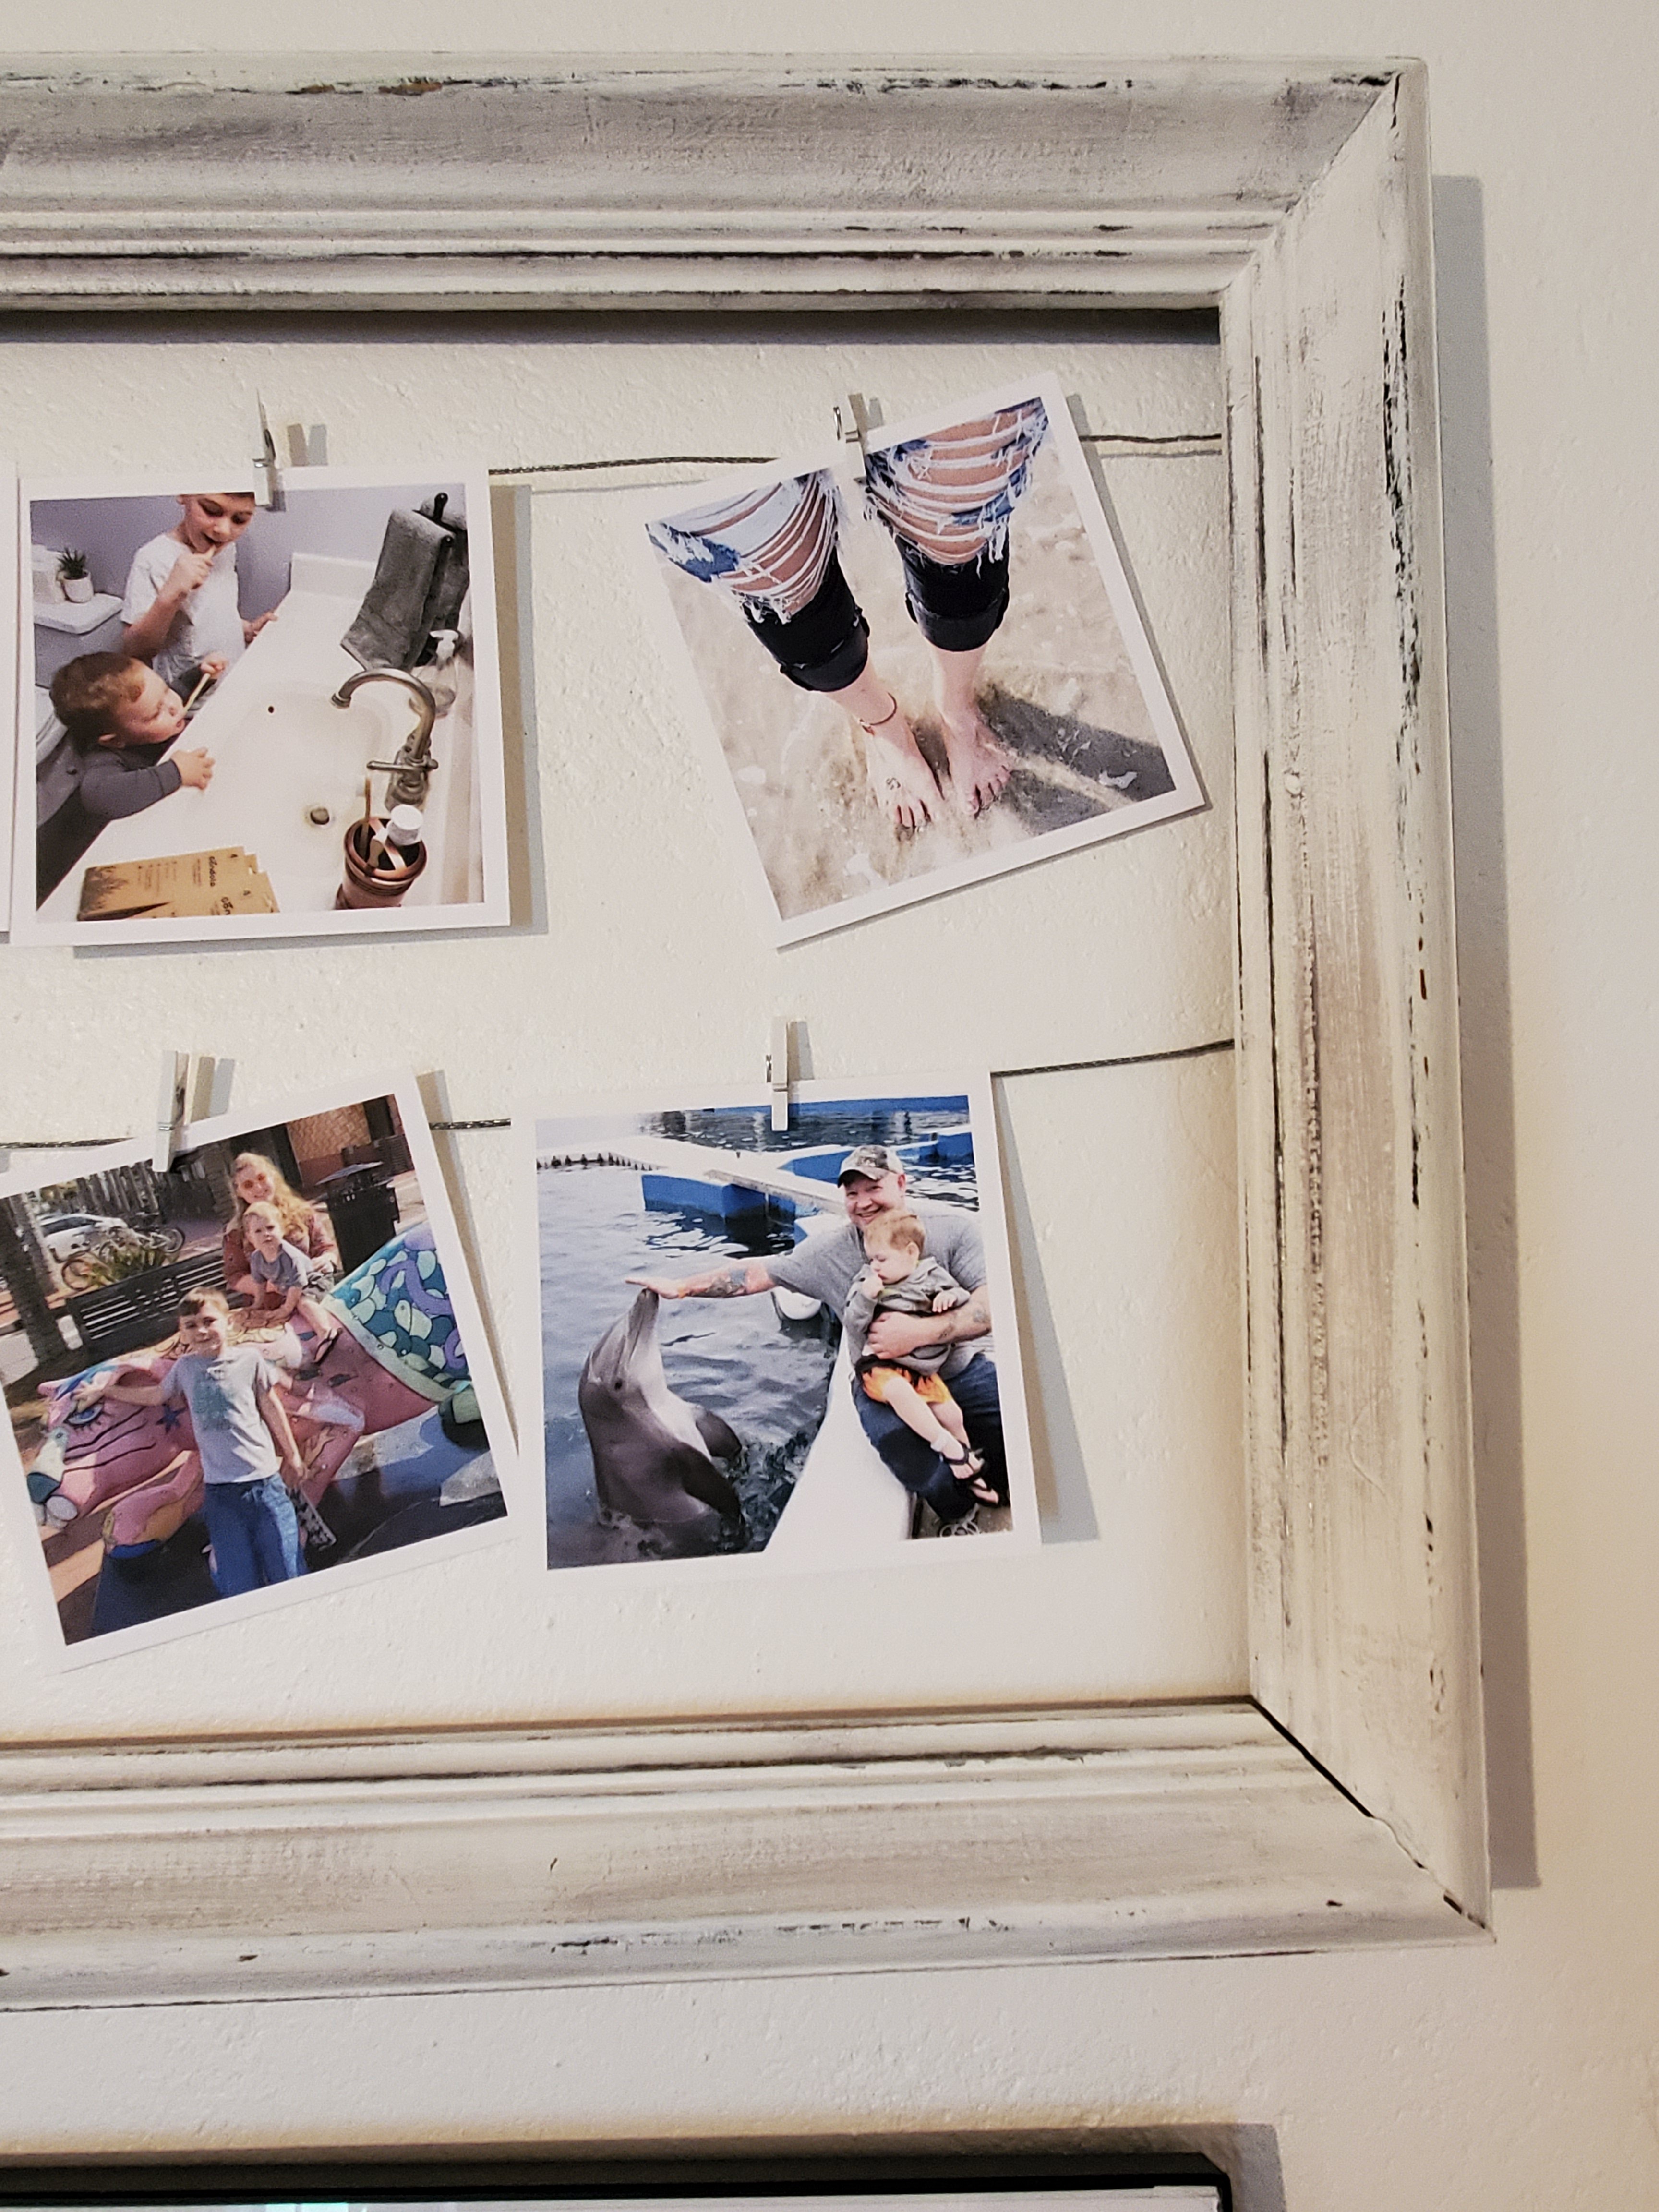
Then to add some wire. You could use twine or ribbon, or whatever you have. I had some picture hanging wire from a hanging kit. I cut it slightly longer than the width of the frame, maybe a half inch extra on each side. Then I pulled it tight across the frame and used a staple fun to staple it in place. I twisted the extra ends into a little ball to help keep it in place.
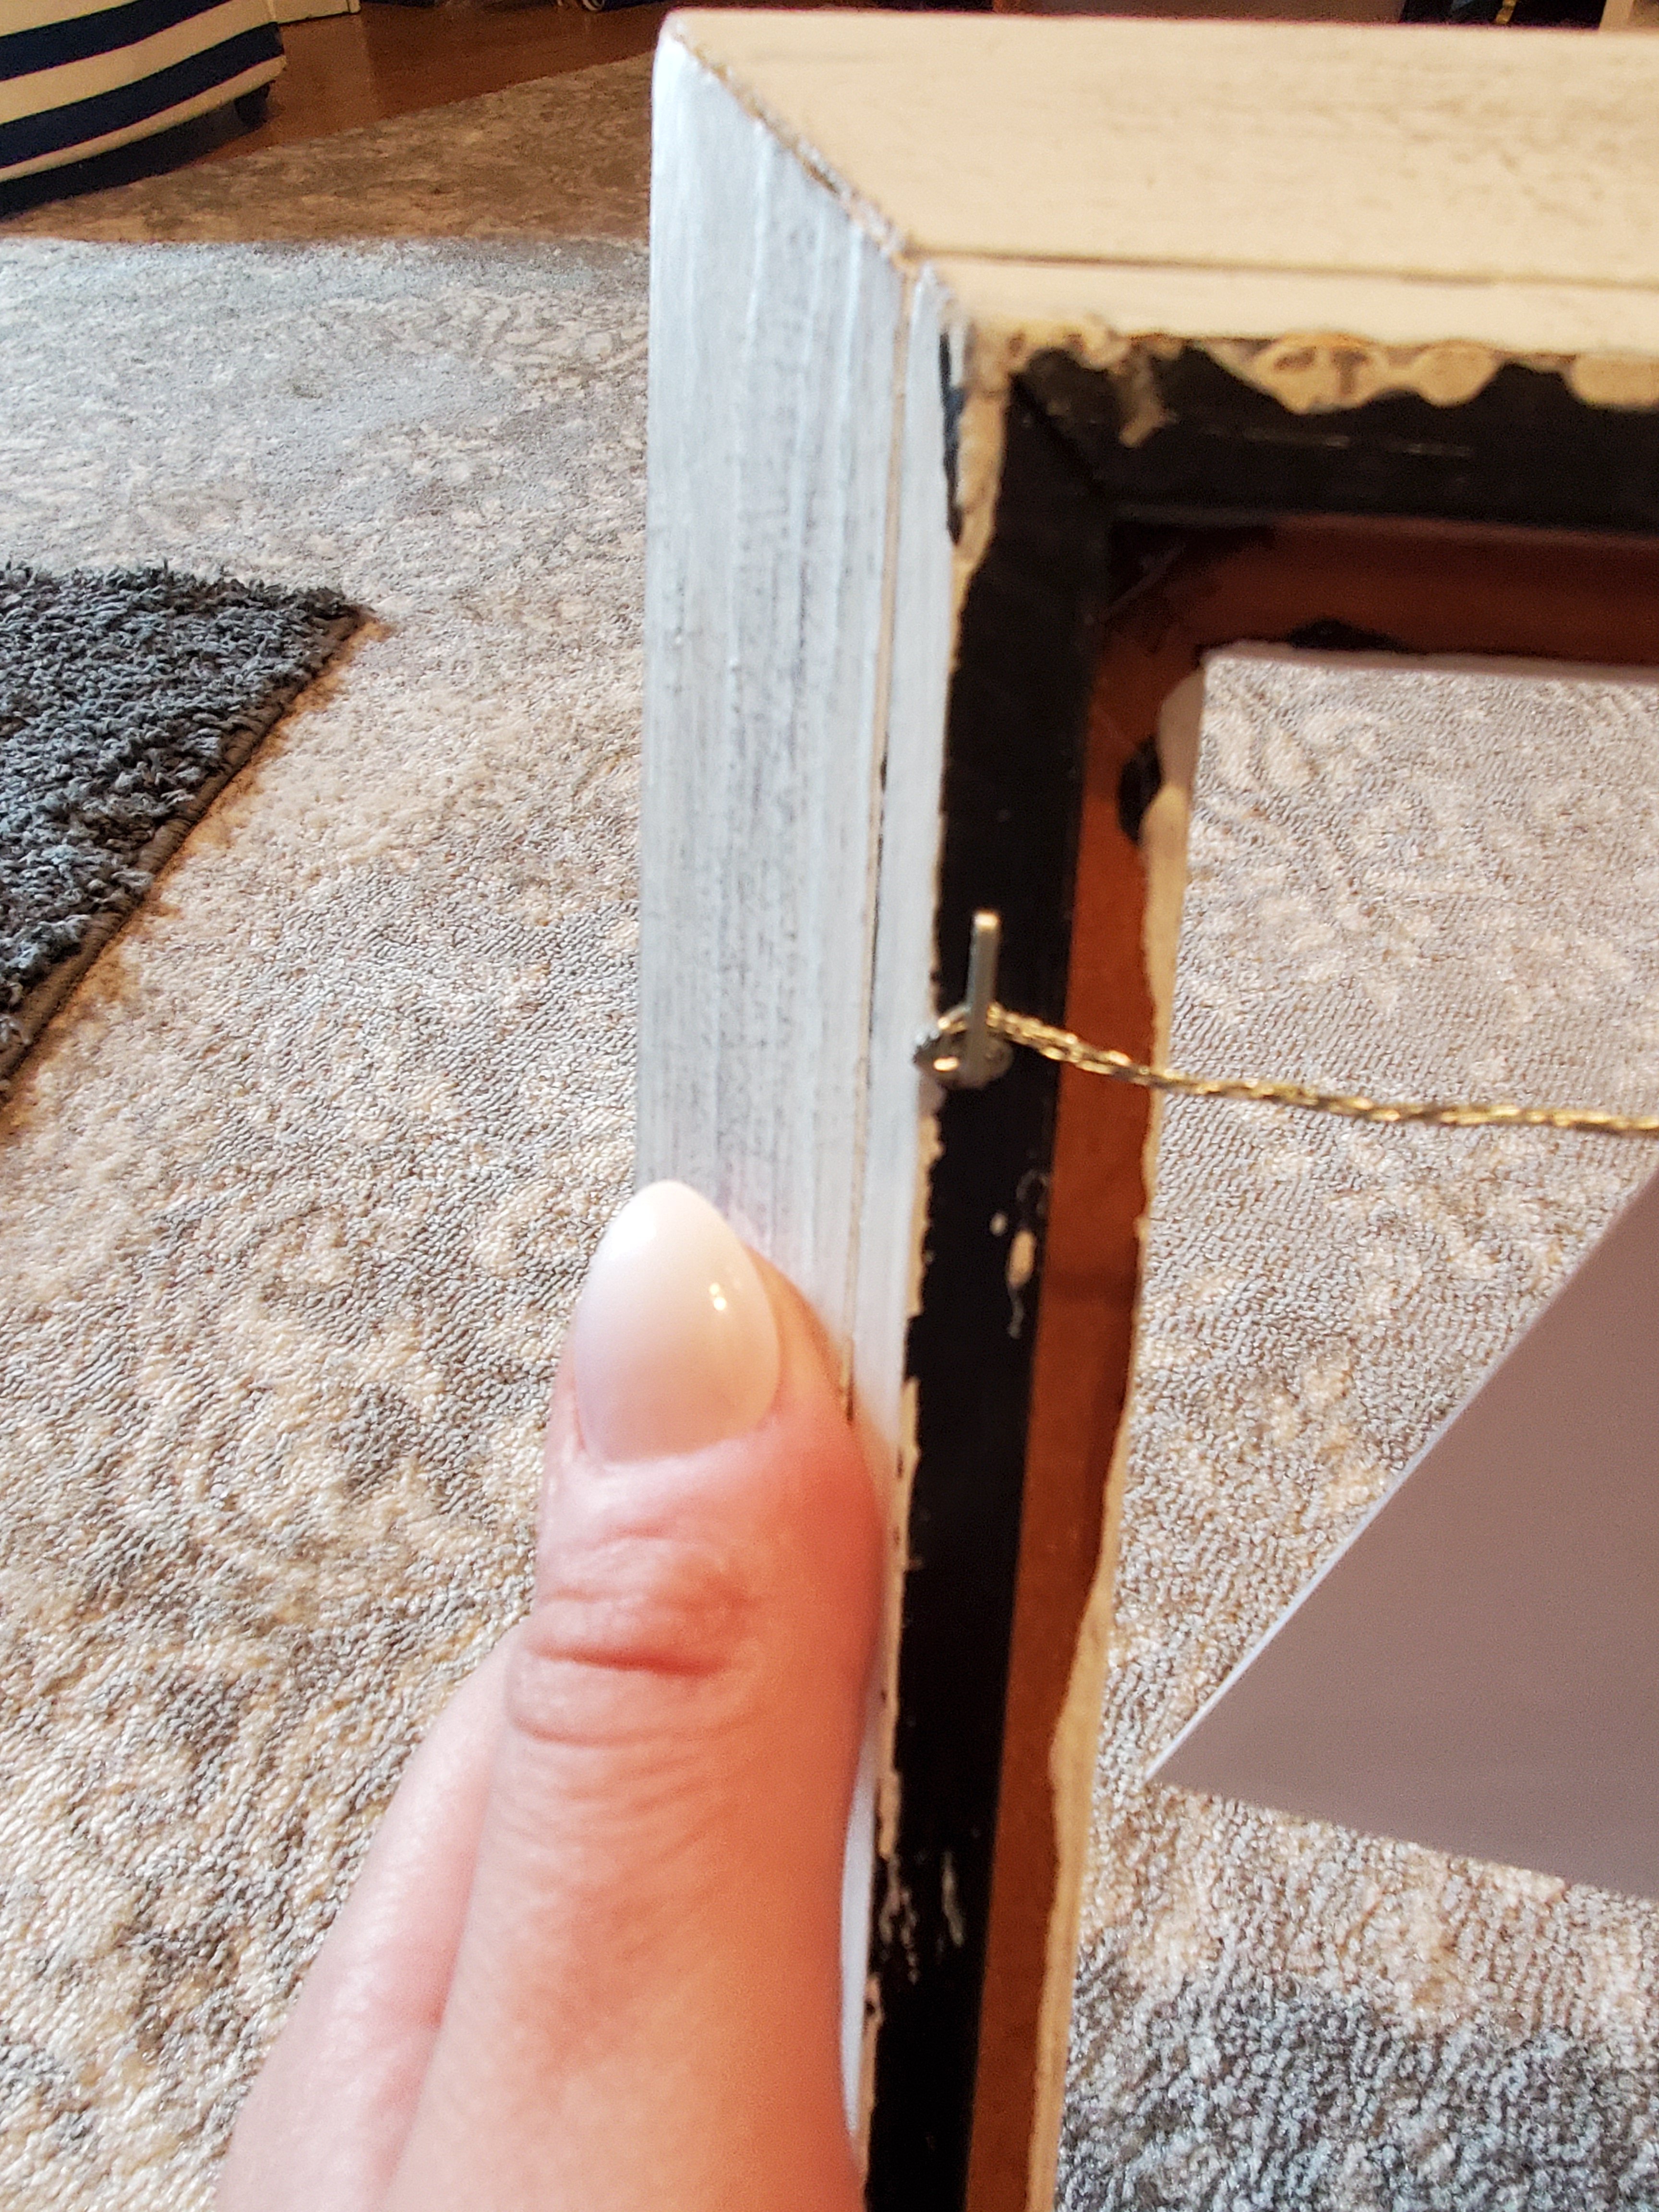
You can get tiny clothes pins on Amazon.
And viola!

I’ve also done this before with chicken wire…
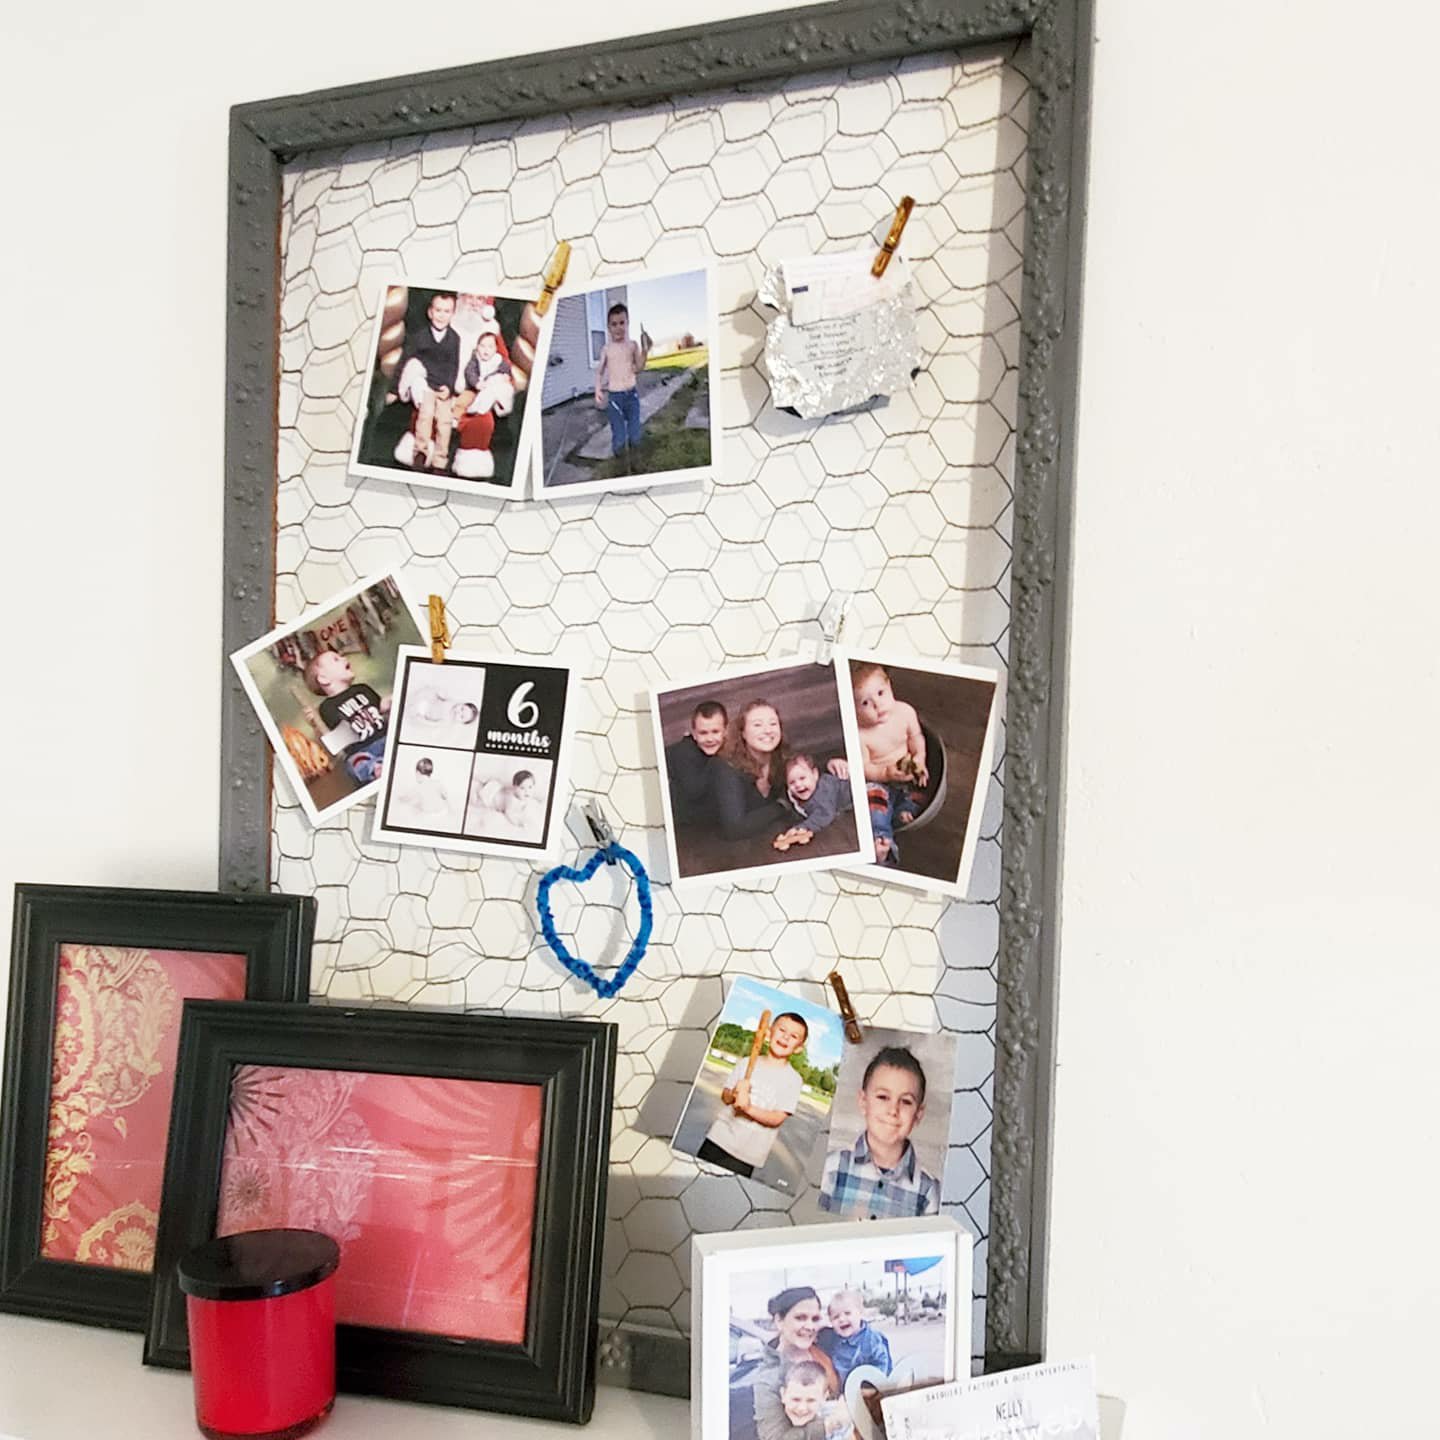
What do you think?
Doing any quarantine projects?!
XX,
Jess
Permalink Comments Off on Frame Hanger Project
Bathroom Update
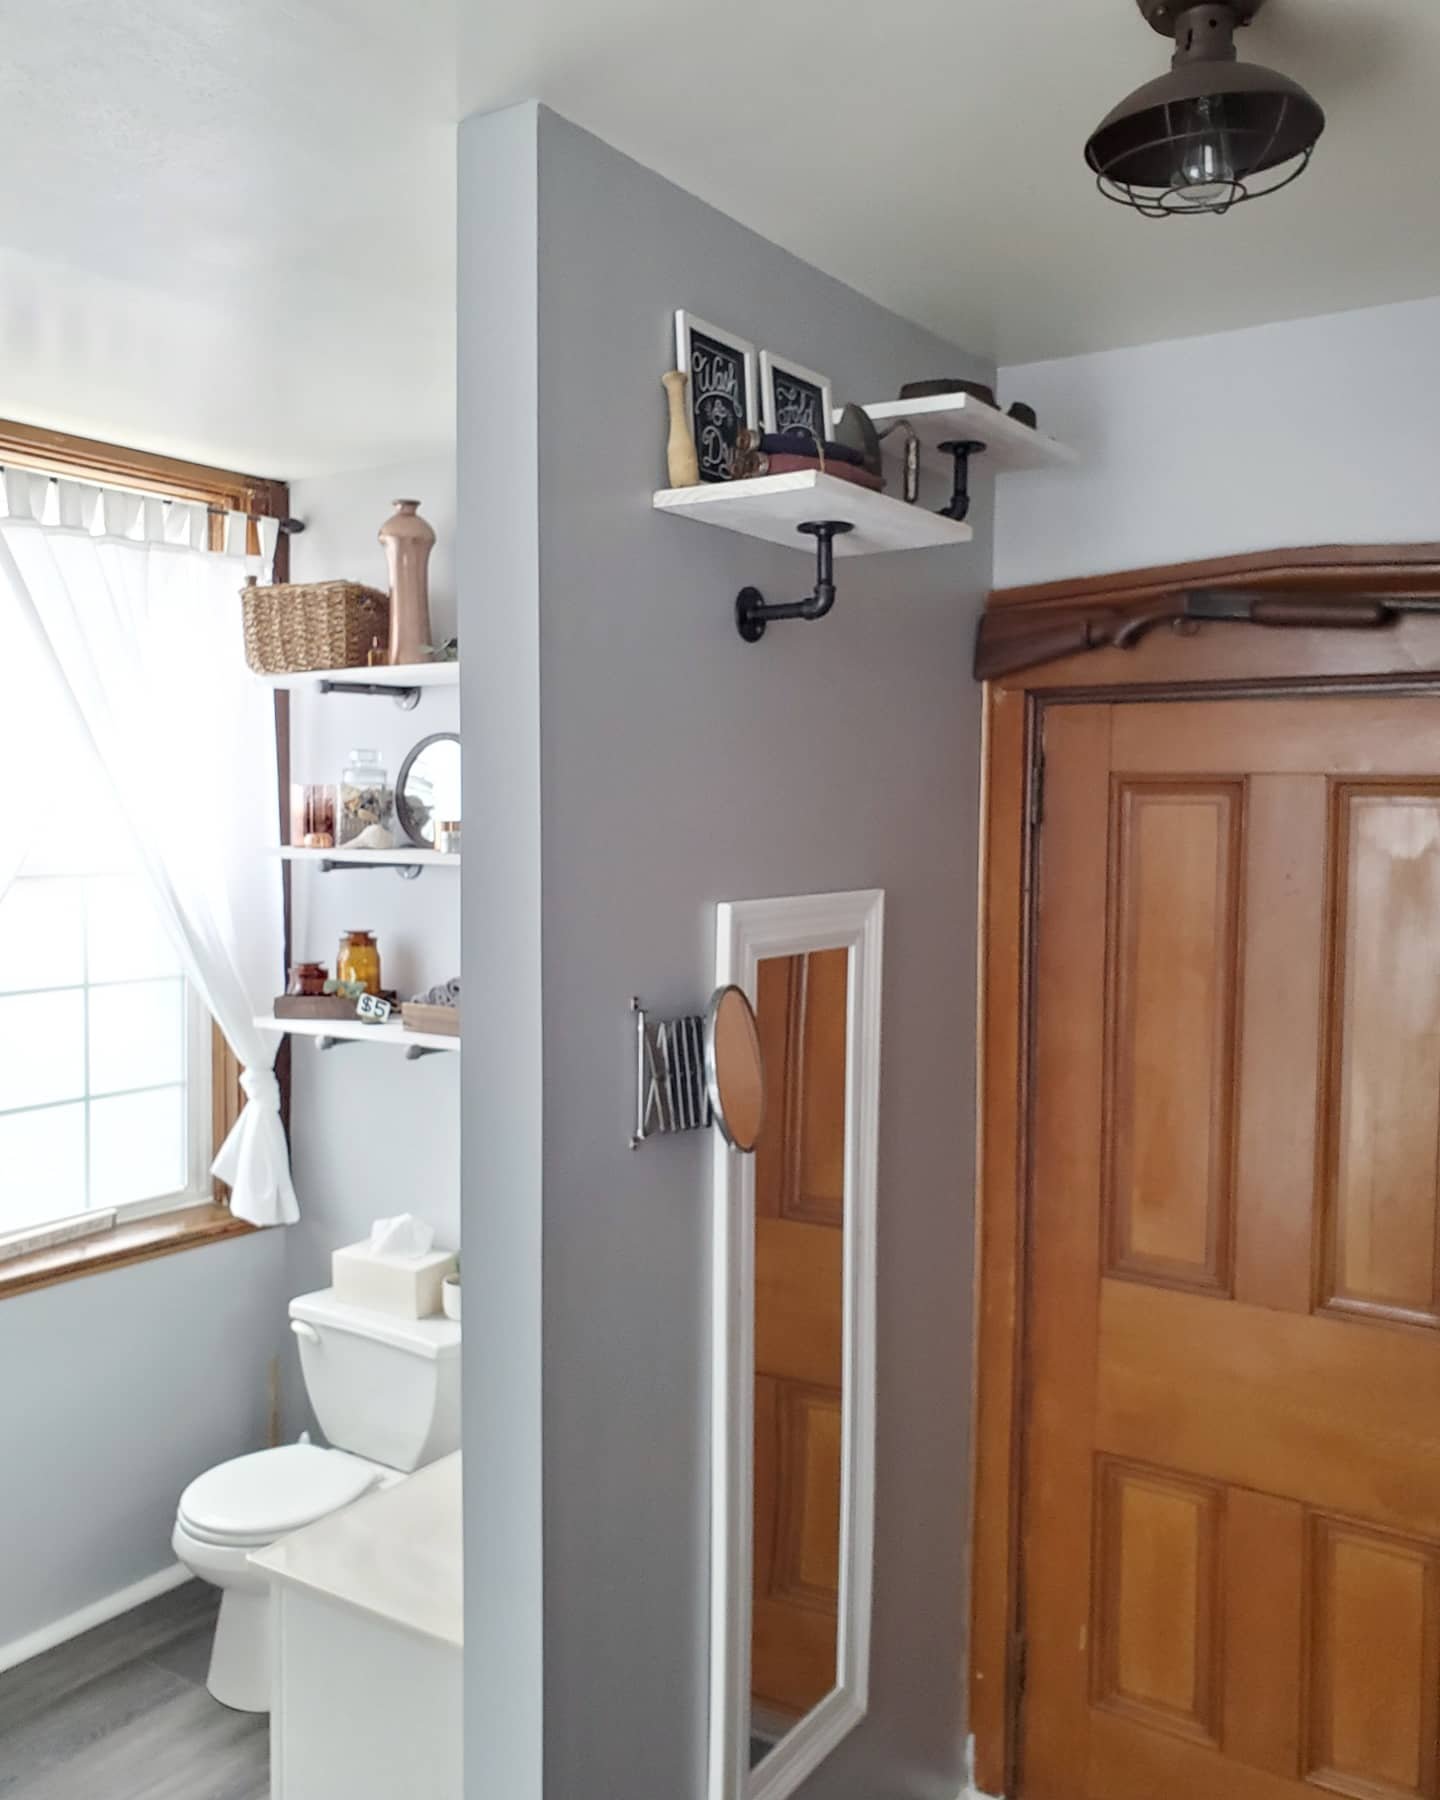
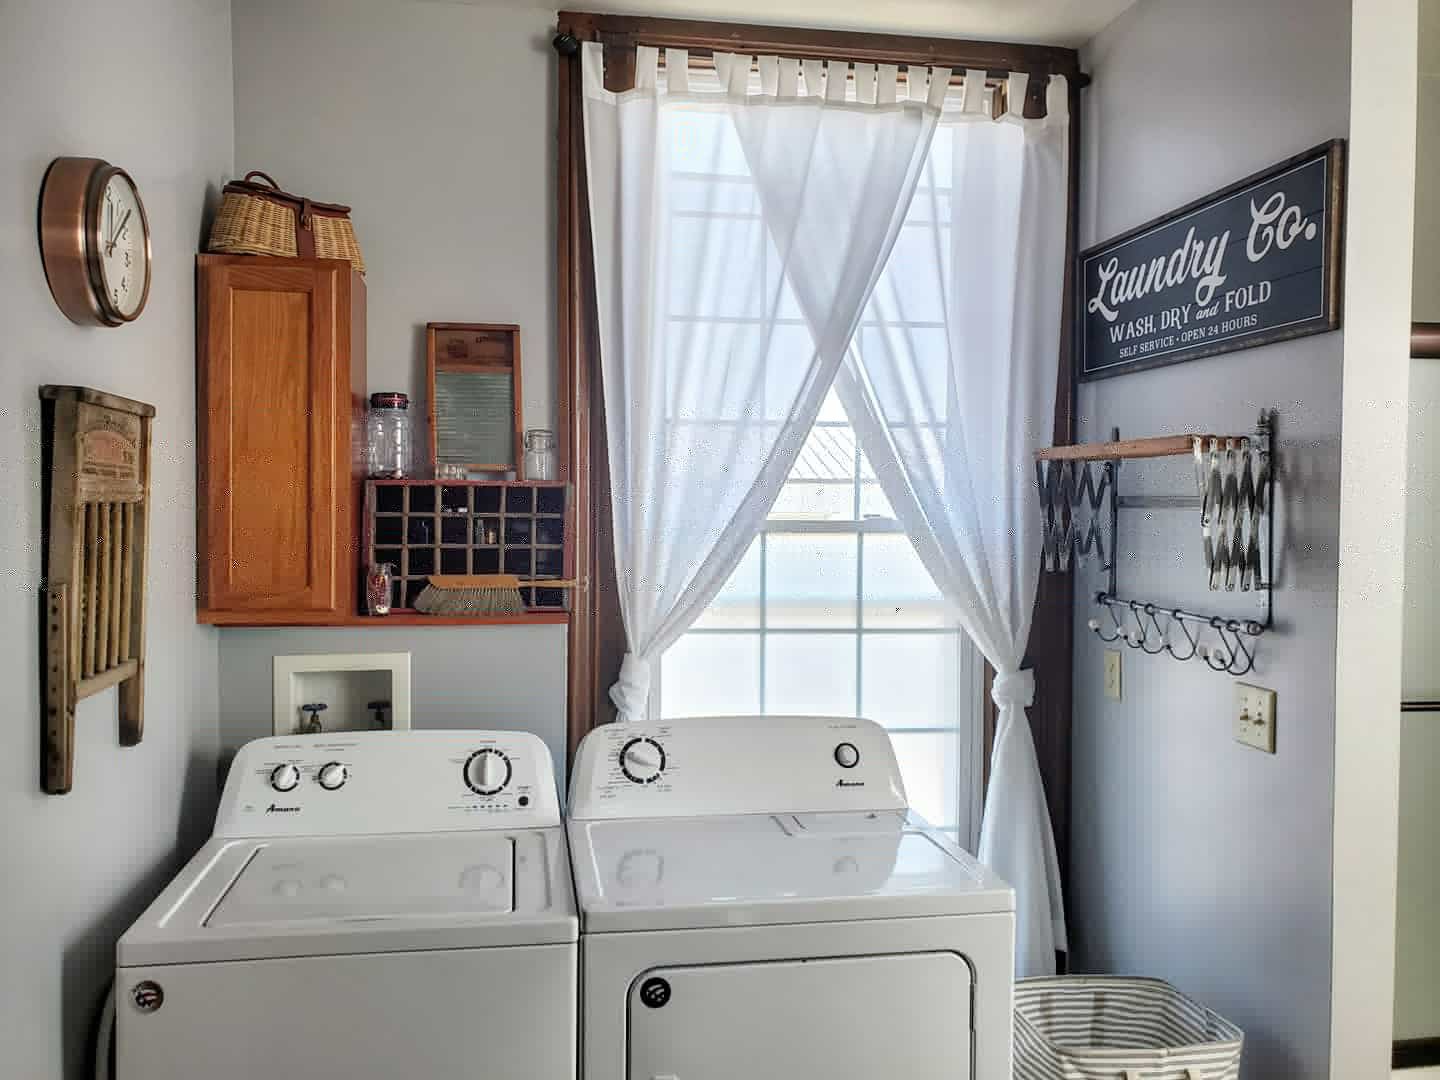
I thought we were going to live with the 85% bathroom update for a while. But we got a little shove to take it to 98% done now. 🤣 What this means is that we redid the flooring! Yay! And we added a mirror and a couple more custom shelves in the laundry room.

We used snap-in wood and vinyl flooring and it was super easy! Except for dealing with the uniqueness of an antique house with crooked walls and missing trim, etc, but we managed and it’s been amazing and seems super durable already. We ended up going with large quarter round as trim because we need to hide some of those flaws from a very old house. But I love the look here!
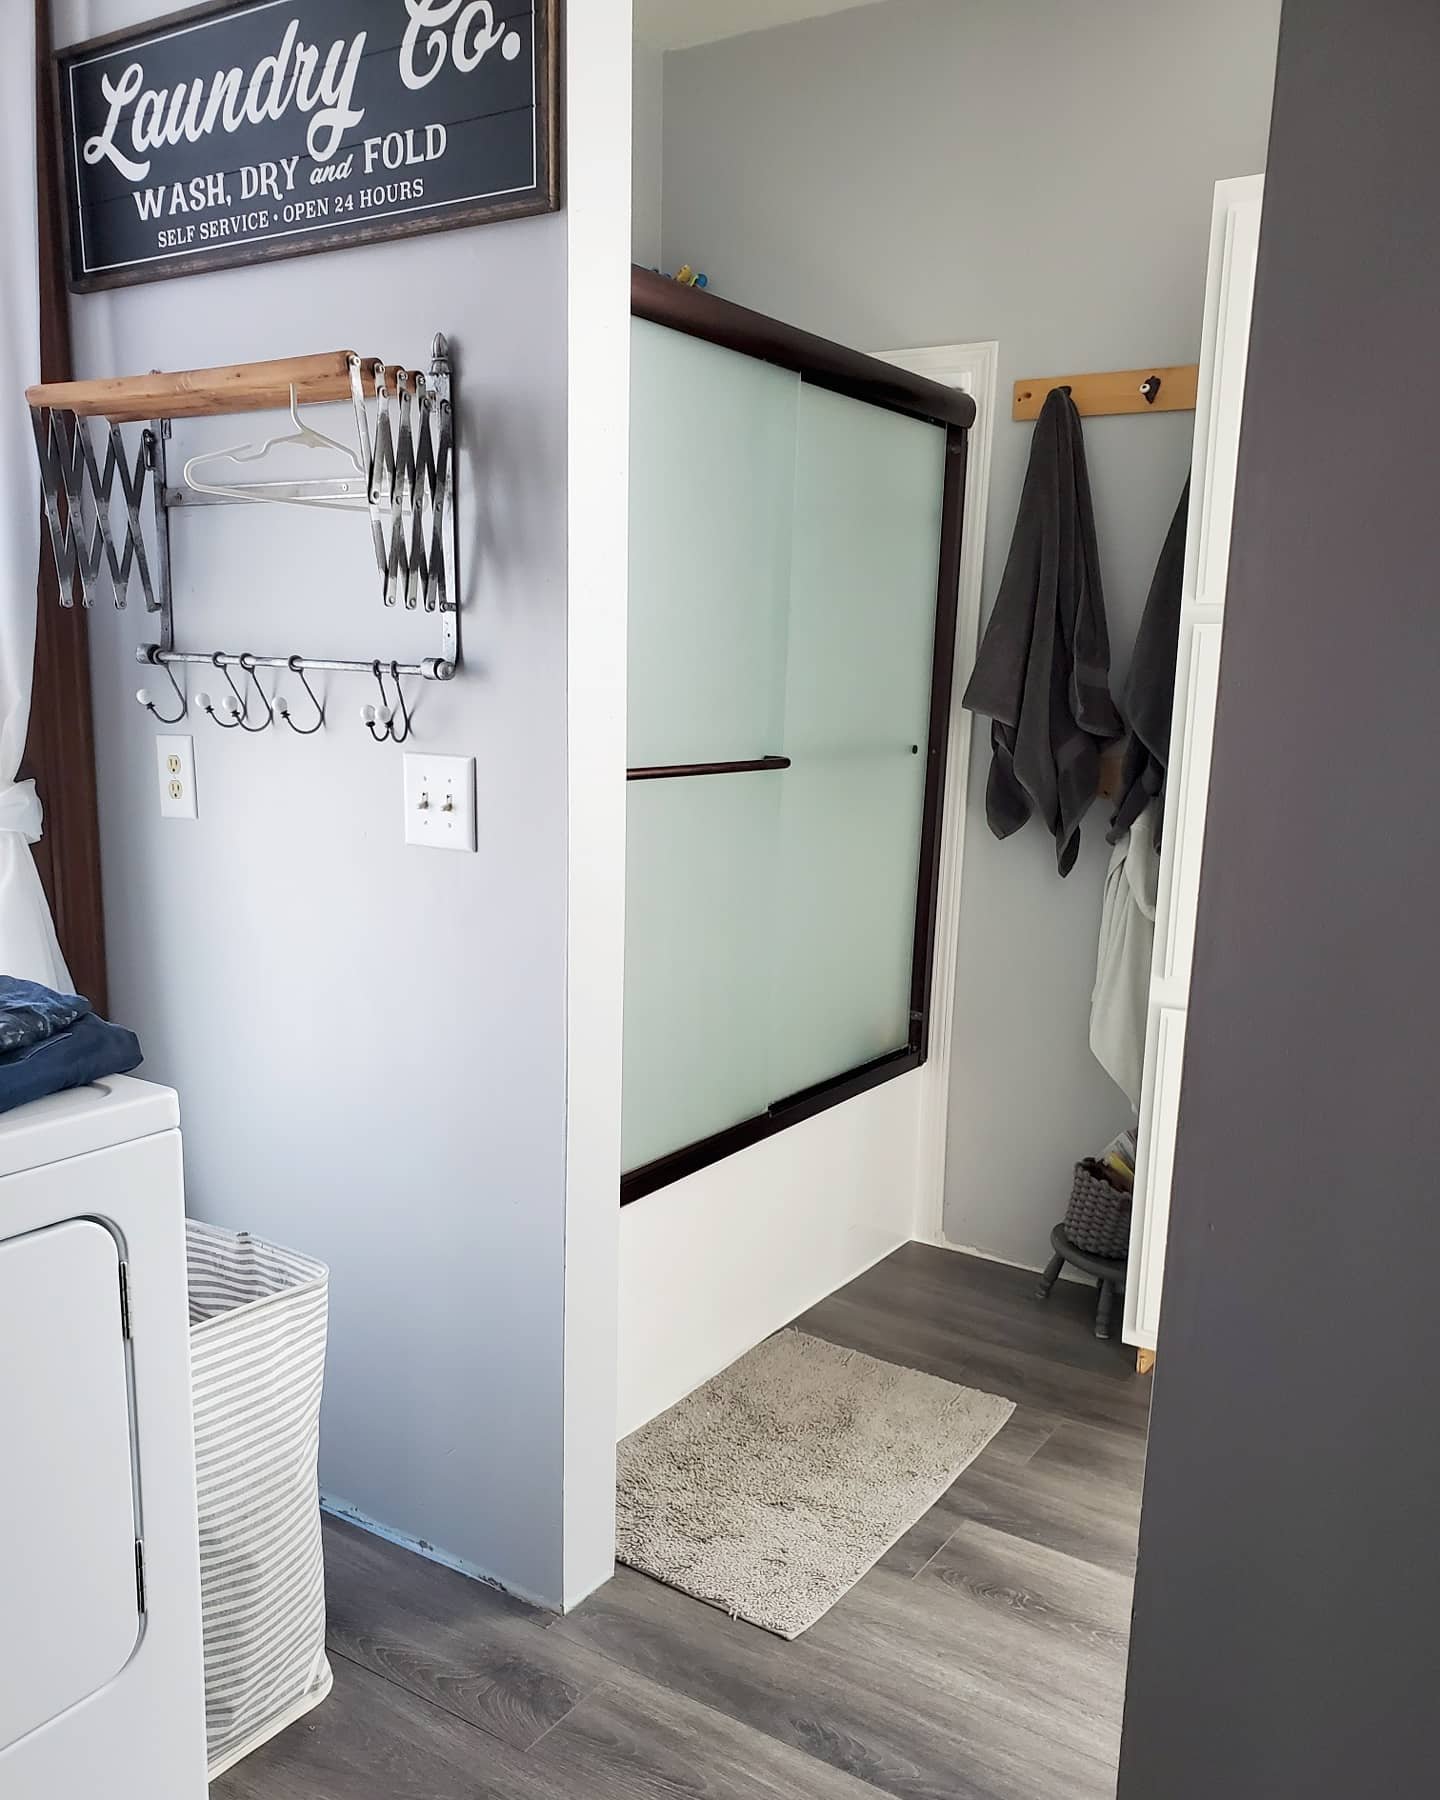
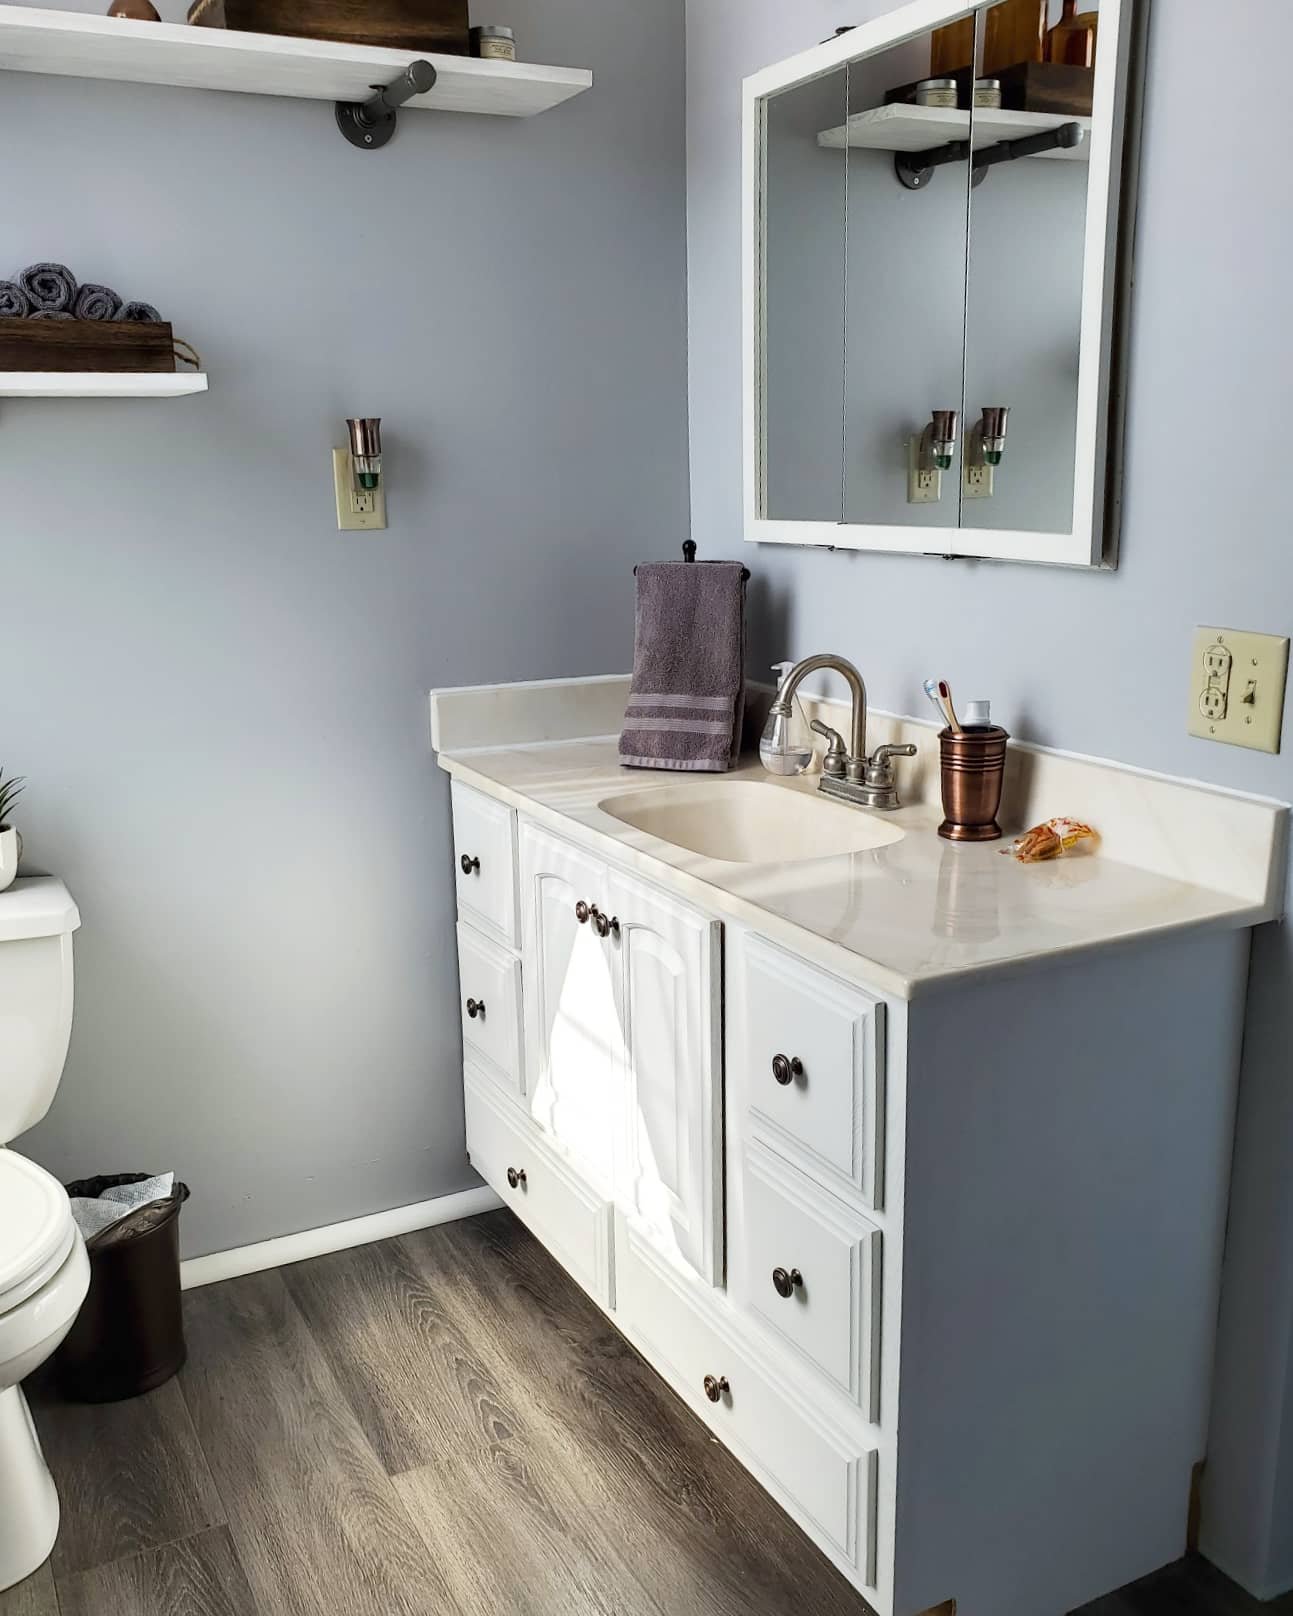
The ONLY thing left is to replace the faucet. Soon. We are going to live with the sink and counter top for a while, but I can deal with that.
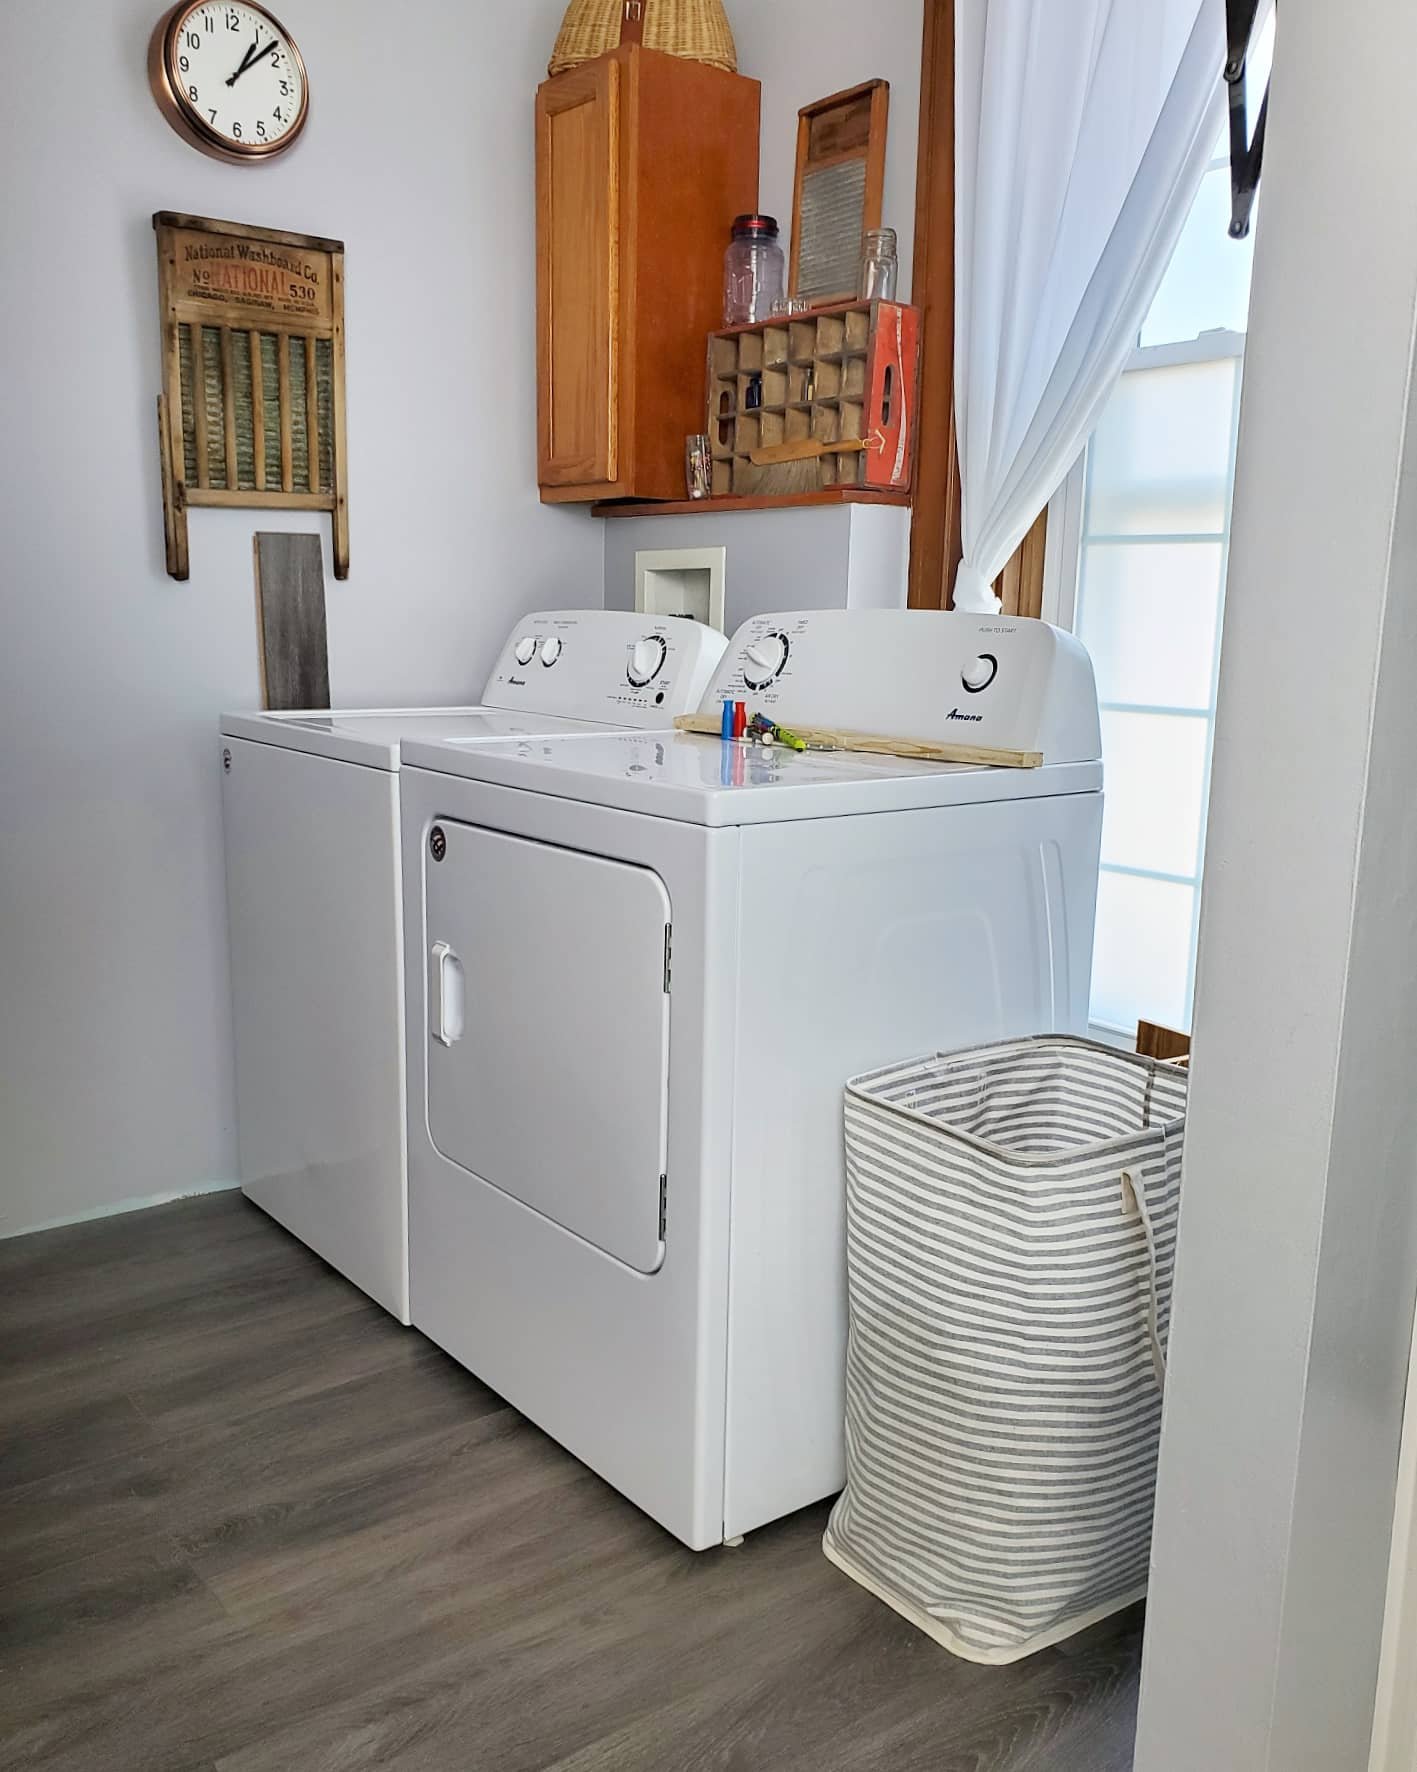
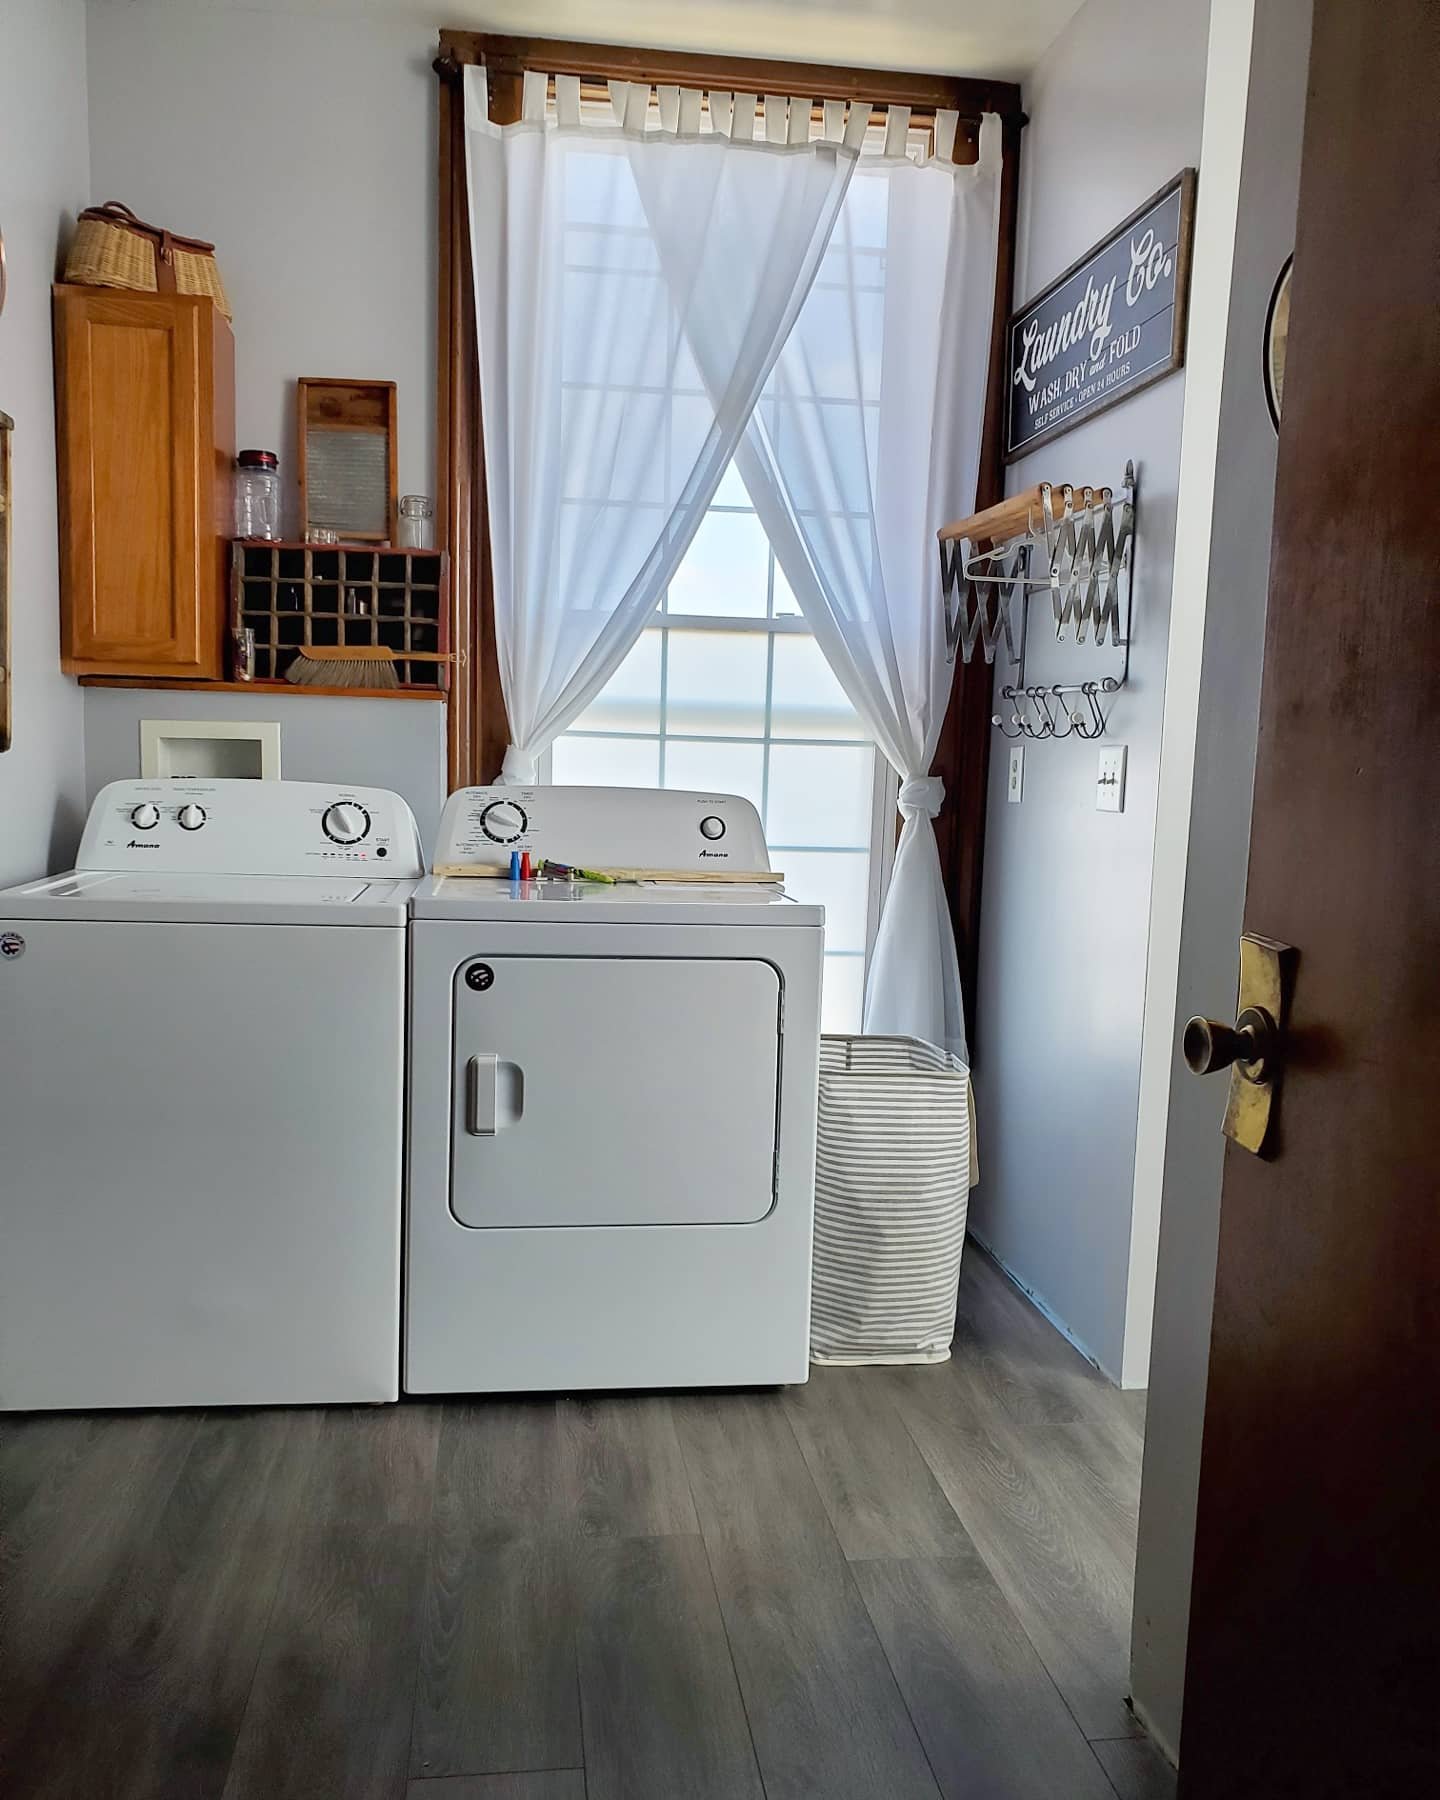
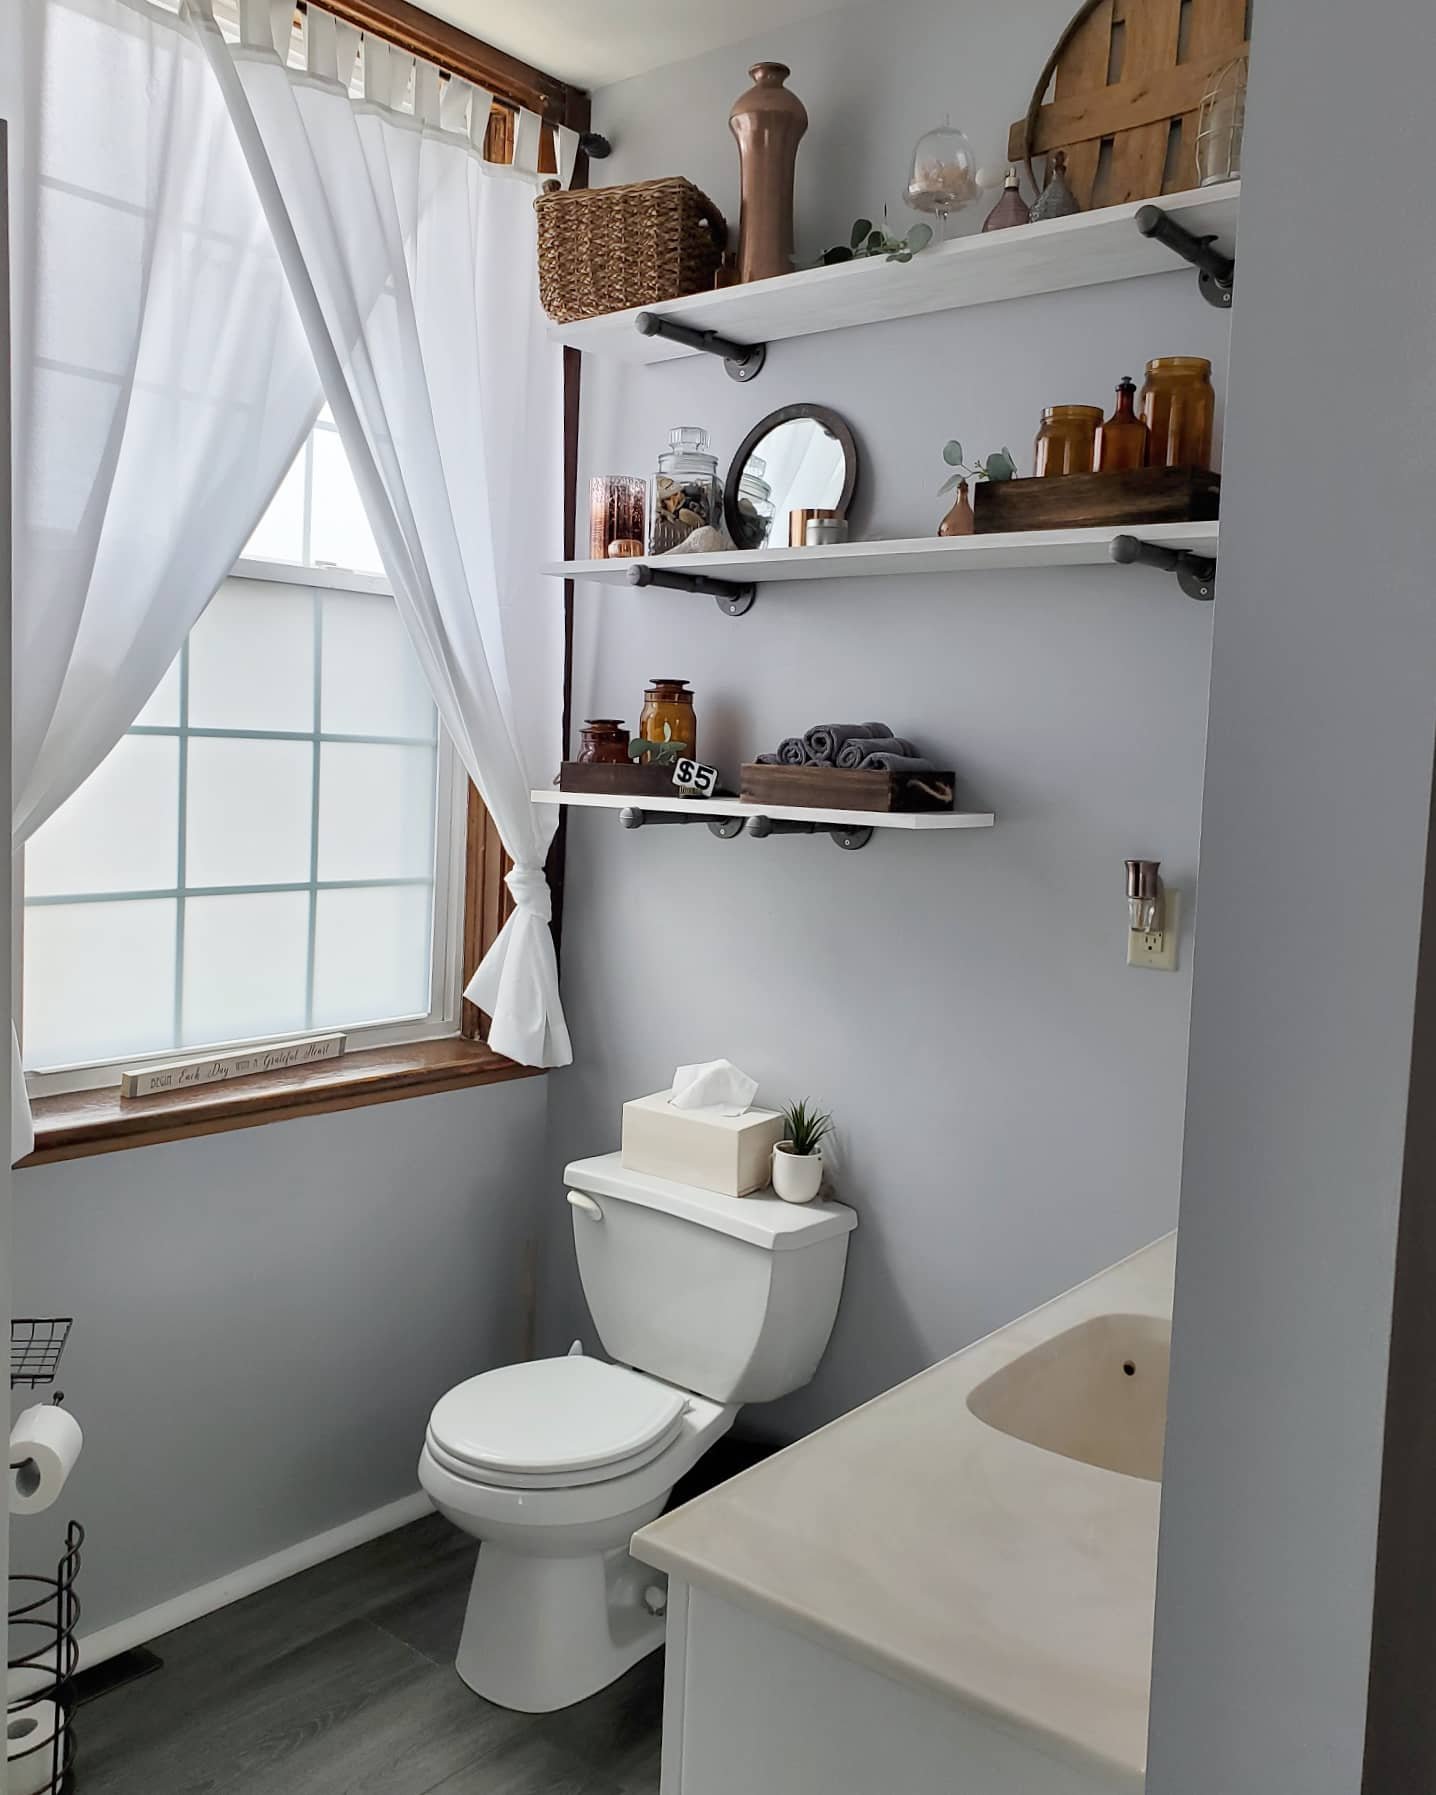
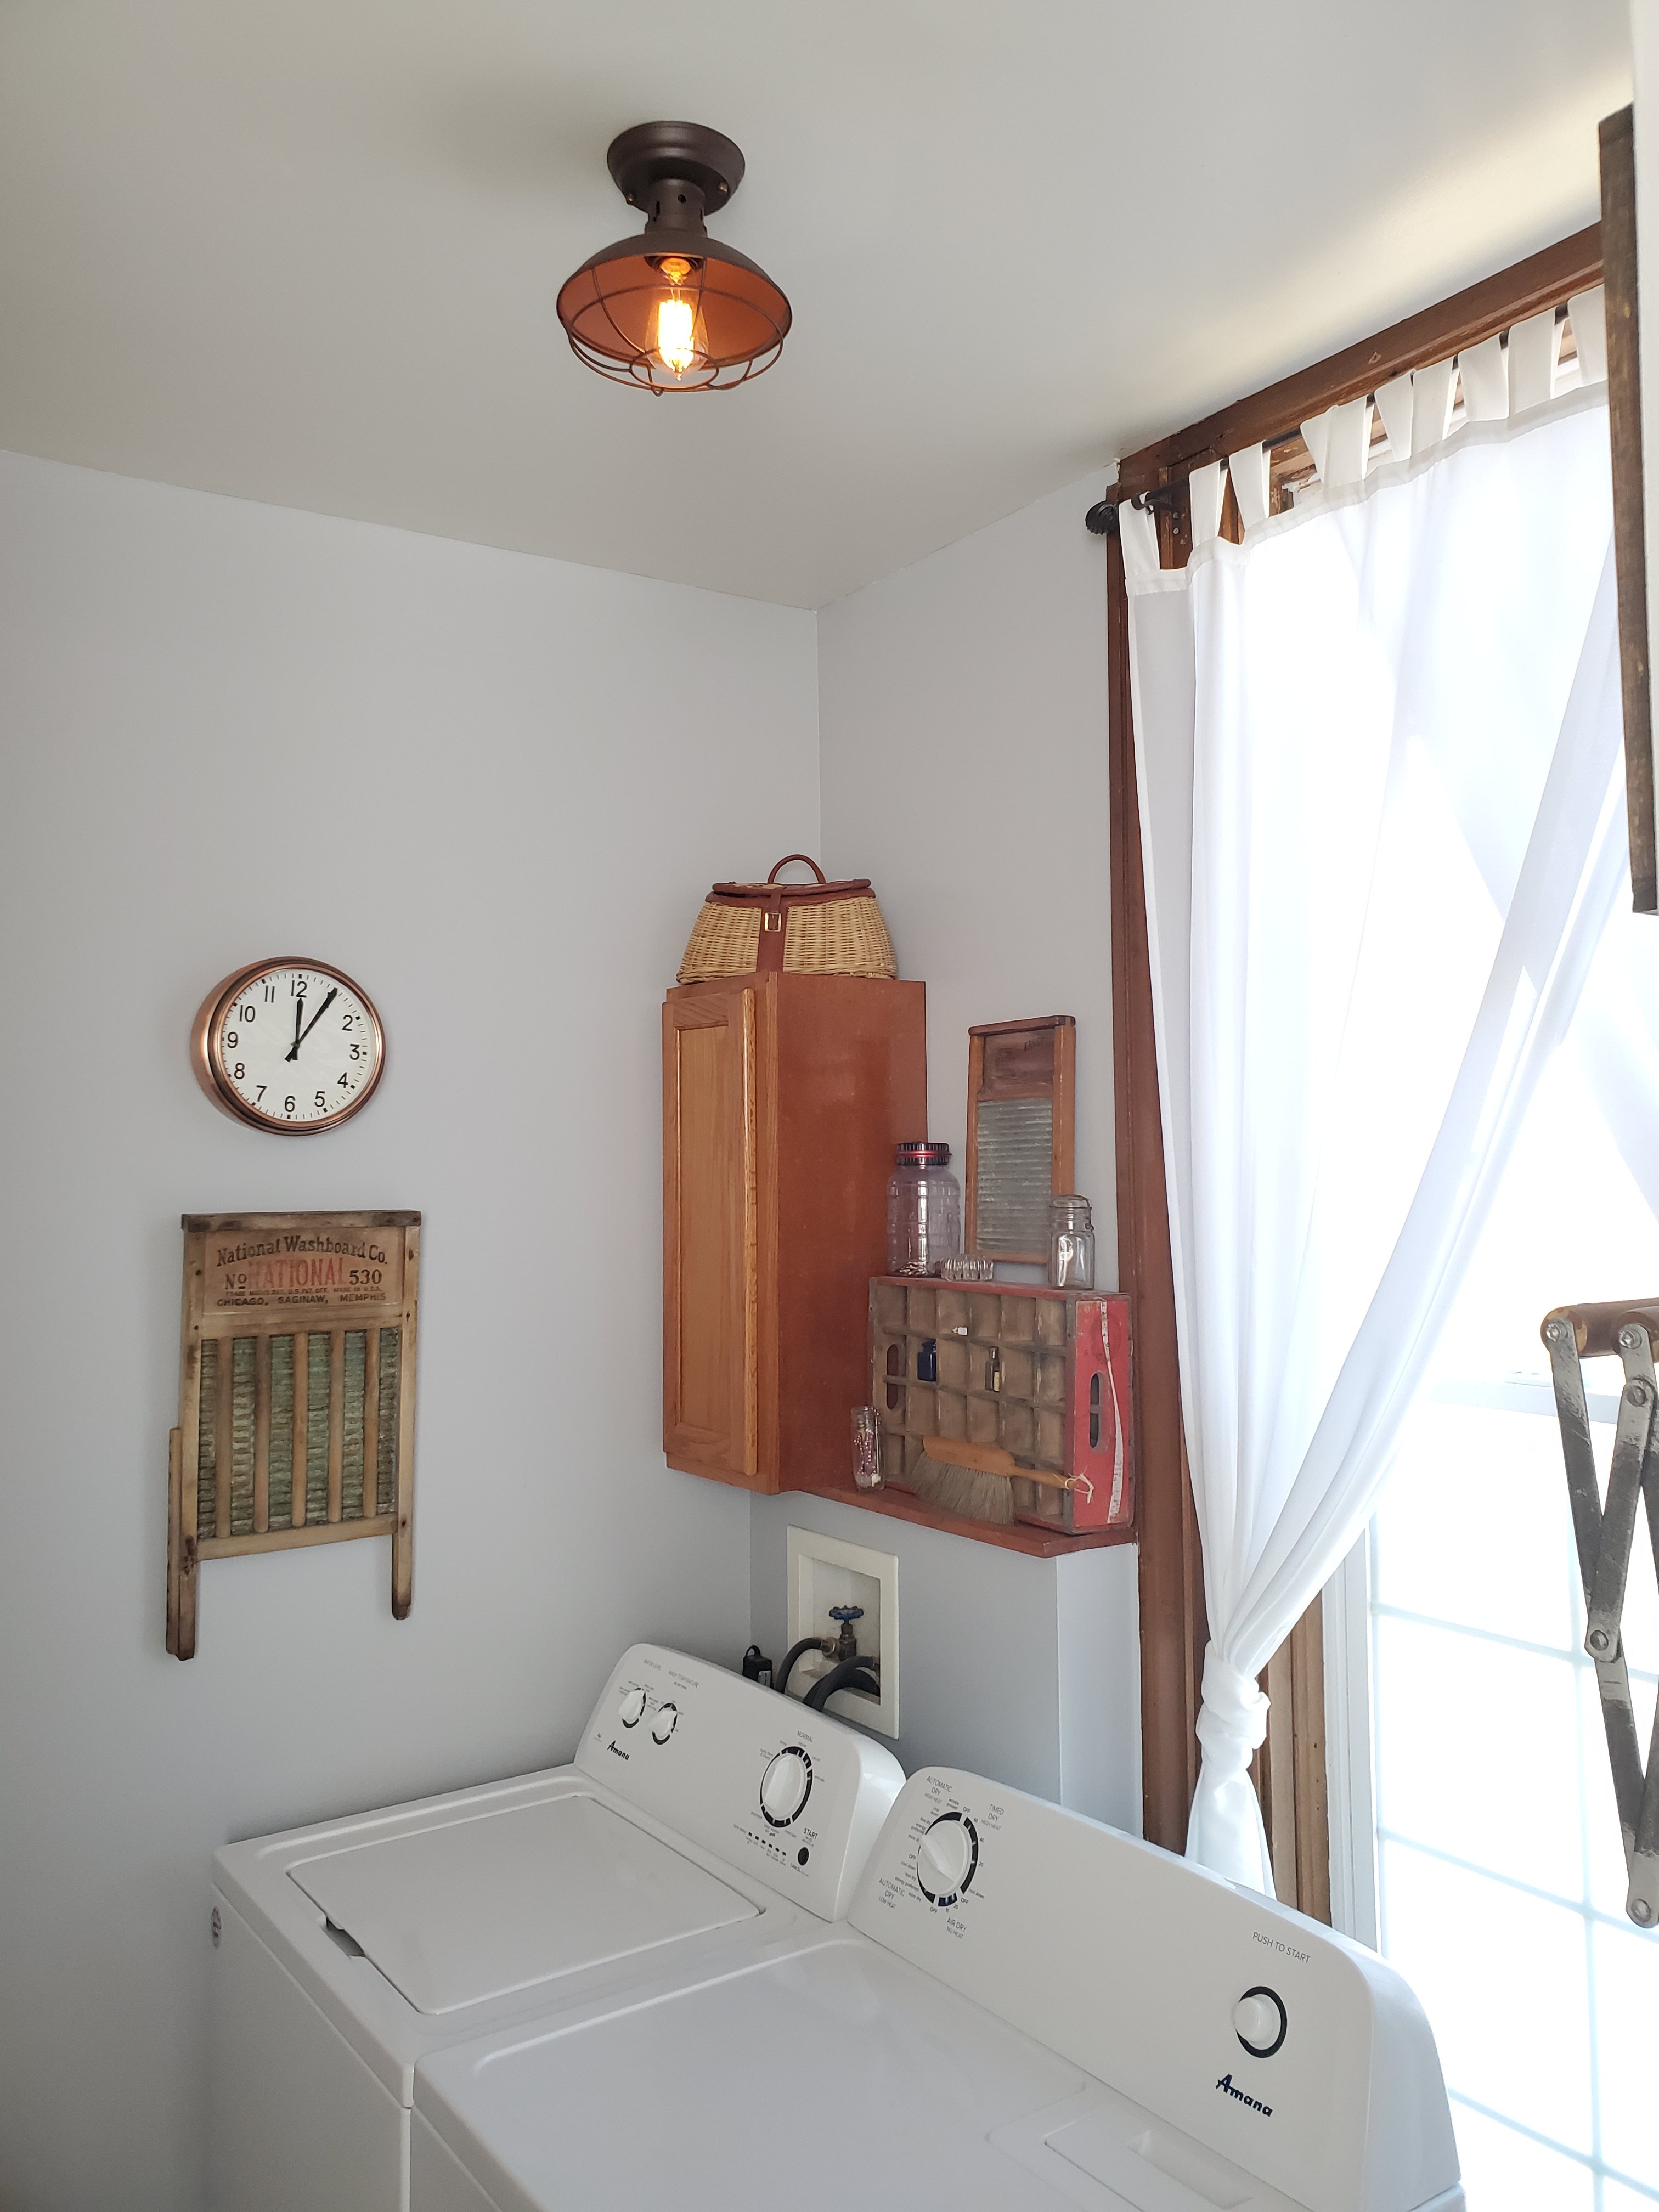
How cute are the little shelves holding laundry items?! We made them the same way, with plumbing pipes and hand whitewashed boards.


Remember, this is a mini refresh, (see the before shots, yikes, 2 posts back!) not a total overhaul, so this girl will still have to dream of one day having a stacking washer and dryer and wall cabinetry. This is gorgeous to me for now! 😉
Xx,
Jess
Permalink Comments Off on Bathroom Update
Bath/Laundry Room Update
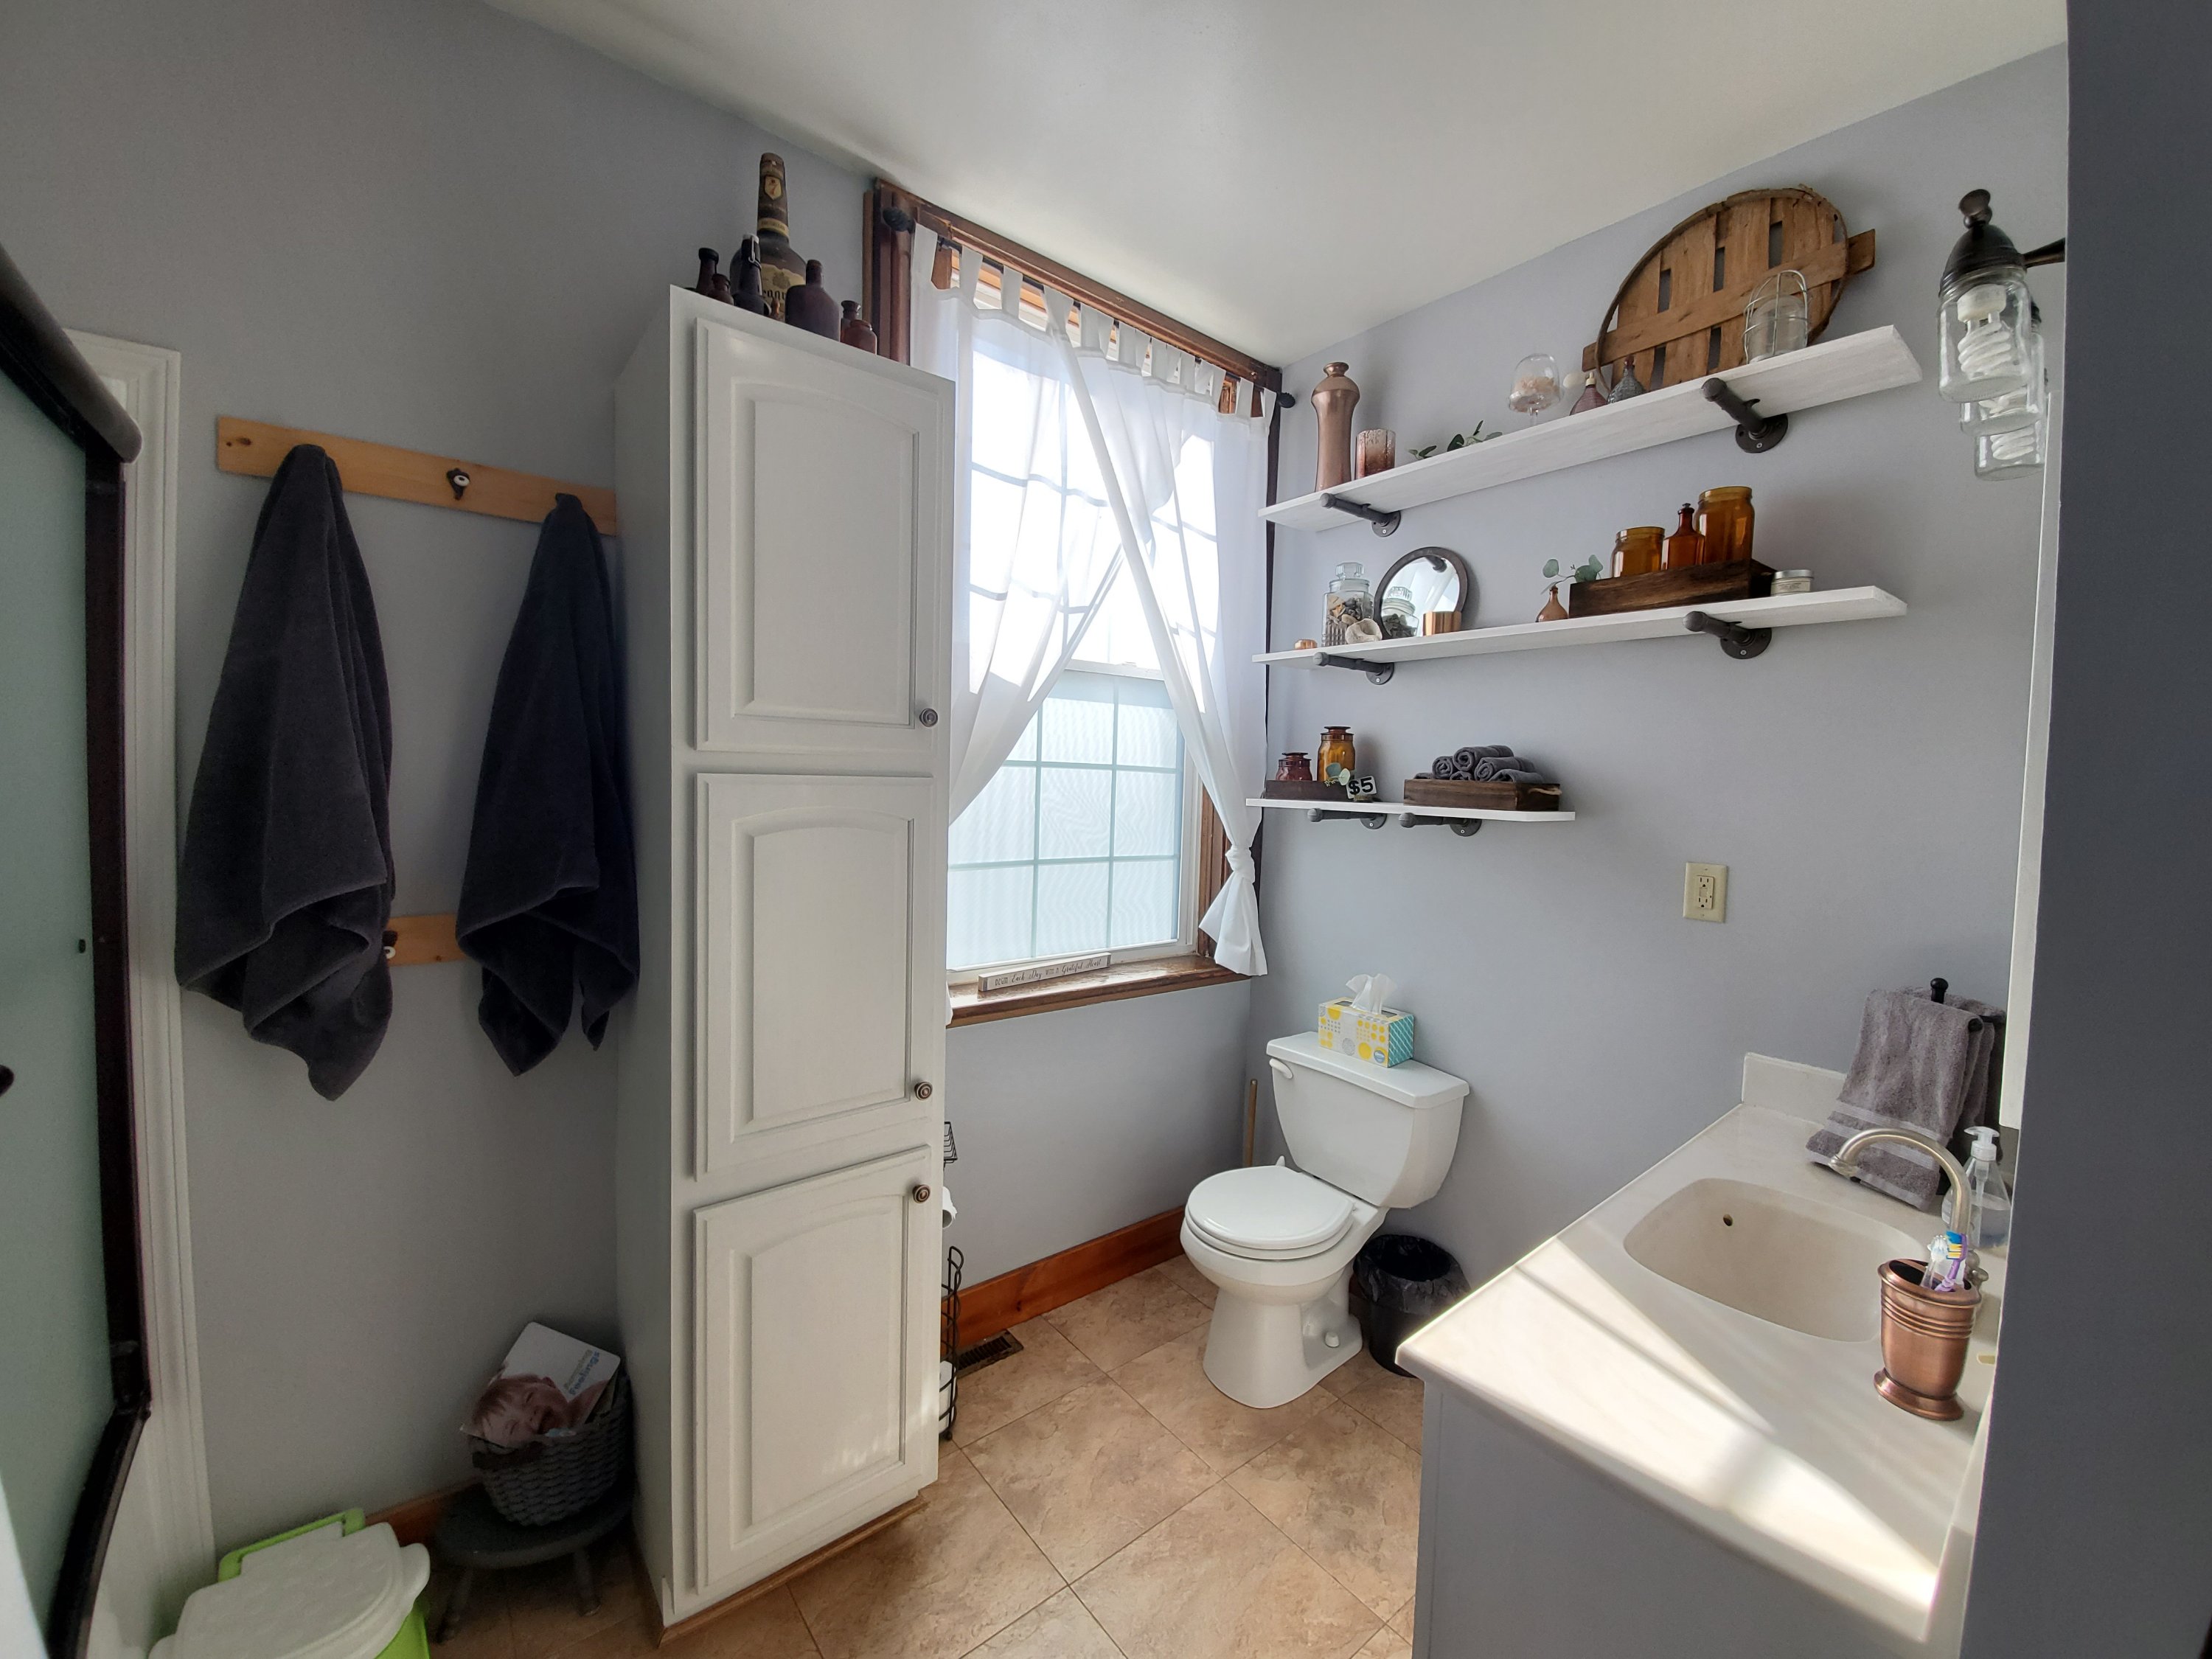
We knew we wanted a fixer-upper, and we sure got it with this one! But we are enjoying putting in the work and making it into what we want for a home. The bathroom was no exception. We can’t afford a complete gut and overhaul of every room (I wish!), so this is a little refresh.
Before:
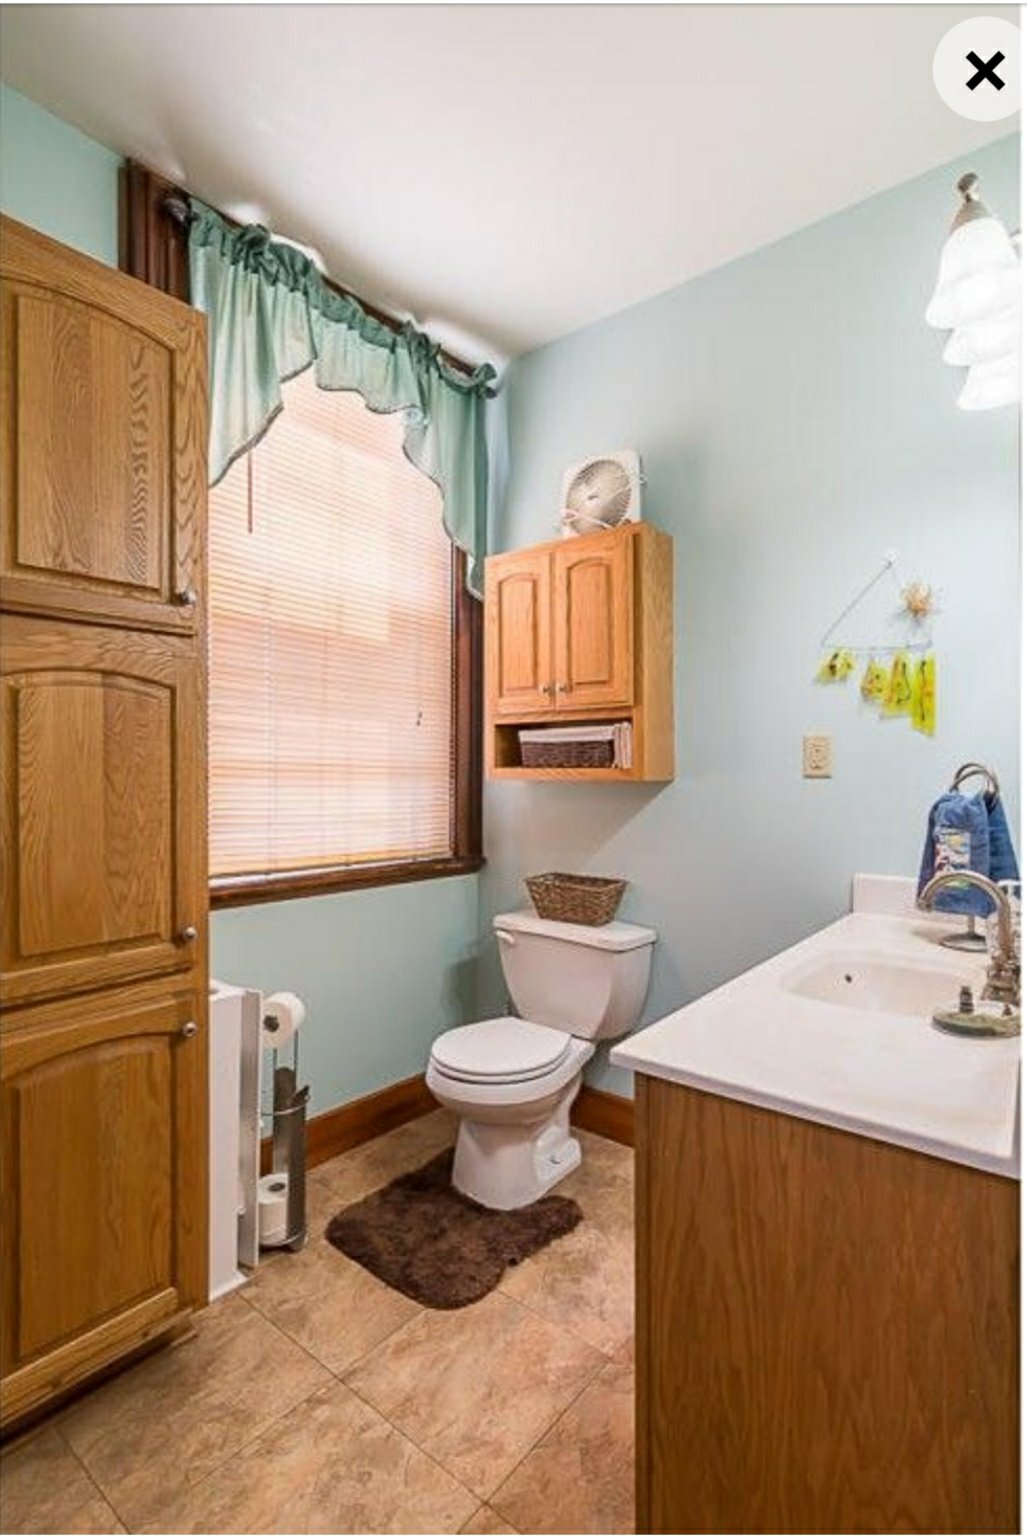
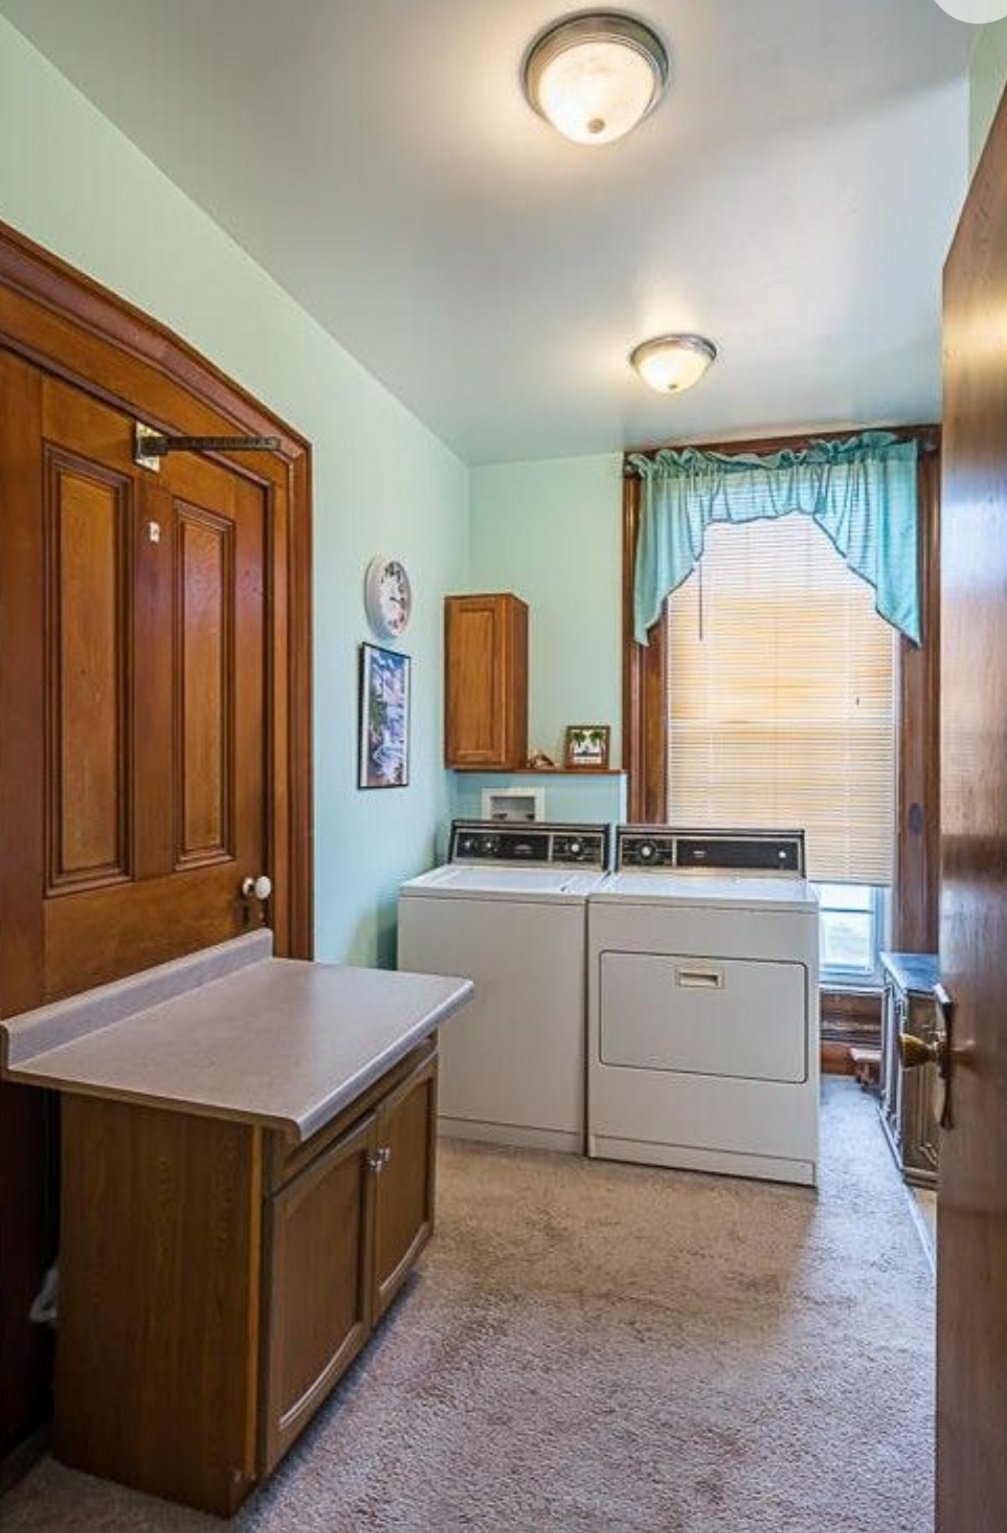
After:

We will put a new faucet in soon and plan to redo the bath and laundry room floors in a few months. But for now, wow. Its clean. Its peaceful. I’m in love.

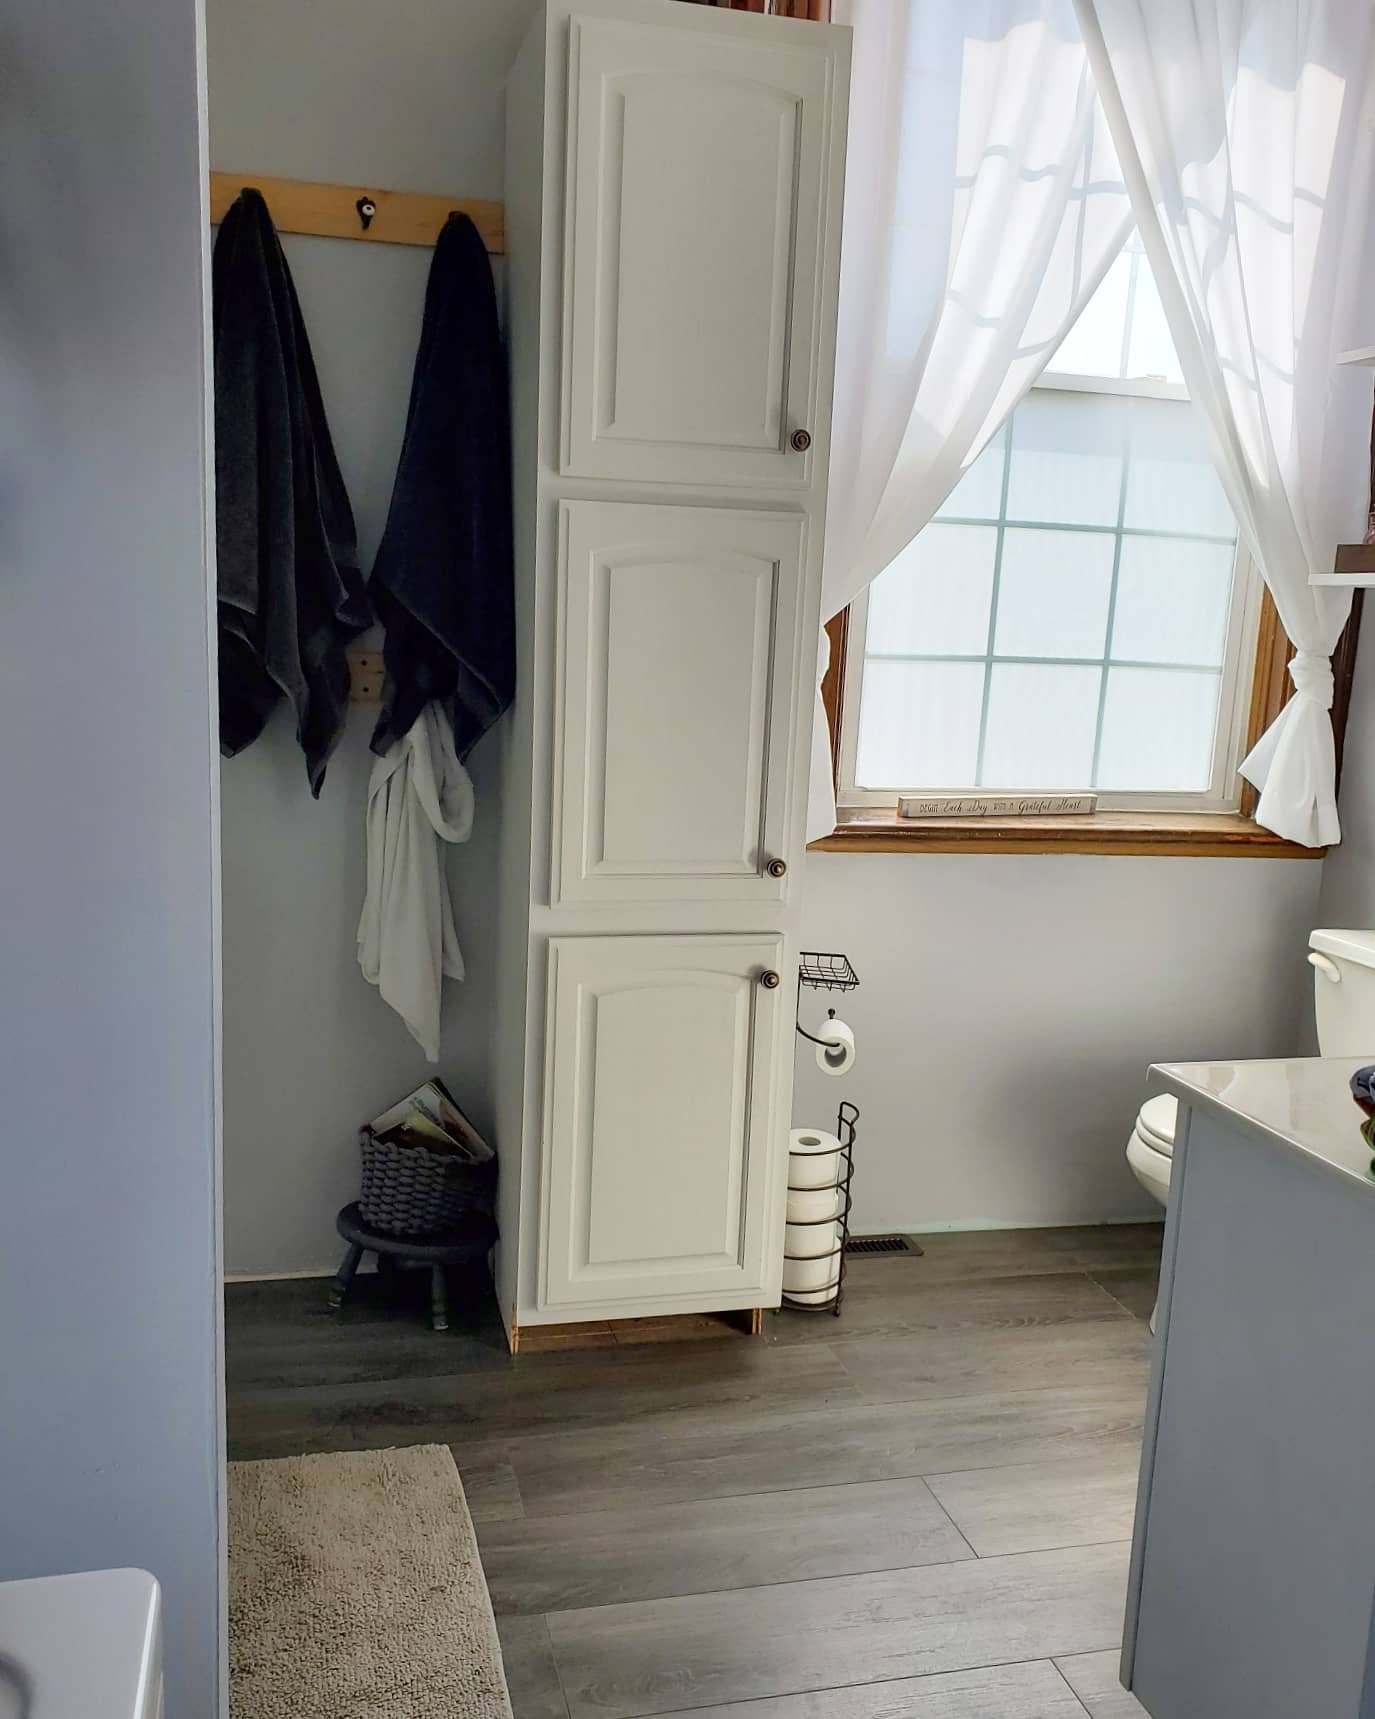
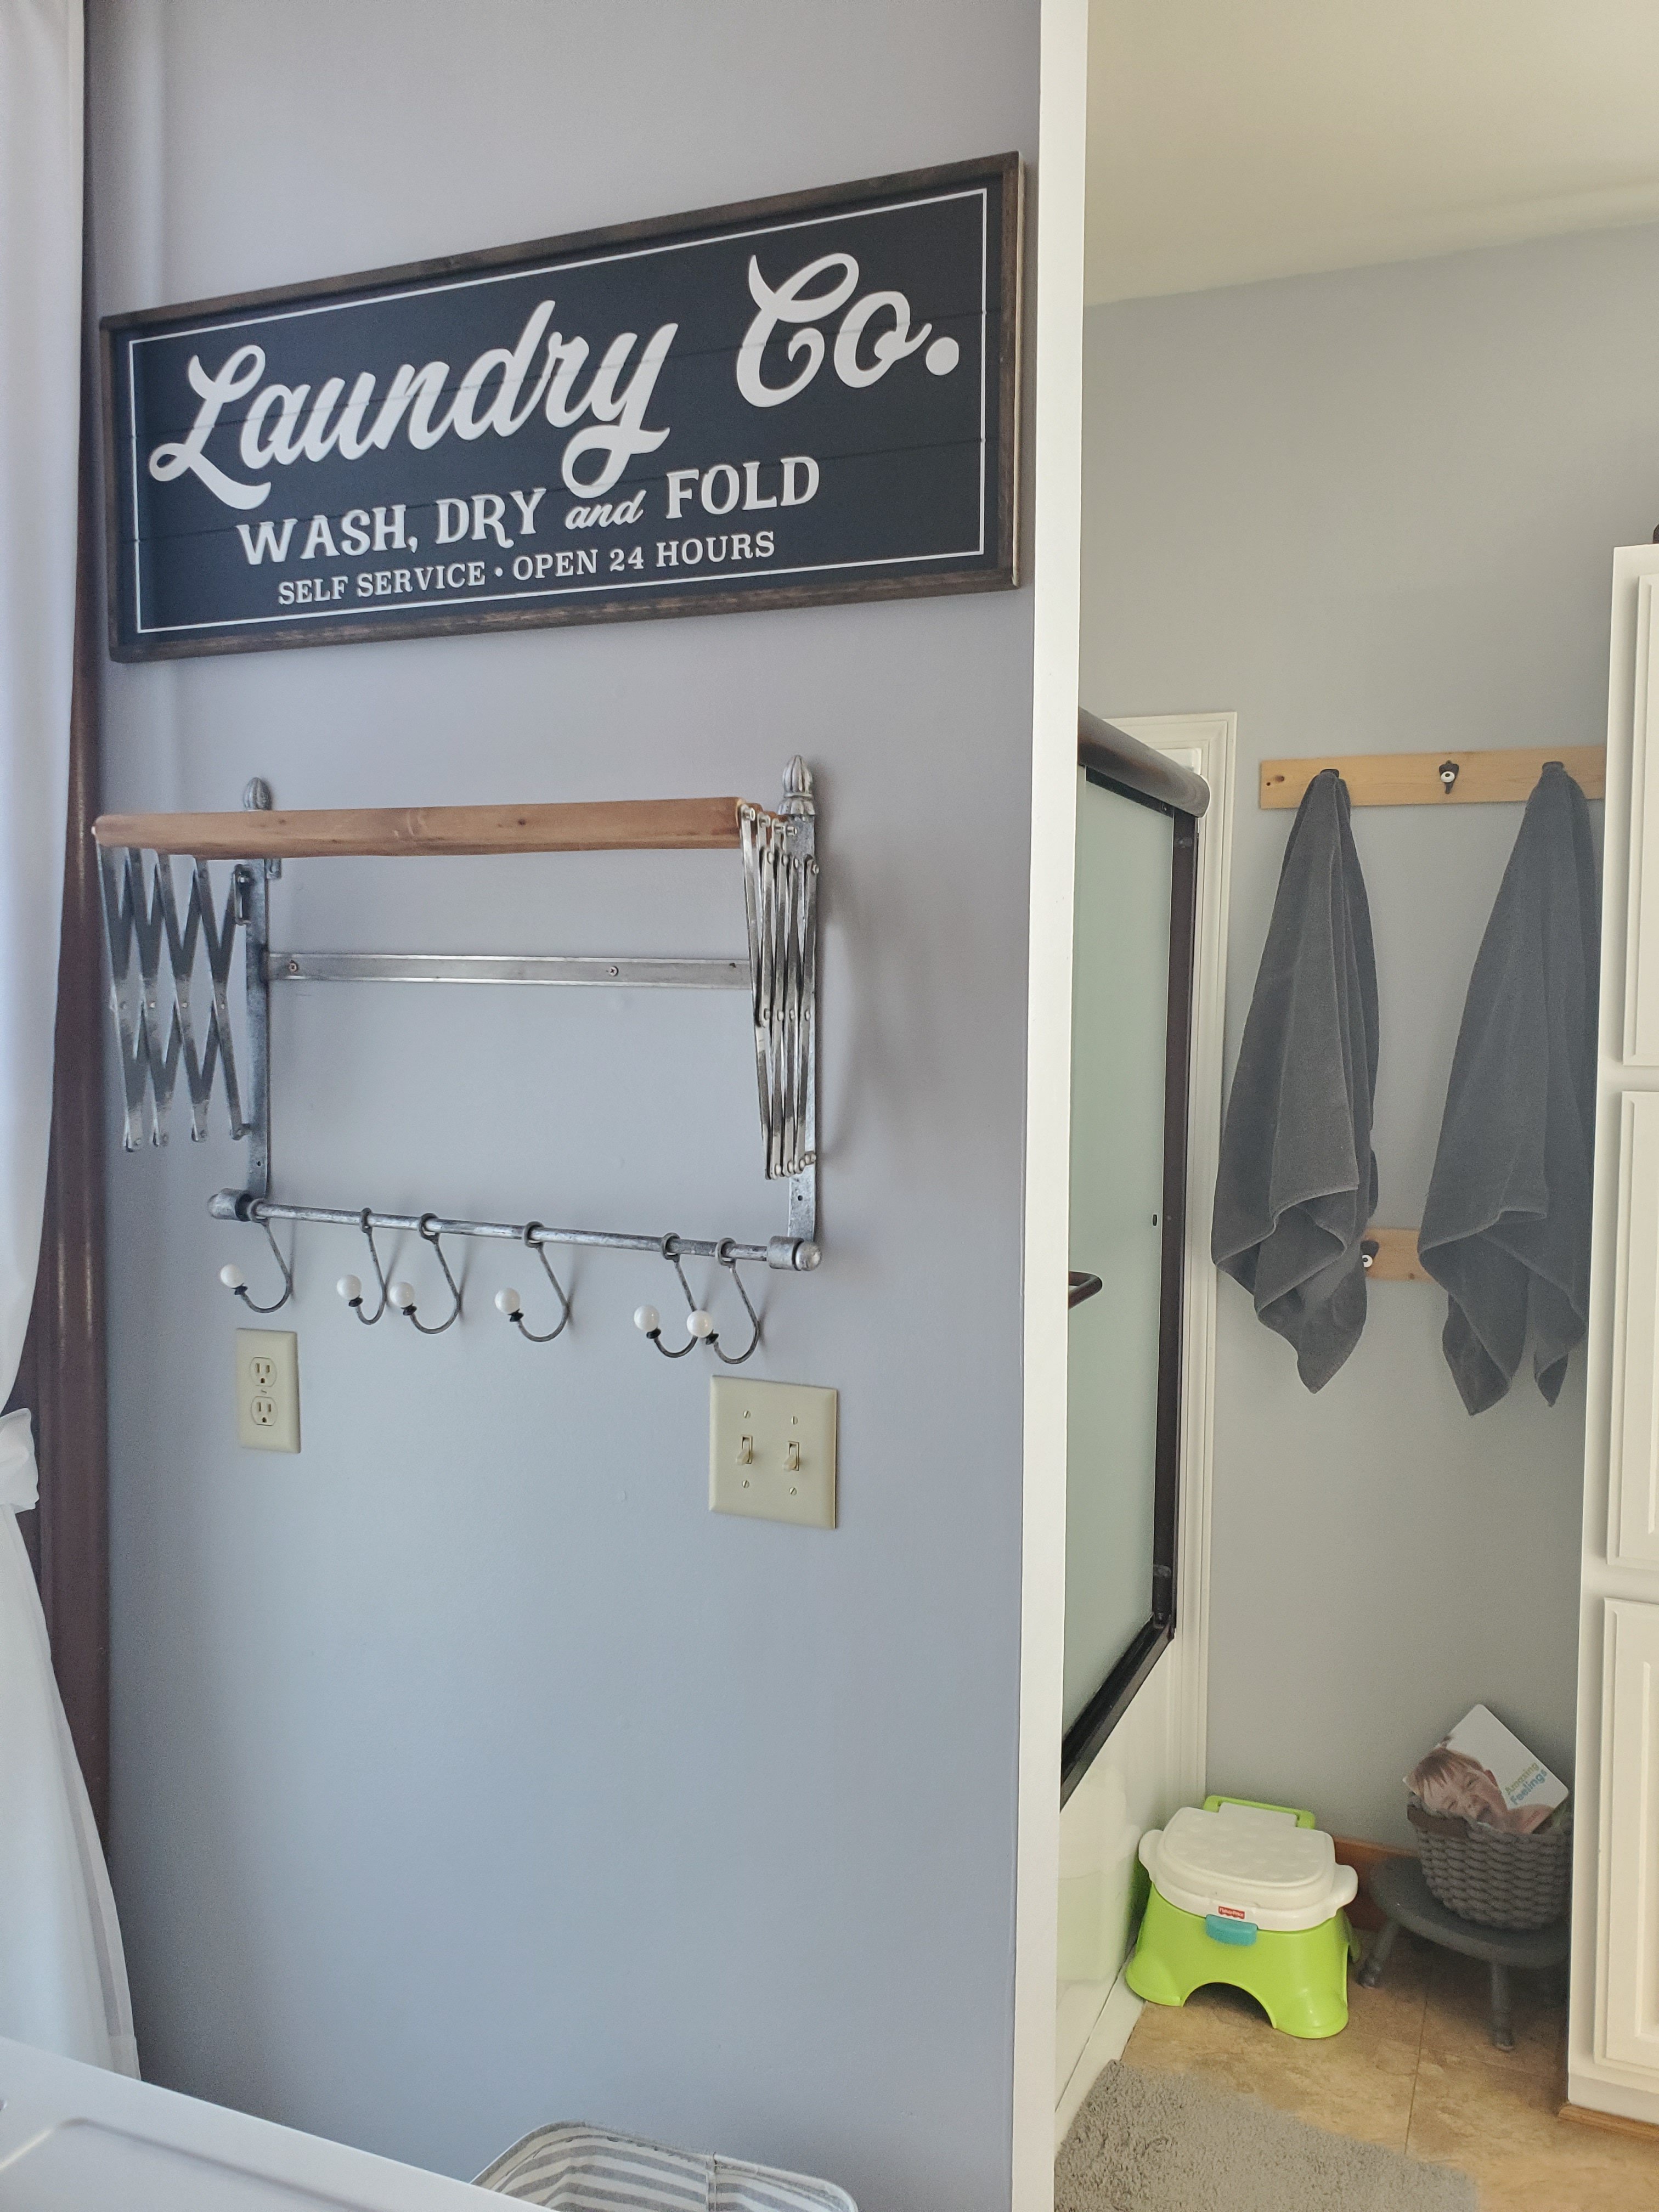
We made the bathroom hook boards because in old houses you are at the mercy of where the studs may or may not be when hanging things. Attach the hooks in the spacing you want and then attach the boards to the wall where the studs allow.
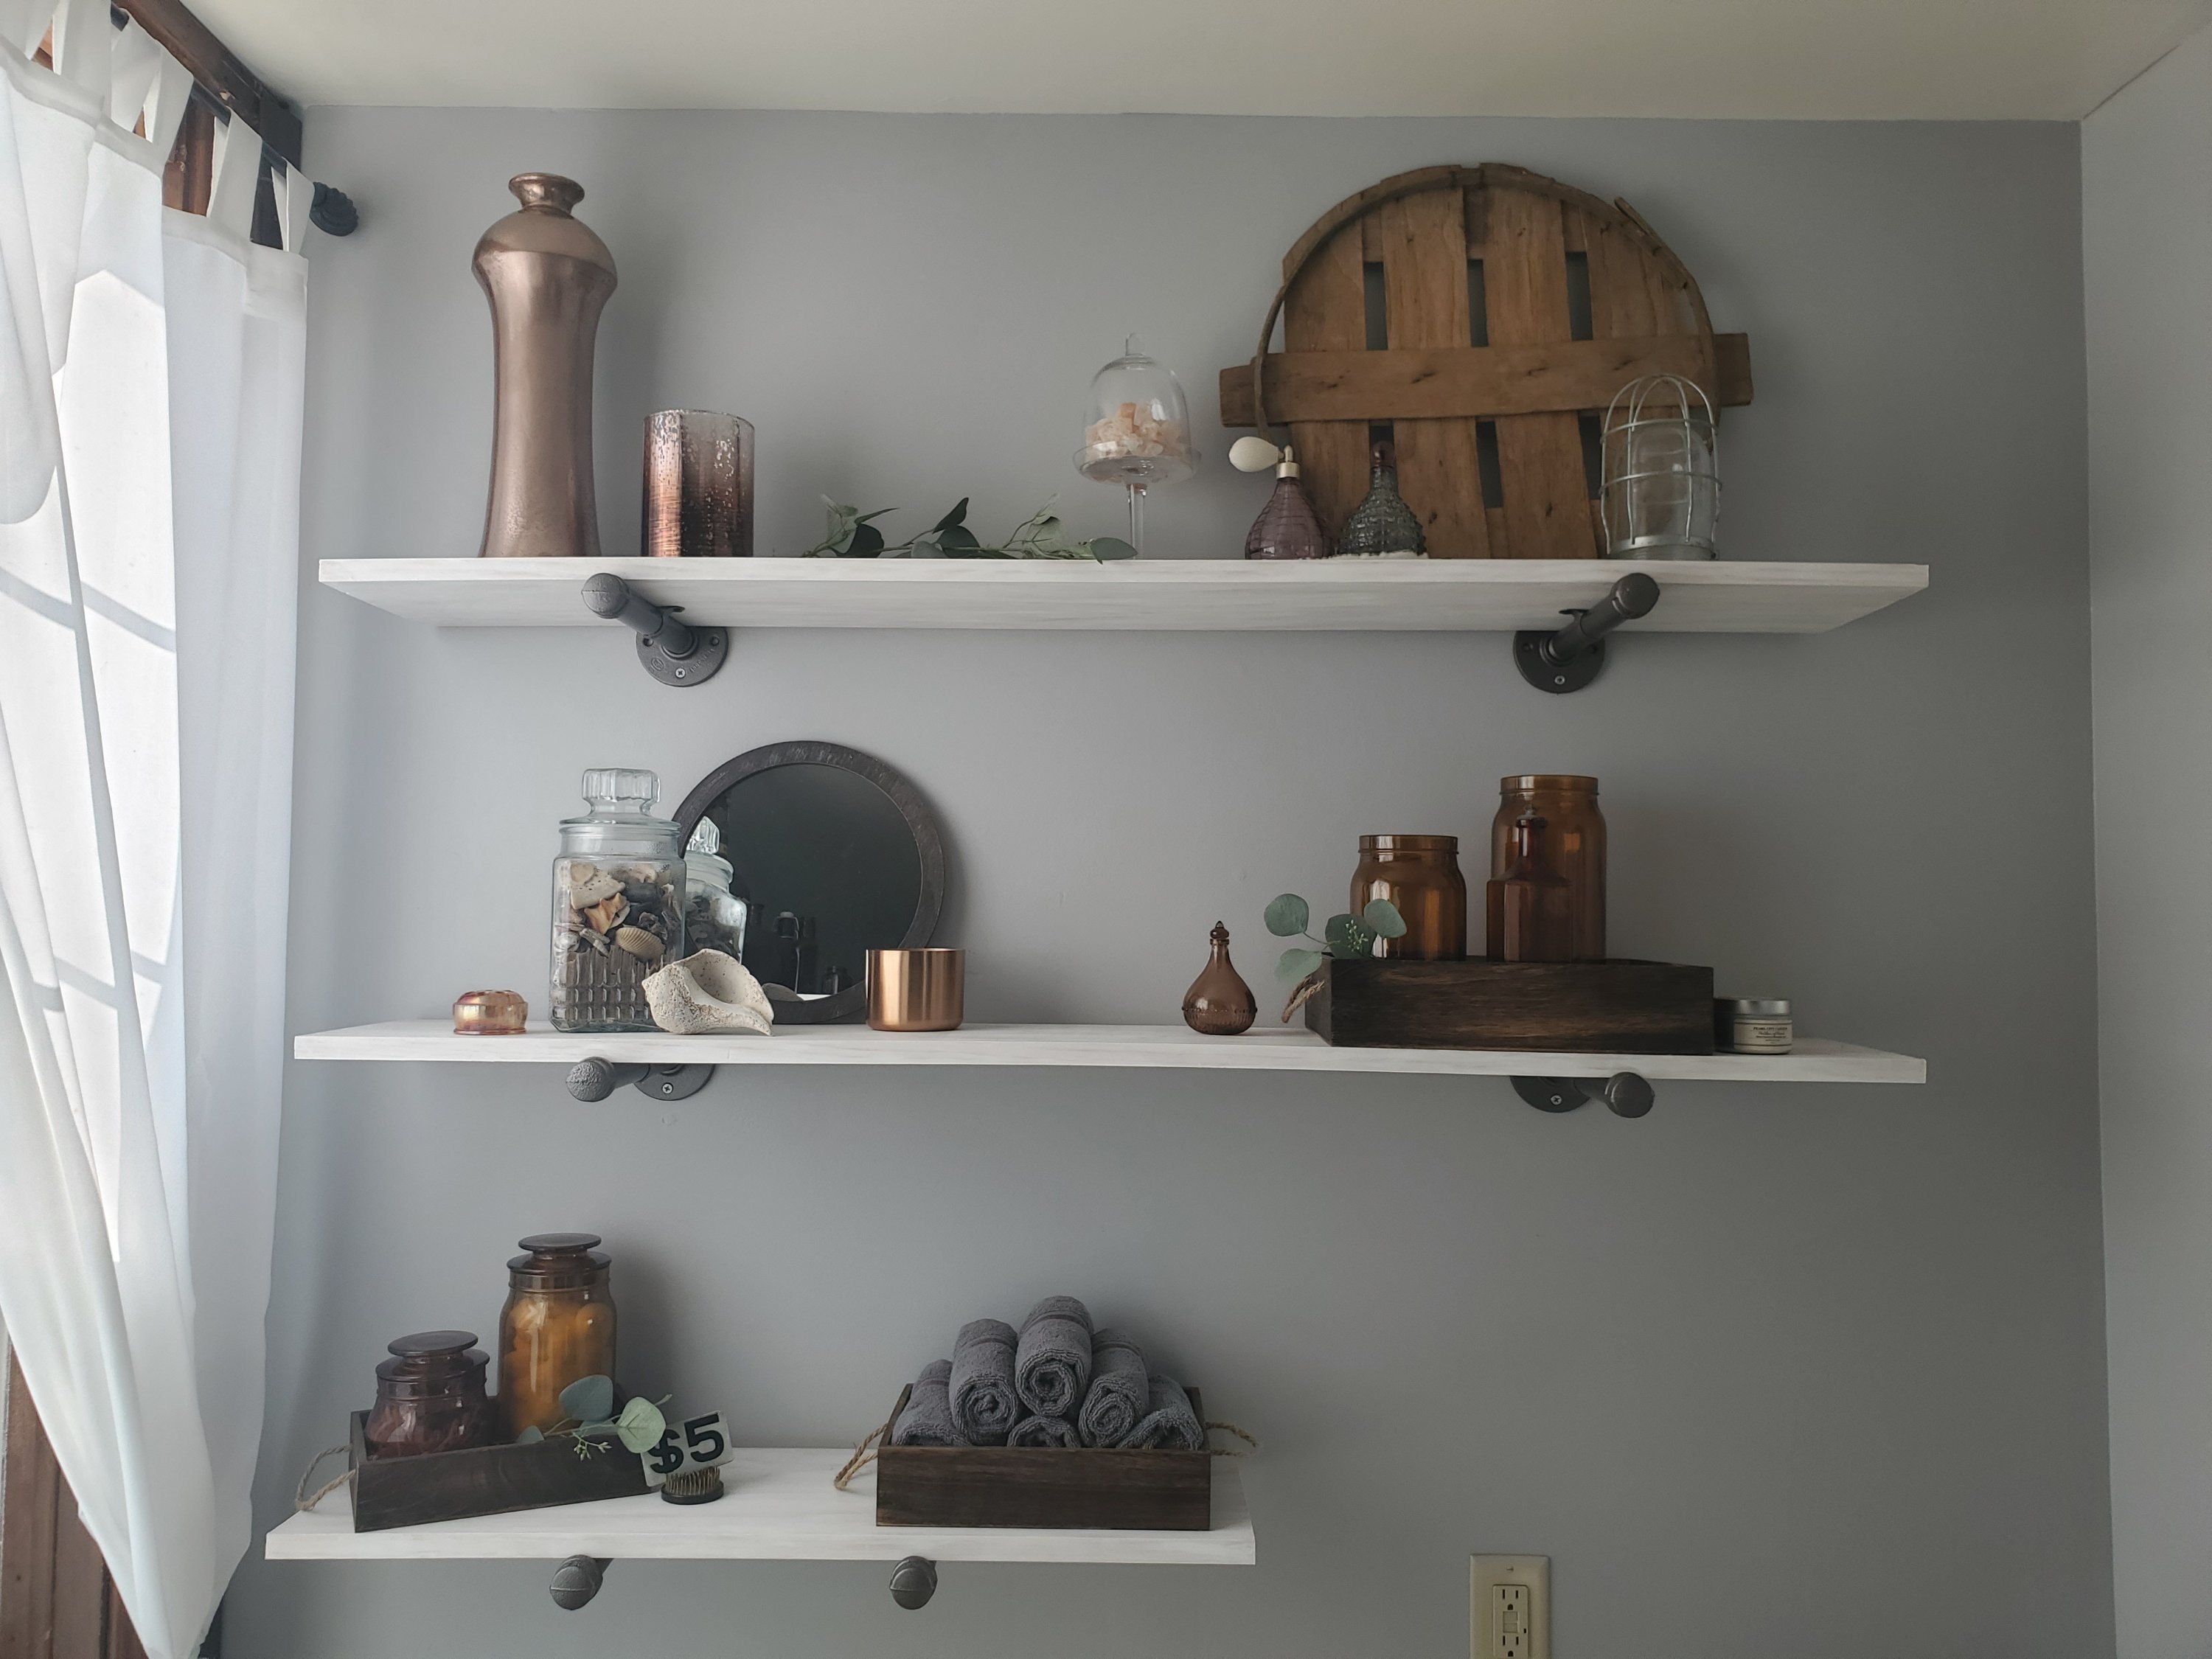
We also made the shelves ourselves and hand “grayed” the boards by smearing white paint with fingers. Tedious but so worth it. The brackets are plumbing hardware and can be found at Mendards. We painted the parts with a light oil rubbed bronze spray paint.
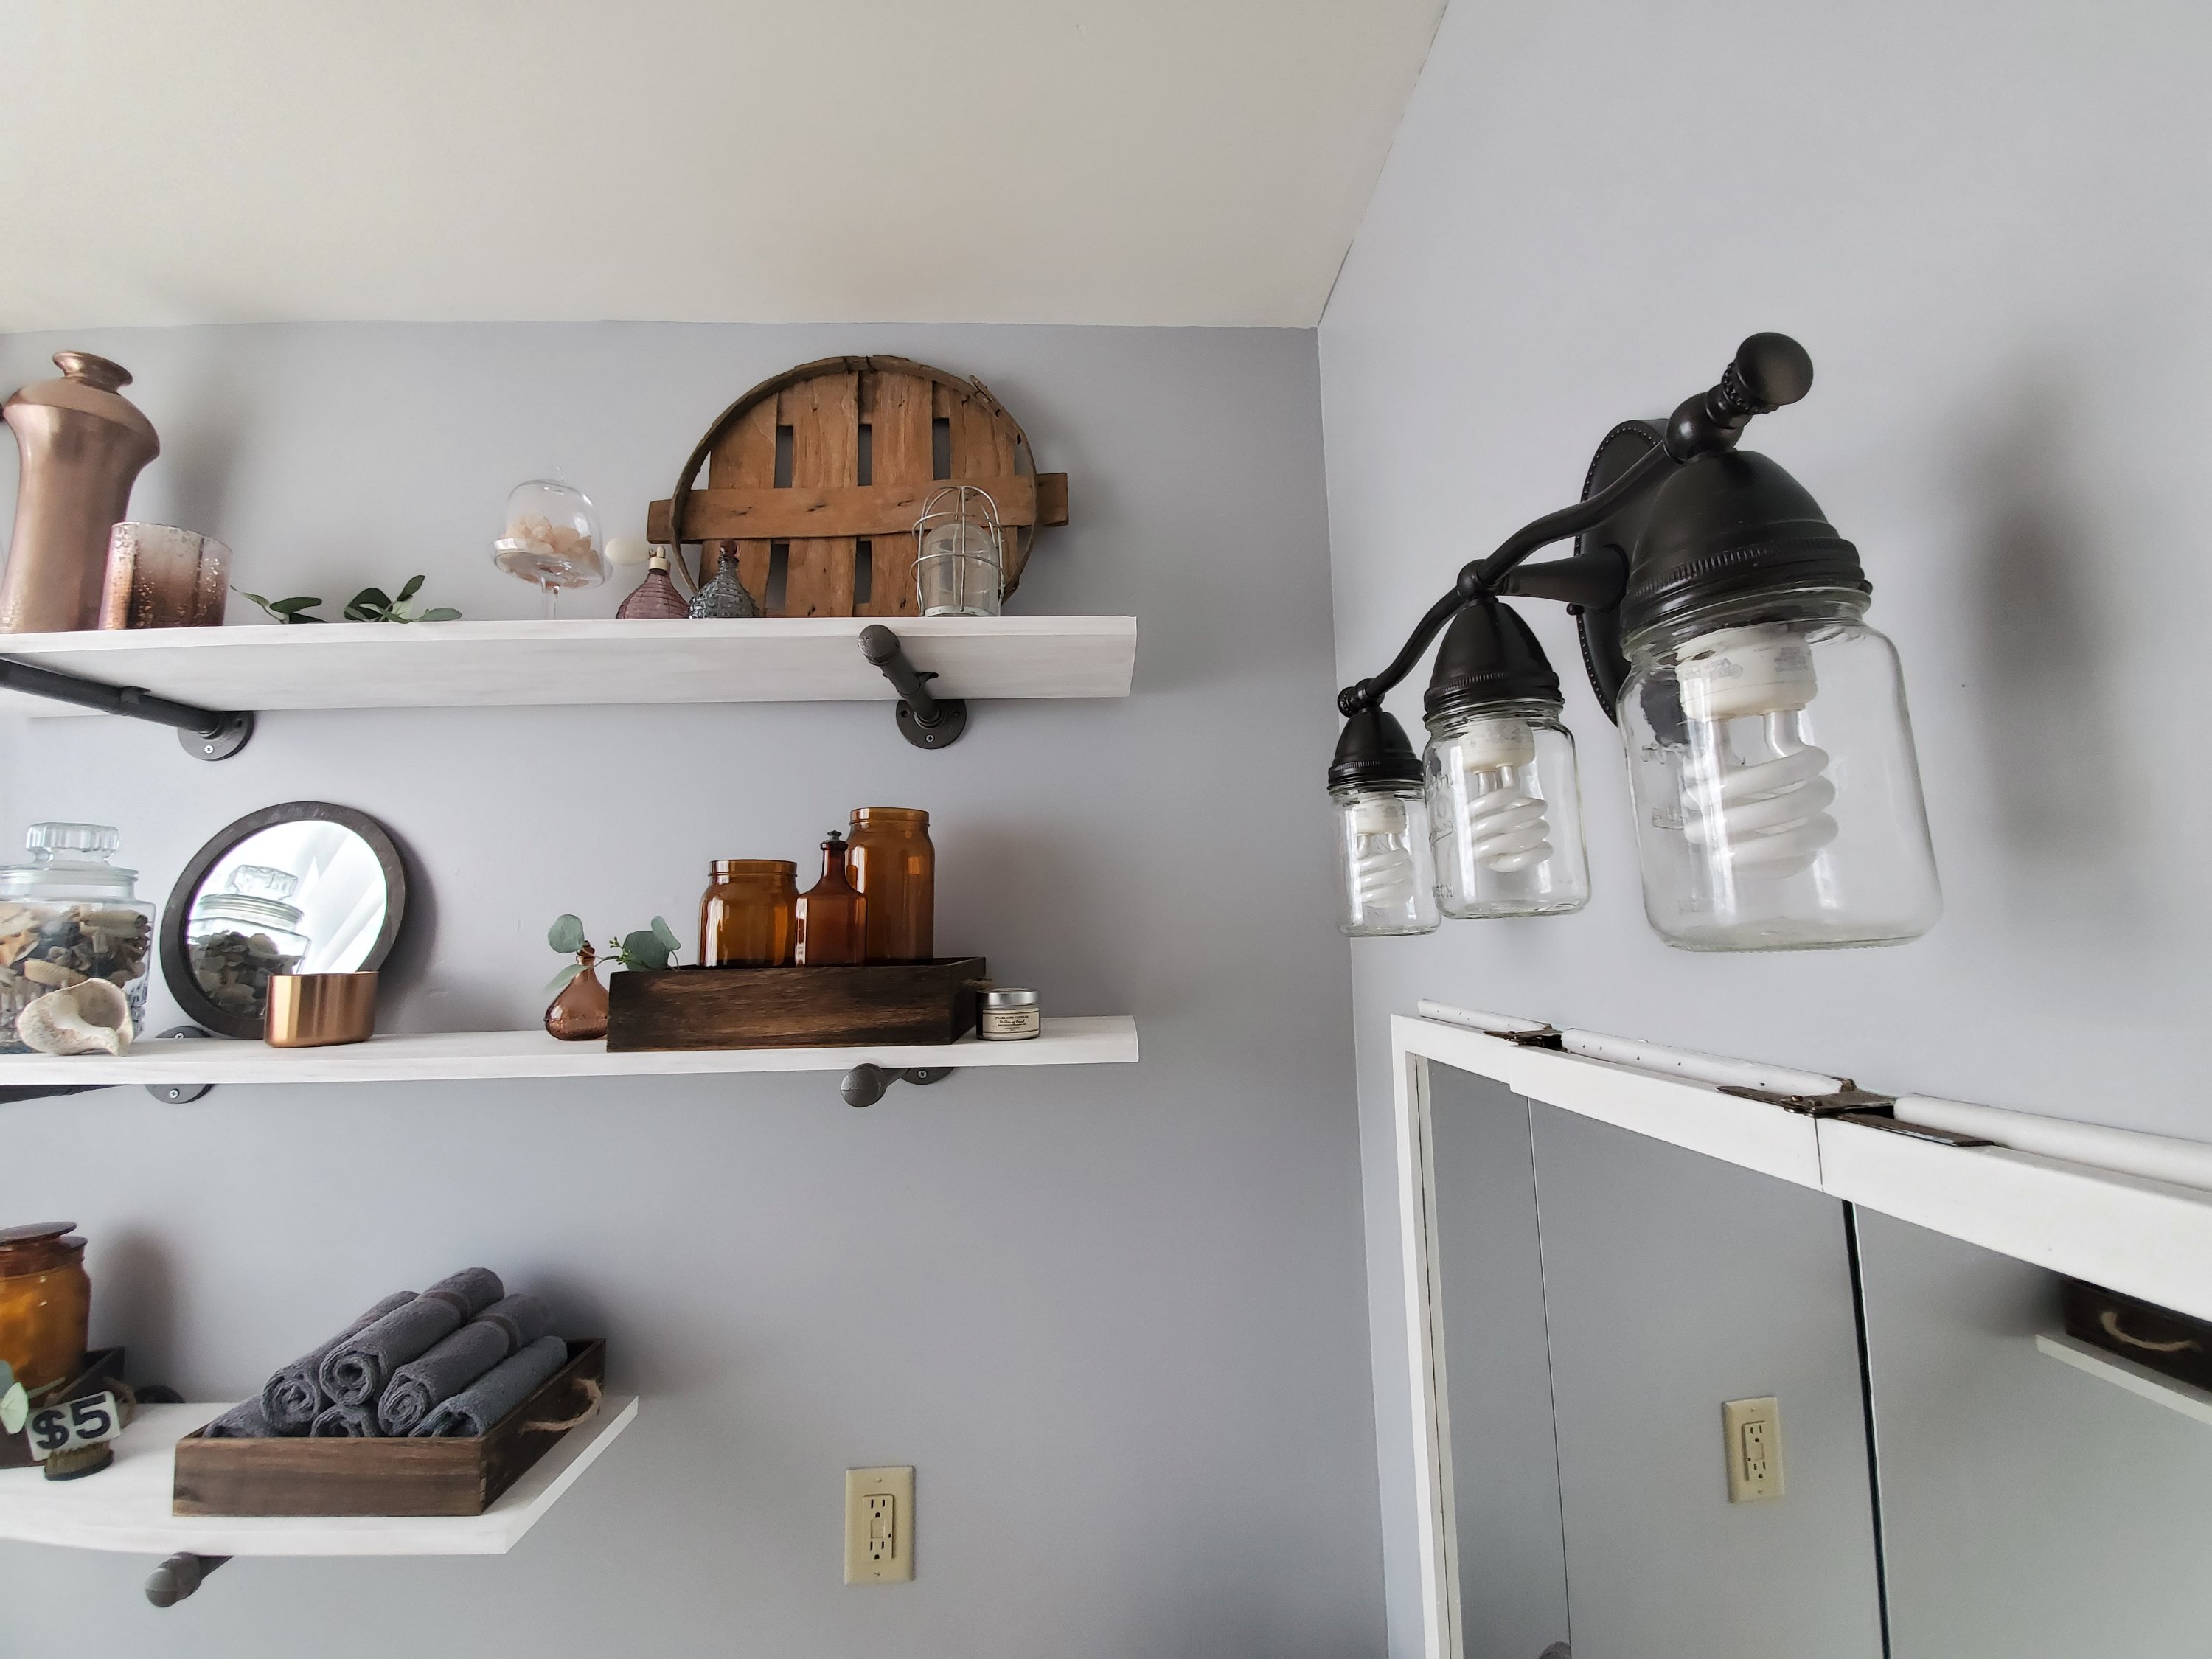
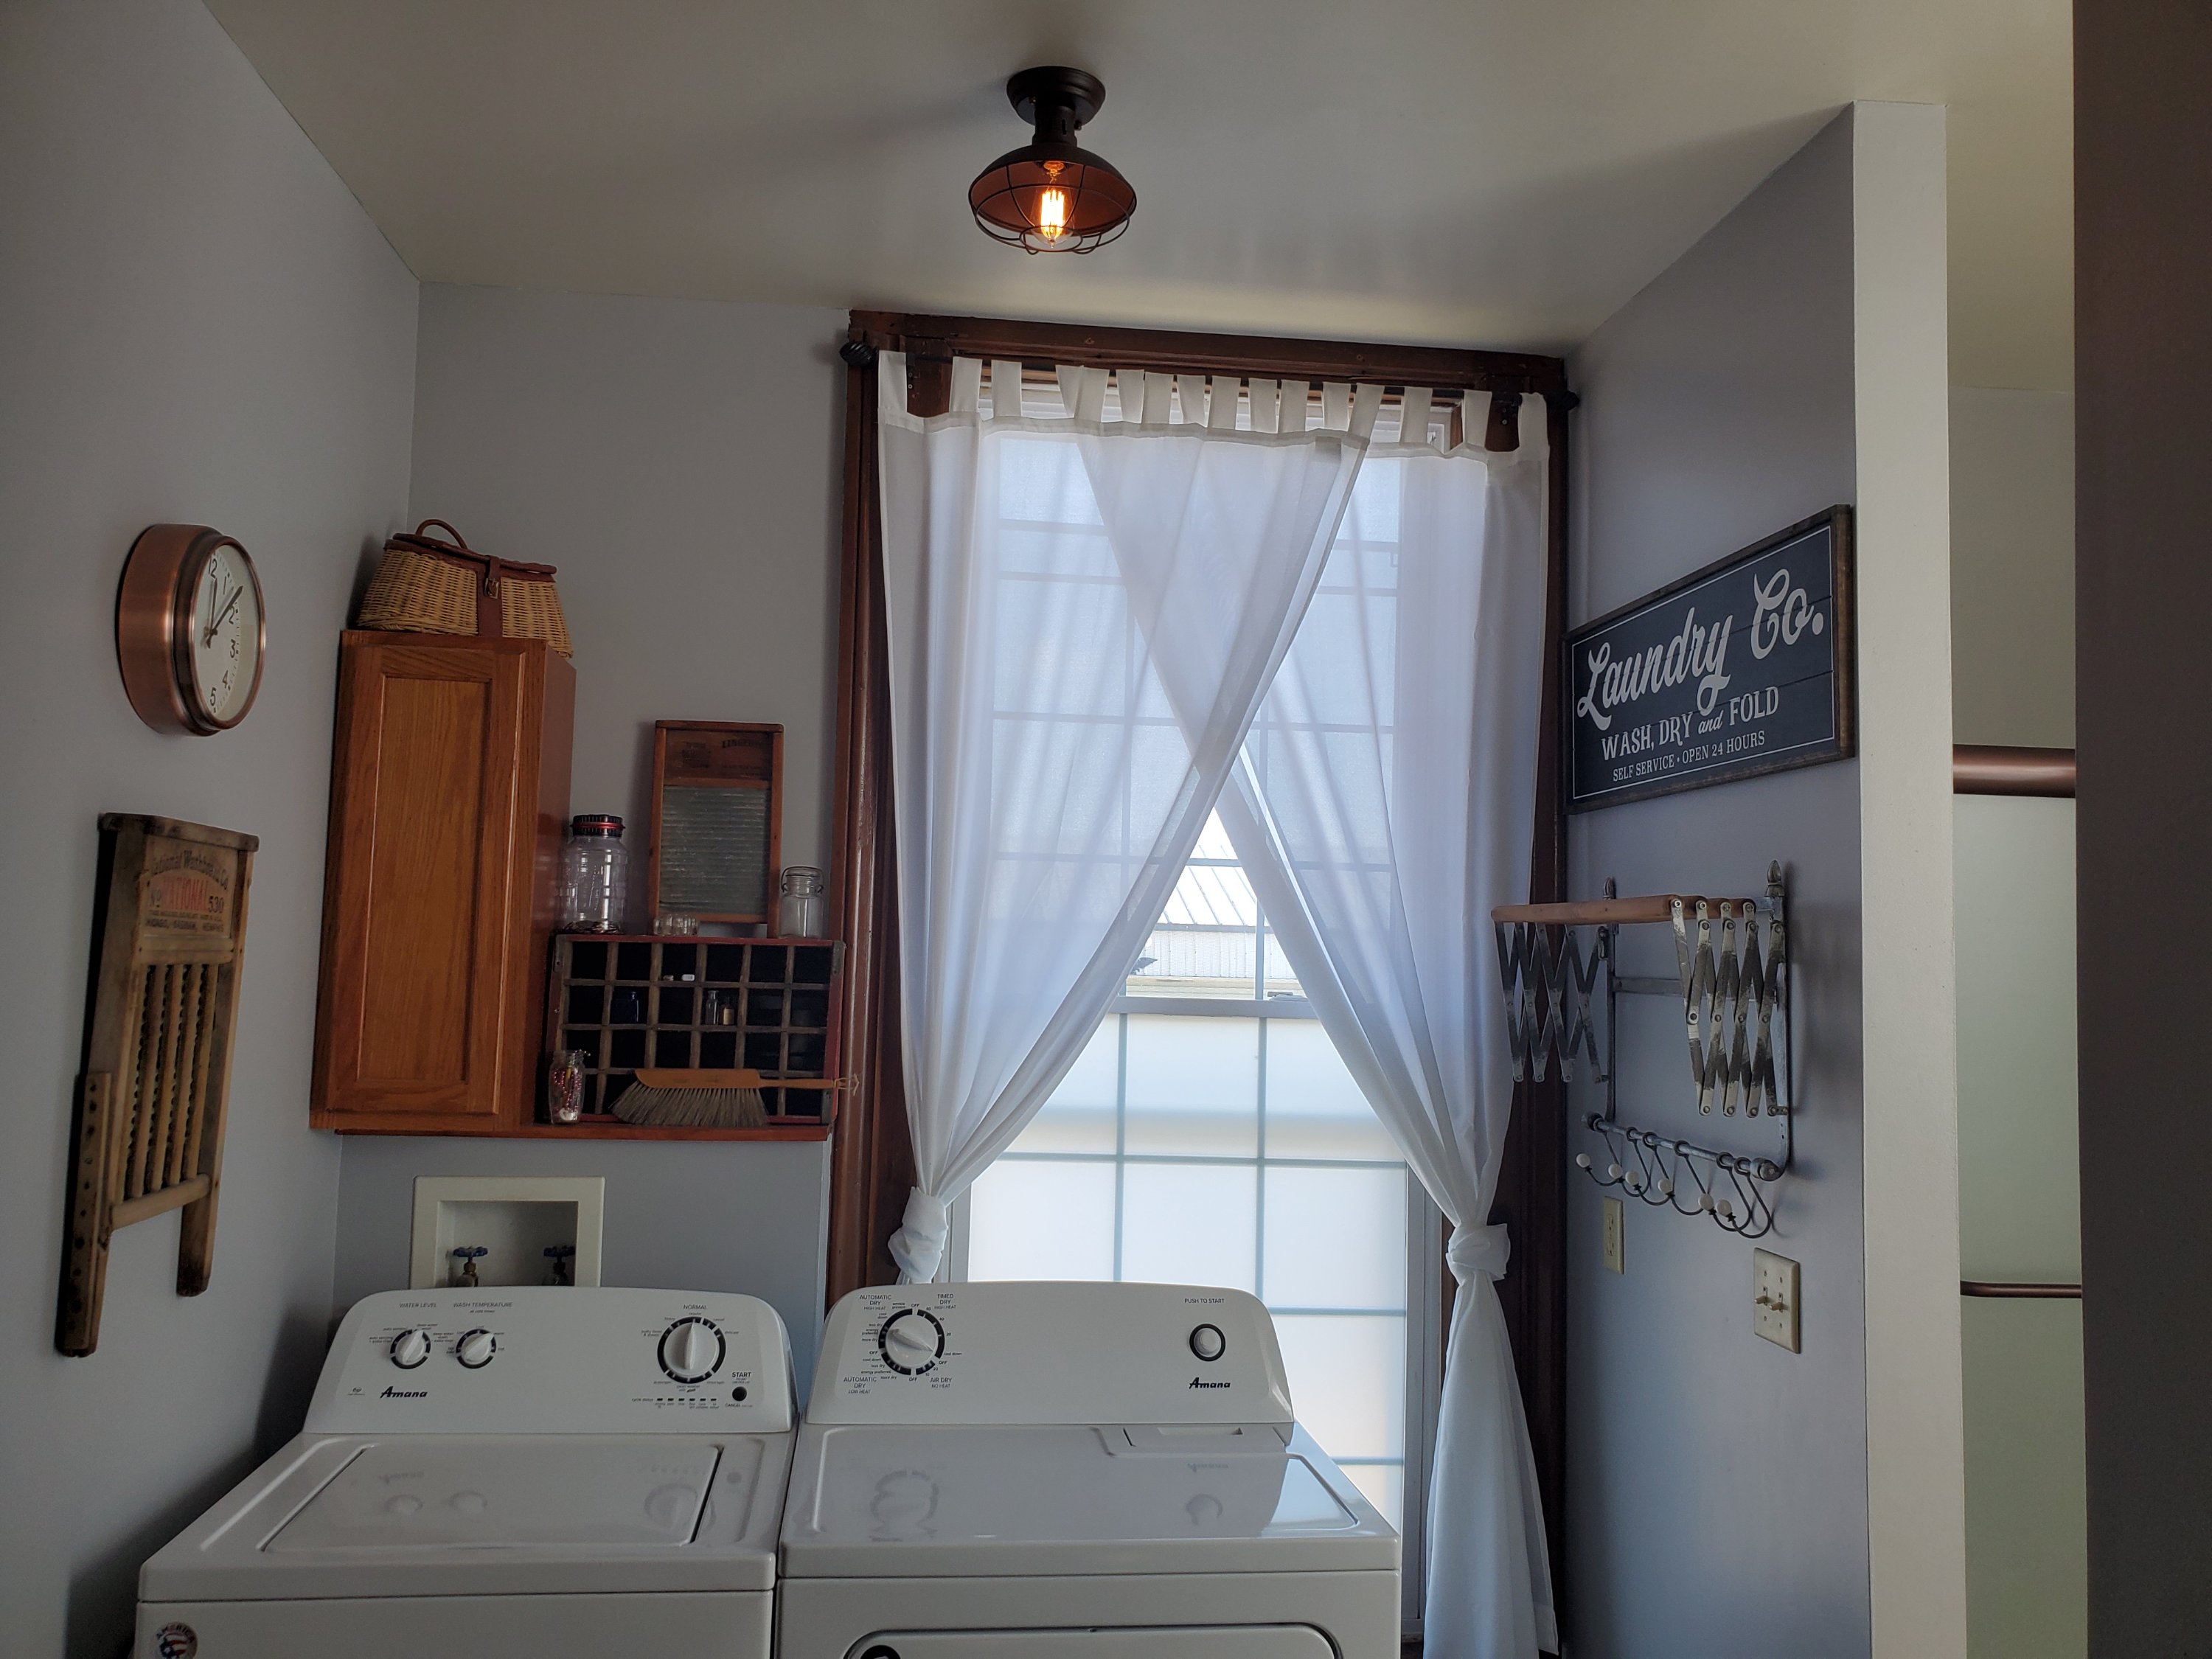
We made the jar light fixture by painting the old silver fixture with oil rubbed bronze paint and adding the jars. We took solid jar lids and made holes in them to fix the jars to the fixture. Once it’s all painted you can’t see what method you used to attach them.
All on a budget for a quick fix up. We did add a new shower, as ours was a walk in when we bought the house and we needed a tub for the kids. Paint and curtains, and especially shelving, make a huge, but affordable difference!
Here are some fun detail shots.


A few detail links:
What do you think? Any recommendations?
Xx,
Jess
Permalink Comments Off on Bath/Laundry Room Update
