Why I Love My Cricut
This is a sponsored post written by me on behalf of <a href=”Cricuthttps://lnk2.io/wjcWg2L”>Cricut</a>. All opinions are 100% mine.
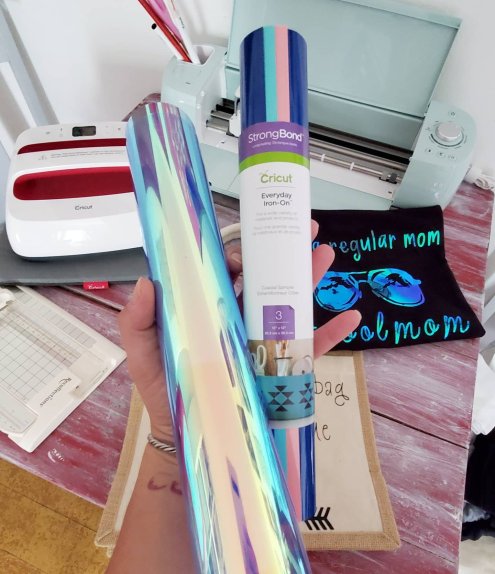
I have had my Cricut Explore Air 2 for a few months now, and to say I’m in love is an understatement! I’ve always been a crafter, but this things really helps me step up my game! Here I am going to talk about the 5 things that I love about my Cricut!

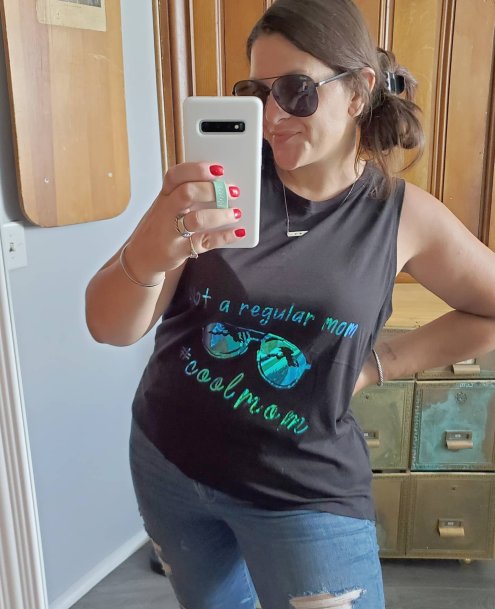
1. Its easy to use! I was truly shocked at how easy this machine is! Not going to lie, I was intimidated at first. I worried where to start and if I would be able to figure it all out. Yup. I was. Best place to start? Pick a project and jump in. They really mean it when they say their motto is “beginners luck every time.” I learn tricks and get braver each time I use my machine, but I definitely agree that picking a beginner level project and diving in head first is a great way to start and will prove to you how easy it is! Check out this shirt I made as one of my very first projects:
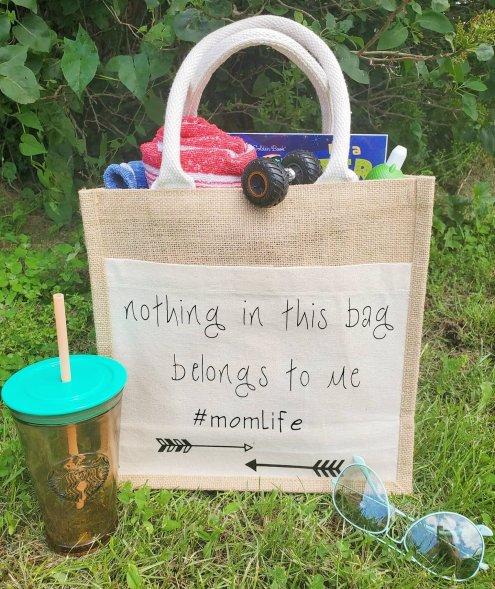
2. Support! That brings me to the second thing I love about my Cricut. Its like having a whole community of creators to support you. Have a question? Worried about where to begin or which type of project to do? They’ve got an answer! Not only does Cricut have a team you can email or chat with, but they have numerous pages where you can reach out to their pros or other crafters with tons of experience. They’ve all started somewhere and learned lots and are at the ready to make sure you love your machine and projects. I would know. I wasn’t sure how to customize the design I wanted to make myself for this bag, and the Facebook page group had almost immediate answers for me!
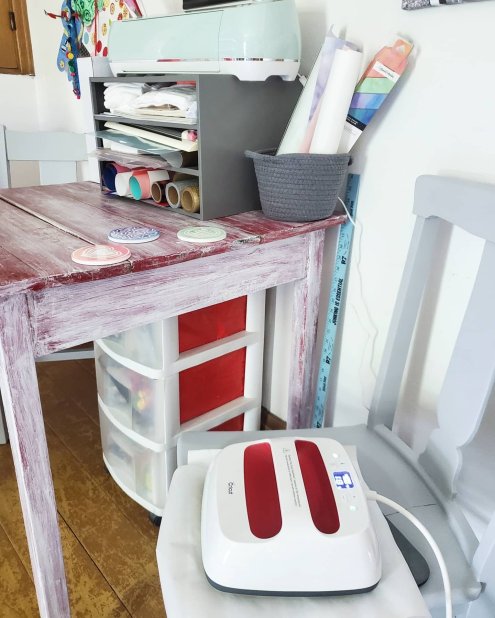
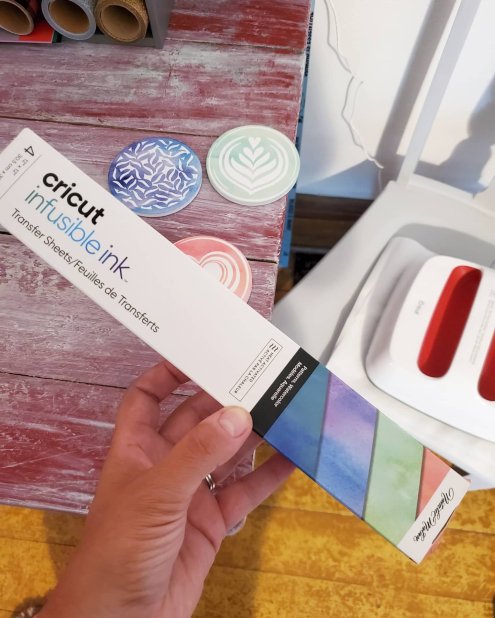
3. Ideas! This also leads me to another thing I love about Cricut, the ideas! I never worry about having a creative block. There’s no way. The ideas of projects to make are endless, for every single occasion you cak dream of. Really. You can find ideas galore on Pinterest, and Instagram, or Cricuts’s Facebook page. And my favorite place for inspiration? The Cricut emails! They send seasonal emails showing the new ideas and templates added to Design Space, their app for making. How did I know about the new infusible ink and coaster blanks to make these? One of their idea emails! Light bulb!

4. The options! Got a bright idea to make? You can! And Cricut can help you do it! The options they supply for you is endless. Or almost. Not only do they help with the ideas, but they make it easy to find all of the supplies you need to make visions come to fruition. They have coasters, bags, shirts, materials, pens, markers, vinyls, decals, iron ons, and the widest variety of patterns in their supplies you could imagine! Sparkles, holographics, leopard, wood grain…their possibilities are never ending! Not to mention, cricut has other machines like the EasyPress, and tools like mats, cutters, Nd weeders, to make all of the options come to life!

5. Capabilities! This machine not only cuts paper and vinyls. I was shocked to learn what all it really can do. Like blown away. It can cut leather, poster board, felt, fabric and even wood. But it doesn’t just cut, it can score. And it can draw! Yup! Shocked?! Me too. You can insert pens and markers into the blade holder and it can draw or write, making handmade cards, letters, signs… mind blown.
The capabilities combined with the Cricut options alone shows you that the possibilities are truly endless. I cannot wait to do another project every time I finish one! And now all of my gifts will be one of a kind made by yours truly!
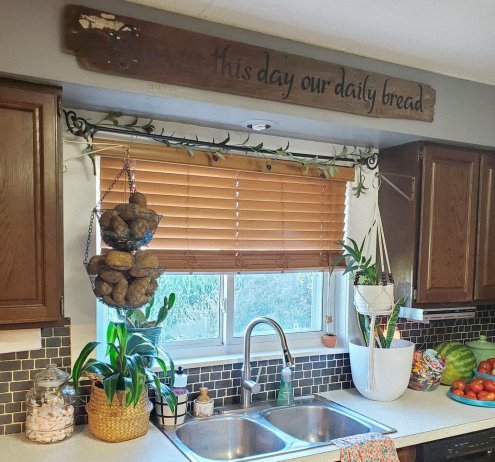
Here’s a quick breakdown of my latest project, a sign for our kitchen.

Choose a board and a quote. My board is a faded, chipped, barn board from our barn. (I’m sure to some the white paint left on one corner and the odd shape caused by years of cattle wear are not pretty, but we loved this board! 😉
Then, start on the Design Space app, and find my design template here. My board is 5ft long, but you can edit the design to adjust measurements. Once you send the design to the machine and it cuts it on vinyl, weed the excess pieces out. Use transfer tape to pick up your design and stick it down in place on your board. You could add flourishes to the ends of your quote too! You can change this design and even choose your own color vinyl. I used matte clear coat over the board to ensure no edges lift since I chose an old, rippled barn board for my project. Add a hanger or two on the back and hang. Easy peasy and a great one-of-a-kind, beginner-friendly project!

Have questions? Need help or ideas? Just ask! 😘
XX,
Jess
A Few New Scrapbook Pages
I have been getting some things done over my past blogging absence! I accomplished many many scrapbook pages. Here is a peak at just a few. I hope these inspire you scrapbookers out there! Feel free to ask any questions!


I personally like my pages to be handwritten. I like the imperfections and mistakes. It makes them feel more personal to me. My pages are also always original. Personalizing is my best advice for scrapbookers, it will always mean more in the end!
Hope that gives you all some ideas! And feel free to give your ideas too!
A Few Layouts
Last night was a quiet, restful night at our busy house. Having the puppy has meant little sleep and rowdy evenings at home. So, no projects for us last night. But, I did do a few scrapbook layouts. I thought I would share these with you. Hope they are inspiring. Let me know what you think and if you have any ideas!

I did the black swirl as well as the spider web lettering for Halloween by hand.

I love torn edges, especially when using vellum. And, its so easy!
Something I Love
Through my many recent projects I have found a product that I love. Undo Adhesive Remover! This stuff is amazing. I started using it while scrap-booking. You stick a sticker to a page and realize that you want to move it. No problem for Undo. It not only removes the sticker with no harm to the paper or the sticker, but it also brings the sticker back to it’s original stickiness when it dries! I have also used this to un-peal photos and other papers that I have stuck down with glue.
After using and loving this product on my scrap-book, I decided that it was worth a shot on other projects as well. Yes, it can safely un-stick stamps, labels, and even gunk. The possibilities are endless! My next project involves a very pretty bottle of liqueur that I would like to remove the label from. I want to leave the label in good condition to use for something, and also have the bottle sticky-free for use for something. No problem for Undo, I’m sure.
I highly recommend for every do-it-yourself-er!

Scrap-booking Question
I have been scrap-booking since I was in high school. I love taking photos and loving preserving memories, so this is quickly became one of my favorite hobbies. Due to being extremely busy I quit scrap-booking for a few years almost completely. The other day I found some very adorable paper and was so inspired I have started scrap-booking again full force. (The paper was from Micheal’s, which I recommend!).
I have come across a small problem, however, that I am hoping you out there in the blog world can help me with. My supplies are currently stored in about 4 different boxes. I rummage through the boxes when I am in search of inspiration or the perfect color of paper. The are constantly getting messy and unmanageable. The boxes are not uniform, either, which makes them hard to store. I am such a neat freak that this is really bothering me. I have seen carrying cases for sale that are meant for scrap-booking, but they are ridiculously overpriced!
My dilemma: I am insearch of an affordable, possibly DIY solution to the scrapbooking mess!

Here are just a couple of my unruly boxes of scrap-booking materials. I love the pink box, as it is an over-sized gift box from Victoria's Secret, but the heavy materials are starting to demolish the box!

Here is just a glimpse of the plethora of supplies needed for scrap-booking. Scissors, stickers, markers, pens, accessories, paper...
I was thinking that sticker sheets and paper might be categorized and sorted in some sort of accordion type portfolio folder (Wal-Mart even carries on in a black and white damask pattern!). But, the 12′ x12′ sheets of paper might not fit in one of those. What do you think? Suggestions?
Here is a glimpse of the pages I have completed recently. Any page ideas? If you would like help with your scrapbook just drop me a line about that as well! 🙂

P.S. It really is too bad that photos don’t do the details of these pages justice, as some of this paper is really gorgeous up close!
