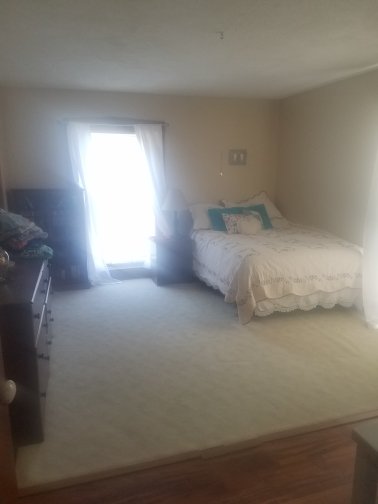
Guest/Play Room Transformation
When we moved in a few years ago the rooms were all boring and ugly…
Then we painted and added some fun flair to make this one a bright teen room…

Then, the teen grew up and moved out, so we had an empty space. 💡 We had an idea! A play room. But also make it a guest room, so that we still have a space for company to sleep…
And so the room became a guest/play room.
Paint again. Tone down those walls. New floors. New furniture. Make it fun, but grown up enough for guests… viola!
We went gray on the walls, but a touch darker than normal since we have lots of sunshine in here. We did snap in wood floor, since they are durable and easy to clean. Then the fun part…
We added a wall mural from PhotoWall! What better way to keep it fun for play and interesting but adult for guests?!
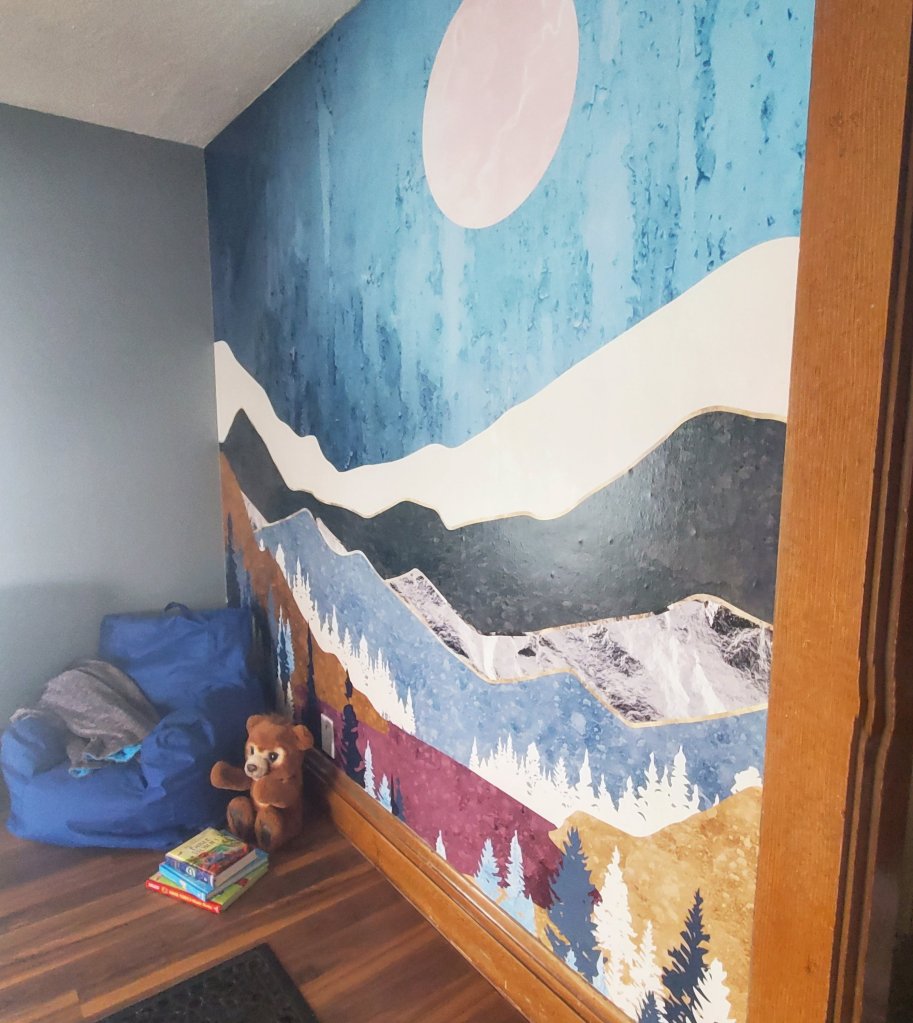

How cool is that?! It was actually super easy to install, just wallpaper in vertical strips, and it even comes with the paste. The boys are in LOVE with their new space!
You can head to PhotoWall too and use code ‘makemineeclectic25’ for 25% off any of their art, canvases, or wallpapers!

Next we will add furniture, so stay tuned…
XX,
Jess
Loving Right Now
I have to work on this lovely Saturday, so while I try to fill my time today I am scouring Pinterest. Here are some thing I am loving right now…


As always lately, wedding planning is on my mind, along with rustic home ideas, eclectic living rooms with gorgeous coffee tables, and some organization ideas. Speaking of organization, very soon I will have some projects to show you that deal in that area! 🙂
Tidying Up
I’m a neat freak. I know it. I’m actually proud of it. I like that my home is always clean, neat, and organized. I feel that everything should have a place. Junk left out of it’s place clutters up your house and really ruins the appearance. I love ugly necessities (like cleaning supplies or utensils) to have a place to be stashed that is concealed when not in use. Not only does this just look so much better, but it also means you will not lose things or forget where you left them. Our cleaning supplies are under the kitchen sink in tubs. We always keep a flashlight right under the sink as well. A few basic tools and utensils that are needed frequently are in a drawer in the kitchen island, and the rest of the tools are in the tool box in the basement. I could tell you where ever item I own is right now. This drives Tony nuts that he has to put everything back in it’s assigned spot, but he will be thanking me in an emergency when I find what we need in seconds!
Anyway, this brings me to the topic at hand. Our mops and brooms. They are too big to fit under the sink, but too ugly to be left leaning against a wall in the kitchen. I had them stashed away in the basement. But, no one wanted to go down there to get them every time there was a mess. I even caught myself on hands and knees wiping up the floor with a paper towel instead of heading to the basement. I knew there had to be a better solution.
We took a trip this weekend to our local hardware store and found a basic hook set. My plan was to hang this strip of hooks inside the basement door for easy access to brooms and mops. The strip was a bit too long to fit from one beam to another along the unfinished basement walls. We compromised and leaned the strip of hooks on it’s side. It actually worked out perfectly, and the long handled tools hang perfectly just inside the door. I’m pleased. 🙂 And, now we can save paper towels and make our lazy selves go grab the mop!

The brooms and mops hanging so nicely just inside our basement door.

The row of hooks that proved to be a simple and inexpensive solution to a daily annoyance.
We were so inspired we even added a couple single hooks to the opposite wall for hanging dog toys and leashes.

These things will no longer have to be draped sloppily over the banister!
Simple fixes make all the difference in a home!
Scrap-booking Question
I have been scrap-booking since I was in high school. I love taking photos and loving preserving memories, so this is quickly became one of my favorite hobbies. Due to being extremely busy I quit scrap-booking for a few years almost completely. The other day I found some very adorable paper and was so inspired I have started scrap-booking again full force. (The paper was from Micheal’s, which I recommend!).
I have come across a small problem, however, that I am hoping you out there in the blog world can help me with. My supplies are currently stored in about 4 different boxes. I rummage through the boxes when I am in search of inspiration or the perfect color of paper. The are constantly getting messy and unmanageable. The boxes are not uniform, either, which makes them hard to store. I am such a neat freak that this is really bothering me. I have seen carrying cases for sale that are meant for scrap-booking, but they are ridiculously overpriced!
My dilemma: I am insearch of an affordable, possibly DIY solution to the scrapbooking mess!

Here are just a couple of my unruly boxes of scrap-booking materials. I love the pink box, as it is an over-sized gift box from Victoria's Secret, but the heavy materials are starting to demolish the box!

Here is just a glimpse of the plethora of supplies needed for scrap-booking. Scissors, stickers, markers, pens, accessories, paper...
I was thinking that sticker sheets and paper might be categorized and sorted in some sort of accordion type portfolio folder (Wal-Mart even carries on in a black and white damask pattern!). But, the 12′ x12′ sheets of paper might not fit in one of those. What do you think? Suggestions?
Here is a glimpse of the pages I have completed recently. Any page ideas? If you would like help with your scrapbook just drop me a line about that as well! 🙂

P.S. It really is too bad that photos don’t do the details of these pages justice, as some of this paper is really gorgeous up close!
I’m A {Wedding} Geek
Yup, its true. I’m a geek. I love to plan, and organize, and make lists, and check things off…
So, planning for the wedding is no different. I decided to put the wedding planning ideas onto paper and stay organized. There are so many thoughts bouncing around in my head right now, this was the only way to keep sane!
I checked into wedding planners. But, they seemed like a crazy waste of money, as they can be upwards of $50! Some are very cute, and yes, it is a great way to keep the memories of the process, and even pass the information along to other brides-to-be, but…
I decided (after very little debate) to make my own. I got a thin, white three-ring binder and put tabs in it. I labeled the tabs into categories I thought would be most helpful. These tabs have changed a few times, but I think I finally have it. I also bought some cute post-it notes and sticky tabs to make notes and mark things. I have scoured the blog world for ideas and inspiration, and have used these resources to put the information into the planner. Everything will be at my fingertips. I even found printable versions of budgets and timelines to keep the planner organized. Other images in the planner have come from various bridal magazines. As we get closer to the big day we won’t miss a single detail with my geeky planning skills and my beautiful, new, handmade, planner.
These are the tabs I have used so far:
- Guest List
- Budget
- Resources
- Dress Ideas
- Brides Maids
- Tuxes
- Invitations
- Music
- Food
- Reception Ideas
- Gifts
- Day Of
These tabs could be different for everyone, but since I am doing almost everything myself, I had to keep many different categories. I am also splitting some of the categories down further into sub-categories, such as Reception Ideas. There will be tabs for things such as cakes, flowers and tables. I also inserted to clear pocket pouches in the binder, one for contracts and one for reciepts. This way the items in the pockets do not need holes punched in them.
If any of you other planning brides-to-be out there need any help getting organized, or have helpful hints, feel free to send me a message!

All of my materials, magazines, and books spread out on the floor to work!

My Planner! I simply printed up this simple, but pretty cover on the computer, printed it, and inserted into the binder pocket.

The inside of the planner. This is a budget page. You can see the tabs as well as some post-it notes.

One of the images in the planner. I simply love this suit, the vintage pinstripes, and the bow tie! It is even in our colors. The boutonierre can be made with Martha Stewart's help. We might be reproducing the whole picture!
P.S. My materials for this planner all came from Wal-Mart. They are very inexpensive, and have a pretty good selection. Yes, there are beautiful papers online, but I was to impatient to wait for something to come in the mail. The black and white damask post-its are adoarable and affordable there. That print is also available in many other supplies!
Vintage Cool
We have been searching for a solution to our overflowing silverware drawer lately. A jar or canister seemed like the perfect solution to hold some of the larger utensils. But, finding the perfect one was the difficult part. We tried to be open minded, but wanted to stick with something vintage and fun. Then, it hit me. We were at our favorite little retro shop in Moline, IL, Fred And Ethel’s. We saw the cutest little solution. A retro ice bucket! It is a little short and wide, but so adorable. So, we took it, and here it is in it’s new home!

The colors don't really match our black and white and red theme, but it was too funky to pass up!


Check out Fred And Ethel’s website here: http://www.fredandethels.com

On An Organizing Spree
After being so impressed with my organizational skills with the jewelry in the medicine cabinet, I decided not to stop there. I moved onto the closet next. Mostly we were already pretty organized in there, but rearranging a few things helped free up some space. I also hung a hook on one of the walls inside the closet to hang a few extra long necklaces from my costume jewelry collection. Things seem so handy and visible now. Here’s a peak inside the space of our home that everyone is afraid to share:

This is a view of the closet as a whole. The shelving was already installed when we moved in, so we are using it as-is. It is helpful, but we do not have "sides," just "areas." A little confusing at first, but now it works.

We hang belts, scarves, and ties on the low bar, along with a few of my shorter shirts. My giant shoe rack fits in the corner.

This is the hook of necklaces that I hung along a side wall of the closet. This is so helpful!

Here is a close-up of the hook I used. It is actually a hook that fits over a door, so one end is flat, which I use to hold multiple necklaces. The other end is curved, but I twisted it with pliers to hang agianst a wall. So simple I even did it myself.
