Quick and Easy Halloween DIY
Happy Spooky Season!
Maybe its that we’ve been cooped up way too long and missed too many “normal” things, I don’t know, but we are going all out extra for Halloween this year. Our house, or yard, our decor, even our snacks, have all gone completely spooky. I’m loving it!
If Halloween time is your thing, or even if it’s not so much, but you want to show the kiddos just a little festive fun, then I have a super easy and cute DIY project for you!
Faux Ghost Macrame Wall Hanging!
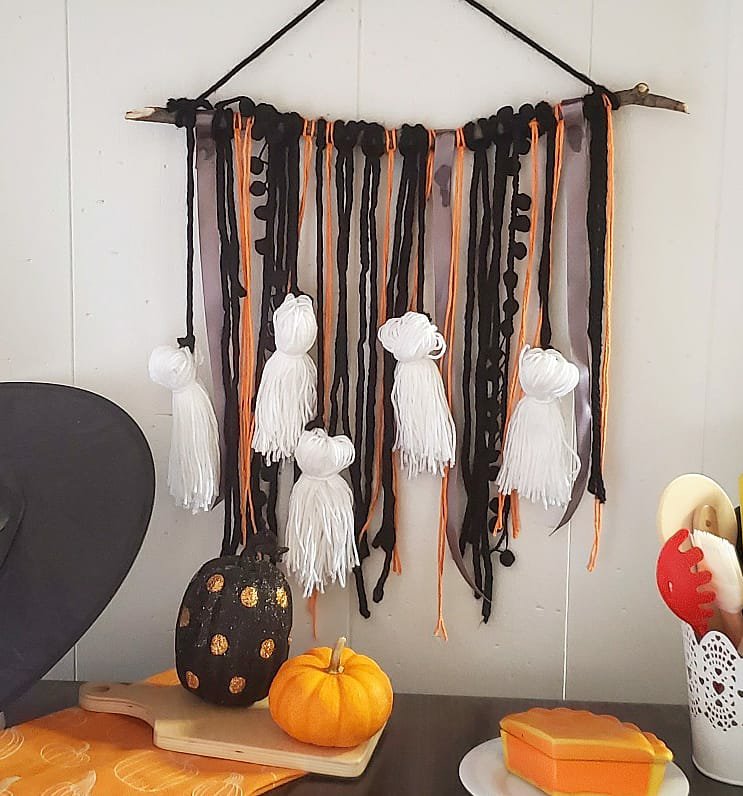
Supplies: -stick
-yarn and ribbons in various colors and textures
That’s it! Super easy, but such a cute payoff.
I cut the branch from a tree in the yard, even a dowel would work. Mine is a bit over a foot long. I started with it longer and then cut it off as I worked to make sure I knew I liked it. Decide how long you want things to hang. Mine is all random lengths, but around 14-16 inches. When you cut your pieces of yard, double this. You will fold them in half. I eyeball all of this and er on the long side. You can trim them down later.

With the piece of yarn folded in half, lay it over the stick. Bring your looped end under the stick, then stick the ends back through the loop and pull tight. Viola! I glued the ribbon together in the back around the stick instead of this method so as not to crease it. I love the ball tassel ribbon to give texture too and tied these in a knot around the stick.
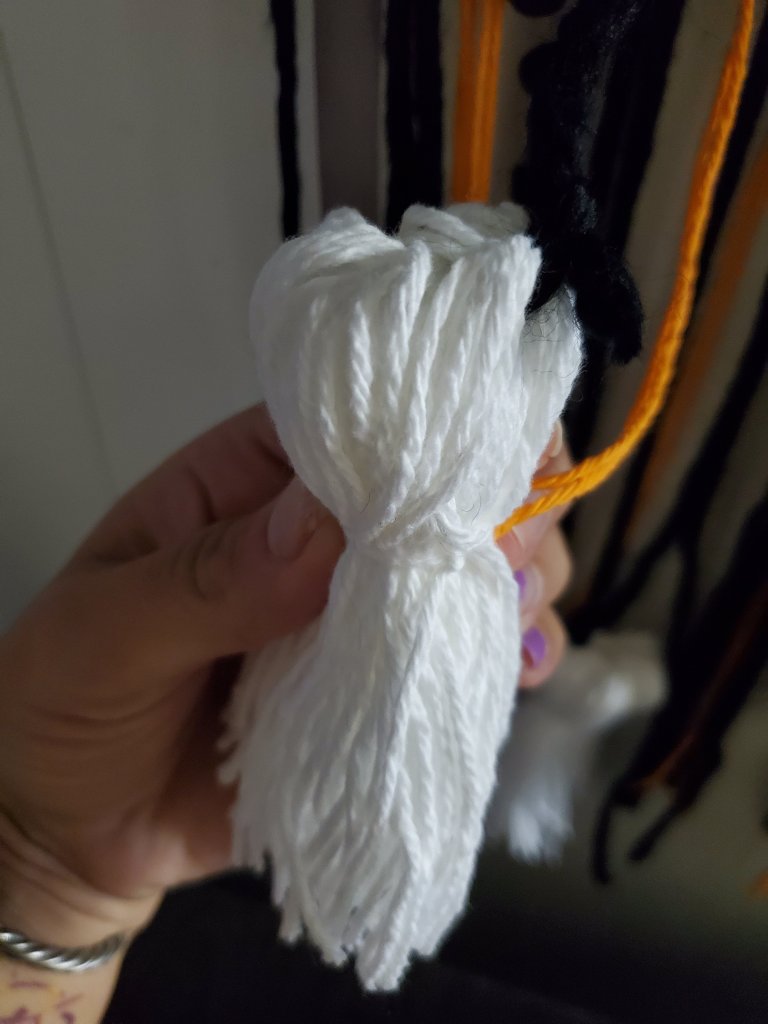
The ghosts. Also simple. Wrap white yarn around a book about 50 times. Cut the strings on each end of the book and keep them in a bunch. Fold the bunch over and tie a piece of yarn around it. I took black yarn through a small chunk of the white ghost head yarn on each side and tied this together in back and then tied the black to the stick.
There is no right or wrong with any of this! Keep it fun and super simple. You could glue eyes and mouth on the ghosts too if you want! You can add more or less pieces to the stick too.
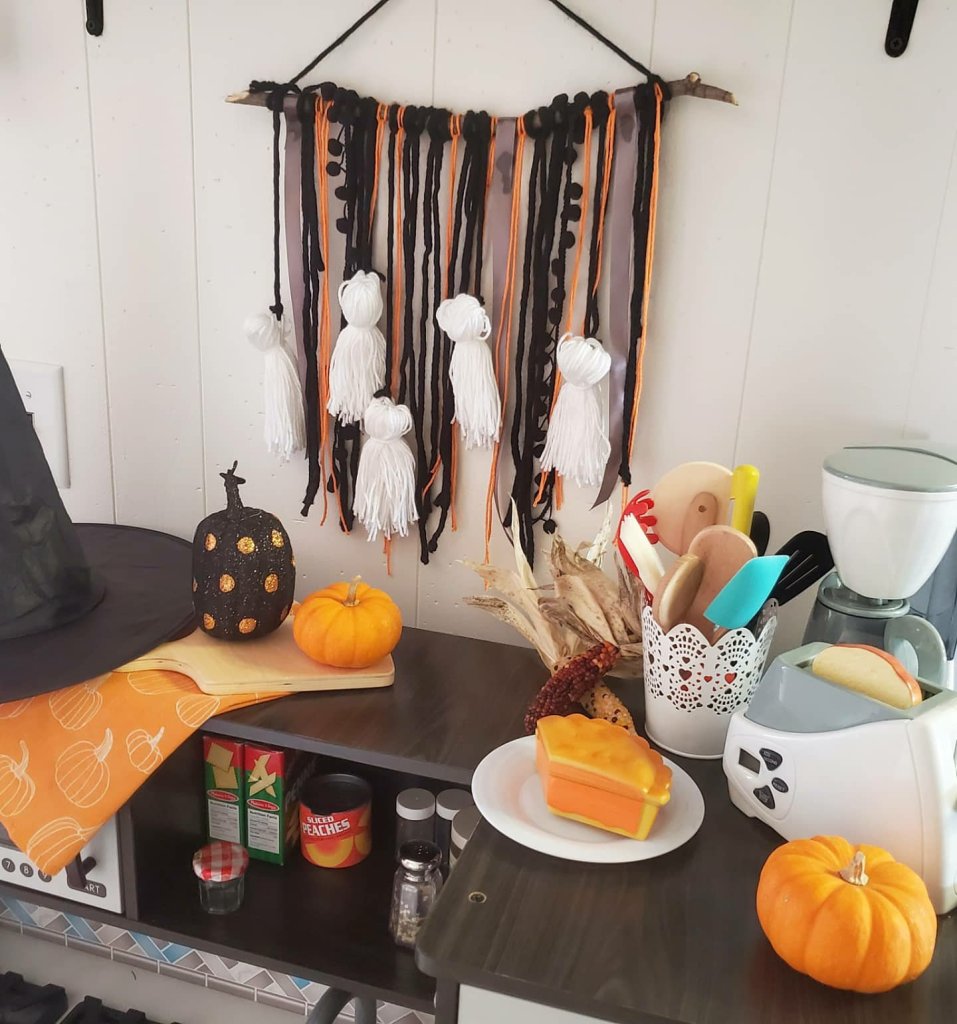
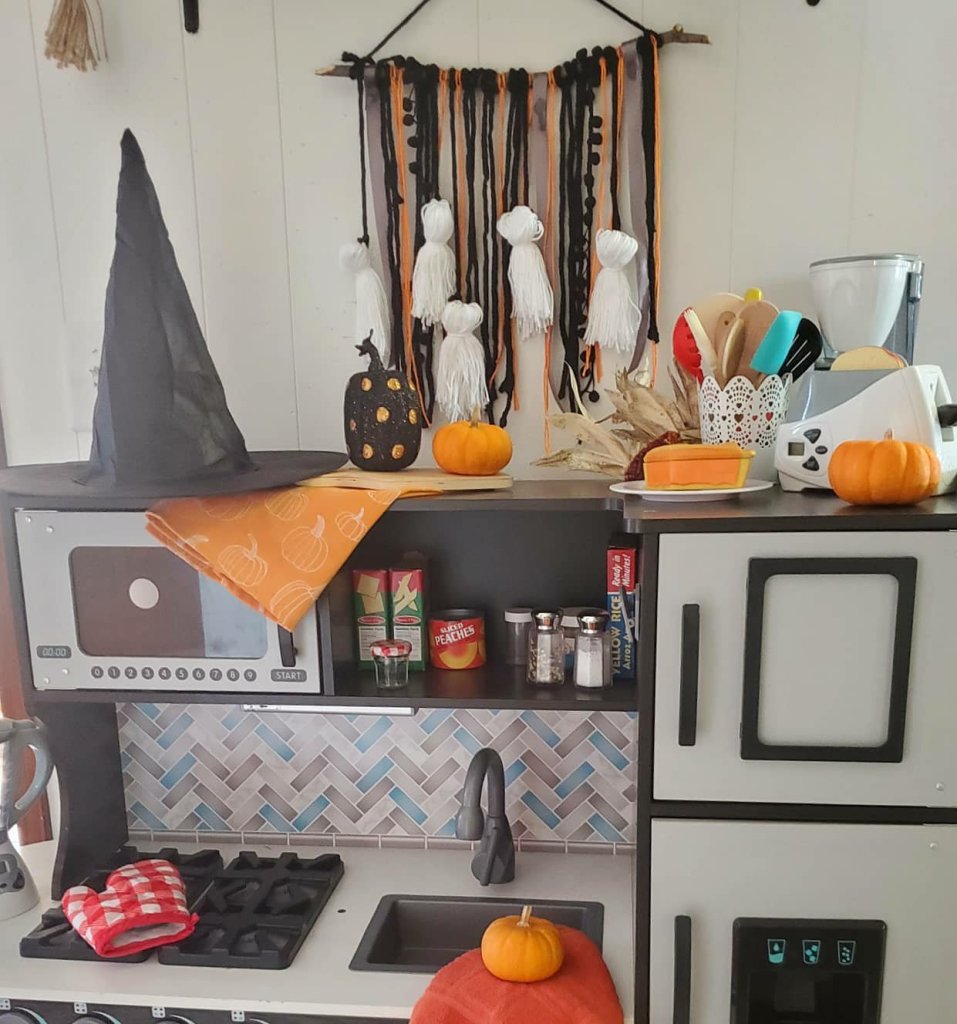
Enjoy! 😉
Xx,
Jess
Why I Love My Cricut
This is a sponsored post written by me on behalf of <a href=”Cricuthttps://lnk2.io/wjcWg2L”>Cricut</a>. All opinions are 100% mine.
I have had my Cricut Explore Air 2 for a few months now, and to say I’m in love is an understatement! I’ve always been a crafter, but this things really helps me step up my game! Here I am going to talk about the 5 things that I love about my Cricut!
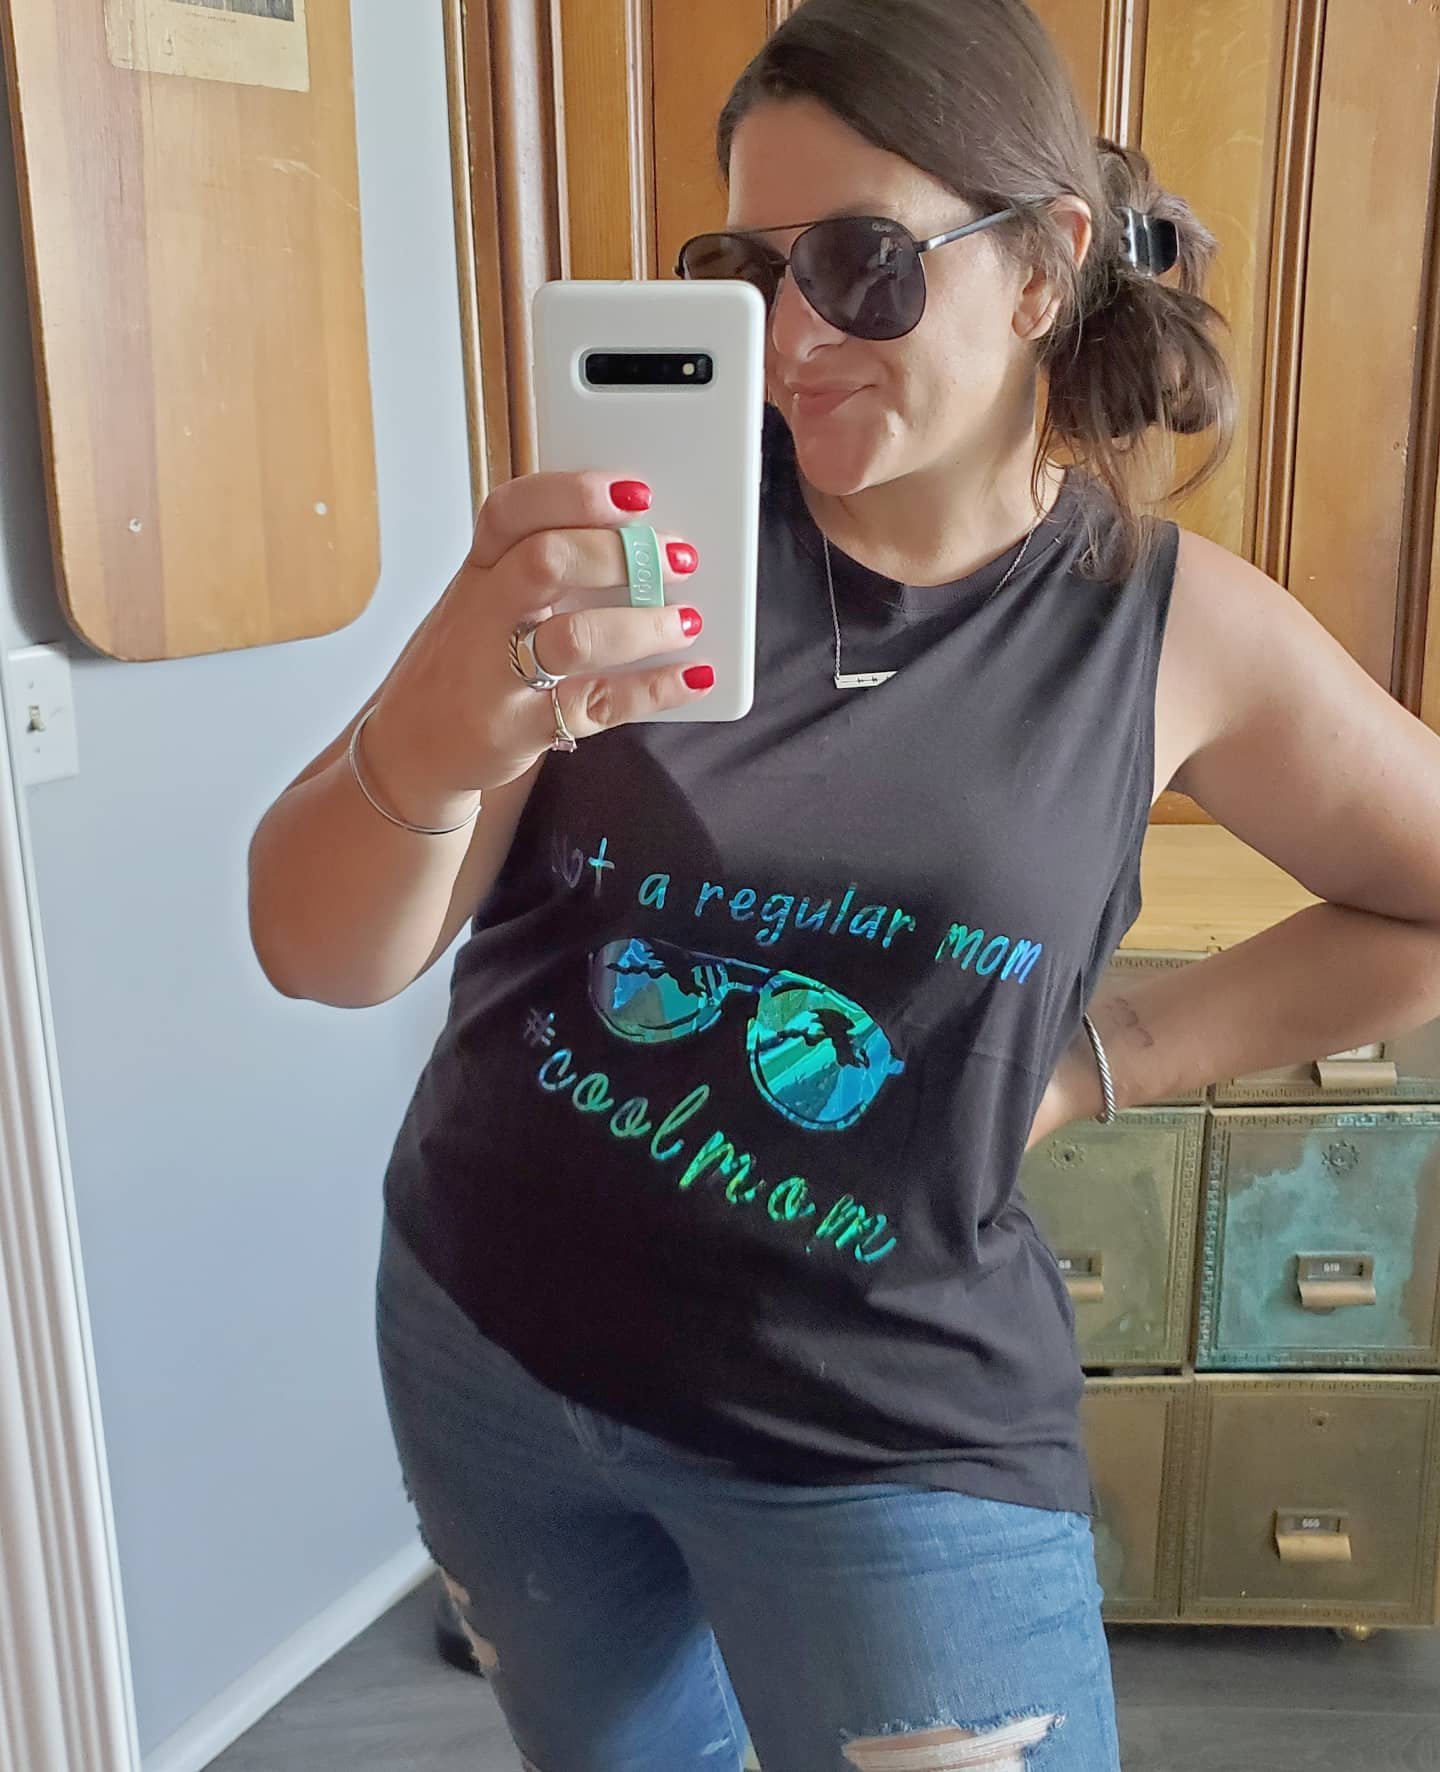
1. Its easy to use! I was truly shocked at how easy this machine is! Not going to lie, I was intimidated at first. I worried where to start and if I would be able to figure it all out. Yup. I was. Best place to start? Pick a project and jump in. They really mean it when they say their motto is “beginners luck every time.” I learn tricks and get braver each time I use my machine, but I definitely agree that picking a beginner level project and diving in head first is a great way to start and will prove to you how easy it is! Check out this shirt I made as one of my very first projects:
2. Support! That brings me to the second thing I love about my Cricut. Its like having a whole community of creators to support you. Have a question? Worried about where to begin or which type of project to do? They’ve got an answer! Not only does Cricut have a team you can email or chat with, but they have numerous pages where you can reach out to their pros or other crafters with tons of experience. They’ve all started somewhere and learned lots and are at the ready to make sure you love your machine and projects. I would know. I wasn’t sure how to customize the design I wanted to make myself for this bag, and the Facebook page group had almost immediate answers for me!

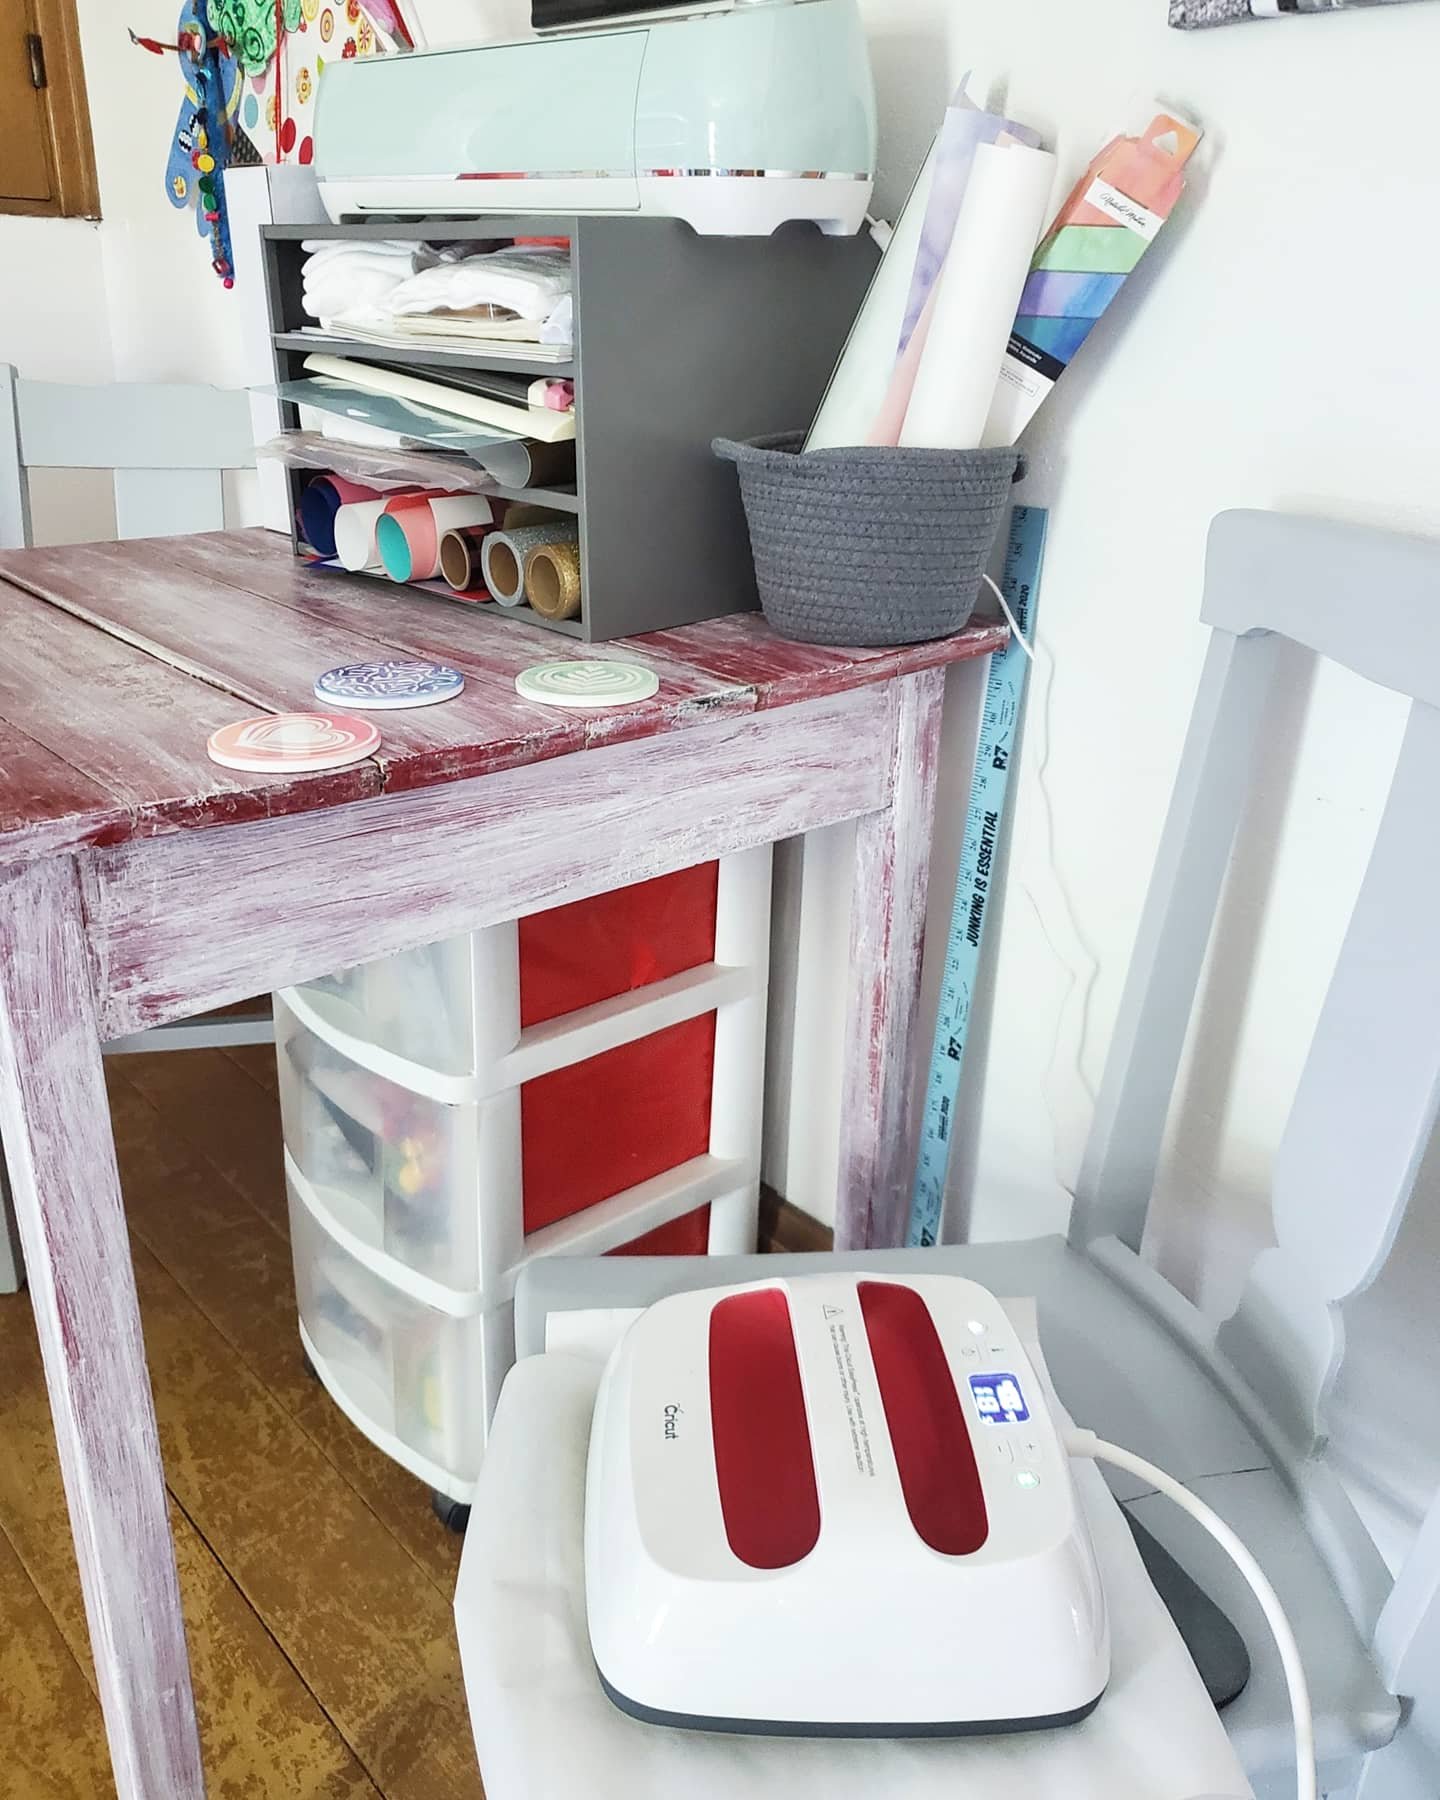
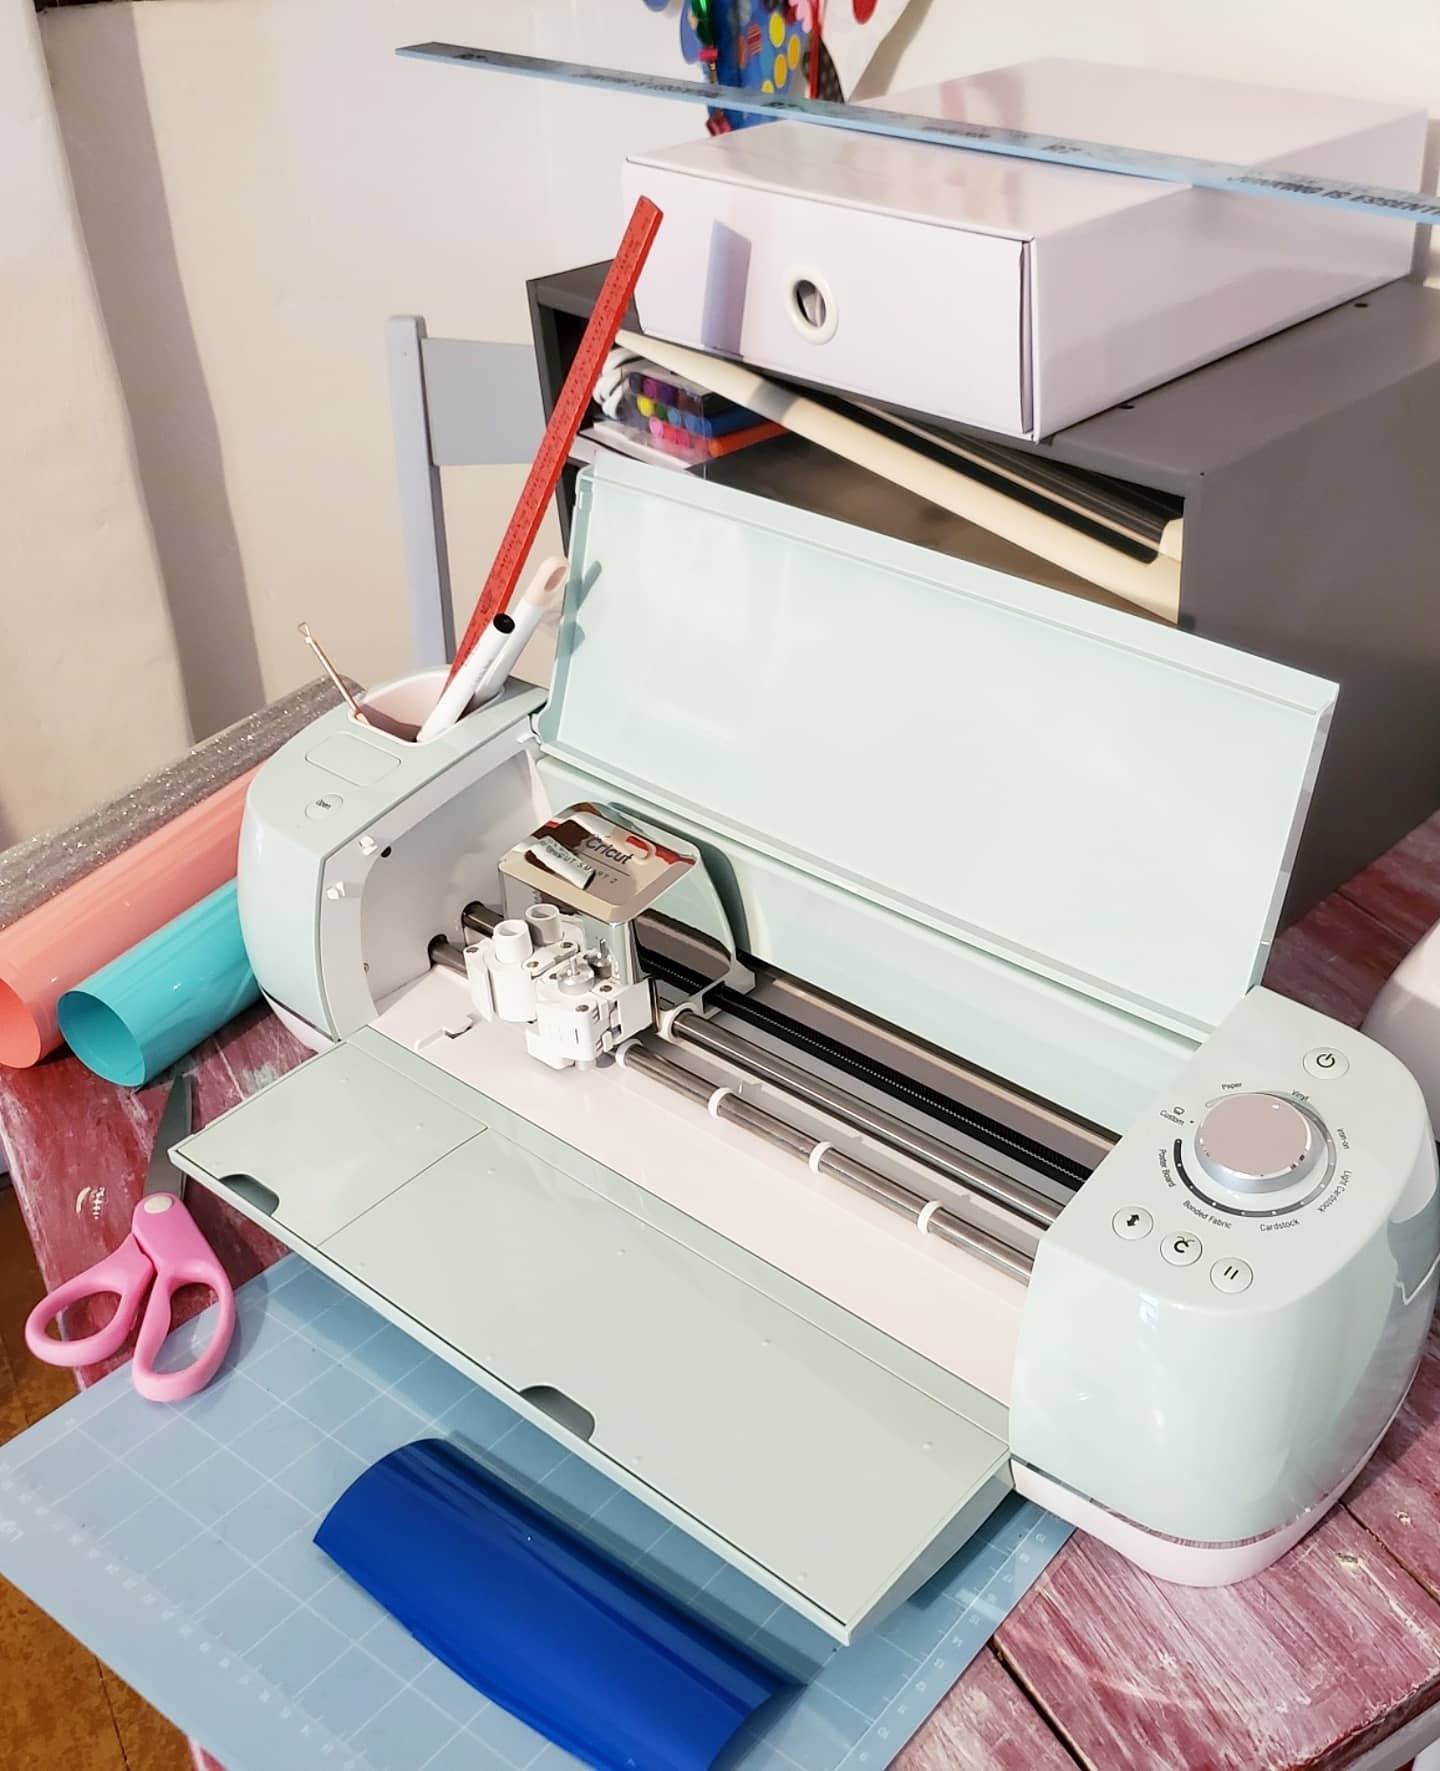
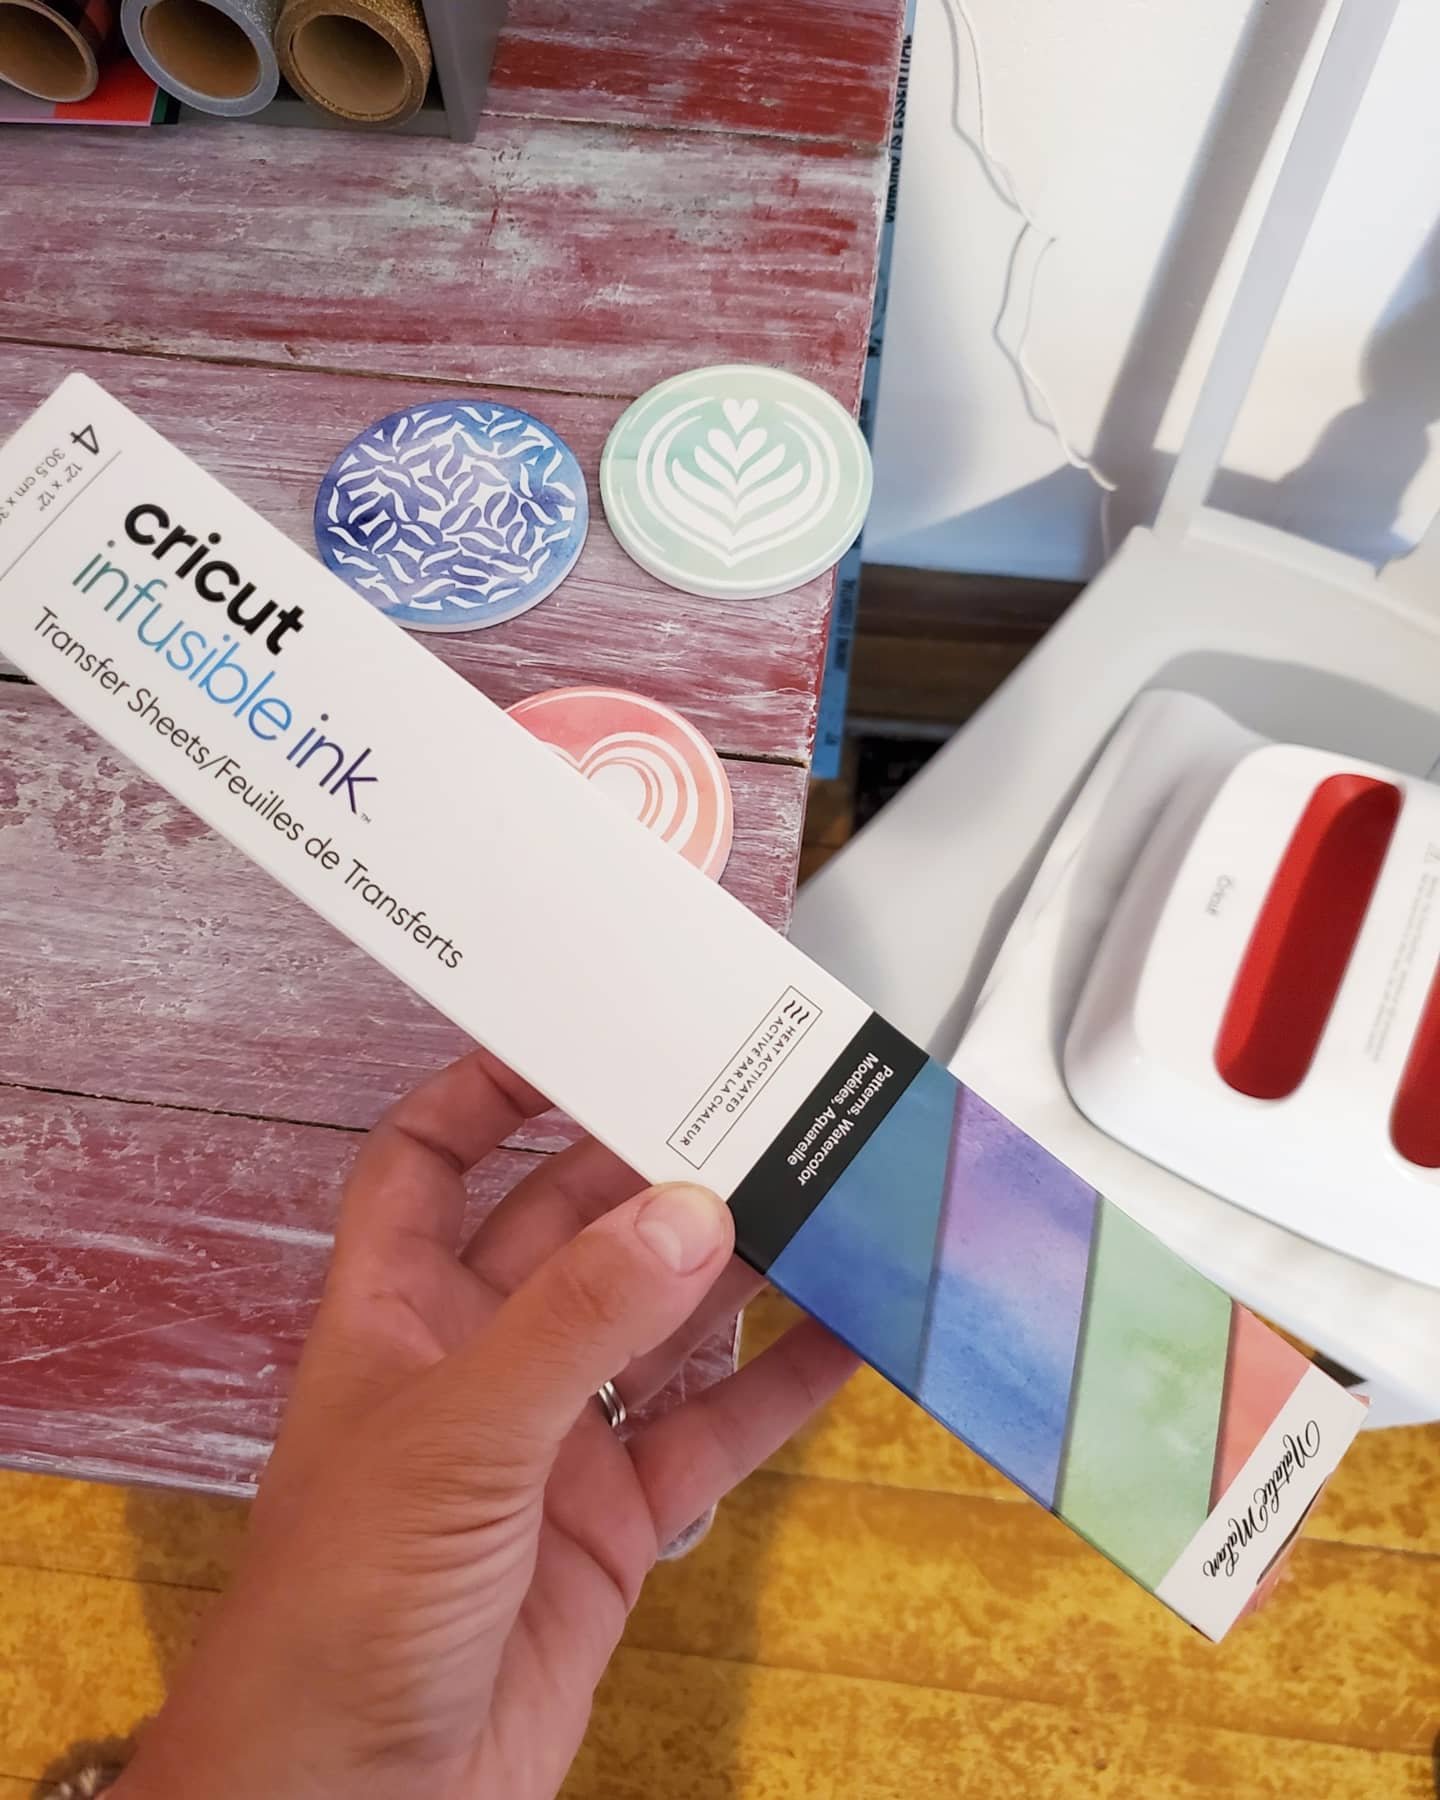
3. Ideas! This also leads me to another thing I love about Cricut, the ideas! I never worry about having a creative block. There’s no way. The ideas of projects to make are endless, for every single occasion you cak dream of. Really. You can find ideas galore on Pinterest, and Instagram, or Cricuts’s Facebook page. And my favorite place for inspiration? The Cricut emails! They send seasonal emails showing the new ideas and templates added to Design Space, their app for making. How did I know about the new infusible ink and coaster blanks to make these? One of their idea emails! Light bulb!

4. The options! Got a bright idea to make? You can! And Cricut can help you do it! The options they supply for you is endless. Or almost. Not only do they help with the ideas, but they make it easy to find all of the supplies you need to make visions come to fruition. They have coasters, bags, shirts, materials, pens, markers, vinyls, decals, iron ons, and the widest variety of patterns in their supplies you could imagine! Sparkles, holographics, leopard, wood grain…their possibilities are never ending! Not to mention, cricut has other machines like the EasyPress, and tools like mats, cutters, Nd weeders, to make all of the options come to life!

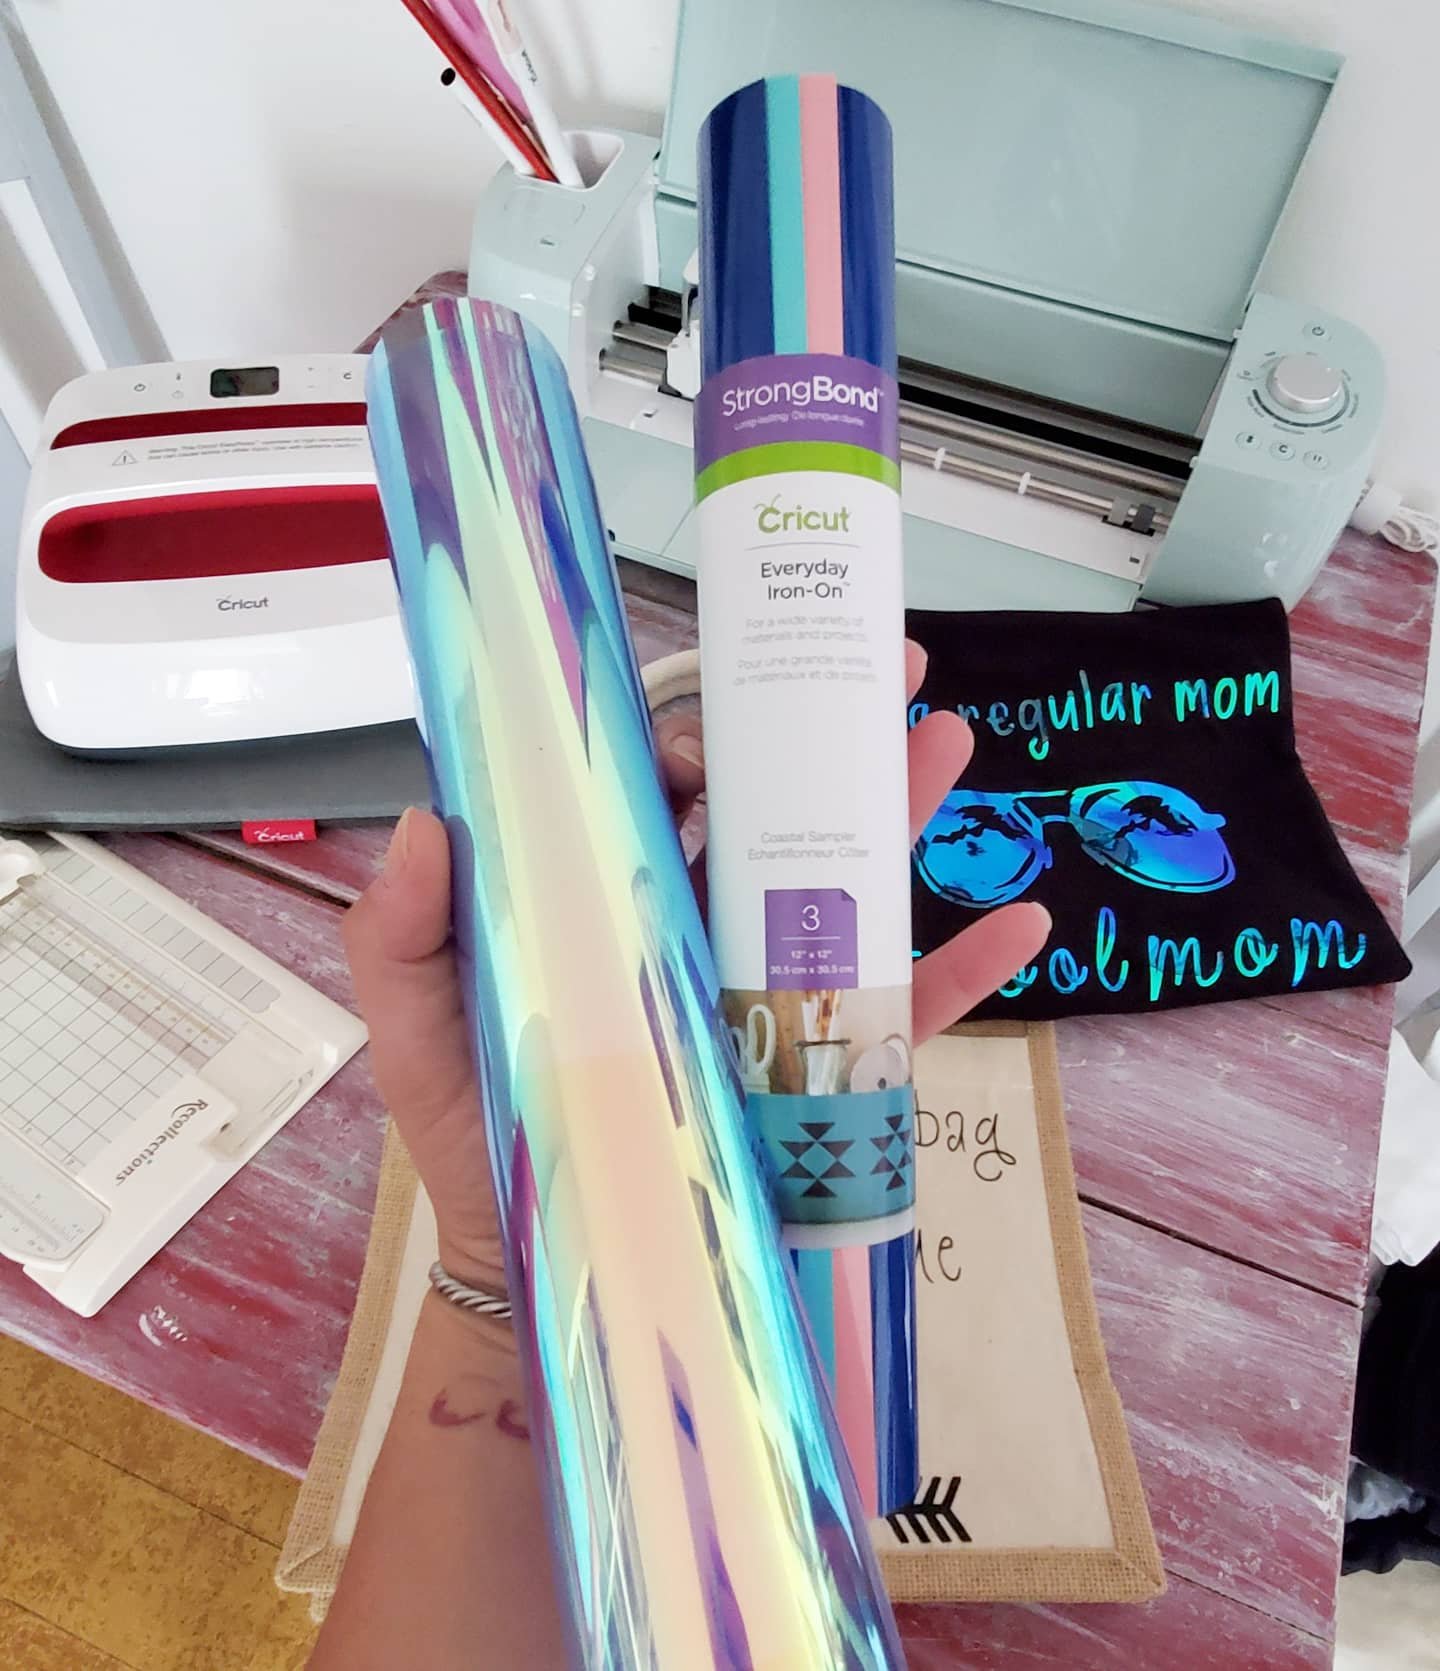
5. Capabilities! This machine not only cuts paper and vinyls. I was shocked to learn what all it really can do. Like blown away. It can cut leather, poster board, felt, fabric and even wood. But it doesn’t just cut, it can score. And it can draw! Yup! Shocked?! Me too. You can insert pens and markers into the blade holder and it can draw or write, making handmade cards, letters, signs… mind blown.
The capabilities combined with the Cricut options alone shows you that the possibilities are truly endless. I cannot wait to do another project every time I finish one! And now all of my gifts will be one of a kind made by yours truly!
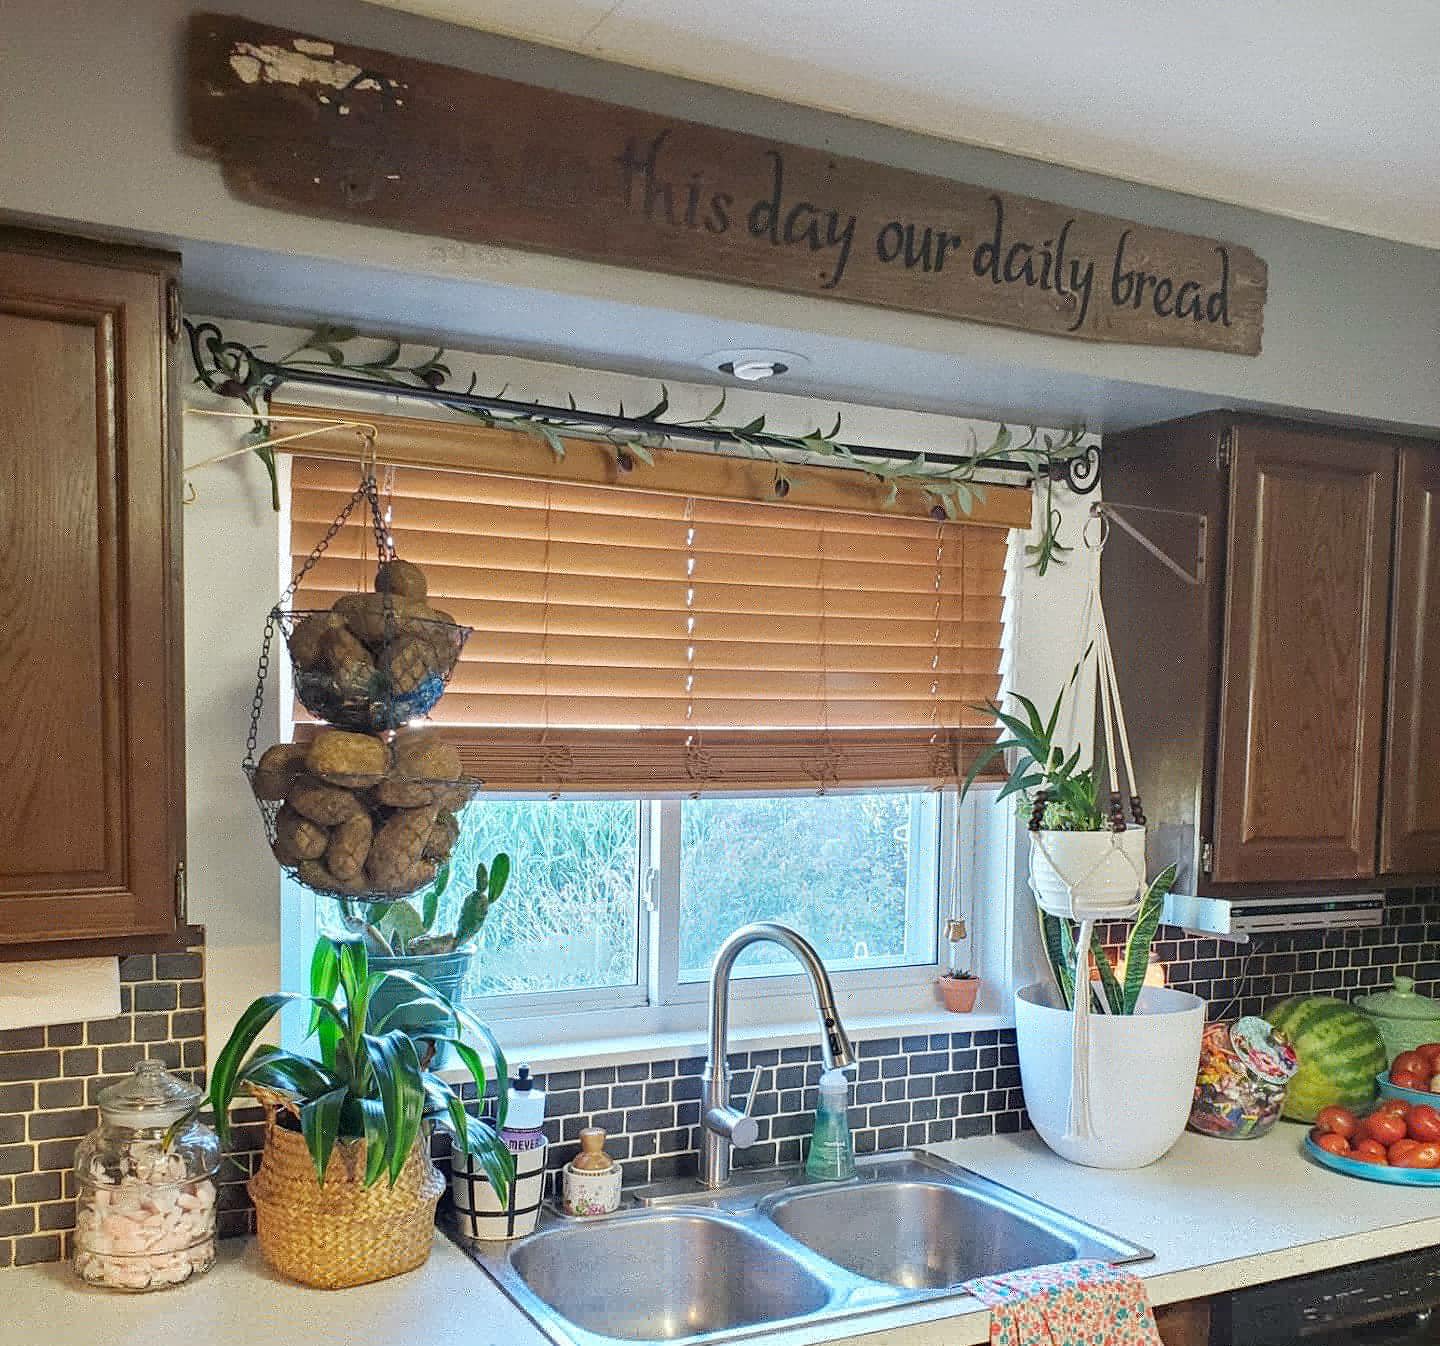
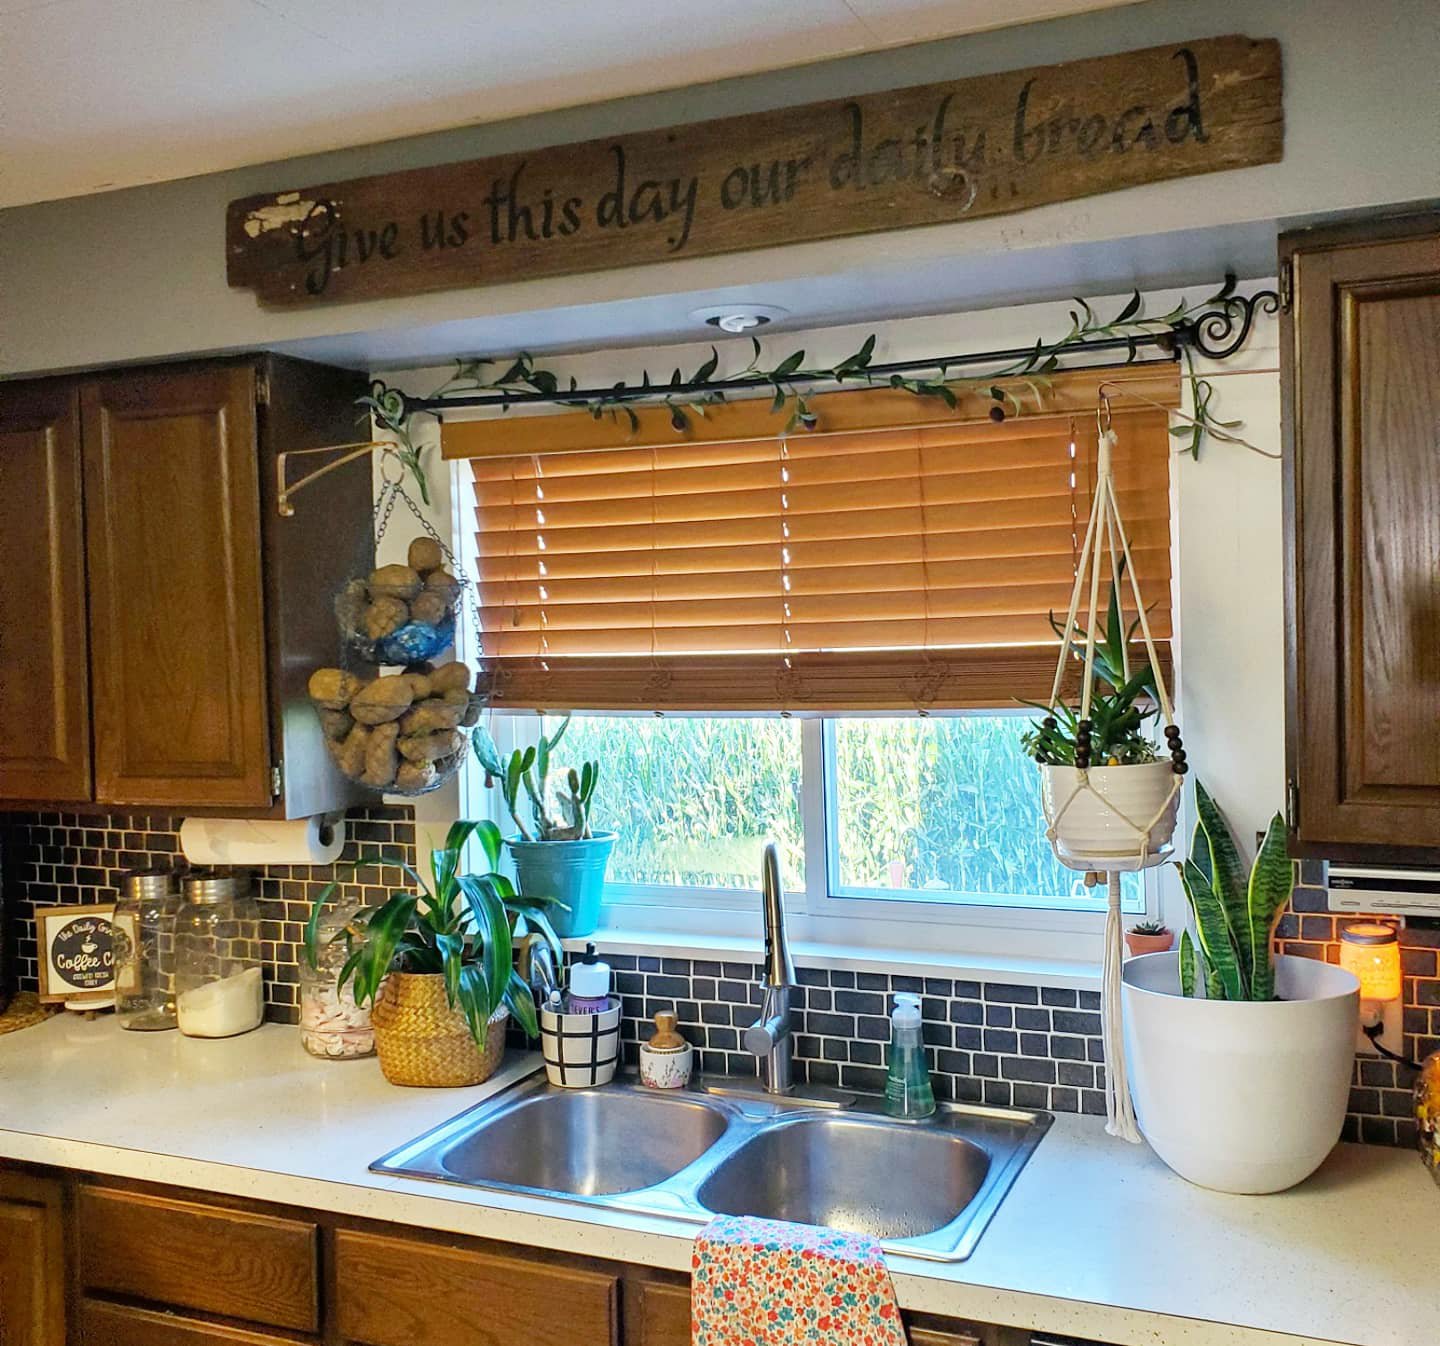
Here’s a quick breakdown of my latest project, a sign for our kitchen.
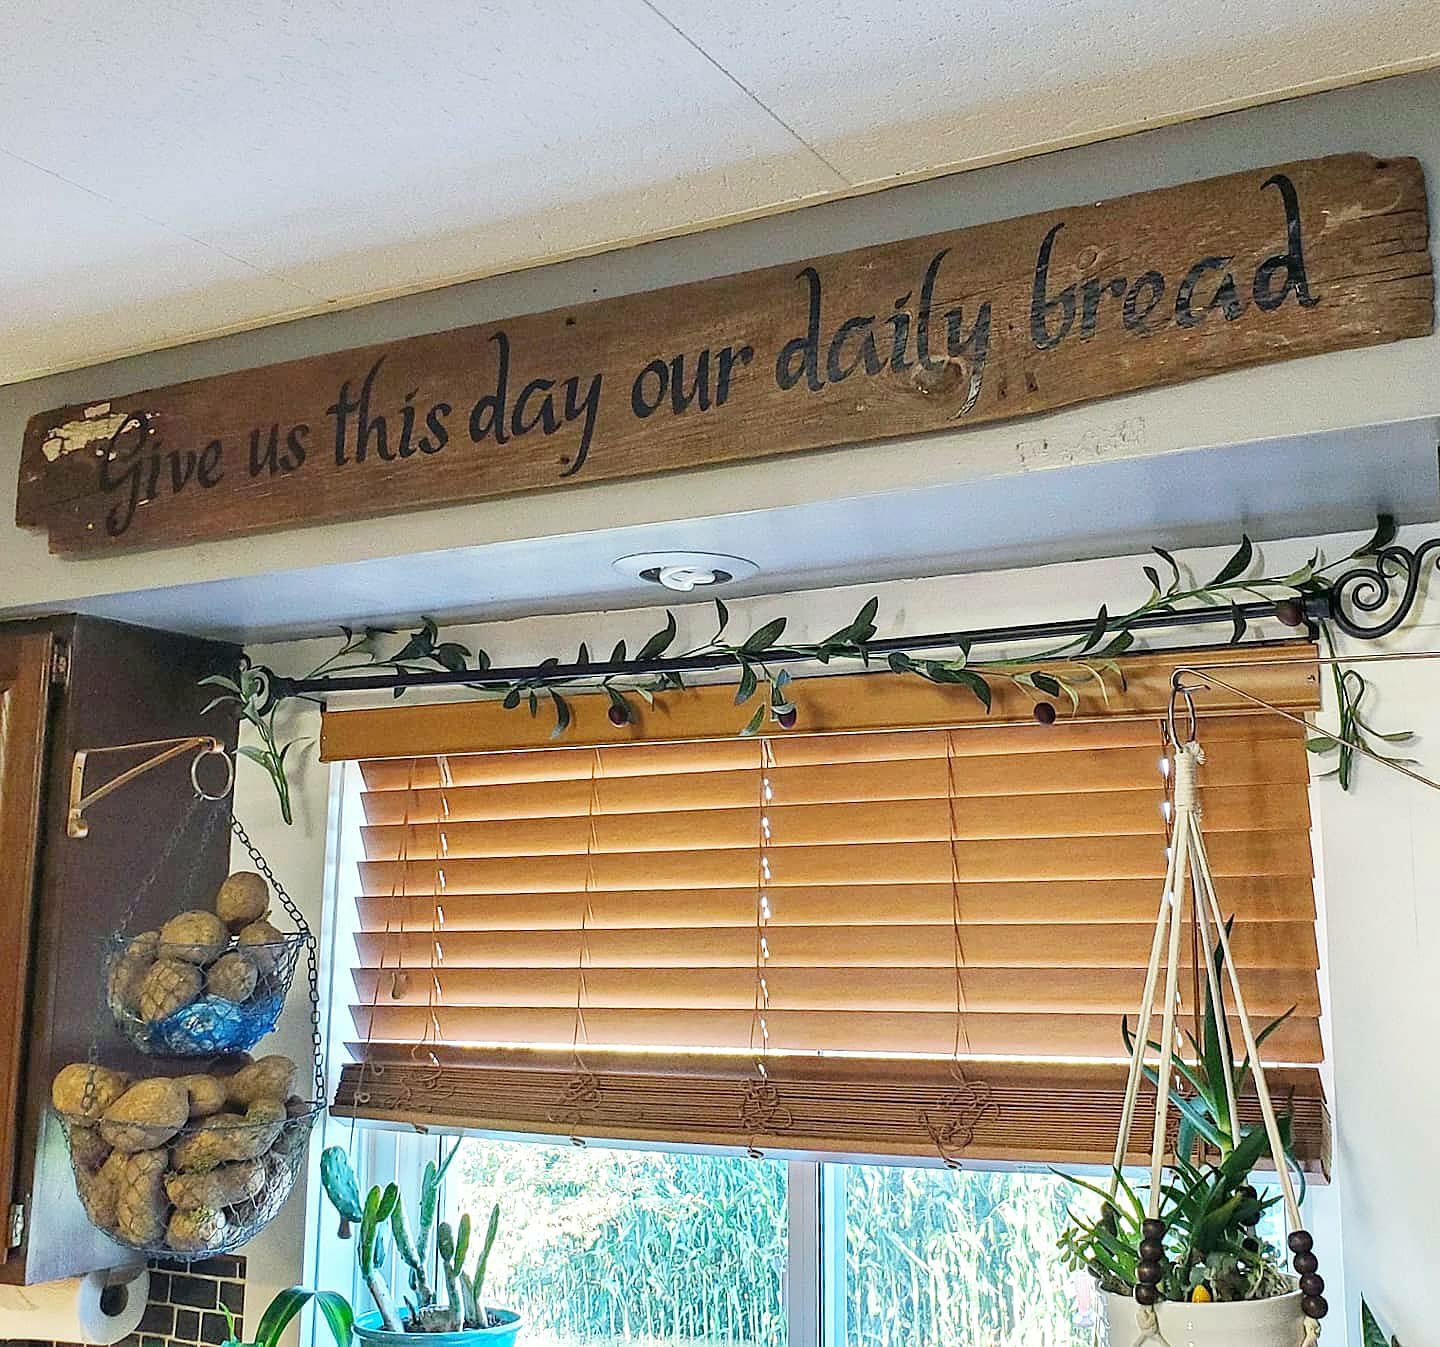
Choose a board and a quote. My board is a faded, chipped, barn board from our barn. (I’m sure to some the white paint left on one corner and the odd shape caused by years of cattle wear are not pretty, but we loved this board! 😉
Then, start on the Design Space app, and find my design template here. My board is 5ft long, but you can edit the design to adjust measurements. Once you send the design to the machine and it cuts it on vinyl, weed the excess pieces out. Use transfer tape to pick up your design and stick it down in place on your board. You could add flourishes to the ends of your quote too! You can change this design and even choose your own color vinyl. I used matte clear coat over the board to ensure no edges lift since I chose an old, rippled barn board for my project. Add a hanger or two on the back and hang. Easy peasy and a great one-of-a-kind, beginner-friendly project!
Have questions? Need help or ideas? Just ask! 😘
XX,
Jess
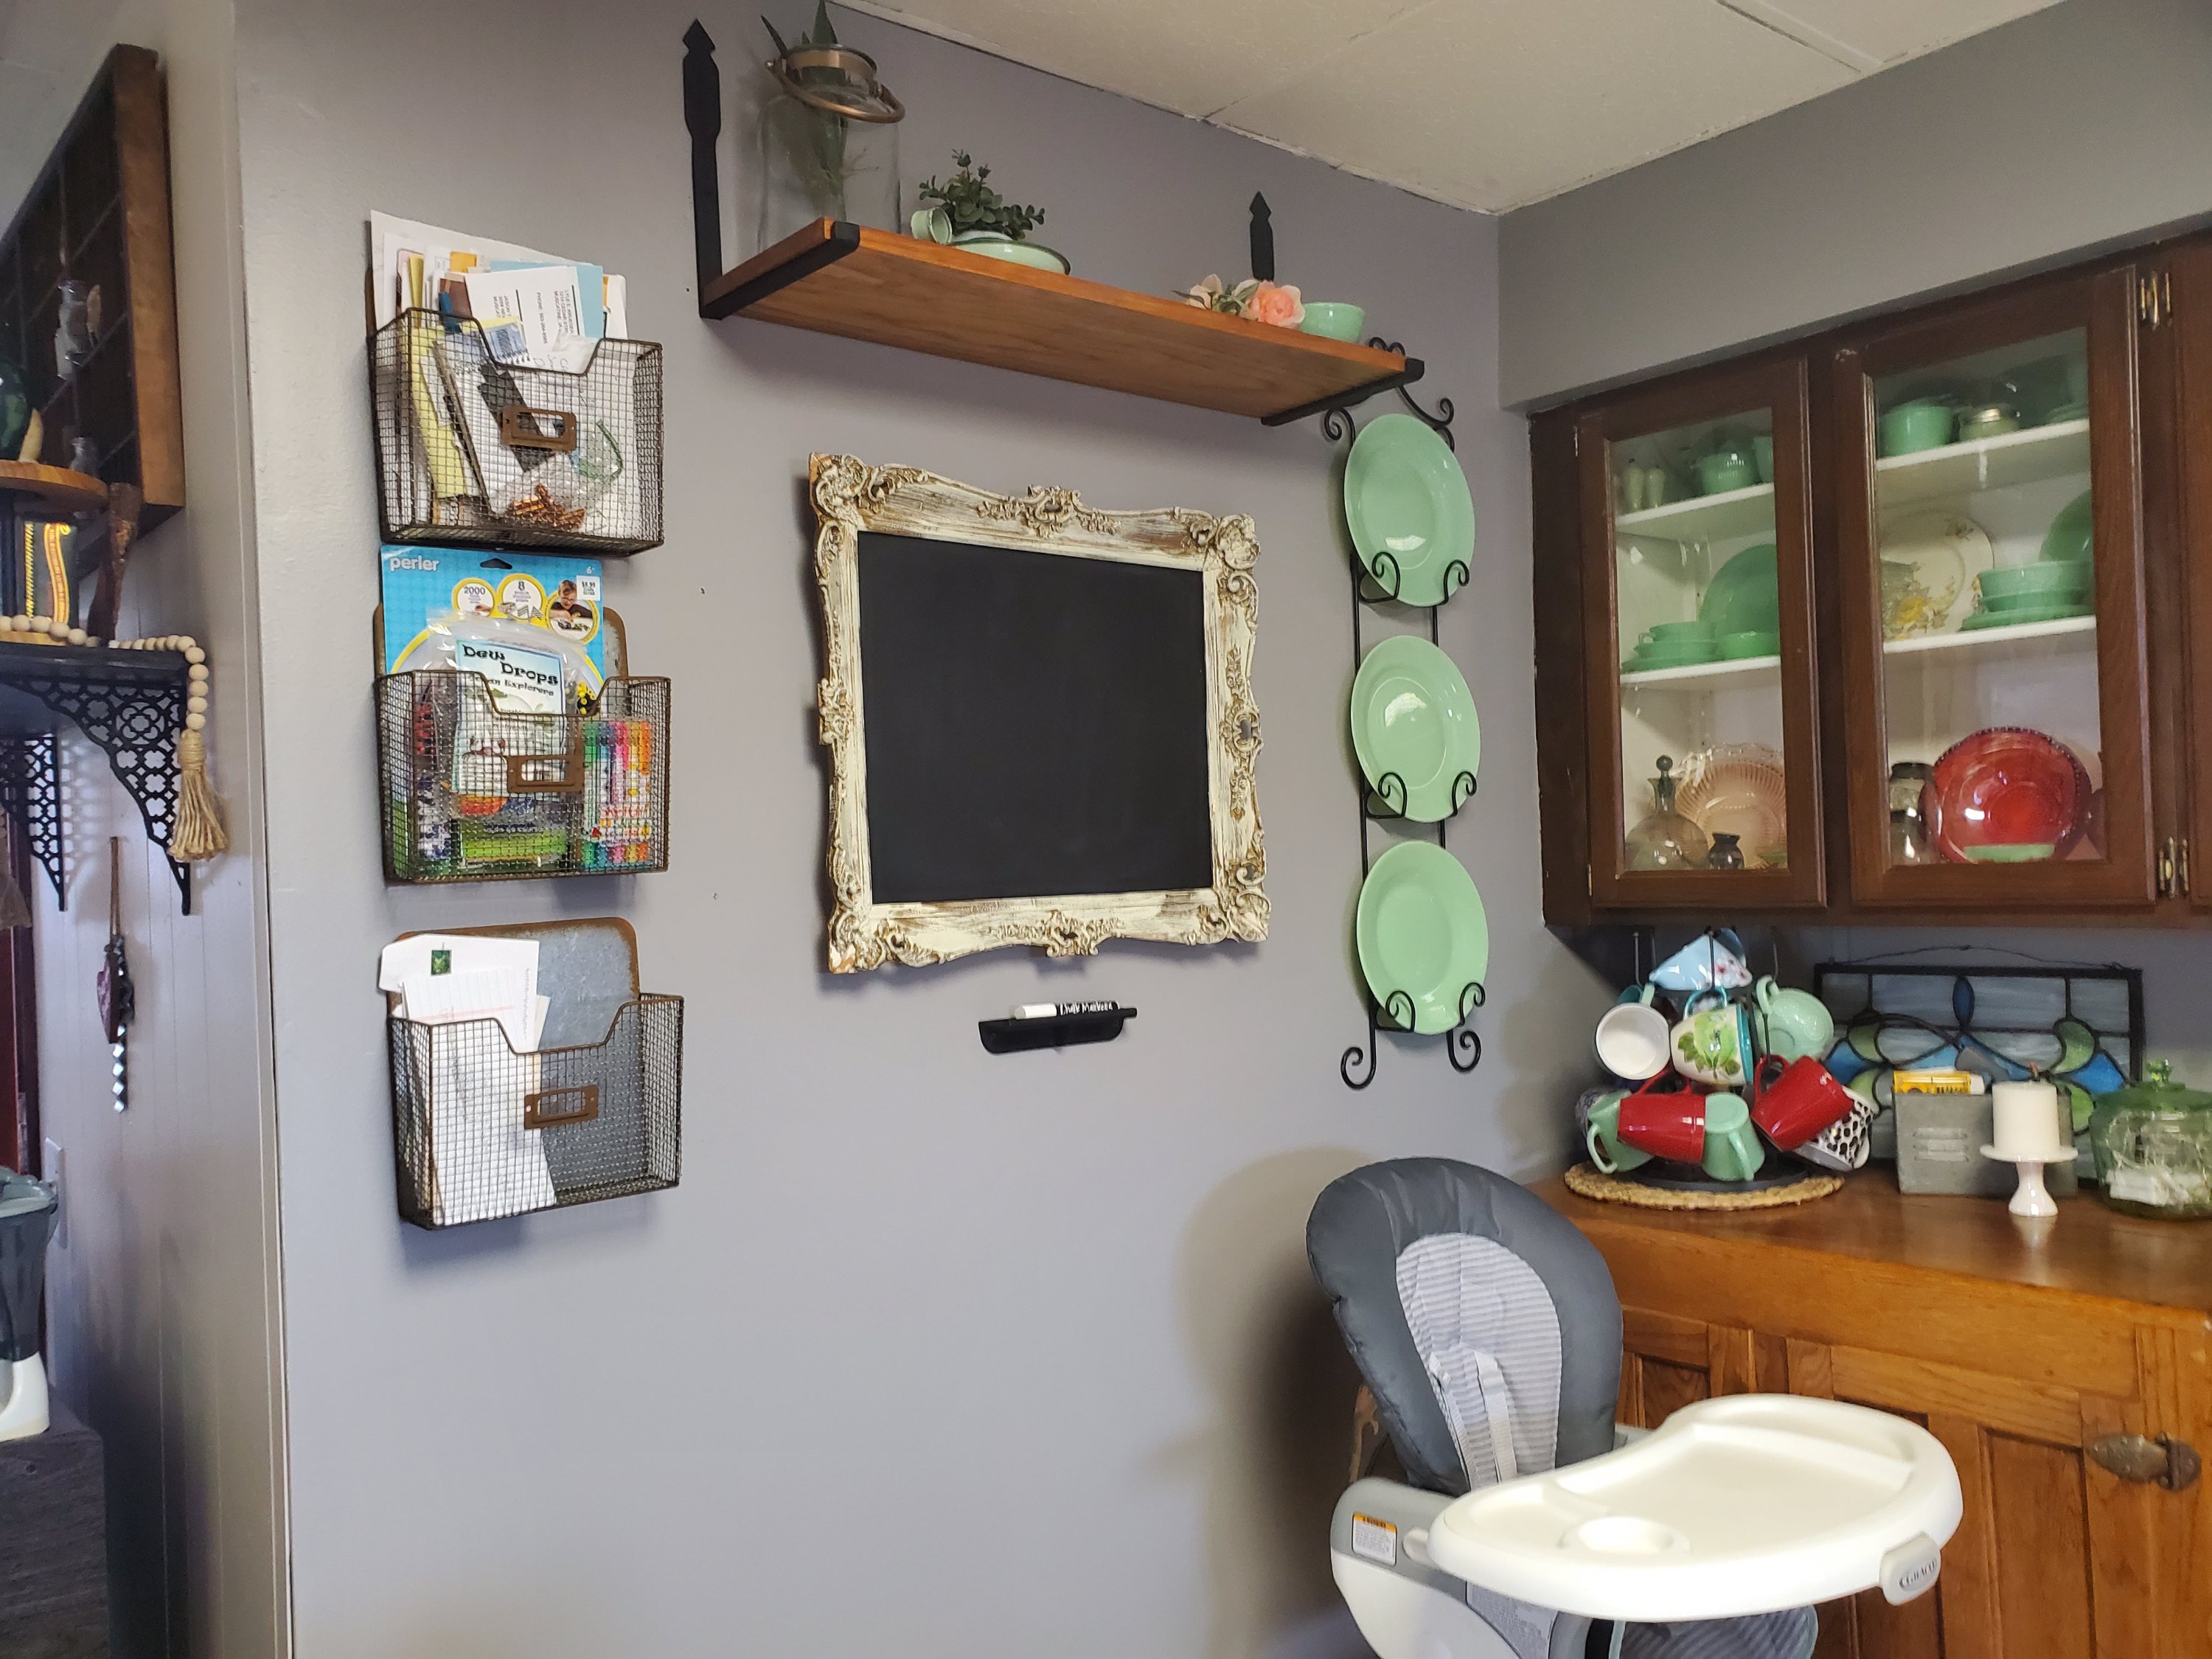
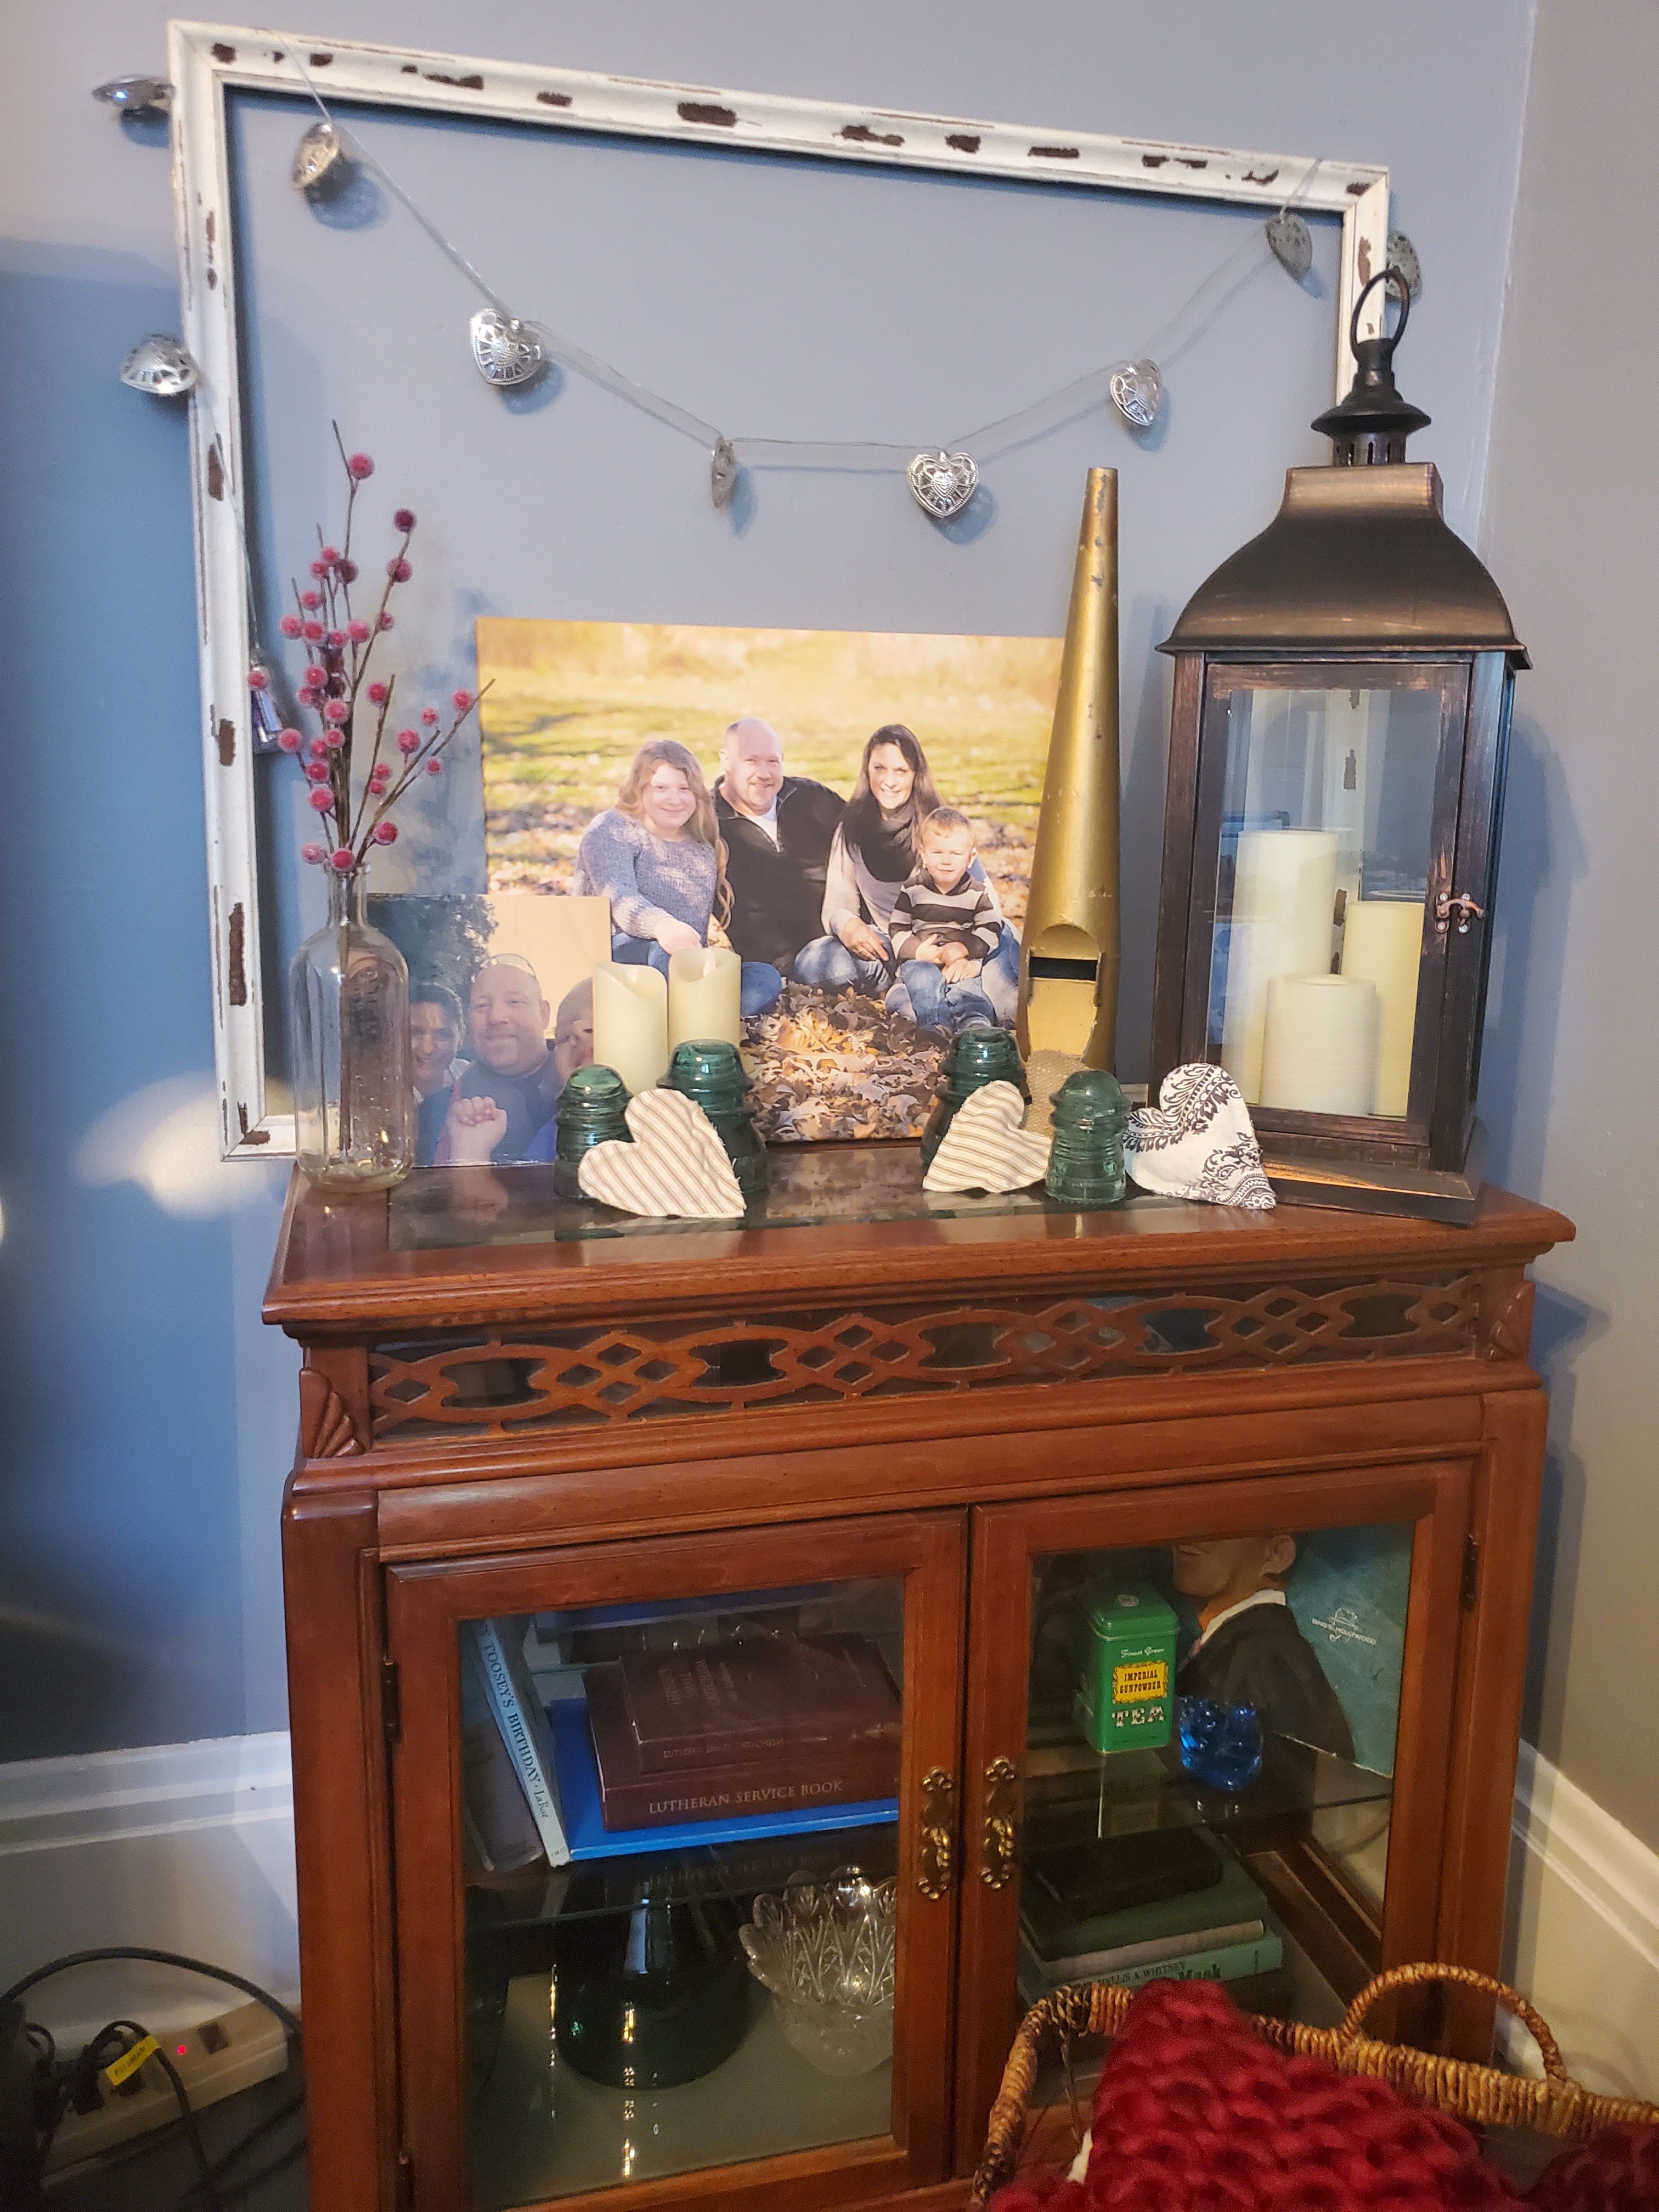
The Landing Strip
A landing strip, a command center, the drop spot. No matter what you call it, every house should have one. It’s a place for all the family “stuff”.
I call it a landing strip. In this house we actually have it split up a little, but it’s whatever works for you! When you come in our backdoor, we have hooks for each family member. Bag and coat go there. There’s a little hook station for car keys. And we have a small rack holding bug spray, sunscreen, sunglasses, wireless speaker, etc. But there’s still other “stuff” that accumulates. What do you do with it?! Enter our landing strip.
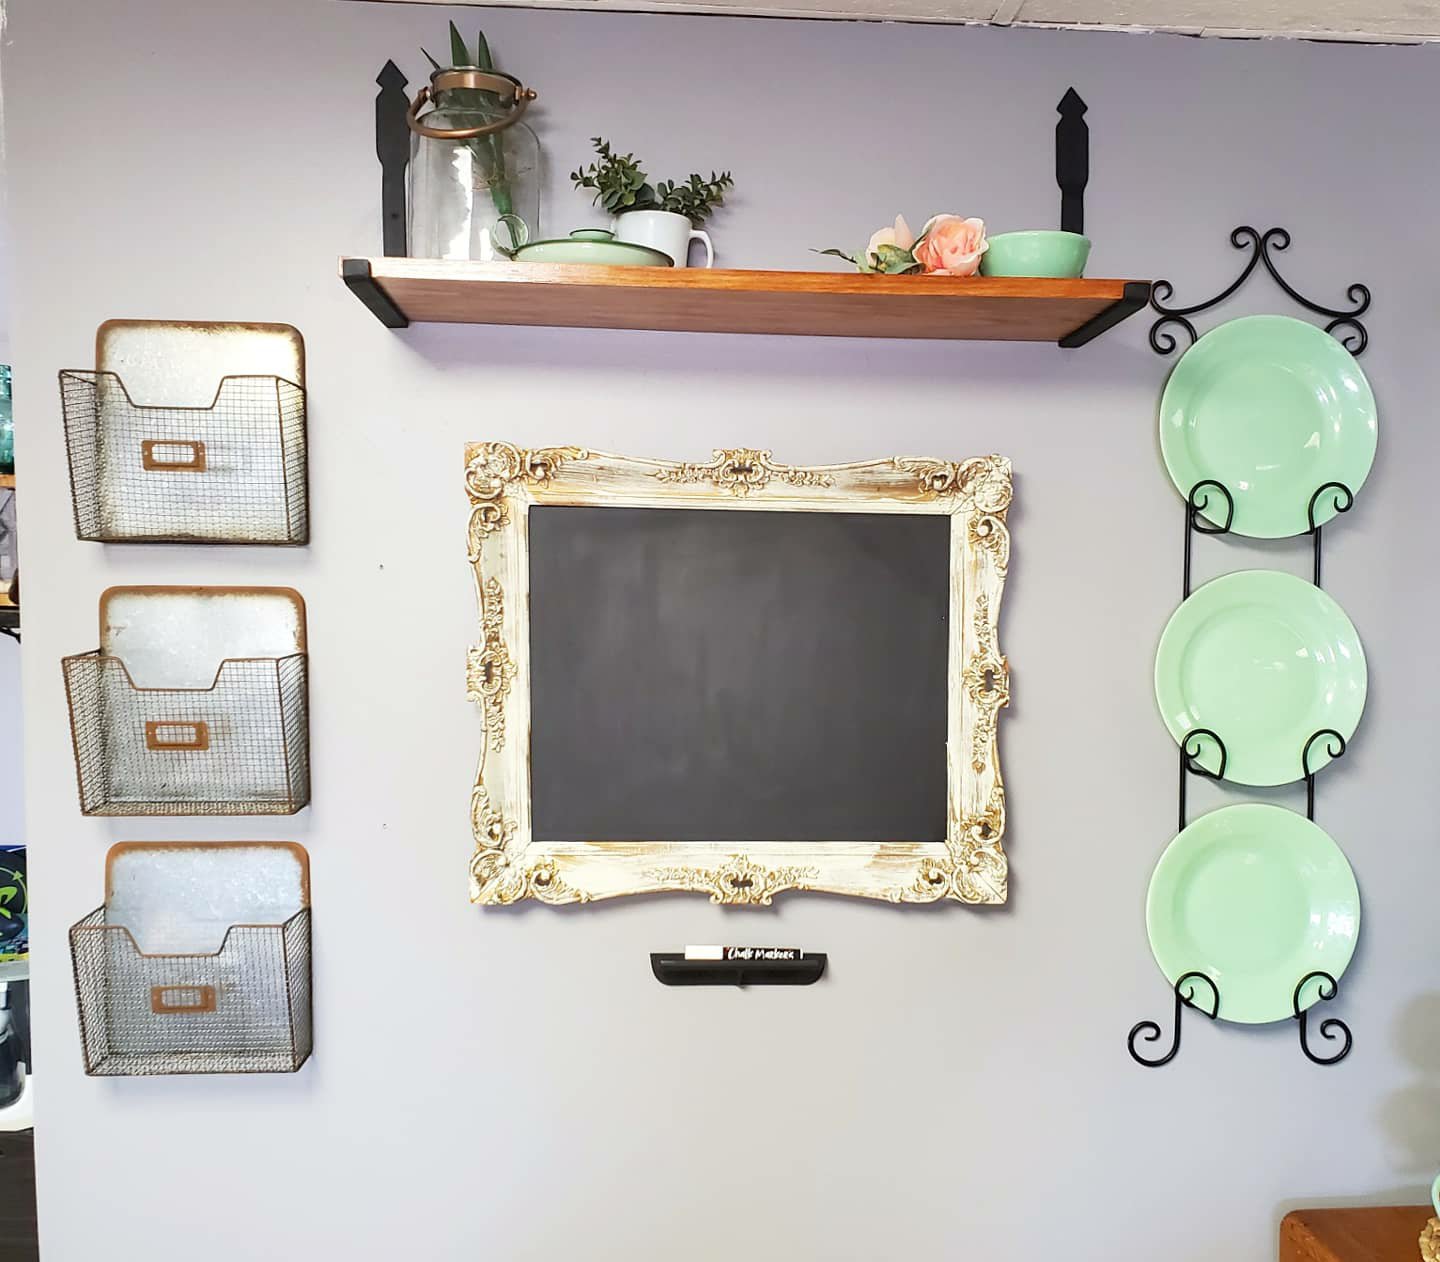
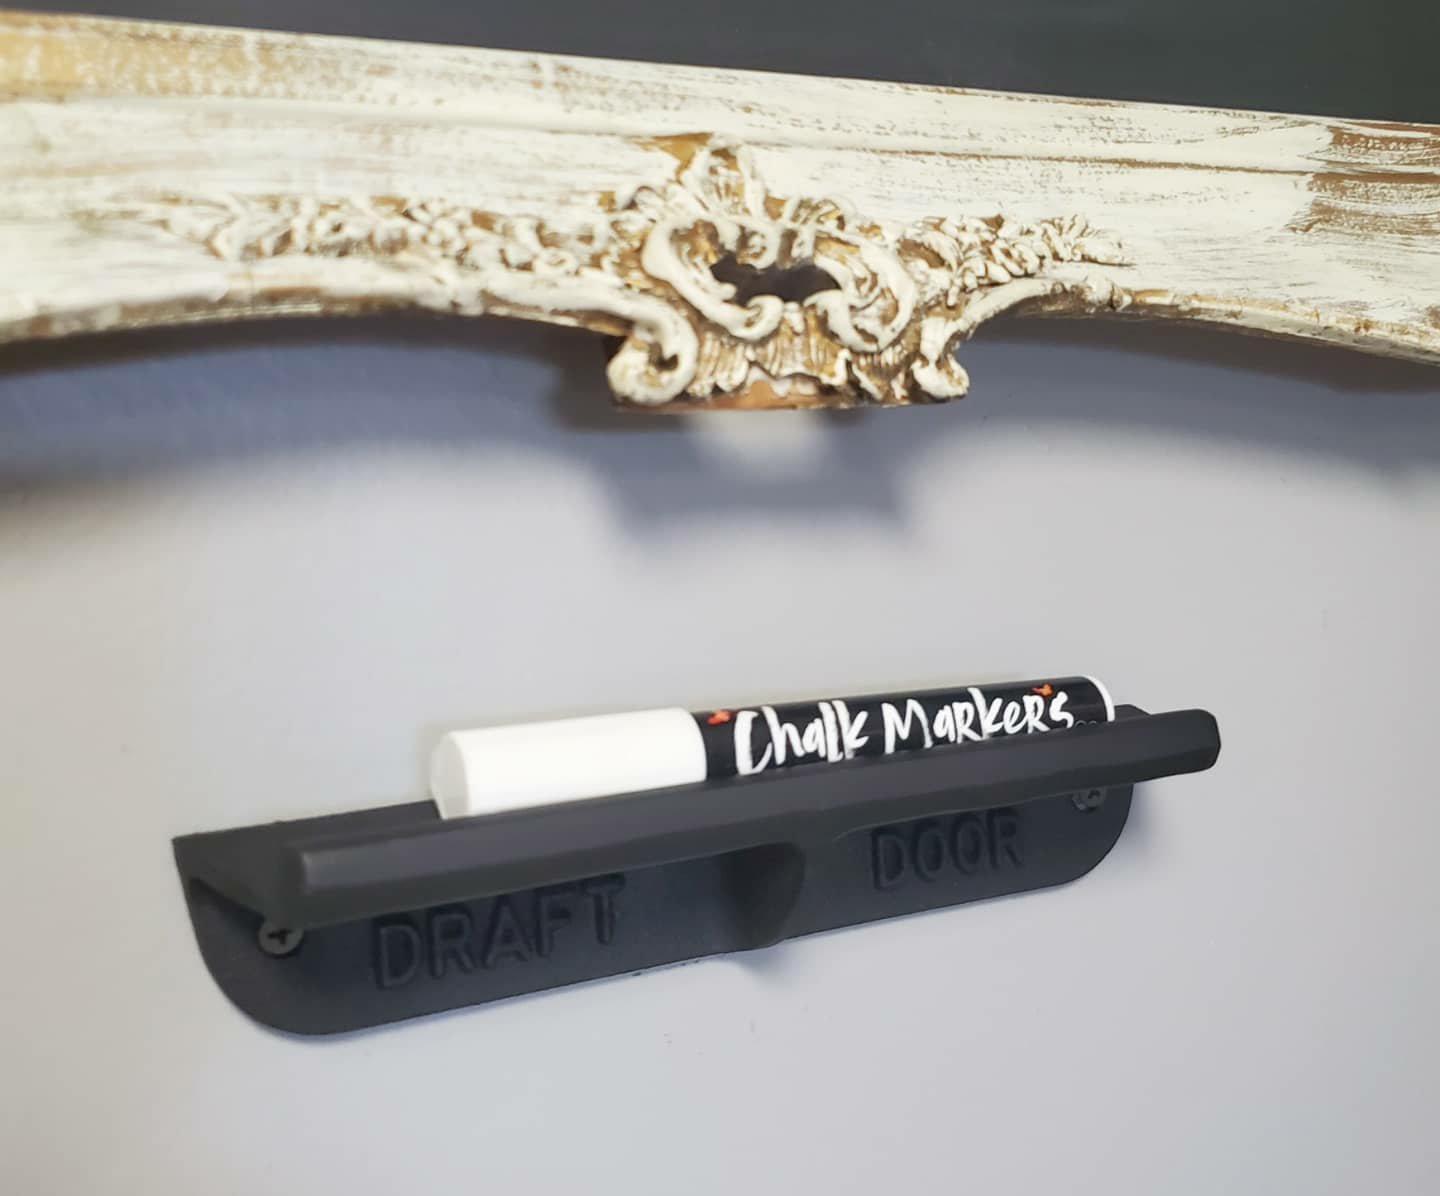
He we have a stash spot for everything else so that we stay organized and don’t lose important things! We use the chalk board for calendar notes and grocery lists. And each of the boys and mom and dad have a basket. We put bills in ours. The boys put homework and such in theirs. I keep a pen jar on the shelf. Here is stash stamps, a candle lighter, a marker, and pens. If you need more than that they you have to go upstairs to the office. 😆
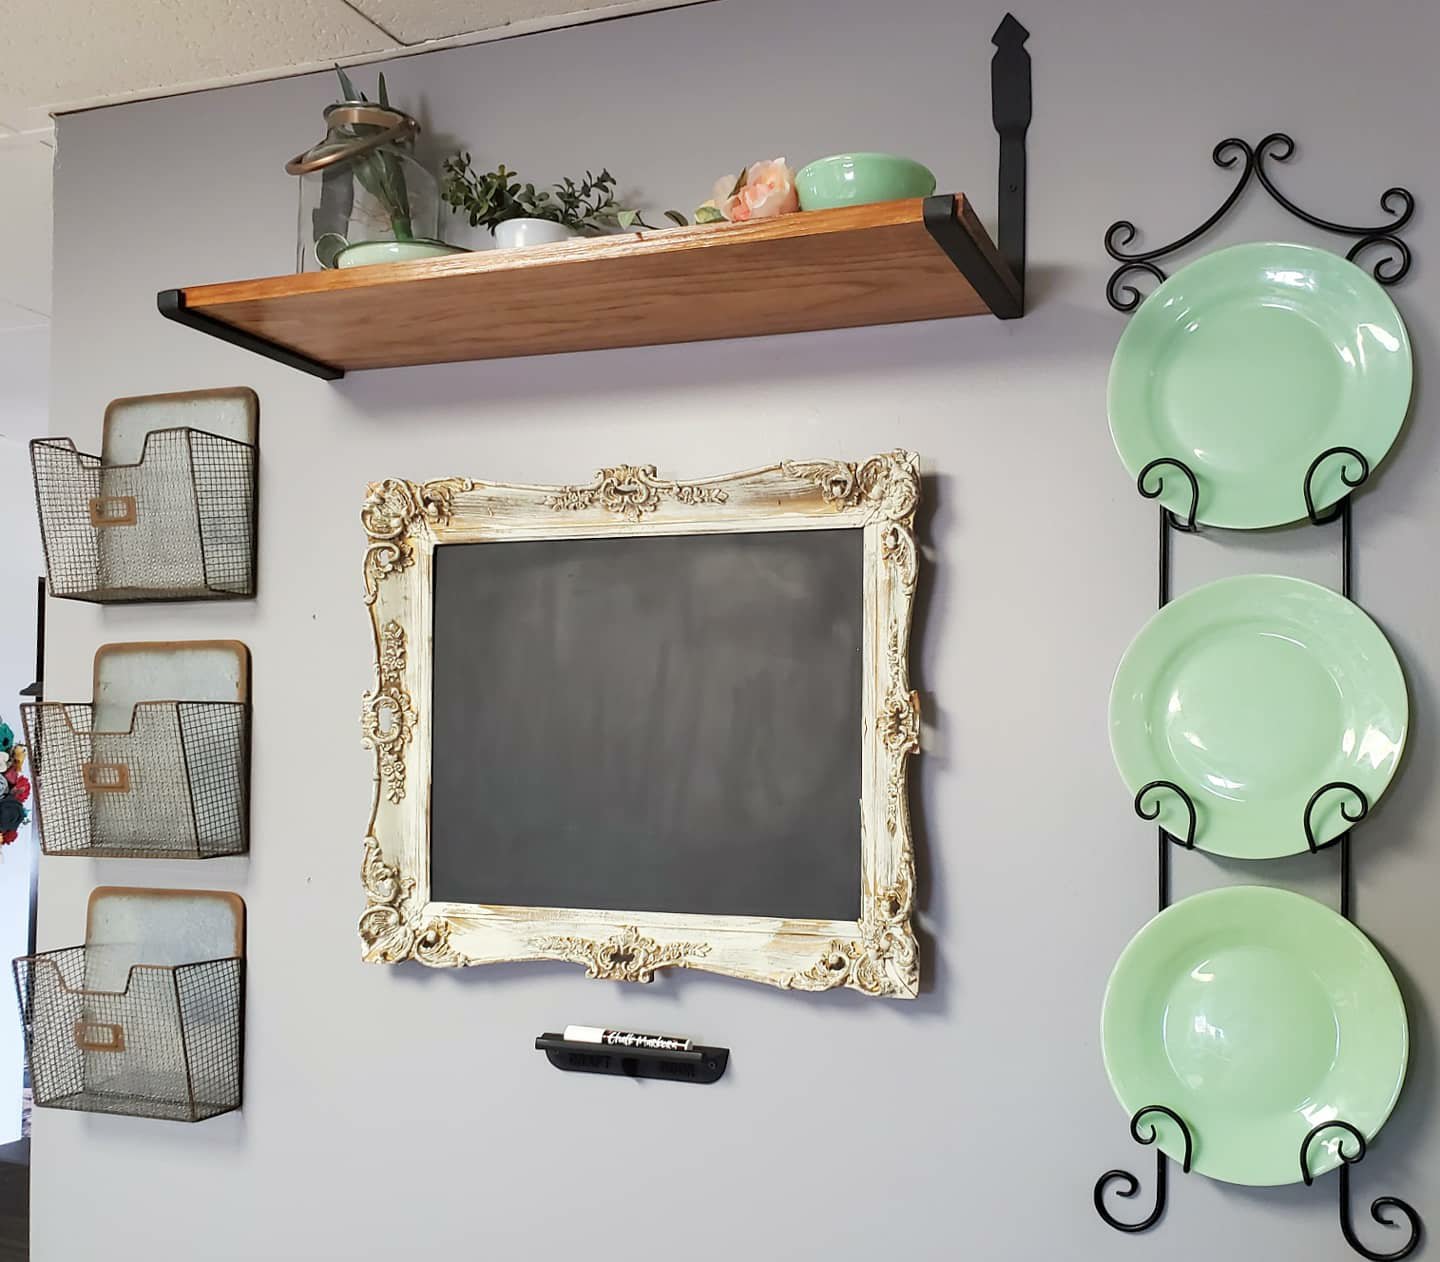

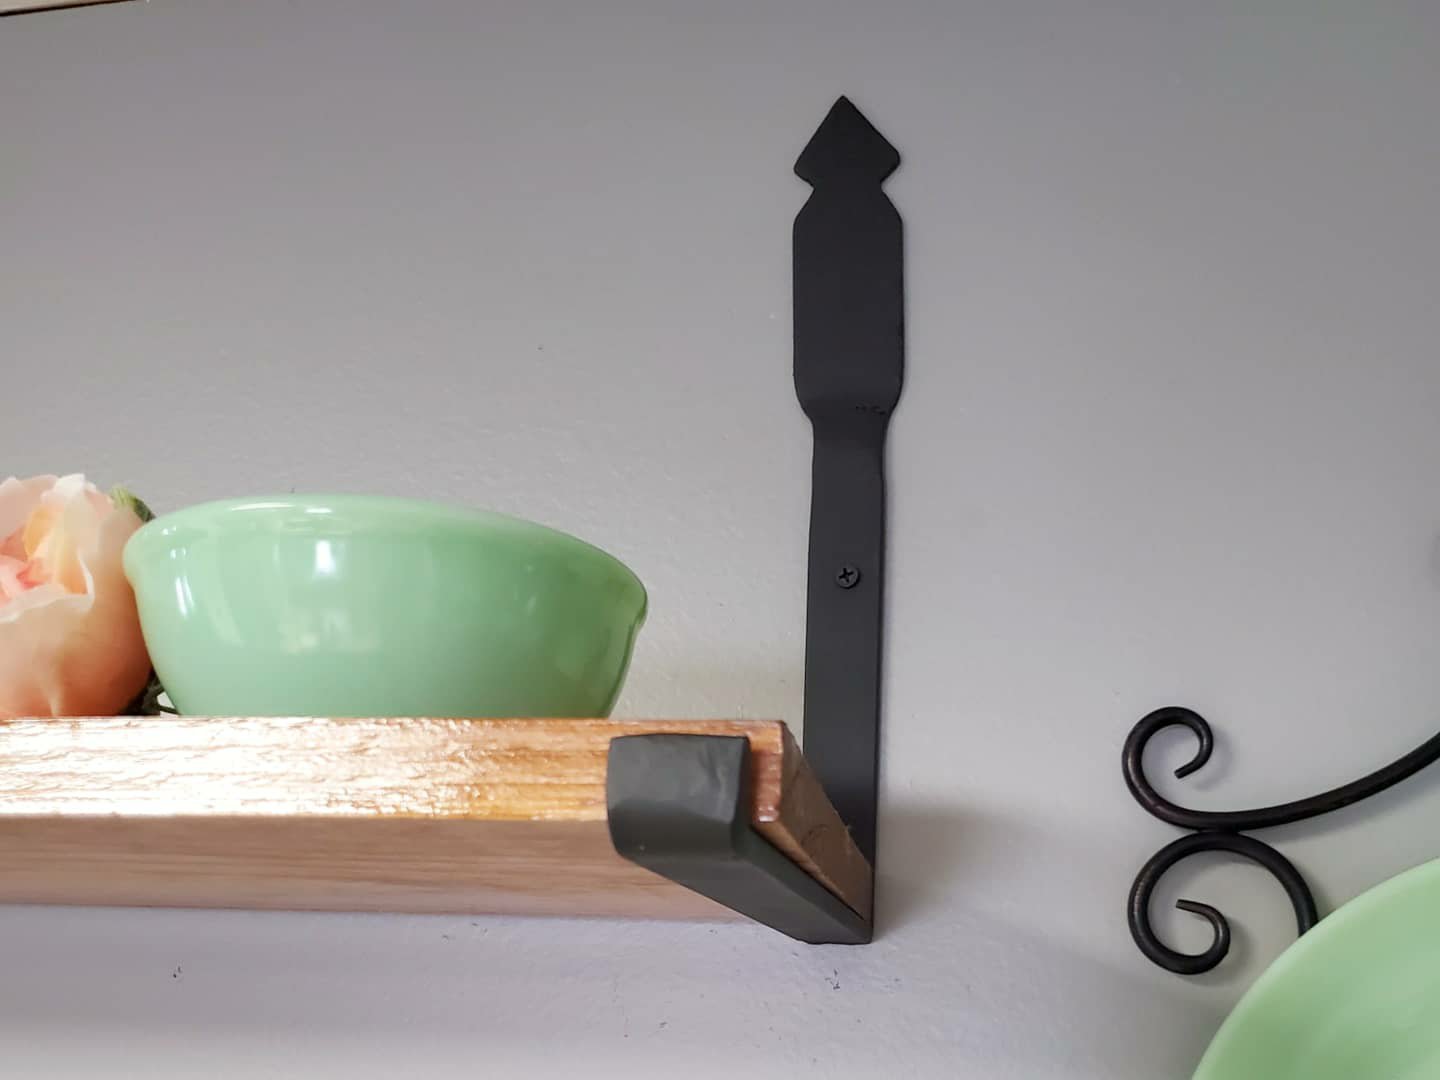
The antique mirror got a metal insert painted with chalk paint. The little chalk marker tray below it is an antique door stop out of an old barn. The baskets are from Hobby Lobby. The shelf is a custom design I requested from Jason. He added and welded the flourish at the top of the brackets.

Here’s my tid bit of advice. Have a place for the “stuff”, whatever you may call it. I truly believe in “a place for everything and everything in its place.” Even if you don’t organize that far, at least set up a zone with a calendar and pens and notepad. Have a spot where you put mail and homework. Always put your keys in the same location. I promise you that these tricks will prevent you from losing important things or searching frantically for the lost items!
And just for fun, here’s a shot of what it looks like more often than not. 😉
Anything else you would add?
XX,
Jess
Permalink Comments Off on The Landing Strip
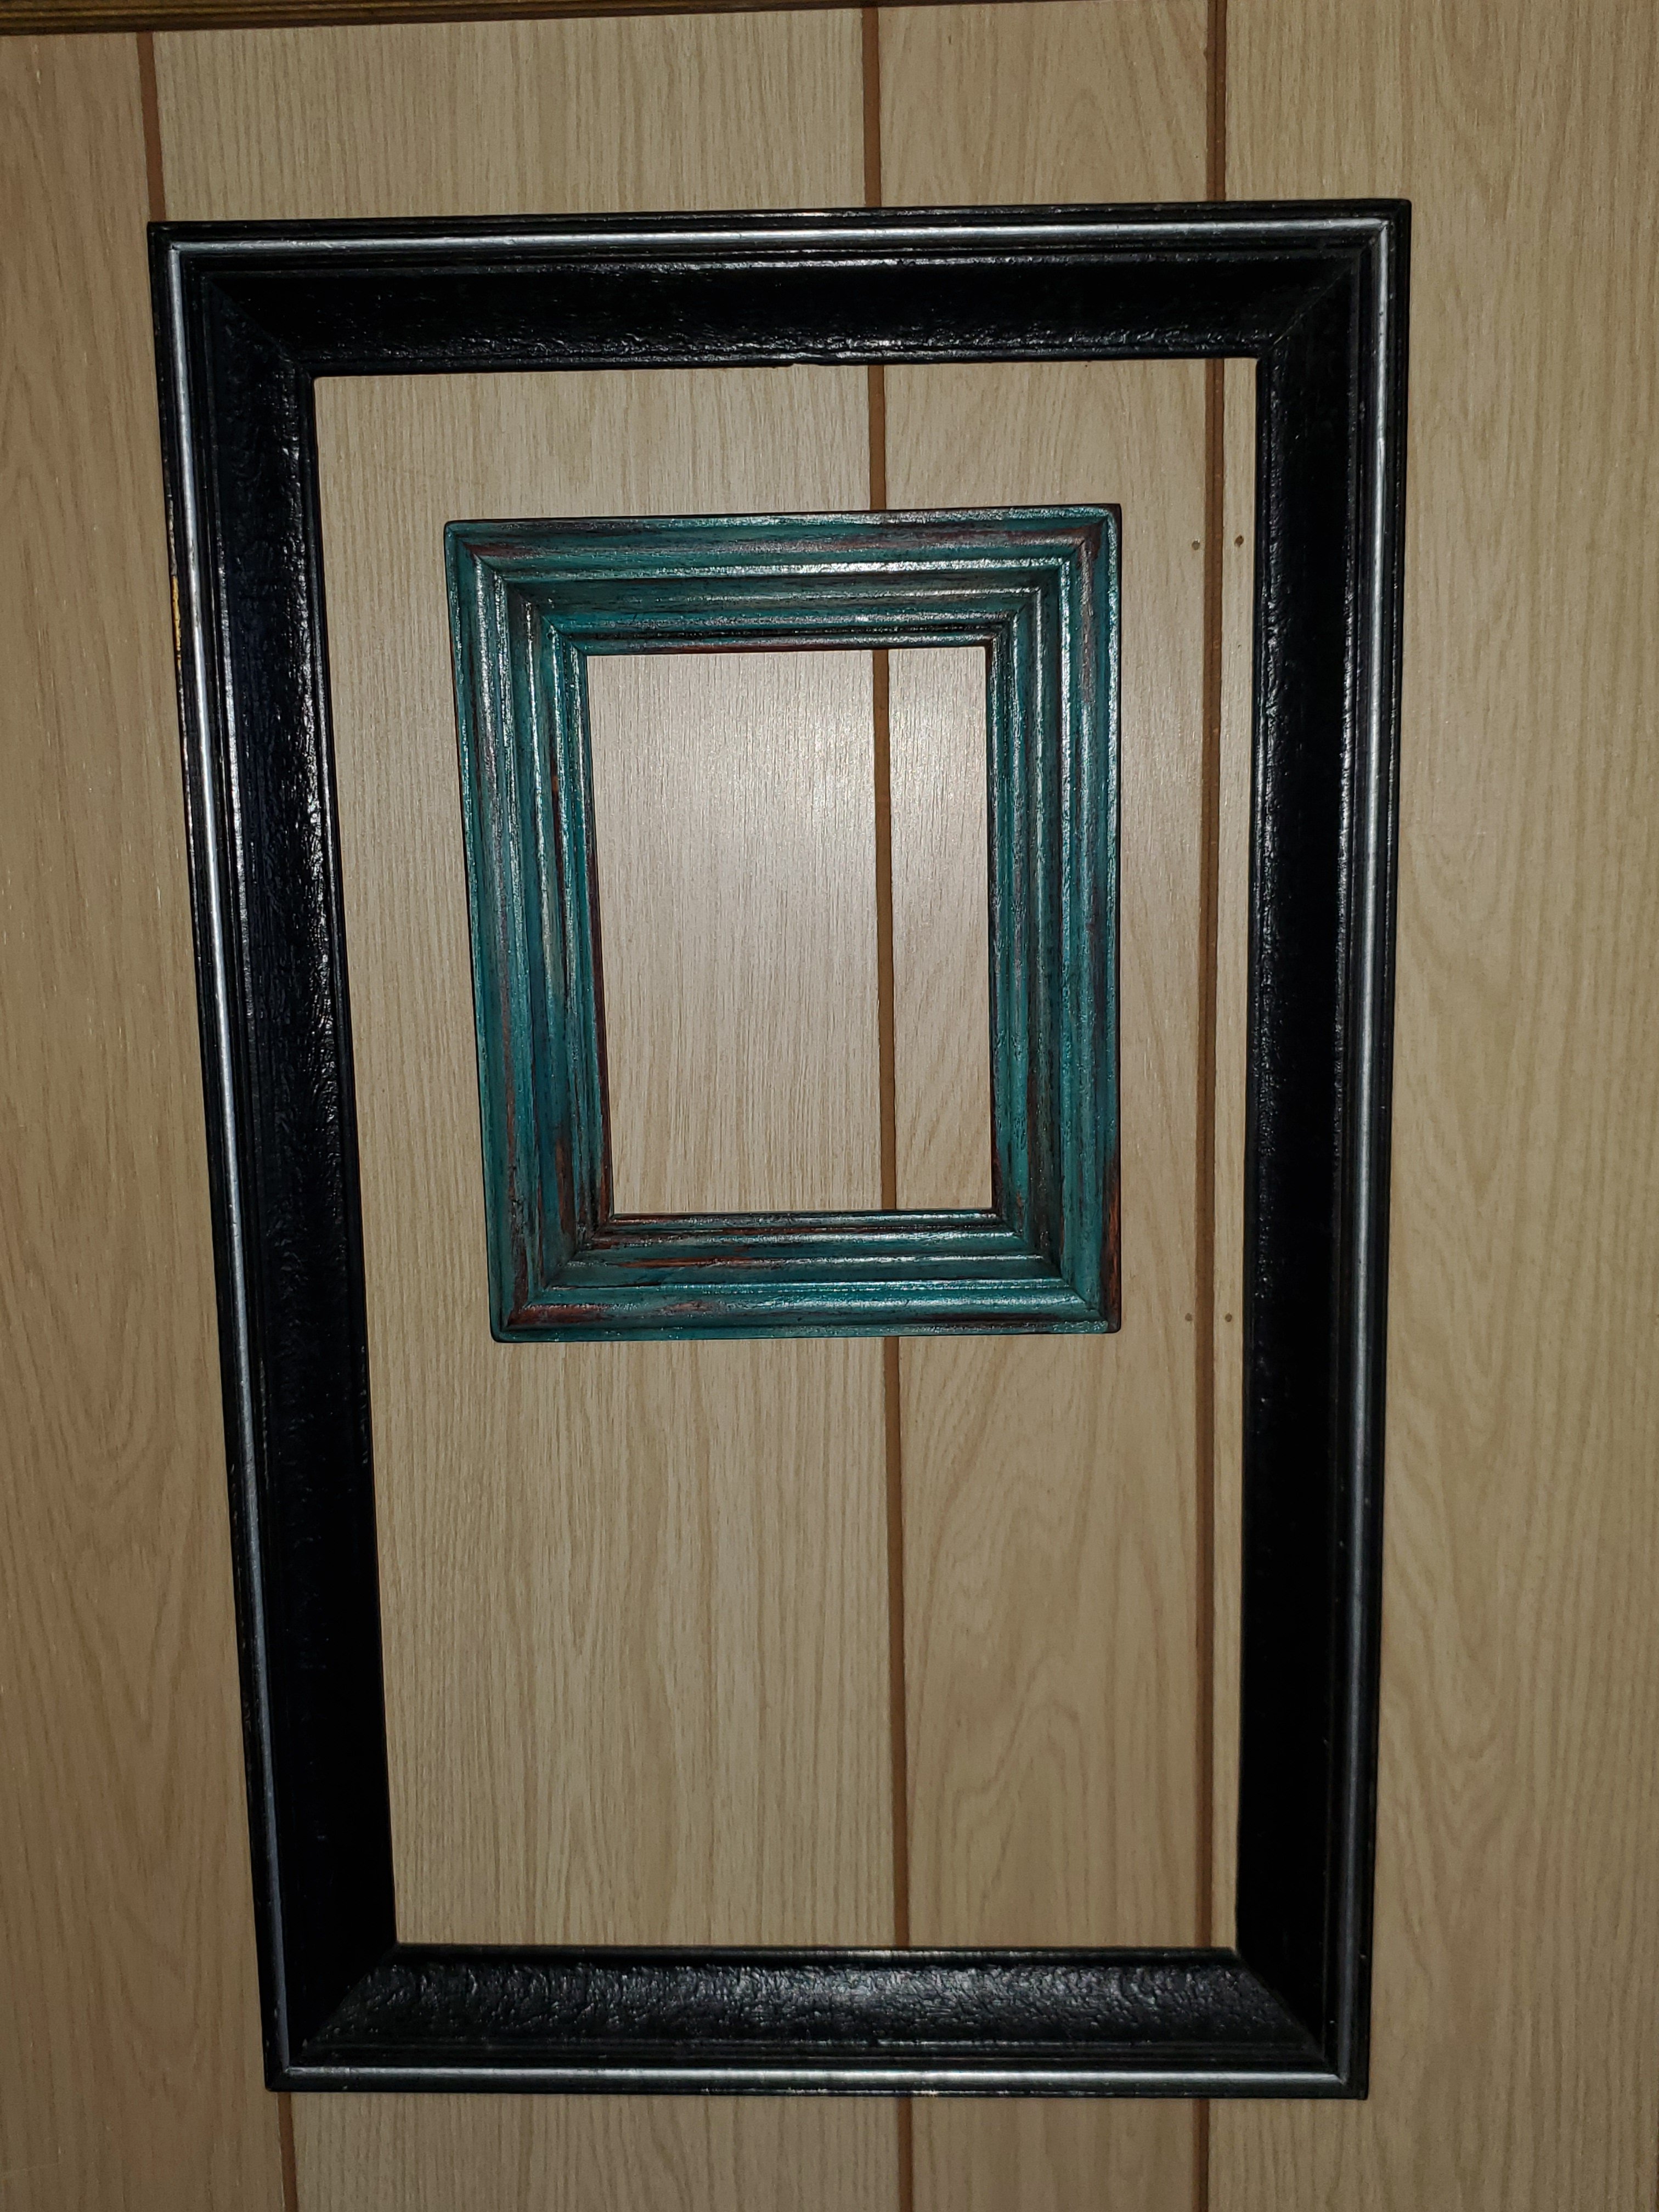
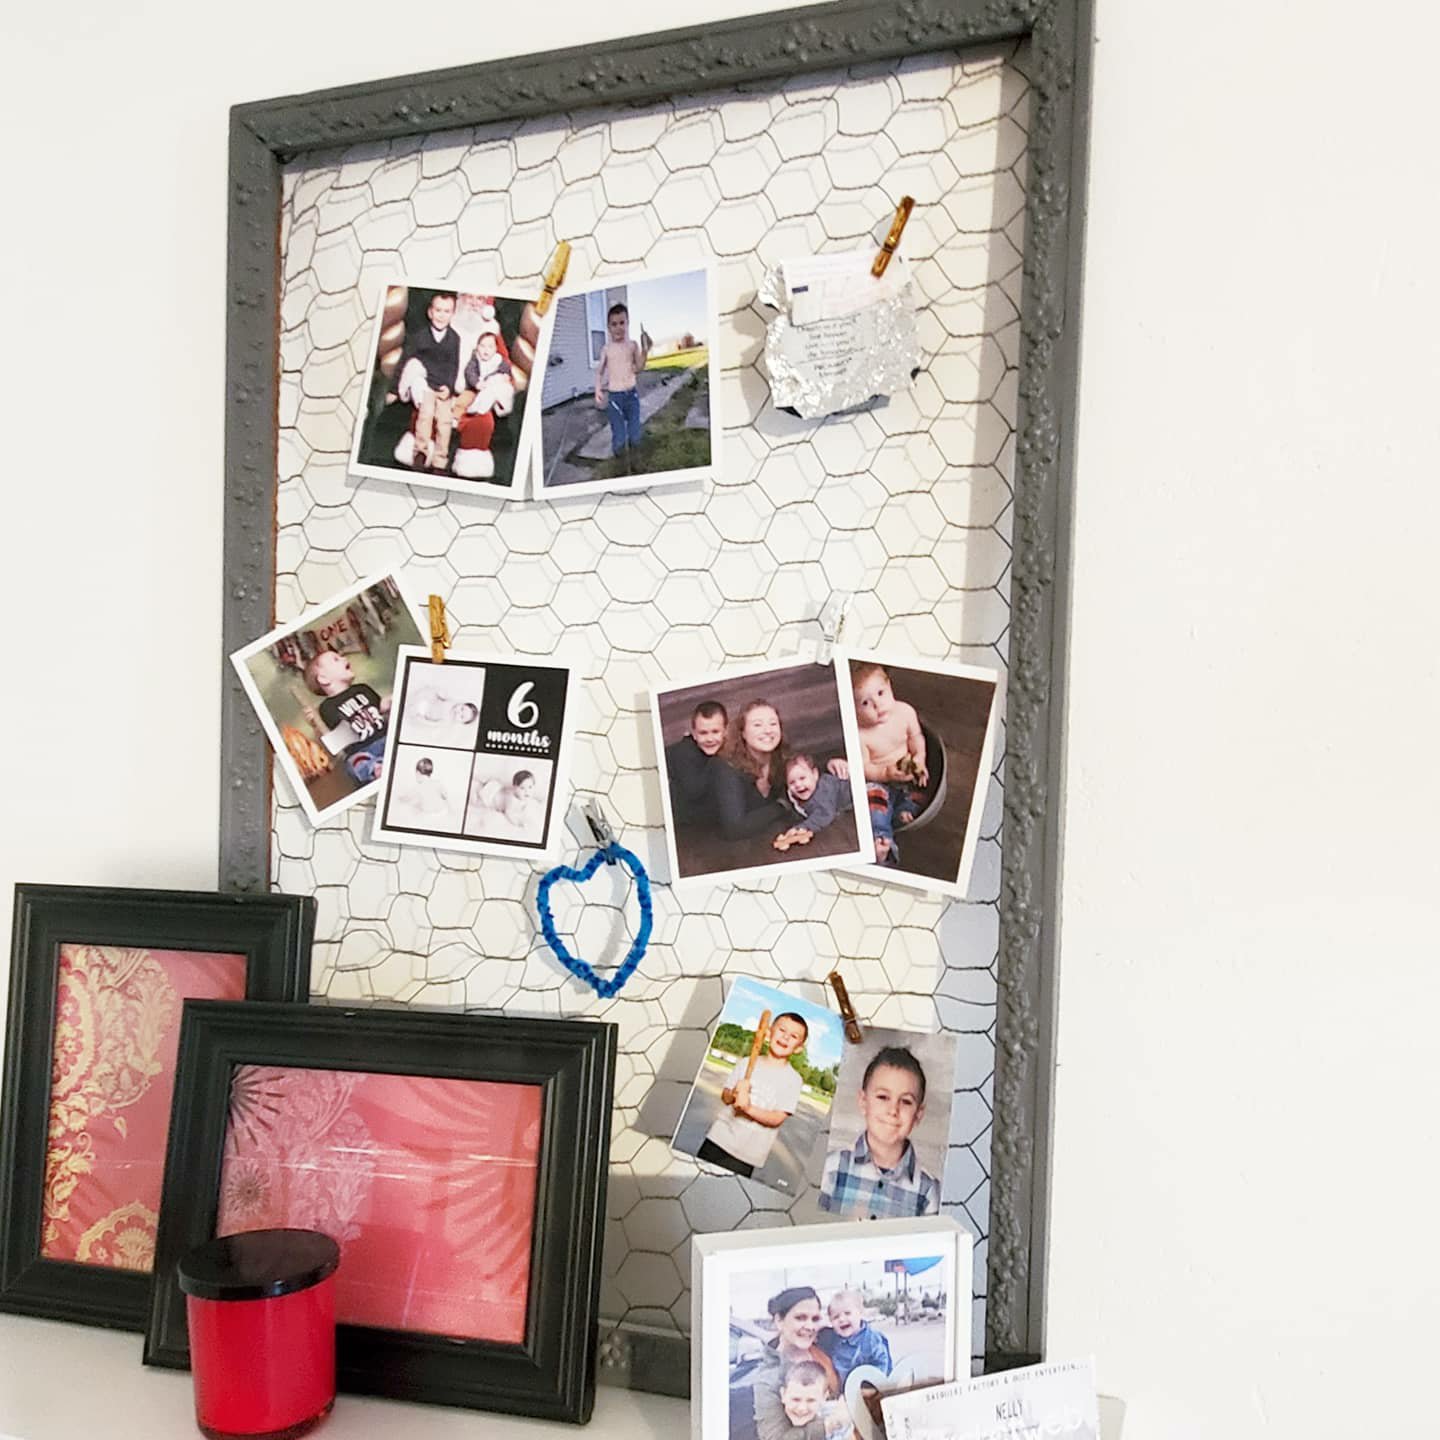
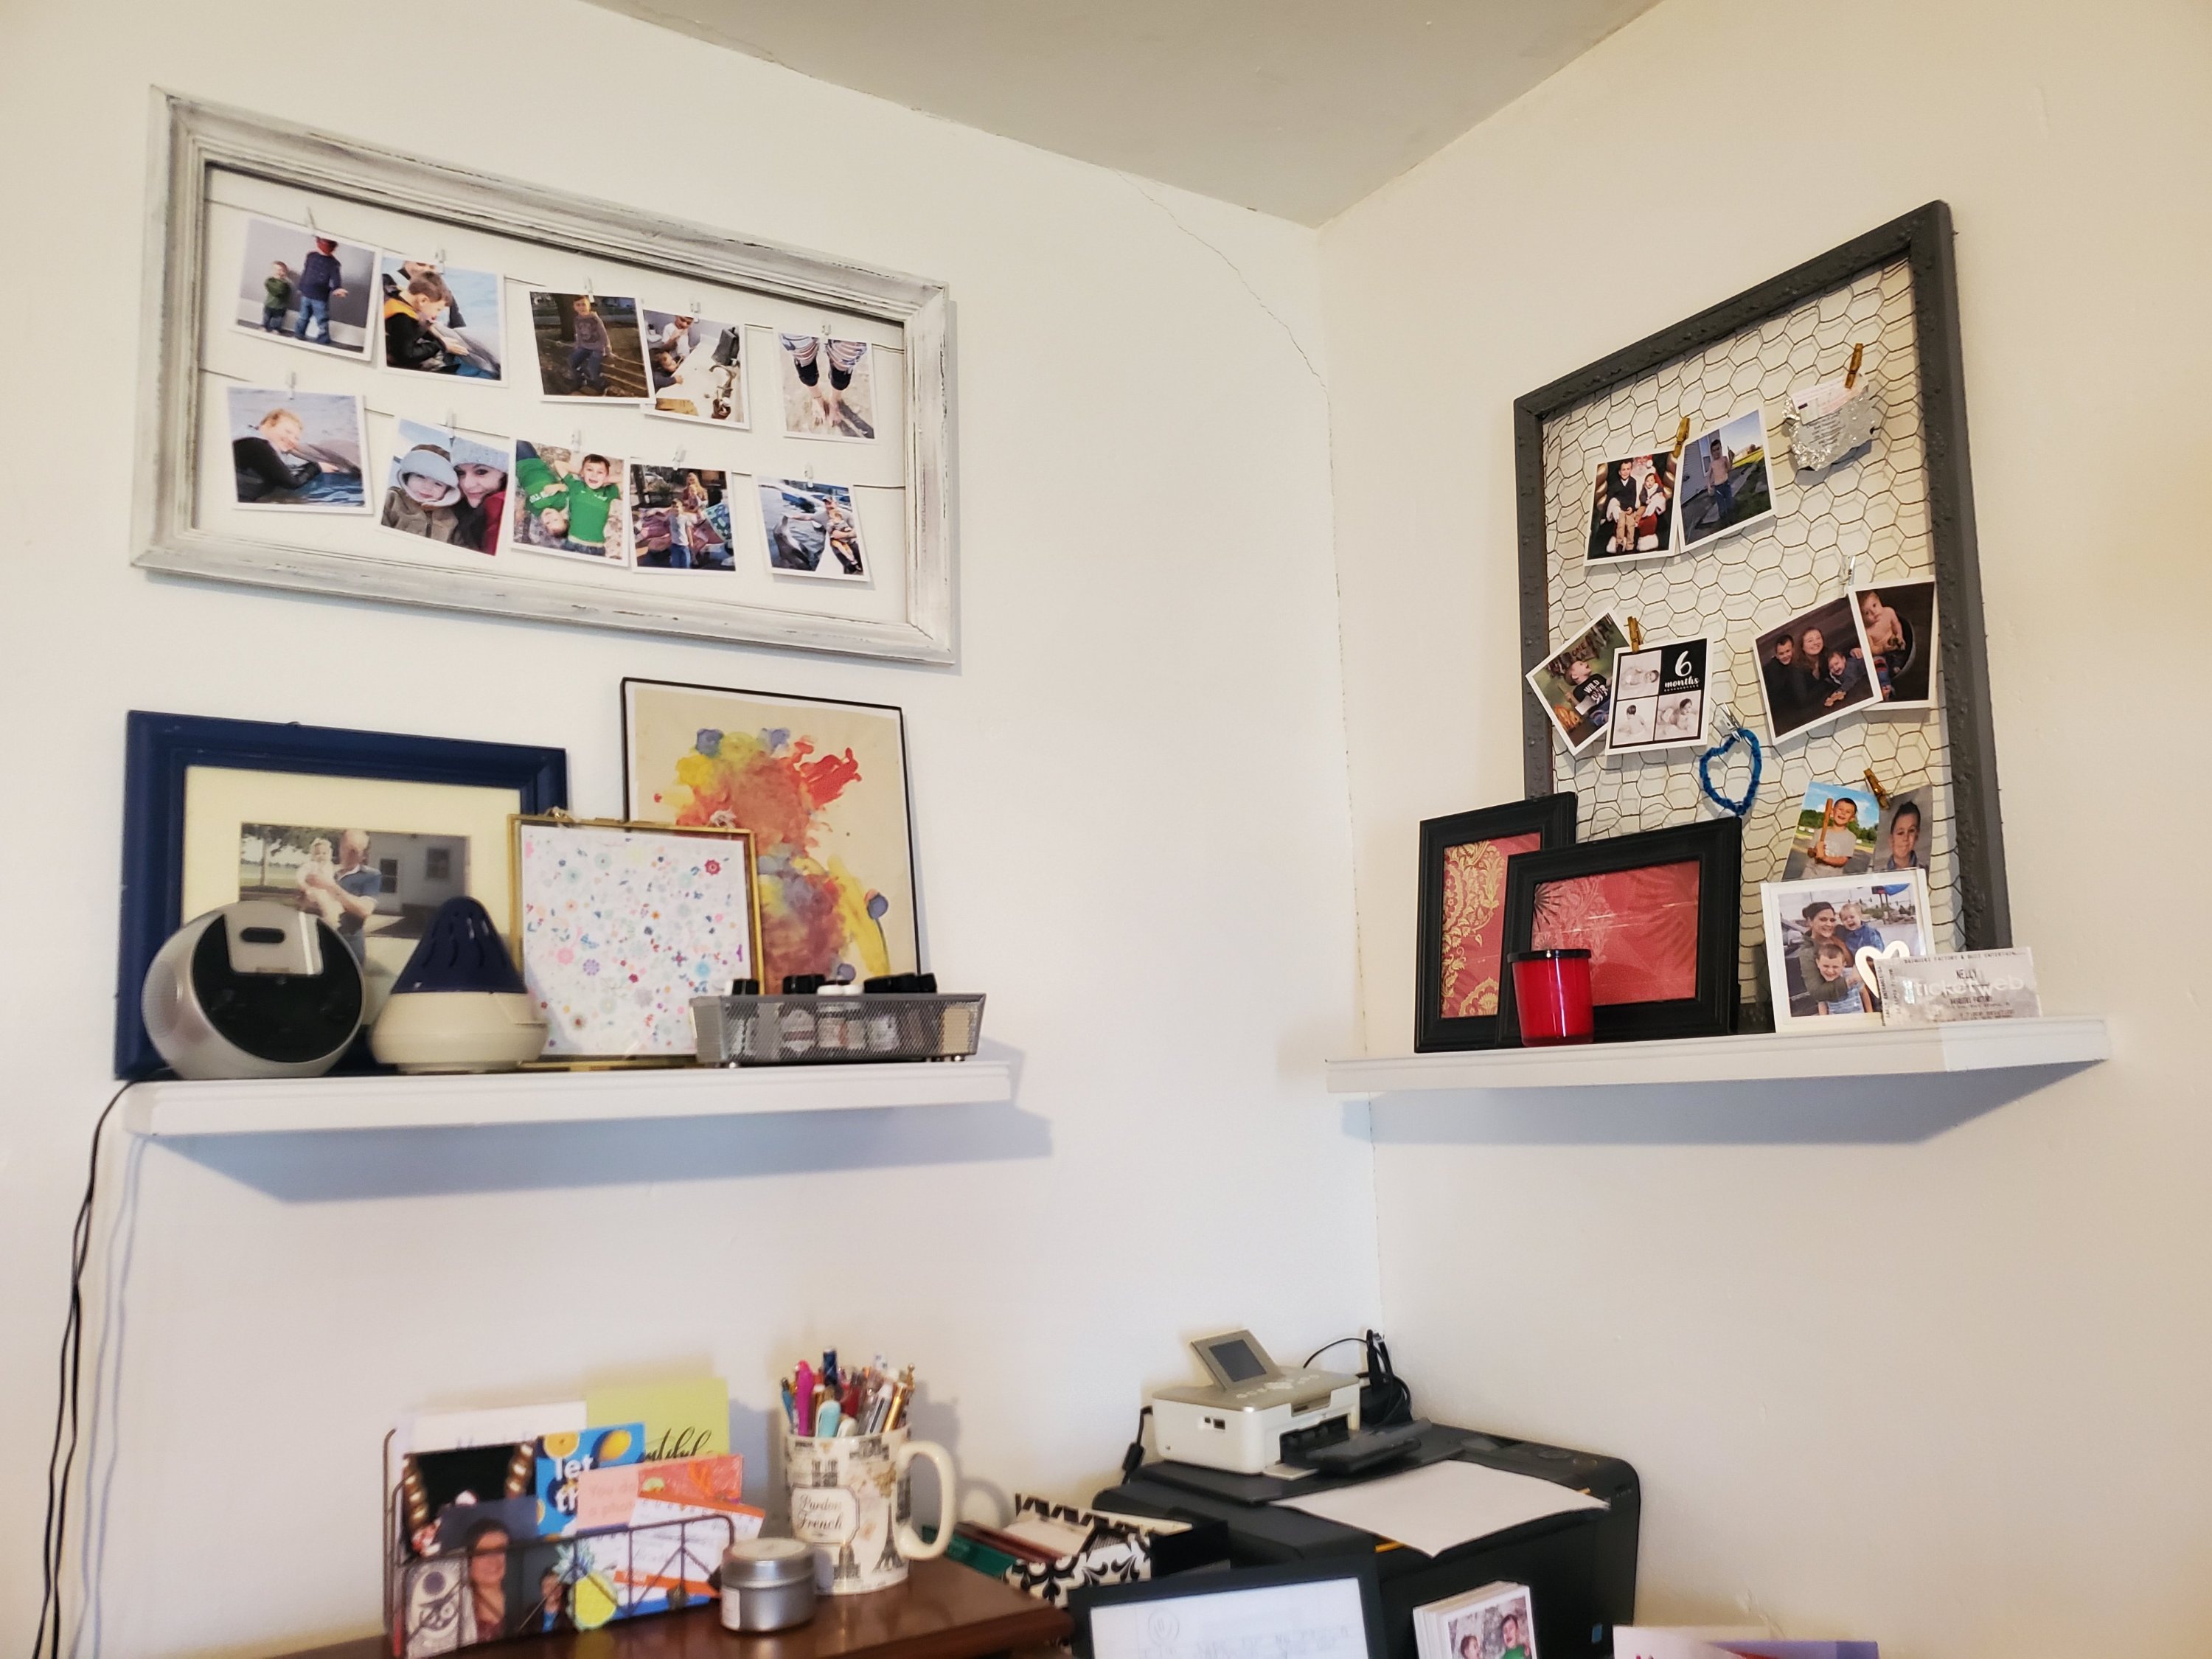
Frame Hanger Project
I love old picture frames. All kinds. I’ve got a hallway of empty ones upstairs. Sometimes I fill them. Sometimes I paint them. And sometimes I do something fun with them…

This frame I once painted black with a silver line. Years ago. I was over it. (Ignore the ugly paneling in the upstairs hall we hope to rip out soon)
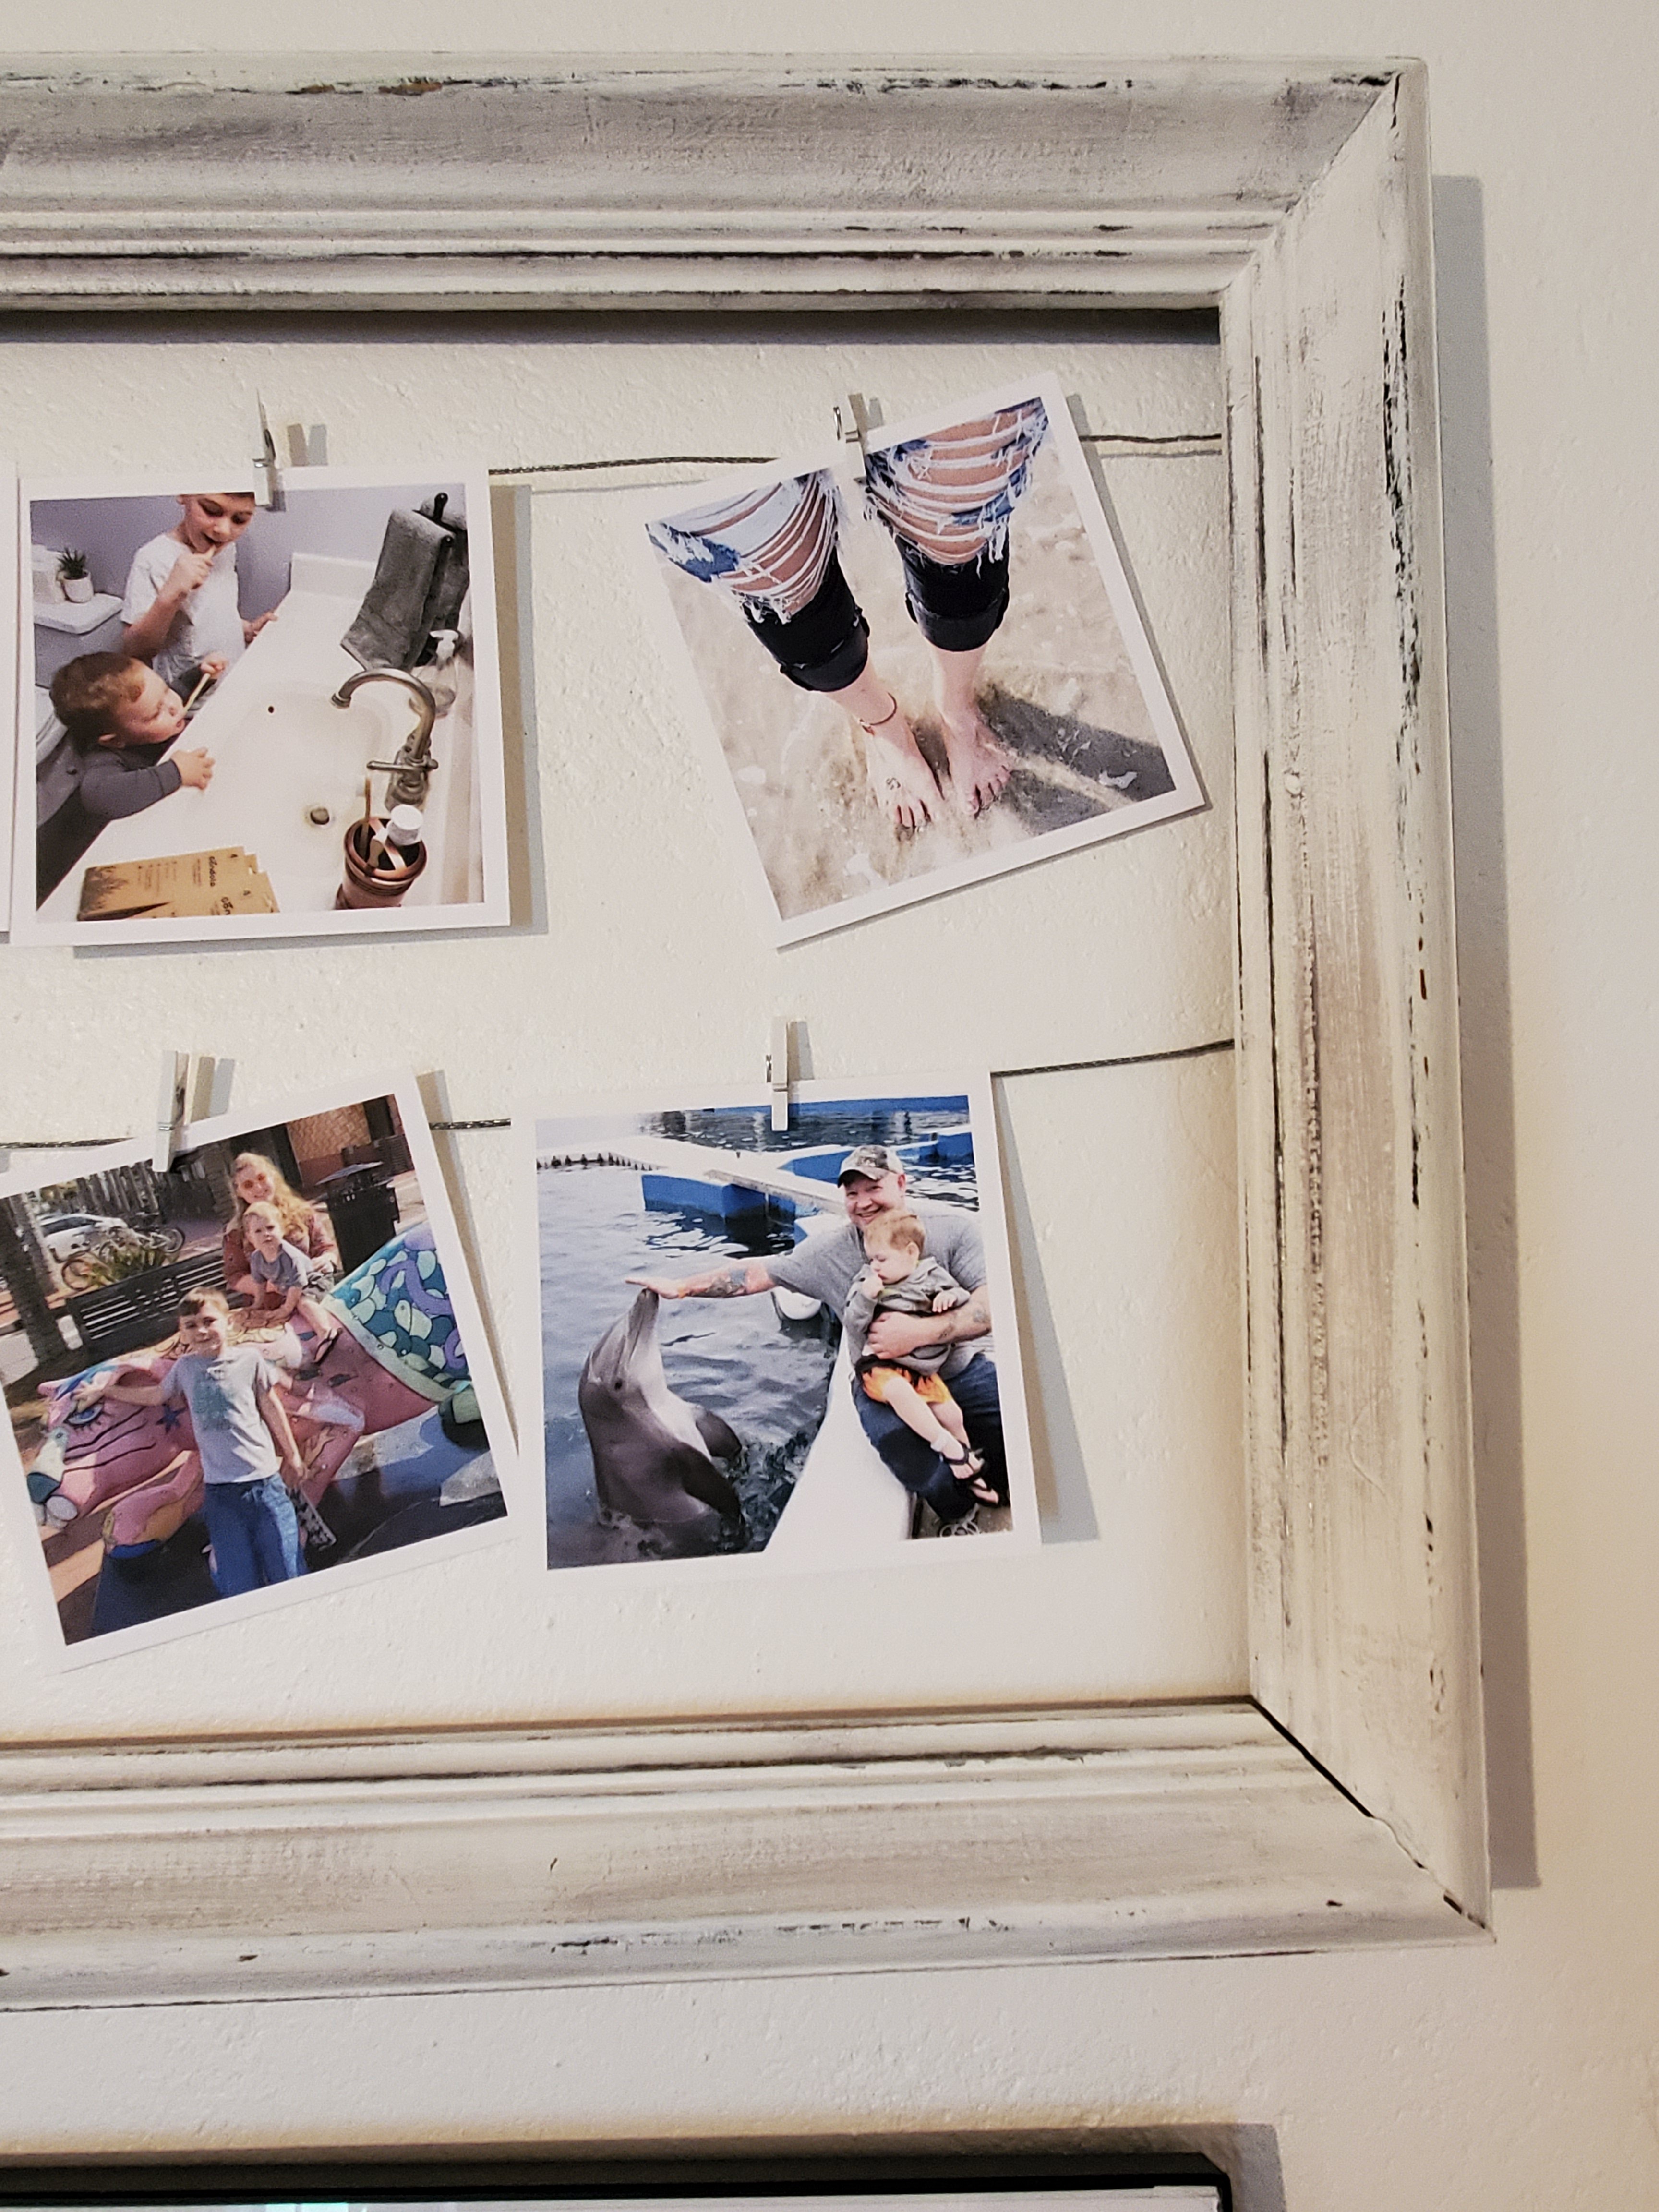
I wanted something lighter and brighter for my office. And I needed a place to hang some of my beautiful Parabo Press photos. (If you haven’t ordered from them, you must. They are gorgeous)
So first I lightly sanded the frame. Then I painted it white. I used wall paint for this project because it’s what I had. And its quarantine. And this step wasn’t super important for this project. It took 2-3 coats, but doesn’t need to be perfect.
Then I sanded with a foam sanding block. I scraped the edges and roughed up the centers. Go slowly and start lightly. Keep going until you love it.
Then, because I wanted just a little something more for this one, I used a small brush and “dry brushed” on some charcoal gray paint. This means I dipped a tiny amount on the brush and then swiped most of it off onto a paper plate. When the brush is almost dry, wipe it on the frame. It will give you just a tiny bit of paint and give a smudge-y look. I used a paper towel to rub this in as I added it too. It came out nice and weathered.
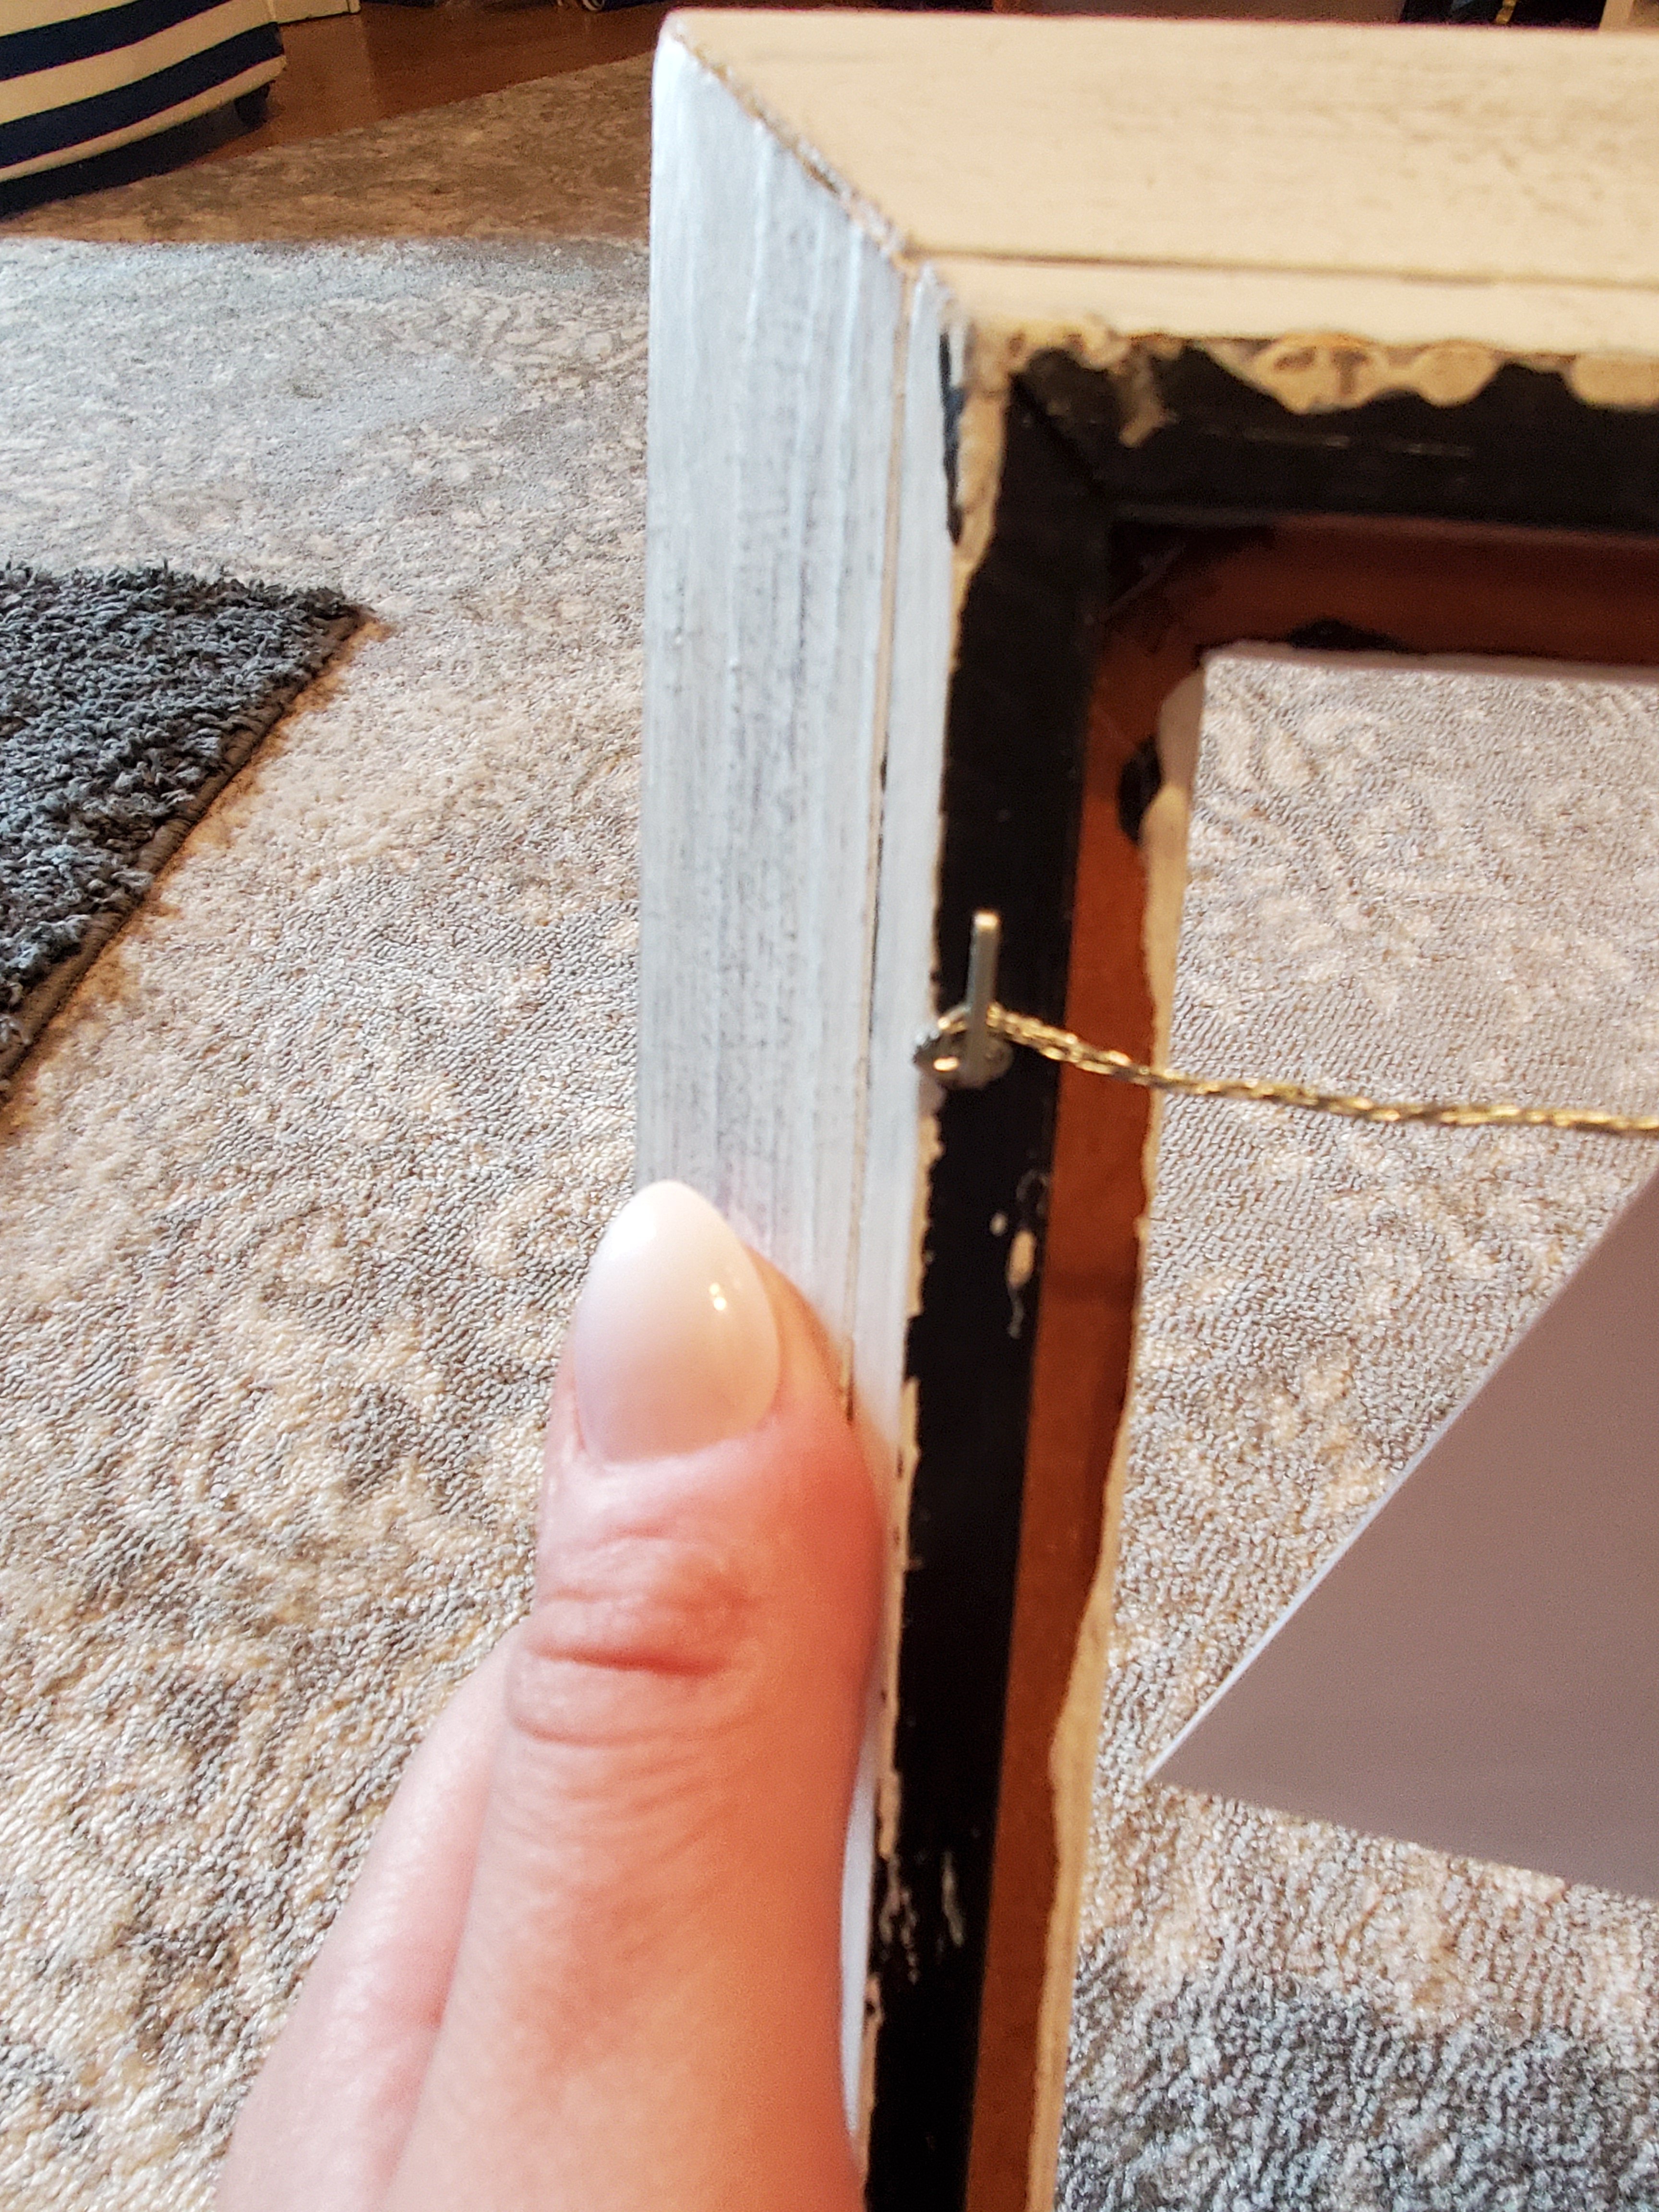
Then to add some wire. You could use twine or ribbon, or whatever you have. I had some picture hanging wire from a hanging kit. I cut it slightly longer than the width of the frame, maybe a half inch extra on each side. Then I pulled it tight across the frame and used a staple fun to staple it in place. I twisted the extra ends into a little ball to help keep it in place.
You can get tiny clothes pins on Amazon.
And viola!

I’ve also done this before with chicken wire…
What do you think?
Doing any quarantine projects?!
XX,
Jess
Permalink Comments Off on Frame Hanger Project
Quick and Easy Valentine’s DIY
I made these fabric hearts last year and loved them so much I put them out again this year!


It’s so simple that it doesn’t require much instruction, but a fun project for anyone because there are so many possibilities! I used scrap fabric that I had on hand, making this super inexpensive too! I picked a couple fabrics that complimented one another and had a rustic vibe. You could use anything at all! The only other supplies you need are liquid stitch (always handy to have a tube on hand!) and some stuffing. You can get both of these at your local craft store or a Walmart. The stuffing sold here at our Walmart was in too large of a bag and I knew I didn’t want a ton. So, quick fix was to buy a small pillow insert at Walmart. This was about $4 and I have plenty left for more projects.

Start by drawing a heart on cardboard. Try a cereal or cracker box! Then trace this heart onto the backside of your fabric. Do sets of two hearts in matching fabric. Then run a bead of the fabric glue around the heart. Leave a few inches unglued. I left a quarter inch or so around the edge. I used a few binder clips to hold these while drying. You could also set a book on them. When they are dry, stuff fabric into them. Doing it in this order allows you to fill them full and puffy without ungluing. Now add glue to the last few inches and clip to dry. You could always add sequins, embellishments, ribbon, or any extras too.

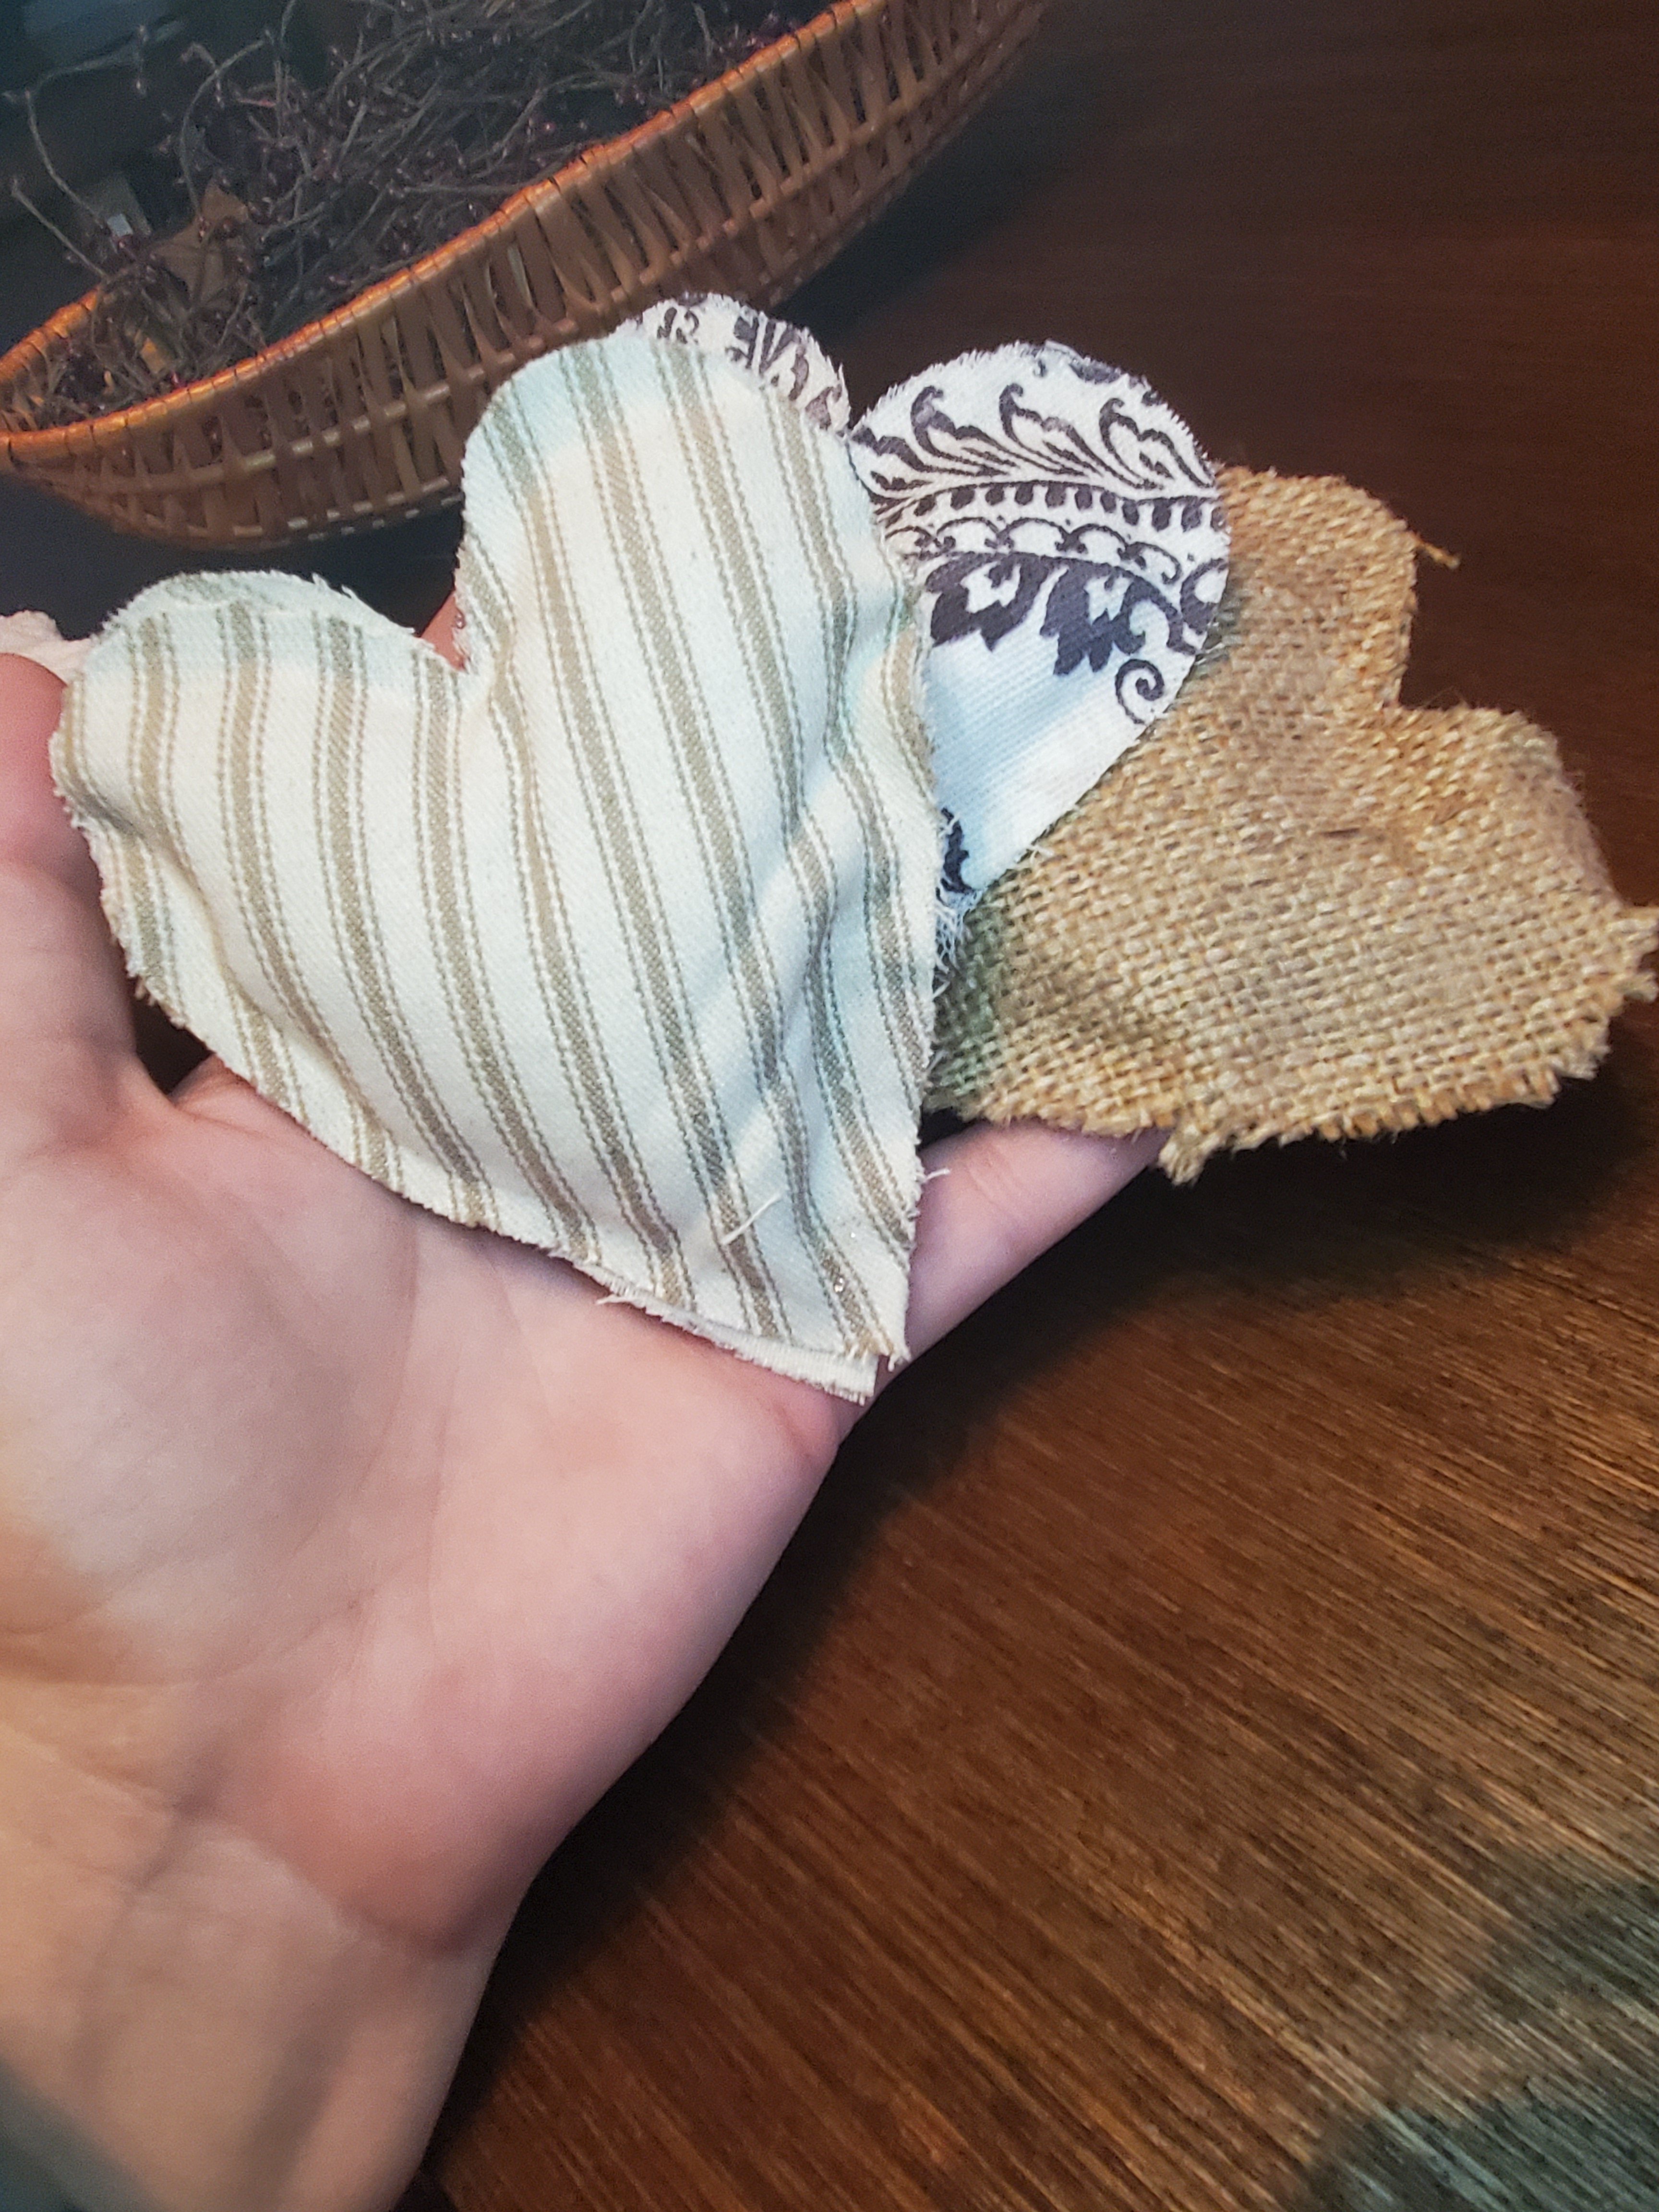
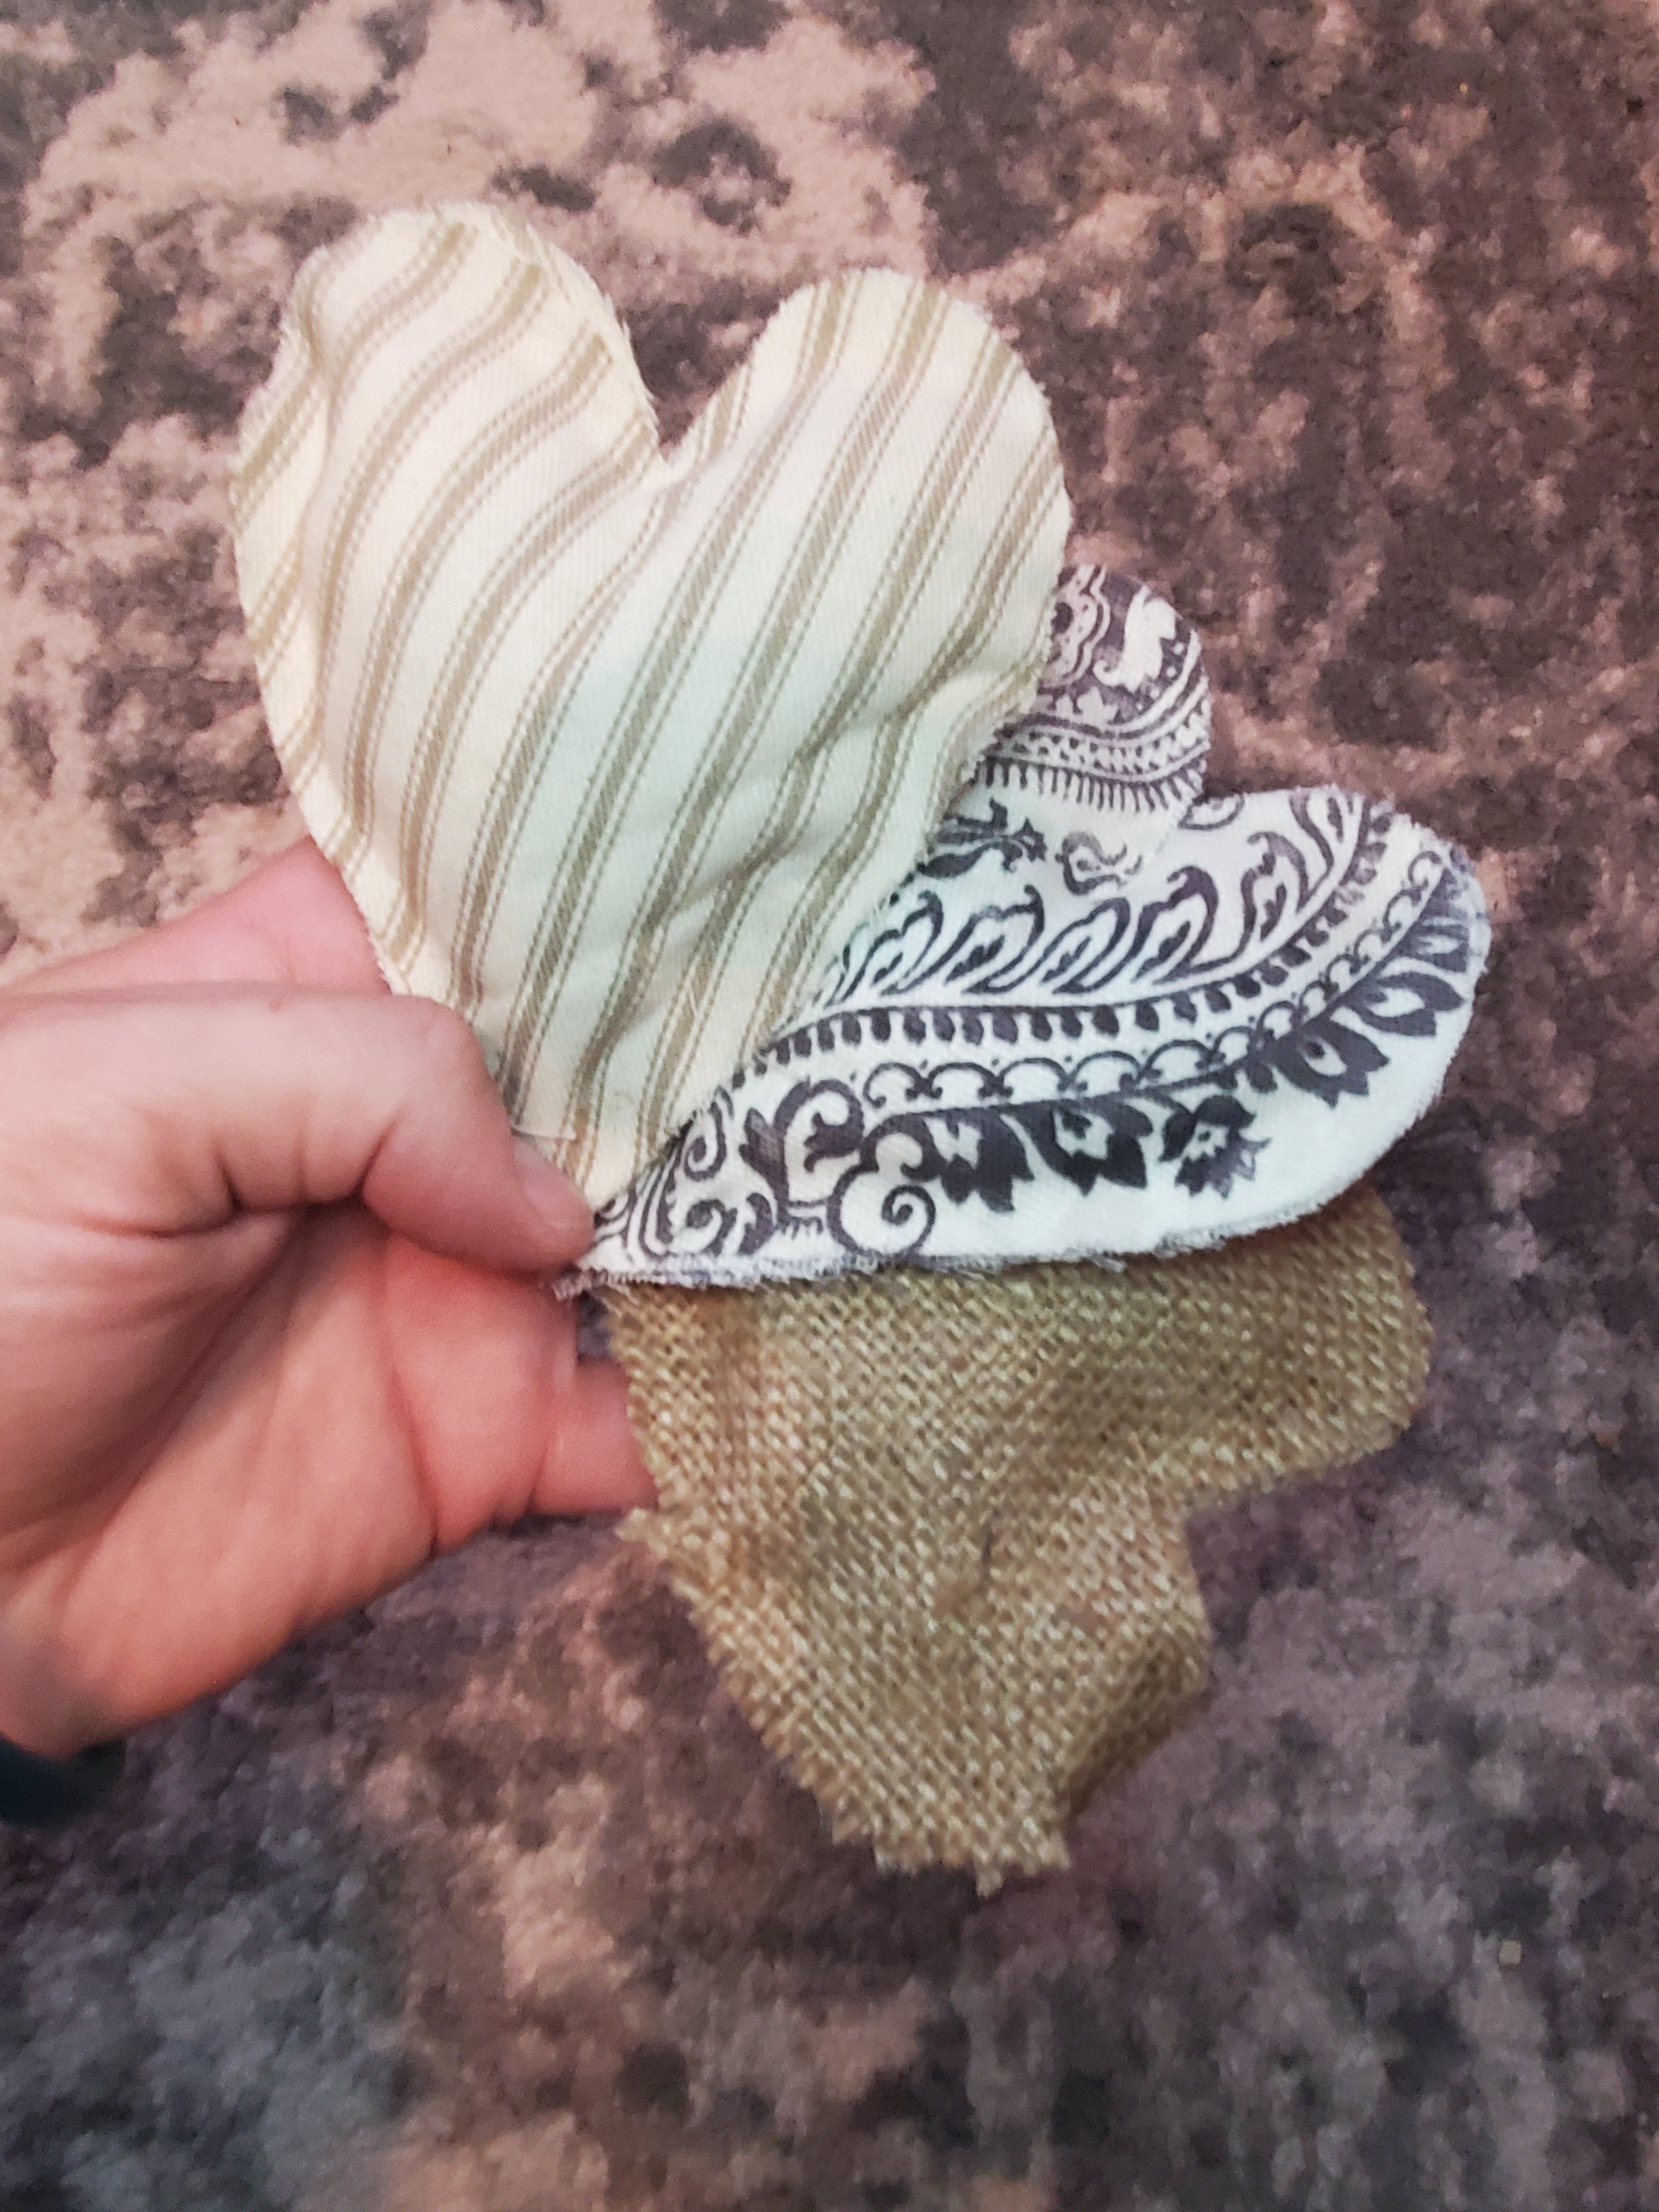
The other little white heart was super simple too. I used a cardboard hear, made little cuts around the outside, and wrapped yard around the heart. The cuts helps hold the yarn in place for the first layer of wrapping. Wrap all different directions. Glue with the fabric glue. Simple!

Viola! Hope you enjoy this quick and easy project!
Xx,
Jess
Permalink Comments Off on Quick and Easy Valentine’s DIY
DIY Wreath
Winter makes me a little stir crazy. Luckily Pinterest has many many cures for that! Enter my new wreath project. Bonus: I love a project that has quick and easy payoff! 😉
I picked up a wire wreath form at Joann craft store for a few dollars. I also grabbed a remnant of burgundy fabric and a pack of colored leaf print fabric squares. I cut tons and tons and tons of fabric strips about 5 inches long. Then I tied the oodles of strips in knots around the wire wreath form. I also added some strips of burlap to give a rustic look. Simple.

Here is a close up of my strips of fabric.

I also painted a wood letter T to hang in the center if I choose.


And for the winter season I hung a seasons greetings basket in the center that I already had. Cute, no? 🙂
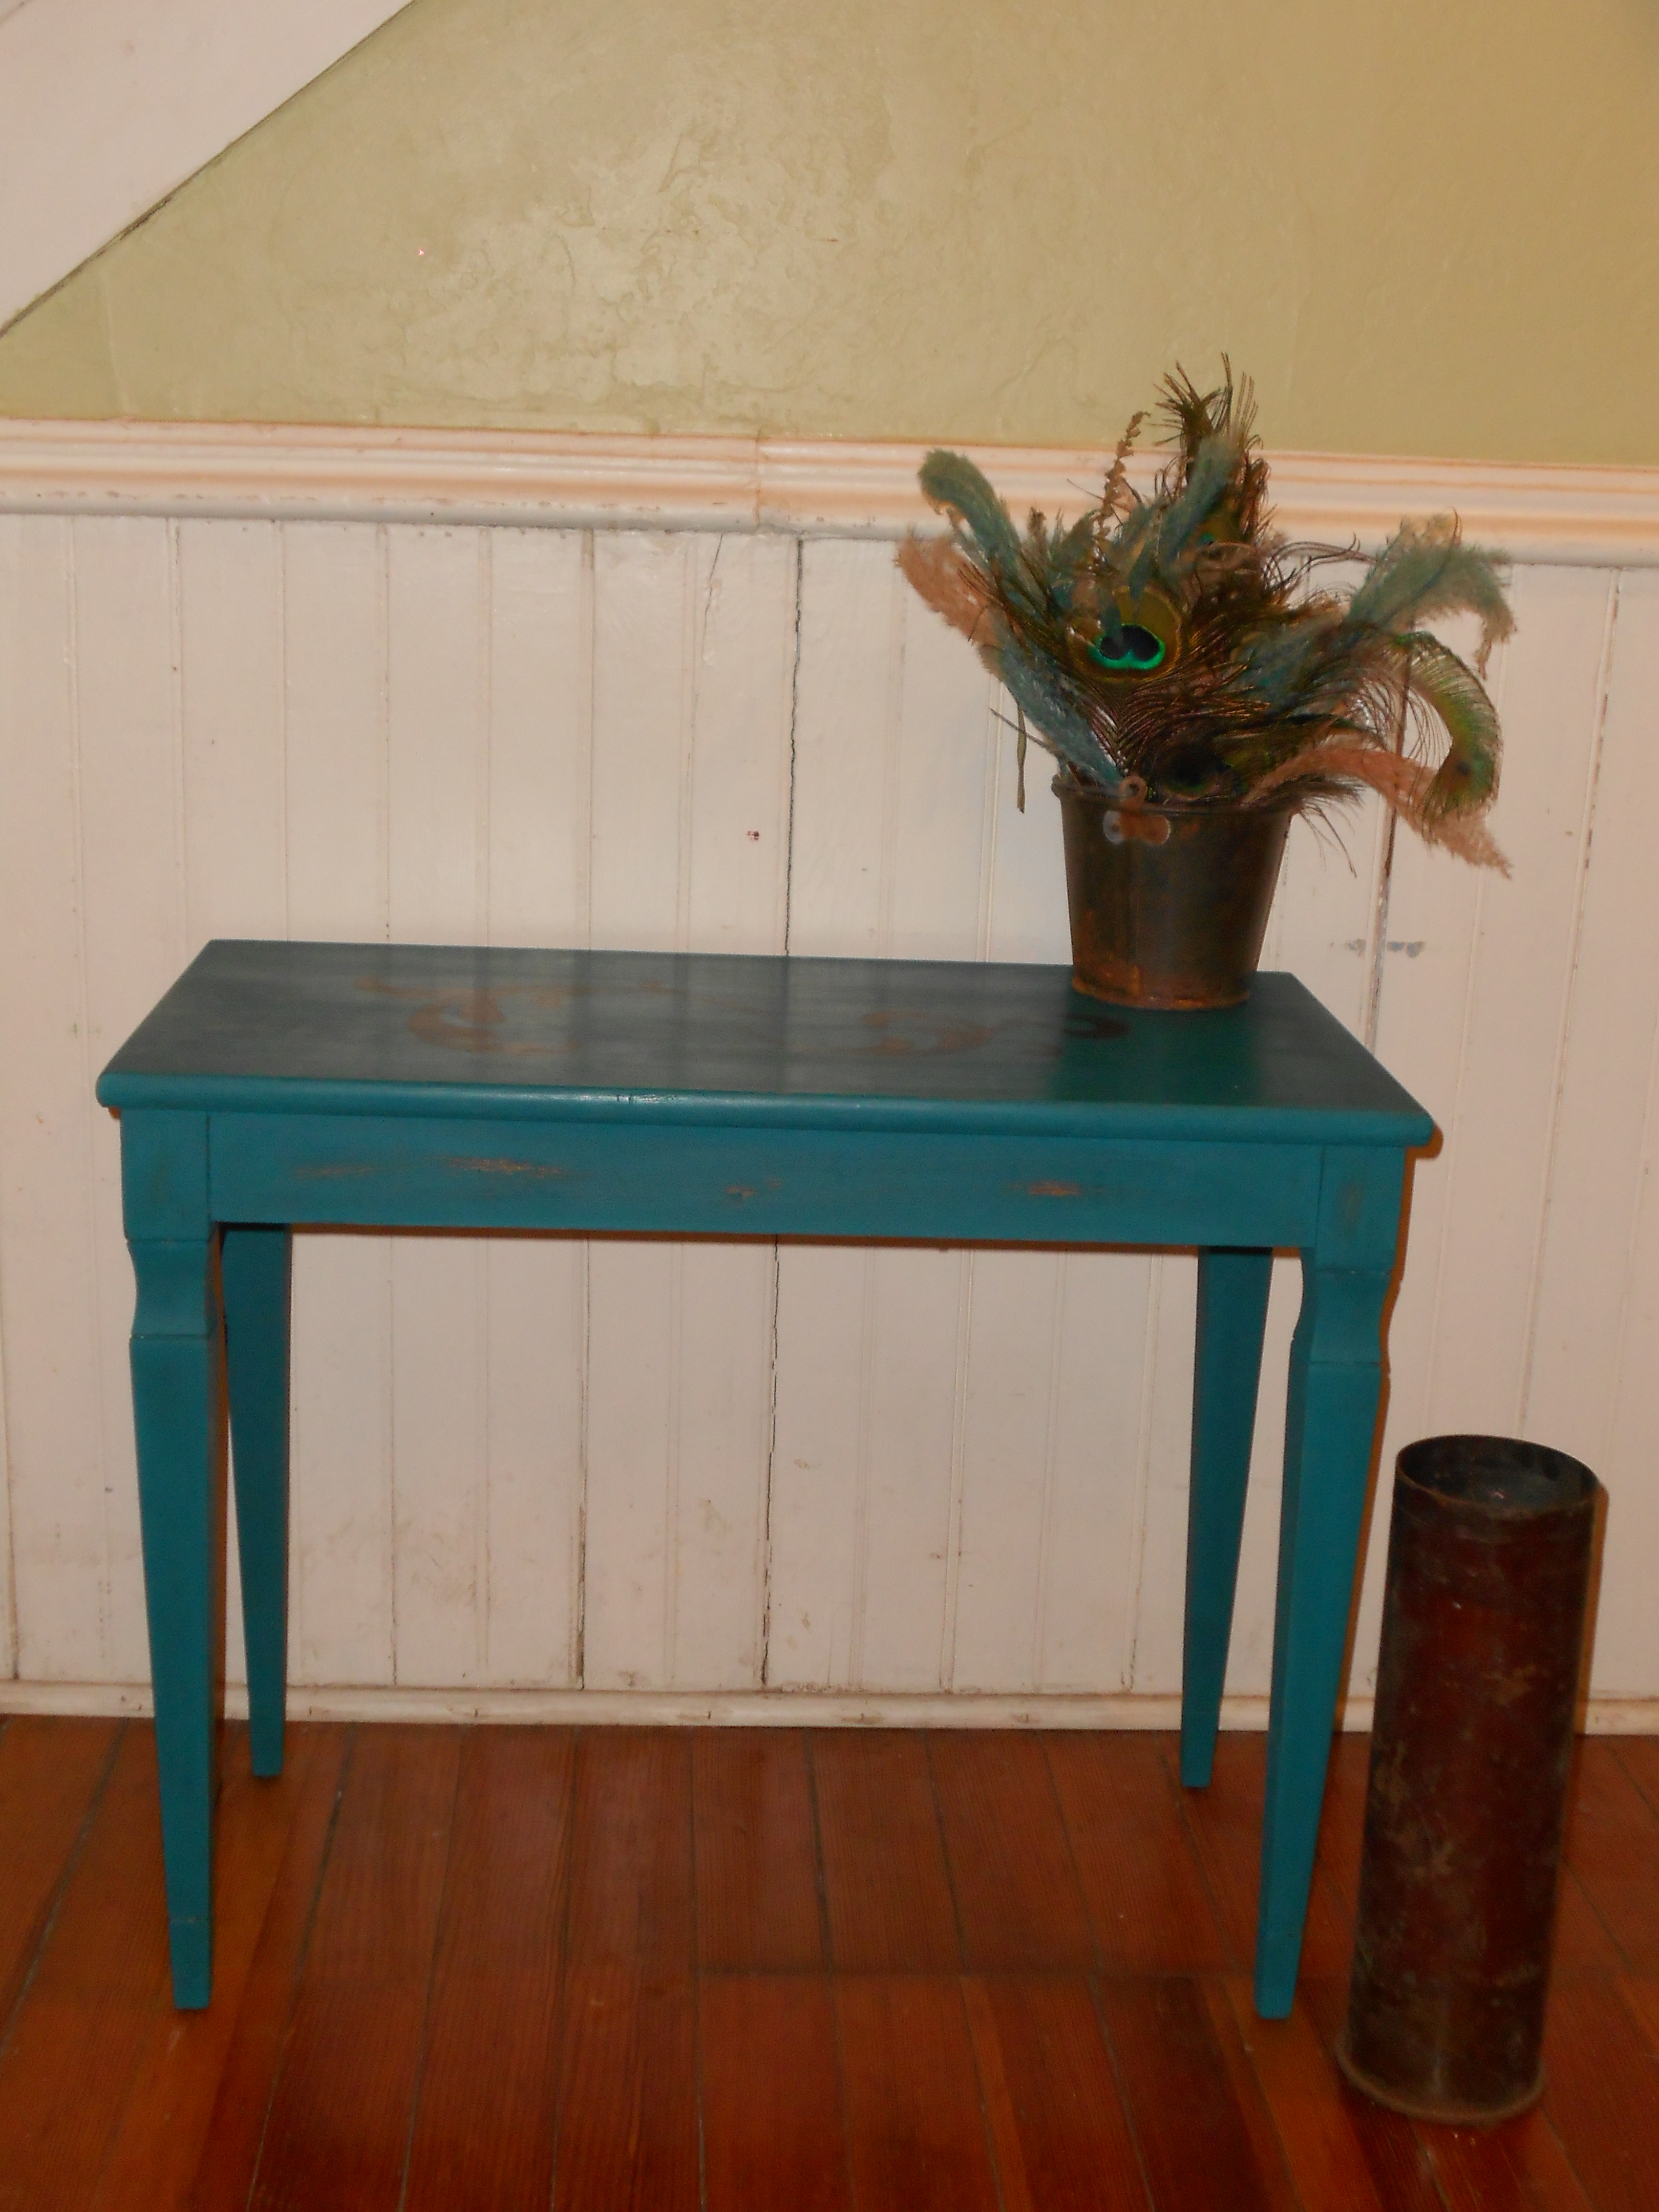
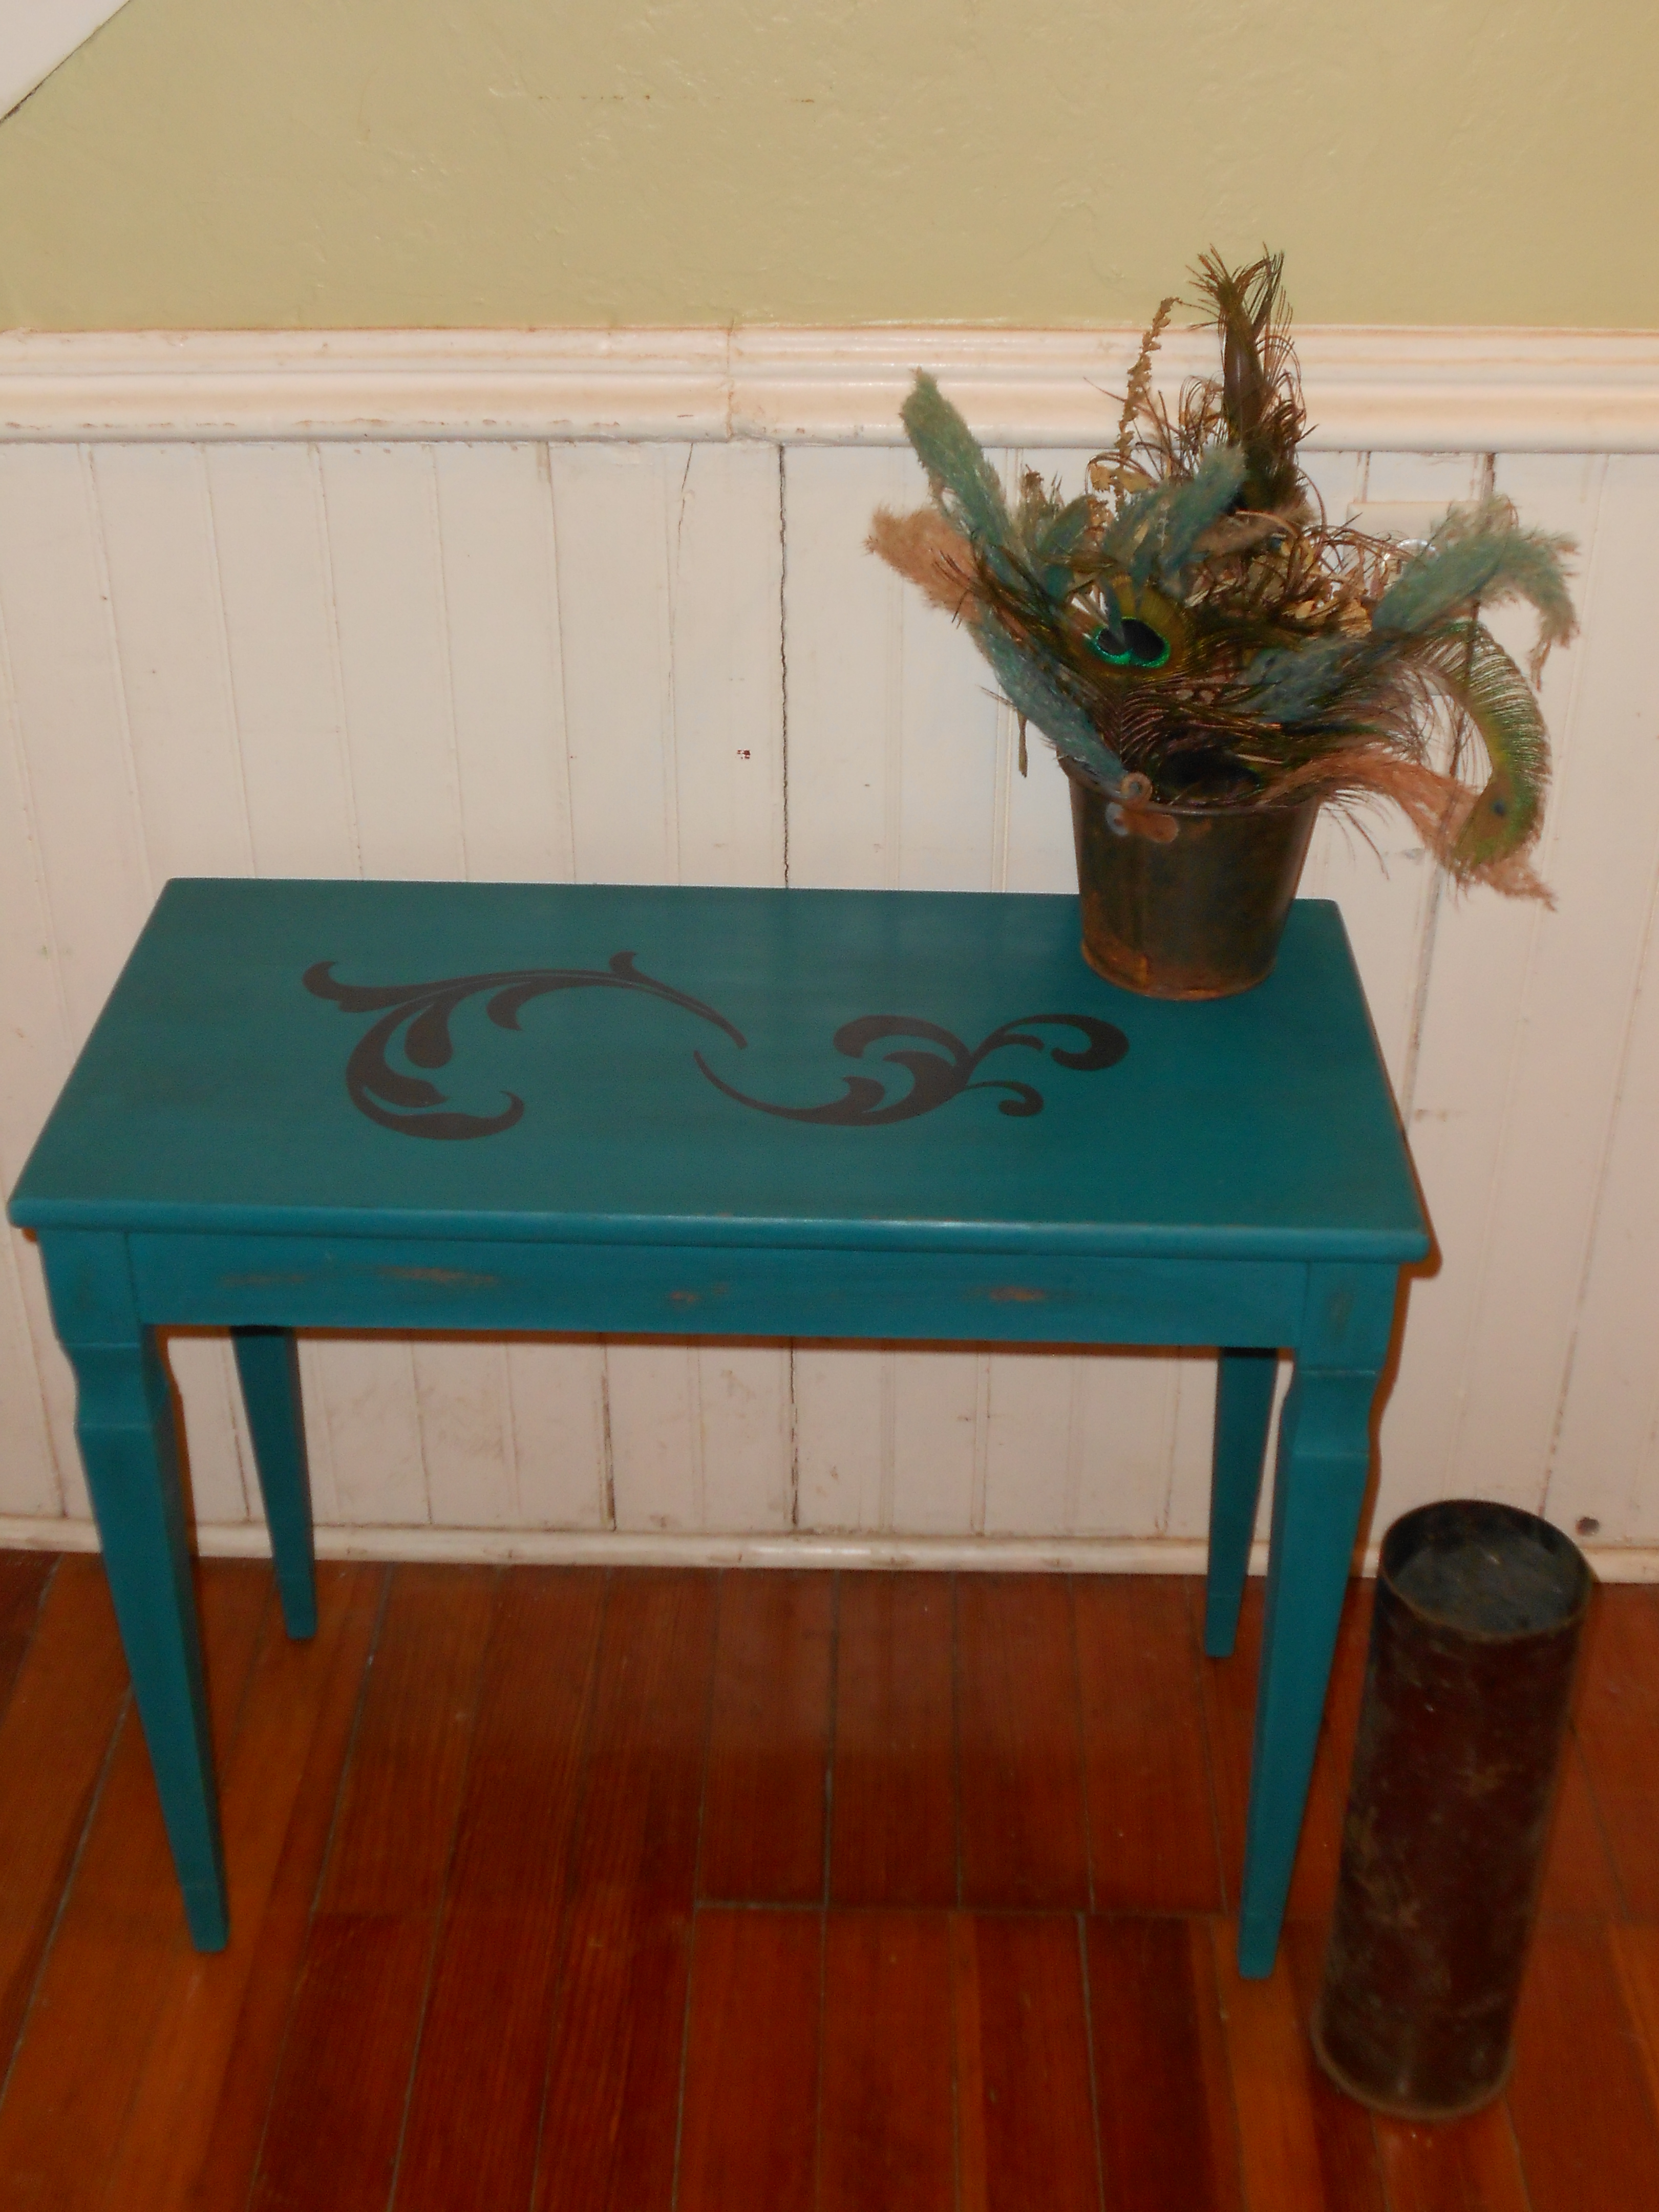
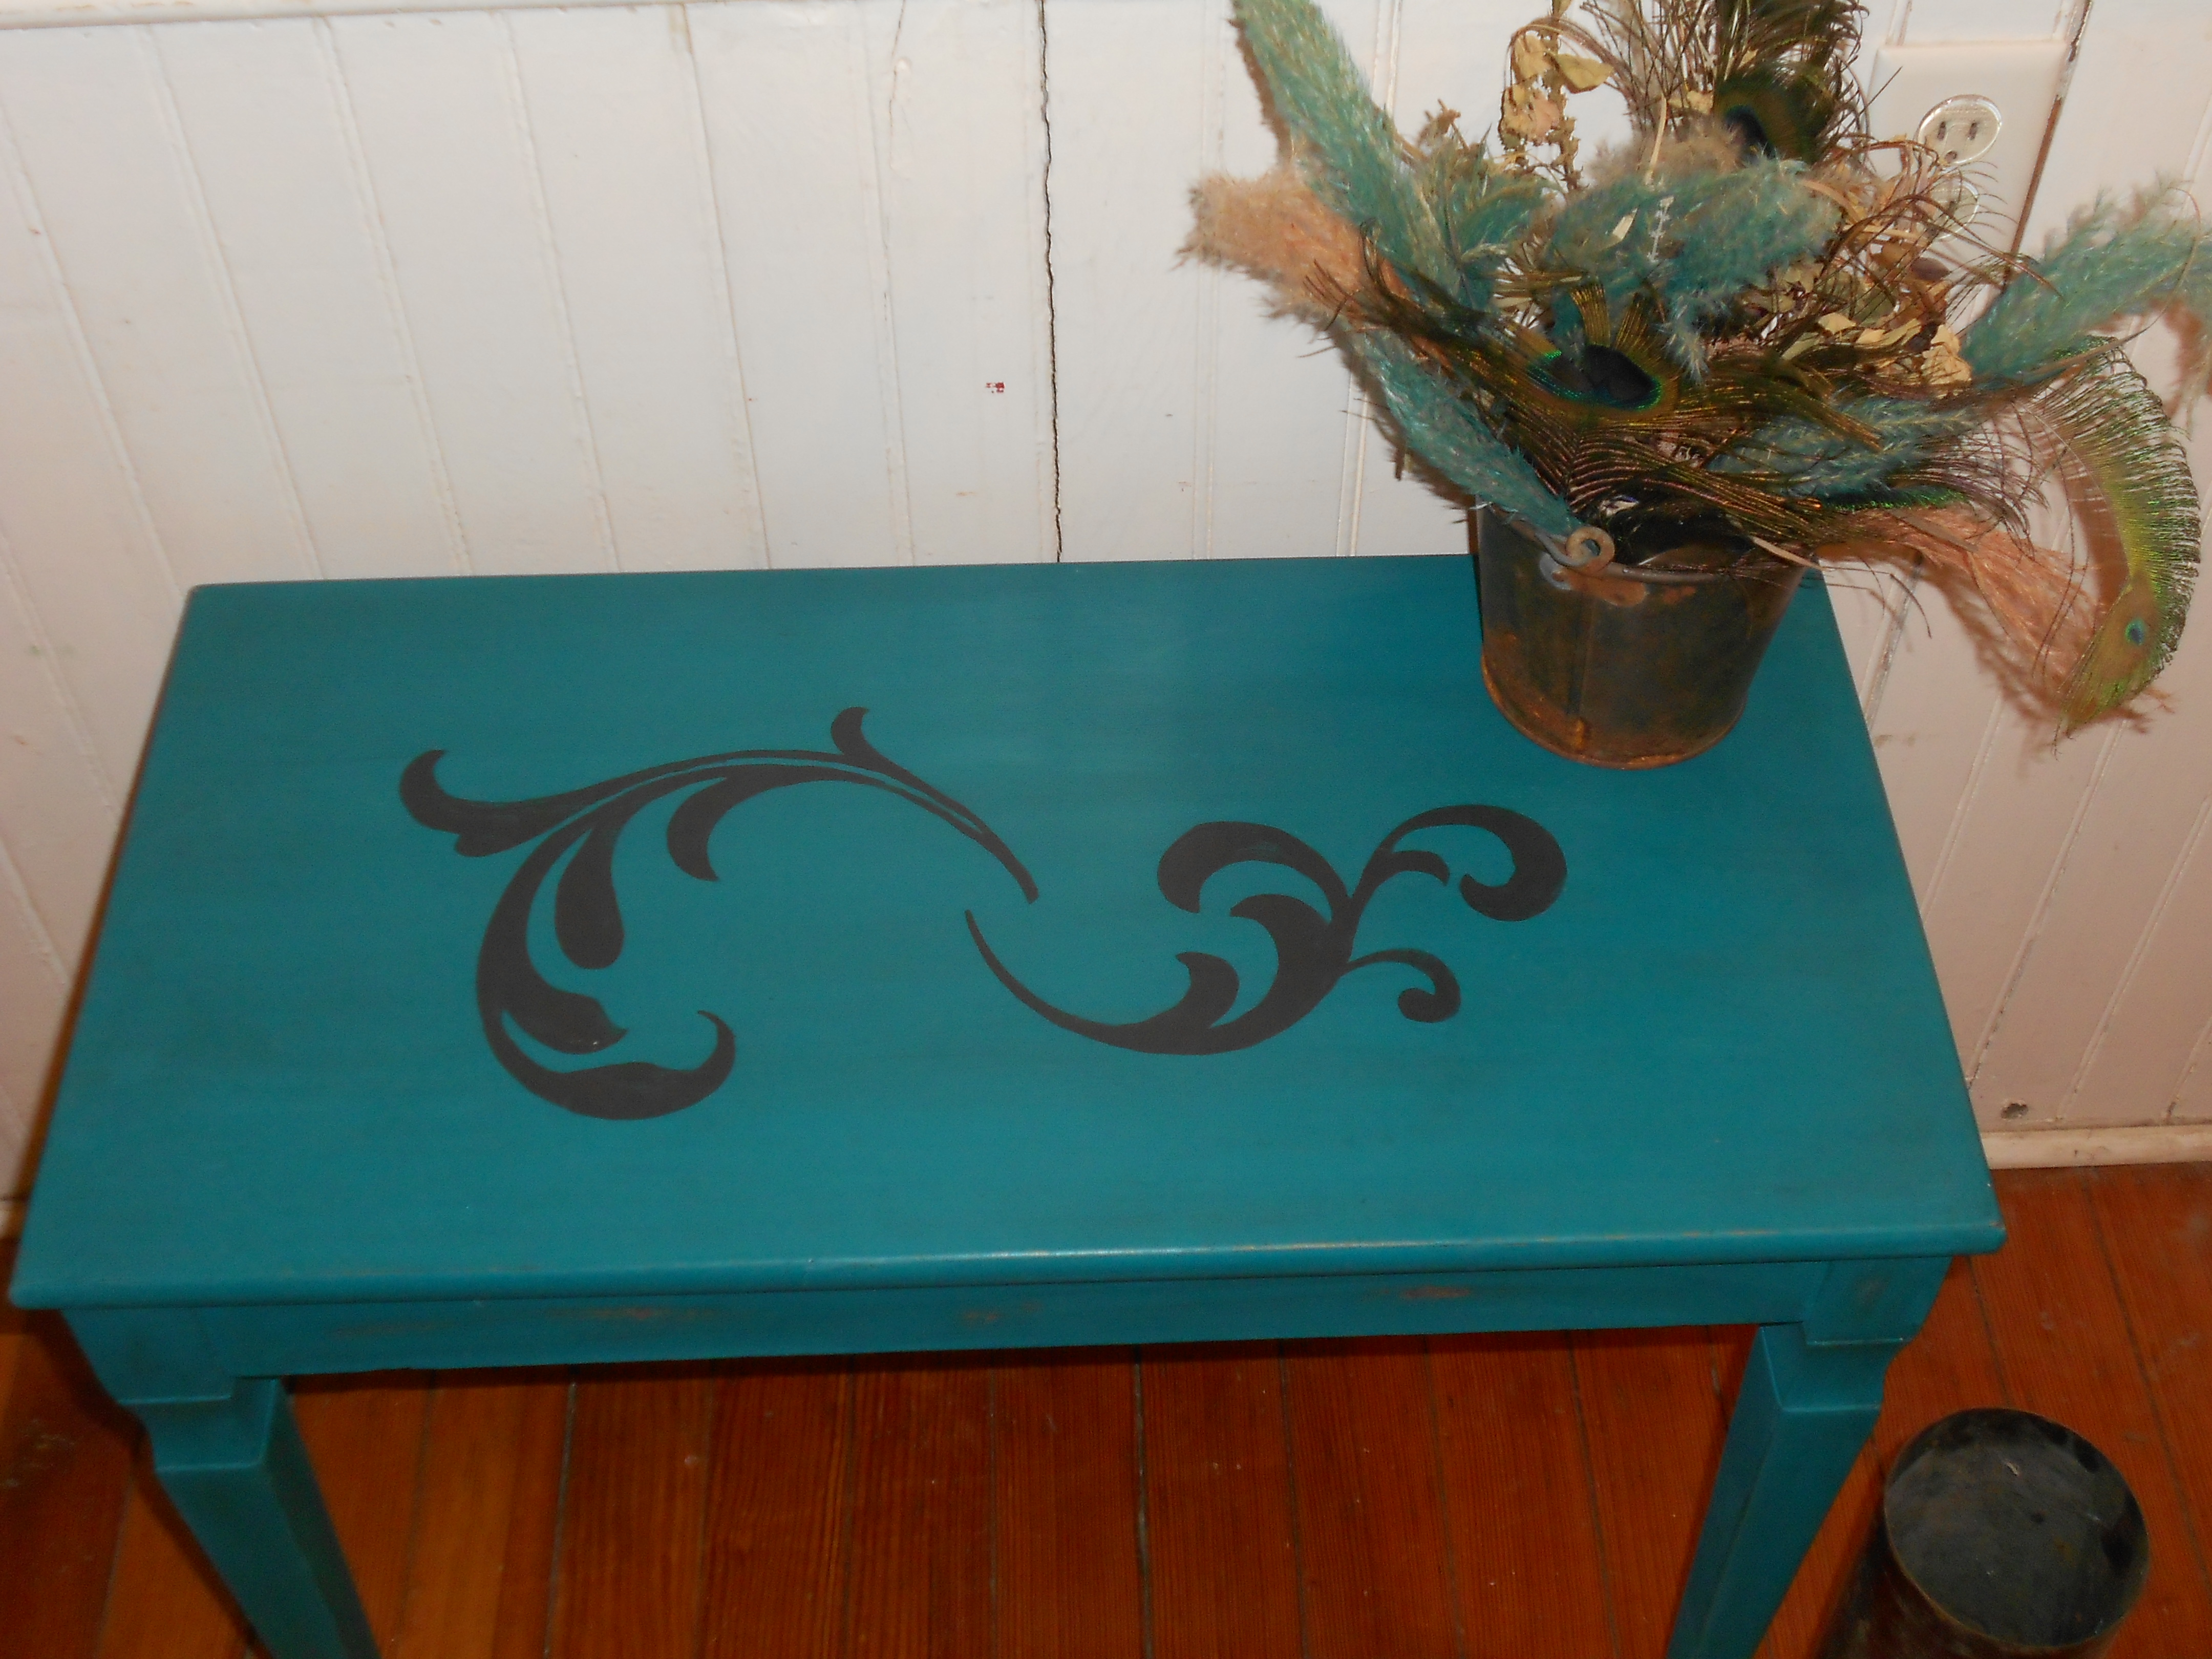
Coffee Table Fix Up
It’s taken me over a year. But it’s finally done. I have a coffee table that I love, finally.
Before:

Perfect shape to hold lots of treasures, but outdated color and in rough shape.
After:


I sanded the table and then painted I’m gray (shock!) And then roughed it up. The top got a coat of a darker gray, and the whole table was finished with paste wax to protect it. I had to fix the drawer, but ended up keeping the old knobs. What do you think?
New Old Dresser
This old house has plenty of character, but really lacks storage. I get by because no one is using the spare bedroom currently, so outgrown baby items, my vacuum, and luggage all live in there. The bathroom, however, is still in desperate need of storage. I still use my old quilt rack to hang towels. I love this, but not so much when towels have to be stacked 7 high because there is no cupboard for the extras. So, I set out to buy a large old dresser to refinish, in hopes that it could serve as storage in the bathroom.
I started with this guy for $40 on a garage sale:

Great vintage bones, ugly paint job. So I sanded, patched one spot, and painted him gray.

He was already looking gorgeous. Then I added some charcoal tinted furniture paste wax.

I was loving it. The hardest part was picking hardware. I didn’t want the hardware to pull too much attention, so I ended up choosing twisted iron pulls that reminded me of the Threshers, and little black knobs for the top. Now he’s finished and gorgeous. Oh, and one more dilemma. Do I really put it in the barhroom, or do I give it to Brantley as he transitions to his big boy furniture? OR, do I sell it? 😉


What do you think?! ♡
Piano Bench Project
I’m in love. I really don’t want to sell this project. My house is going to overflow.
I found this old piano bench, beat up and sad, left behind in the basement of the rental property we own.

After filling, sanding, painting, stenciling, and waxing, this is what she looks like now:
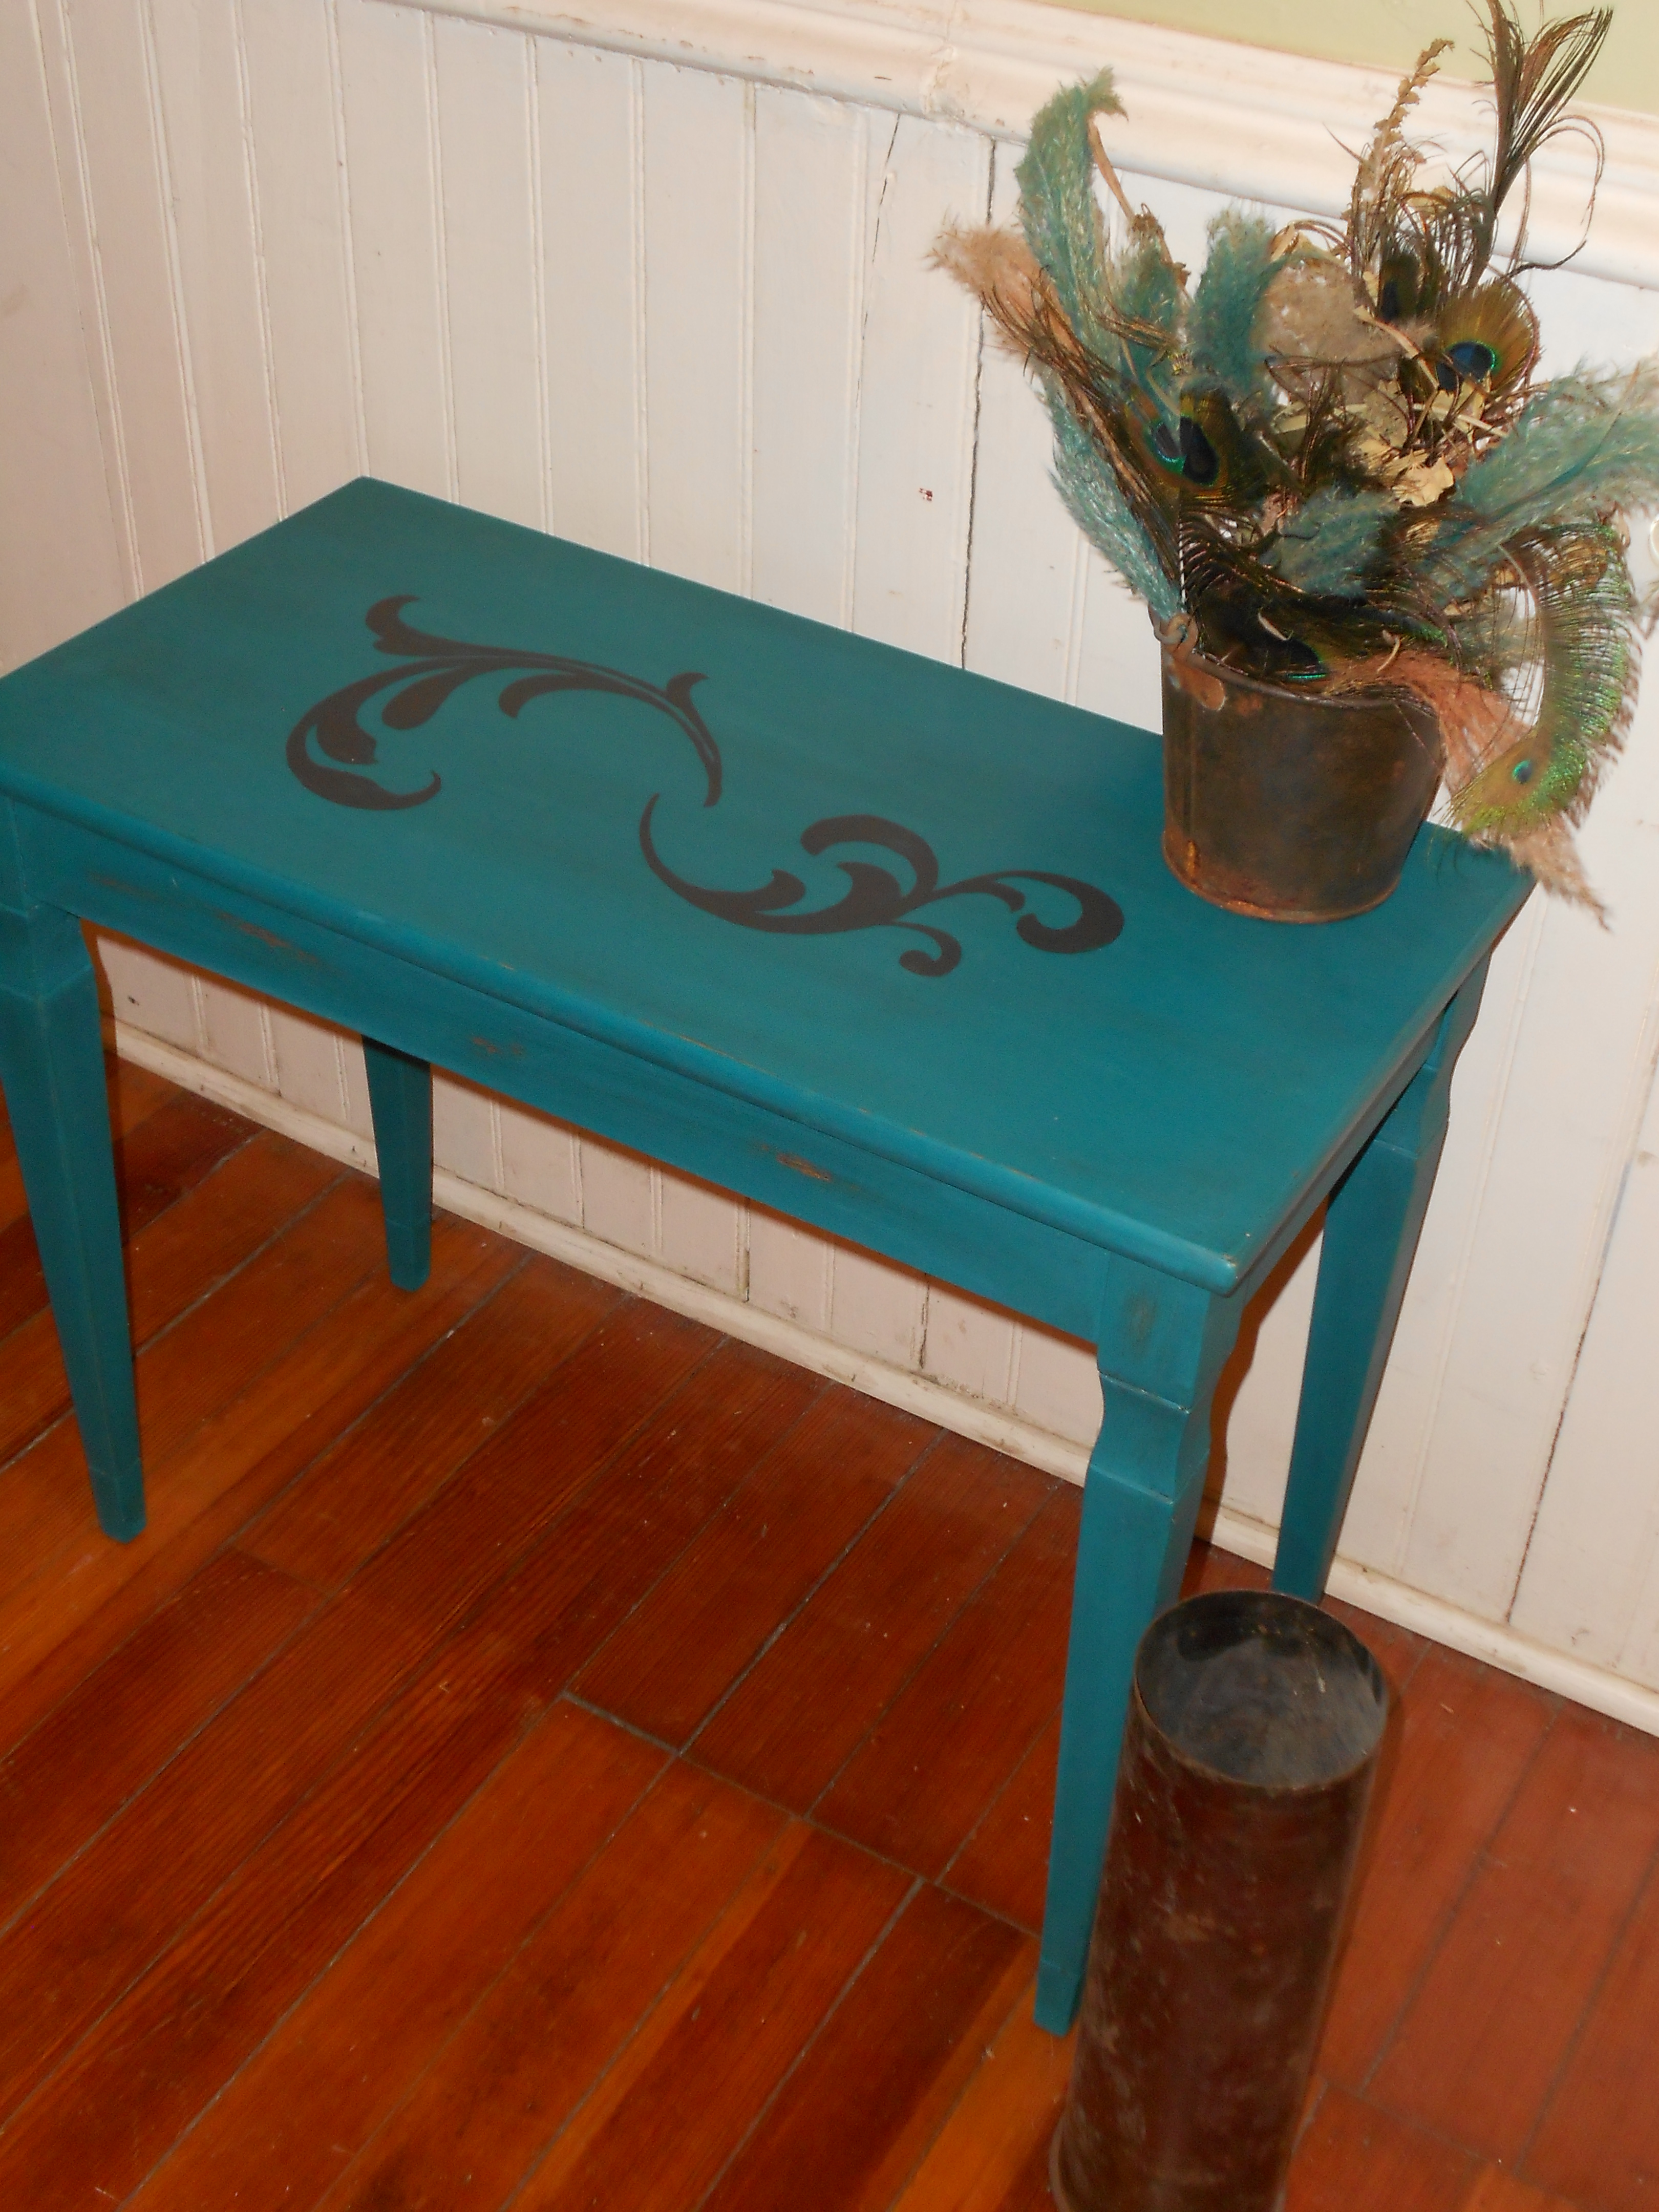
I love how the waxing turns out. The finish is protected and it is more wipable now. I used regular paste furniture wax and then tinted it with a charcoal paint. I am so excited to keep perfecting this technique. What do you think?
A Vintage Nursery Project
I know I just now finally shared the nursery with you, but I also just finished a fun little project in there.
I was given this beat up little vintage dresser the other day , with plans to turn it into a book shelf for toys.

Suddenly it struck me. Those two drawers could also be another project, perfect for some storage! I cleaned, sanded, painted, roughed, waxed, added wheels and knobs, and viola!


I absolutely love how they turned out! B can now store toys or clothes in them, and they should fit under any bed, so he can use them for a long time! My helper approves.


This was my first time using paste wax. I tinted my wax myself with paint. I really like how it gives the drawers a barn board feel. I think with a little practice this could be a new favorite technique! What do you think?
