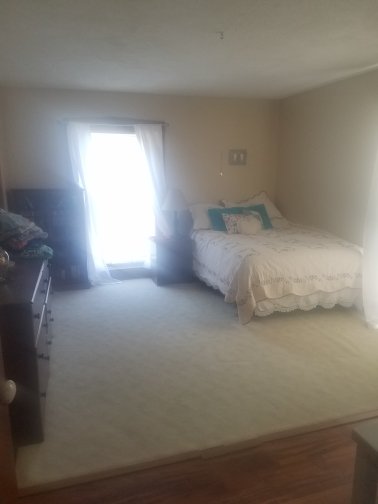
Guest/Play Room Transformation
When we moved in a few years ago the rooms were all boring and ugly…
Then we painted and added some fun flair to make this one a bright teen room…

Then, the teen grew up and moved out, so we had an empty space. 💡 We had an idea! A play room. But also make it a guest room, so that we still have a space for company to sleep…
And so the room became a guest/play room.
Paint again. Tone down those walls. New floors. New furniture. Make it fun, but grown up enough for guests… viola!
We went gray on the walls, but a touch darker than normal since we have lots of sunshine in here. We did snap in wood floor, since they are durable and easy to clean. Then the fun part…
We added a wall mural from PhotoWall! What better way to keep it fun for play and interesting but adult for guests?!
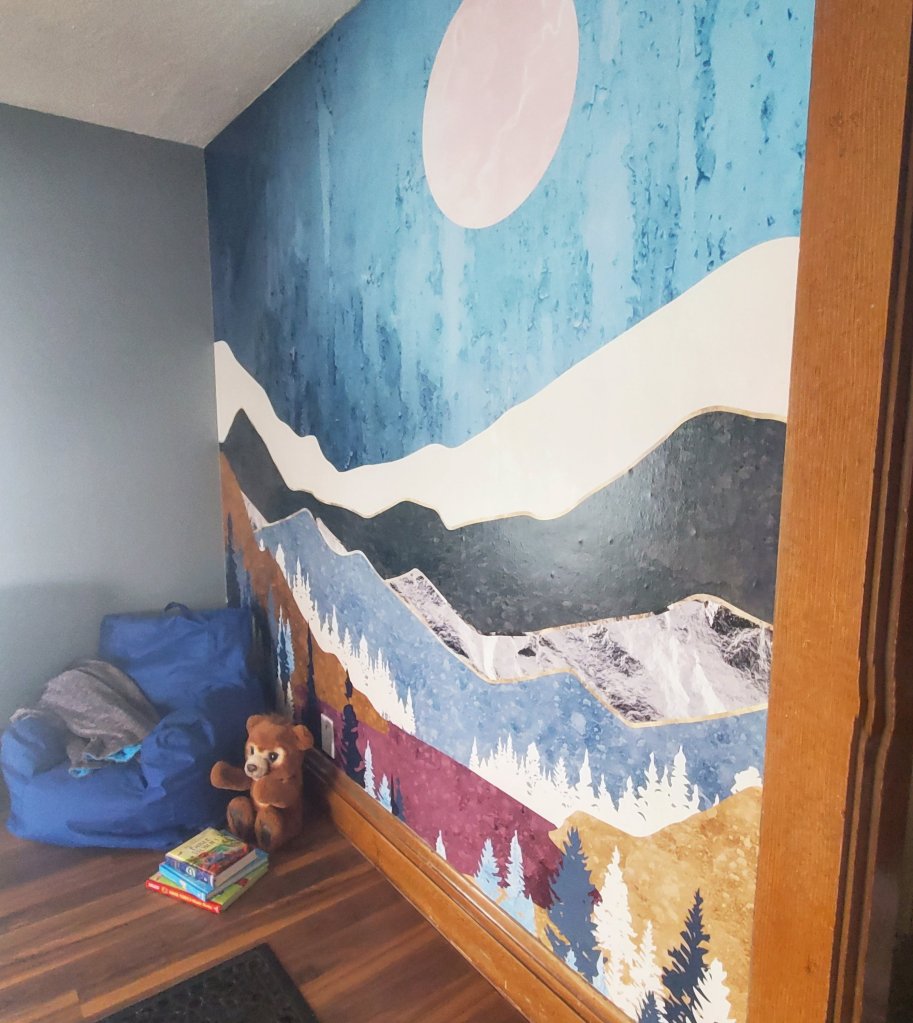

How cool is that?! It was actually super easy to install, just wallpaper in vertical strips, and it even comes with the paste. The boys are in LOVE with their new space!
You can head to PhotoWall too and use code ‘makemineeclectic25’ for 25% off any of their art, canvases, or wallpapers!

Next we will add furniture, so stay tuned…
XX,
Jess
A Vintage Nursery Project
I know I just now finally shared the nursery with you, but I also just finished a fun little project in there.
I was given this beat up little vintage dresser the other day , with plans to turn it into a book shelf for toys.

Suddenly it struck me. Those two drawers could also be another project, perfect for some storage! I cleaned, sanded, painted, roughed, waxed, added wheels and knobs, and viola!


I absolutely love how they turned out! B can now store toys or clothes in them, and they should fit under any bed, so he can use them for a long time! My helper approves.


This was my first time using paste wax. I tinted my wax myself with paint. I really like how it gives the drawers a barn board feel. I think with a little practice this could be a new favorite technique! What do you think?
A Nursery!
So, this big news was big a year ago. Oops. But, the nursery is still cute, so I wanted to share!


I just love how it turned out! The blue walls became a soft gray, we added barn board shelves to hold a collection of John Deere tractors, I made a mobile from small shed antlers, and the giant bull poster from the Angus producers ties the farm colors together!


I love the vintage games and trucks and tractors on the book shelves. Don’t worry, the green lamp did eventually get a little white shade!


And a stash of cowboy boots and cloth diapers to boot! 🙂
So, like I mentioned, this was news a whole year ago. So here is a peak of what else a year can do.

😉
Busy With The Move, And A Good Idea
Sorry for the lack of posts this past week. Getting ready for the big move has got me super busy. And, with everything packed I have gotten very few projects done at all. I do, however, have a bunch of ideas going around in my head for things to work on once we get to the new house! Less than a week!
When I came accross this poto on Apartment Therapy I thought it was gorgeous. Upon reading further I discovered that it was also a handy idea.

This little shelf is above a door. And in our little bathroom(s) at the new house, this may be very helpful! Head over to Home Depot for the tutorial on how to make one. I know we will be trying it out!
Garage Sale Day Find
Garage sale day in our little town was Saturday! This day has to be one of my favorite spring days. Scouring someone else’s junk for that perfect treasure is a great way to kick off the season. I even got Tony in on the fun. We didn’t find much to bring home with us, but a few treasures makes the day worth it. We brought home a few vintage glass marbles and a couple large dice for the collection. But here is our bargain beauty:

This is an antique set of mailboxes from a post office in Champagne Illinois. I came back twice to check it out, and at the end of the day he said it was too heavy for him to carry back home, so he gave me a sweet deal! It took two men to load it into my truck and we took the drawers out to get it into the house, but since it is on wheels it is easily movable in the house. I love it right here in the kitchen. The drawers were the perfect addition to the “landing strip” area. Tony was thrilled to have his own drawer for his pocket junk. I love its mismatched drawers, and the vintage numbers and letters above the handles. I know, I know. Some of you probably think this guy is tacky (my mom didn’t like it!), but we think its great. And, the drawers are big enough to function in the house! Here it is in the landing strip area:

I’m not sure if the school desk should stay now or not. But, for now, this is what the area looks like. Suggestions?
Also- we did pick up one other thing at the garage sales, but that project will have to wait… 🙂
Office Storage
I love the matching office supplies my mom got me a year or two ago. There is a pencil cup, tray, two boxes, and a magazine box, and they are all in different forms of black and white damask with little bits of red here and there. I was thinking lately that I just needed a few more storage pieces for office things. I had recently seen a post online about making your own magazine boxes with cereal boxes. Last night I dug into this project as well.
I cut the cereal box top off and cut the sides on an angle. I then recovered the box by glueing some black and white skull material (I have a thing for skulls right now) over all outter sufaces. It was easy and cheap and I think it goes well in the office space. Now I have one more storage box. More to come in the future.

I didn't take a before picture of the empty cereal box, but here is the finished product.

There it sits next to the other box on the shelf of our pocket office.
Also, another little office update. Tony finally installed the frame for the projector picture. The wall at least appears empty for a reason now. I kind of like it. It almost looks a little purposefully quirky when the projector isn’t on.

Tidying Up
I’m a neat freak. I know it. I’m actually proud of it. I like that my home is always clean, neat, and organized. I feel that everything should have a place. Junk left out of it’s place clutters up your house and really ruins the appearance. I love ugly necessities (like cleaning supplies or utensils) to have a place to be stashed that is concealed when not in use. Not only does this just look so much better, but it also means you will not lose things or forget where you left them. Our cleaning supplies are under the kitchen sink in tubs. We always keep a flashlight right under the sink as well. A few basic tools and utensils that are needed frequently are in a drawer in the kitchen island, and the rest of the tools are in the tool box in the basement. I could tell you where ever item I own is right now. This drives Tony nuts that he has to put everything back in it’s assigned spot, but he will be thanking me in an emergency when I find what we need in seconds!
Anyway, this brings me to the topic at hand. Our mops and brooms. They are too big to fit under the sink, but too ugly to be left leaning against a wall in the kitchen. I had them stashed away in the basement. But, no one wanted to go down there to get them every time there was a mess. I even caught myself on hands and knees wiping up the floor with a paper towel instead of heading to the basement. I knew there had to be a better solution.
We took a trip this weekend to our local hardware store and found a basic hook set. My plan was to hang this strip of hooks inside the basement door for easy access to brooms and mops. The strip was a bit too long to fit from one beam to another along the unfinished basement walls. We compromised and leaned the strip of hooks on it’s side. It actually worked out perfectly, and the long handled tools hang perfectly just inside the door. I’m pleased. 🙂 And, now we can save paper towels and make our lazy selves go grab the mop!

The brooms and mops hanging so nicely just inside our basement door.

The row of hooks that proved to be a simple and inexpensive solution to a daily annoyance.
We were so inspired we even added a couple single hooks to the opposite wall for hanging dog toys and leashes.

These things will no longer have to be draped sloppily over the banister!
Simple fixes make all the difference in a home!
Making A Mini Bar
Currently we hold all of our drink glasses, servers, shakers and wine and liqueurs in one of our kitchen cupboards. But, I have always wanted to do something different with these items. I would like to have some sort of mini bar in the kitchen or dining room. This would be such easy access for entertaining. Also, it would free up more cupboard space in the kitchen, which for us is at a premium!
I have recently seen a few photos of DIY bars and am in planning process for making one of our own.

This redone shelf unit was posted on Apartment Therapy. I think this is great inspiration for our project. A simple shelf unit like this would be easy to find and probably affordable. I really love the wine racks and glass holders. I also like the idea of lining the backs of cabinets with colorful ,fun paper. Here is another picture of a mini bar with beautiful paper:

http://www.apartmenttherapy.com/chicago/inspiration/inspiration-lined-cabinets-075583 . Originally from Homes and Gardens.
I also like the idea of using a bar cart or serving tray with a few bottles and glasses, but options like the cabinets in the pictures would give us much more space and probably be safer with pets, especially if there are doors.
I am very excited to get started on this project, and will keep you posted!
Cube Redo
I have had this little storage cube since I was a kid. When new, it had a unicorn and a rainbow on it. Recently I redid the look of the cube so that it could be used in our home. I forgot all about the cube project until yesterday. There was a question posed on Apartment Therapy about recommendations for redoing a similar cube. I thought that I would let you all know how I did the project, and although I do not have any before or durring pictures, I can show you how it turned out. Here was the process:
1. I started by covering the picture areas of the cube with white contact paper. I was lucky that the sides were the same width as the paper, but I did run short of paper at the top and had to piece two pieces together. For a bigger box this is what you would have to do. Not to worry, the seem barely shows once you get the paint on the paper. Just try to line them up as exactly as possible.
2. Once the paper was on, I used an Exact-O knife to cut the contact paper around any hardware or latches. This worked well and really didn’t cause any problems as long as you work slowly and patiently.
3. After the paper was laid and cut, I painted it. I picked a dark red, and simply used wall paint from the hardware store and applied with a regular brush. I recommend this, as it was easy and inexpensive. I personally wanted an antiqued look to go with the worn metal hardware, so I only applied one coat and left it a bit streaky. If you want a smooth, more flawless finish, I think two coats would do the trick just fine.
4. To add a personal touch I used a foam stamp. I found this stamp at the hardware store on sale for about 50 cents. While the paint was still wet I pressed the dry stamp into it in a pattern I liked. When you raise the stamp it takes some of the paint off, leaving a lighter area for the design. I used a circular design that went with the antiqued look.
Viola! Finished! It really was that simple. Now this cube serves as storage for blankets in our living room. And, this has stood up to some use and abuse and even relocating a few times. It has a few small scratches in it now, but that seems to add to it’s antiqued character. If you want yours to stay looking new try using a protective clear coat on top. Here’s what ours looks like:


Some foam stamps similar to mine can be find at http://www.makingmemories.com and other scrap-booking websites.

Have fun!
Scrap-booking Question
I have been scrap-booking since I was in high school. I love taking photos and loving preserving memories, so this is quickly became one of my favorite hobbies. Due to being extremely busy I quit scrap-booking for a few years almost completely. The other day I found some very adorable paper and was so inspired I have started scrap-booking again full force. (The paper was from Micheal’s, which I recommend!).
I have come across a small problem, however, that I am hoping you out there in the blog world can help me with. My supplies are currently stored in about 4 different boxes. I rummage through the boxes when I am in search of inspiration or the perfect color of paper. The are constantly getting messy and unmanageable. The boxes are not uniform, either, which makes them hard to store. I am such a neat freak that this is really bothering me. I have seen carrying cases for sale that are meant for scrap-booking, but they are ridiculously overpriced!
My dilemma: I am insearch of an affordable, possibly DIY solution to the scrapbooking mess!

Here are just a couple of my unruly boxes of scrap-booking materials. I love the pink box, as it is an over-sized gift box from Victoria's Secret, but the heavy materials are starting to demolish the box!

Here is just a glimpse of the plethora of supplies needed for scrap-booking. Scissors, stickers, markers, pens, accessories, paper...
I was thinking that sticker sheets and paper might be categorized and sorted in some sort of accordion type portfolio folder (Wal-Mart even carries on in a black and white damask pattern!). But, the 12′ x12′ sheets of paper might not fit in one of those. What do you think? Suggestions?
Here is a glimpse of the pages I have completed recently. Any page ideas? If you would like help with your scrapbook just drop me a line about that as well! 🙂

P.S. It really is too bad that photos don’t do the details of these pages justice, as some of this paper is really gorgeous up close!
