Why I Love My Cricut
This is a sponsored post written by me on behalf of <a href=”Cricuthttps://lnk2.io/wjcWg2L”>Cricut</a>. All opinions are 100% mine.
I have had my Cricut Explore Air 2 for a few months now, and to say I’m in love is an understatement! I’ve always been a crafter, but this things really helps me step up my game! Here I am going to talk about the 5 things that I love about my Cricut!

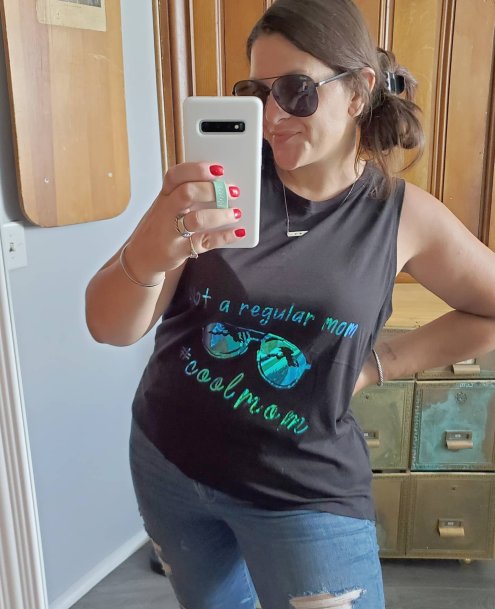
1. Its easy to use! I was truly shocked at how easy this machine is! Not going to lie, I was intimidated at first. I worried where to start and if I would be able to figure it all out. Yup. I was. Best place to start? Pick a project and jump in. They really mean it when they say their motto is “beginners luck every time.” I learn tricks and get braver each time I use my machine, but I definitely agree that picking a beginner level project and diving in head first is a great way to start and will prove to you how easy it is! Check out this shirt I made as one of my very first projects:
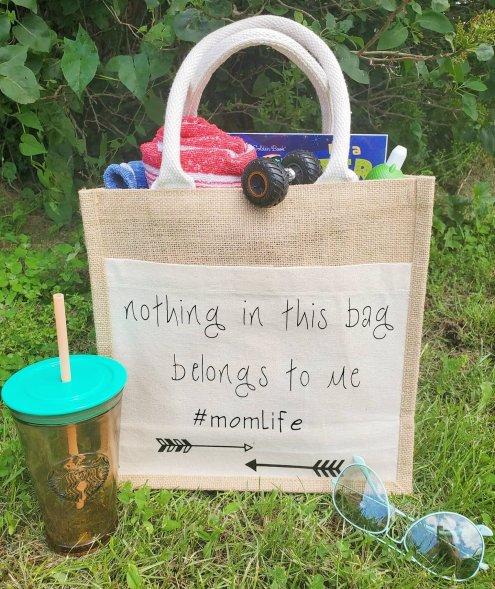
2. Support! That brings me to the second thing I love about my Cricut. Its like having a whole community of creators to support you. Have a question? Worried about where to begin or which type of project to do? They’ve got an answer! Not only does Cricut have a team you can email or chat with, but they have numerous pages where you can reach out to their pros or other crafters with tons of experience. They’ve all started somewhere and learned lots and are at the ready to make sure you love your machine and projects. I would know. I wasn’t sure how to customize the design I wanted to make myself for this bag, and the Facebook page group had almost immediate answers for me!
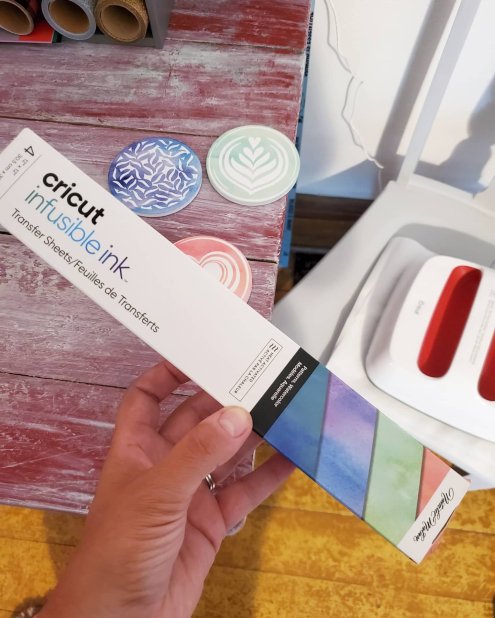
3. Ideas! This also leads me to another thing I love about Cricut, the ideas! I never worry about having a creative block. There’s no way. The ideas of projects to make are endless, for every single occasion you cak dream of. Really. You can find ideas galore on Pinterest, and Instagram, or Cricuts’s Facebook page. And my favorite place for inspiration? The Cricut emails! They send seasonal emails showing the new ideas and templates added to Design Space, their app for making. How did I know about the new infusible ink and coaster blanks to make these? One of their idea emails! Light bulb!

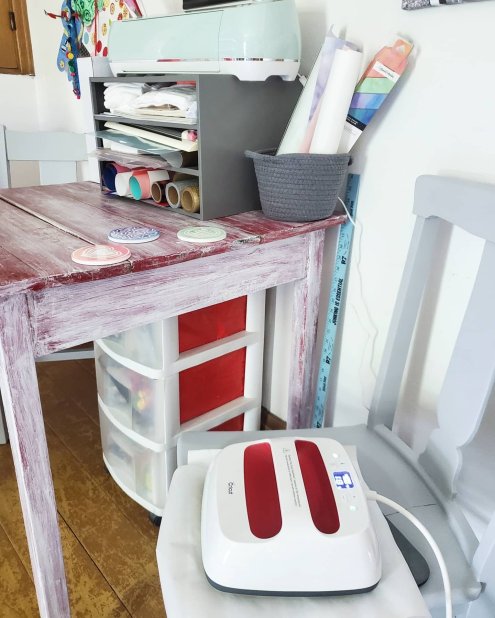
4. The options! Got a bright idea to make? You can! And Cricut can help you do it! The options they supply for you is endless. Or almost. Not only do they help with the ideas, but they make it easy to find all of the supplies you need to make visions come to fruition. They have coasters, bags, shirts, materials, pens, markers, vinyls, decals, iron ons, and the widest variety of patterns in their supplies you could imagine! Sparkles, holographics, leopard, wood grain…their possibilities are never ending! Not to mention, cricut has other machines like the EasyPress, and tools like mats, cutters, Nd weeders, to make all of the options come to life!

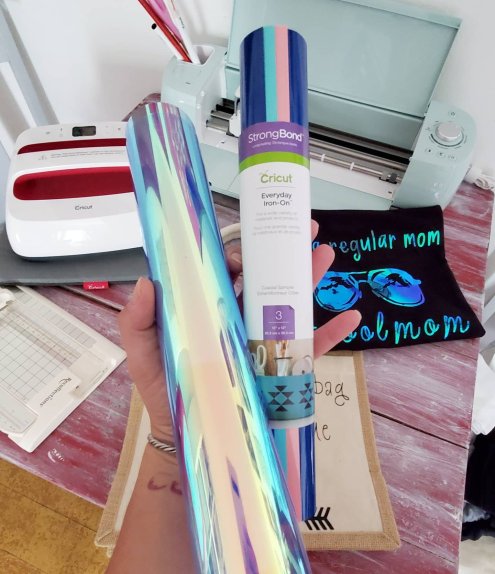
5. Capabilities! This machine not only cuts paper and vinyls. I was shocked to learn what all it really can do. Like blown away. It can cut leather, poster board, felt, fabric and even wood. But it doesn’t just cut, it can score. And it can draw! Yup! Shocked?! Me too. You can insert pens and markers into the blade holder and it can draw or write, making handmade cards, letters, signs… mind blown.
The capabilities combined with the Cricut options alone shows you that the possibilities are truly endless. I cannot wait to do another project every time I finish one! And now all of my gifts will be one of a kind made by yours truly!
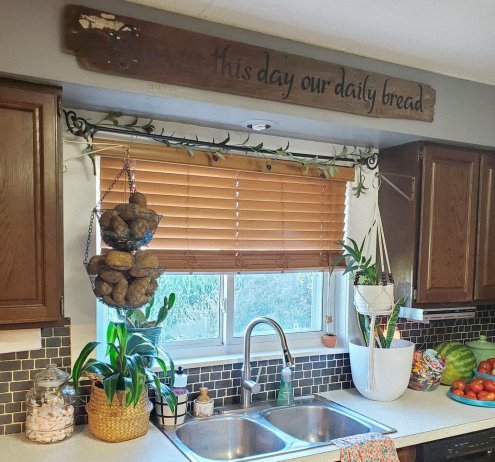
Here’s a quick breakdown of my latest project, a sign for our kitchen.

Choose a board and a quote. My board is a faded, chipped, barn board from our barn. (I’m sure to some the white paint left on one corner and the odd shape caused by years of cattle wear are not pretty, but we loved this board! 😉
Then, start on the Design Space app, and find my design template here. My board is 5ft long, but you can edit the design to adjust measurements. Once you send the design to the machine and it cuts it on vinyl, weed the excess pieces out. Use transfer tape to pick up your design and stick it down in place on your board. You could add flourishes to the ends of your quote too! You can change this design and even choose your own color vinyl. I used matte clear coat over the board to ensure no edges lift since I chose an old, rippled barn board for my project. Add a hanger or two on the back and hang. Easy peasy and a great one-of-a-kind, beginner-friendly project!

Have questions? Need help or ideas? Just ask! 😘
XX,
Jess
The Landing Strip
A landing strip, a command center, the drop spot. No matter what you call it, every house should have one. It’s a place for all the family “stuff”.
I call it a landing strip. In this house we actually have it split up a little, but it’s whatever works for you! When you come in our backdoor, we have hooks for each family member. Bag and coat go there. There’s a little hook station for car keys. And we have a small rack holding bug spray, sunscreen, sunglasses, wireless speaker, etc. But there’s still other “stuff” that accumulates. What do you do with it?! Enter our landing strip.

He we have a stash spot for everything else so that we stay organized and don’t lose important things! We use the chalk board for calendar notes and grocery lists. And each of the boys and mom and dad have a basket. We put bills in ours. The boys put homework and such in theirs. I keep a pen jar on the shelf. Here is stash stamps, a candle lighter, a marker, and pens. If you need more than that they you have to go upstairs to the office. 😆

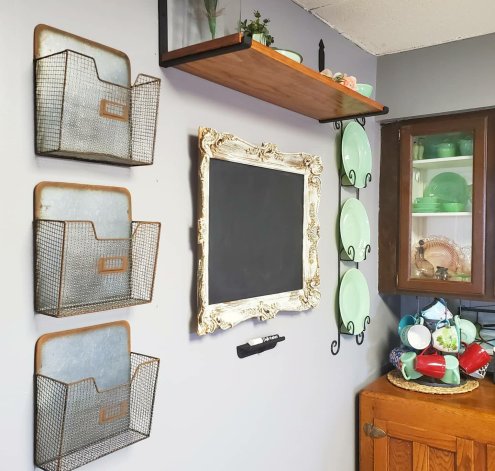
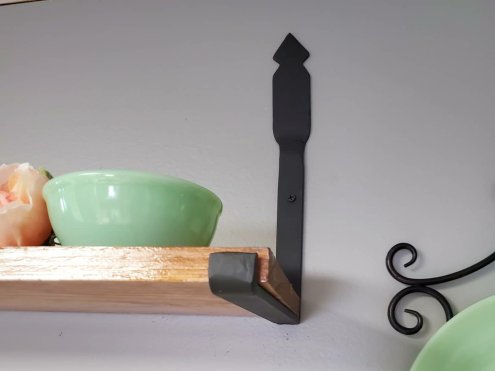
The antique mirror got a metal insert painted with chalk paint. The little chalk marker tray below it is an antique door stop out of an old barn. The baskets are from Hobby Lobby. The shelf is a custom design I requested from Jason. He added and welded the flourish at the top of the brackets.


Here’s my tid bit of advice. Have a place for the “stuff”, whatever you may call it. I truly believe in “a place for everything and everything in its place.” Even if you don’t organize that far, at least set up a zone with a calendar and pens and notepad. Have a spot where you put mail and homework. Always put your keys in the same location. I promise you that these tricks will prevent you from losing important things or searching frantically for the lost items!
And just for fun, here’s a shot of what it looks like more often than not. 😉

Anything else you would add?
XX,
Jess
Permalink Comments Off on The Landing Strip
Rustic Blue Chair Love
I finally got the chance to finish a little antique chair project over the holiday weekend. This little guy was found at a late garage sale. Shabby pink paint hid the cute chunky style of this cutie. Enter my rustic blue paint…
Before…


And after…


Well, what do you think? I think this one turned out super adorable! For sale now in the shop! 🙂
Beautiful Inspiration
Desire to Inspire recently featured the works of Claire Larritt-Evans, the ultra talented designer behind Fenton & Fenton. I found every single image inspiring! This was my favorite:

Oh, and did you notice the antler chandelier, again?
Go check out the rest of the awesome photos here: http://www.desiretoinspire.net/blog/2011/6/21/claire-larritt-evans.html
An Awesome DIY Project
This chandelier is completely awesome! I drool everytime I look at this picture. Someday I hope I can work up the courage to attempt this DIY project. For now I call it inspiration and stare longingly at the photo each day.

Simple Fix and 4th of July Weekend
Sometimes the tiniest details of your home can make life so much more organized, easy, and even pretty. Well, the other day I was very annoyed by my growing collection of costume jewelry. My good jewelry is hung neatly in my jewelry box and some of my most often worn costume pieces are held in jars in my dresser and vintage medicine cabinet in the bedroom. But, the rest of it has been hanging in clumps on hangers and hooks in the closet. You couldn’t see them easily, and you definitely couldn’t grab one easily. Here is the pile that I hurriedly threw on the bed.

So, my grandma gave me some vintage hand crochetedhangers. And I picked up a package of sewing pins with bead heads.

Although the pins didn’t stick into the wood hanger underneath very well, they stuck in the ends enough to keep any slippery necklaces from falling off the hanger. And, viola! Simple, yet cute and organized. What an easy fix. Thanks grandma!

Oh, and if you were wondering why the big bandage on my hand… I burned my hand that night while cooking dinner. Yes, I think it was a sign from God to quit cooking and get some take-out menus. But, the sloppy joe’s turned out well, so Tony didn’t buy that. By the next day I had to go to the doctor for it and my hand was completely wrapped up for the whole holiday weekend.
And, as with most of my projects, the dogs helped of course!

So, on to the 4th of July celebration! We camped at our local park, and it rained here the entire day (of course). That didn’t stop us! We waded through the mud the entire weekend. It ended up clearing up just in time to have amazing fire works! Here’s the guys playing in a horseshoe tournament right through the rain!

You can see all the umbrellas out there! You can also see the river in the background. That’s the rock river, and right were we camp and also sit and watch the fireworks. Here we are playing games together.

Our softball team also won another game Sunday, so we are now 6-1! Yay!

How was your 4th of July? Hope it was a great one!
Chair Love Again
This week I have been slow. But, it just hit me. My daily Apartment Therapy email just came in, and there is was, this amazing industial looking chair. I do not know much about the chair itself, but Atelier 154 in France is the shop where this baby can be found, and the stylists of this blog that contains manygorgeous photos other photos are Elodie and Karine Kong. See them here: http://bodieandfou.blogspot.com .

Just simply beautiful.
P.S. I think that my weekly chair loves are so random and different because they tend to match my mood for that week (or day). I just noticed that as this chair even kind of matches the outfit I am wearing today. Casual, but classic, but also unique. Anyways…
New Chair Love
This week I have been a little sick, making me a little absent, but I am pining for a new chair. I had to share it with you. Its the Marais AC chair from DWR. Industrial. Colorful. Perfection!

This photo was on Apartment Therapy. http://www.apartmenttherapy.com/la/flickr-finds/flickr-finds-bright-yellow-076197
Here is it in red:

I think these are just gorgeous! I would love either color. Or silver metal…
Oh, the possibilities!
Making A Mini Bar
Currently we hold all of our drink glasses, servers, shakers and wine and liqueurs in one of our kitchen cupboards. But, I have always wanted to do something different with these items. I would like to have some sort of mini bar in the kitchen or dining room. This would be such easy access for entertaining. Also, it would free up more cupboard space in the kitchen, which for us is at a premium!
I have recently seen a few photos of DIY bars and am in planning process for making one of our own.

This redone shelf unit was posted on Apartment Therapy. I think this is great inspiration for our project. A simple shelf unit like this would be easy to find and probably affordable. I really love the wine racks and glass holders. I also like the idea of lining the backs of cabinets with colorful ,fun paper. Here is another picture of a mini bar with beautiful paper:

http://www.apartmenttherapy.com/chicago/inspiration/inspiration-lined-cabinets-075583 . Originally from Homes and Gardens.
I also like the idea of using a bar cart or serving tray with a few bottles and glasses, but options like the cabinets in the pictures would give us much more space and probably be safer with pets, especially if there are doors.
I am very excited to get started on this project, and will keep you posted!
Cube Redo
I have had this little storage cube since I was a kid. When new, it had a unicorn and a rainbow on it. Recently I redid the look of the cube so that it could be used in our home. I forgot all about the cube project until yesterday. There was a question posed on Apartment Therapy about recommendations for redoing a similar cube. I thought that I would let you all know how I did the project, and although I do not have any before or durring pictures, I can show you how it turned out. Here was the process:
1. I started by covering the picture areas of the cube with white contact paper. I was lucky that the sides were the same width as the paper, but I did run short of paper at the top and had to piece two pieces together. For a bigger box this is what you would have to do. Not to worry, the seem barely shows once you get the paint on the paper. Just try to line them up as exactly as possible.
2. Once the paper was on, I used an Exact-O knife to cut the contact paper around any hardware or latches. This worked well and really didn’t cause any problems as long as you work slowly and patiently.
3. After the paper was laid and cut, I painted it. I picked a dark red, and simply used wall paint from the hardware store and applied with a regular brush. I recommend this, as it was easy and inexpensive. I personally wanted an antiqued look to go with the worn metal hardware, so I only applied one coat and left it a bit streaky. If you want a smooth, more flawless finish, I think two coats would do the trick just fine.
4. To add a personal touch I used a foam stamp. I found this stamp at the hardware store on sale for about 50 cents. While the paint was still wet I pressed the dry stamp into it in a pattern I liked. When you raise the stamp it takes some of the paint off, leaving a lighter area for the design. I used a circular design that went with the antiqued look.
Viola! Finished! It really was that simple. Now this cube serves as storage for blankets in our living room. And, this has stood up to some use and abuse and even relocating a few times. It has a few small scratches in it now, but that seems to add to it’s antiqued character. If you want yours to stay looking new try using a protective clear coat on top. Here’s what ours looks like:


Some foam stamps similar to mine can be find at http://www.makingmemories.com and other scrap-booking websites.

Have fun!
