The Best Chex Mix
I have it. The Best. Chex. Mix. Recipe.
I promise.
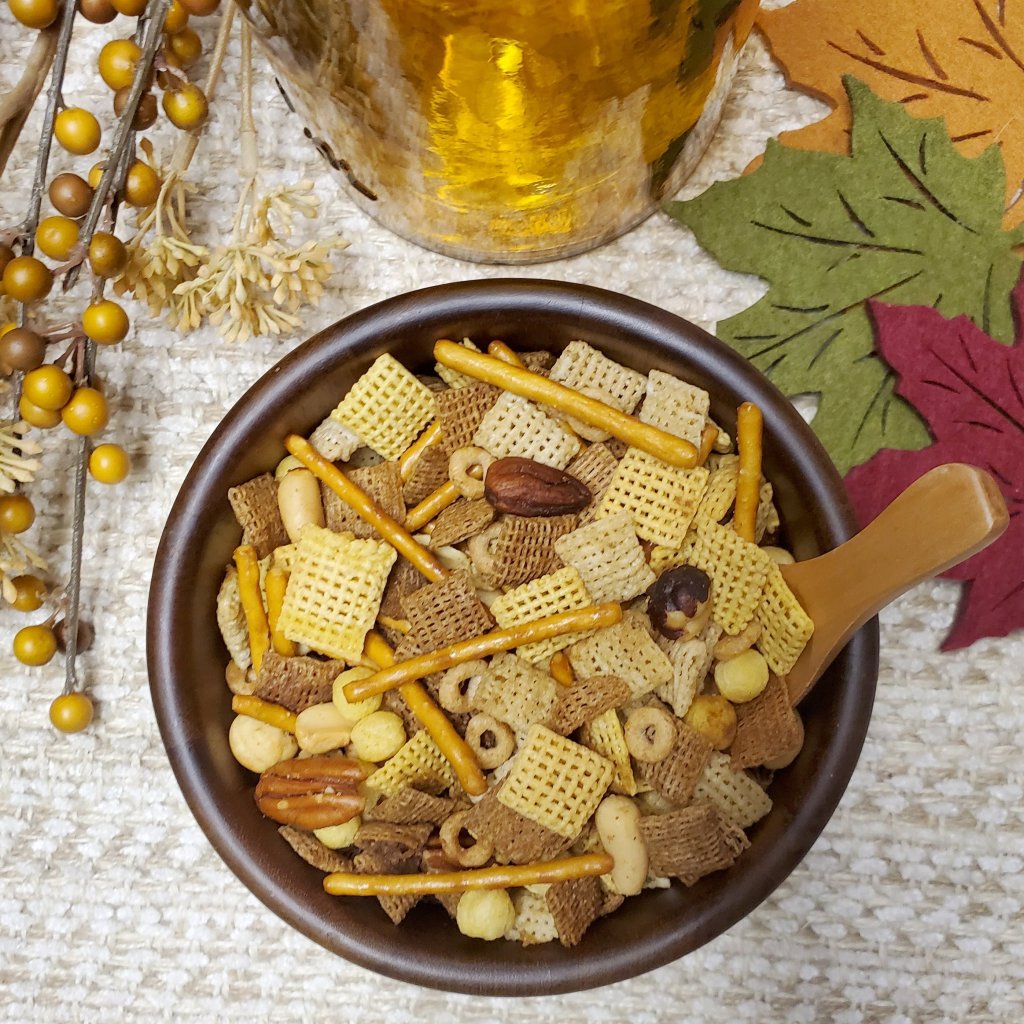
This recipe has been a family tradition since we were kids, and still is today for my kiddos. Its super easy and EVERYONE is a fan. We freeze a couple bags and it serves family, friends, guests, and gift recipients all season long. And is always welcomed.
I hope you all enjoy like we do!
1/2 c. Butter or Margarine
1 1/2 tsp. Seasoned Salt
4 1/2 tsp. Worchestershire Sauce
Sprinkle of Garlic Powder to taste
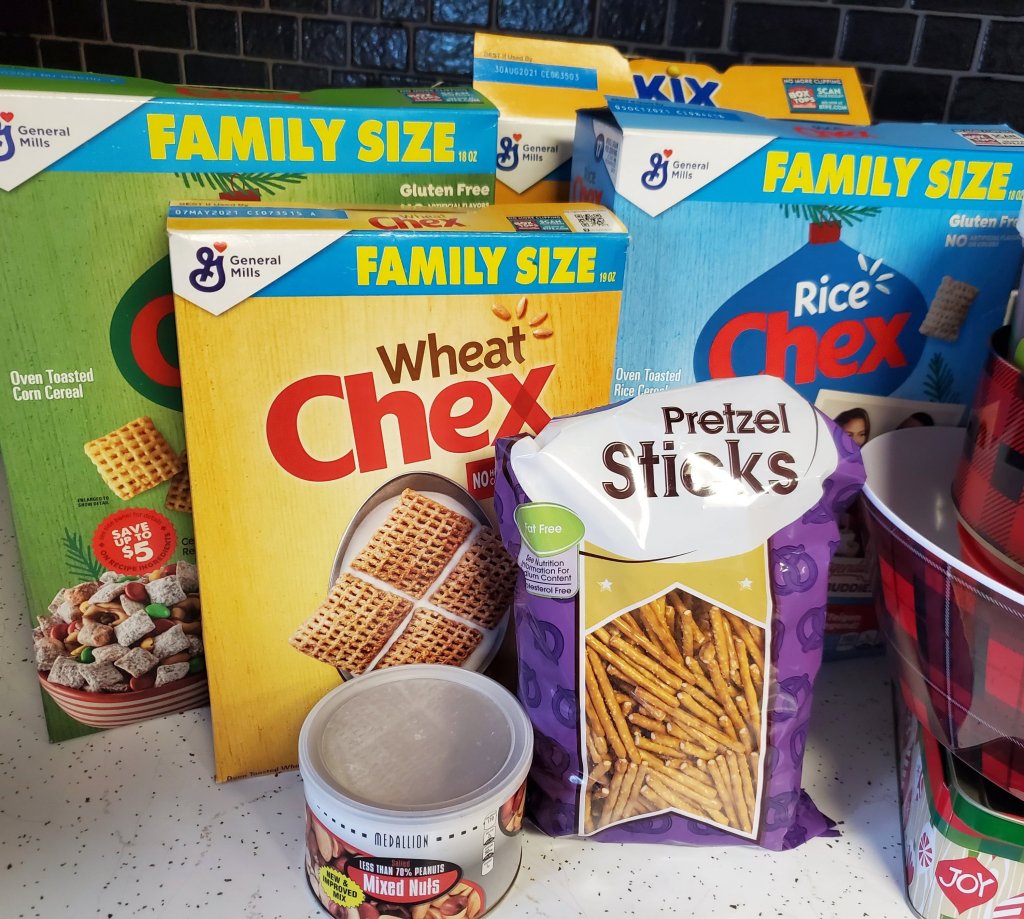
2 c. Corn Chex
2 c. Rice Chex
2 c. Wheat Chex
1 c. Cheerios
1 c. Pretzel Sticks
1 c. Mixed Nuts
1 c. Mix Cereal
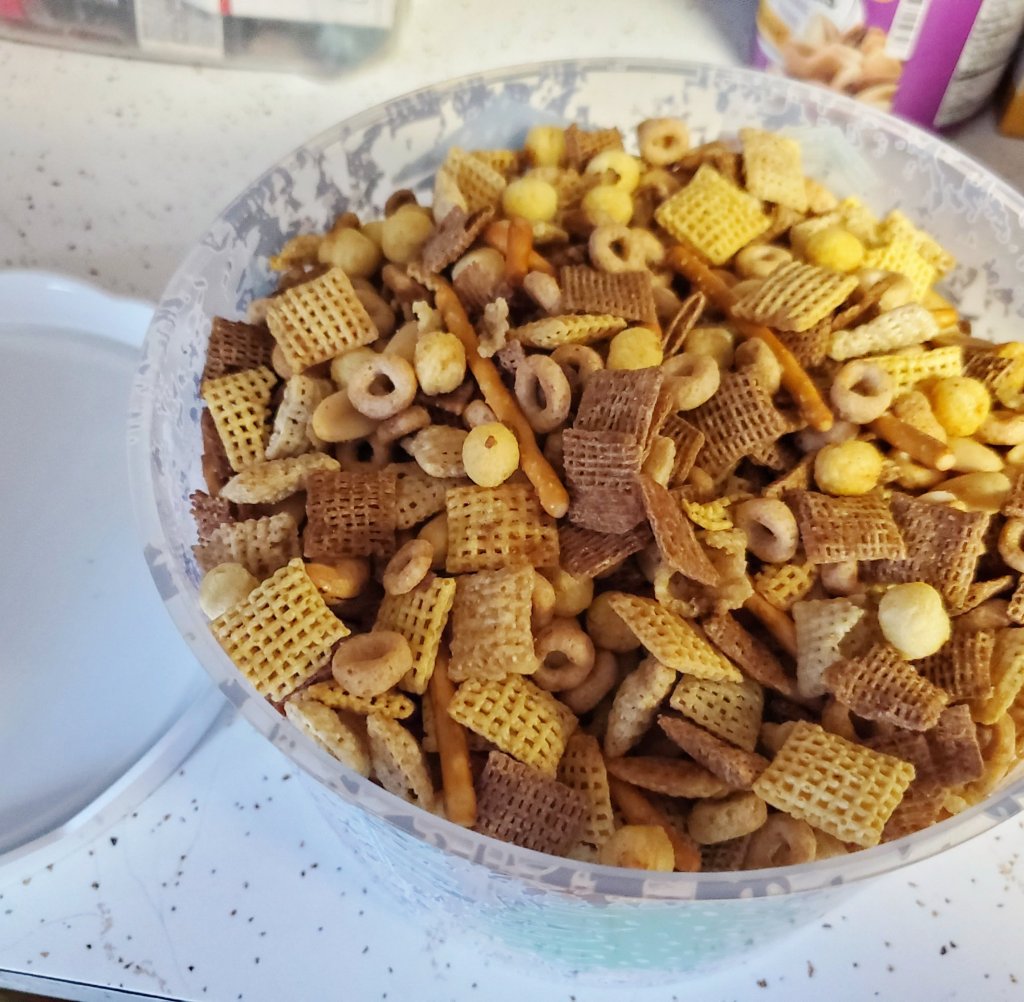
Heat margarine at 250° in shallow roasting pan until melted. Remove and stir in seasoned salt and worchestershire sauce. Add cereal and nuts. Mix until all pieces are coated. Heat in oven 1 hour. Stir every 15 minutes. Spread to cool.
Best part is, it doubles well! Make a double batch and use a large pan. Easy!
Let me know what you think!
Jess,
XX
School At Home
This year has been a wild one, that’s for sure. It’s been so different from the norm for many of us. But, one things remains the same. We want our kids to learn, and we want them to have the best opportunities possible. So, no matter what type of schooling you are doing, these ideas can be for you!
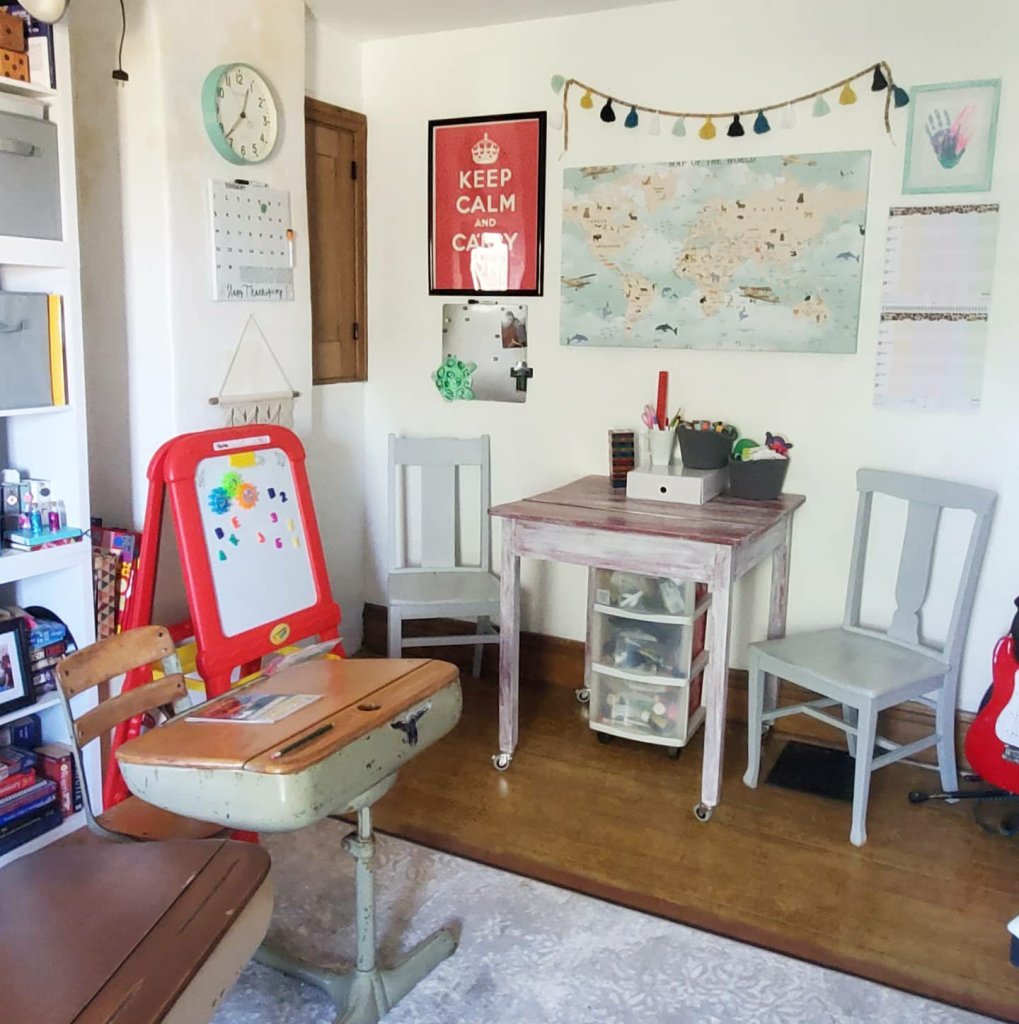
We are doing online schooling this year. Classes are via computer, but mom facilitates. Optimal? No. But we are making the best of it. My best tip so far? Find a space and make it for learning. Boundaries and expectations help learning go well!
You don’t need a whole room, maybe a corner, or a table, or even a certain table cloth, and when it comes out, its time to learn. I had always worked from home a lot and happen to have space in my office that I was able to convert to a learning space. Don’t worry, even if your space is much smaller, these ideas can help you too!
I have several tips for routine, but this will just be about supplies for today.
My second?! Keep it fun!! Third tip?! Get a map!
Look at how we combined both with this animal map canvas from Photo Wall! How cute is this thing?!
Photo Wall is amazing for any Wall decor really. They make wall decals, framed prints, posters, and canvases. You choose the art, the size, the material, and can even customize it! These would be amazing in kids’ rooms and nurseries, or even as an awesome accent wall!
Its details like this that really make your learning space fun and keep kids engaged. We knew Brantley needed a map for a lot of his Social Studies work, and looking things up on the computer really wasn’t cutting it. This map not only shows what he needs, but keeps his interest with the animals and details. He’s taken such an interest now! I plan to add a few more maps like this now too! And of course, you can fit them to your space.
Human anatomy? Plants or leaves? Turn them into a fun canvas or poster to make the learning fun!
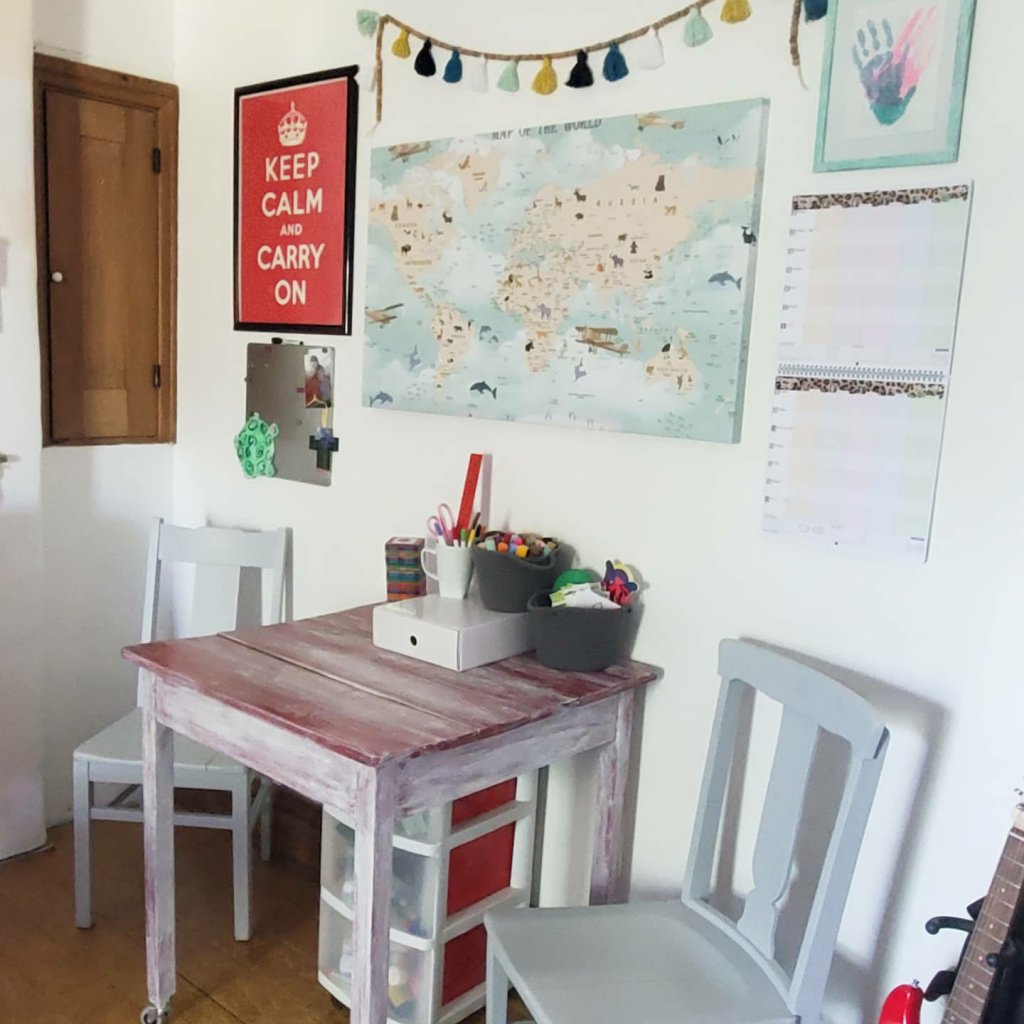
Tip 4 & 5- Have your supplies accessible, and keep them organized. Again, your space doesn’t need to be huge, but if you can find your supplies and access them easily, you will be more likely to do so. Hands on activities teach concepts so much better. Like using the scissors, ruler, markers, paints… engages and sinks in. It could even be a tote of supplies that comes out with the table cloth when learning time is happening!
I’m no pro yet, but I can tell you that I’m learning right along with the kids. You can do it, and even better with some simple tweaks!
And back to my gushing about this map canvas, because it really is my pride of decorating the classroom. 😉 Here is my map link. And use code makemineeclectic25 on your purchase from Photo Wall too! Your walls will truly thank you, in a classroom or not!

What tips would you add for schooling at home?!
XX,
Jess
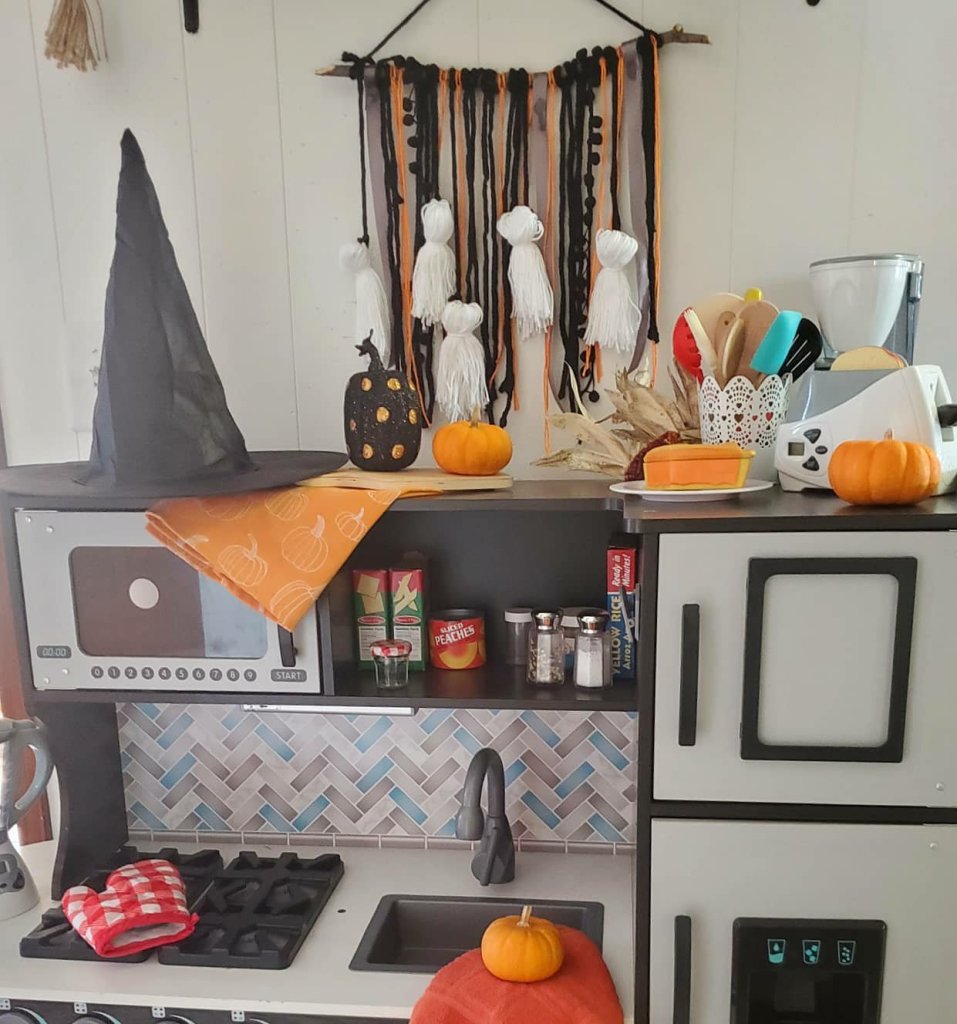
Quick and Easy Halloween DIY
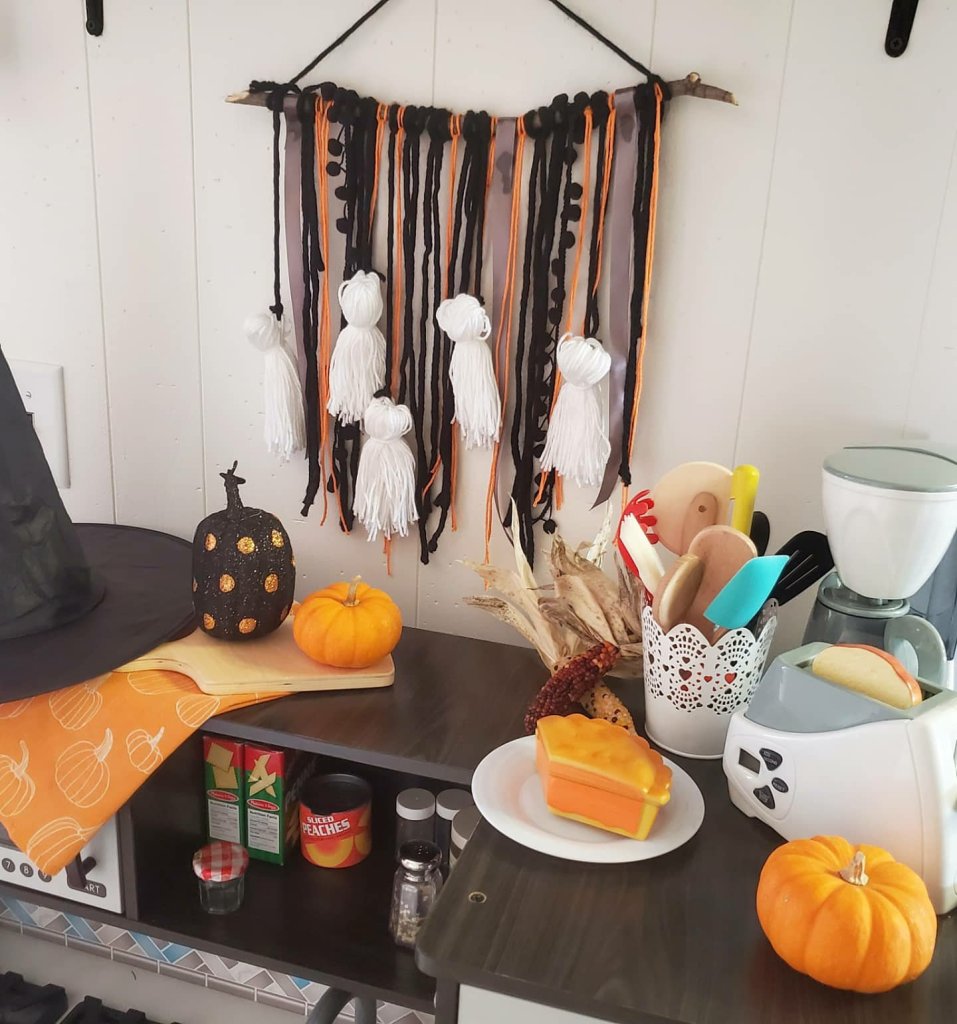
Happy Spooky Season!
Maybe its that we’ve been cooped up way too long and missed too many “normal” things, I don’t know, but we are going all out extra for Halloween this year. Our house, or yard, our decor, even our snacks, have all gone completely spooky. I’m loving it!
If Halloween time is your thing, or even if it’s not so much, but you want to show the kiddos just a little festive fun, then I have a super easy and cute DIY project for you!
Faux Ghost Macrame Wall Hanging!
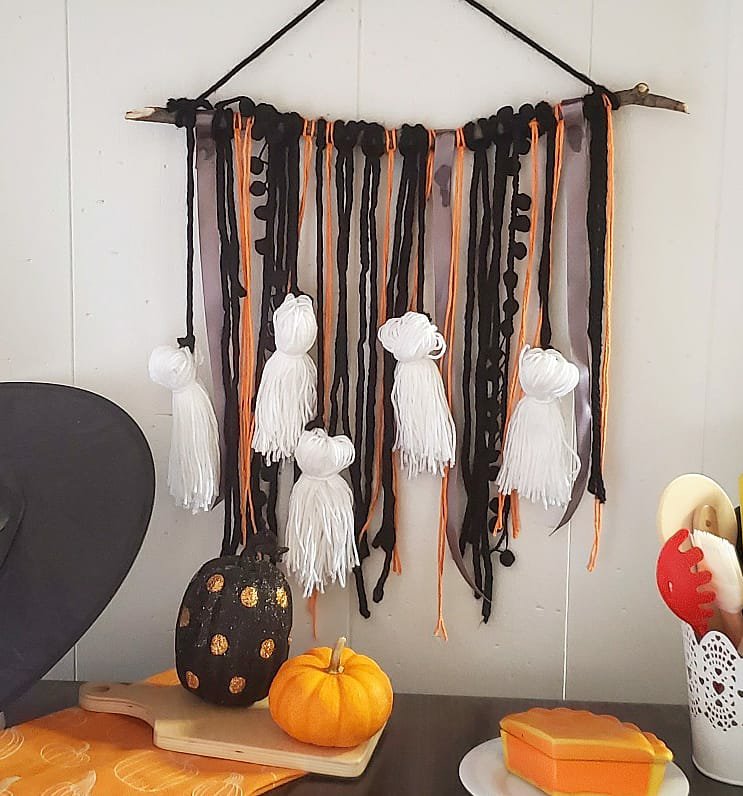
Supplies: -stick
-yarn and ribbons in various colors and textures
That’s it! Super easy, but such a cute payoff.
I cut the branch from a tree in the yard, even a dowel would work. Mine is a bit over a foot long. I started with it longer and then cut it off as I worked to make sure I knew I liked it. Decide how long you want things to hang. Mine is all random lengths, but around 14-16 inches. When you cut your pieces of yard, double this. You will fold them in half. I eyeball all of this and er on the long side. You can trim them down later.

With the piece of yarn folded in half, lay it over the stick. Bring your looped end under the stick, then stick the ends back through the loop and pull tight. Viola! I glued the ribbon together in the back around the stick instead of this method so as not to crease it. I love the ball tassel ribbon to give texture too and tied these in a knot around the stick.
The ghosts. Also simple. Wrap white yarn around a book about 50 times. Cut the strings on each end of the book and keep them in a bunch. Fold the bunch over and tie a piece of yarn around it. I took black yarn through a small chunk of the white ghost head yarn on each side and tied this together in back and then tied the black to the stick.
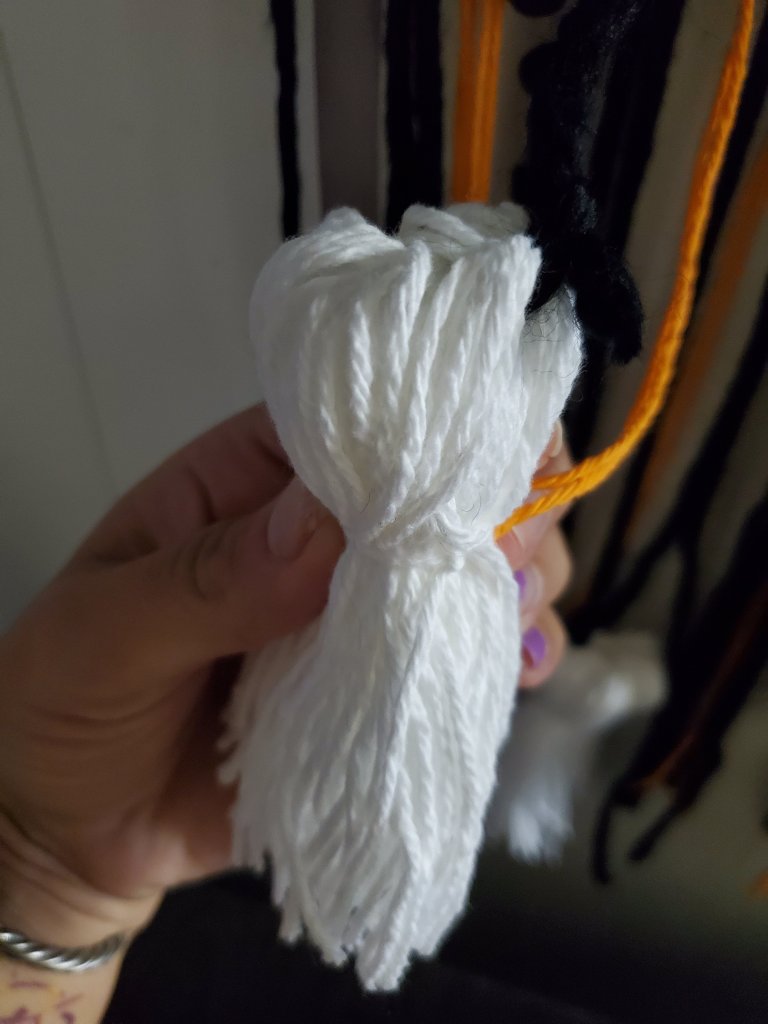
There is no right or wrong with any of this! Keep it fun and super simple. You could glue eyes and mouth on the ghosts too if you want! You can add more or less pieces to the stick too.
Enjoy! 😉
Xx,
Jess
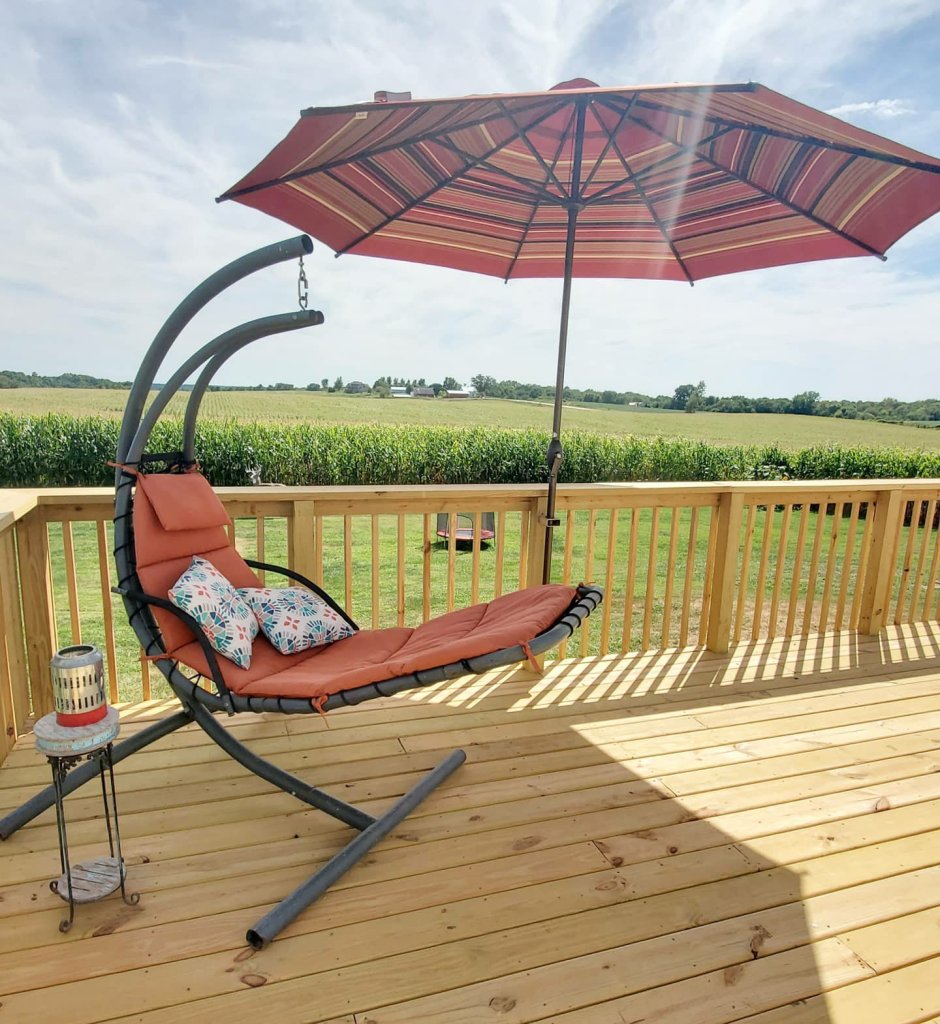
Deck Reveal
Its been a two year wait since moving into this house and several weeks of work this summer… but she’s finally done! We have a deck!!
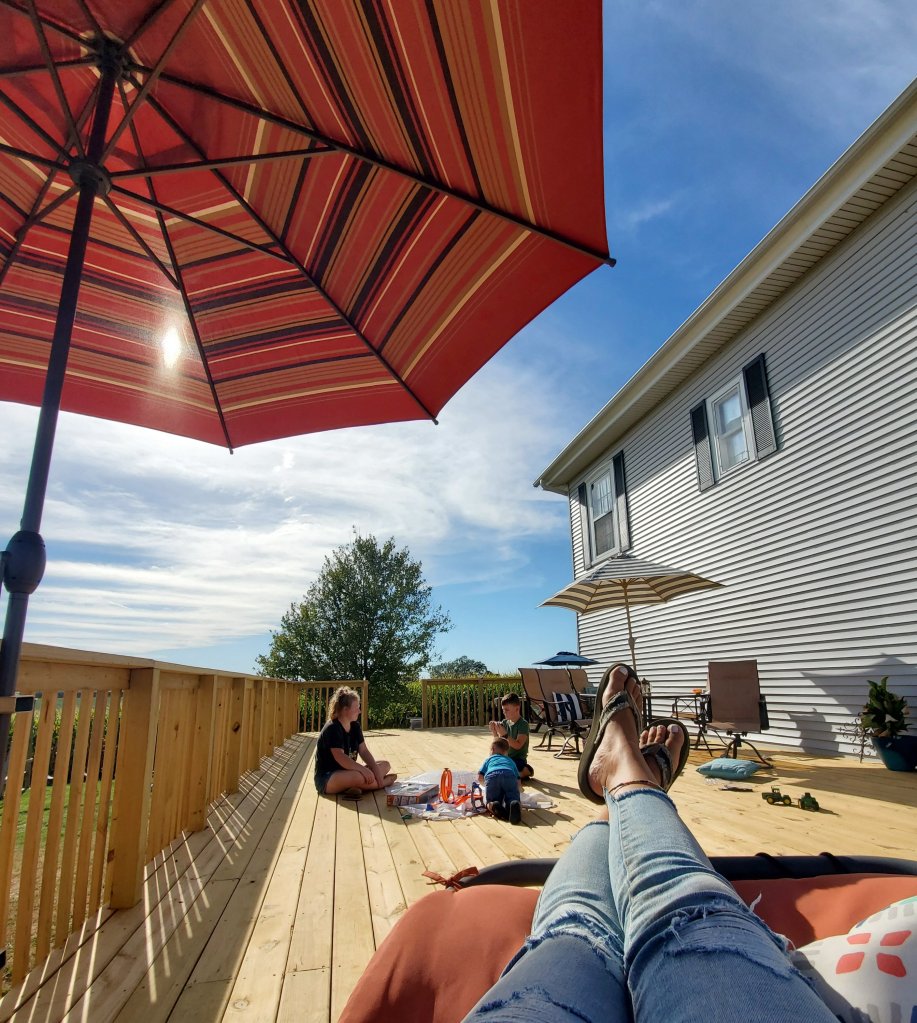
Now mom has a spot to relax and watch the family magic happen! 😉
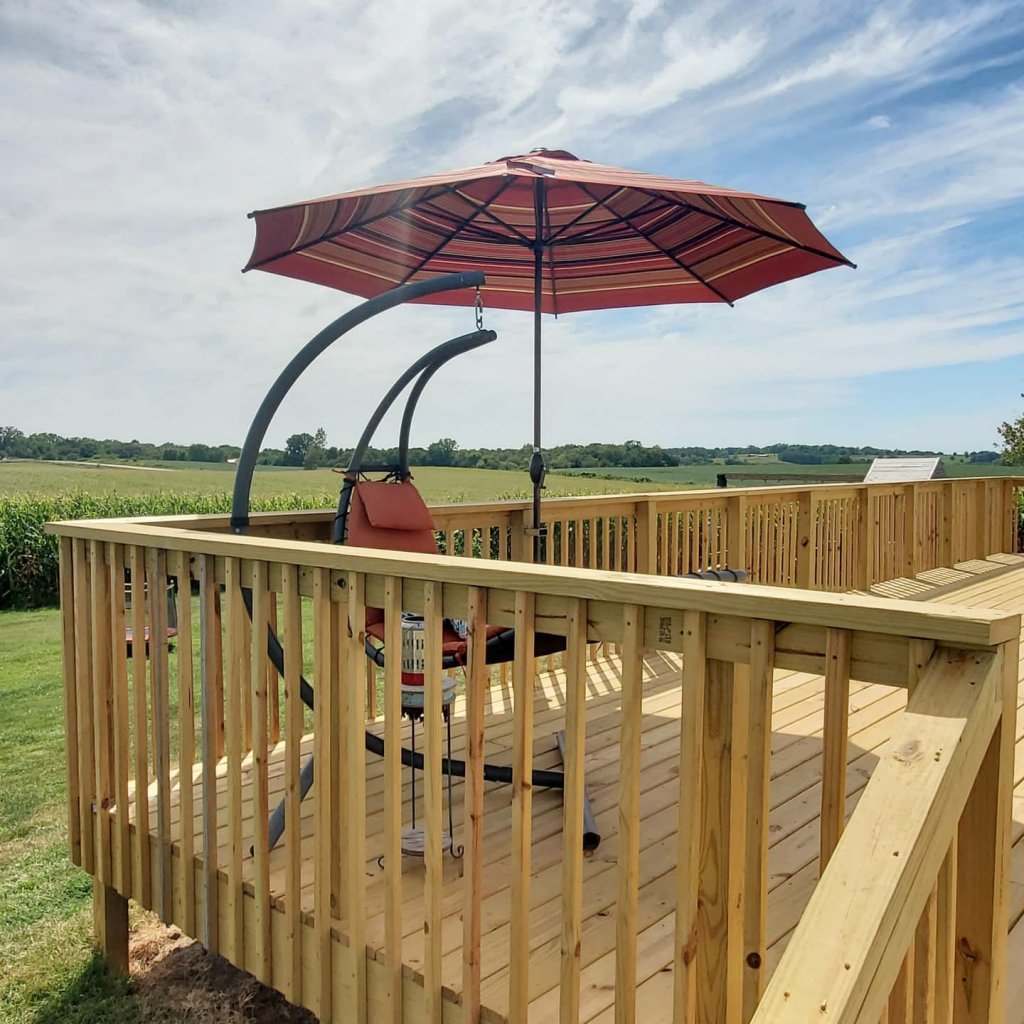
Yes, its huge! The land directly behind the house used to be another house attached. This left the ground hilly, dead, full of bricks and glass, and in general, useless. So, cover it up we did. We filled in two giant cisterns and started a deck slab. Next year we will add a pergola to the blank spot of house where the table is now. We will put a pool in down below and then the following year add another piece of deck to half wrap around the pool. It will be the ultimate dream area when we are finished.
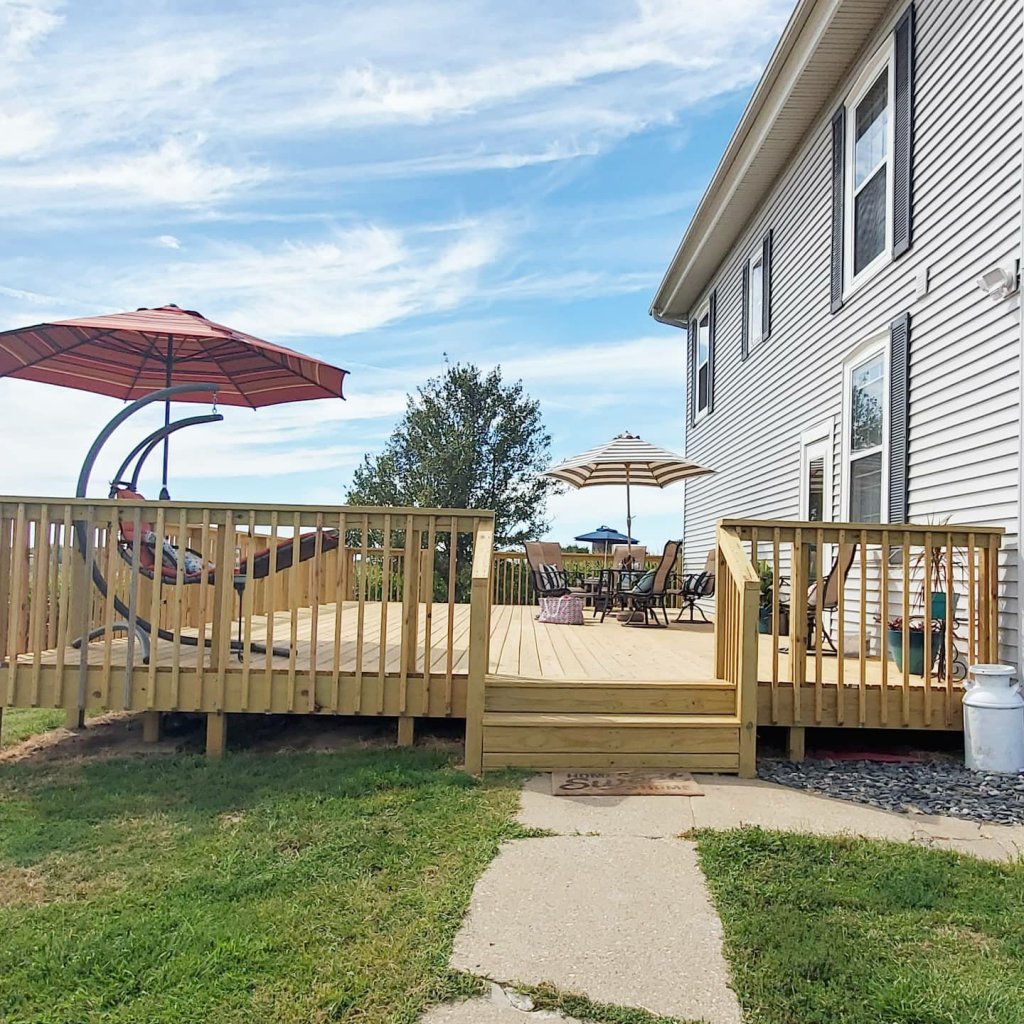

We do still want to add trellis to the bottom to keep everything out, but that will happen this fall.
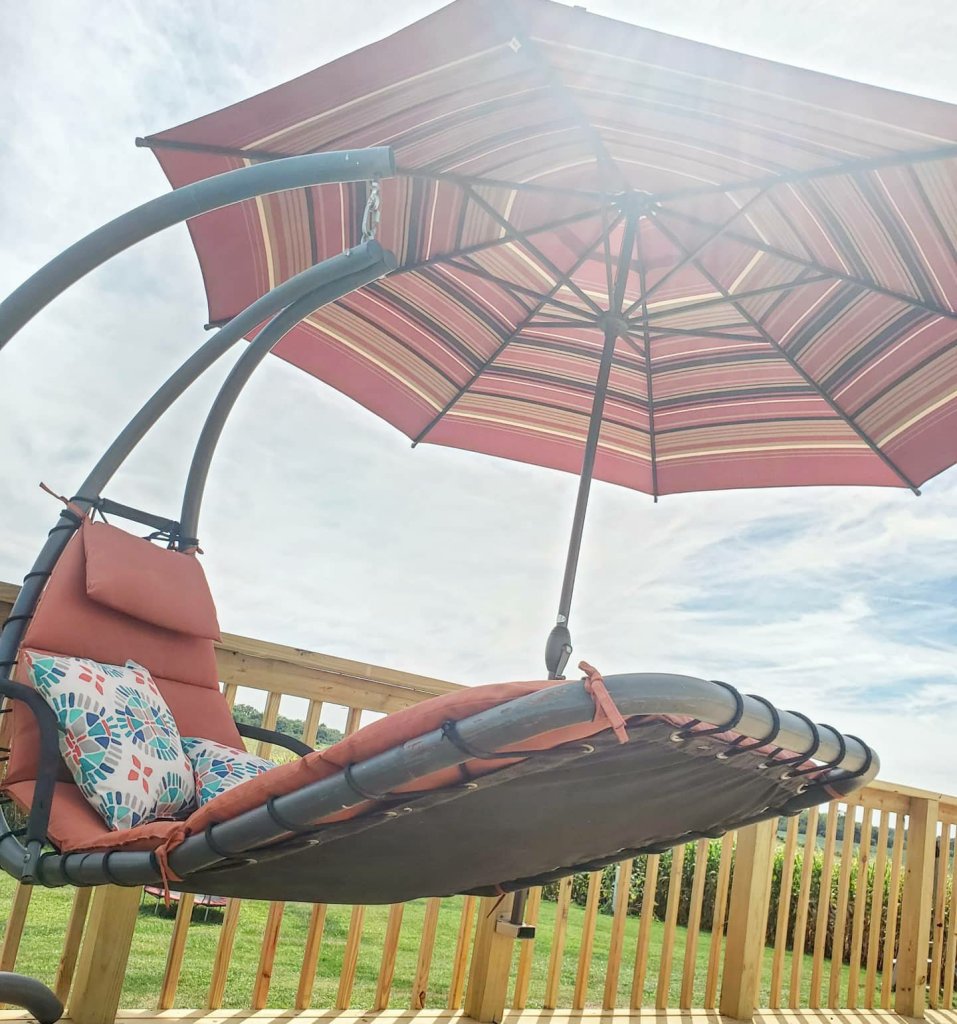
One thing that was super important to us when adding the deck was having some shade, as we have very little from the one small existing tree.
My favorite umbrellas?! From Abba Patio! (You can use code La10 on your order with them too!) The 11 foot red stripe is gorgeous! And so easy to use. We custom installed it with brackets we made, but it can go on a table or a base as well. This keep it so much cooler in the shaded areas!!

Next I need to find some outdoor rugs to tie in the different areas. Suggestions?? I’m being so indecisive!
Also, looking for an outdoor sectional. Maybe a hot tub?! 😜
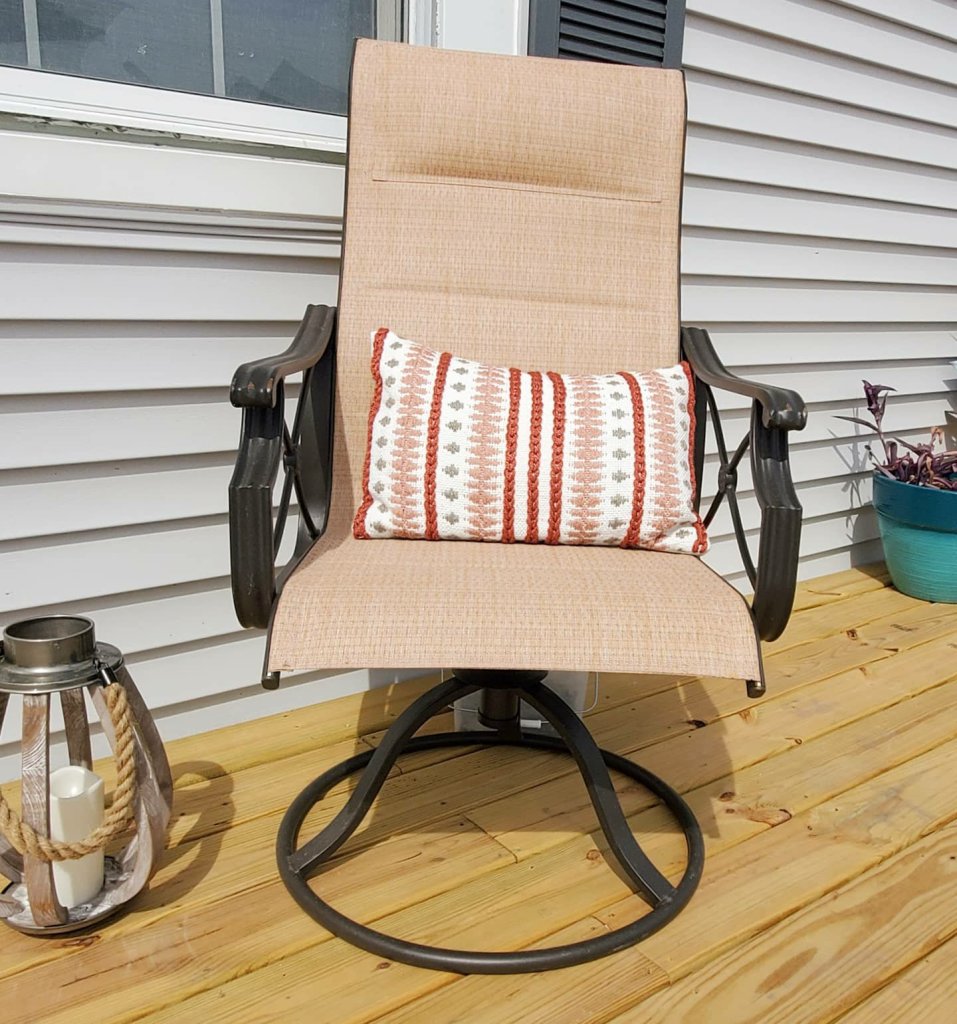
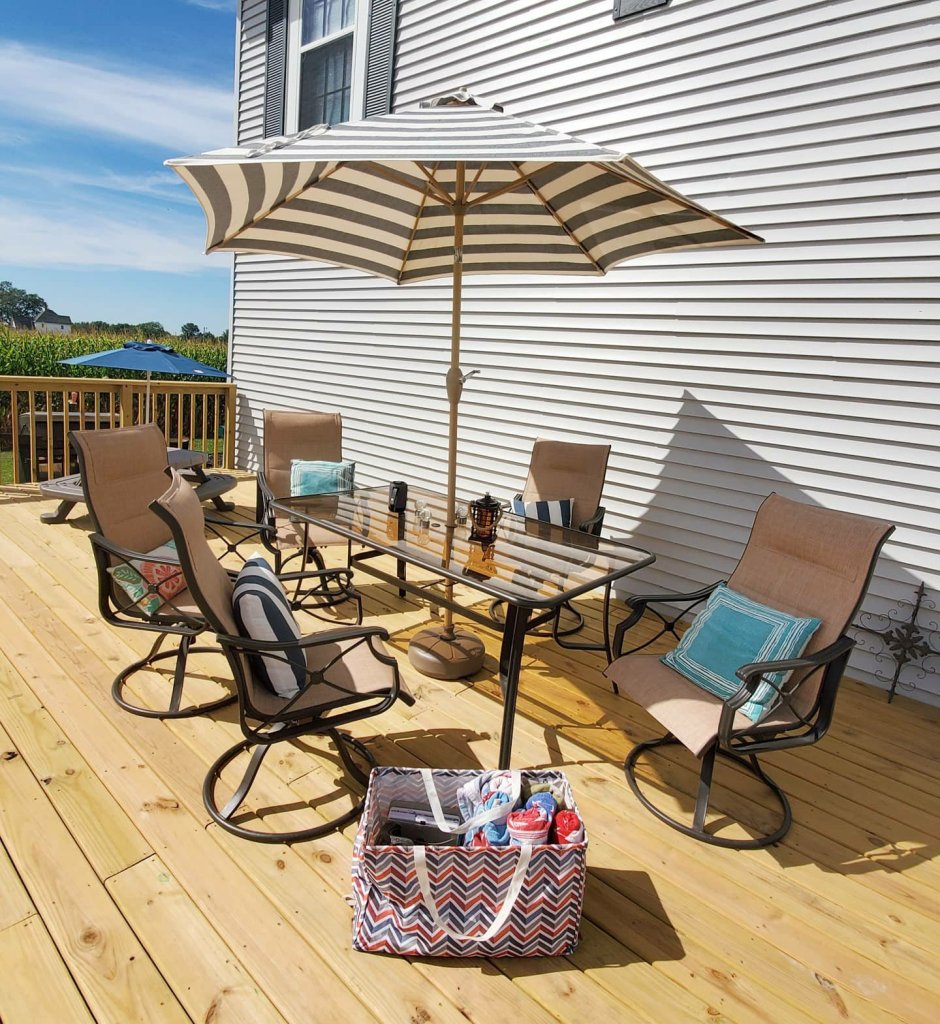
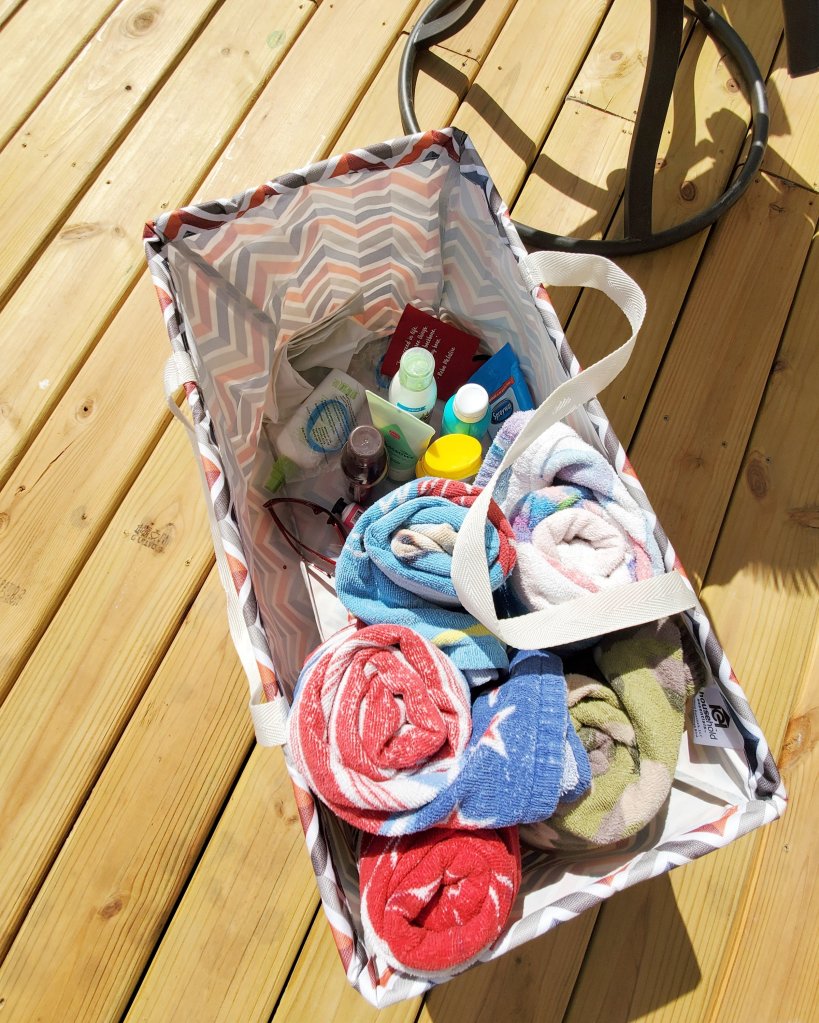
The table and chairs are from Menards. The wood lantern is from Walmart, along with the orange striped pillow and turquoise planters. The beach bag below is from Amazon.

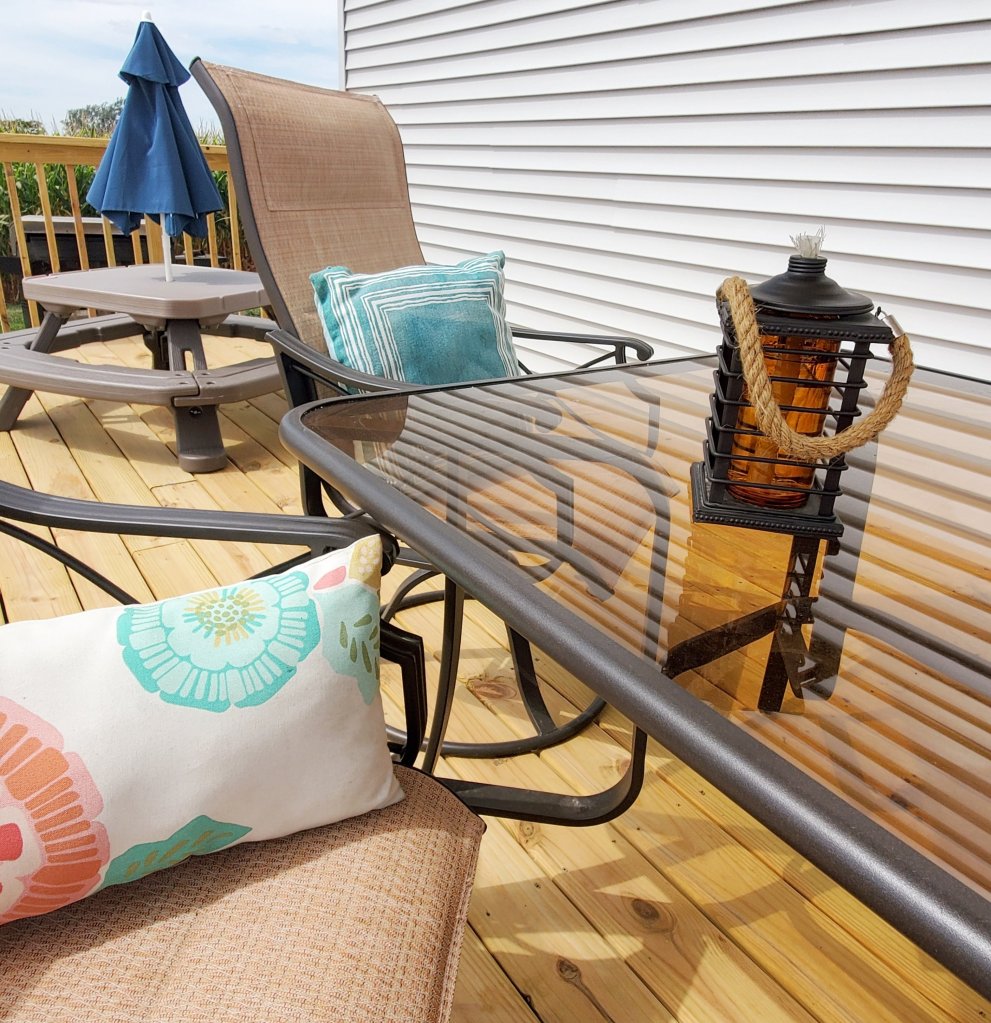
The kids table is Step 2 and an awesome thing to have if you have littles. We use it all the time!
Tip- use a beach bag or tote like the one below to hold your deck or patio essentials. We take it in at night and bring out each day. Super helpful to keep things corralled while not getting ruined being left outside. We keep sunscreen, bug spray, santizer, sunglasses, beach towels, a speaker, and anything we want for the day inside. So handy!!
XX,
Jess
Why I Love My Cricut
This is a sponsored post written by me on behalf of <a href=”Cricuthttps://lnk2.io/wjcWg2L”>Cricut</a>. All opinions are 100% mine.
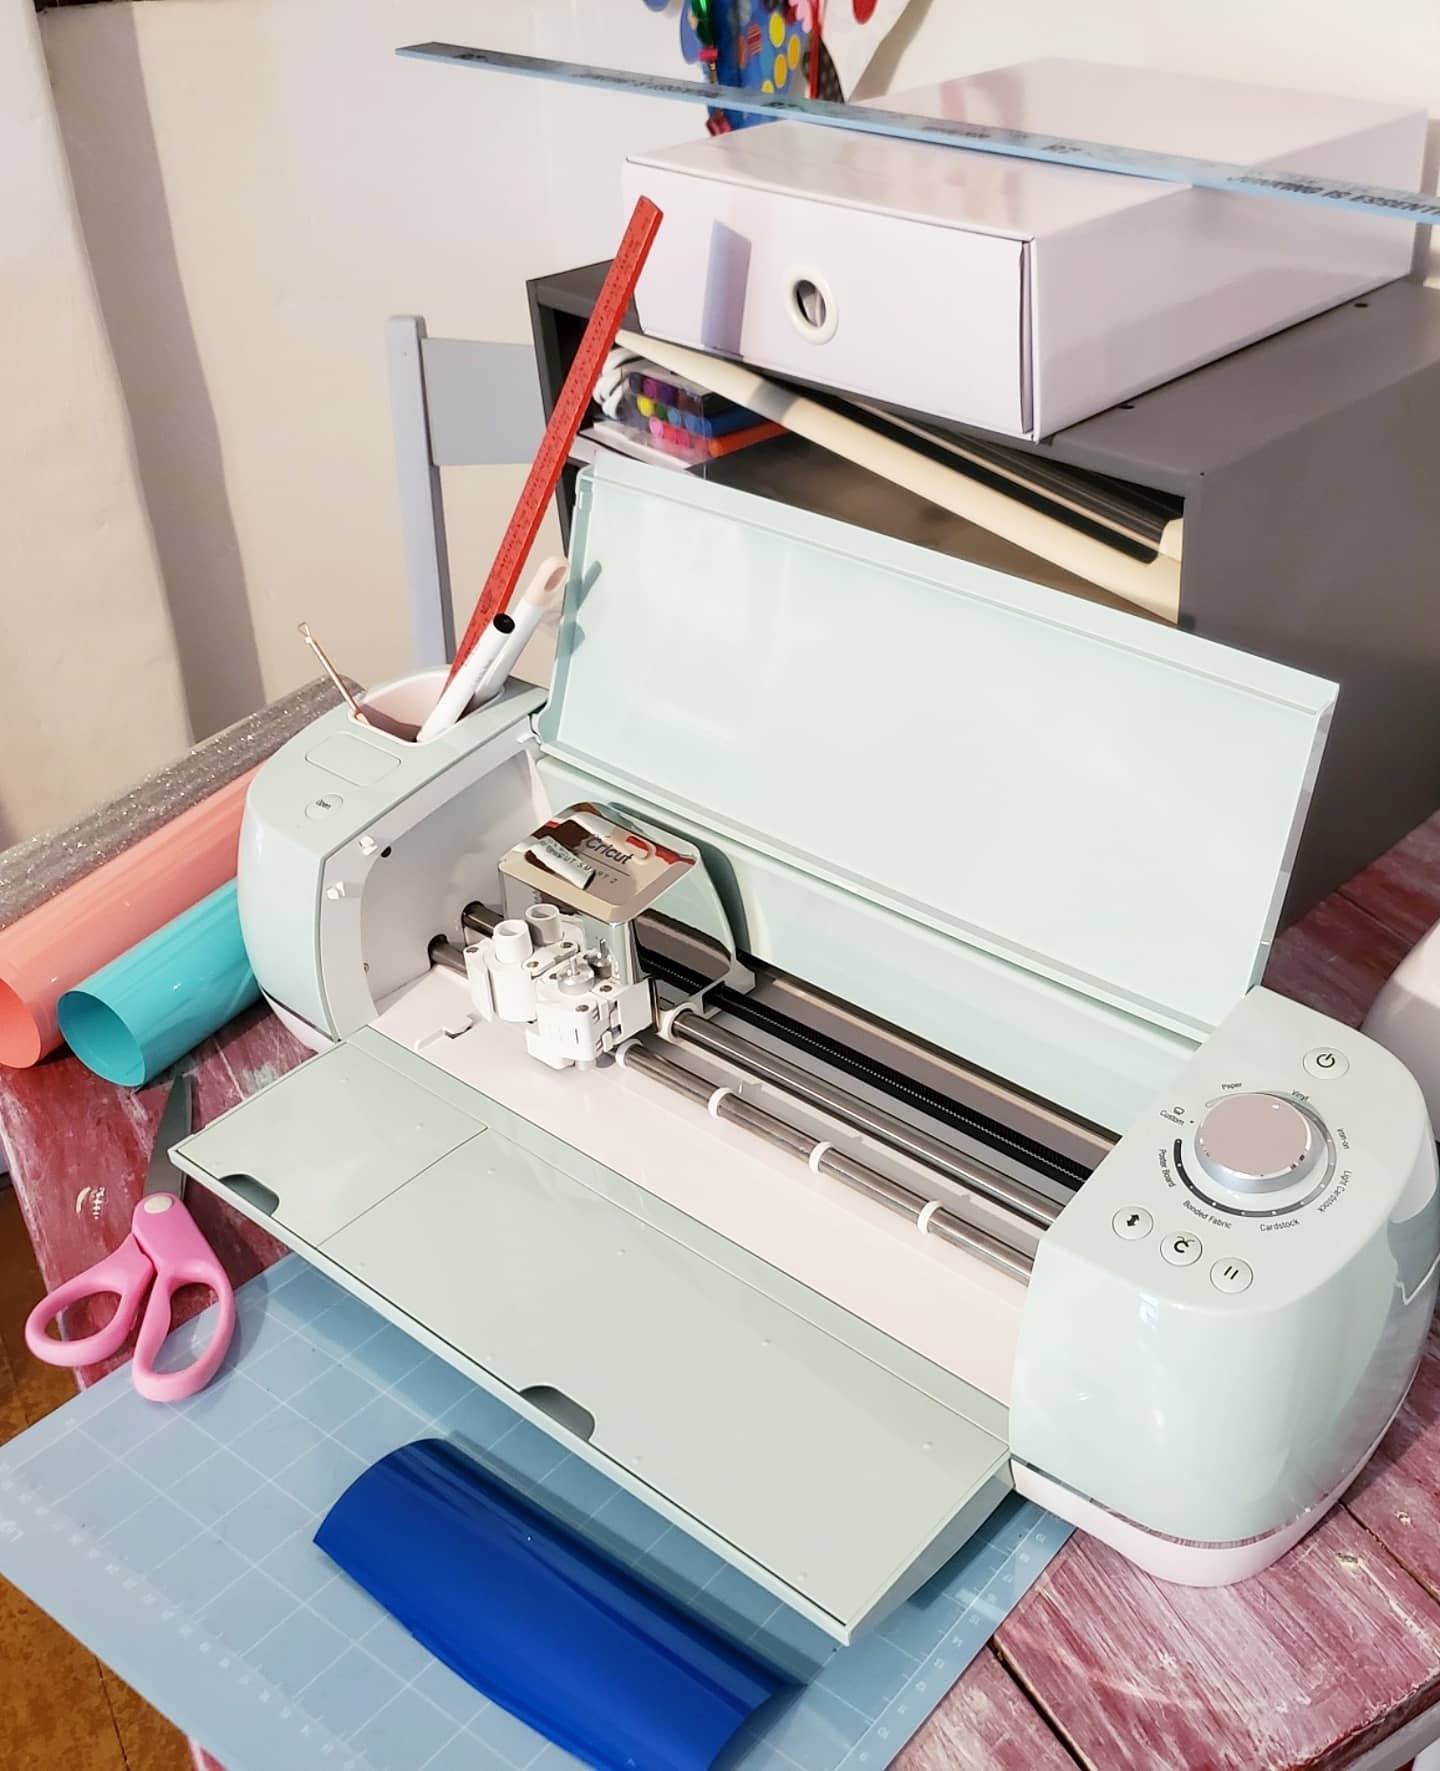
I have had my Cricut Explore Air 2 for a few months now, and to say I’m in love is an understatement! I’ve always been a crafter, but this things really helps me step up my game! Here I am going to talk about the 5 things that I love about my Cricut!
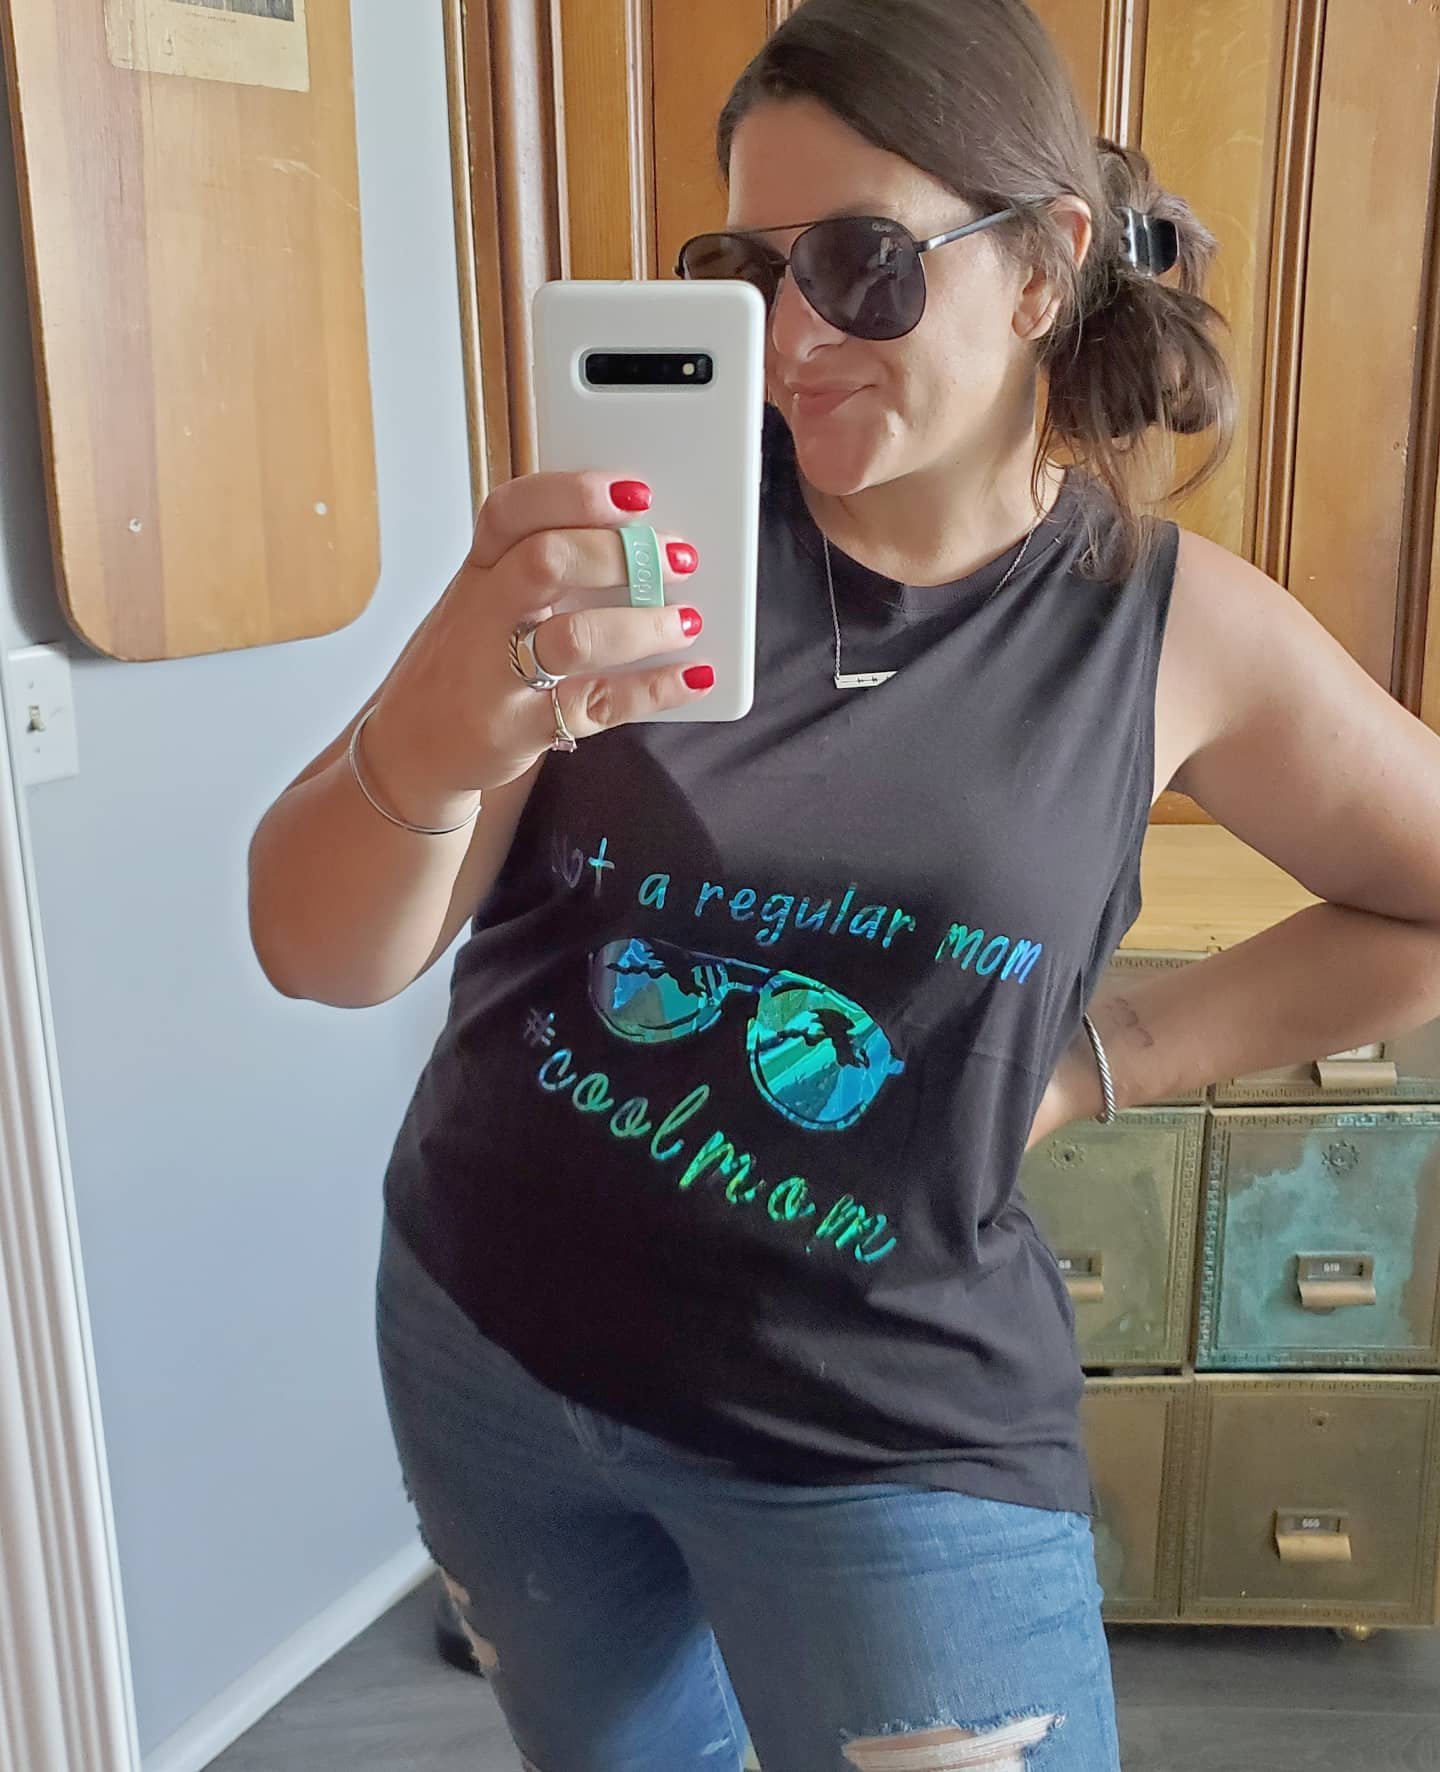
1. Its easy to use! I was truly shocked at how easy this machine is! Not going to lie, I was intimidated at first. I worried where to start and if I would be able to figure it all out. Yup. I was. Best place to start? Pick a project and jump in. They really mean it when they say their motto is “beginners luck every time.” I learn tricks and get braver each time I use my machine, but I definitely agree that picking a beginner level project and diving in head first is a great way to start and will prove to you how easy it is! Check out this shirt I made as one of my very first projects:
2. Support! That brings me to the second thing I love about my Cricut. Its like having a whole community of creators to support you. Have a question? Worried about where to begin or which type of project to do? They’ve got an answer! Not only does Cricut have a team you can email or chat with, but they have numerous pages where you can reach out to their pros or other crafters with tons of experience. They’ve all started somewhere and learned lots and are at the ready to make sure you love your machine and projects. I would know. I wasn’t sure how to customize the design I wanted to make myself for this bag, and the Facebook page group had almost immediate answers for me!

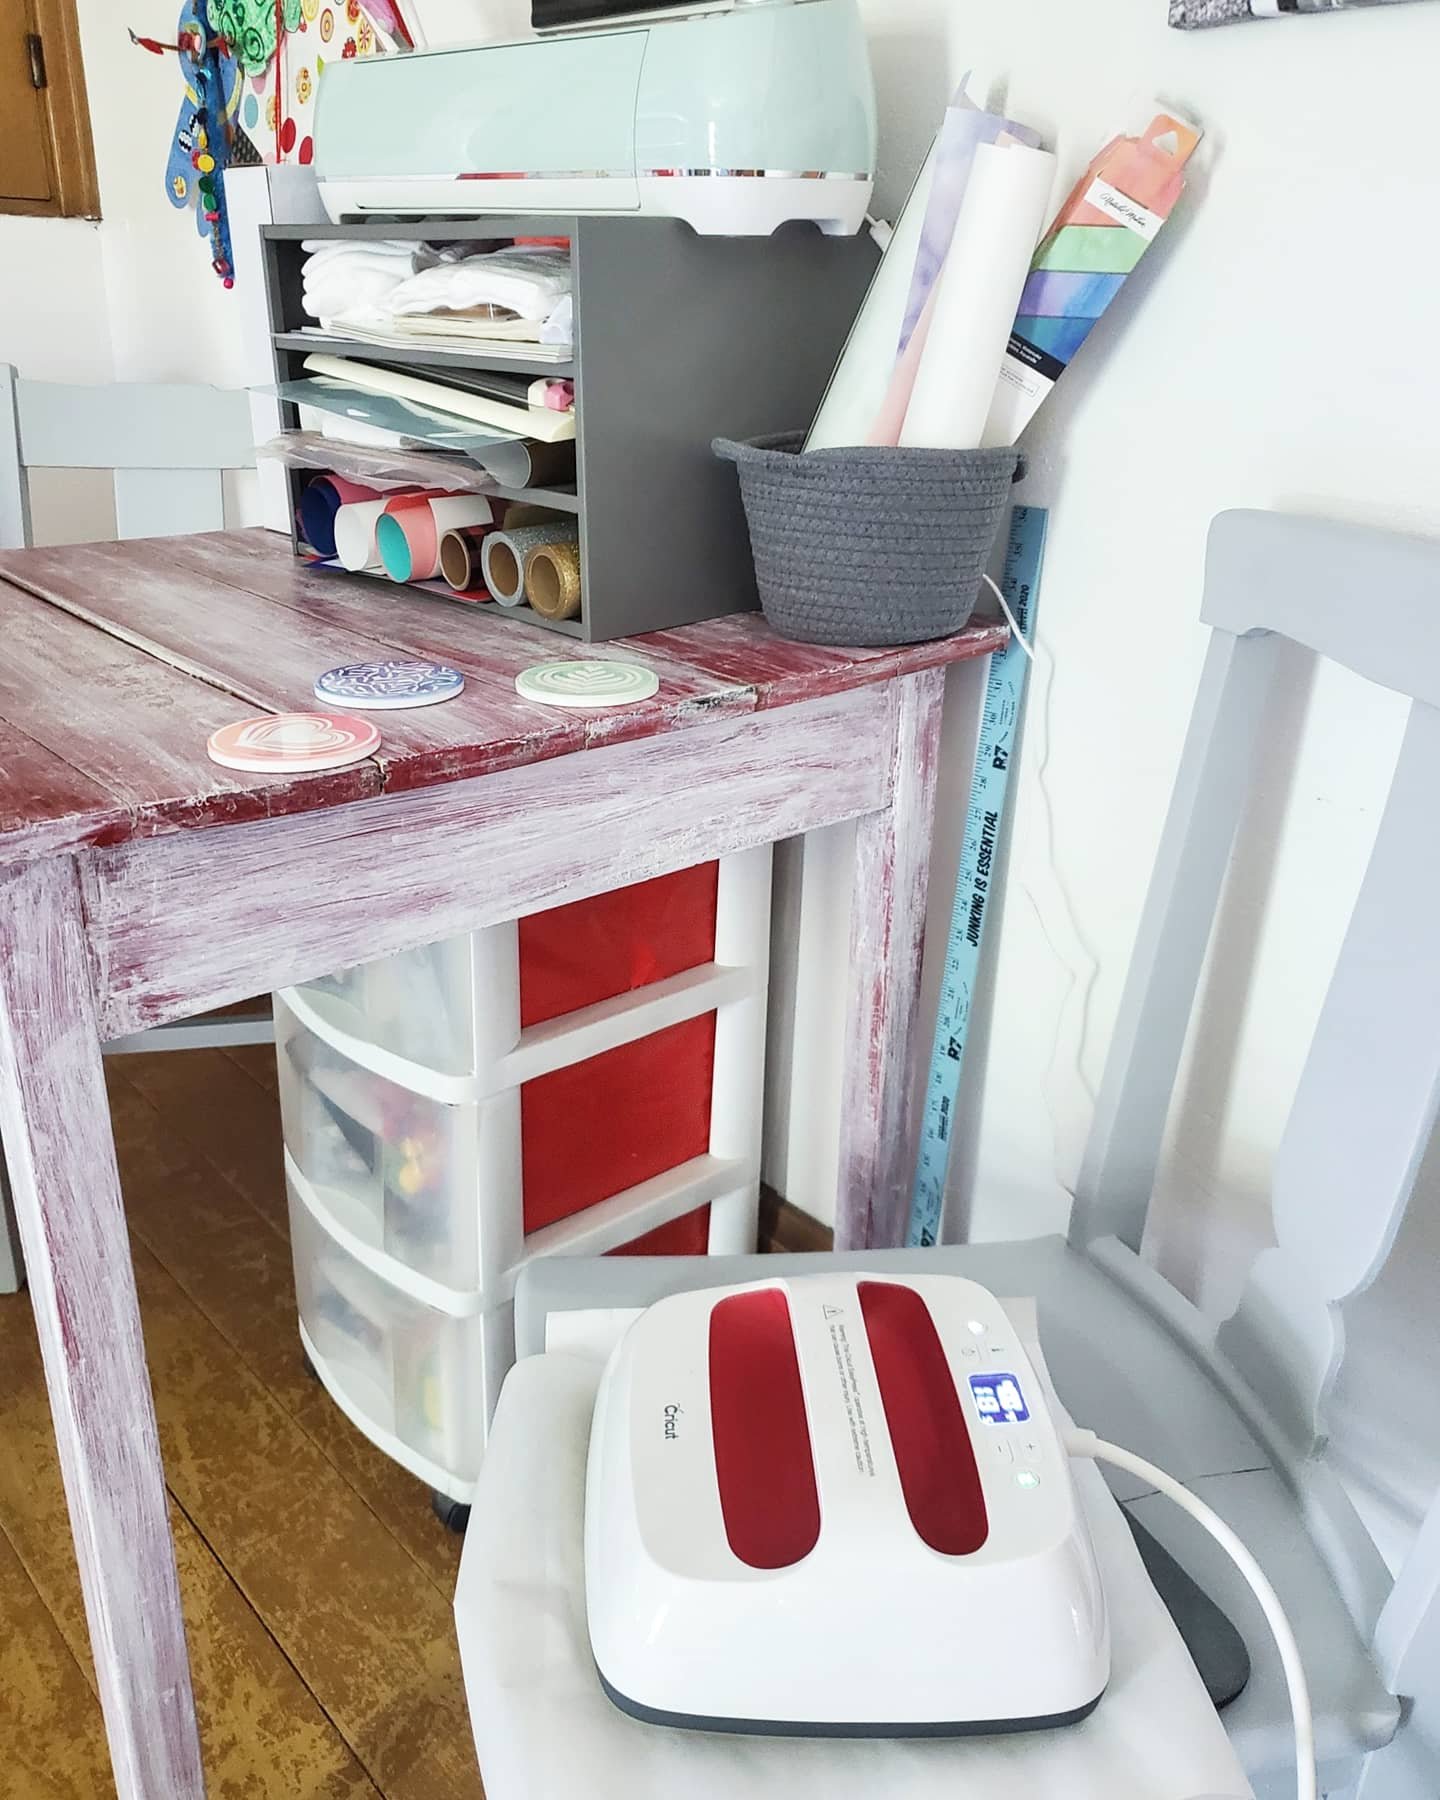
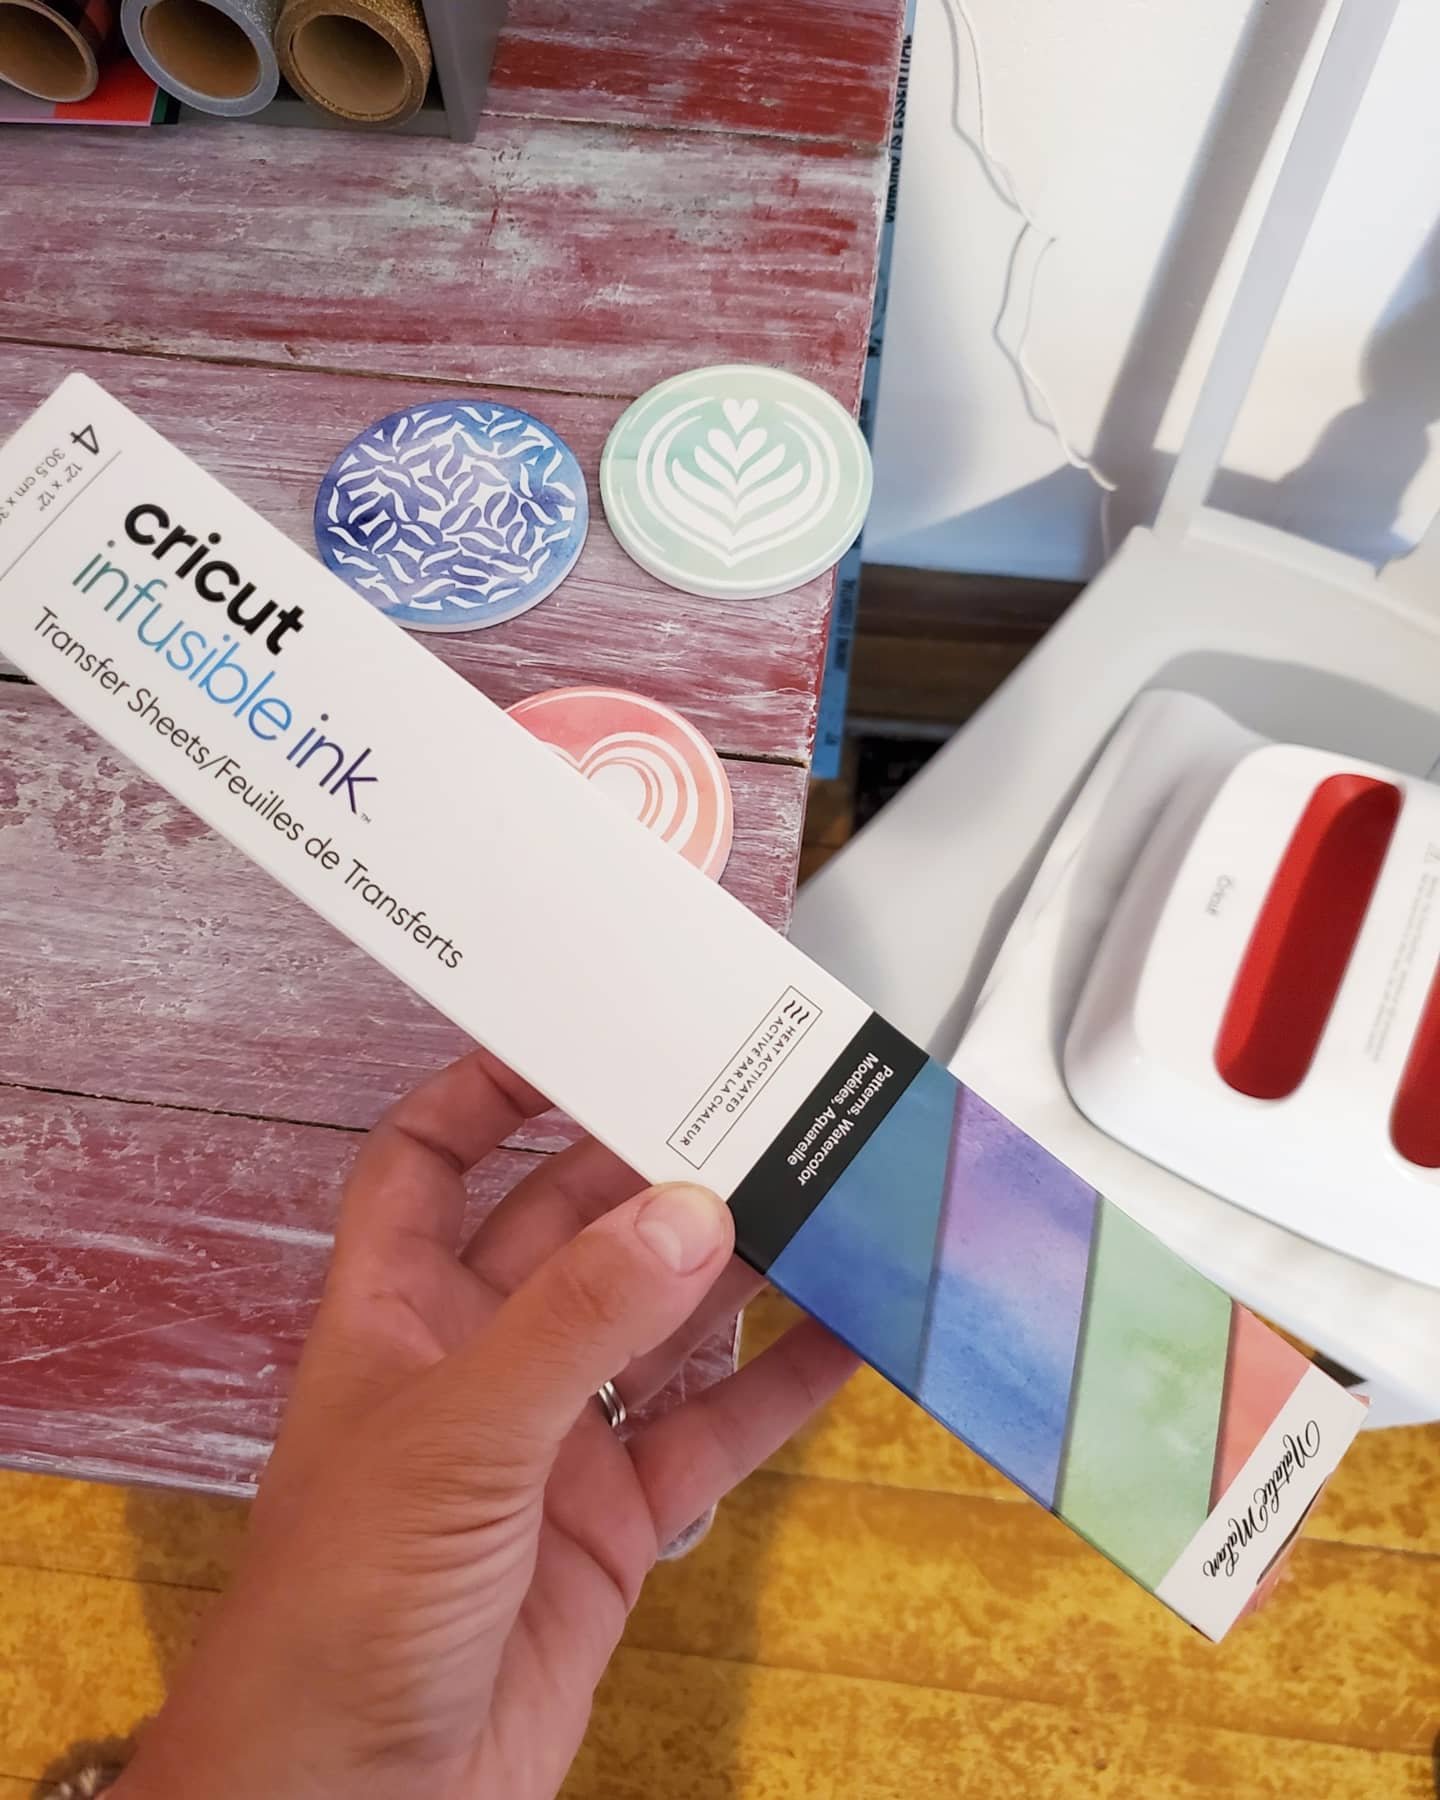
3. Ideas! This also leads me to another thing I love about Cricut, the ideas! I never worry about having a creative block. There’s no way. The ideas of projects to make are endless, for every single occasion you cak dream of. Really. You can find ideas galore on Pinterest, and Instagram, or Cricuts’s Facebook page. And my favorite place for inspiration? The Cricut emails! They send seasonal emails showing the new ideas and templates added to Design Space, their app for making. How did I know about the new infusible ink and coaster blanks to make these? One of their idea emails! Light bulb!

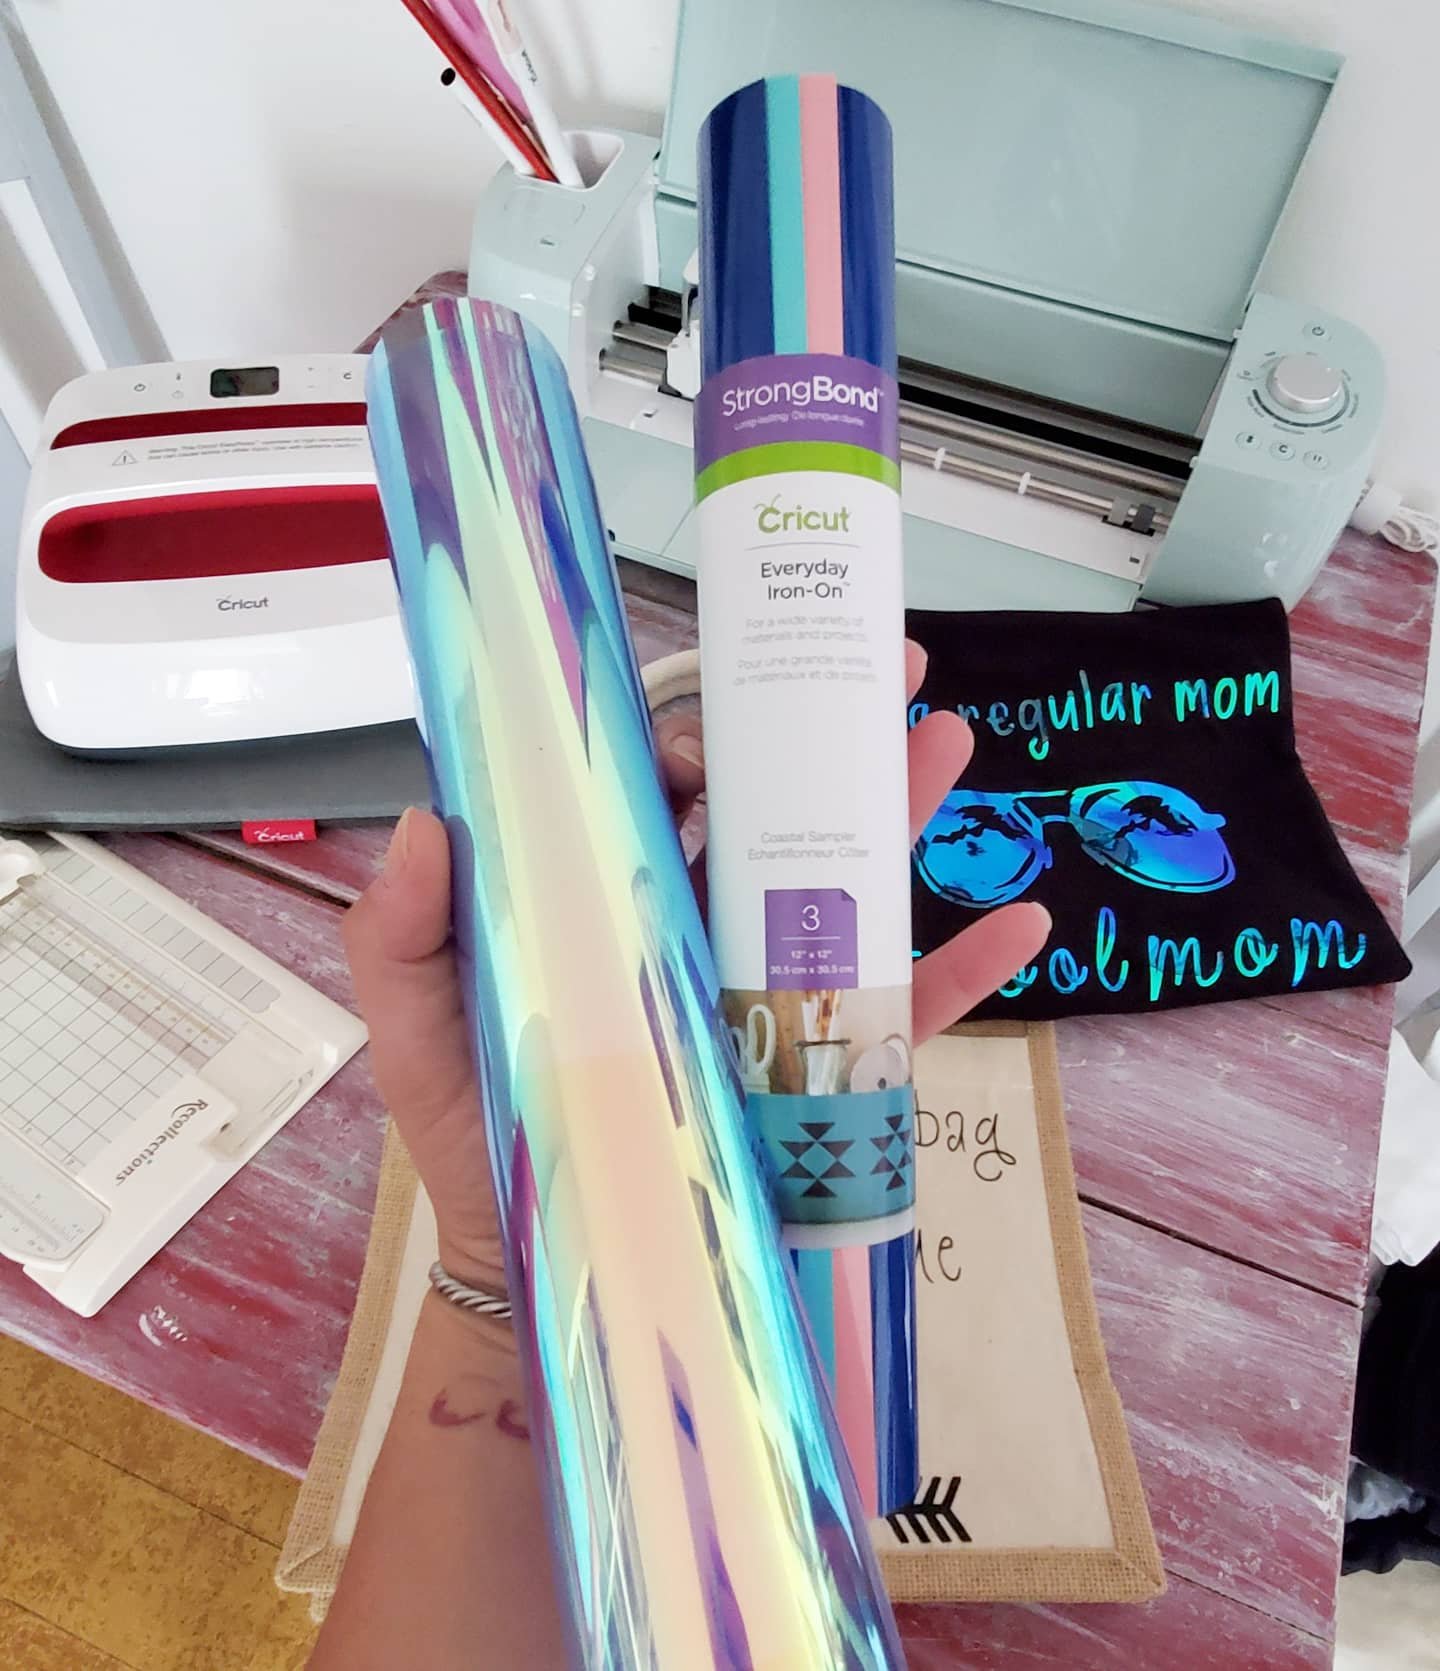
4. The options! Got a bright idea to make? You can! And Cricut can help you do it! The options they supply for you is endless. Or almost. Not only do they help with the ideas, but they make it easy to find all of the supplies you need to make visions come to fruition. They have coasters, bags, shirts, materials, pens, markers, vinyls, decals, iron ons, and the widest variety of patterns in their supplies you could imagine! Sparkles, holographics, leopard, wood grain…their possibilities are never ending! Not to mention, cricut has other machines like the EasyPress, and tools like mats, cutters, Nd weeders, to make all of the options come to life!

5. Capabilities! This machine not only cuts paper and vinyls. I was shocked to learn what all it really can do. Like blown away. It can cut leather, poster board, felt, fabric and even wood. But it doesn’t just cut, it can score. And it can draw! Yup! Shocked?! Me too. You can insert pens and markers into the blade holder and it can draw or write, making handmade cards, letters, signs… mind blown.
The capabilities combined with the Cricut options alone shows you that the possibilities are truly endless. I cannot wait to do another project every time I finish one! And now all of my gifts will be one of a kind made by yours truly!
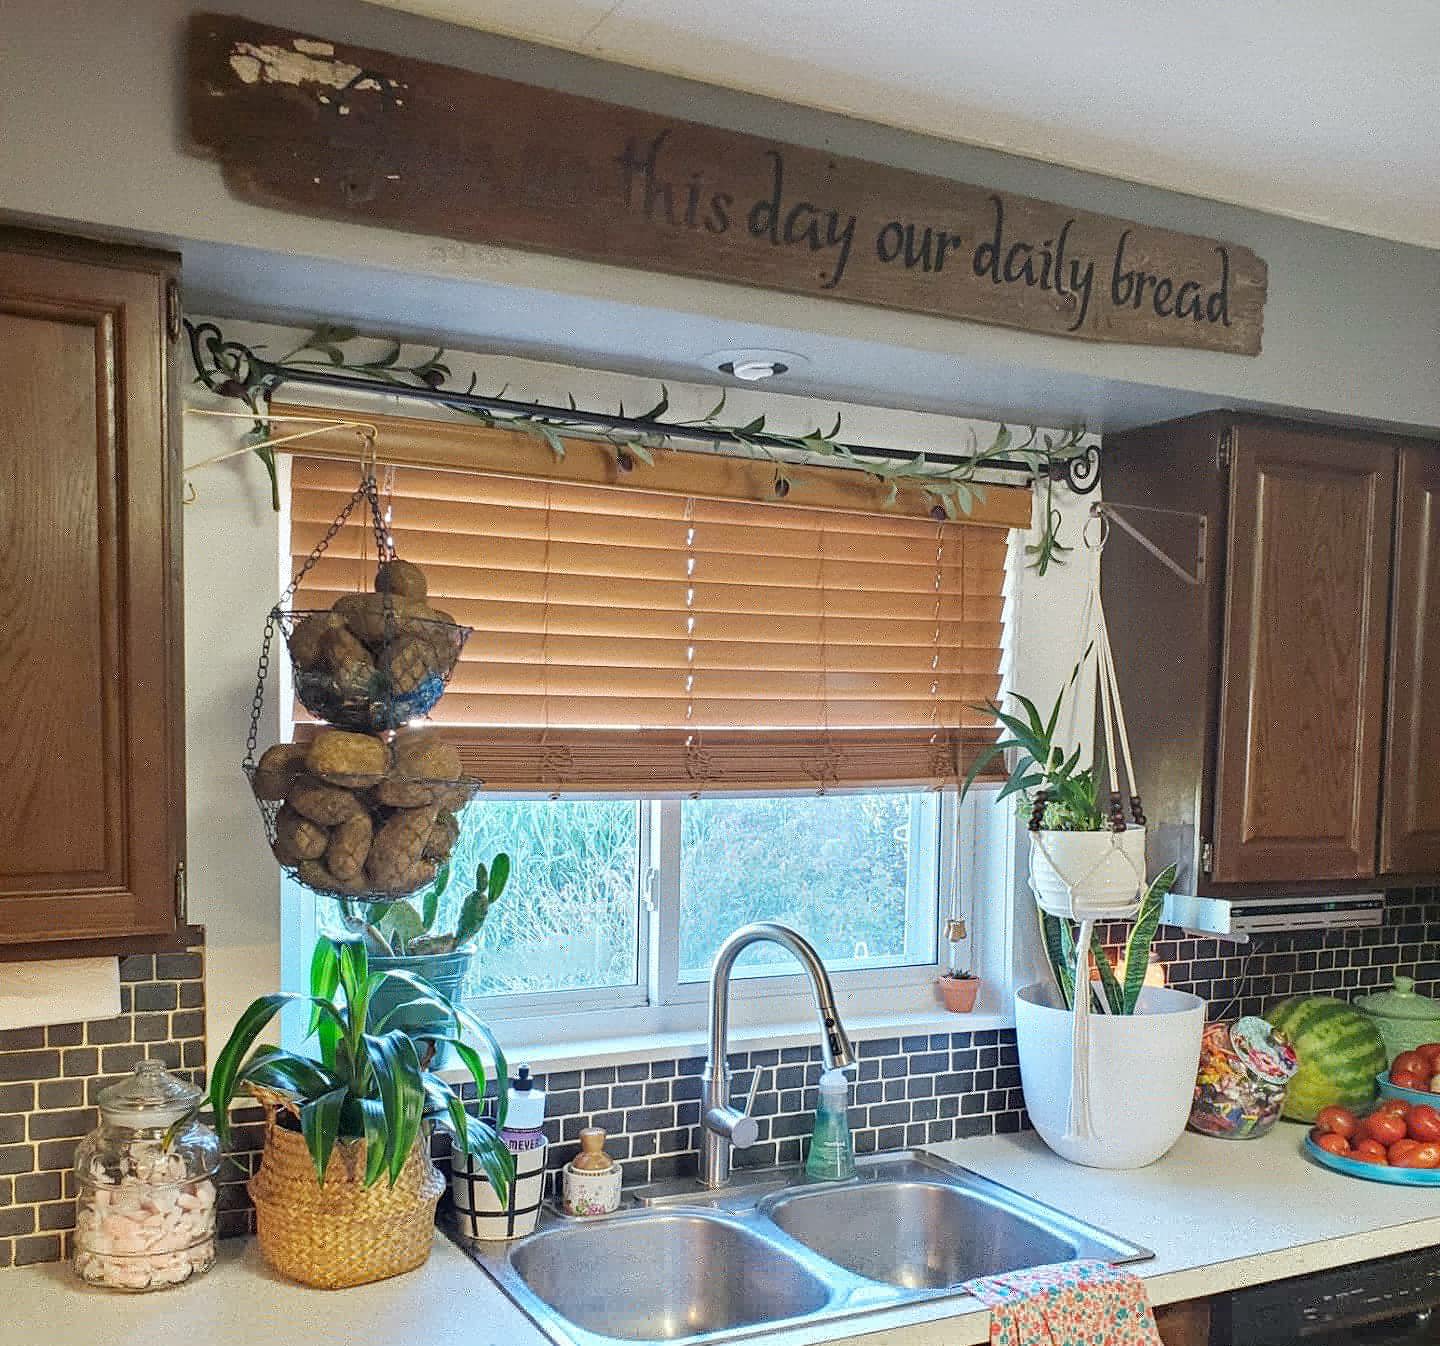
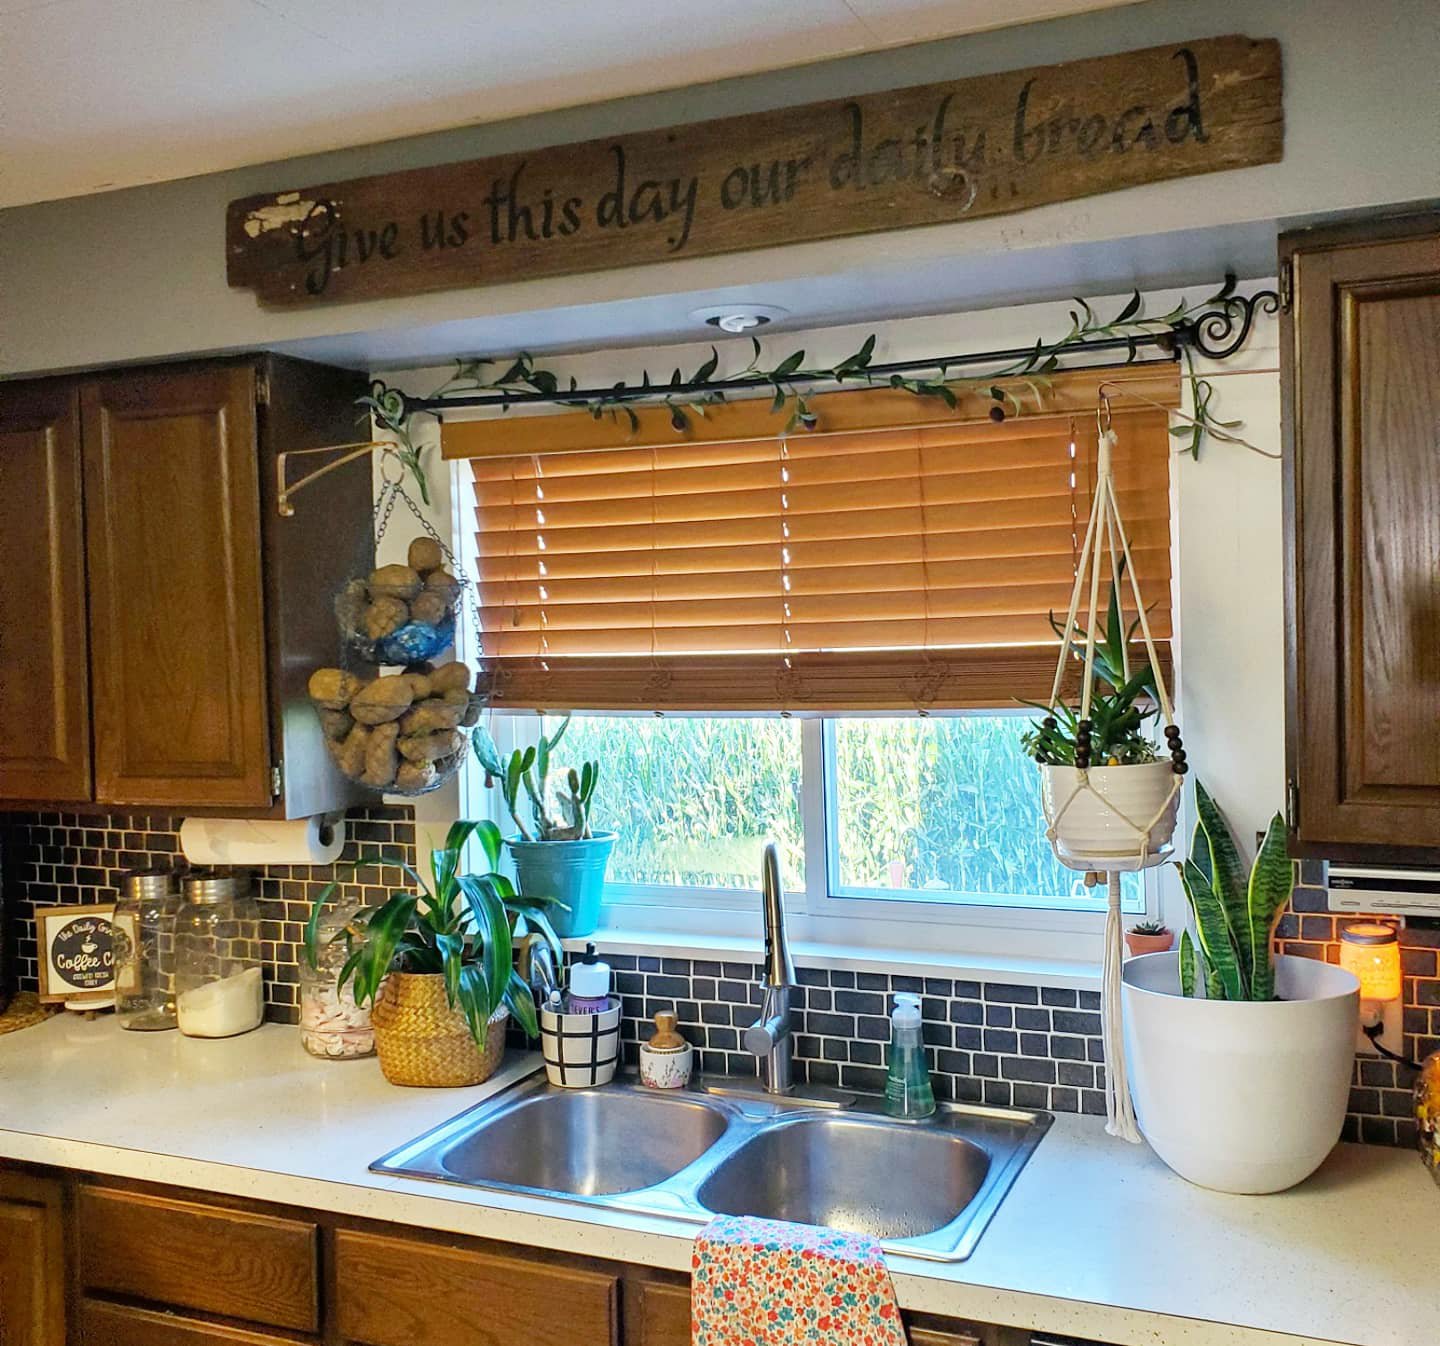
Here’s a quick breakdown of my latest project, a sign for our kitchen.
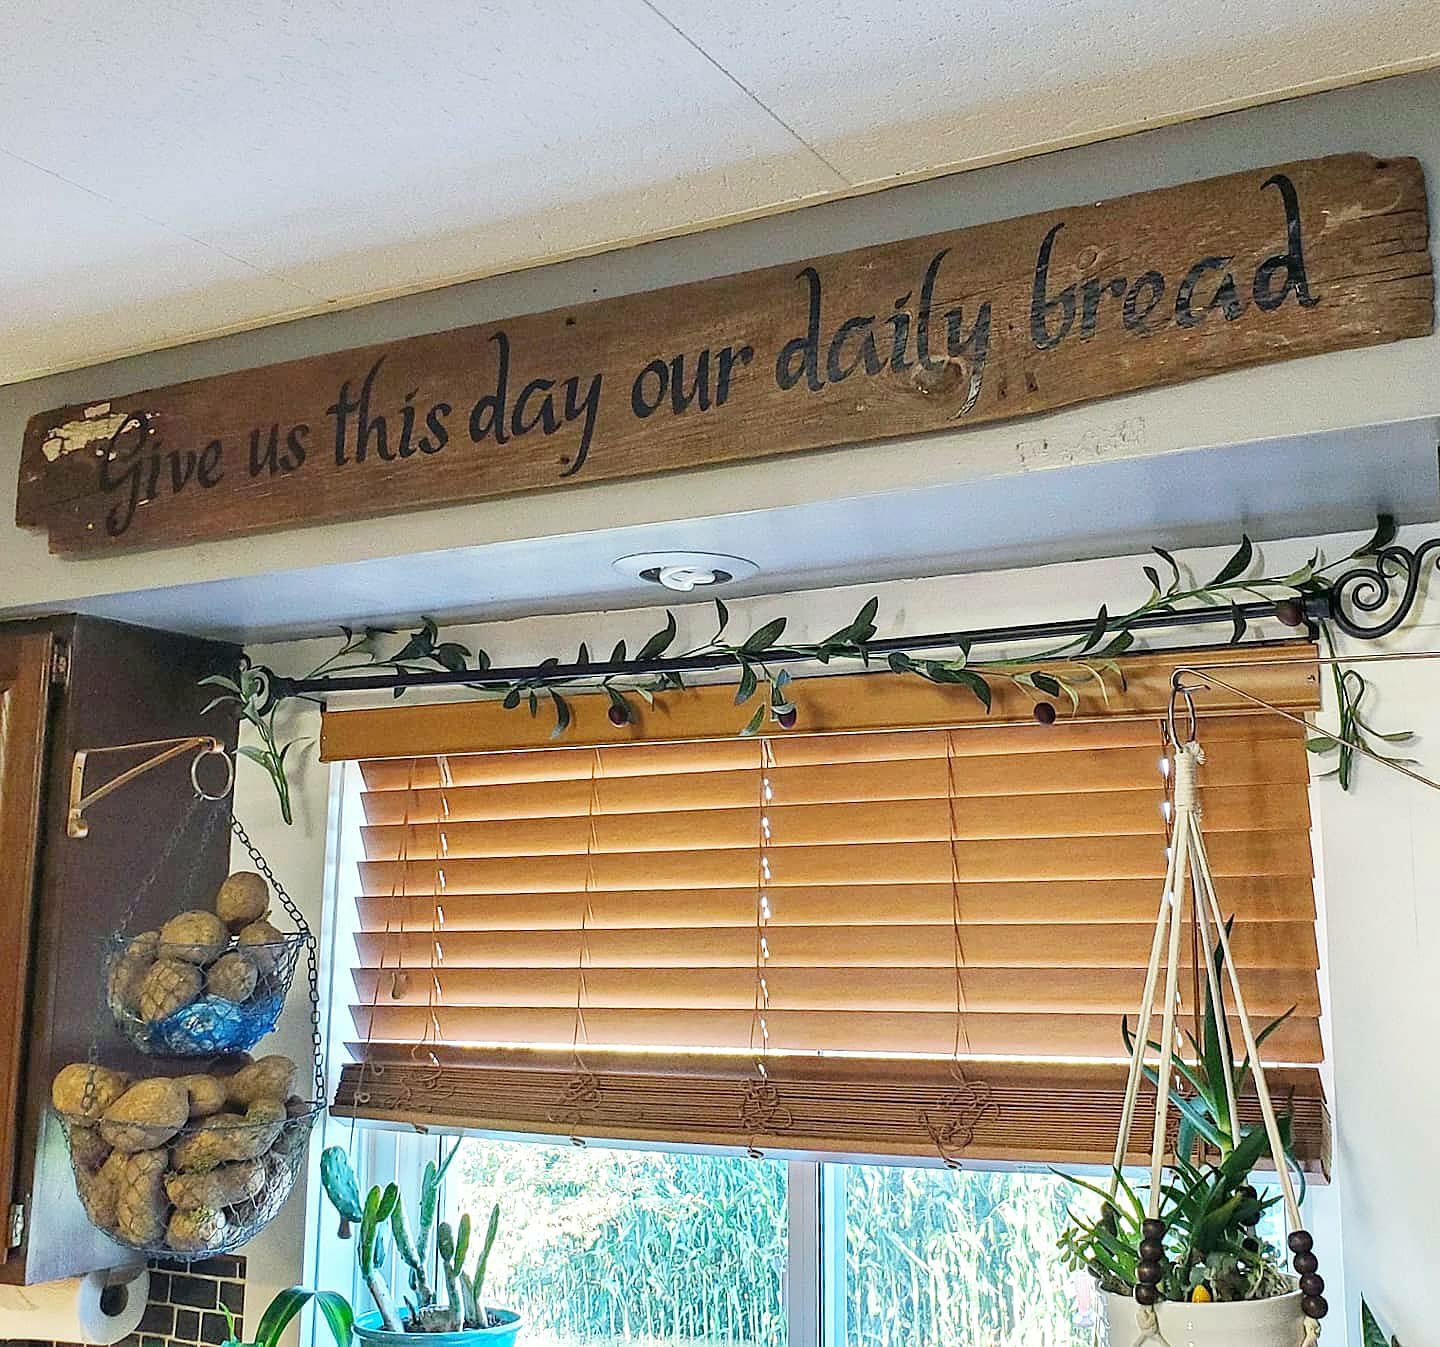
Choose a board and a quote. My board is a faded, chipped, barn board from our barn. (I’m sure to some the white paint left on one corner and the odd shape caused by years of cattle wear are not pretty, but we loved this board! 😉
Then, start on the Design Space app, and find my design template here. My board is 5ft long, but you can edit the design to adjust measurements. Once you send the design to the machine and it cuts it on vinyl, weed the excess pieces out. Use transfer tape to pick up your design and stick it down in place on your board. You could add flourishes to the ends of your quote too! You can change this design and even choose your own color vinyl. I used matte clear coat over the board to ensure no edges lift since I chose an old, rippled barn board for my project. Add a hanger or two on the back and hang. Easy peasy and a great one-of-a-kind, beginner-friendly project!
Have questions? Need help or ideas? Just ask! 😘
XX,
Jess
The Landing Strip
A landing strip, a command center, the drop spot. No matter what you call it, every house should have one. It’s a place for all the family “stuff”.
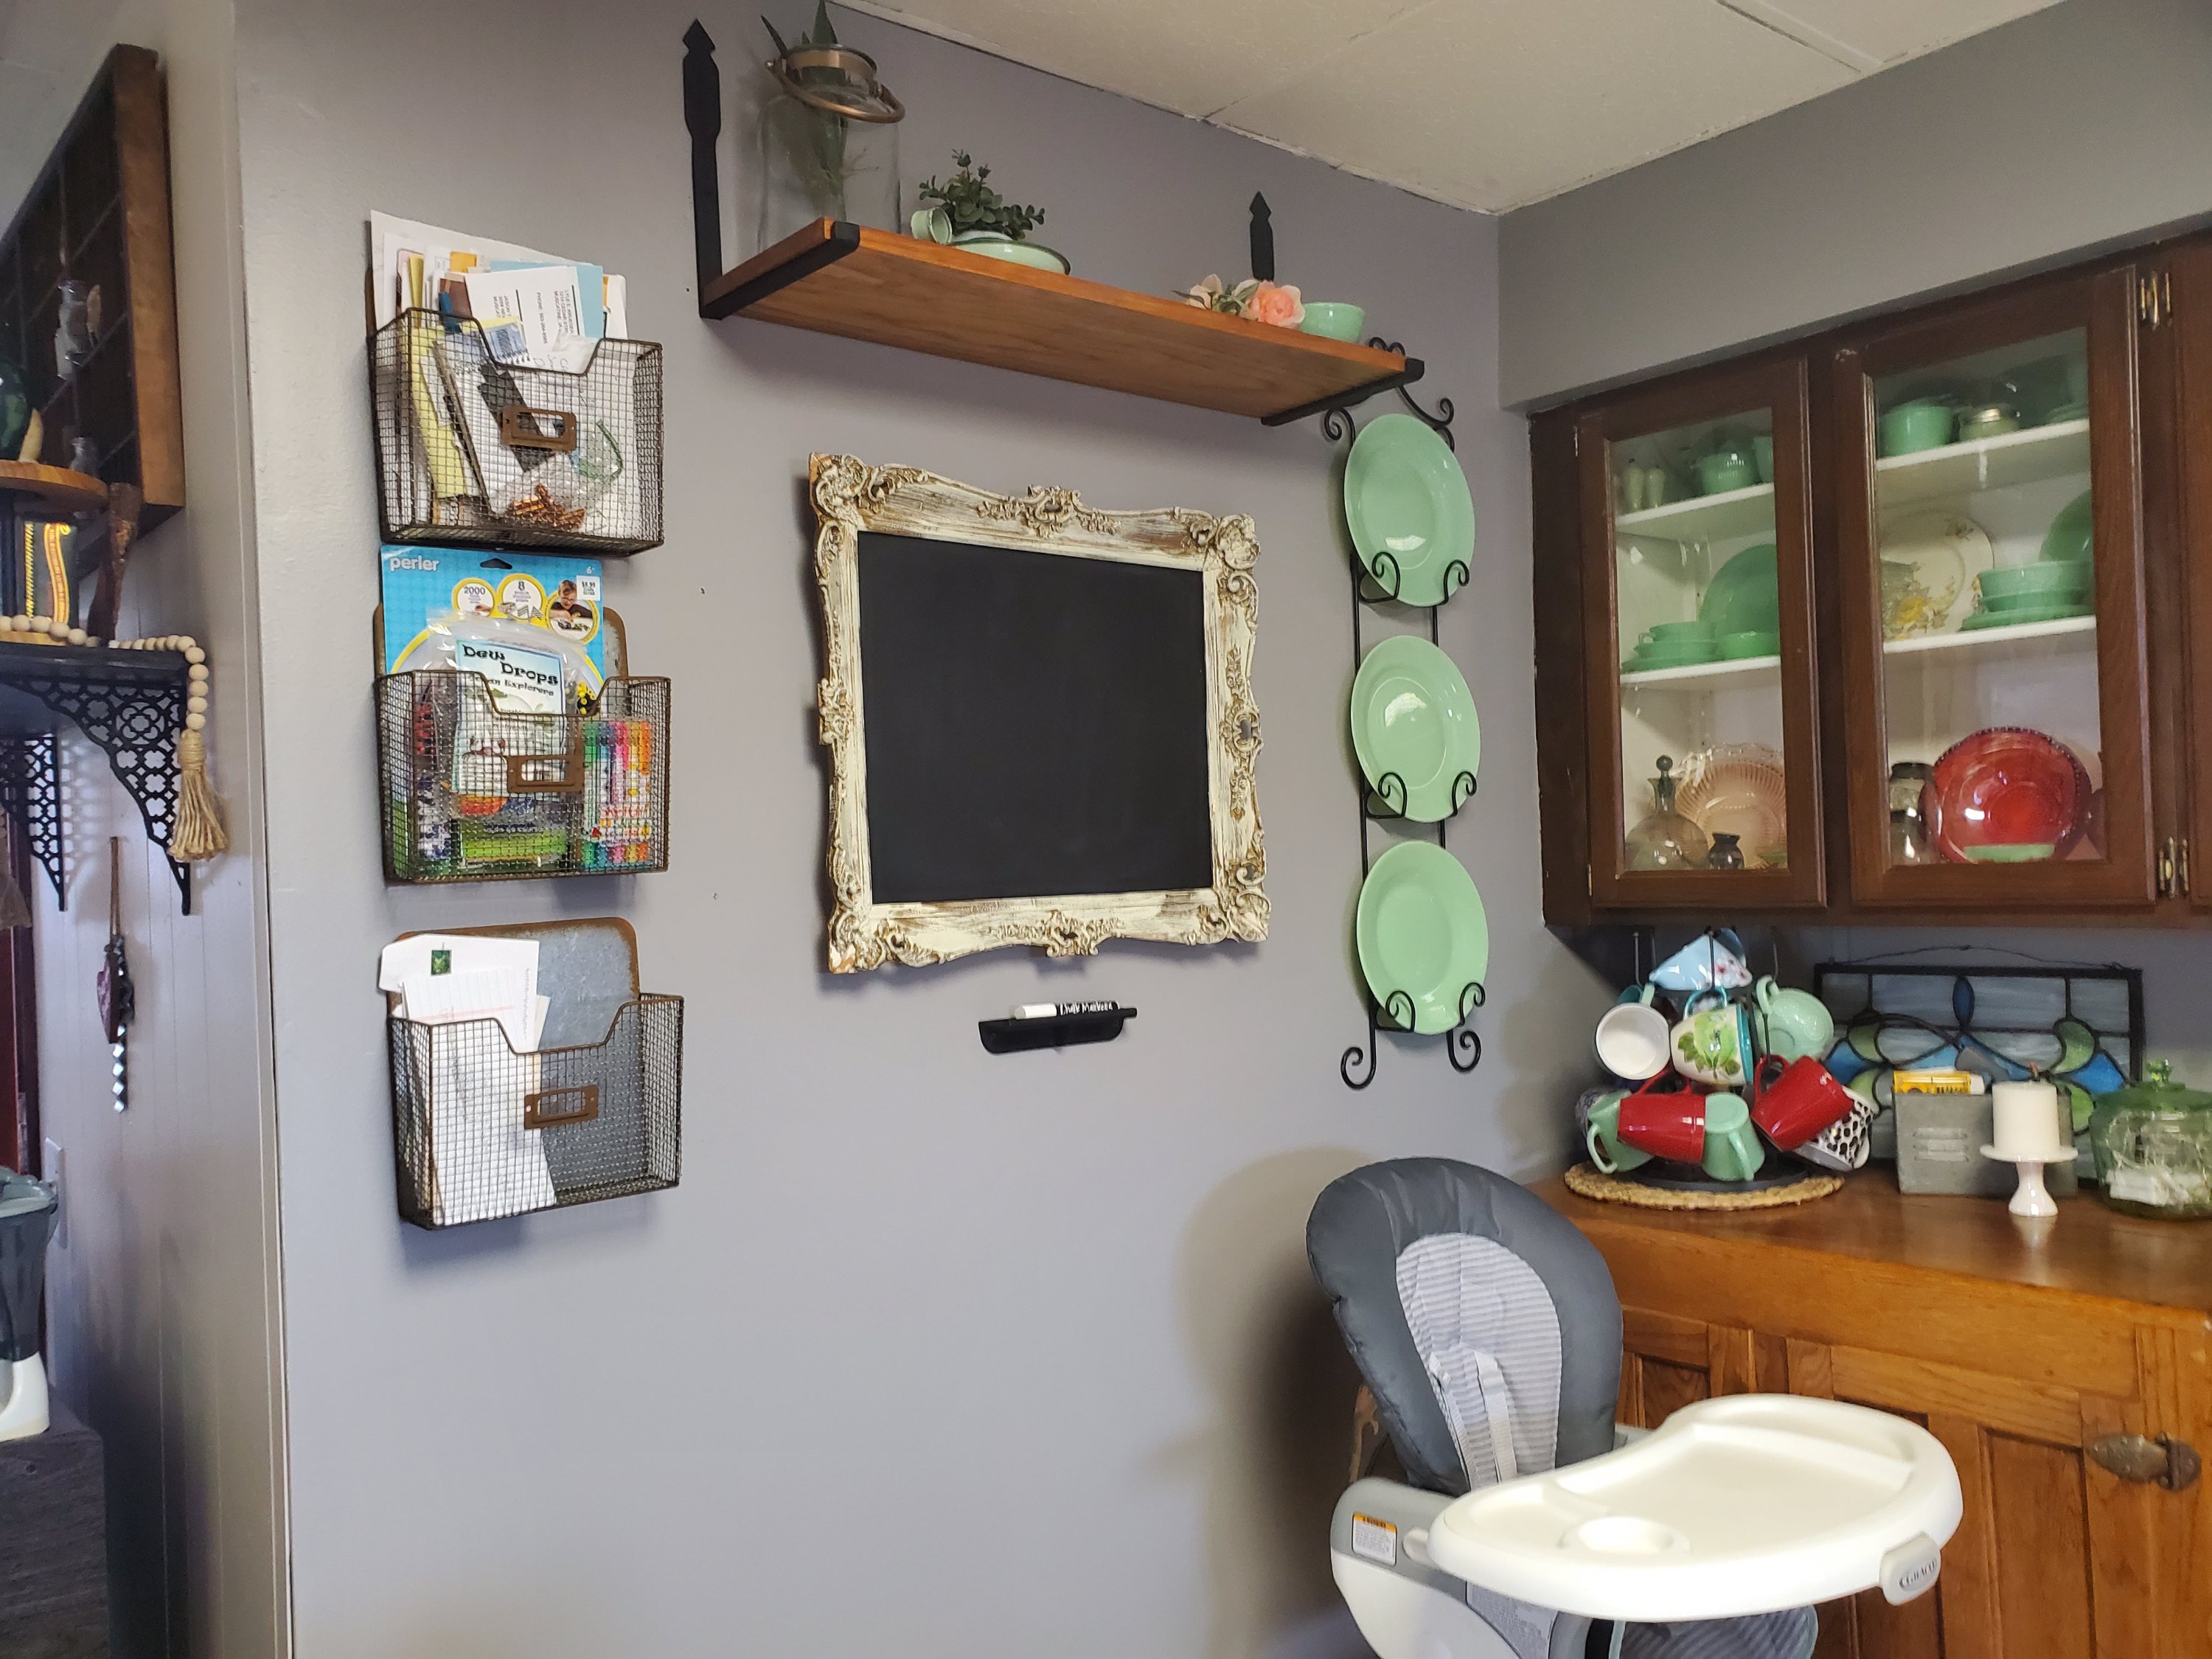
I call it a landing strip. In this house we actually have it split up a little, but it’s whatever works for you! When you come in our backdoor, we have hooks for each family member. Bag and coat go there. There’s a little hook station for car keys. And we have a small rack holding bug spray, sunscreen, sunglasses, wireless speaker, etc. But there’s still other “stuff” that accumulates. What do you do with it?! Enter our landing strip.
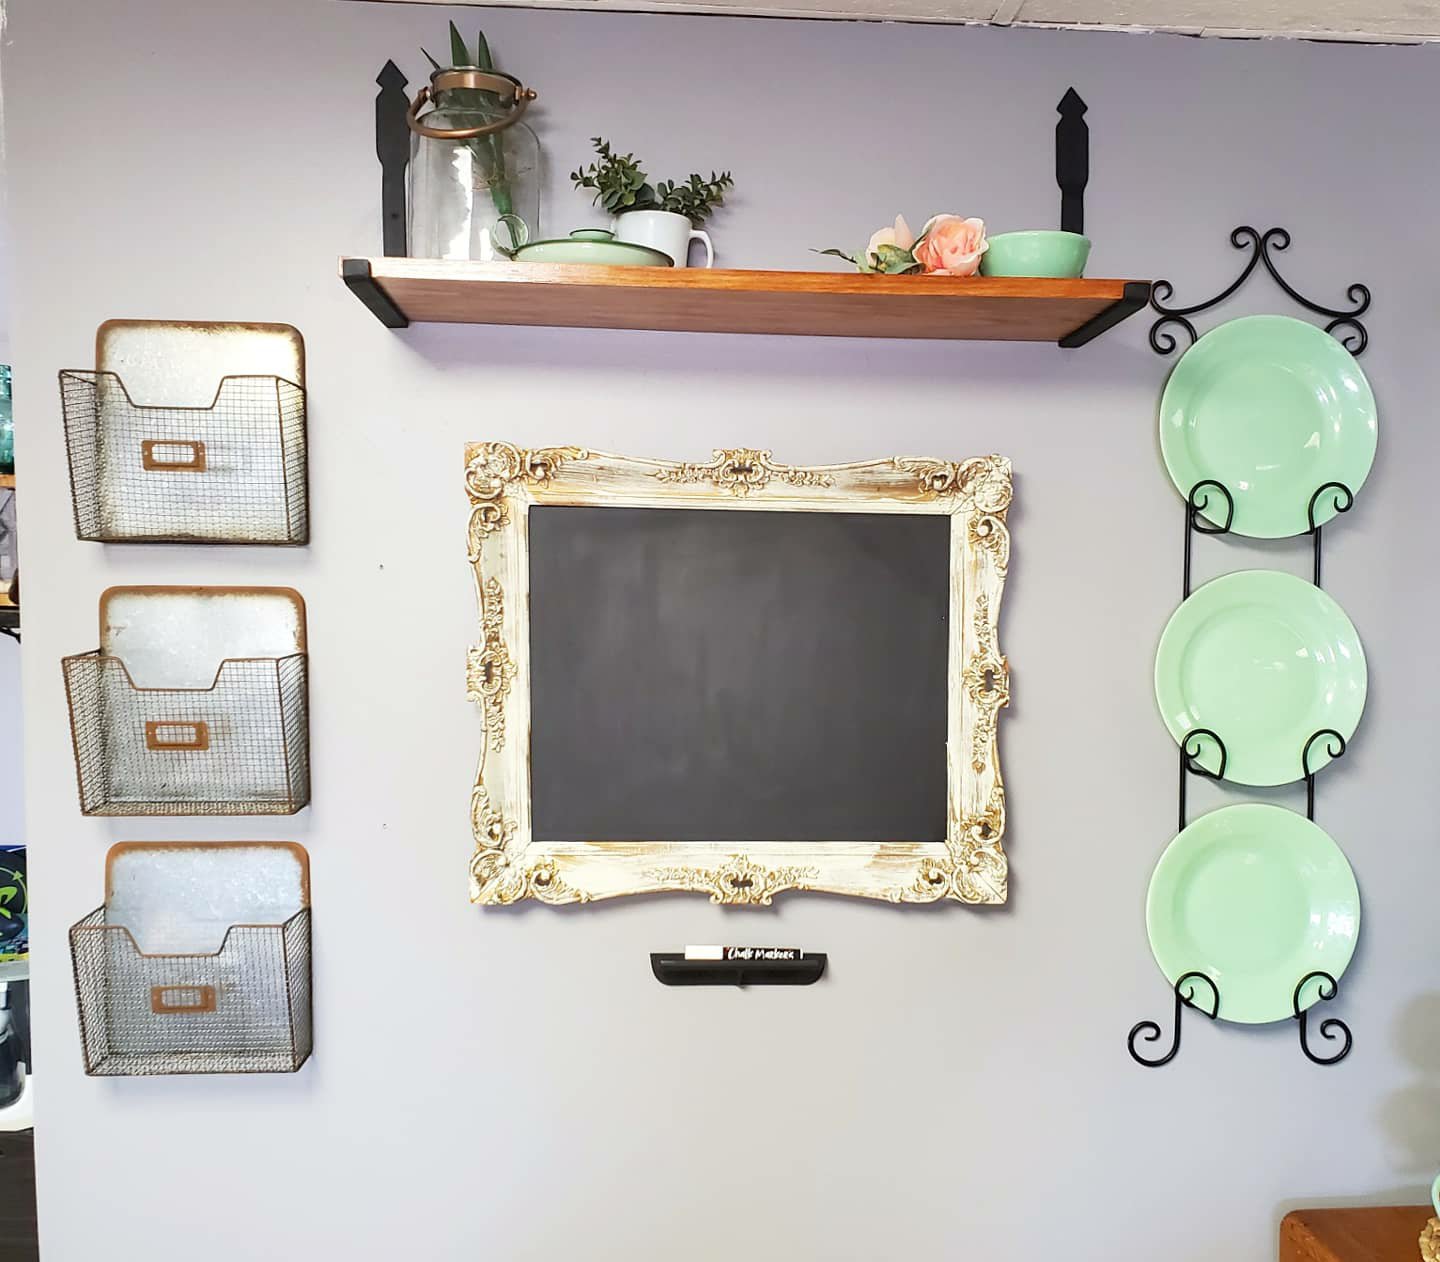
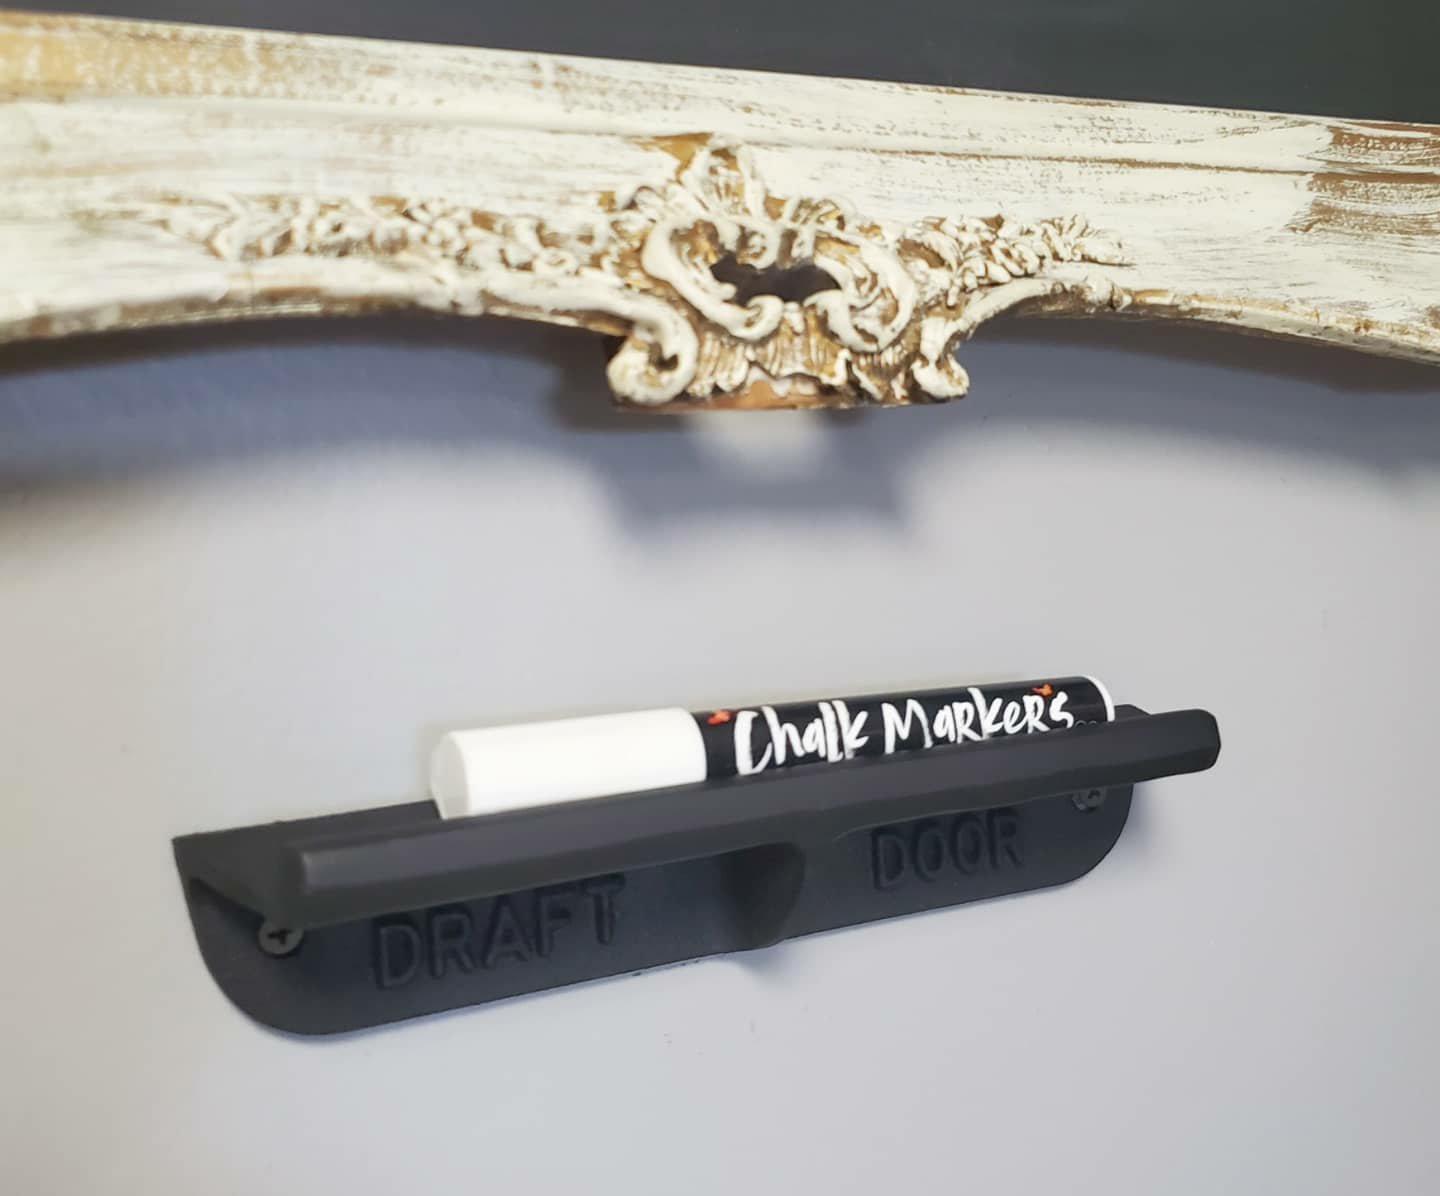
He we have a stash spot for everything else so that we stay organized and don’t lose important things! We use the chalk board for calendar notes and grocery lists. And each of the boys and mom and dad have a basket. We put bills in ours. The boys put homework and such in theirs. I keep a pen jar on the shelf. Here is stash stamps, a candle lighter, a marker, and pens. If you need more than that they you have to go upstairs to the office. 😆
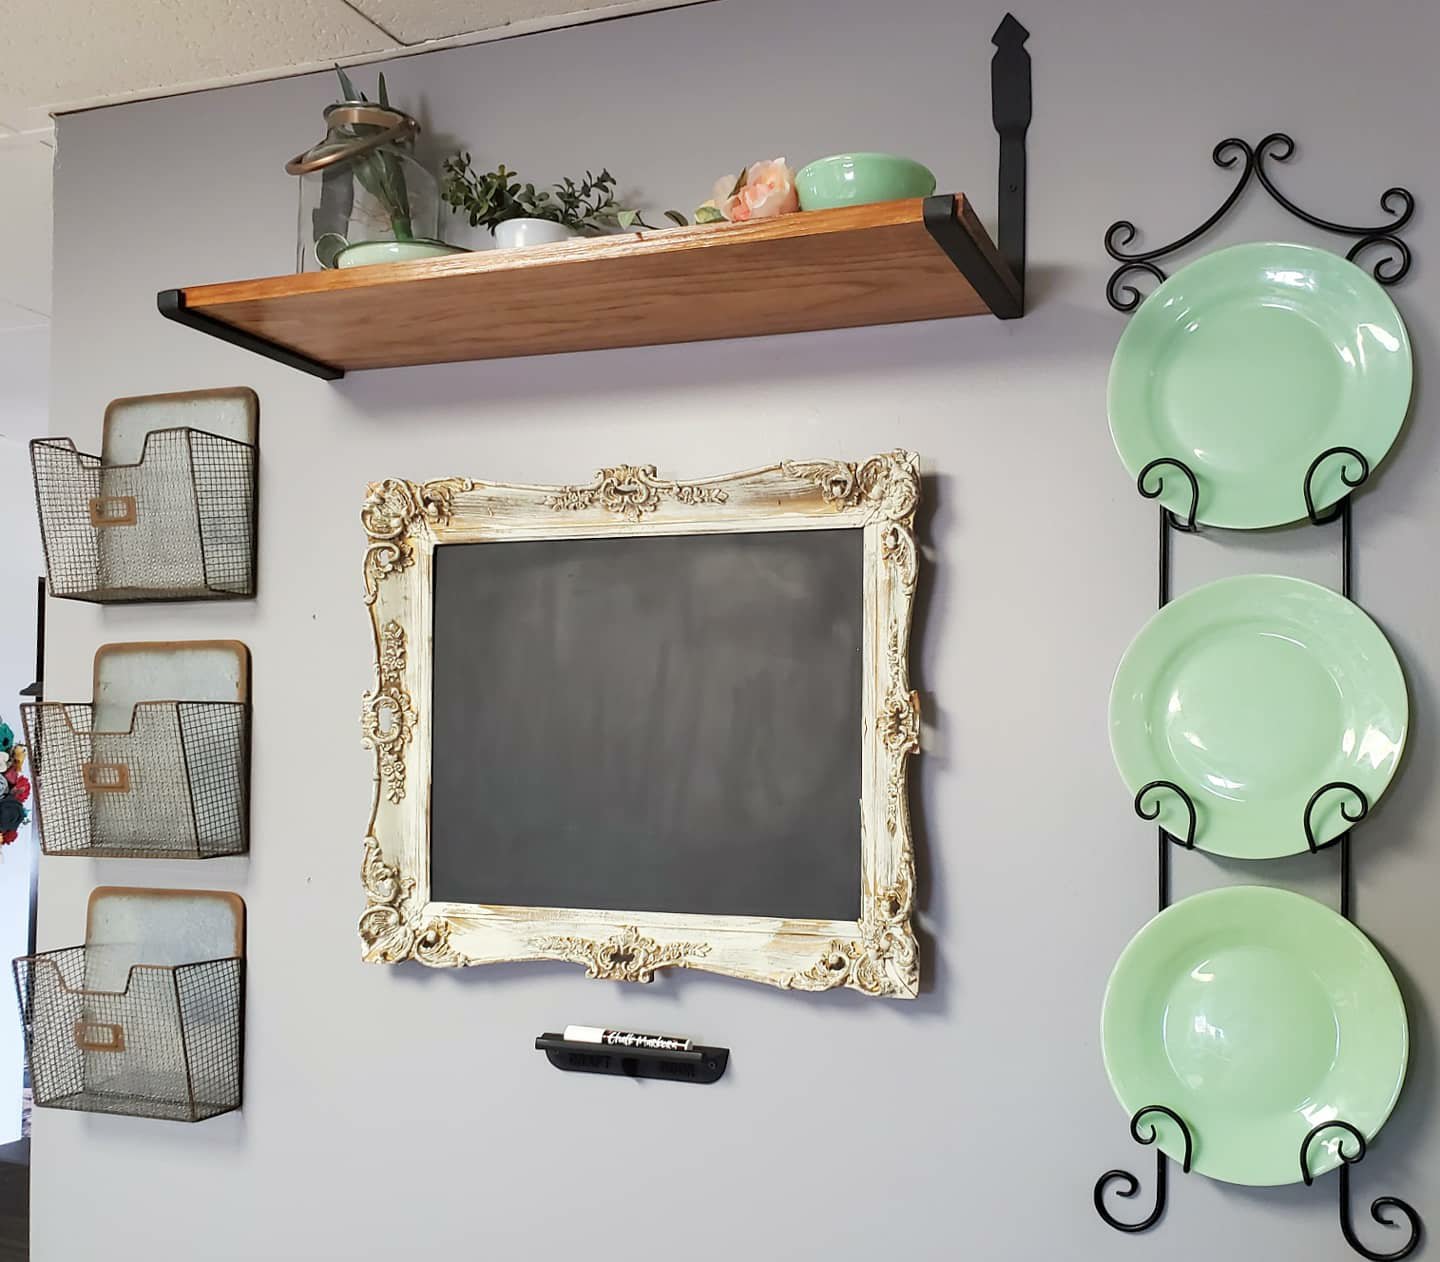

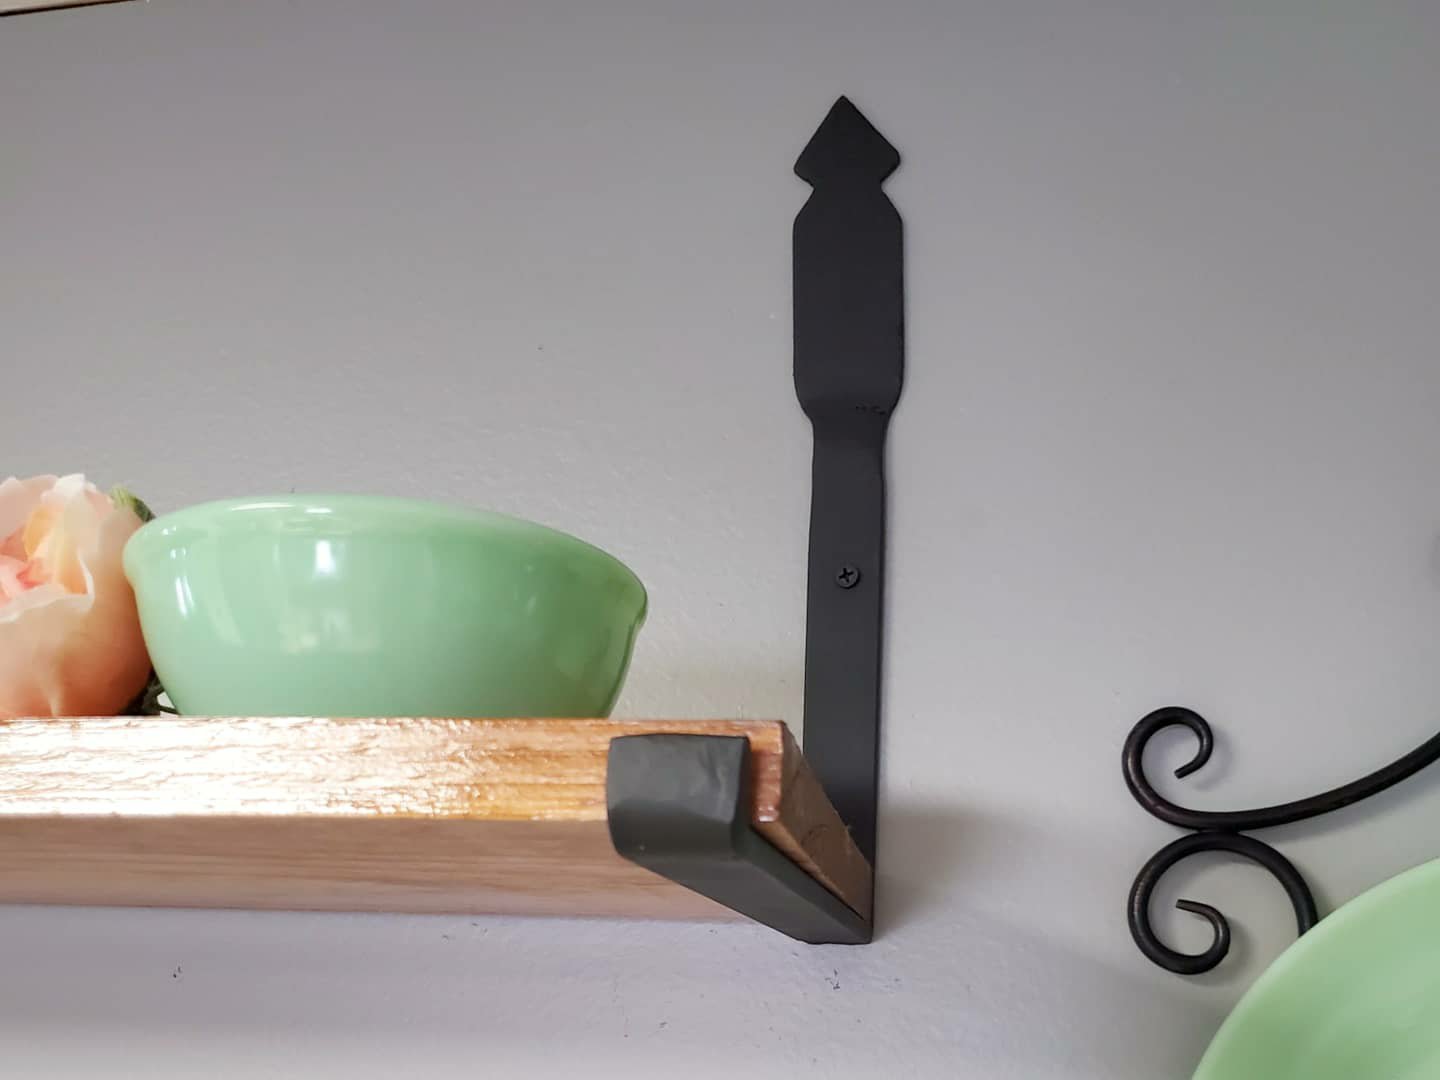
The antique mirror got a metal insert painted with chalk paint. The little chalk marker tray below it is an antique door stop out of an old barn. The baskets are from Hobby Lobby. The shelf is a custom design I requested from Jason. He added and welded the flourish at the top of the brackets.

Here’s my tid bit of advice. Have a place for the “stuff”, whatever you may call it. I truly believe in “a place for everything and everything in its place.” Even if you don’t organize that far, at least set up a zone with a calendar and pens and notepad. Have a spot where you put mail and homework. Always put your keys in the same location. I promise you that these tricks will prevent you from losing important things or searching frantically for the lost items!
And just for fun, here’s a shot of what it looks like more often than not. 😉
Anything else you would add?
XX,
Jess
Permalink Comments Off on The Landing Strip
Saving a Little Fun Money
Money is tight, I’m right there with you. But I want to show my kids things and have fun too. Here are a few simple ways that I have found to grow a little bit of a “fun money” fund and set aside to do some family things, or whatever your heart desires!
Ibotta– (referral code irrqbz) This app really is legit. When I shop, just as I normally would for everyday items and necessities, I search the app for deals on things I got. If I I some, I scan my receipt and get money back. They add it to your account and you can cash out via paypal or other gift cards once you hit $20. It’s a little slow, but free money! Sometimes I check the app before I shop to see if there’s a good deal going on for something we use anyway even if it wasn’t on my list, but in general just shop as normal then scan. If you use my code we can help each other as a team to earn bonuses. Score! See below for how much I’ve earned this way!

Ebates– Same idea, but use when shopping online. You start through the app and then search for the store you want to shop at. Money is added up and a check is sent out to you quarterly. I have cashed the checks and they are legit too! See below!
Receipt Hog– This one you just scan any receipts you get into the app. They give you points for each one. Once you add up to so many points you can cash out via PayPal or other methods. Super easy and I scan I receipts I’m already getting, gas, groceries, etc. I’ve made a little cash so far.

My big tip when doing this is to take the cash out directly and immediately add it to an envelope or jar and stash it away. Why? So that it doesn’t get spent on everyday stuff. This helps me to really keep it “extra” money and see it add up. I add money to this envelope that I get from anything extra, maybe selling some clothes or a furniture project I do.
A couple more to possibly try:
Door Dash- I’ve signed up to be a delivery driver just for some pocket cash, and since I’m always out and about anyway, but haven’t found any jobs in my area yet. Keep you posted!
Amazon Product testing- there are several sites you can do this through. But beware that you may eventually add up enough “income” that taxes may need to be filed. I’ve been told that the expenses would outweigh the income, so this may not be an issue. I’ve used PPOC before and made a little cash.
I also sell our clothes and items that we outgrow, especially baby things, through local resale shops or Stuff, Etc.
Good luck saving for something fun! What are you hoping to save up for?!
XX,
Jess
Permalink Comments Off on Saving a Little Fun Money
Some Handmade Gifts
Hi there! I wanted to do a quick post to show you what we made for our family members for Christmas (and an upcoming wedding!). I started with a few simple stone tiles from Menard’s. I used a flat round brush, a stencil, and some solid paint pots. I dabbed the paint on over the stencil without wiping. I then added some clear coat and some felt pads to the bottom corners. Now…we have personalized coasters! I know I have seen this done before, but I had to share because they turned out so sweet and simple. And, they didn’t break the bank!
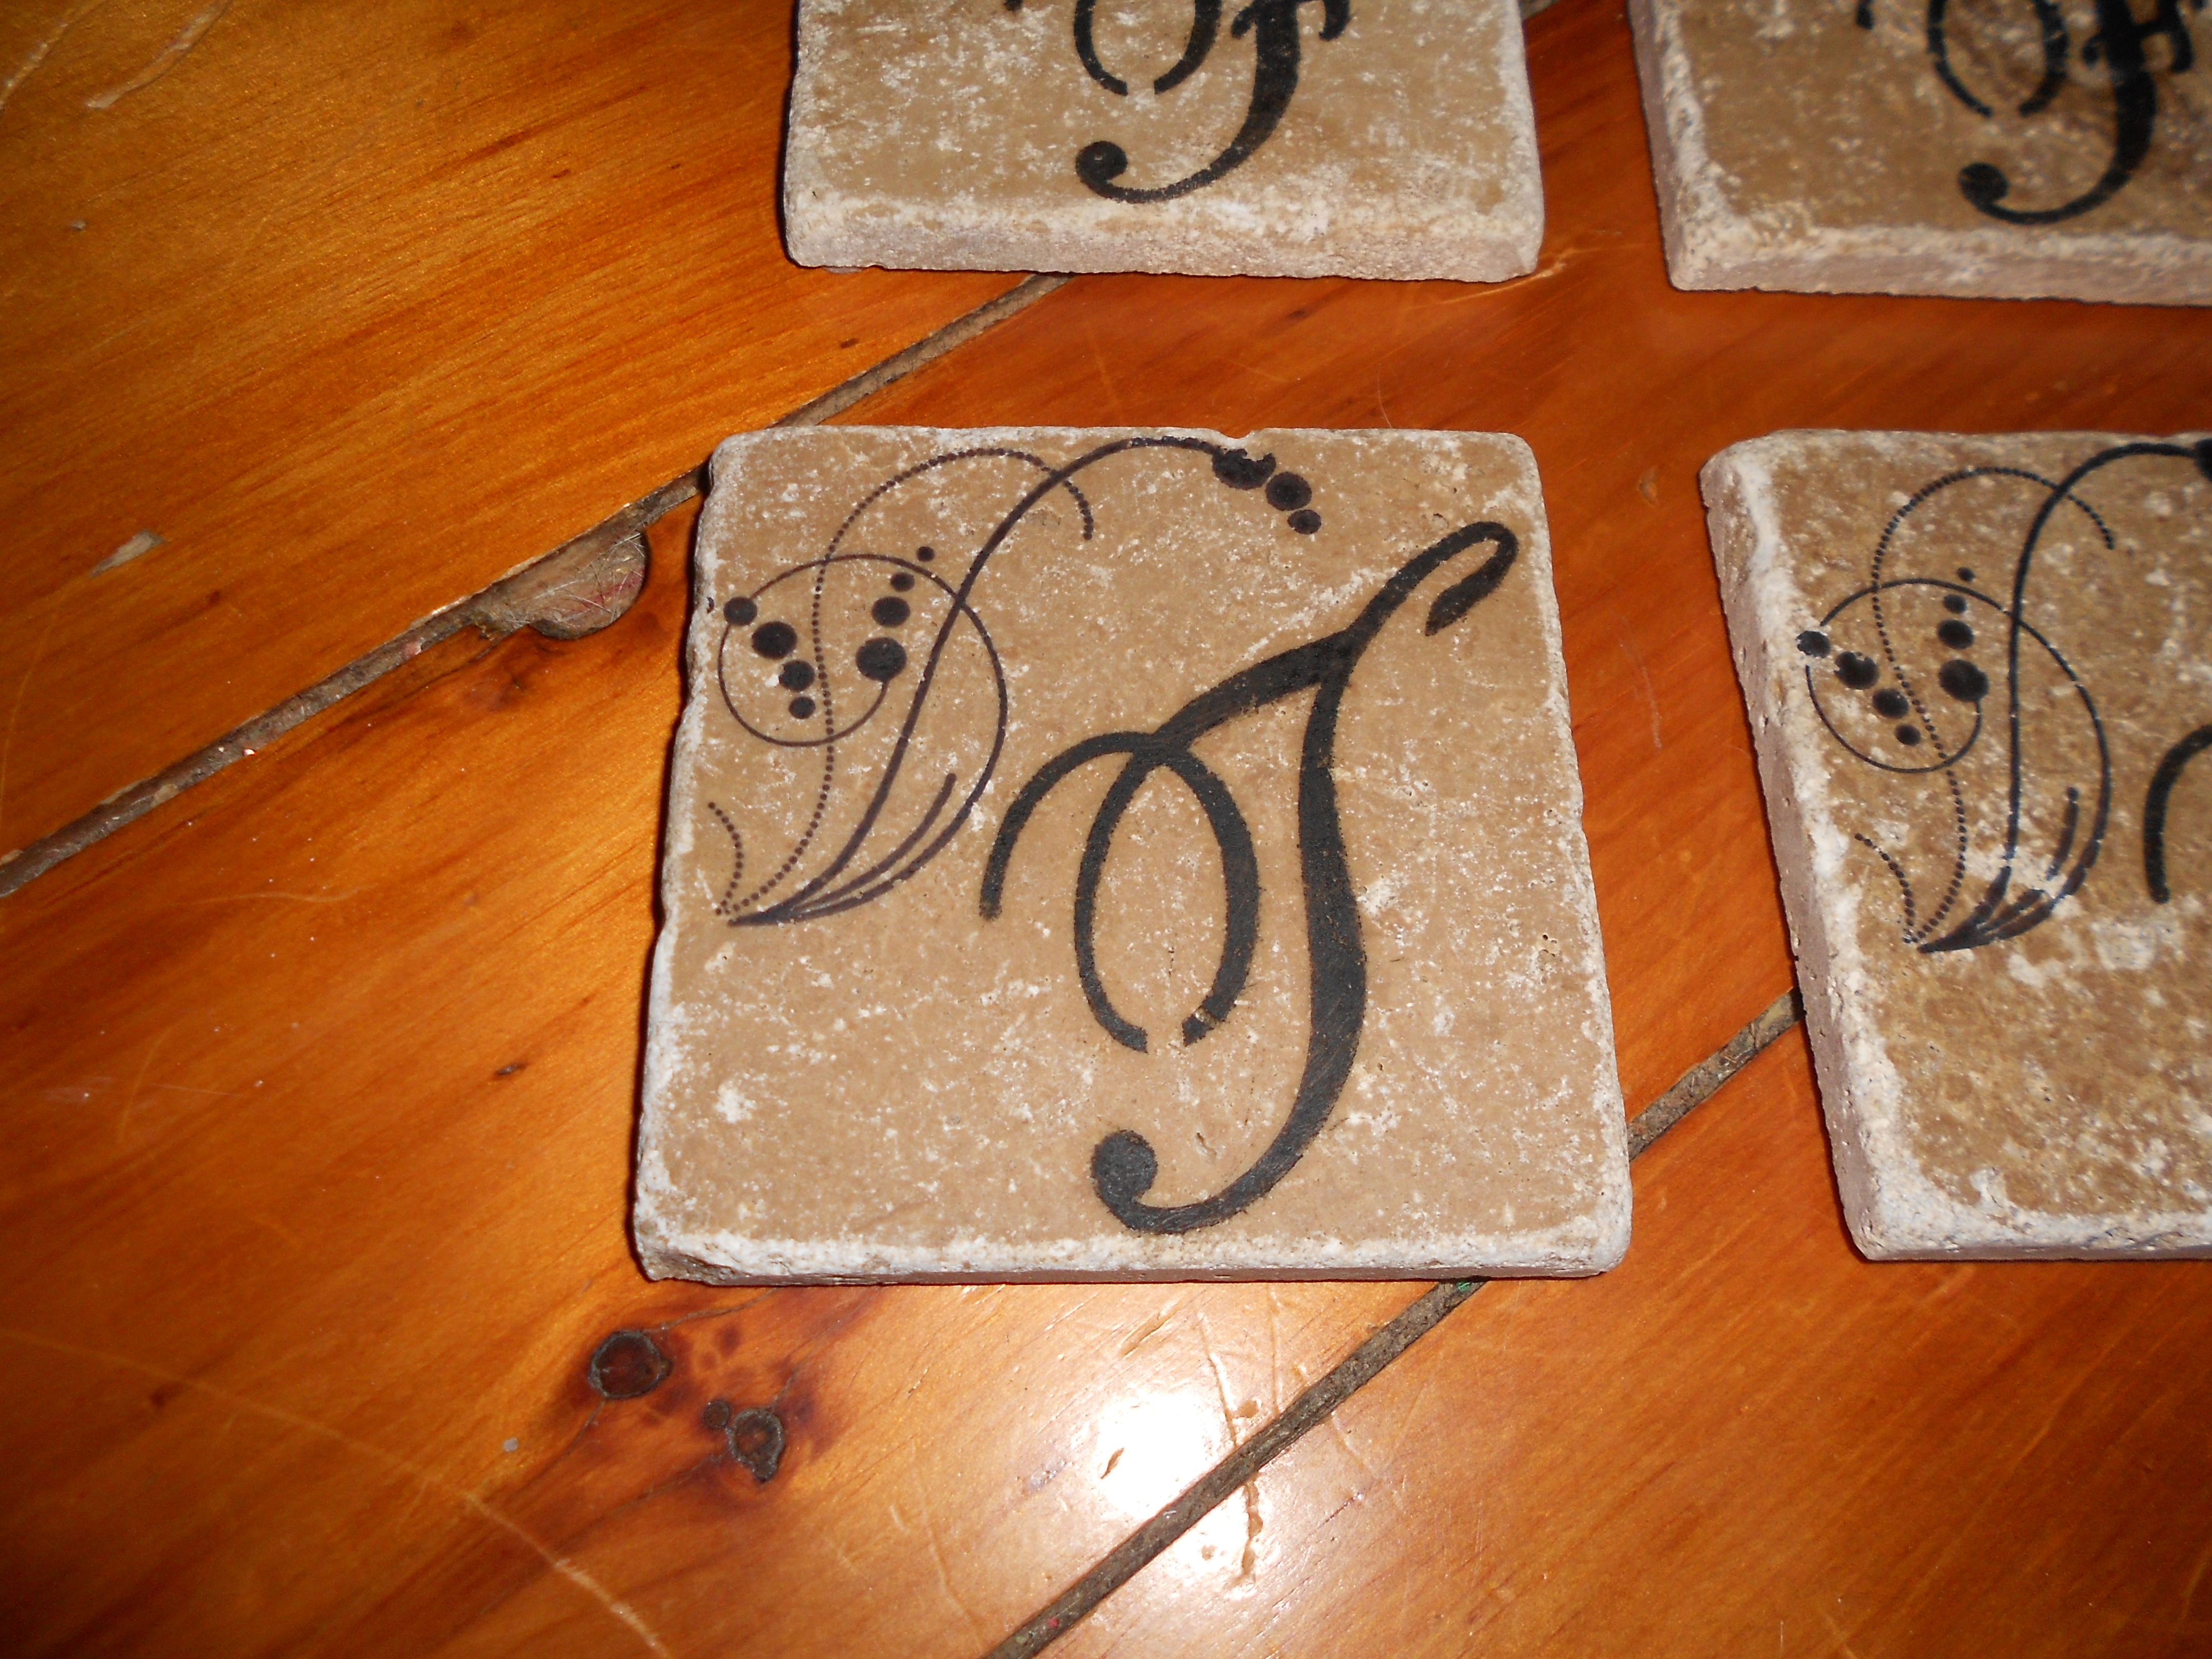

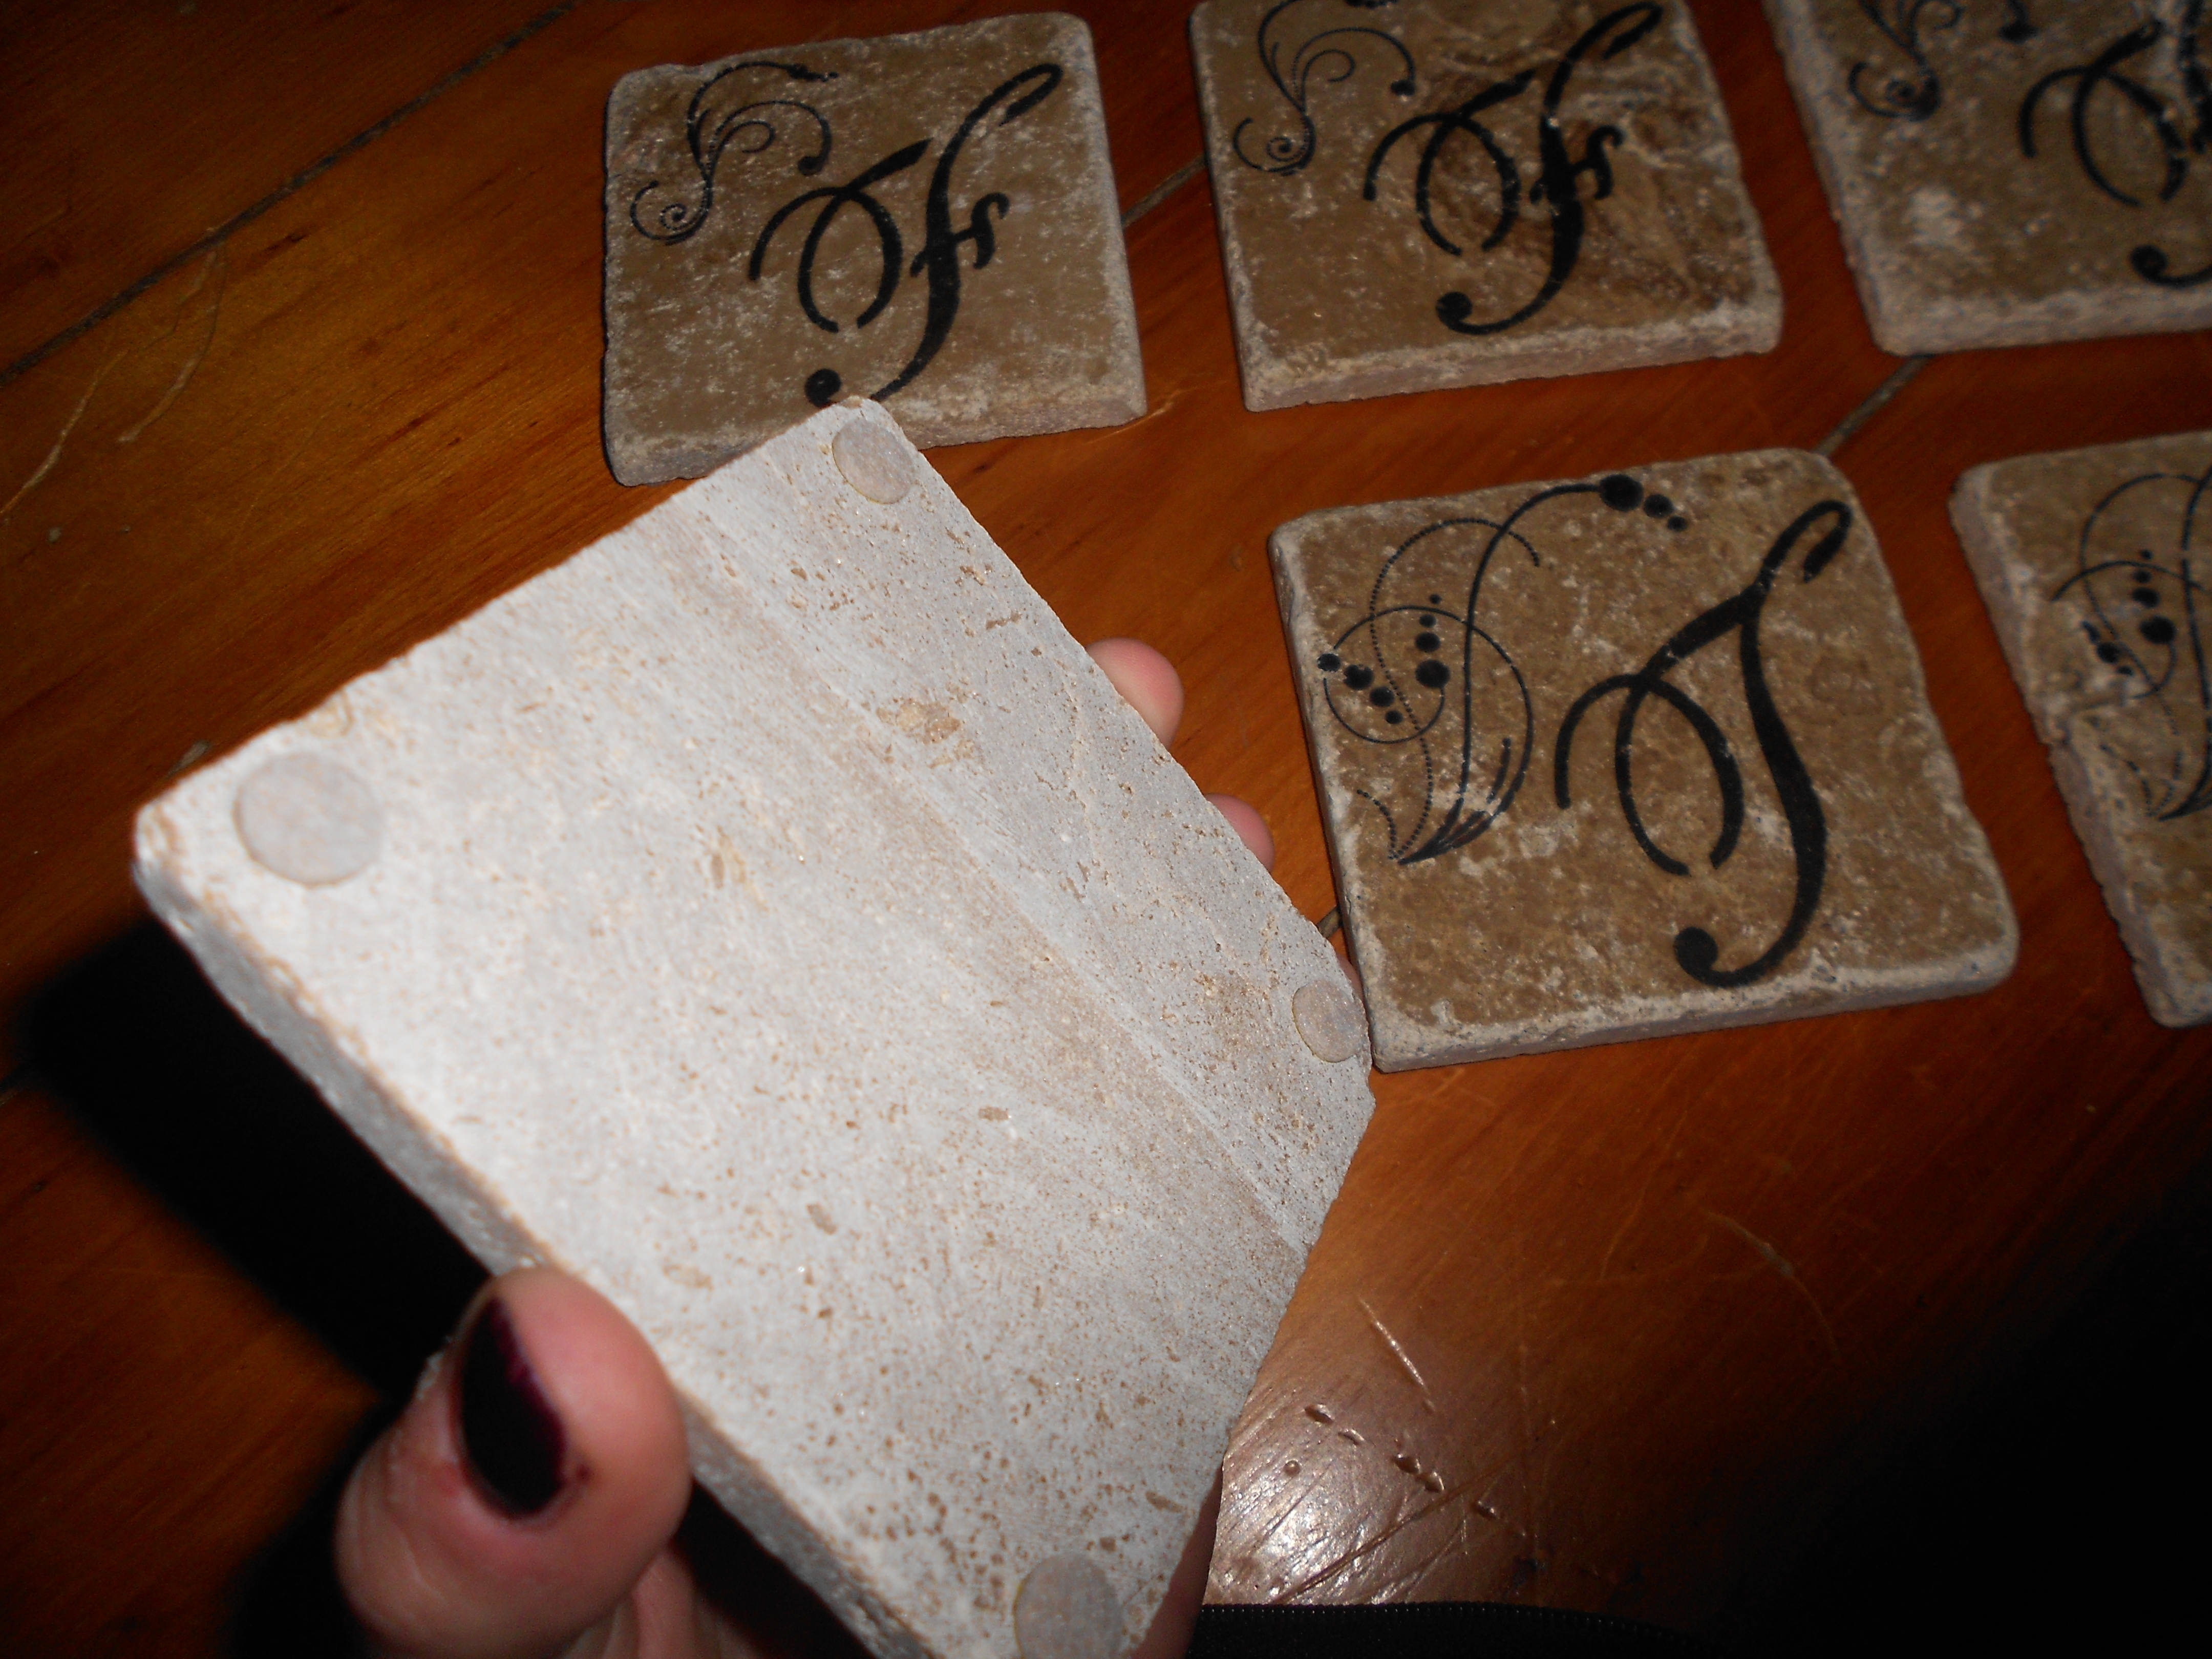
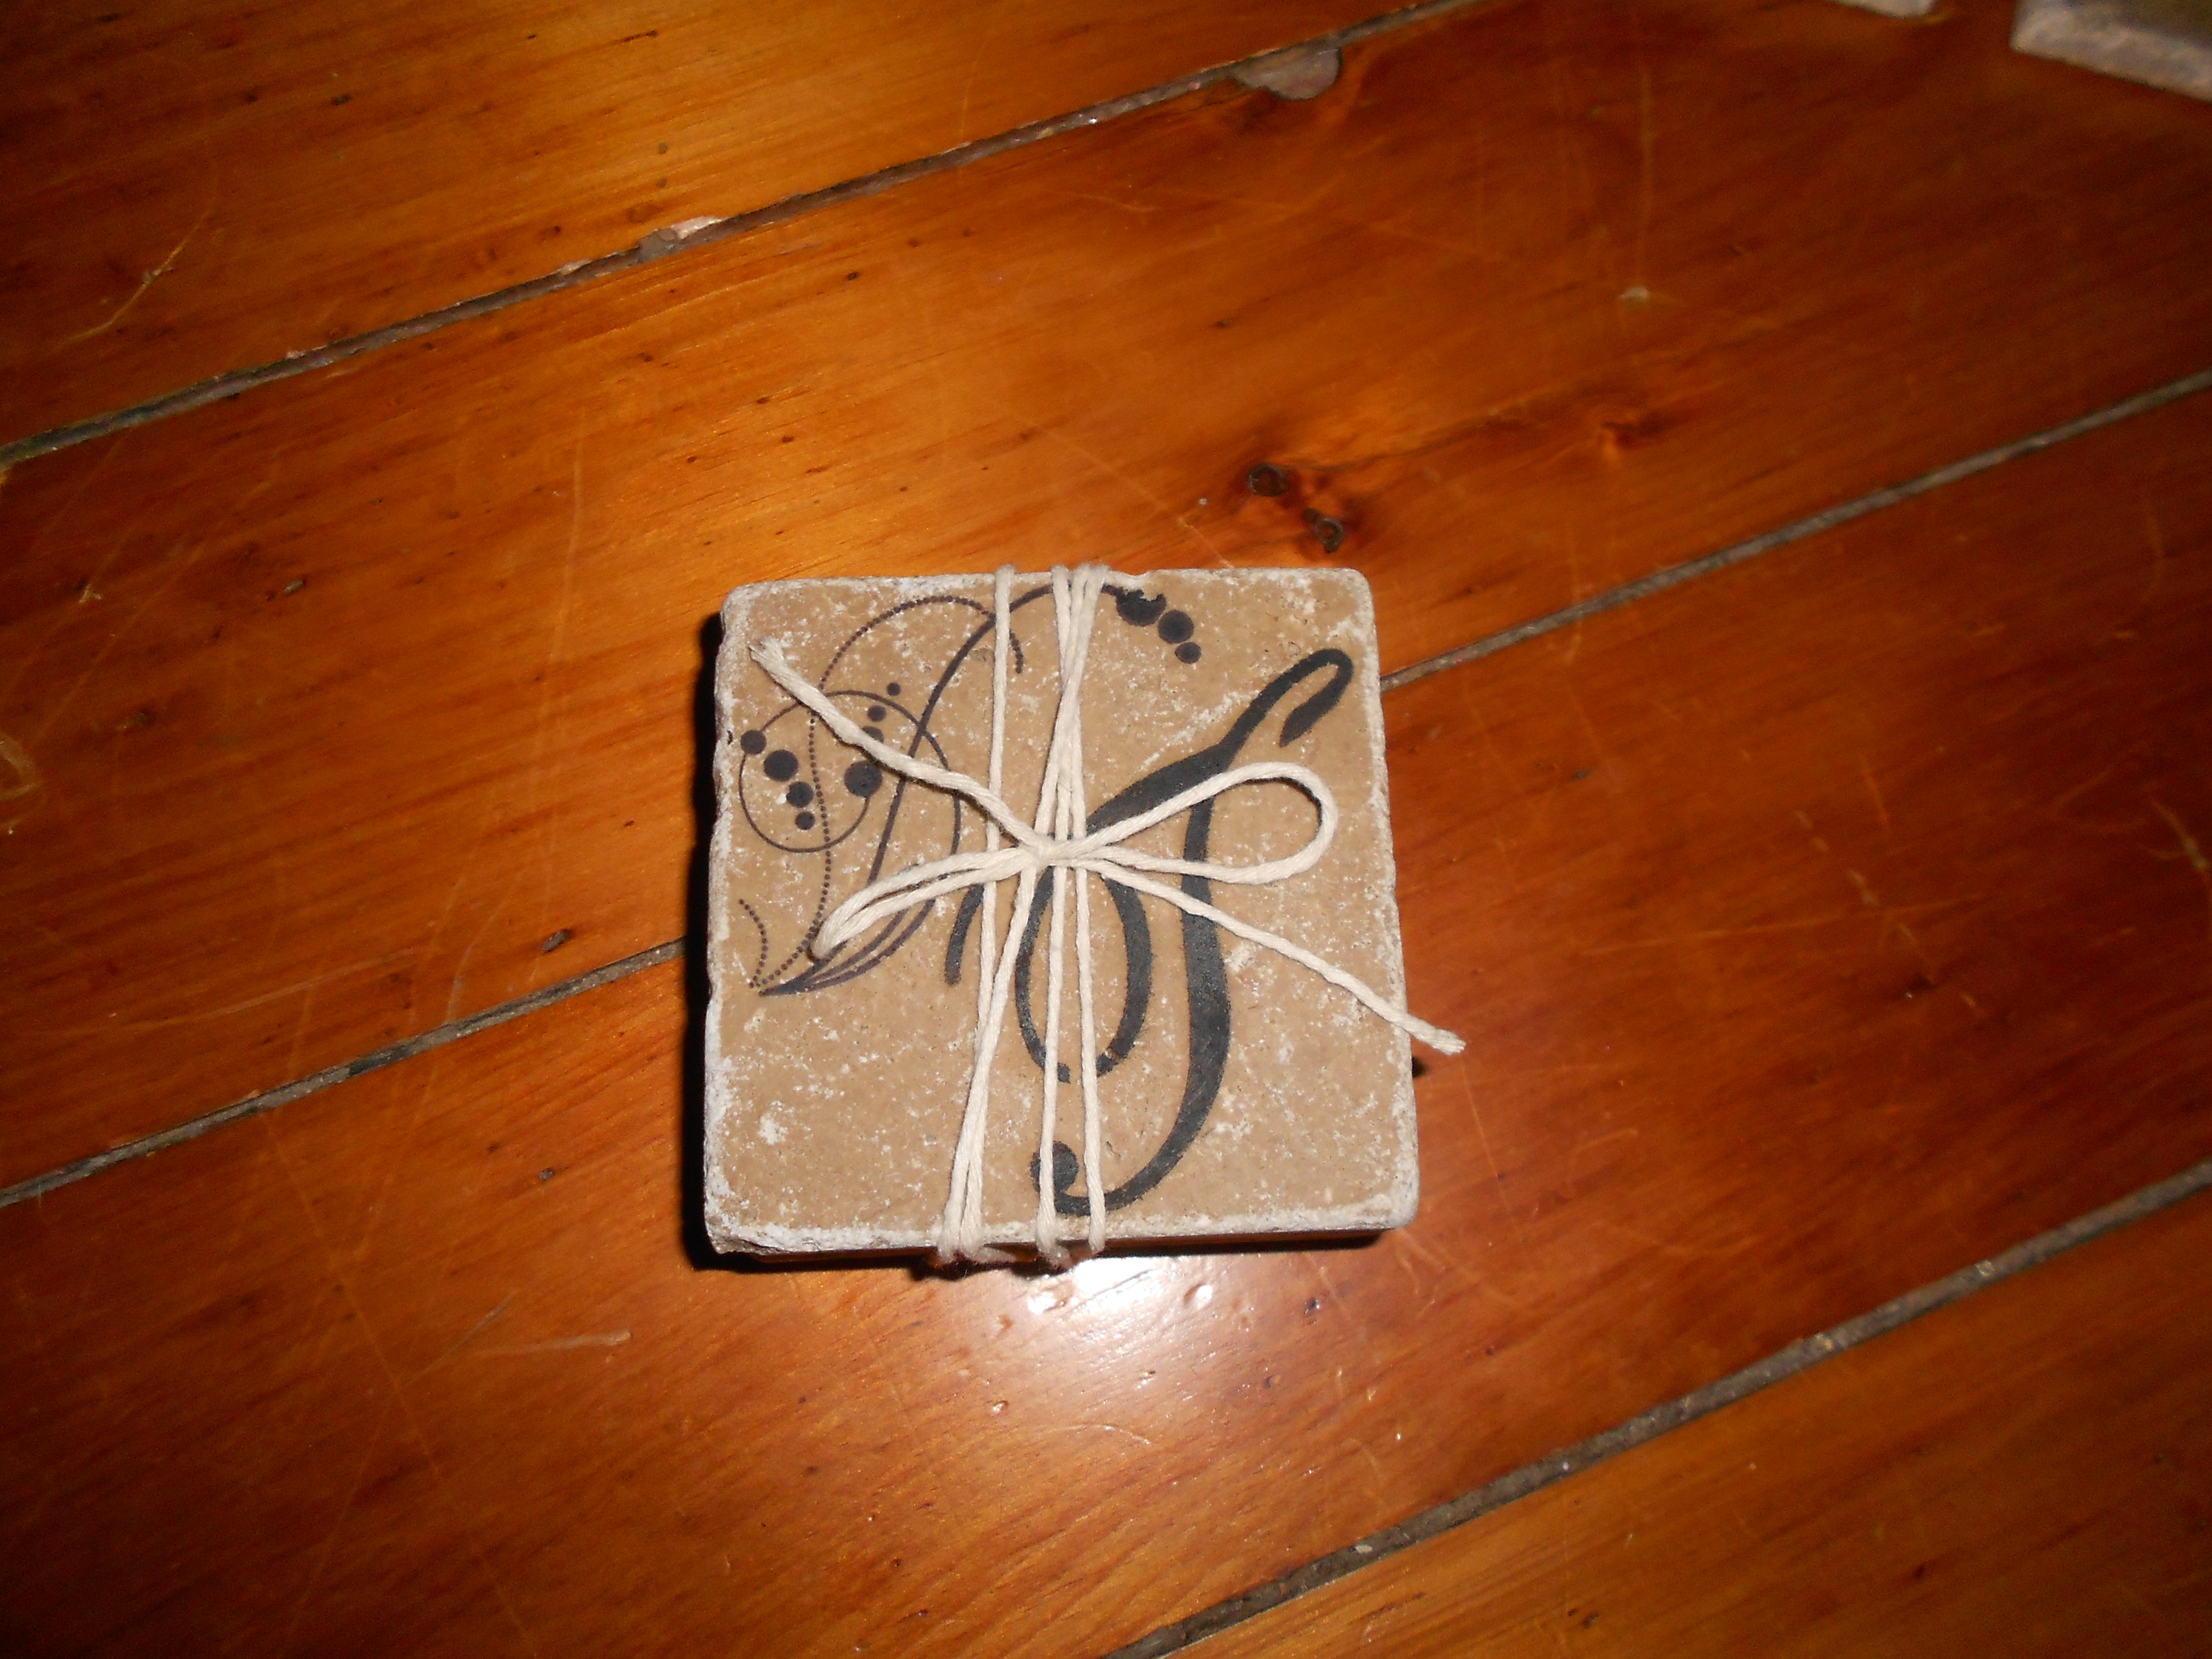
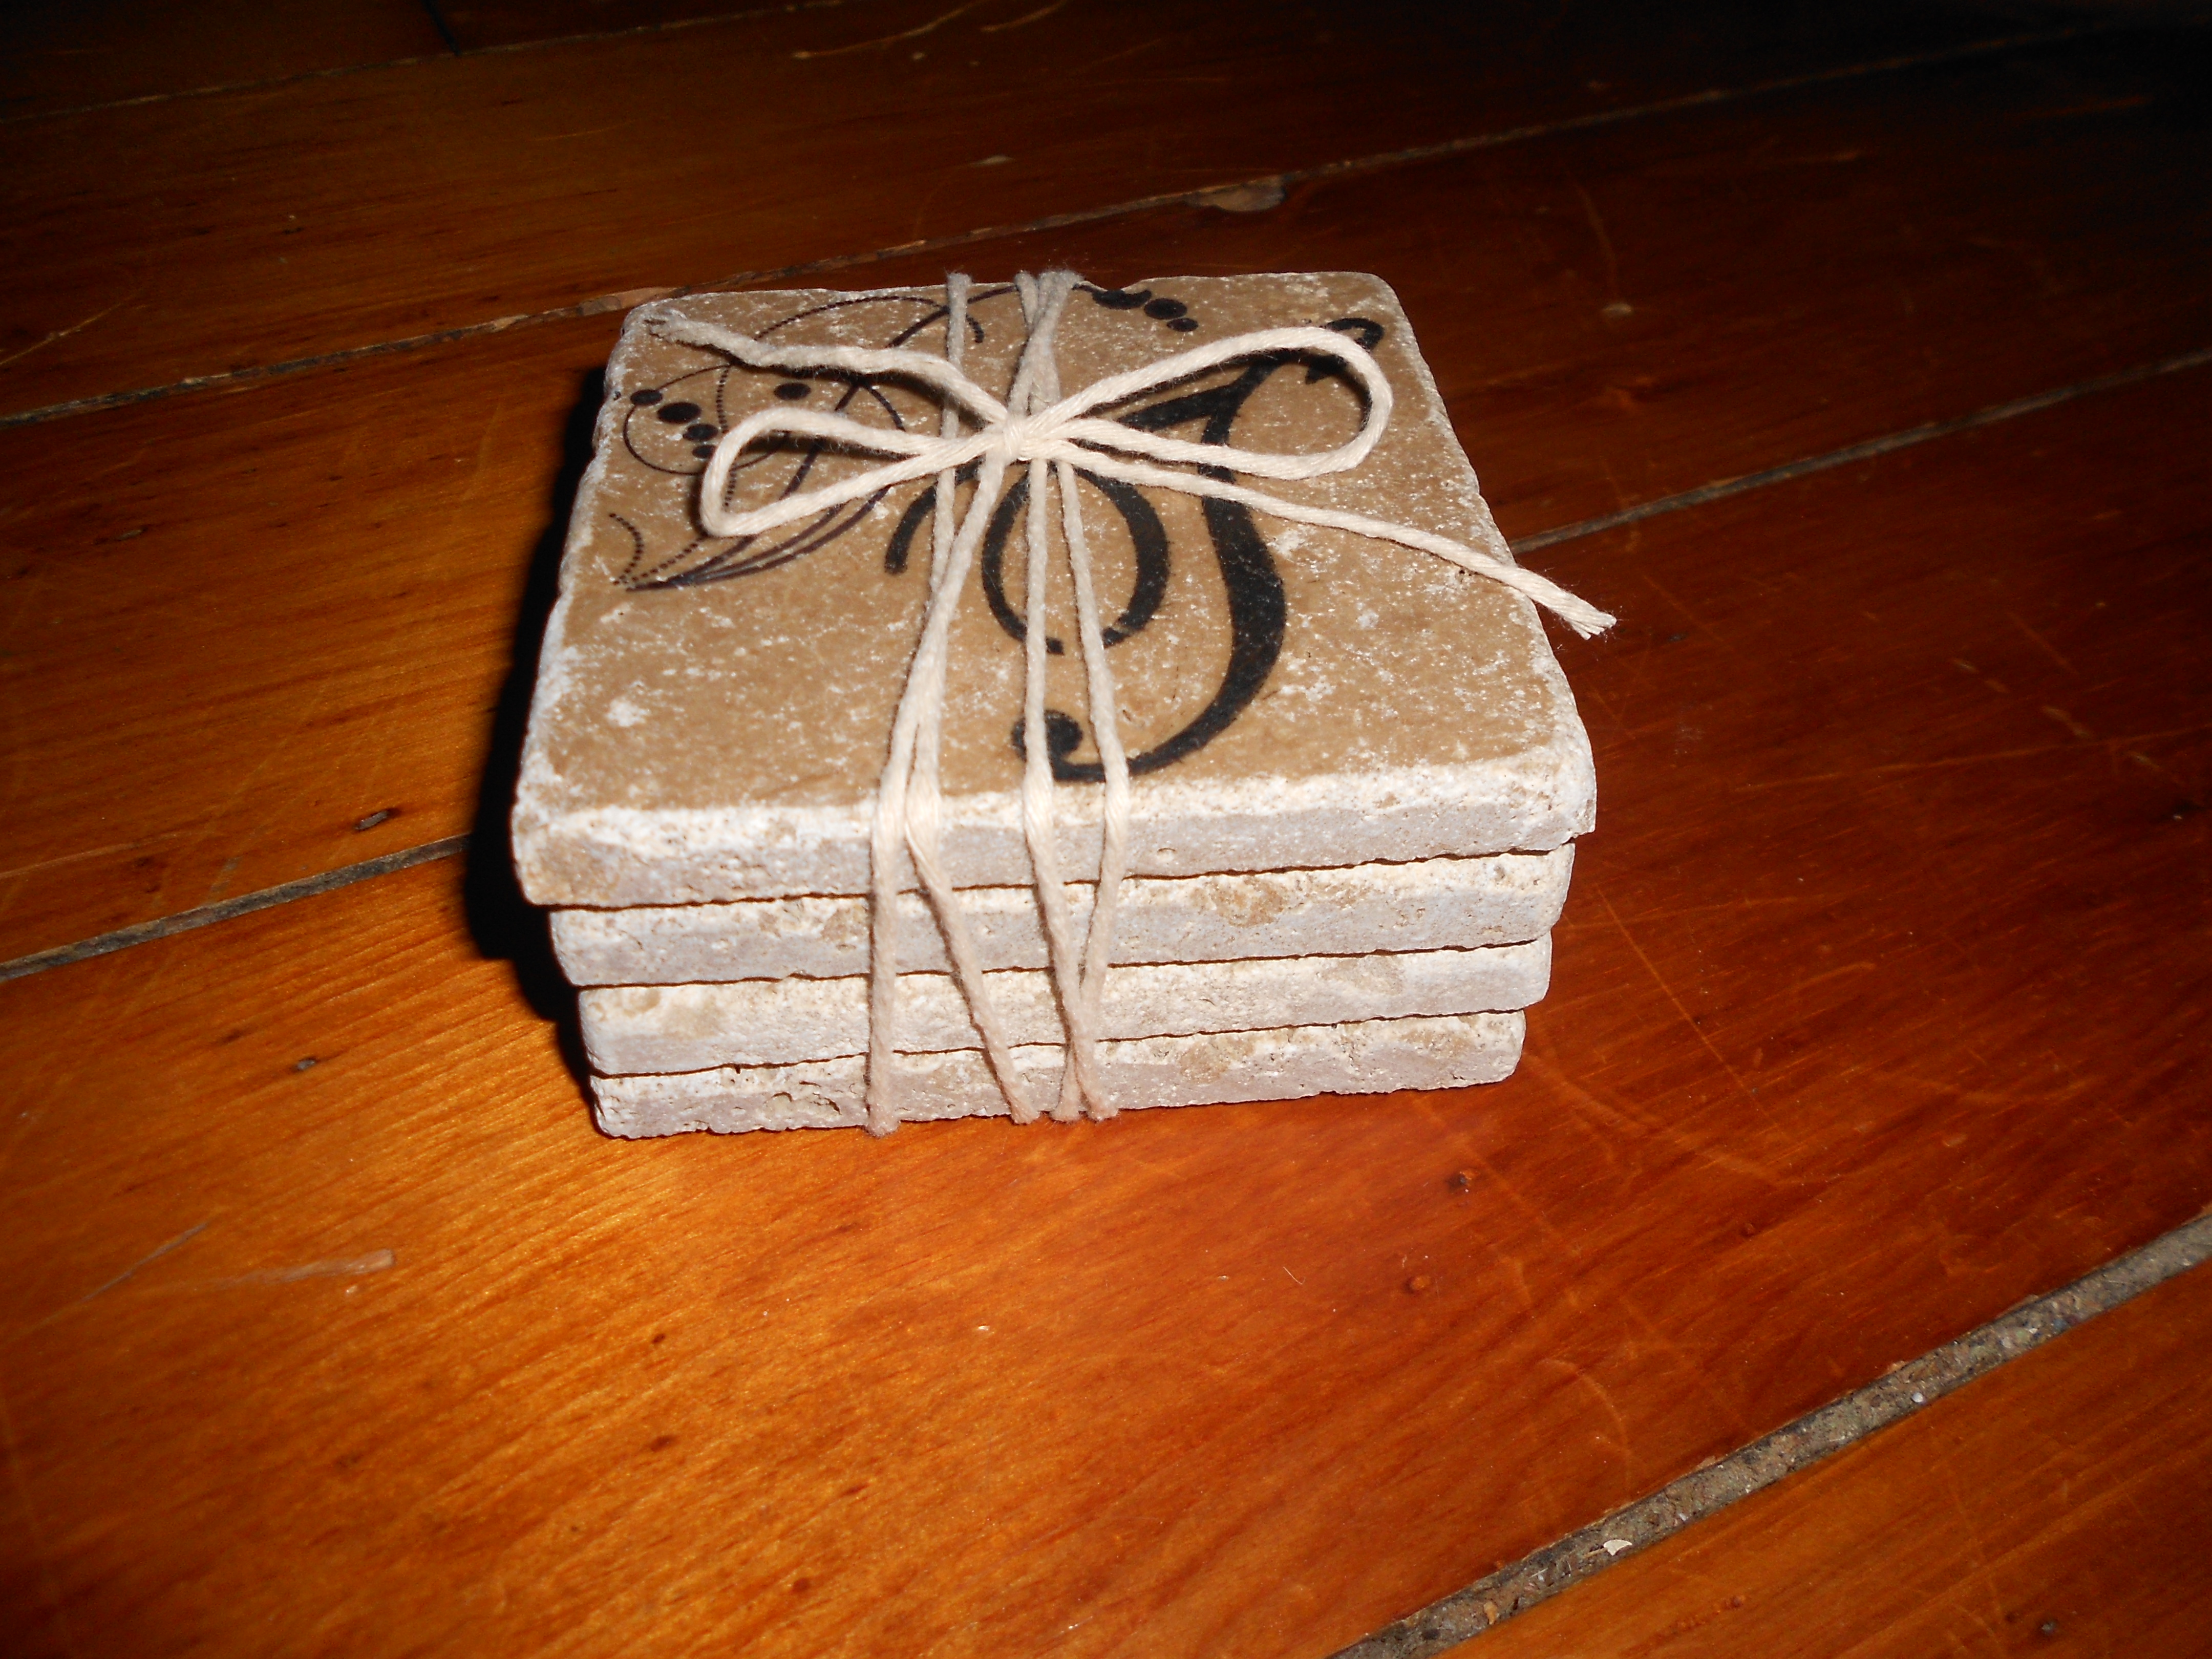
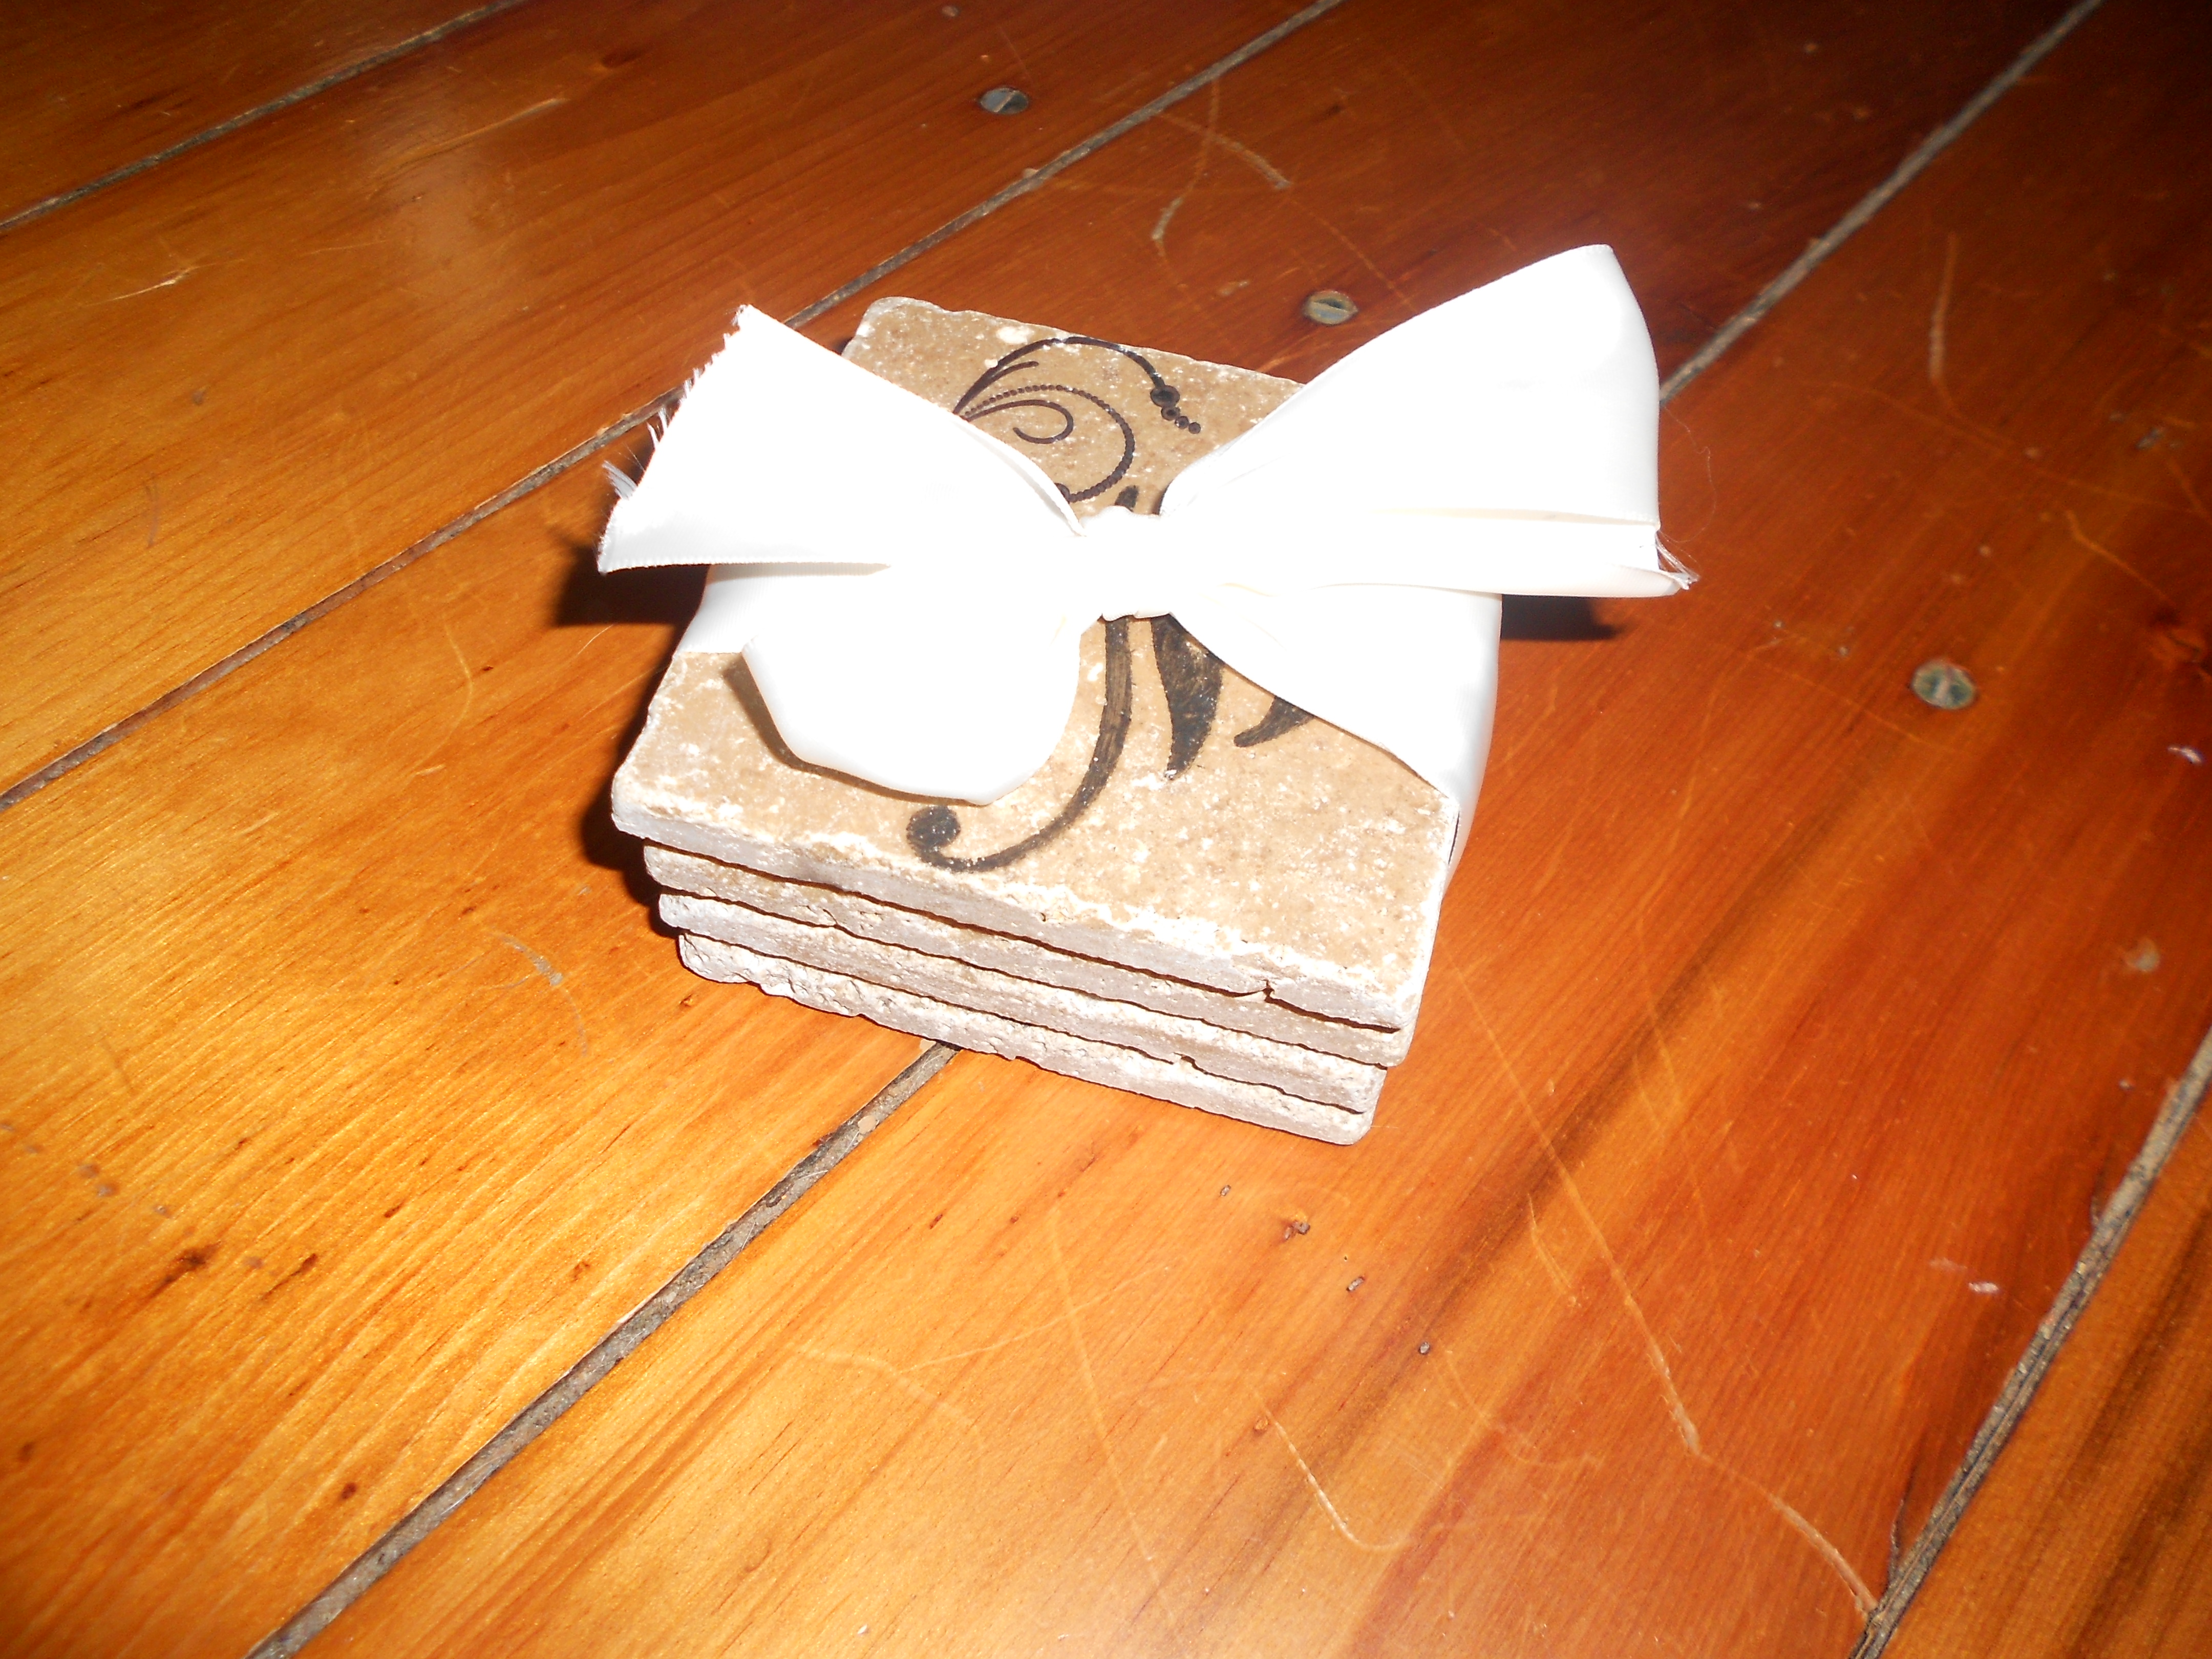
What do you think? I think they turned out great and it was a lot of fun making gifts this year instead of buying something no one needs! 🙂
DIY Serving Tray
This has been on my to-do list since we moved it. Or maybe even before. But it became even more urgent when we bought the new couch with an ottoman. Now I have no room for a coffee table, but that means nowhere safe to put drinks and essentials. However, the previous owners left us lots of junk in the barns, so this one was a snap.
Gross old window uncovered in a heap in the barn:

Add some barn door hardware as handles:

The window was in surprisingly great shape once it was cleaned up, so I added a little paint and distressed the edges, added the hardware, and then used an Uppercase Living decal I had packed away on the glass. (I had minor trouble with the decal, so it may get a new one in the future. Talk about frustration!) And here you have our new serving tray:

Just finished this little guy and we already love it. We think it looks cute in that rustic way, but is also super handy!


Well, what do you think? We are happy with the way this quick and easy project came out! Have you ever tried anything like this?
No-Sew Curtains
Every room of my new house has needed curtains. But, wow! Curtains are expensive! I always see other people’s fun curtains and think, “I can do that!” But then I get started and realize, oh yea, I can’t sew. At all. My mom suggested using iron-on fabric hem tape and making faux roman shades. Light bulb!
I have a little mud room, where the dog kennels and laundry live. These blinds were broken and grimy. I thought this was the perfect place to try this experiment out on. Its a small room, so it can take a bright punch, plus we aren’t in there all the time, so if they aren’t prefect on the first try its no big deal.
So, after reminding myself that the situation couldn’t get much worse, I set forth. I bought a few yards of a fun, floral fabric for each window. I used tension rods, and used these to mark the width of each window. Once I had the width I used the hem tape and ironed a hem onto each side. Then ironed a hem to the bottom and a pocket at the top. I hung the curtains, rolled them up, and tied in place with matching ribbon. Viola!

The bright fabric ties in the red antique table I use for folding laundry, and the fun towels I bought for next to the sink. You can see here that the whole little room needs some work, but for now at least the curtains are fun!

What a simple technique with big impact, no?


I love this big old sink, even though it needs some work too. Here you can see the little purple and yellow picture that I hung too. You can also see the antique expandable mirror.
I think this experiment turned out pretty well and will definitely use this to make me braver for my next curtain project!
