The Best Chex Mix
I have it. The Best. Chex. Mix. Recipe.
I promise.
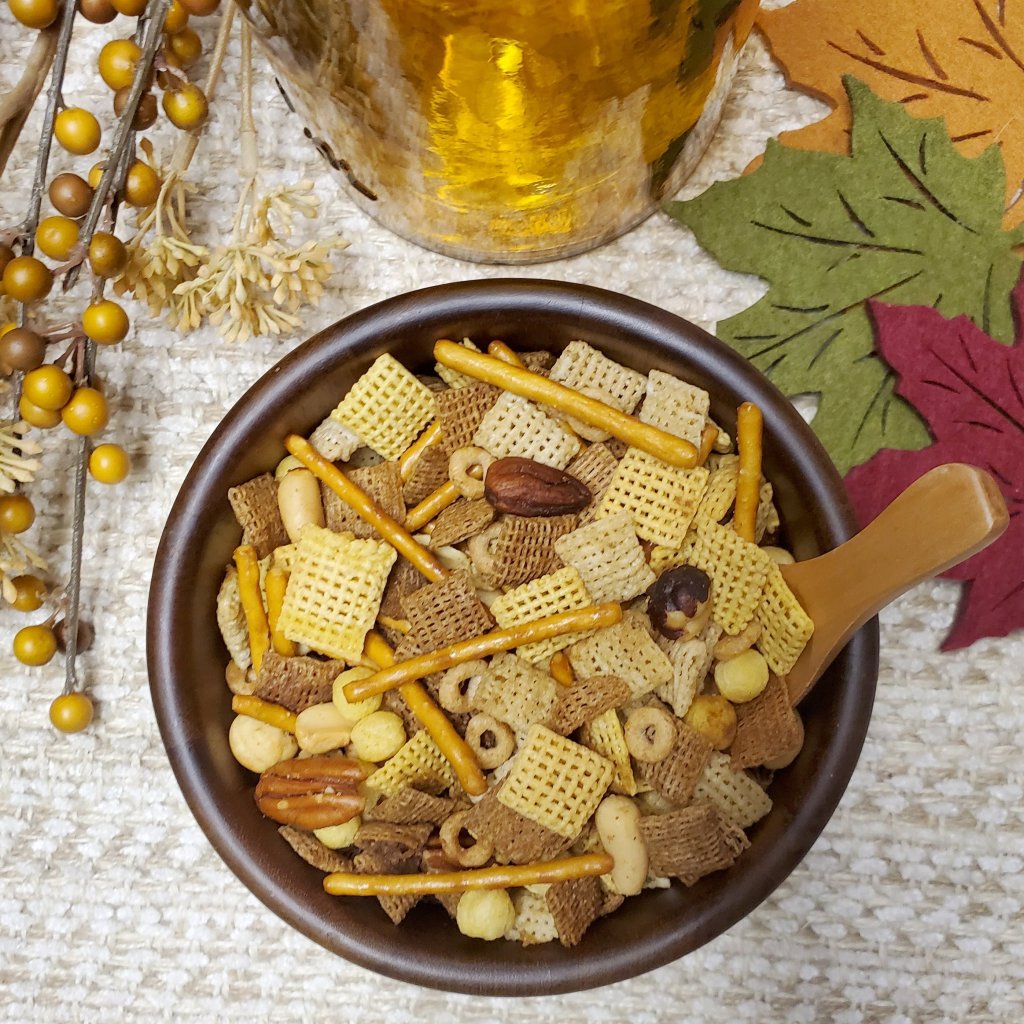
This recipe has been a family tradition since we were kids, and still is today for my kiddos. Its super easy and EVERYONE is a fan. We freeze a couple bags and it serves family, friends, guests, and gift recipients all season long. And is always welcomed.
I hope you all enjoy like we do!
1/2 c. Butter or Margarine
1 1/2 tsp. Seasoned Salt
4 1/2 tsp. Worchestershire Sauce
Sprinkle of Garlic Powder to taste
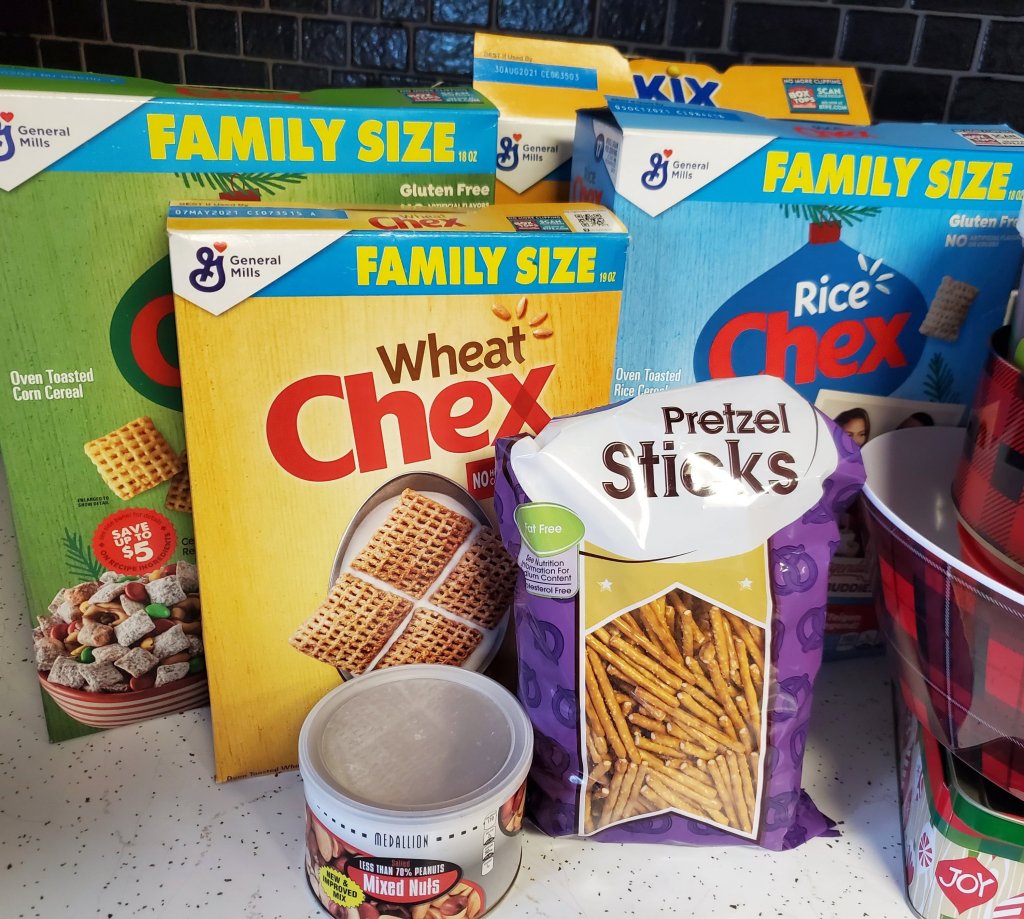
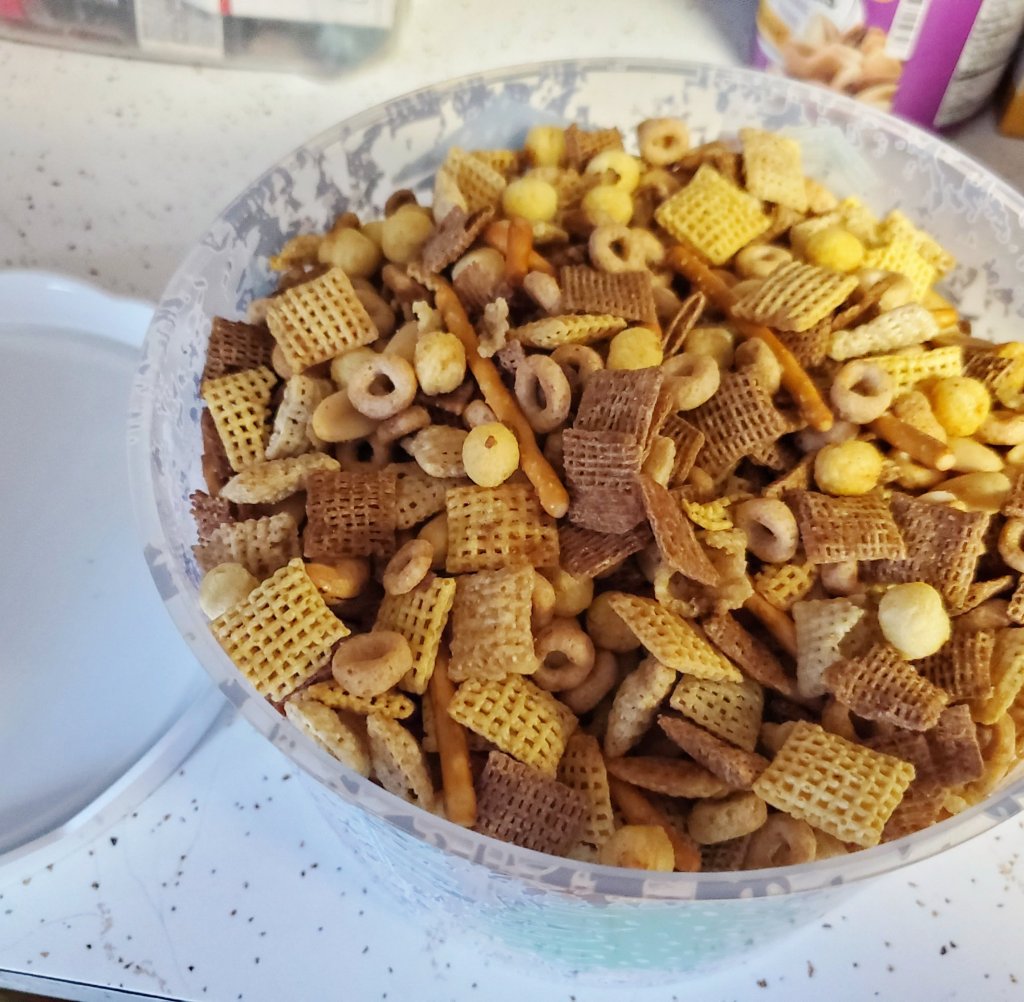
2 c. Corn Chex
2 c. Rice Chex
2 c. Wheat Chex
1 c. Cheerios
1 c. Pretzel Sticks
1 c. Mixed Nuts
1 c. Mix Cereal
Heat margarine at 250° in shallow roasting pan until melted. Remove and stir in seasoned salt and worchestershire sauce. Add cereal and nuts. Mix until all pieces are coated. Heat in oven 1 hour. Stir every 15 minutes. Spread to cool.
Best part is, it doubles well! Make a double batch and use a large pan. Easy!
Let me know what you think!
Jess,
XX
Family Travel Tips
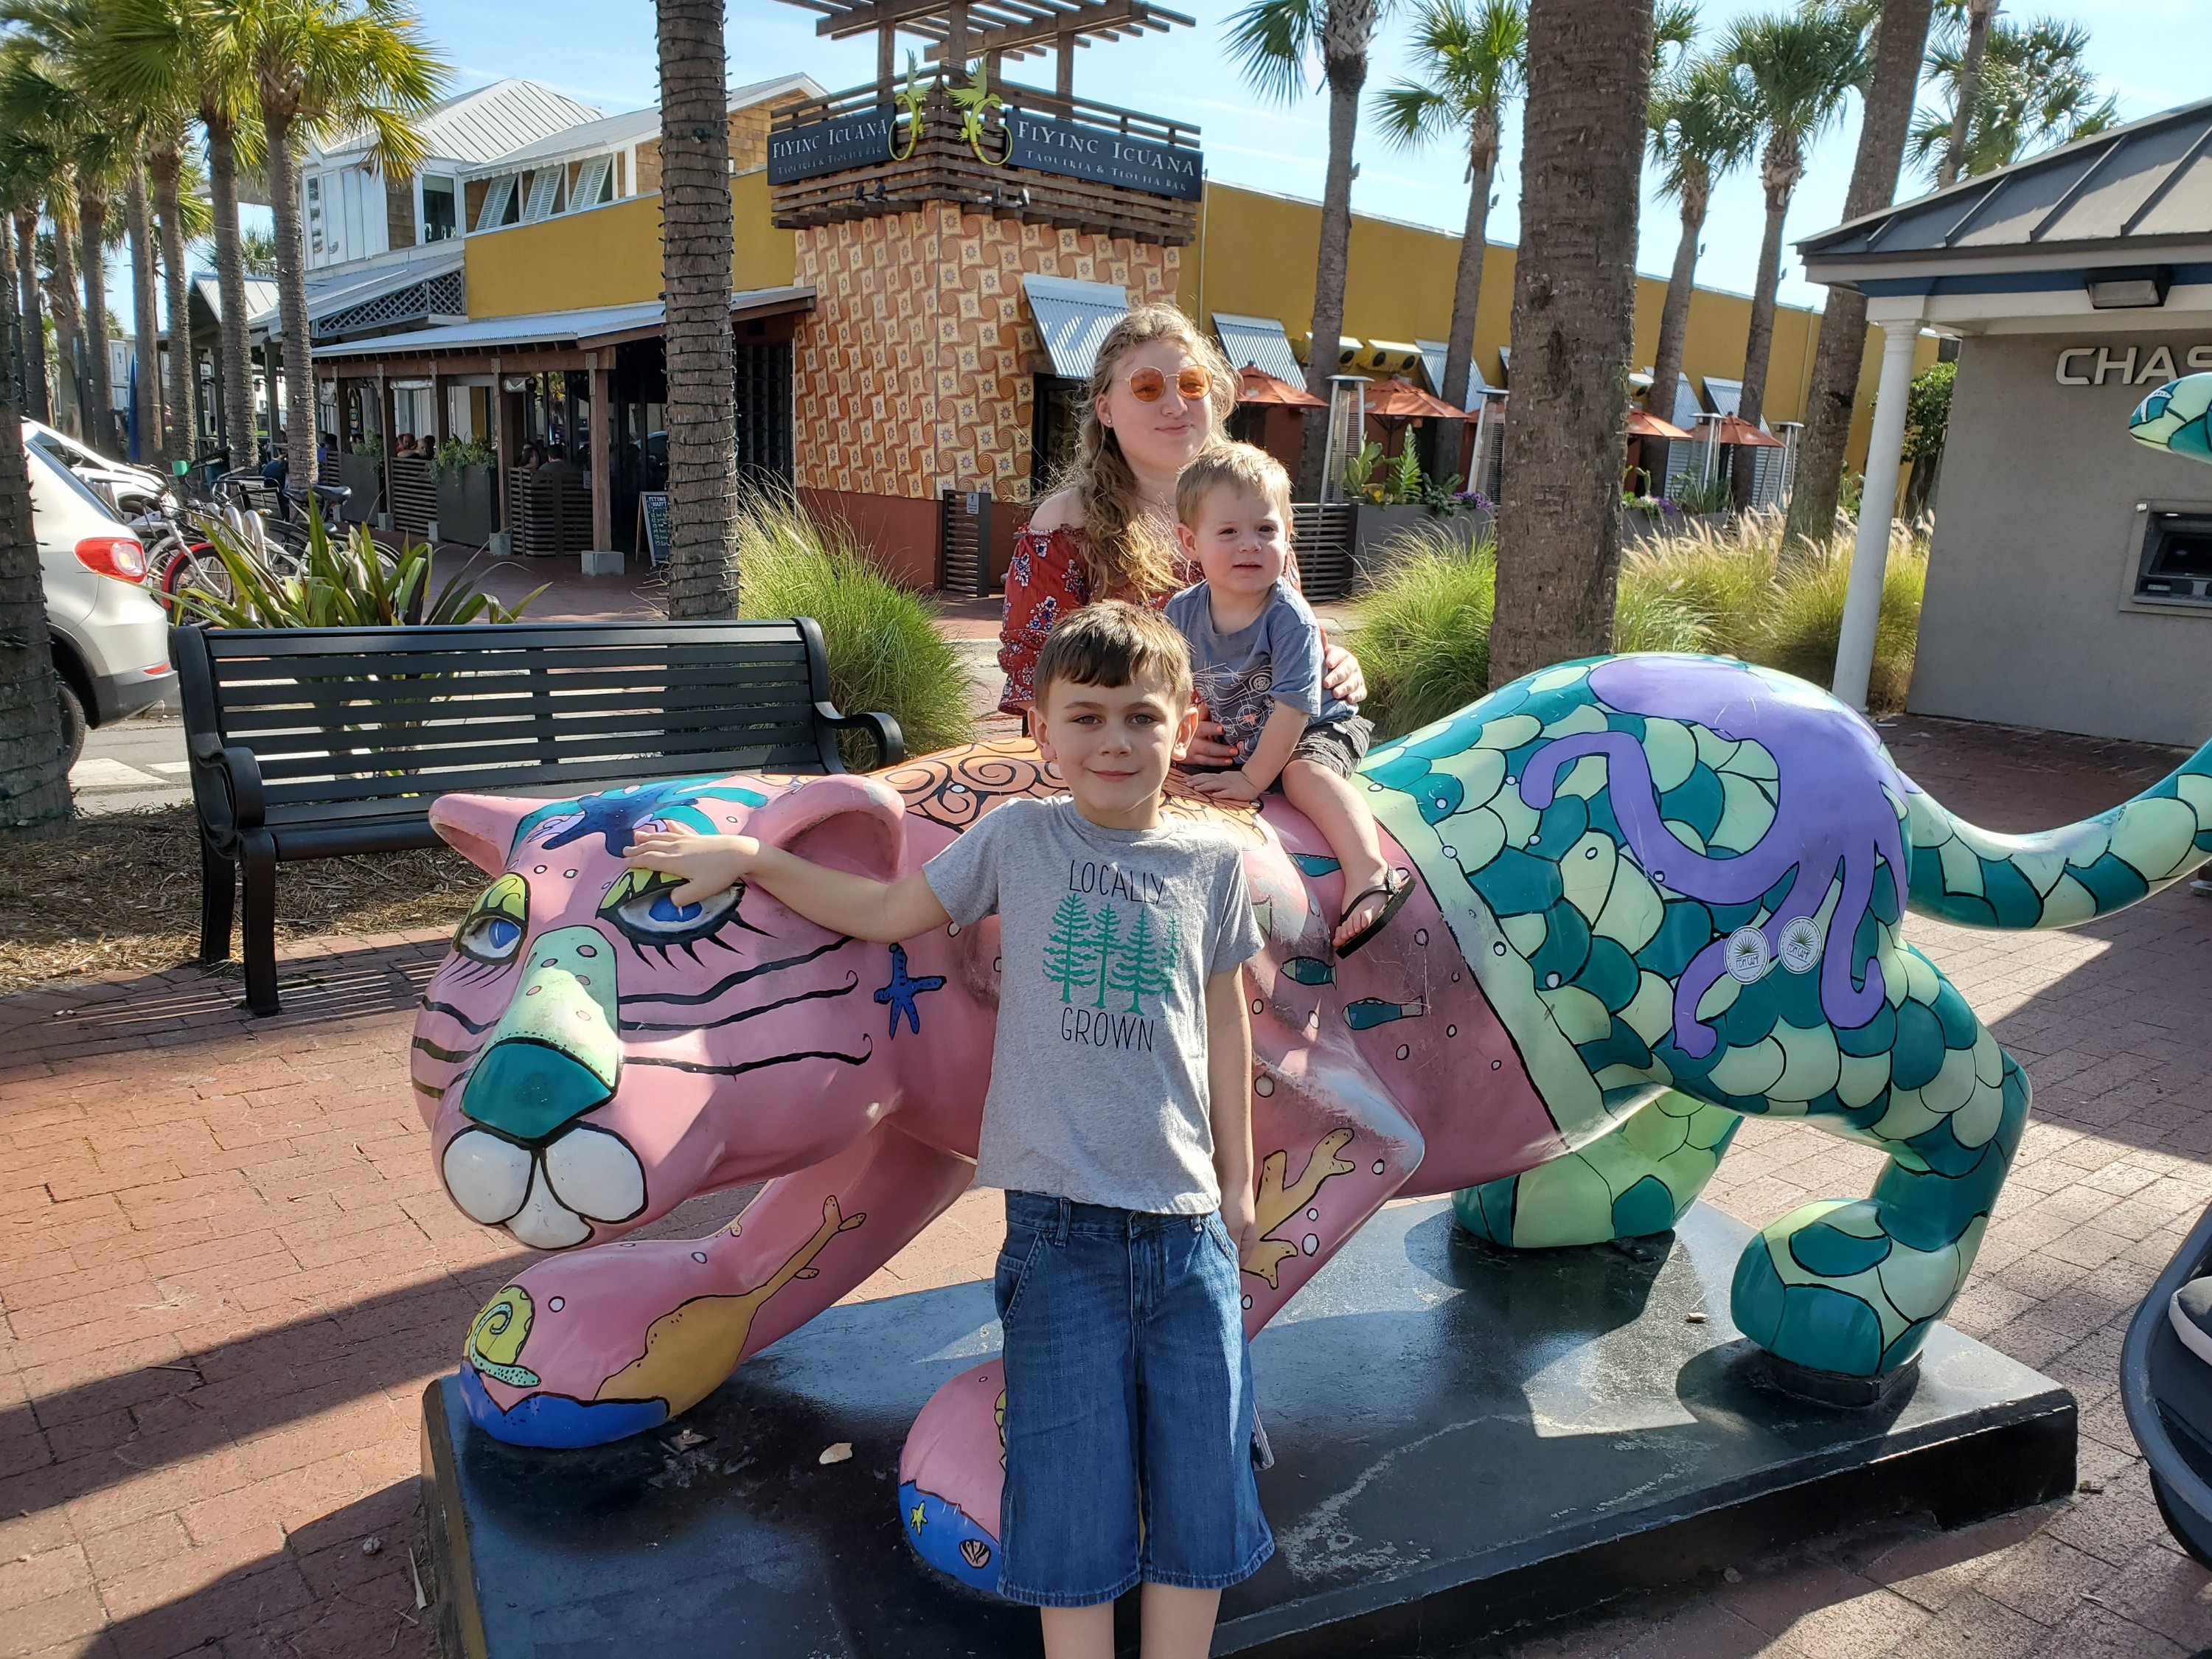
Traveling with kids is not for the faint of heart. But, it’s totally possible to have an awesome time and not lose your sanity! We are living proof. I have a few simple tricks to keep it all together when traveling with a crew. My family of 5, mom, dad, 17 year old, 6 year old, and 1.5 year old, recently traveled to Florida and not only survived, but also had an amazing time. (Read about Florida ideas is previous post!) Here are some things that worked really well for us that we recommend and will be doing again.
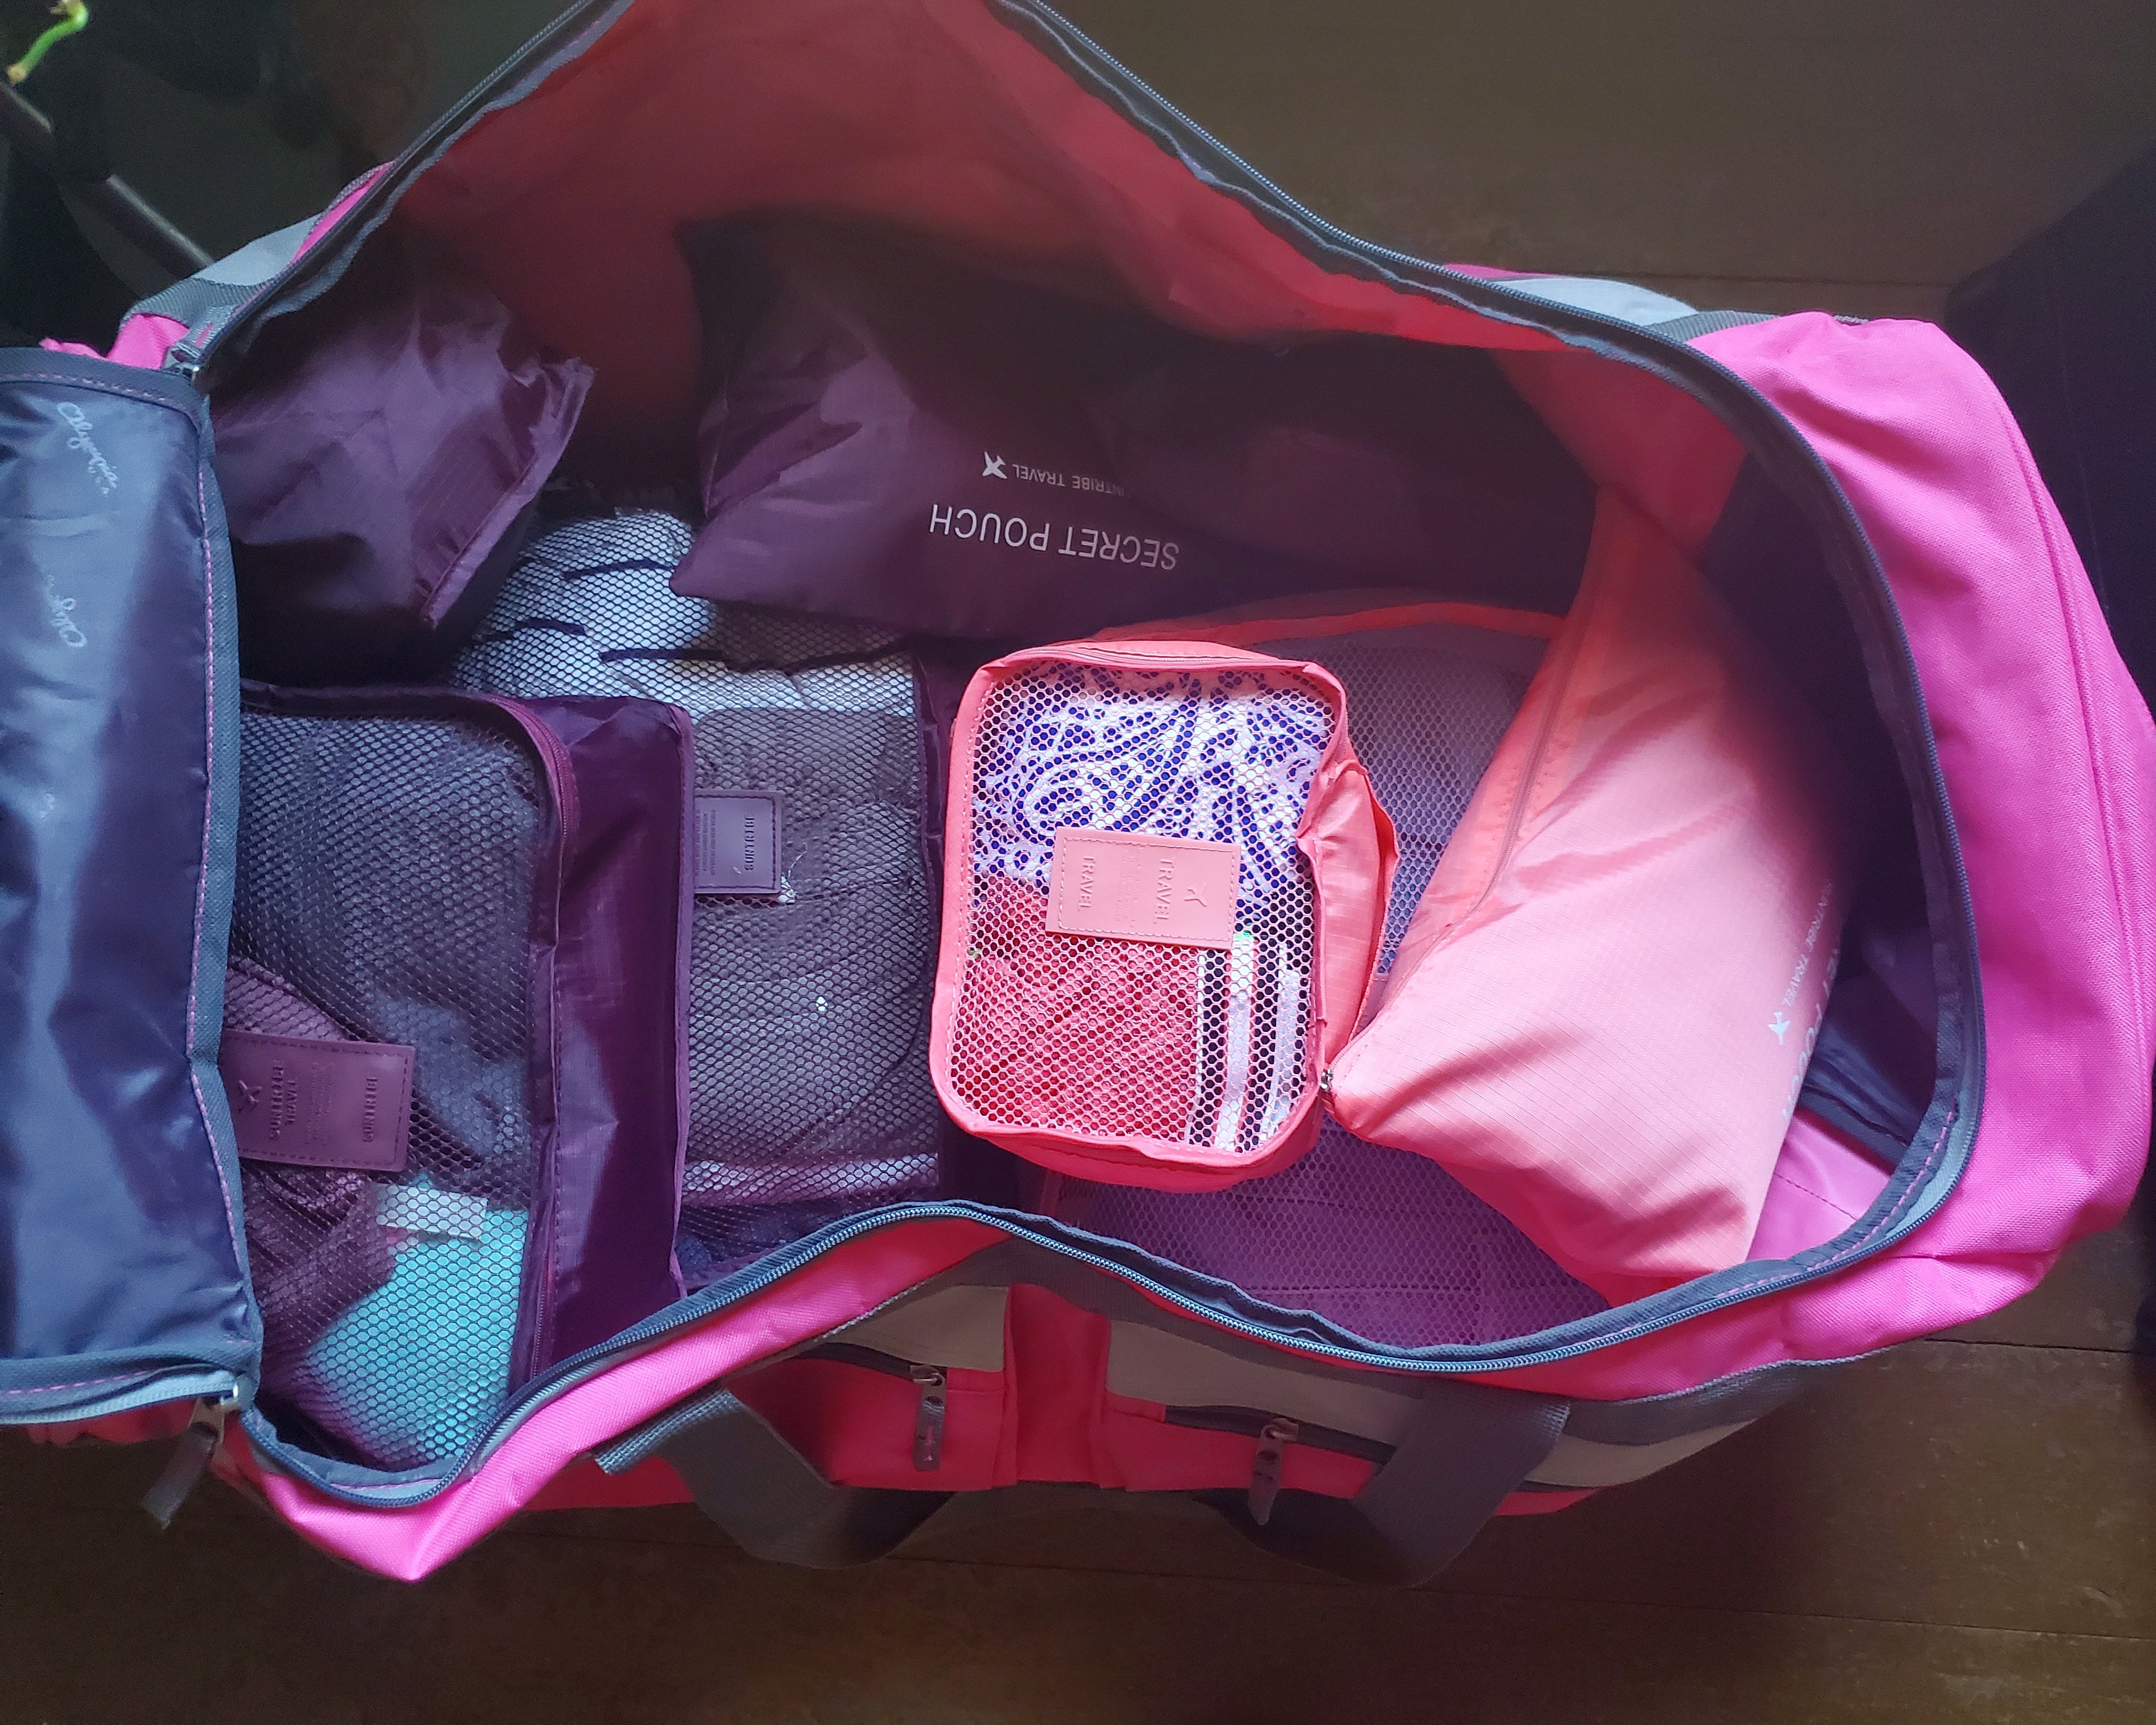
Packing Cases- We got each family member a different color set of packing cases this time. Especially helpful since plane tickets no longer come with a checked bag any longer, as we decided to pay the extra fee for only two large checked suitcases between the 5 of us. This set of packing cases, which we used, are decently priced, come with 6 pouches per set, and had plenty of color options. They are a bit cheaply made, but did a good job for us. Lots more options for these on Amazon too! I divided each person’s cases into groups, like one pouch for shirts, one for bottoms, one for undergarments, etc. I also think it may be helpful to divide by outfits rolled together. At least this way there were only 6 options for where your swim suit could be located on the chaos! 😉


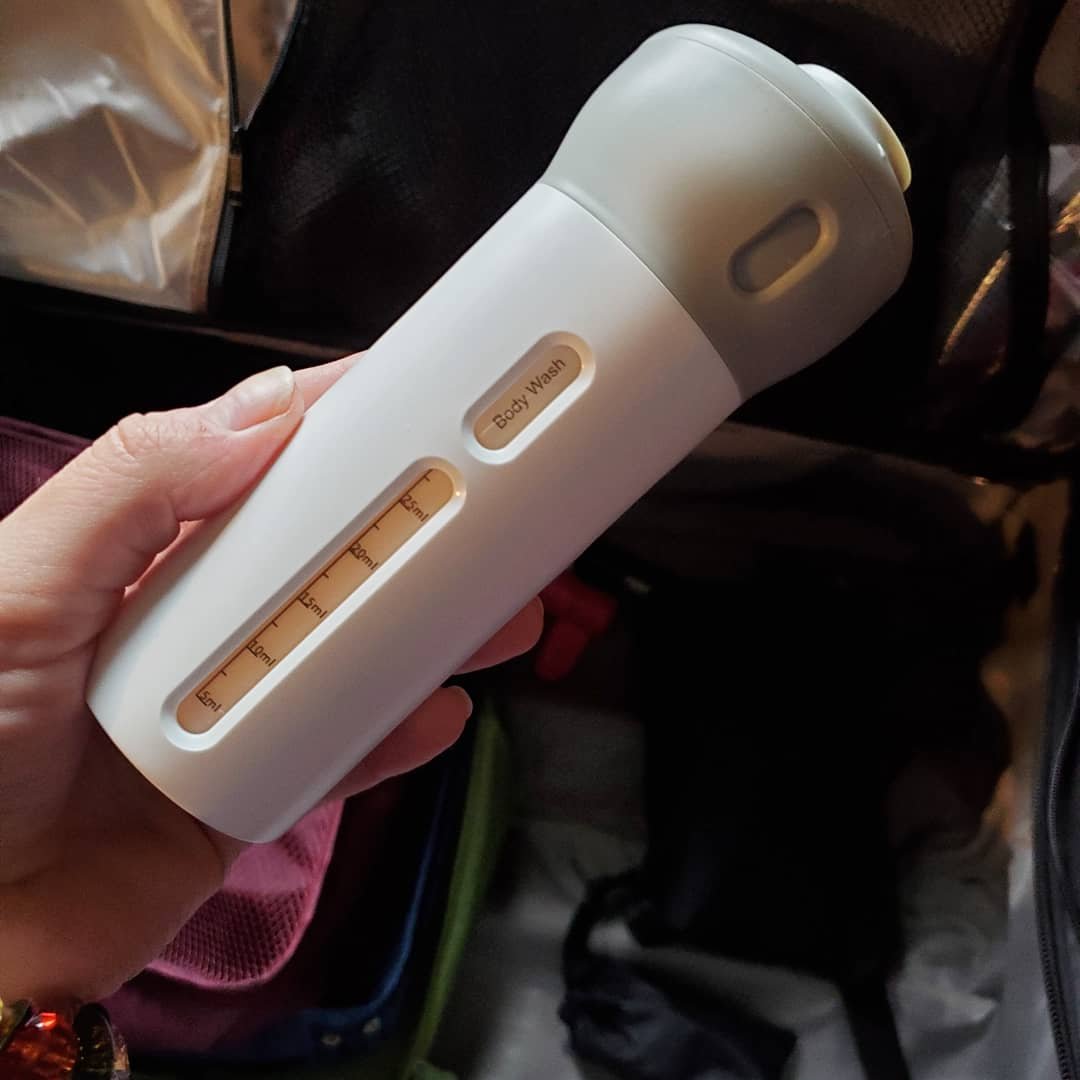
Nacuwa Bottle- If you haven’t heard already, all airlines now only allow liquids in 3.4 oz bottles and these need to be in a quart sized ziplock baggie. To simplify things, use the Nacuwa bottle! All of our necessities can go in one bottle. It’s even TSA approved! Tip- add a ziplock to each bag. You might bring home a hotel lotion, or find that you had a little perfume in your purse without a baggie. Each person is allowed one, so make sure you are prepared to take advantage of this! We use the Nacuwa travel bottle for camping and cabining as well! So handy!

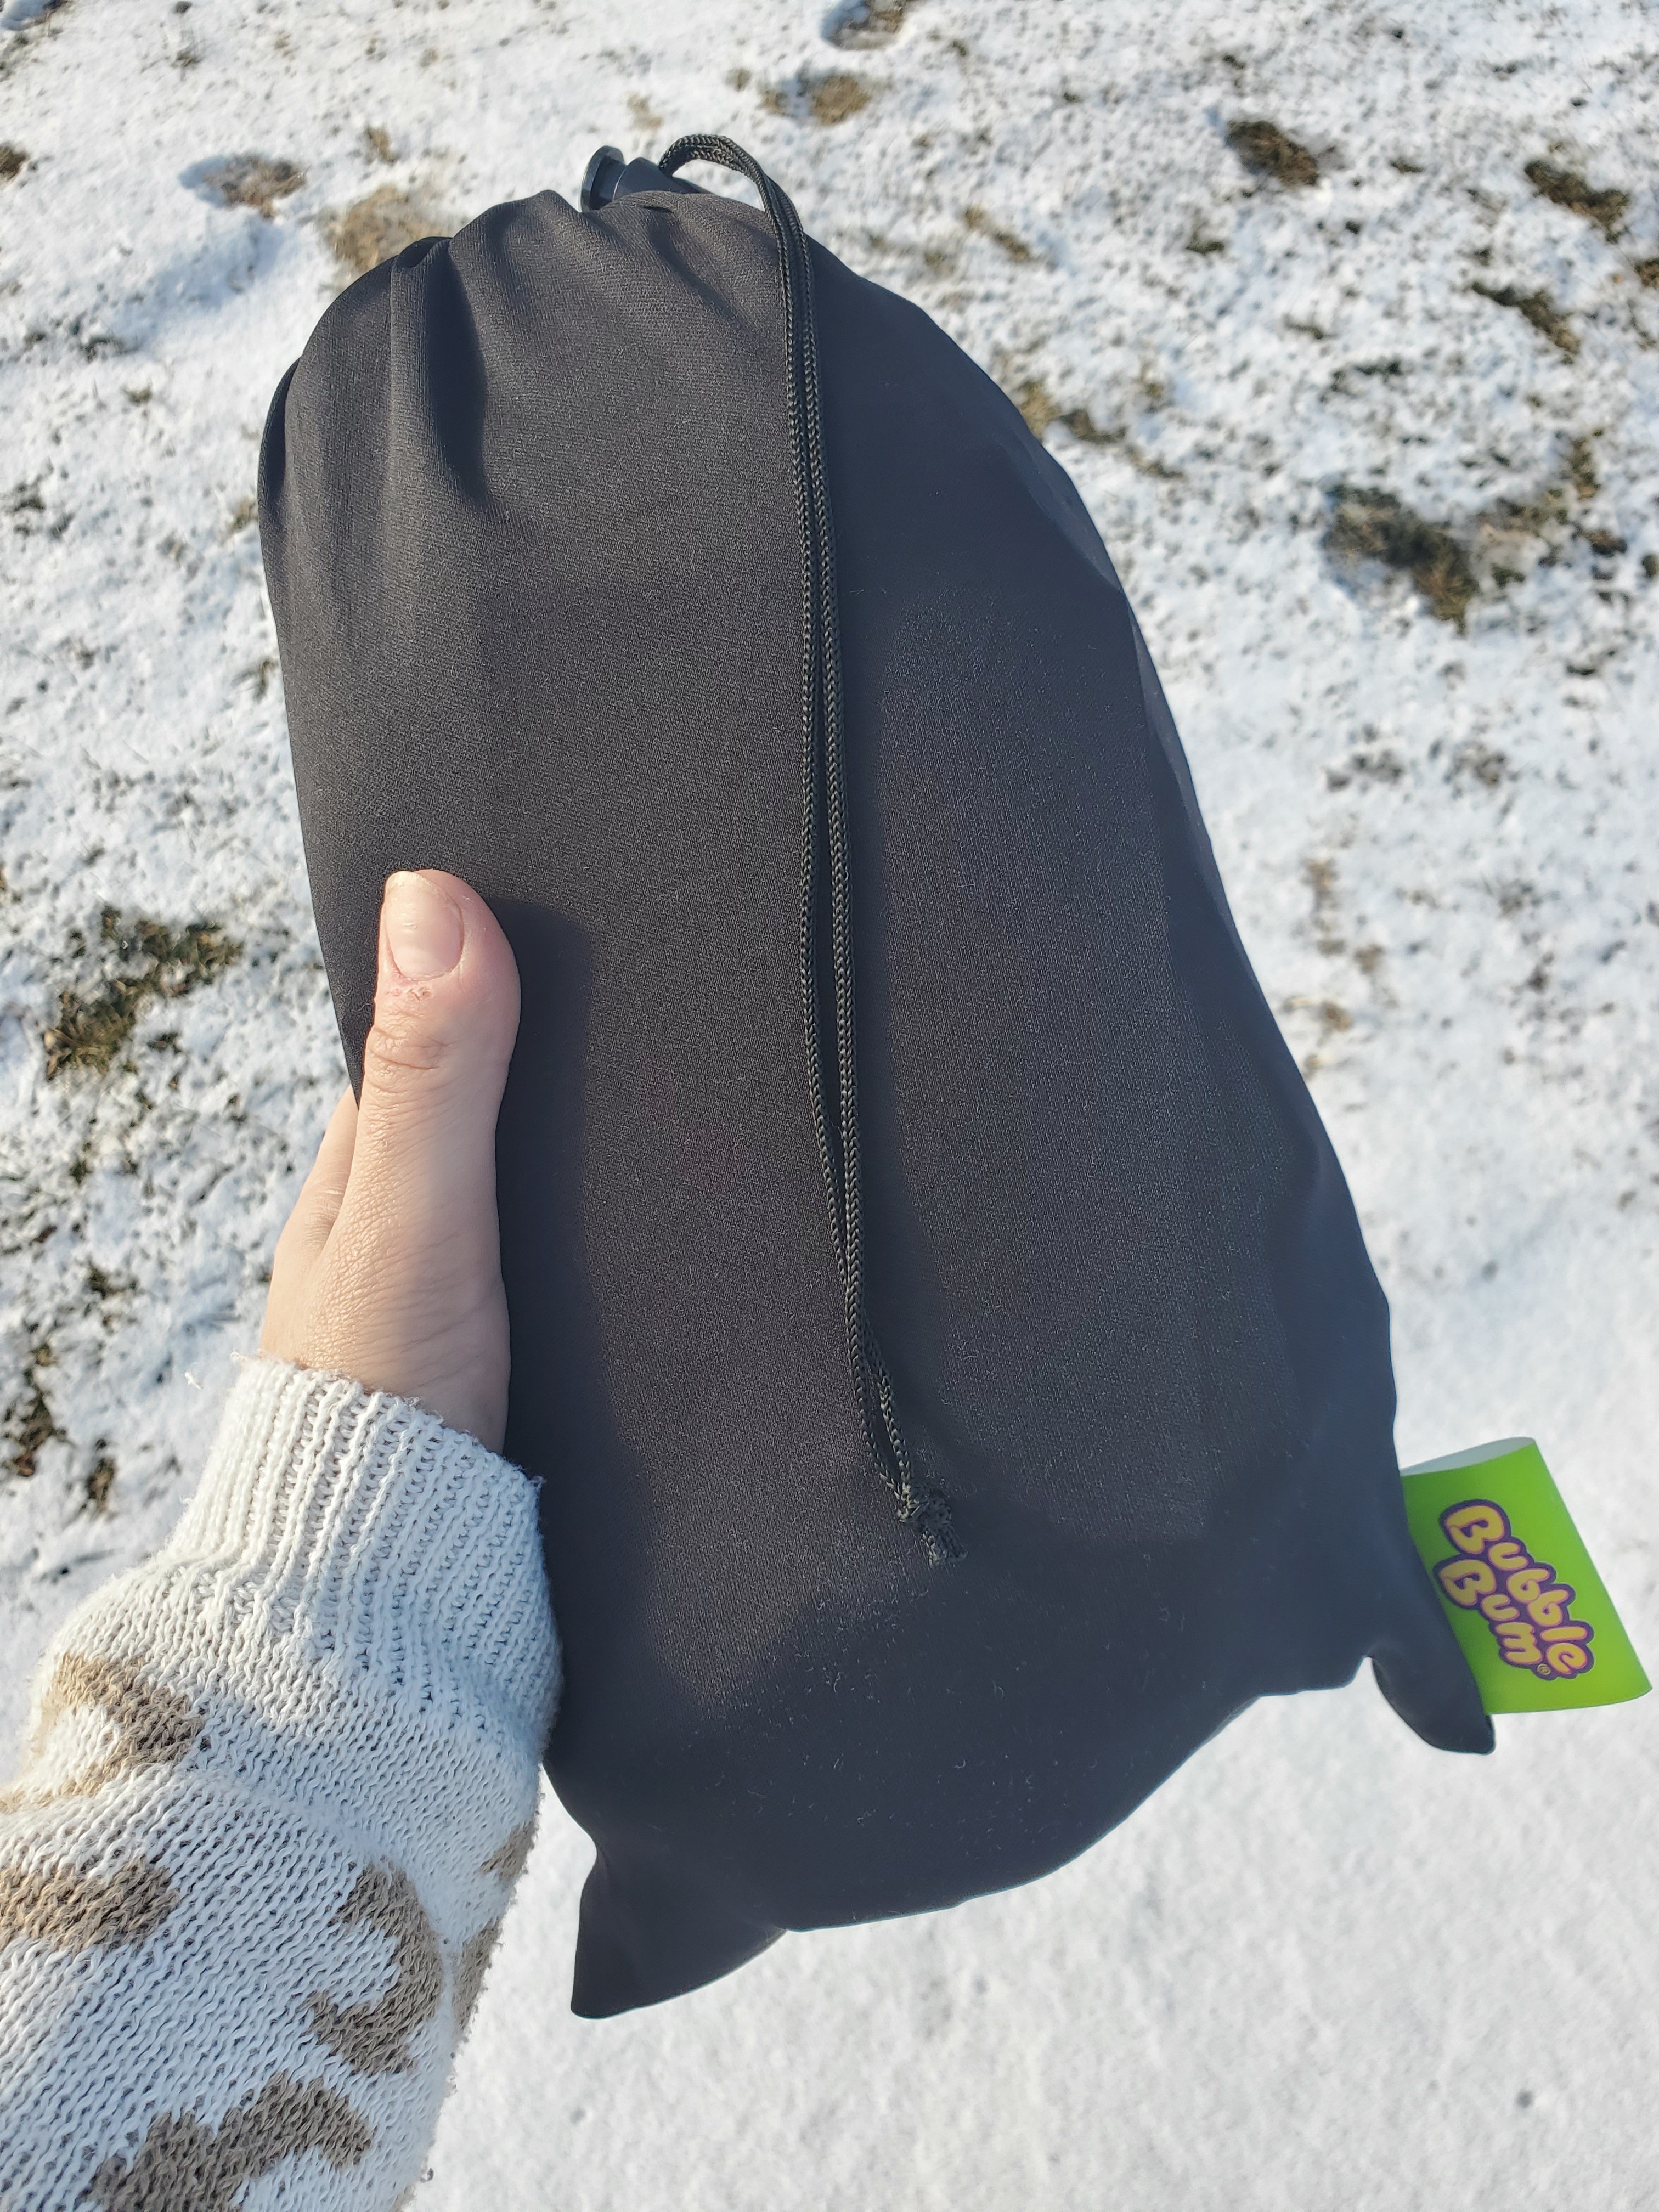
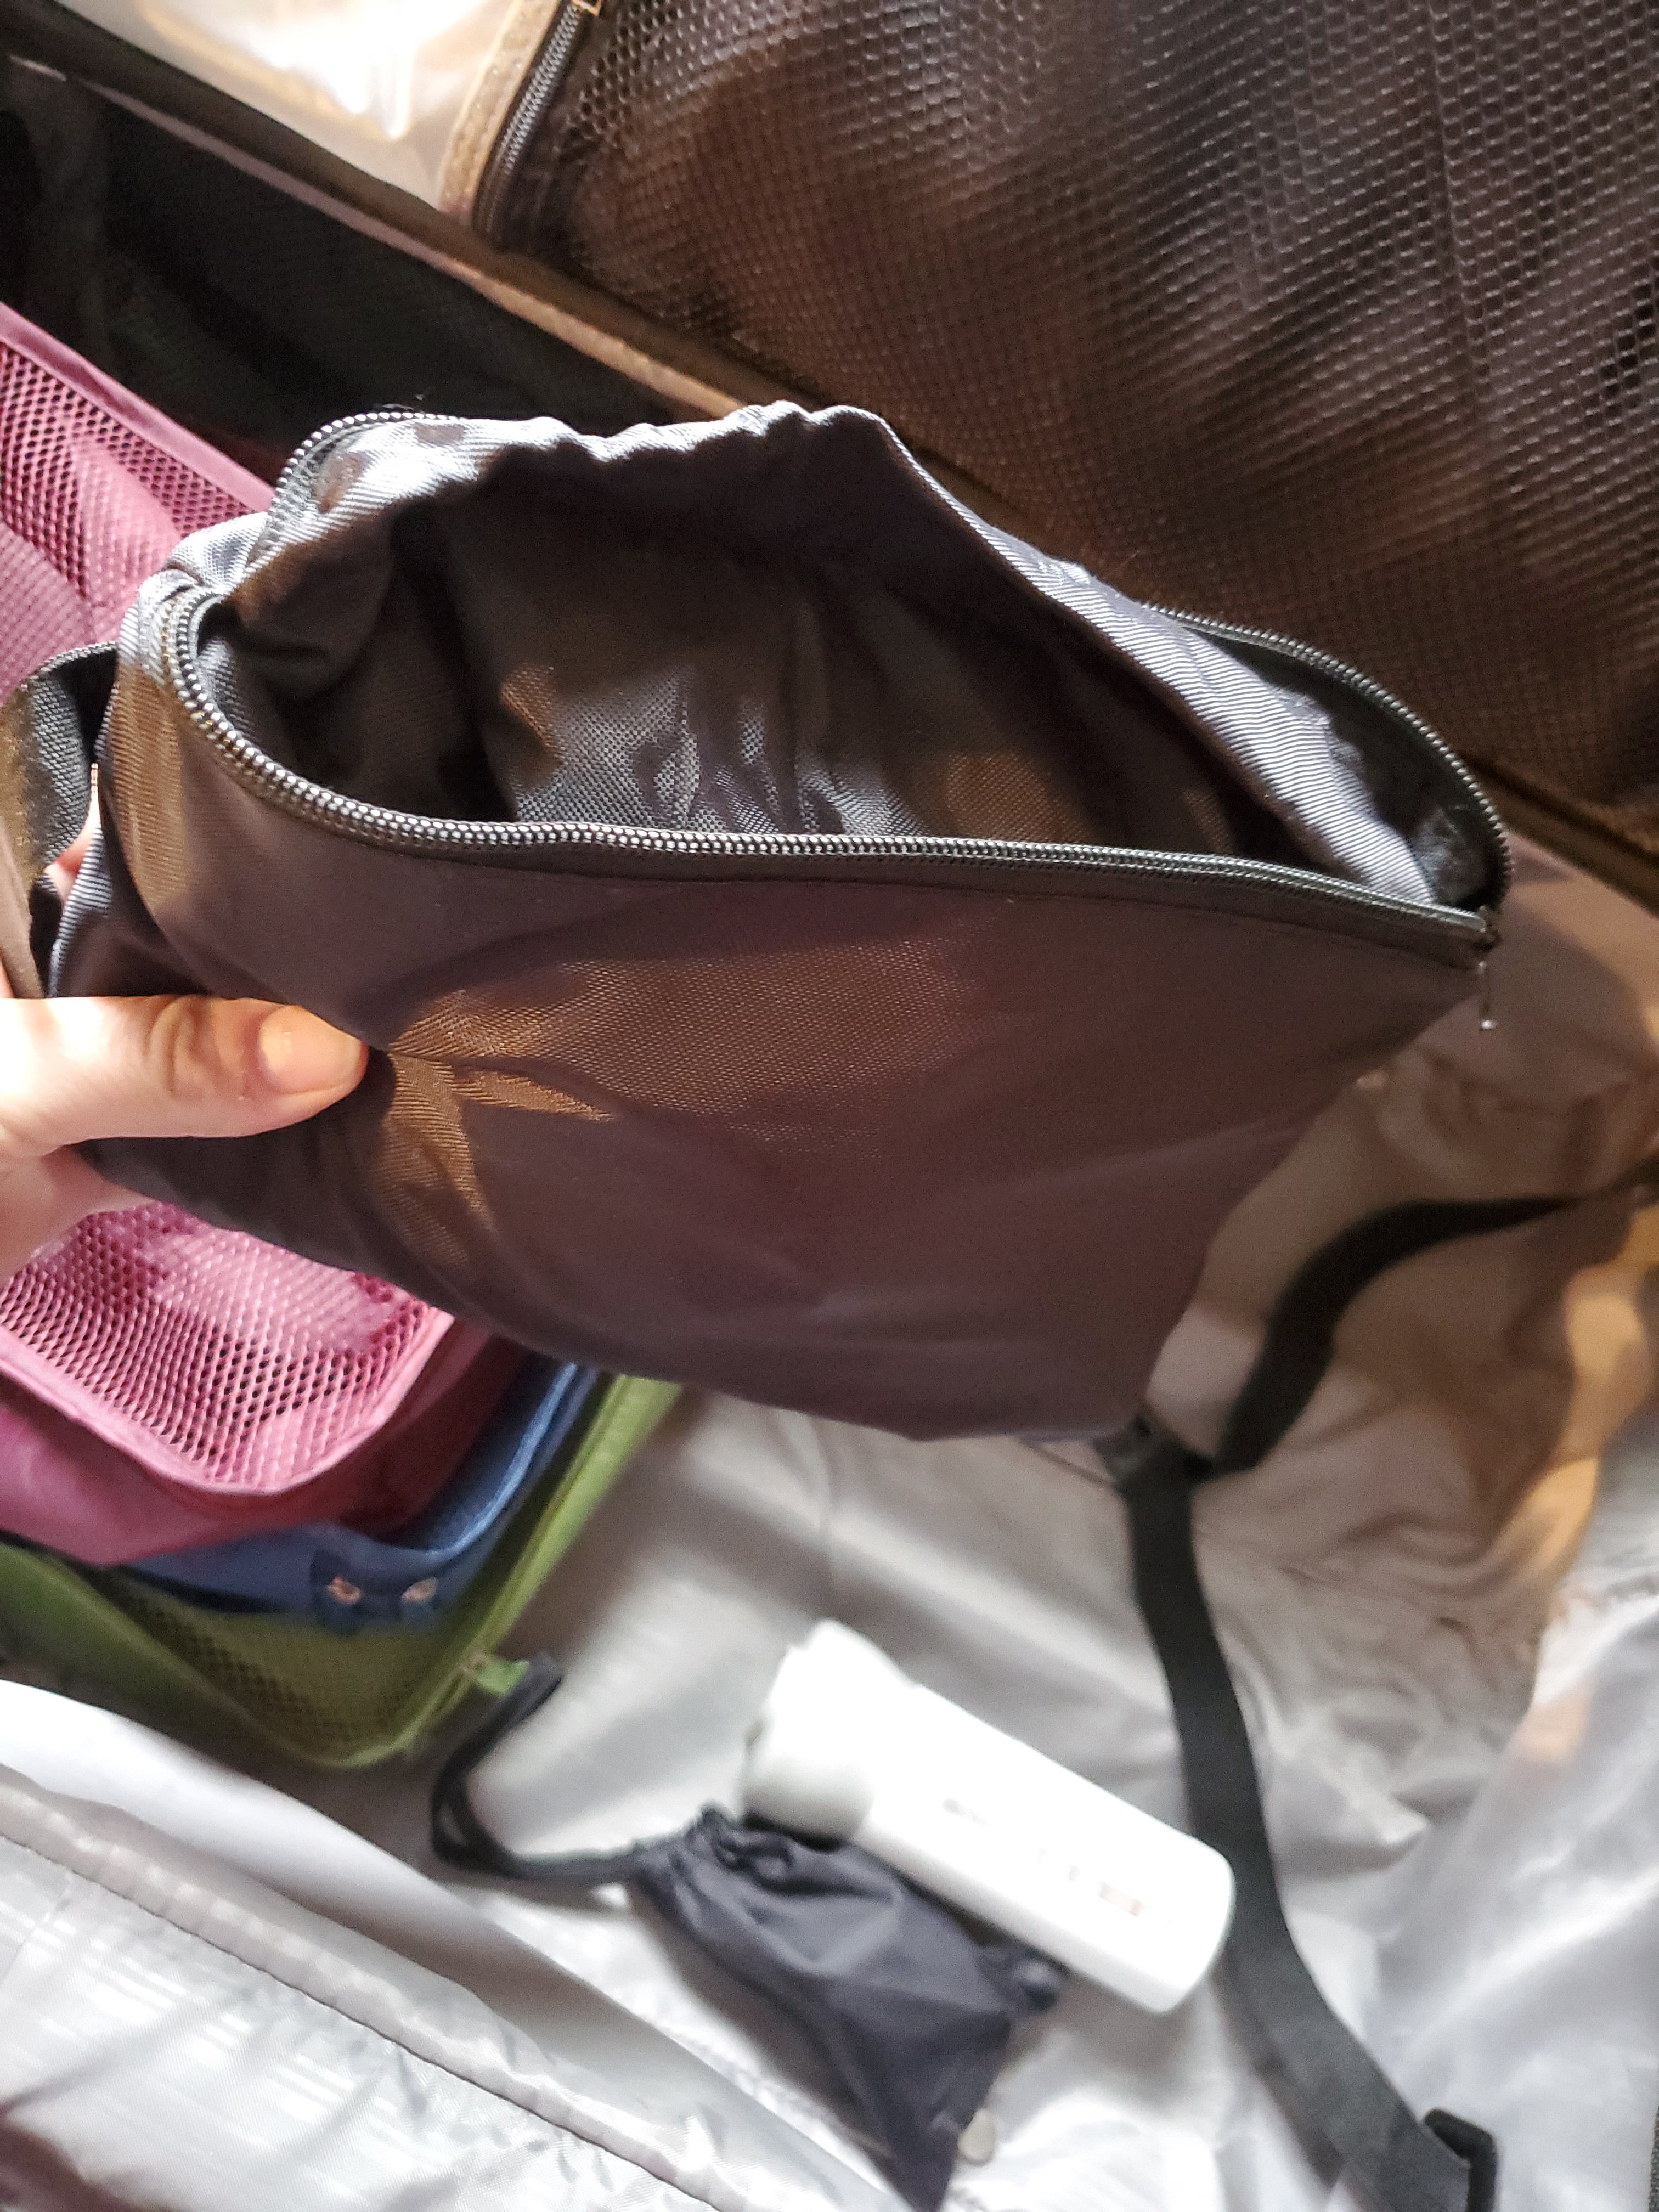
Bubble Bum Seat- Got kids in the booster seat age and size range? You need this. Its handy for all the things, travel, grandma’s car, carpool, etc. We loved having it for the rental car. I know rental cars can provide carseats, but they add an extra expense. And, I’ve heard rumor, that sometimes they don’t have the size seat you requested on hand, or it is outdated or dirty… Save yourself extra trouble and get this guy. He fits in this bag shown in my hand, then blows up to the seat B is holding below. It meets and exceeds all safety standards! Plus, B says it’s super comfy.

Spirit Airlines- Ok, hear me out. This may not be the airline of beat choice if you are taking a super long flight and need extra comfort… but they have their perks if you are ok with very basic and are hoping to save some money. Perk 1- they allow you to bring a diaper bag on free, in addition to the one personal item each traveler is allowed. Thank goodness! Perk 2- they also allow you to check a stroller and carseat for each child for free. We checked the toddler’s carseat (again with the rental car issue) and gate checked the stroller. This means we drove it all the way to the gate with kiddo in it, and it goes right in the door of the plane and off to meet us. Perfect! Perk 3- they combine weights for your suitcases, whereas other airlines don’t. Each checked suitcase is allowed to be 40lbs without extra charge. With Spirit, one could be 20lbs and one could be 60lbs then. Less stress worrying about how to split things up!! Perk 4- you can bring your own snacks and drinks! They do not serve anything for free on the flight, adding to your lower prices, but this also allows you the freedom to pack what and how much you want! Some airports will not allow you through safety checks with drinks. Chicago did, because Spirit’s checkpoint was separated. However, Jacksonville did not, as all airline were checked together. Snacks were fine. Exceptions are always made for breastmilk, formula, etc.
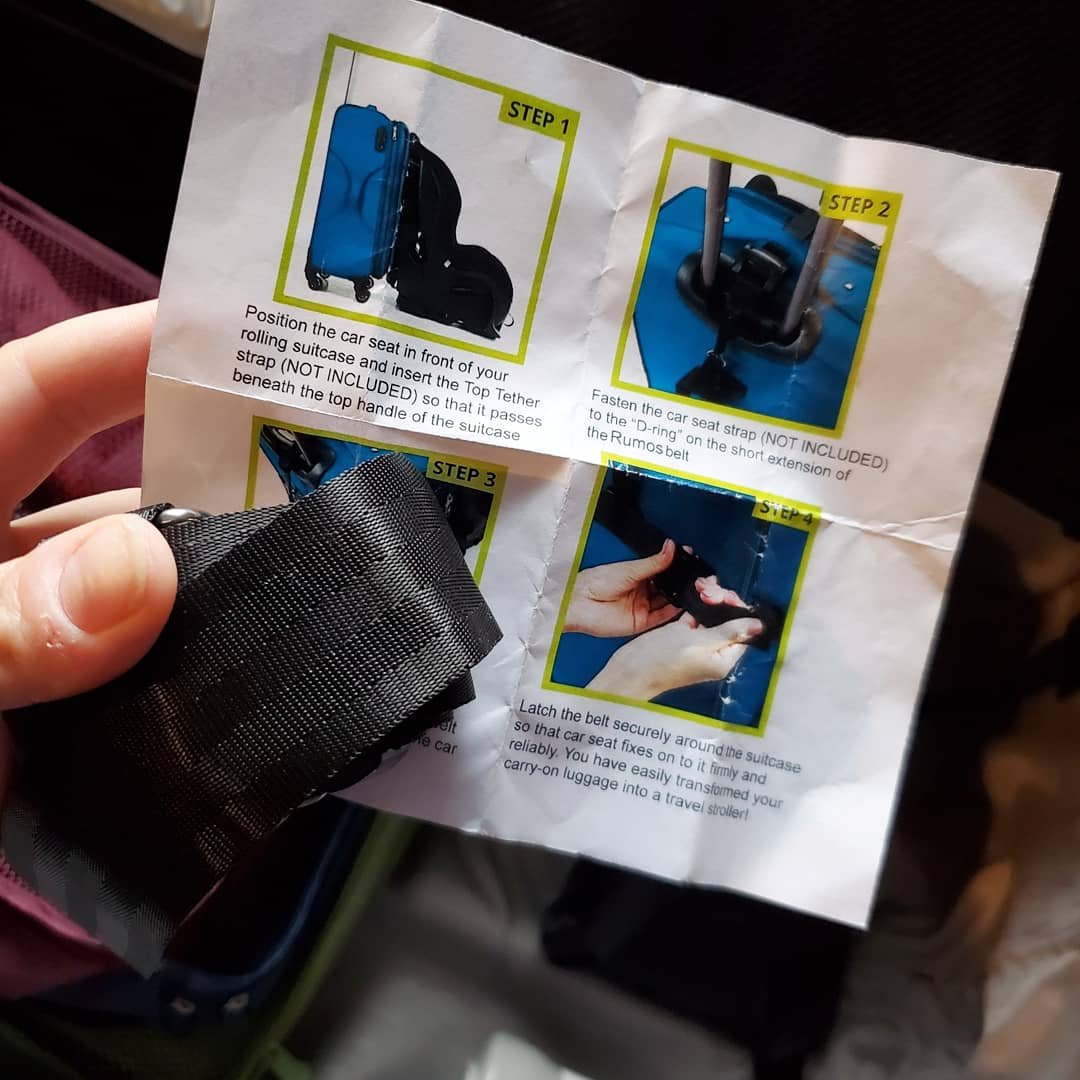
Carseats– I mentioned above that I believe in the perks of bringing your own carseat when renting a car. Here is something you should get. A strap to attach the carseat to your wheeled suitcase. So handy to not lug another parcel through the airport. We wheeled the carseat to baggage check. Then we packed it in it’s own travel bag to be checked. The second picture below is how the carseat bag rolls up into it’s own pouch to pack. Pack this in an outside pocket of your suitcase and you will know where it is before you check bags.
Last tips- stay organized, go with the flow, don’t see it all, and enjoy the little things. Dad says- pack lots of snacks. You will have a blast! Safe travels!
Anything you would add?
XX,
Jess
Permalink Comments Off on Family Travel Tips

Simple Table Setting For Two
We have been keeping busy around here. Mostly working on wedding projects, and although I would love to show you some of them, I am making myself wait until after the big day. So, here is a tid bit of the fun around here, a table setting just for the two of us. Jeremy even helped me think of the fun center piece! 🙂


What do you think? Simple, fun, and totally us. lol. Hope you are all having a nice early spring!
Wax Seals
When we first got engaged I happened to find a W stamp and some silver wax on sale. Of course I snagged it, but we have yet to use it. Although I’m not technically a “W” yet, we decided to test out the seal on our thank you’s from our engagement party. They turned out pretty cool!
Our supplies and our blank thank you notes:


Tony melted the wax for me. We did a few practice runs, but he started to get it down pat.

He said it worked best to slowly swirl the wax stick around while on fire, then as it drips to move the wax into a larger circle. I then stamped the wax with the seal, and viola!

Simple, but fun and a very cute touch. We thought we should make this our signature for all of our cards from now on. And, it was fun to do together!
Our Engagement Party!
We finally had it! It’s all over, even the cleaning up! It all went great, and we also wanted to thank everybody for coming and for the great gifts and cards! And, I have a few pictures to share!

The above is the general view of the backyard before the party. The picture doesn’t really do it justice. It was really nice, relaxing, and cozy. It was impressive for those who had seen our backyard a few months ago when we moved in!


The above is the table before all of the food. The vintage table clothe came from Fred and Ethels. The vintage letters are always hanging in our bedroom, and of course we had to have a big diamond! Isn’t that silverware bucket cute? My mom found us that. We also had some big dice (of course!) on the other end.

There were antique Ball jars scattered on the table tops and even in the grass that held candles for lighting up the night.


I love all of the paper lanterns. These were so easy, they had batteries! And, they were only a couple of dollars at the dollar store! They set a nice mood.


And at night everything glowed!
I hope some of these simple, but fun ideas help you with your next party. I loved them so much that I will use some of them for our casual BBQs and bonfires!
Sweet Little Details
I really believe that it’s the little details in a home that make your space special. Ok, that sounds cheesy. But, it is true. We have made some major repairs, spend lots of money, and in the end it’s the little projects worth a few bucks that make me so proud of our home. I have been excited for days about the new towel bar we hung in the bathroom. This is not only a convenience, but looks so much better than having the towel laying on the sink all the time- and, it only cost me about $3!
So, last night while finishing up the living room curtains we also hung up some coffee mugs in the kitchen. I bought a few new red mugs at Wal Mart for $2 apiece. I got a few cup hooks, and viola! Instant face-lift for the kitchen space. I love my bird of paradise mugs, but these look much more updated and will go great once we finishing the painting of the cabinets. Tony actually hung a separate board under the cabinet so that the screws for the hooks wouldn’t go all the way through. He also had to slightly open up the cup hooks, as the mug handles were a bit wider than standard ones. All in all I think they look great and will be awesome in the new kitchen too!


I know I said that I would be starting to work on the cabinet painting last week, but I got a bit lazy. I really am going to work on it this week, so check back for updates and tips on the cabinet painting!
My Office and Easy Tips
We did do work at home over the weekend, really. But, the snow on Sunday (snow!?) hindered us from accomplishing too much. I will have a few things to show you later on in the week, but for today I am going to show you my work office.
When I started at this job one of the first I thought about was how to dress up my first personal office. I wanted to create a fun and unique work space without spending a bunch of money. Of course I was not about to go out and buy new furniture, but I do have a few simple and very cheap ideas for dressing up the drab office. Although you may not be able to produce your dream office with a space that you don’t own, you can make it a comfortable and productive space!
1. Posters. Not the priciest artwork, but good enough for a work office. I hung the Keep Calm poster as you enter my doorway (Yup, cliche maybe, but I still love it!). I also hung an inspirational quote from Muhammad Ali on the opposite wall. These were so fitting as I work in a hospital as a medical case manager. And, they give me some color, but stay in the basics I love!


2. Use your printer. I made these blah magnets cute by printing a sheet of white paper with a paisley pattern. I cut the sheets down to the size of the magnets and glued them on. I then covered them with clear plastic tape. I also used paper to fill the letter opener magnet. The other side of the desk is a sheet of paper I printed with the Chinese symbol for “happiness.” I have a few printed quotes around the office as well. These are cheap enough to switch out once in a while too!


3. Paper flowers. I wanted to add some brightness to my office, but am horrible at caring for plants. So, I made paper roses with tissue paper. I stuck them in a thrift store vase and now have flowers all year round. (the candy is a crowd pleaser as well)

4. Organization! Staying organized is the simplest, cheapest way to keep an office space looking its best. I have some open shelves that I make sure are always orderly. This is also a good time saver. I always know where things are and never have to hunt!

5. Personal but professional. A nice touch to an office space is something personal. But, remember to keep it professional. Too many pictures or tchochkes can make an office space cluttered and unprofessional. I have some pictures hung and framed in my office, but only ones that I don’t mind if clients see. I have a magic 8 ball on my desk for those real tough decisions as well ;). My desk top is also an example of keeping organized. And, the calendar is a free printable version from calendarsthatwork.com. I love these, as they look cute and are simple instead of busy! Also notice my mouse pad and pen. Little touches that were inexpensive!

Hope these simple ideas help you with your office. Mine is just like my home, always changing. Enjoy!
Kitchen Inspiration
We are currently preparing to do a bit of kitchen renovation in our house. While I have a pretty clear picture in my head of what I would like to do I have also been scouring the blog world for some inspiration and creative ideas. We are trying to do this on a very tiny budget, so I am also searching ideas in that area. Today on Apartment Therapy I found one of my favorite kitchen pictures.

I just love the little swinging door. It reminds me of old western saloon doors. I am wanting one for our kitchen. I’m just not sure that every kitchen could pull this off. Maybe that will have to go on my “someday” dream list. For now we are thinking more basic remodel in the kitchen. I would like to sand and paint all of the dark wood cabinetry a glossy white. The cabinets are outdated and mismatched. This will also allow us to fill the holes from the old hardware and add new pulls. These are the pulls I am thinking of, bin pulls:

http://www.google.com/imgres?imgurl=http://1.bp.blogspot.com/_wmc3cgAjw0k/SHeOWPk3S3I/AAAAAAAAAOc/sp4juB_wHwA/s400/IMG_6026_bin%2Bpull.jpg&imgrefurl=http://theletteredcottage.blogspot.com/2008_07_01_archive.html&h=266&w=400&sz=12&tbnid=1nyLQKGa76QSAM::&tbnh=82&tbnw=124&prev=/images%3Fq%3Ddresser%2Bwith%2Bbin%2Bpulls%2Bpicture&hl=en&usg=__noAFFwDt8FmB3VYpI7taTYFlhEQ=&ei=zCHRSb_kJMSInAfzwbhq&sa=X&oi=image_result&resnum=4&ct=image&cd=1
I have also been reading that it is possible to safely paint laminate countertops. Since paint is a much cheaper alternative to replacing the countertops at this point I would like to paint these black. Here is inspiration for a black and white kitchen with warm hardwood floors:


Tidying Up
I’m a neat freak. I know it. I’m actually proud of it. I like that my home is always clean, neat, and organized. I feel that everything should have a place. Junk left out of it’s place clutters up your house and really ruins the appearance. I love ugly necessities (like cleaning supplies or utensils) to have a place to be stashed that is concealed when not in use. Not only does this just look so much better, but it also means you will not lose things or forget where you left them. Our cleaning supplies are under the kitchen sink in tubs. We always keep a flashlight right under the sink as well. A few basic tools and utensils that are needed frequently are in a drawer in the kitchen island, and the rest of the tools are in the tool box in the basement. I could tell you where ever item I own is right now. This drives Tony nuts that he has to put everything back in it’s assigned spot, but he will be thanking me in an emergency when I find what we need in seconds!
Anyway, this brings me to the topic at hand. Our mops and brooms. They are too big to fit under the sink, but too ugly to be left leaning against a wall in the kitchen. I had them stashed away in the basement. But, no one wanted to go down there to get them every time there was a mess. I even caught myself on hands and knees wiping up the floor with a paper towel instead of heading to the basement. I knew there had to be a better solution.
We took a trip this weekend to our local hardware store and found a basic hook set. My plan was to hang this strip of hooks inside the basement door for easy access to brooms and mops. The strip was a bit too long to fit from one beam to another along the unfinished basement walls. We compromised and leaned the strip of hooks on it’s side. It actually worked out perfectly, and the long handled tools hang perfectly just inside the door. I’m pleased. 🙂 And, now we can save paper towels and make our lazy selves go grab the mop!

The brooms and mops hanging so nicely just inside our basement door.

The row of hooks that proved to be a simple and inexpensive solution to a daily annoyance.
We were so inspired we even added a couple single hooks to the opposite wall for hanging dog toys and leashes.

These things will no longer have to be draped sloppily over the banister!
Simple fixes make all the difference in a home!
