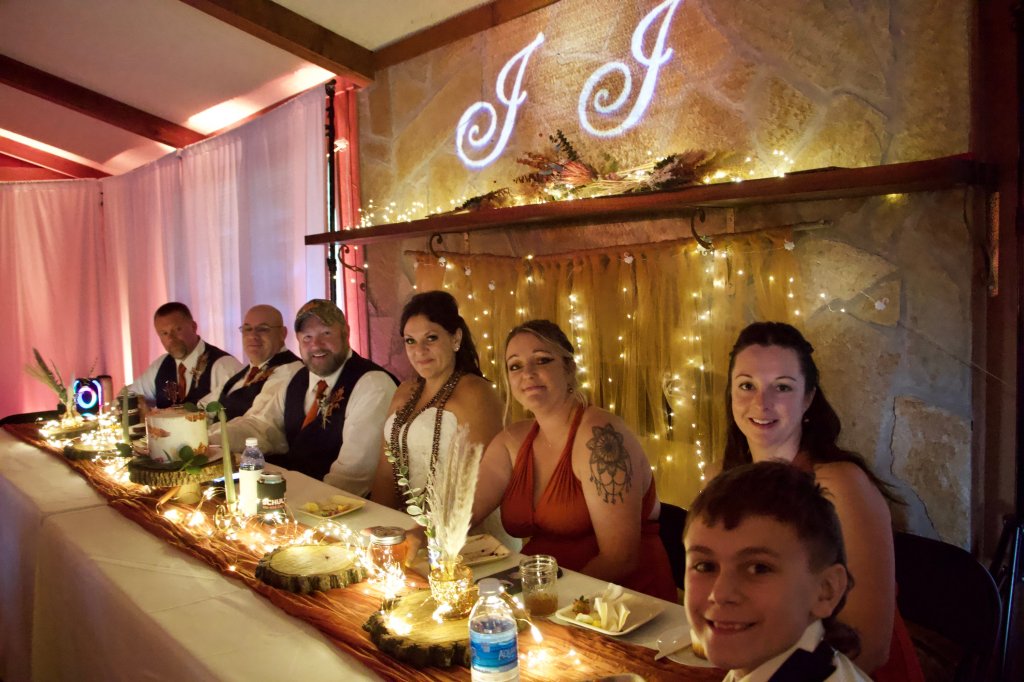
Gorgeous Wedding Decor!
We did it! We got hitched! And it only took us 9 years!
But 9 years later, and we have a home and a family, and the wedding budget was small. So, I’m here to share a few things we did to throw a gorgeous wedding, but on a budget!
First, if you are a planner like me, buy an actual planner and skip hiring one. I used a basic wedding planner from Amazon and tracked everything myself. It’s definitely doable!
Next, buy what you can, don’t rent, and resell when you are done. It was actually cheaper to buy tablecloths and runners than it was to rent them!
Third, pick a venue you like, but if you find a budget friendly option, don’t worry if it needs a little boost to get wedding gorgeous! I used Rent My Wedding and transformed our very inexpensive, albeit dated and bland venue to a gorgeous spot, on a budget!
Before:
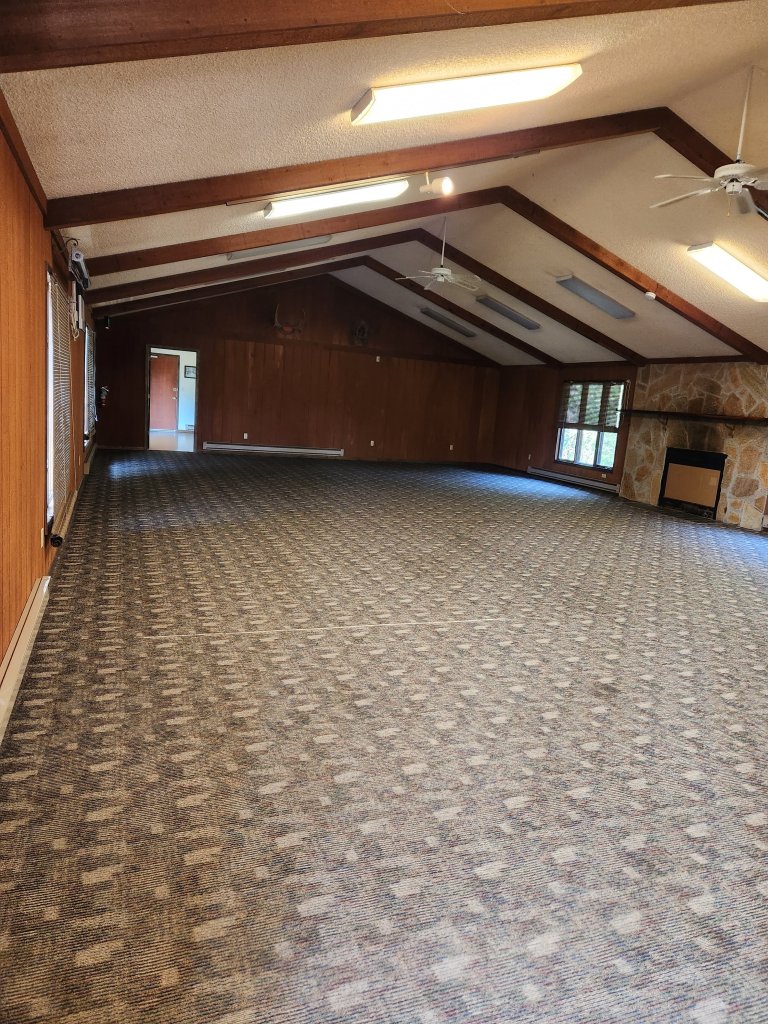
Blah, drab, dated. But cheap. Enter Rent My Wedding.
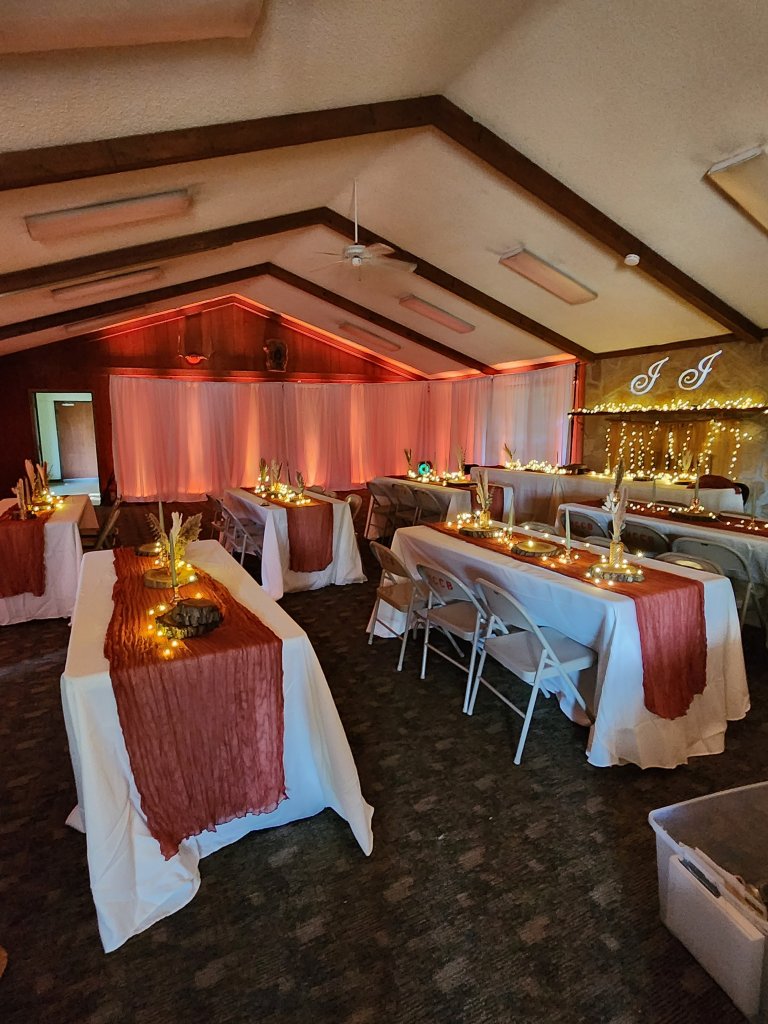
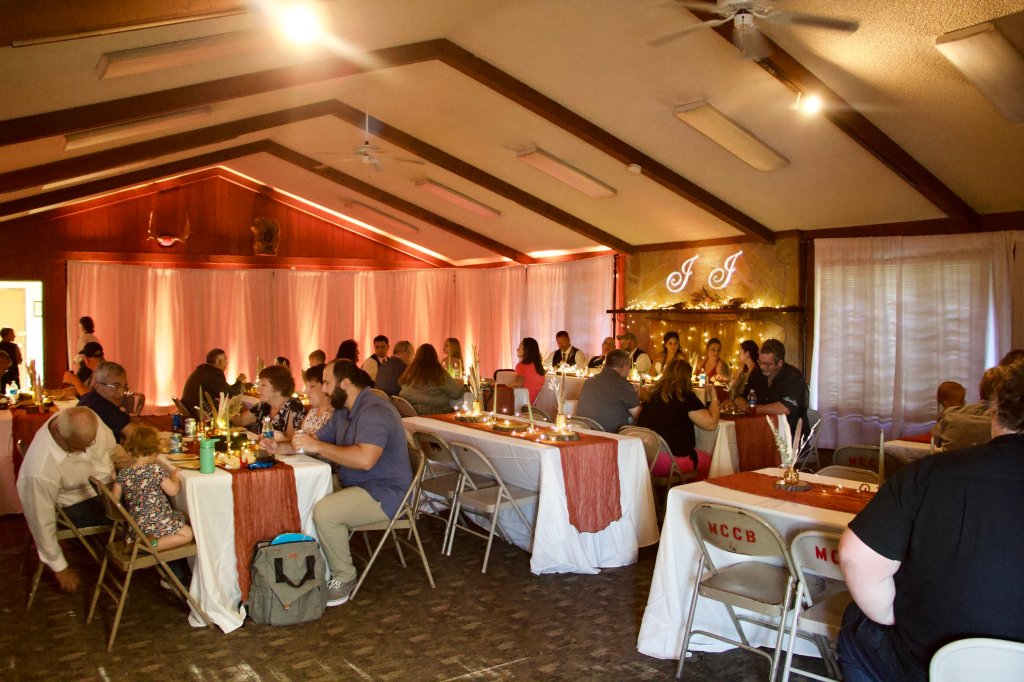
We used white drape walls and uplighting to make the glow. We also added the custom monogram behind our table. It all turned our venue into our rustic glam dream spot!


The whole rental process was super simple too. It can all be chosen and rented online, and customer service is super helpful! Everything is shipped right to you. The directions made it all very easy to assemble and decorate. Then you pack in back up and ship back with the included labels. We even a scheduled a shipping pick up! Boom. We highly recommend Rent My Wedding!
Xx,
Jess

A New Mud Room
Check out this horrible mud room!

I know it doesn’t show it well, but behind the open back door is a small closet and then a sink. Yuck.
It is an old farm house, so once upon a time the sink had a purpose. Now it was just wasting space. Valuable space. We knew this room could be better utilized. Little did we know, we would, as usual, open a giant can of worms…
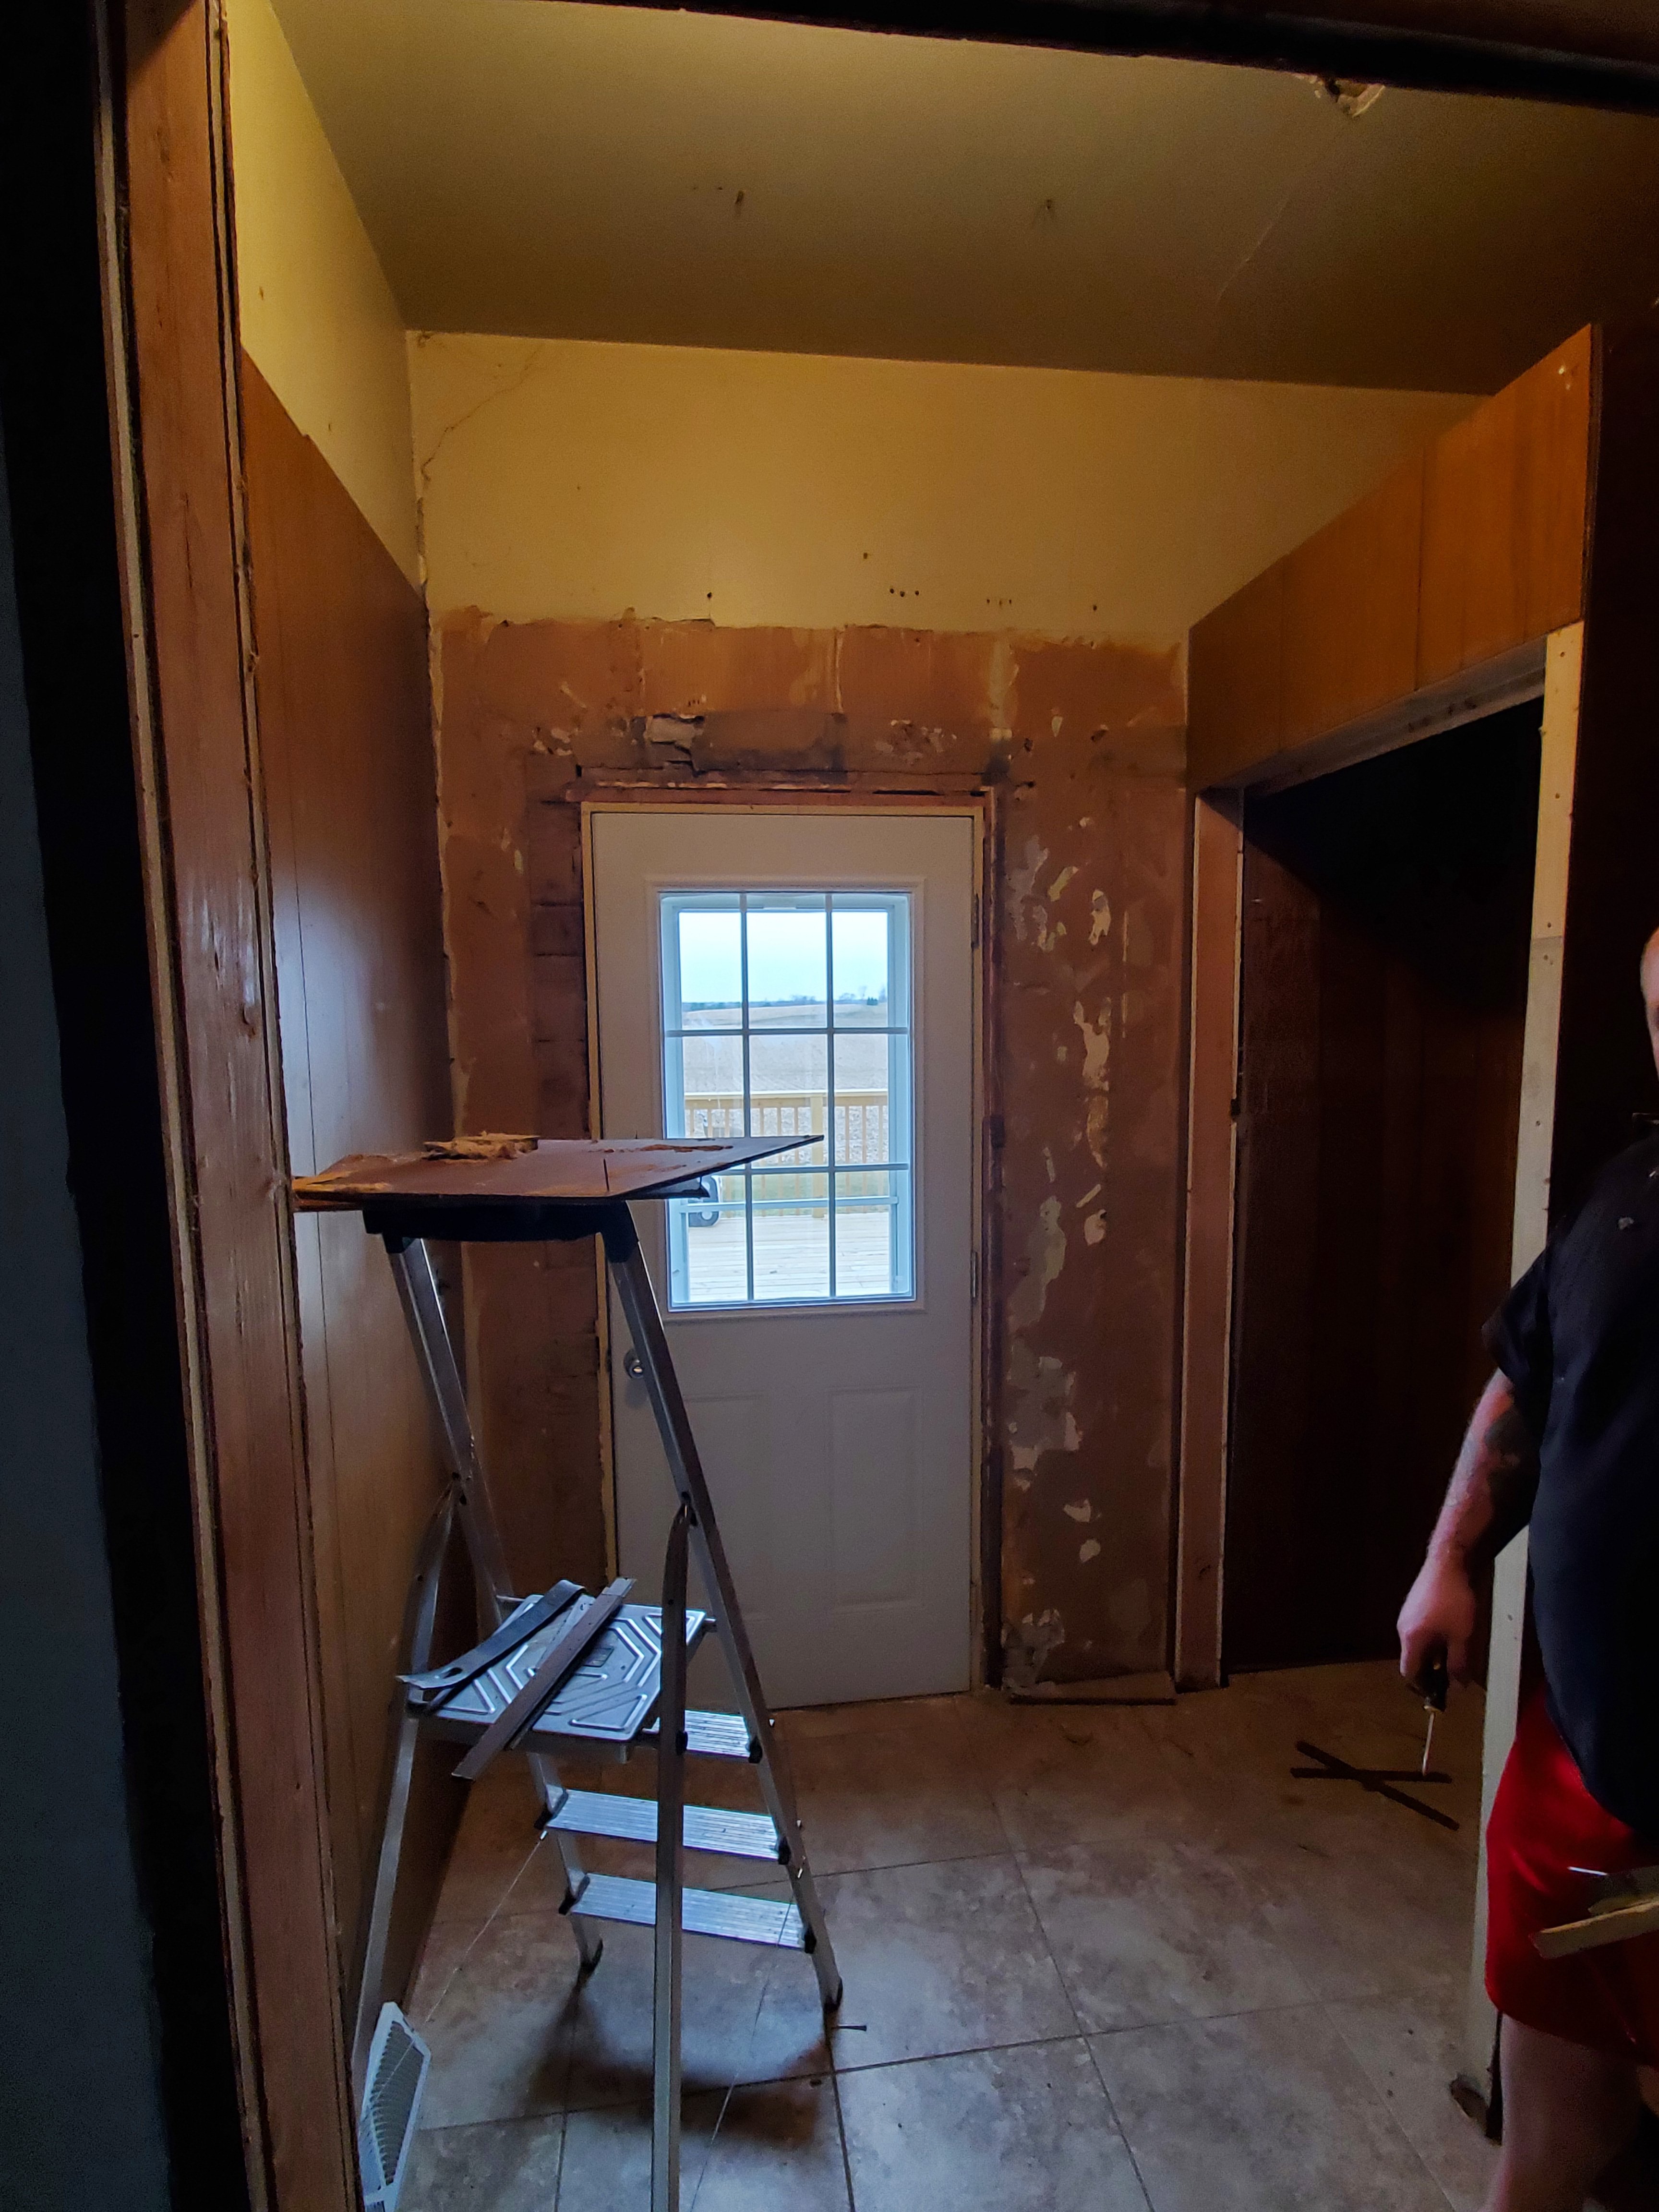
We thought we’d tear out the sink and old paneling, paint, add barn doors and call it a day. No.
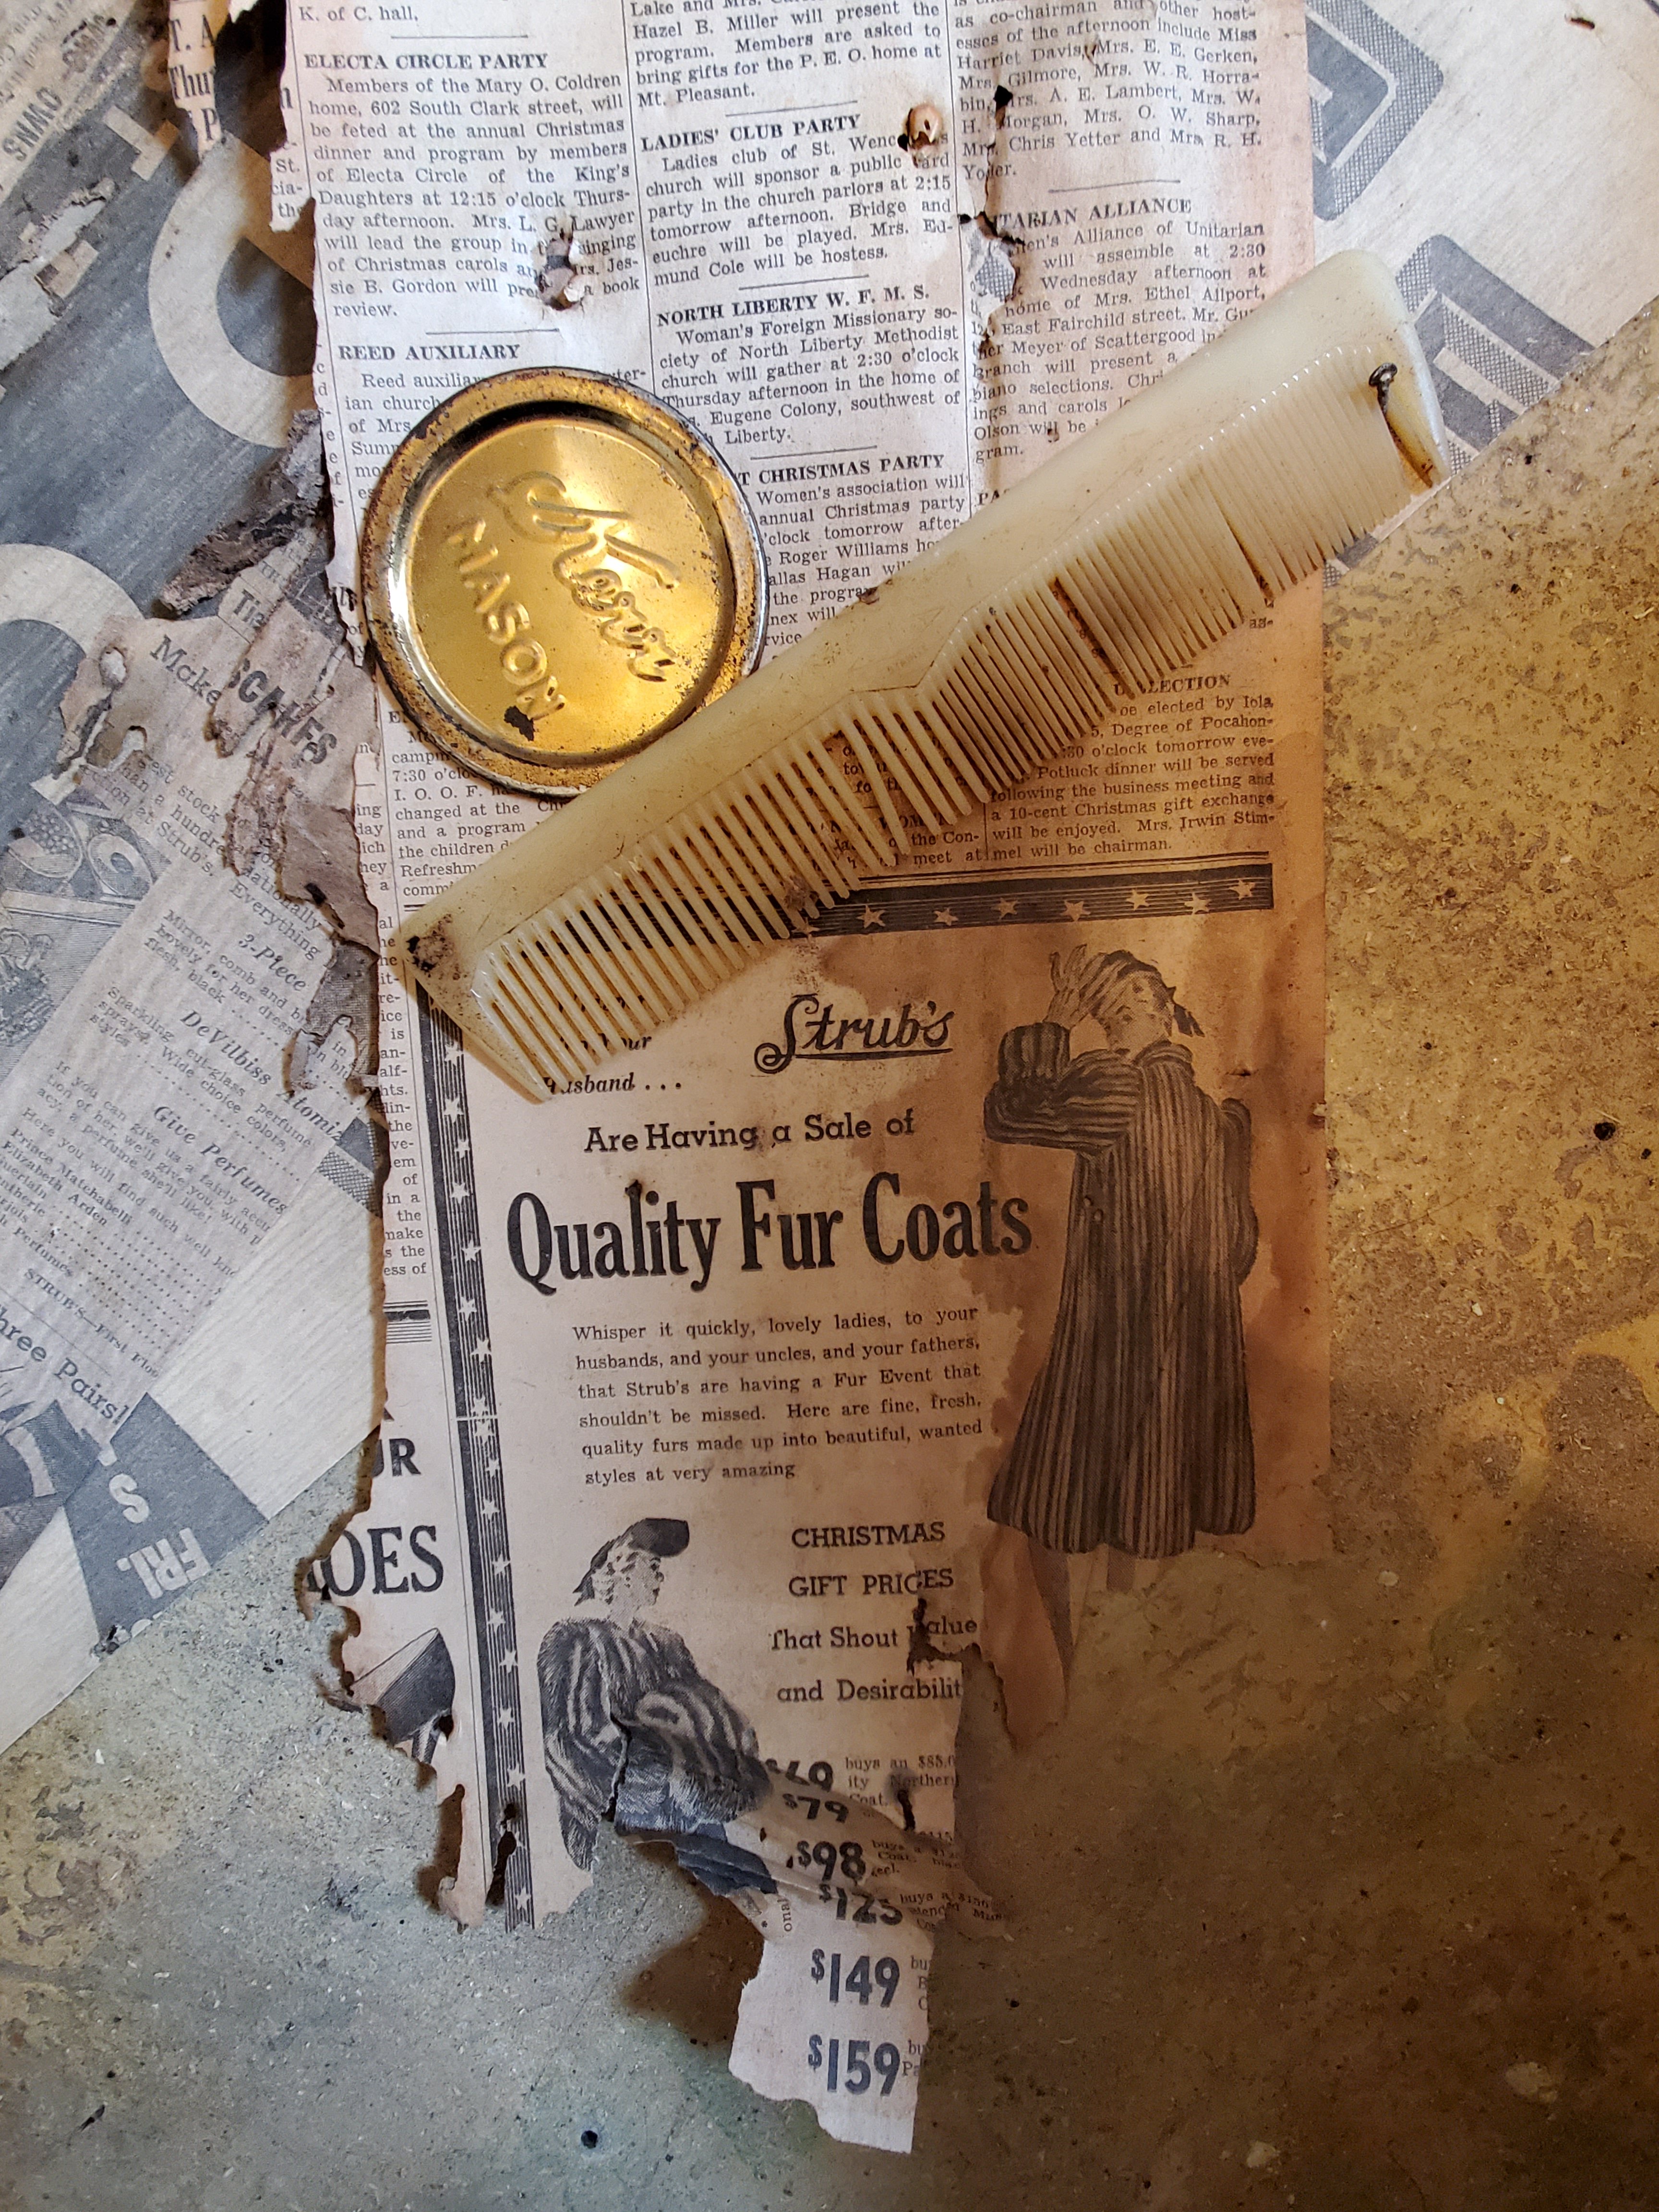
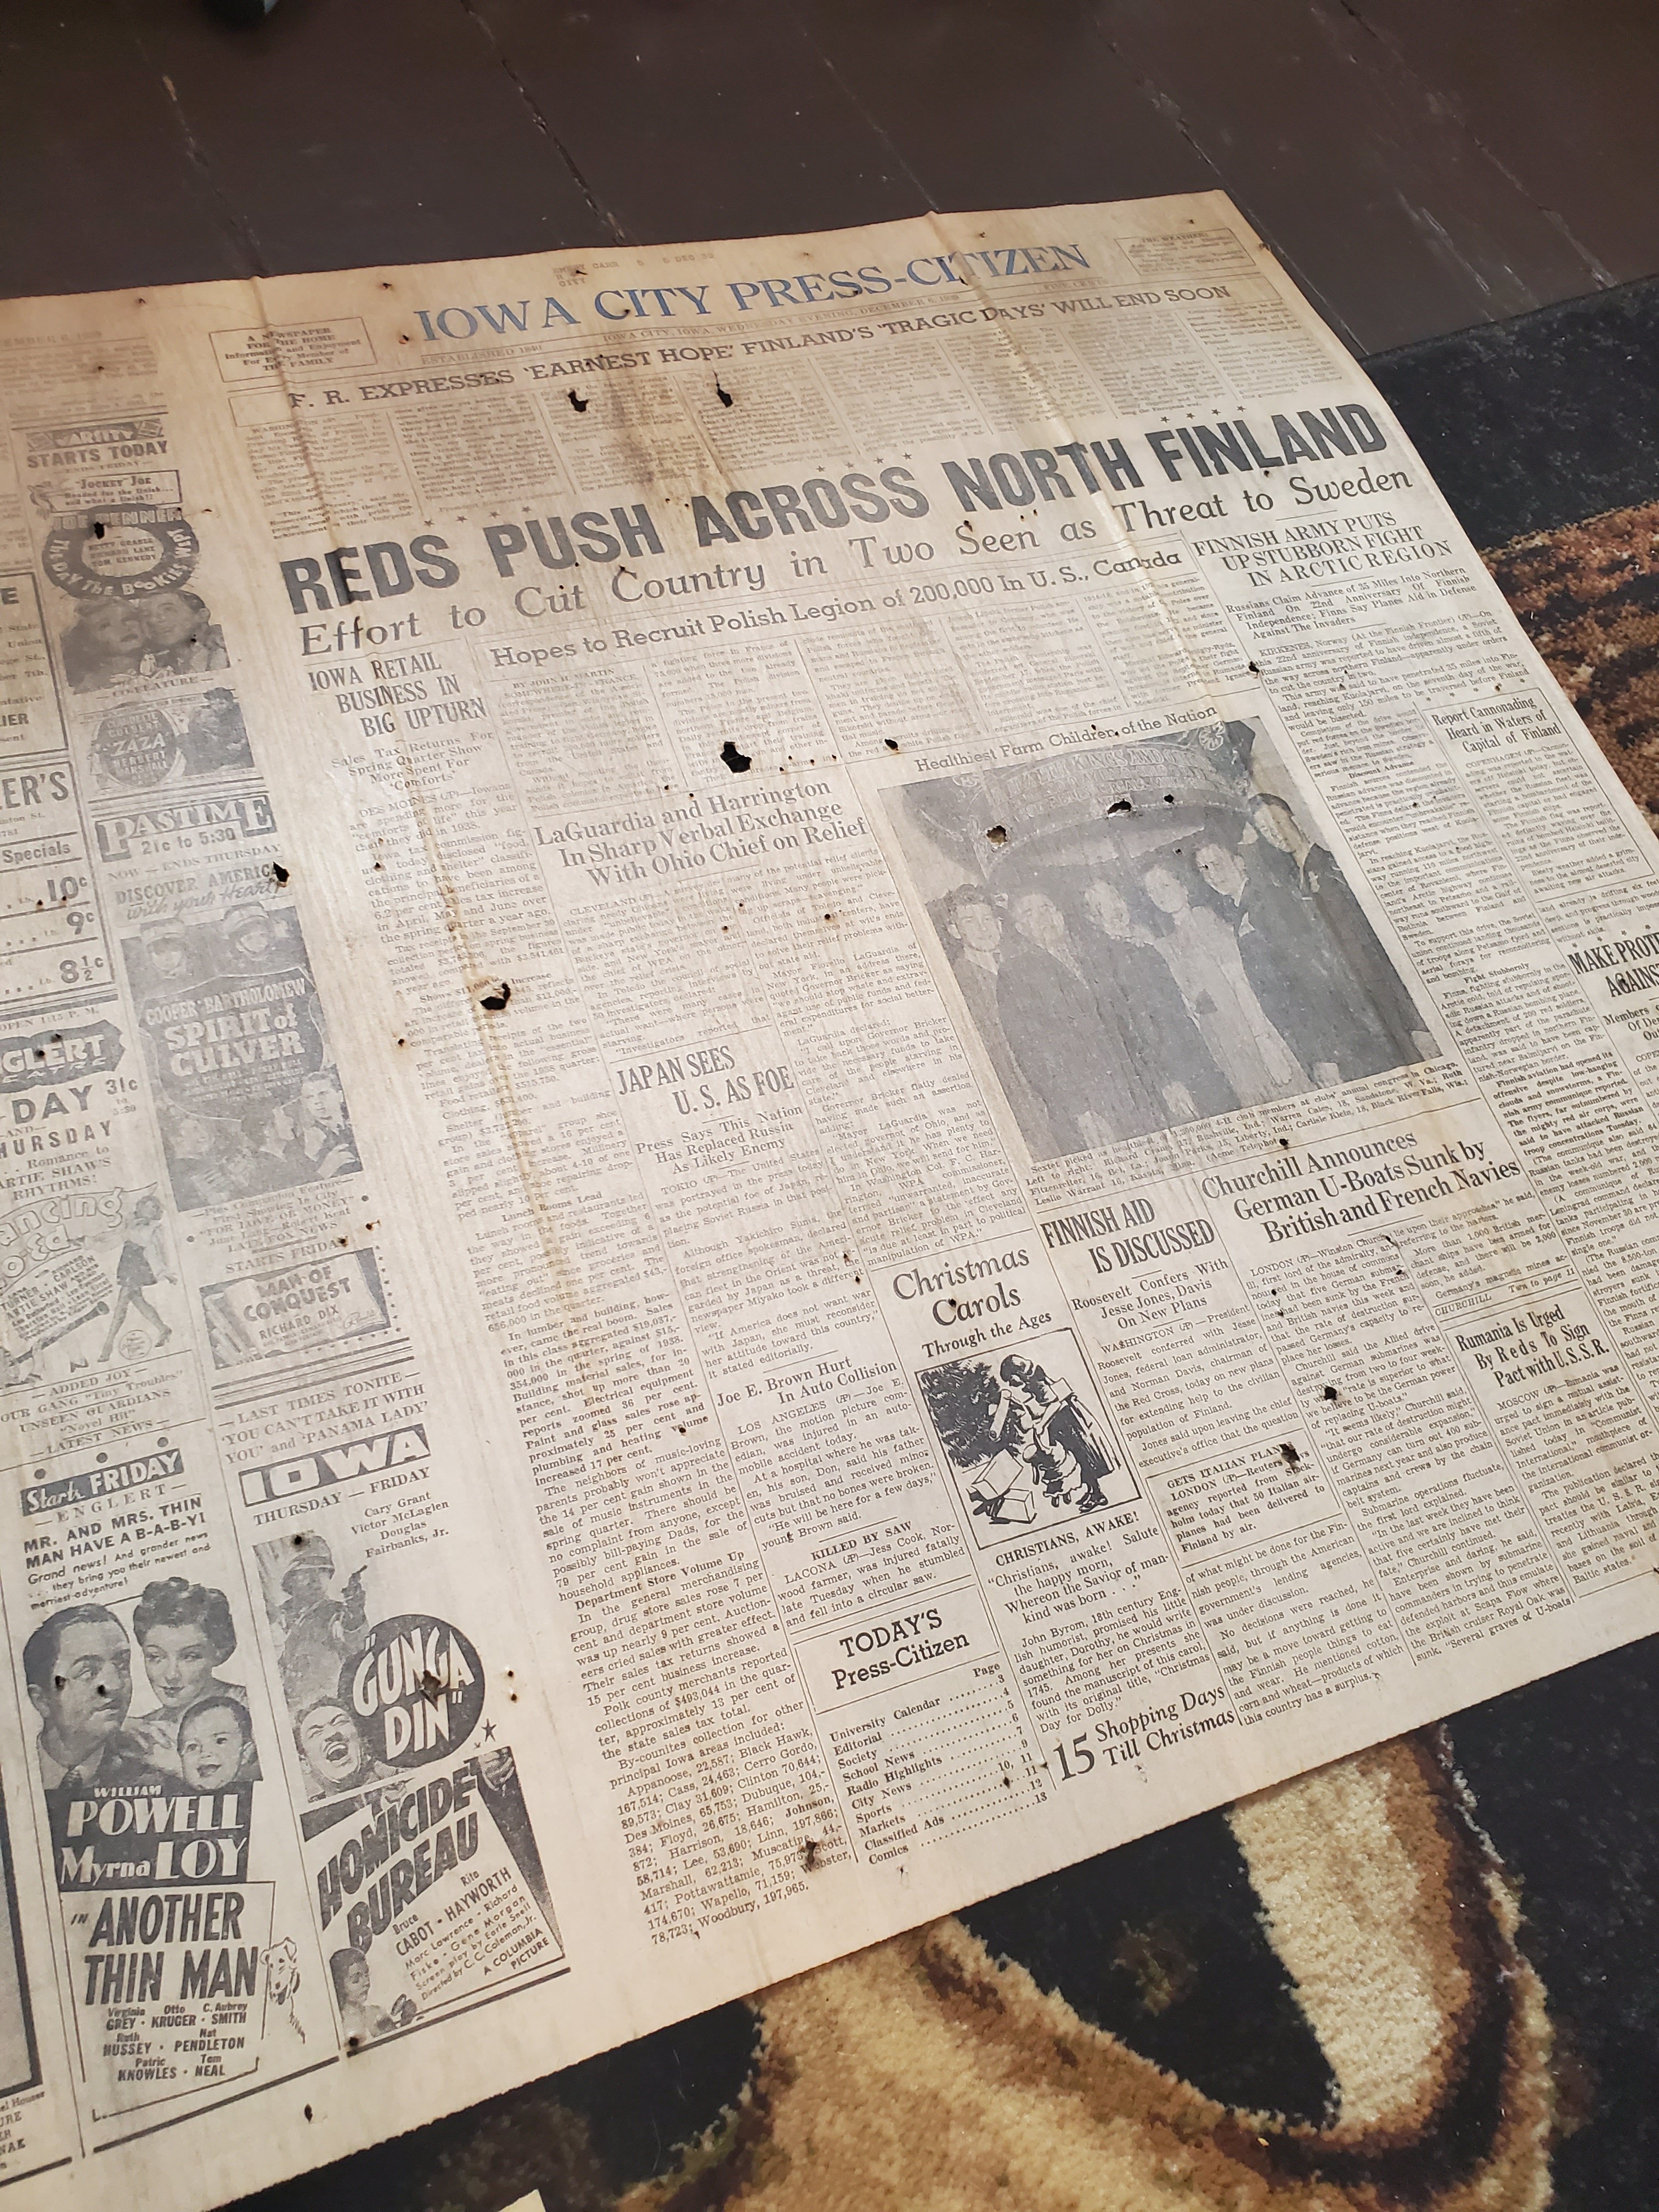
The walls had to be redone down to the studs. A new false wall had to be added above the closet, since we were taking out the drop ceiling. Then we found that the paneling went behind the flooring. This removal ruined the flooring (not sad about it) and in removing the tile we found we had a rotten spot and needed to even replace subflooring. The house is 1862, but still, whew!

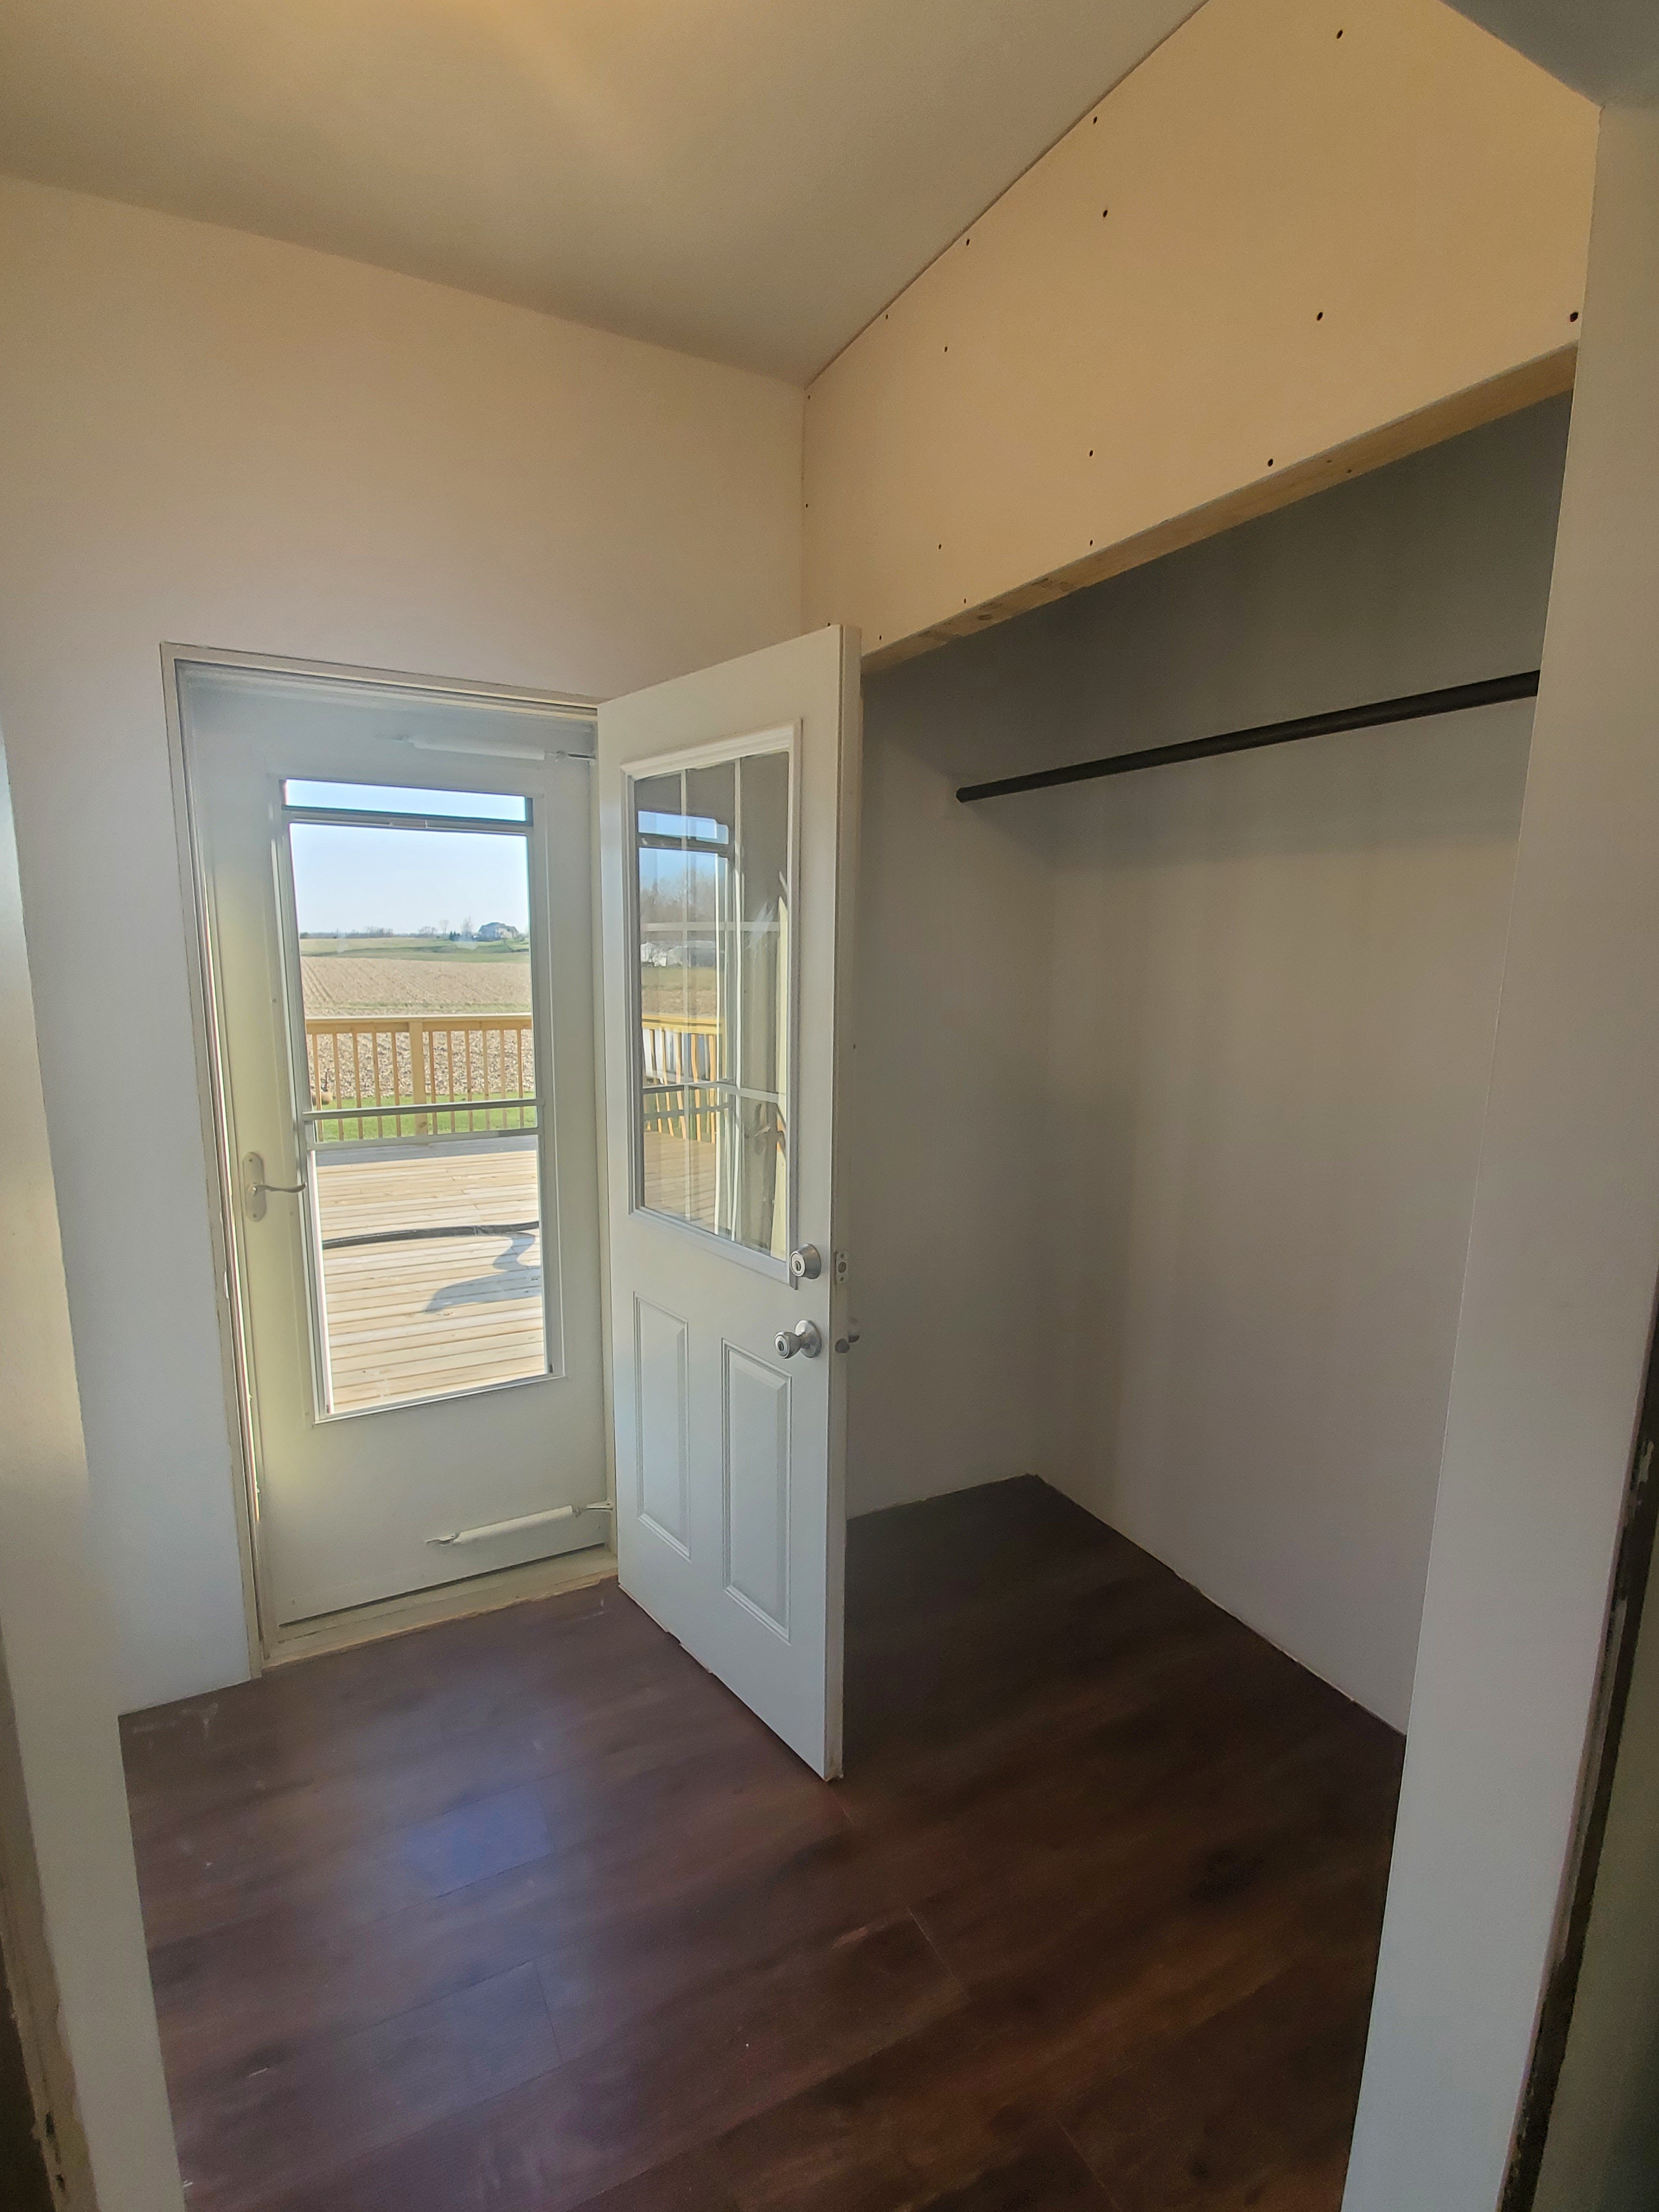

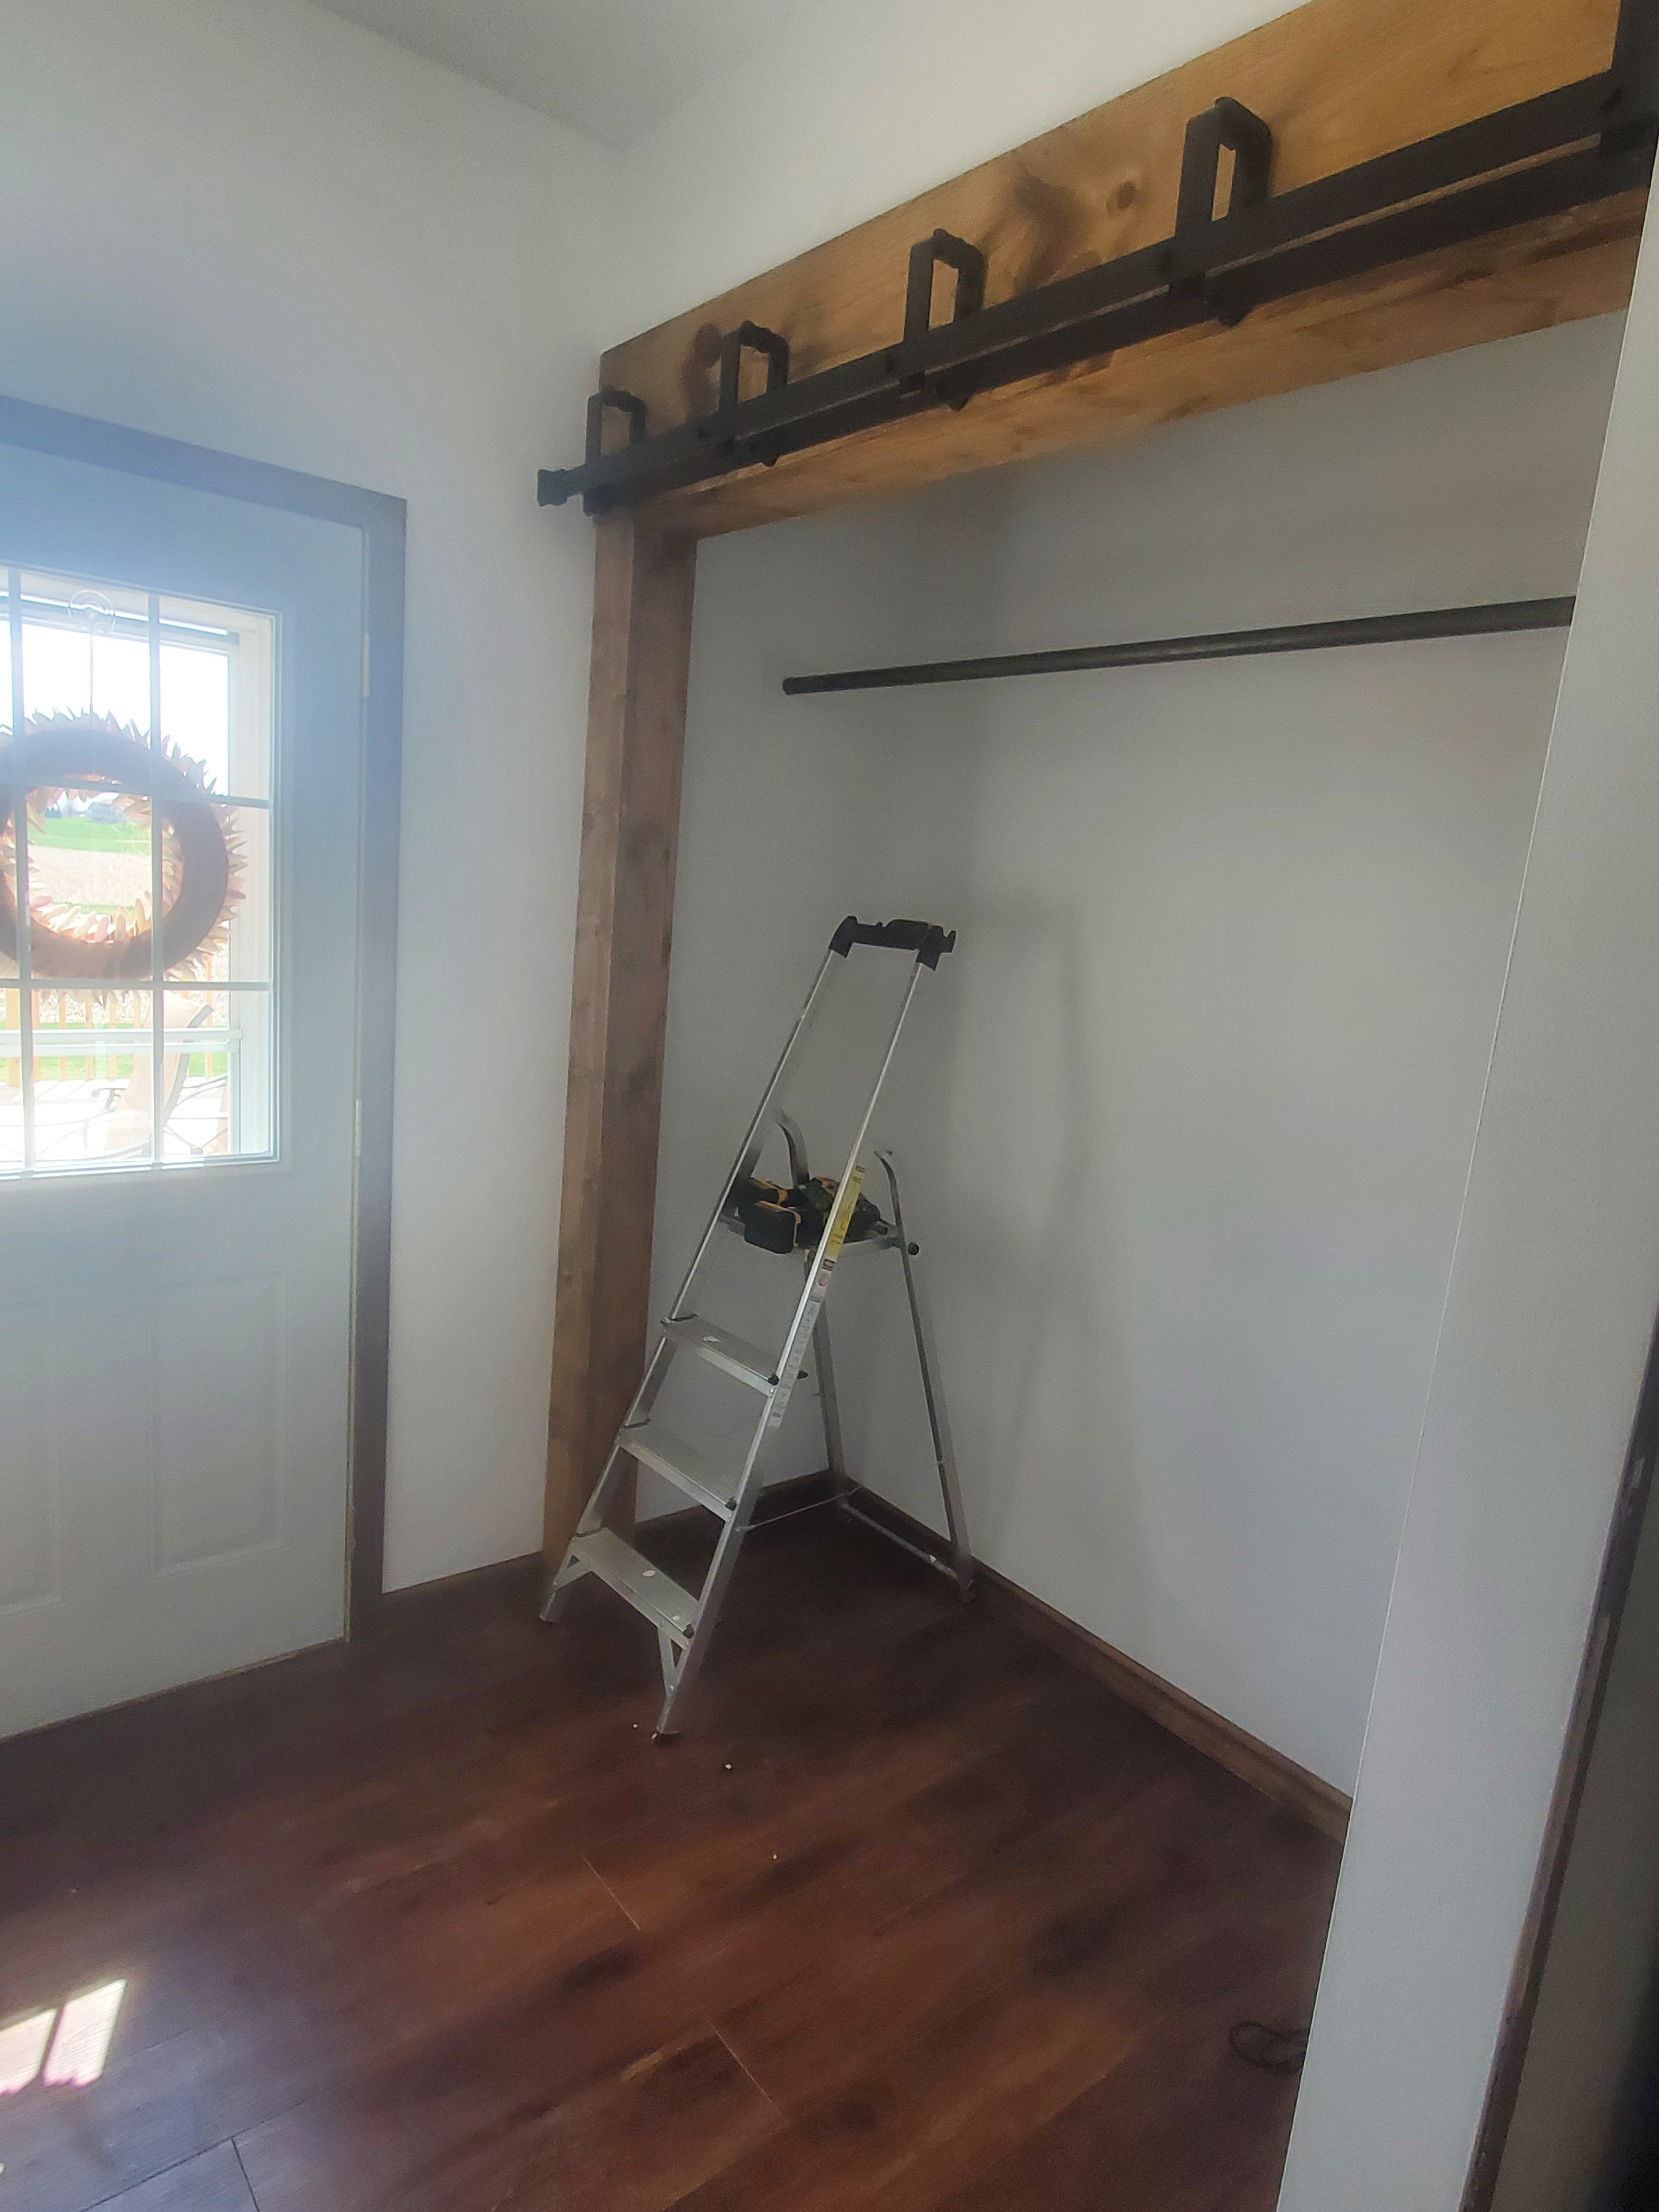
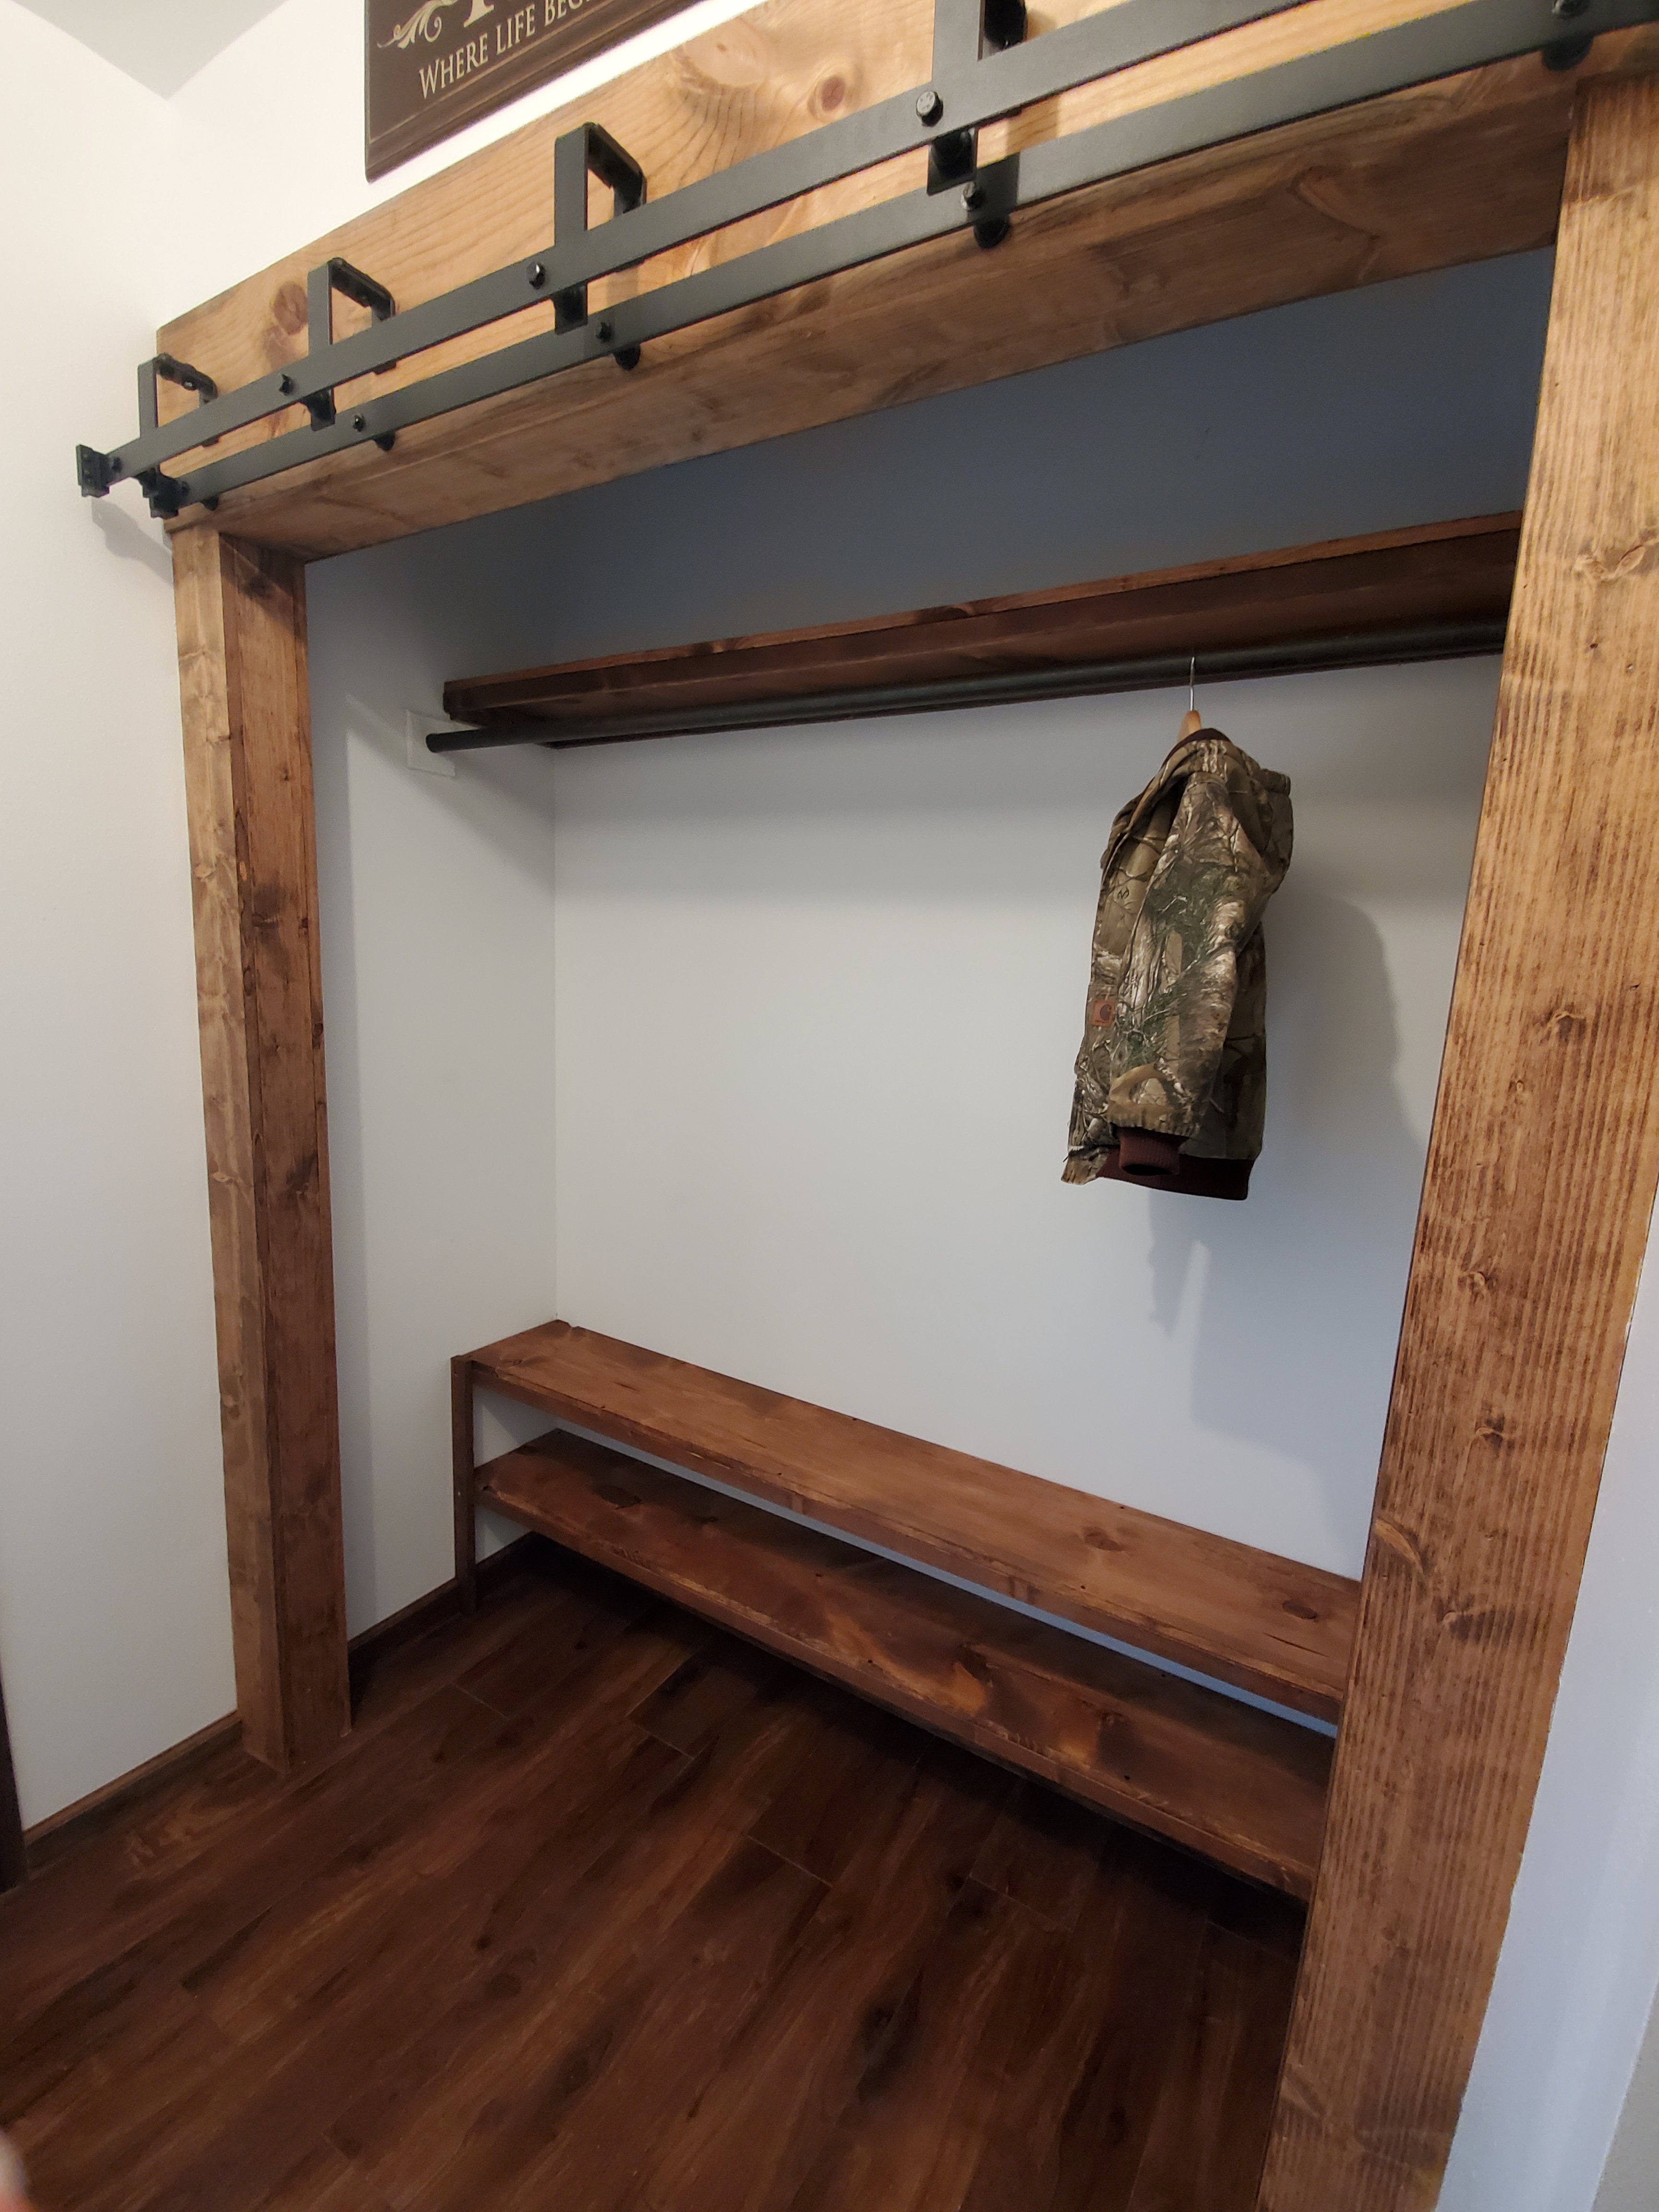
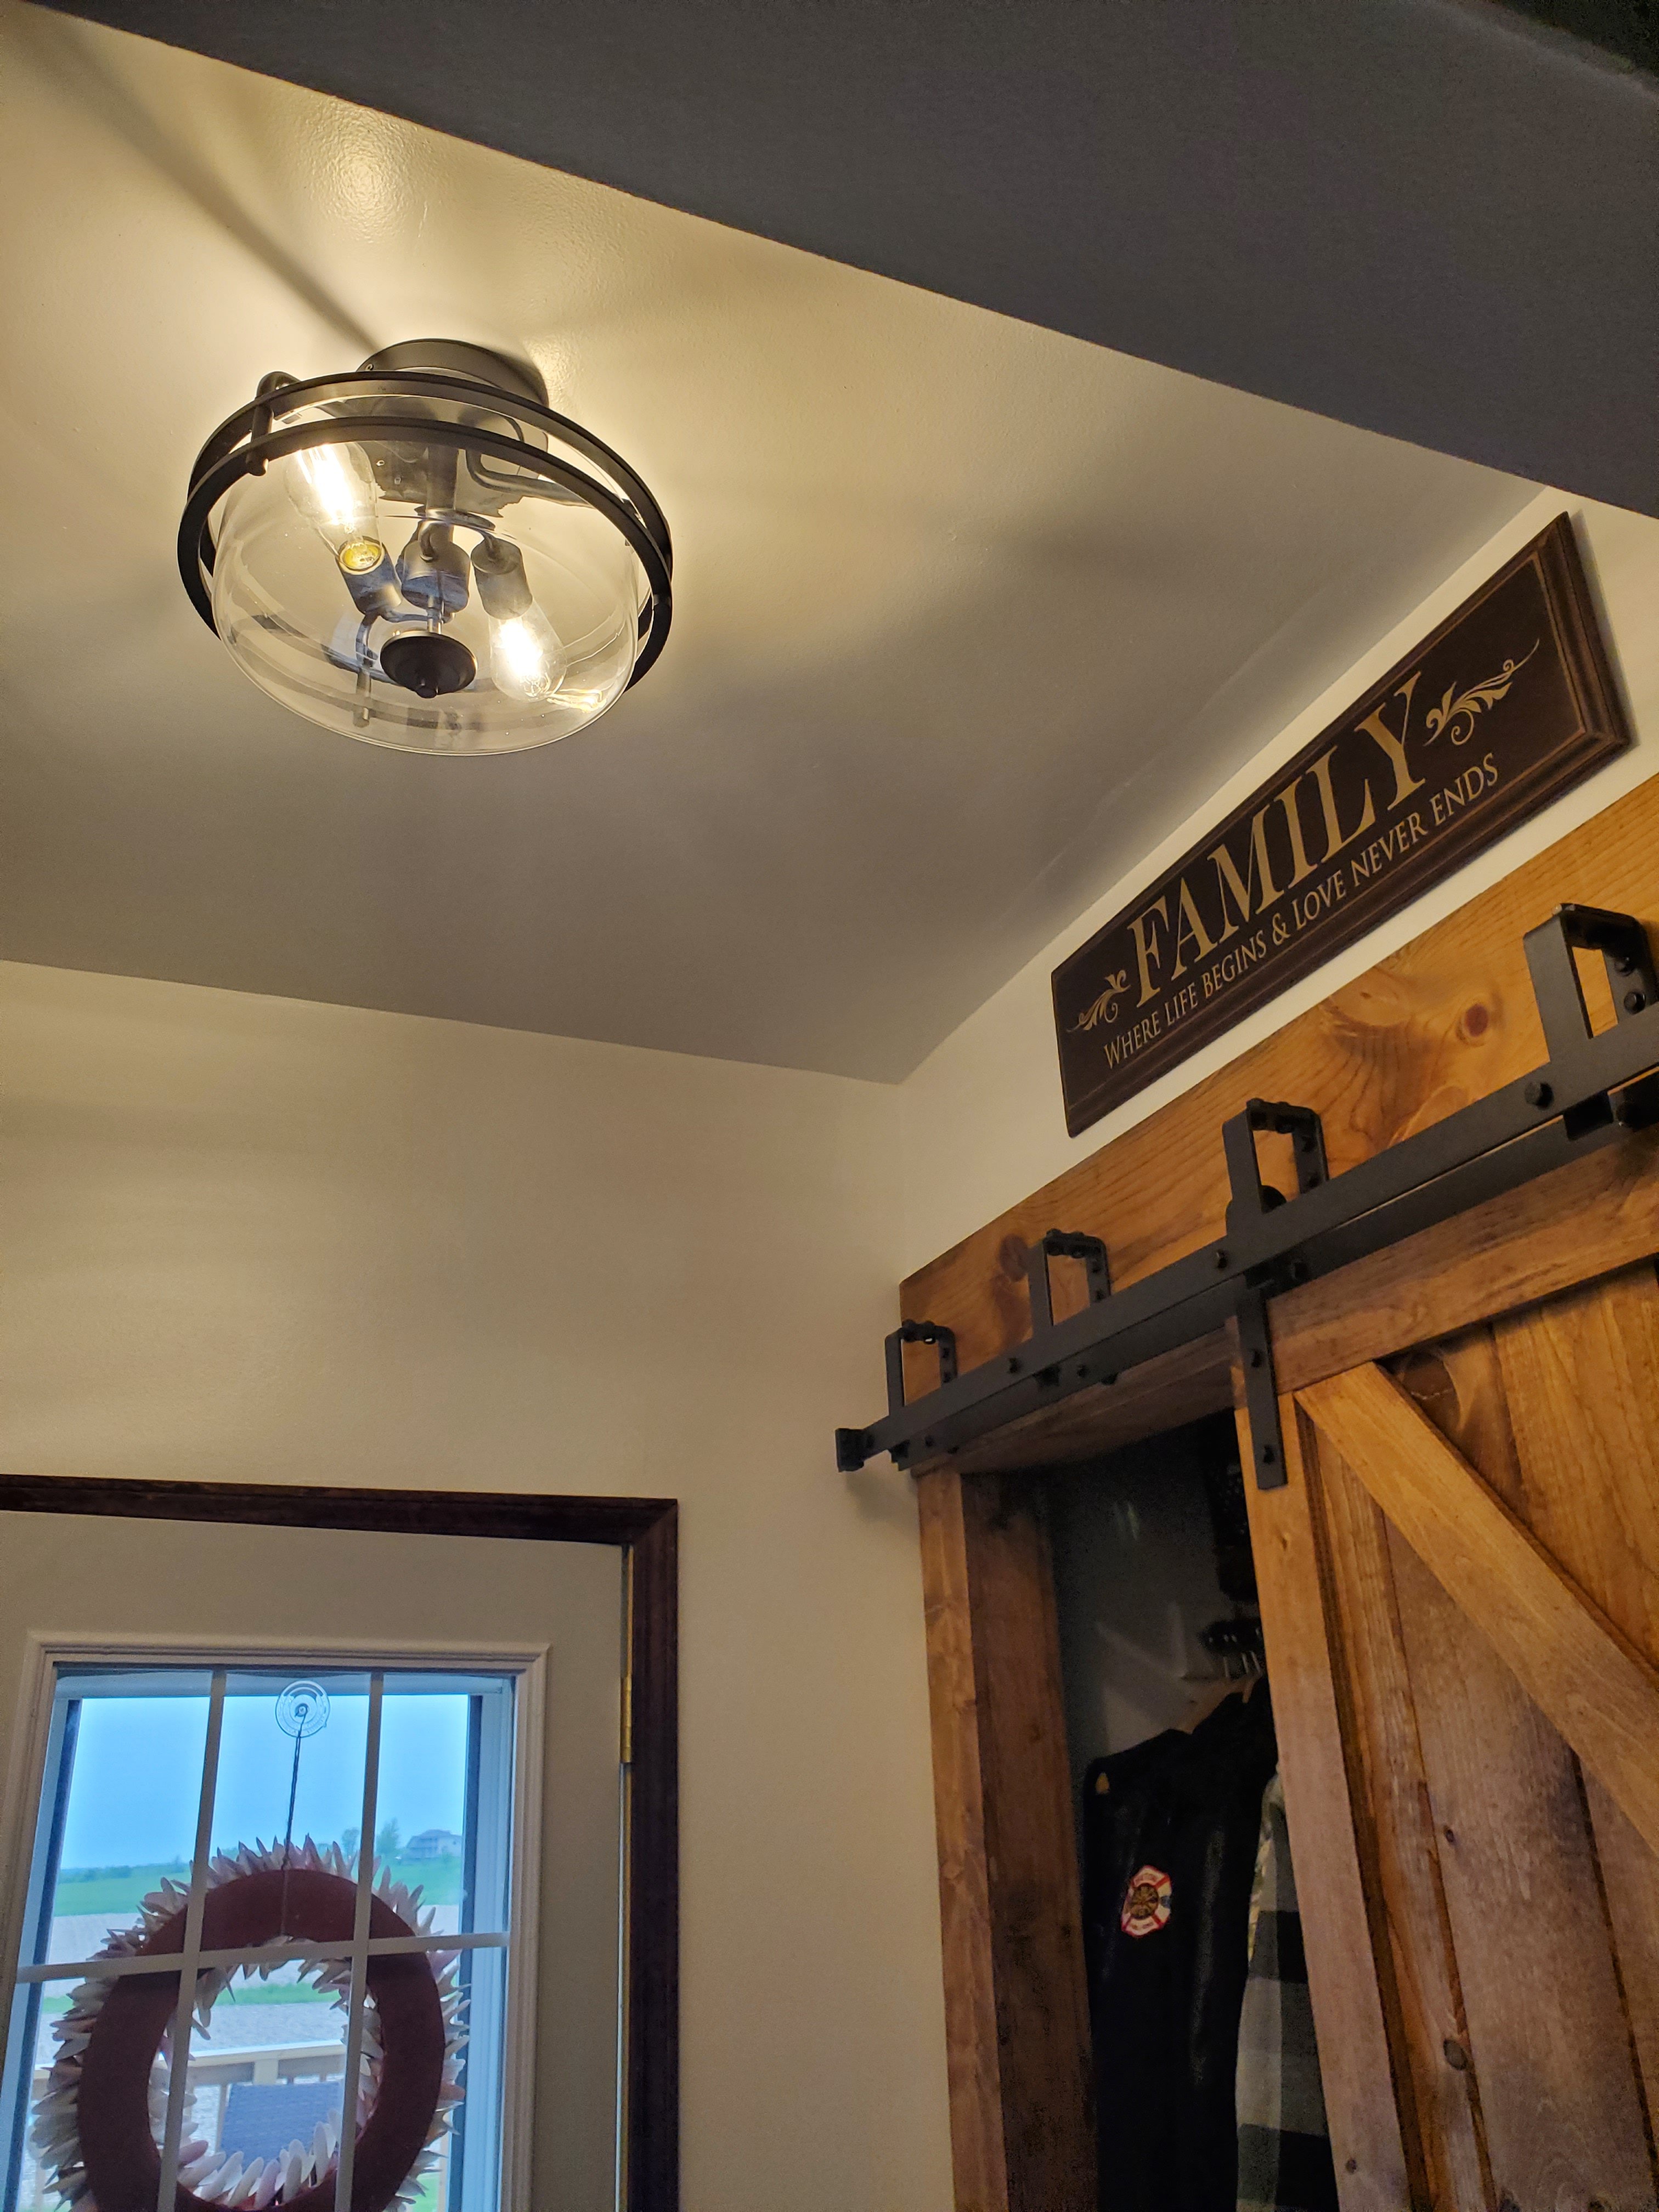
We did make the closet go all the way across the space and Jason built custom barn doors and trim. Gorgeous!
Look what we found under the flooring! Lots of these old papers from the 40s!
But now… she’s about done. (I say about, because we do still have an antique flag we are making a custom frame for to hang about the coat rack, but still, very close)


What do you think?! I think I love it so much that I need to add a chair for company. Come in further and you will see the dining room and hallway that we need to do the same too. 🤣
XX,
Jess
Deck Updates- Easy Ways to Make Outdoor Spaces Cozy
Summer is finally on the way! And we’ve been getting the deck and yard all ready.
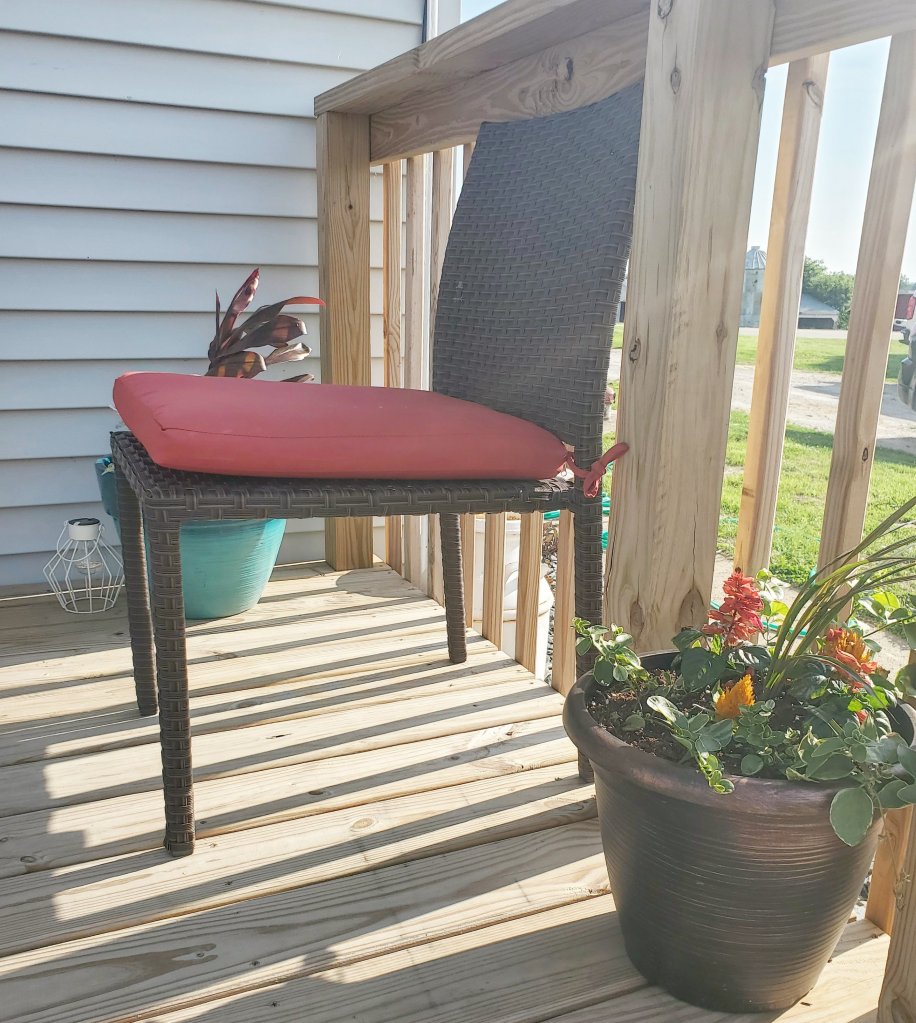
Last year getting the deck built was our project. This year making the deck cozy and entertaining worthy is my mission. So we added a few things. Not done yet, but progress!


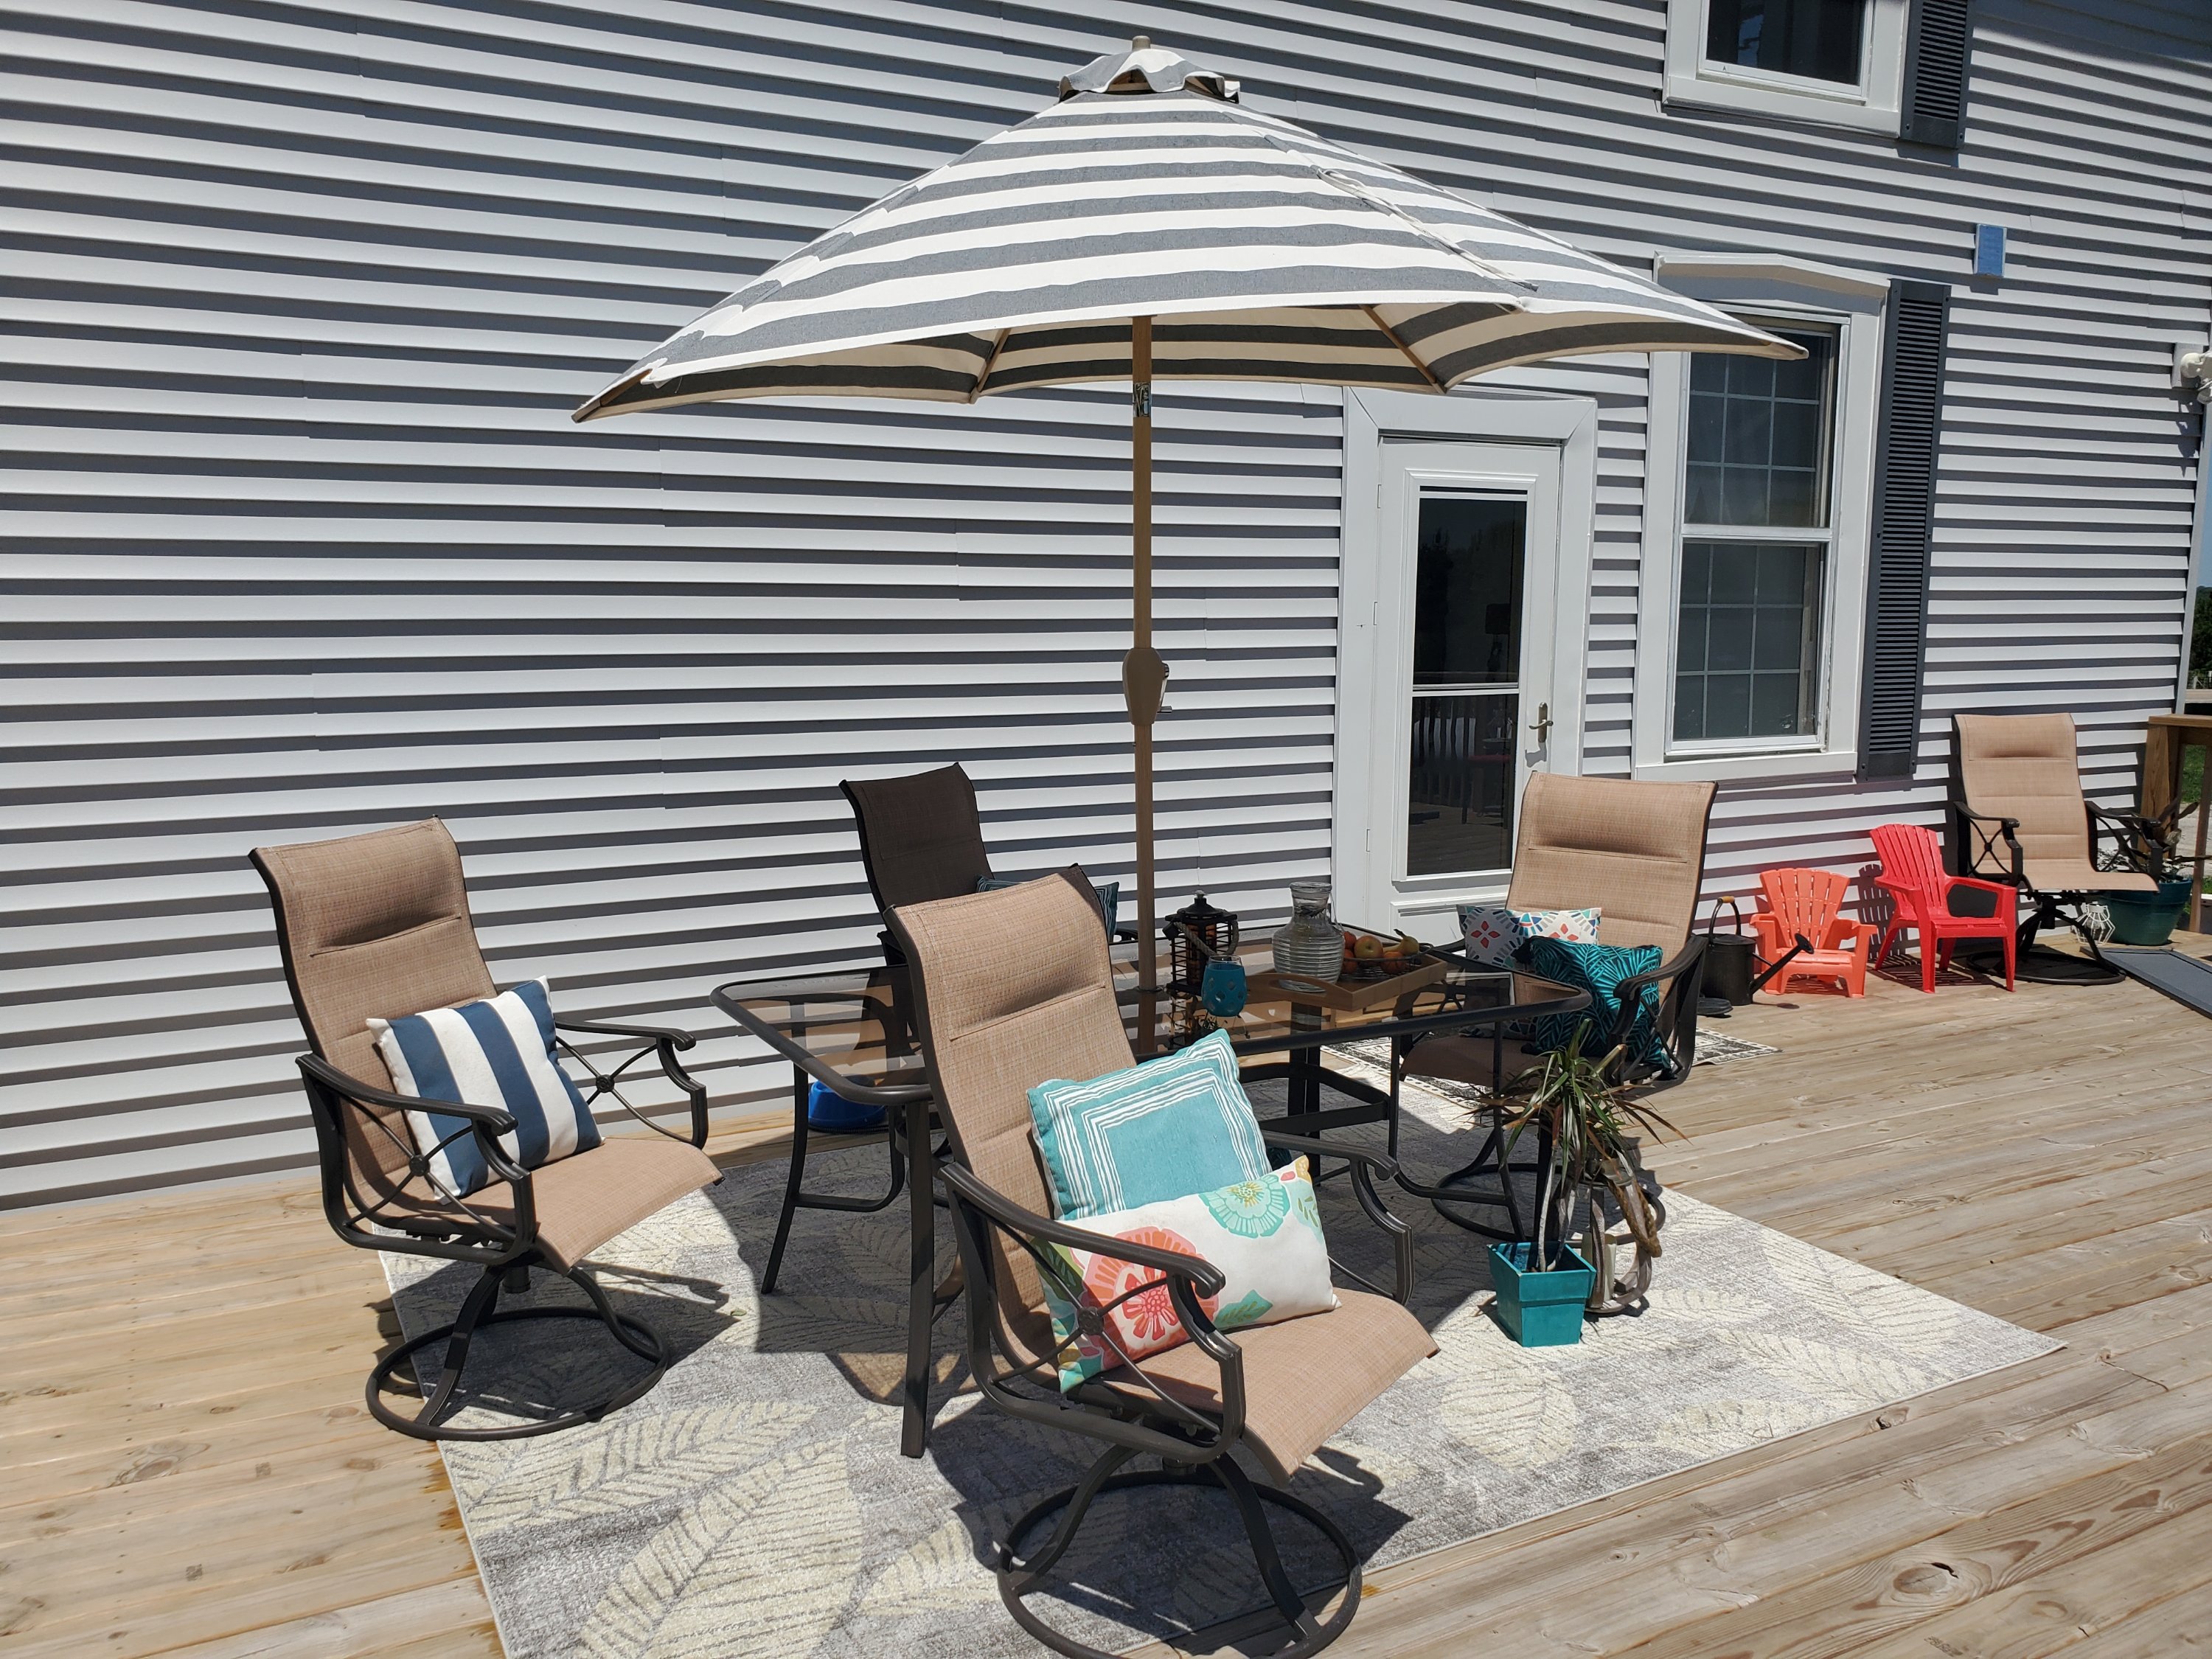


Plenty of cushions and a new rug make it cozy! Rug is from Mark and Day, our favorite rug place! (You can still use my code at Mark and Day too- JESSI10). AND, they are doing a free rug pad promotion right now too!
Some cushions and Walmart and Dollar General, but old, and the two darker green are new from Target Dollar Spot. Scotch Guard them to keep them longer, and I take in or put in a deck box when weather is bad. 😉
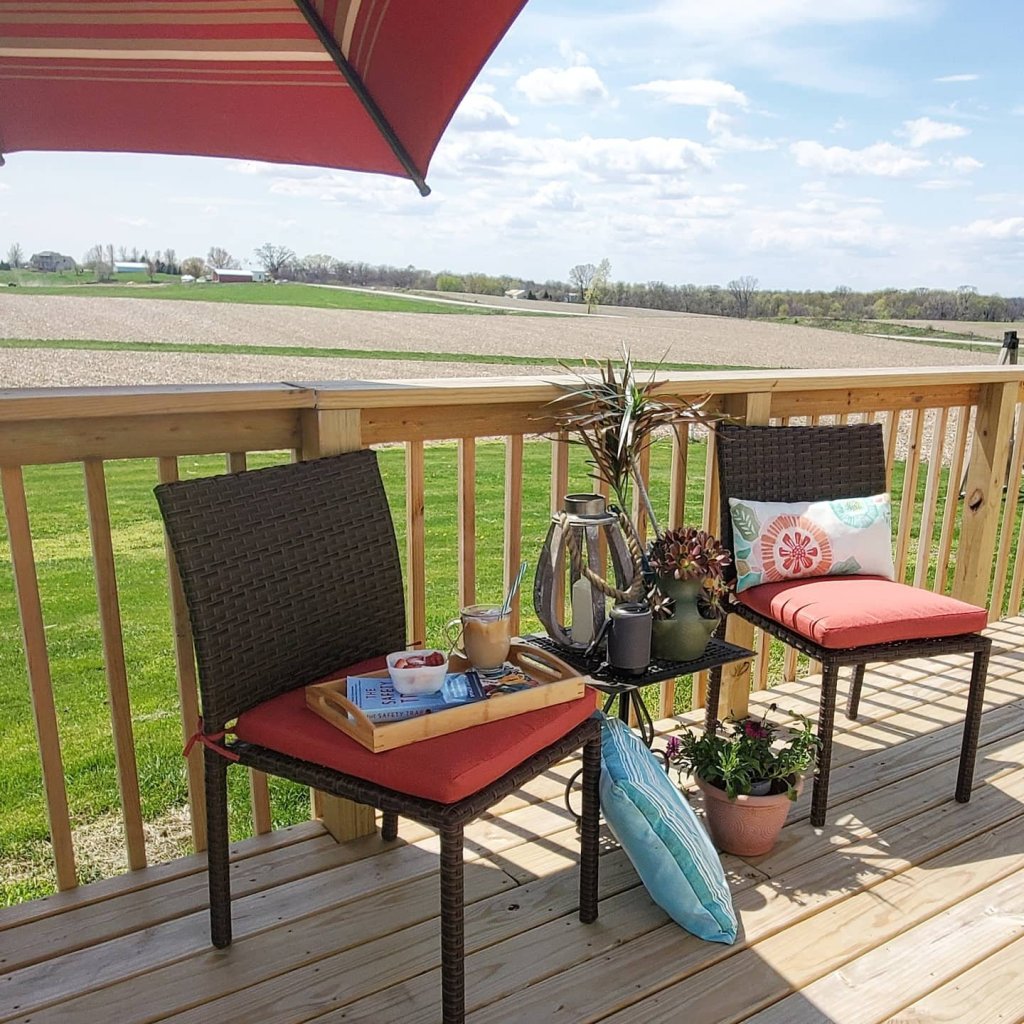
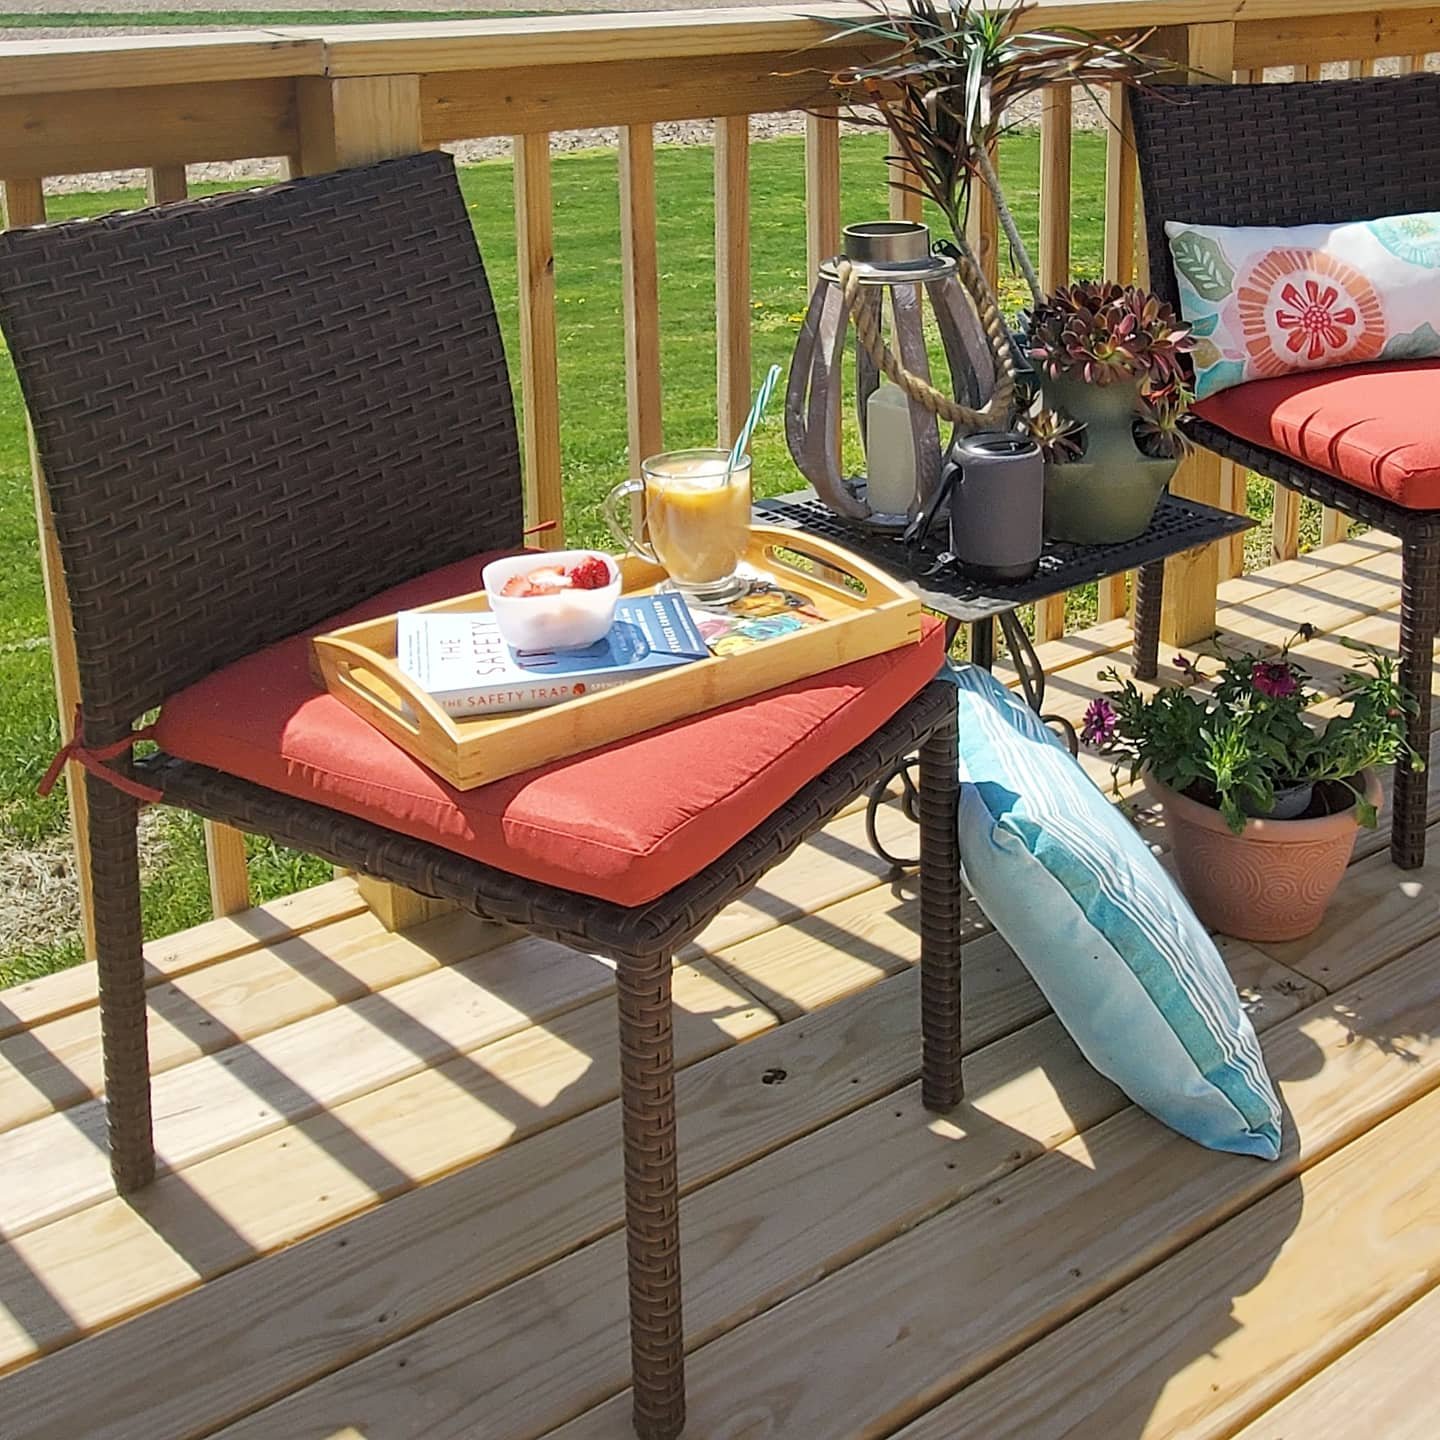
The other cozy trick is to add little areas. When we have company, chairs can get pulled anywhere, but they start out set up in cozy little spots. These stackable chairs we got to have extra seating, are from Best Choice Products. Different rugs also help tie different conversation areas together.
Another easy thing to add for coziness is plants. Plants bring brightness and life to spaces, and same with outdoor spaces! You don’t have to have a green thumb, mine mostly isn’t 😉, even fake plants do the trick.
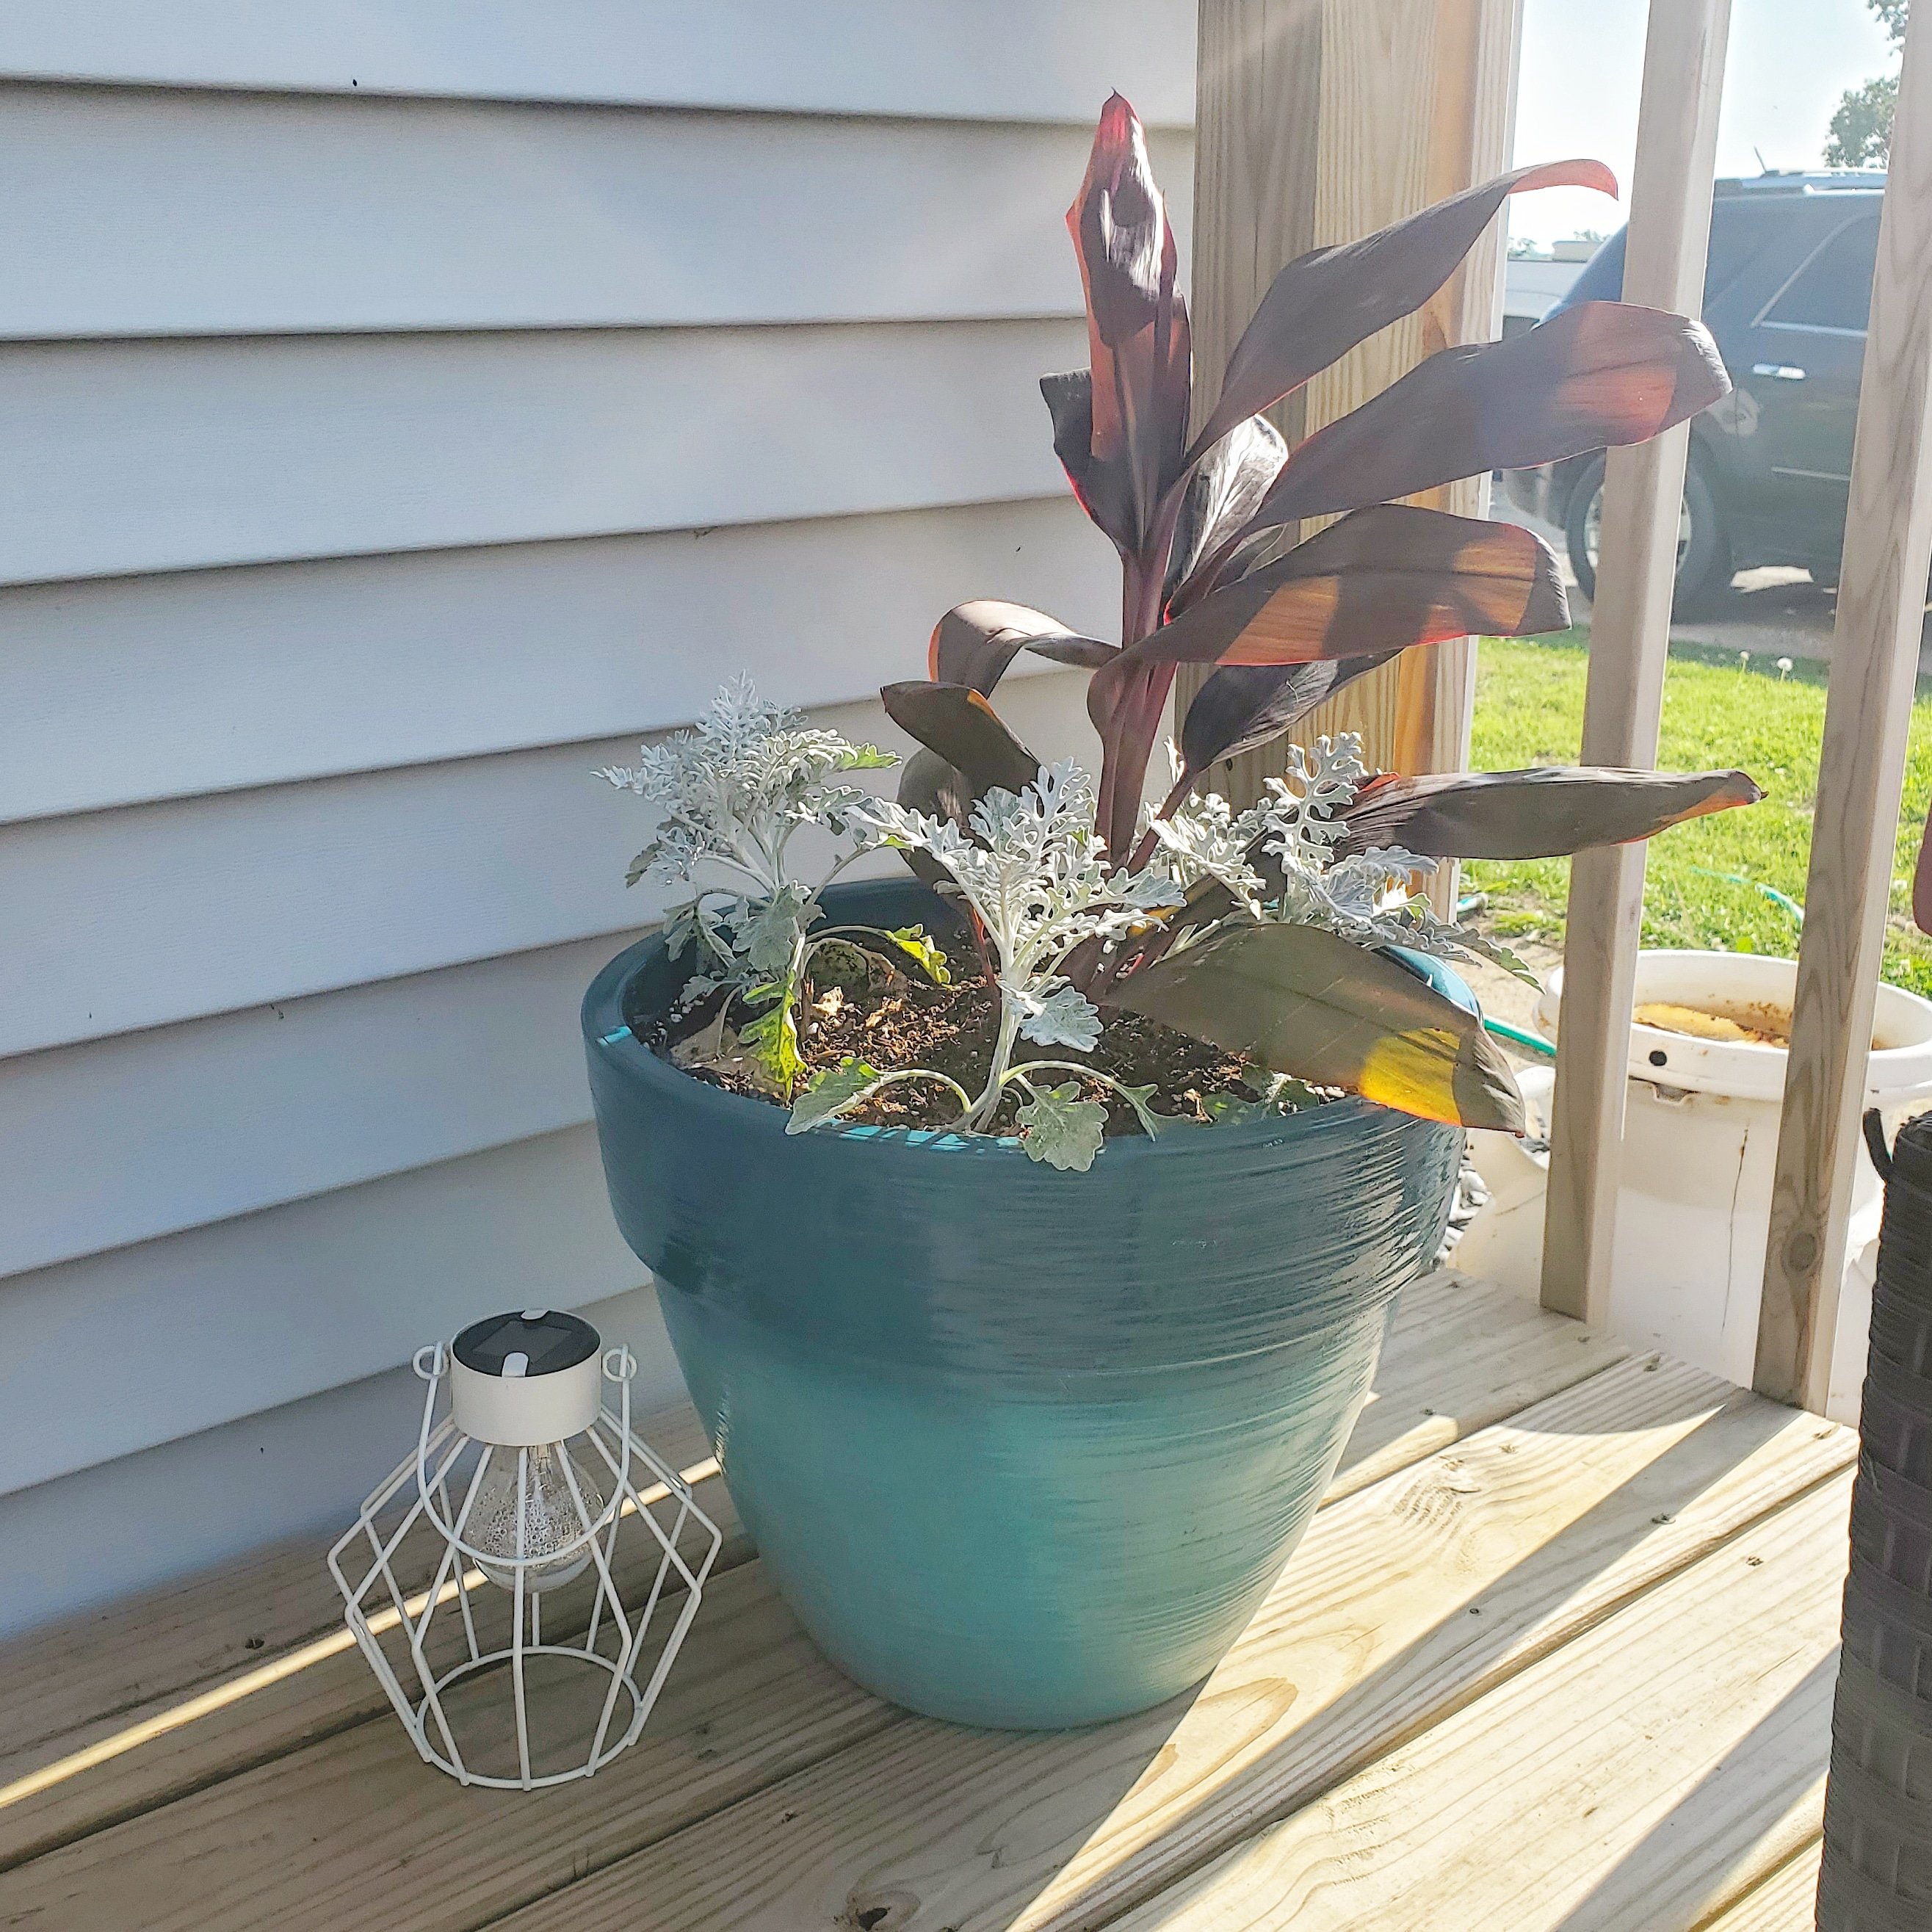
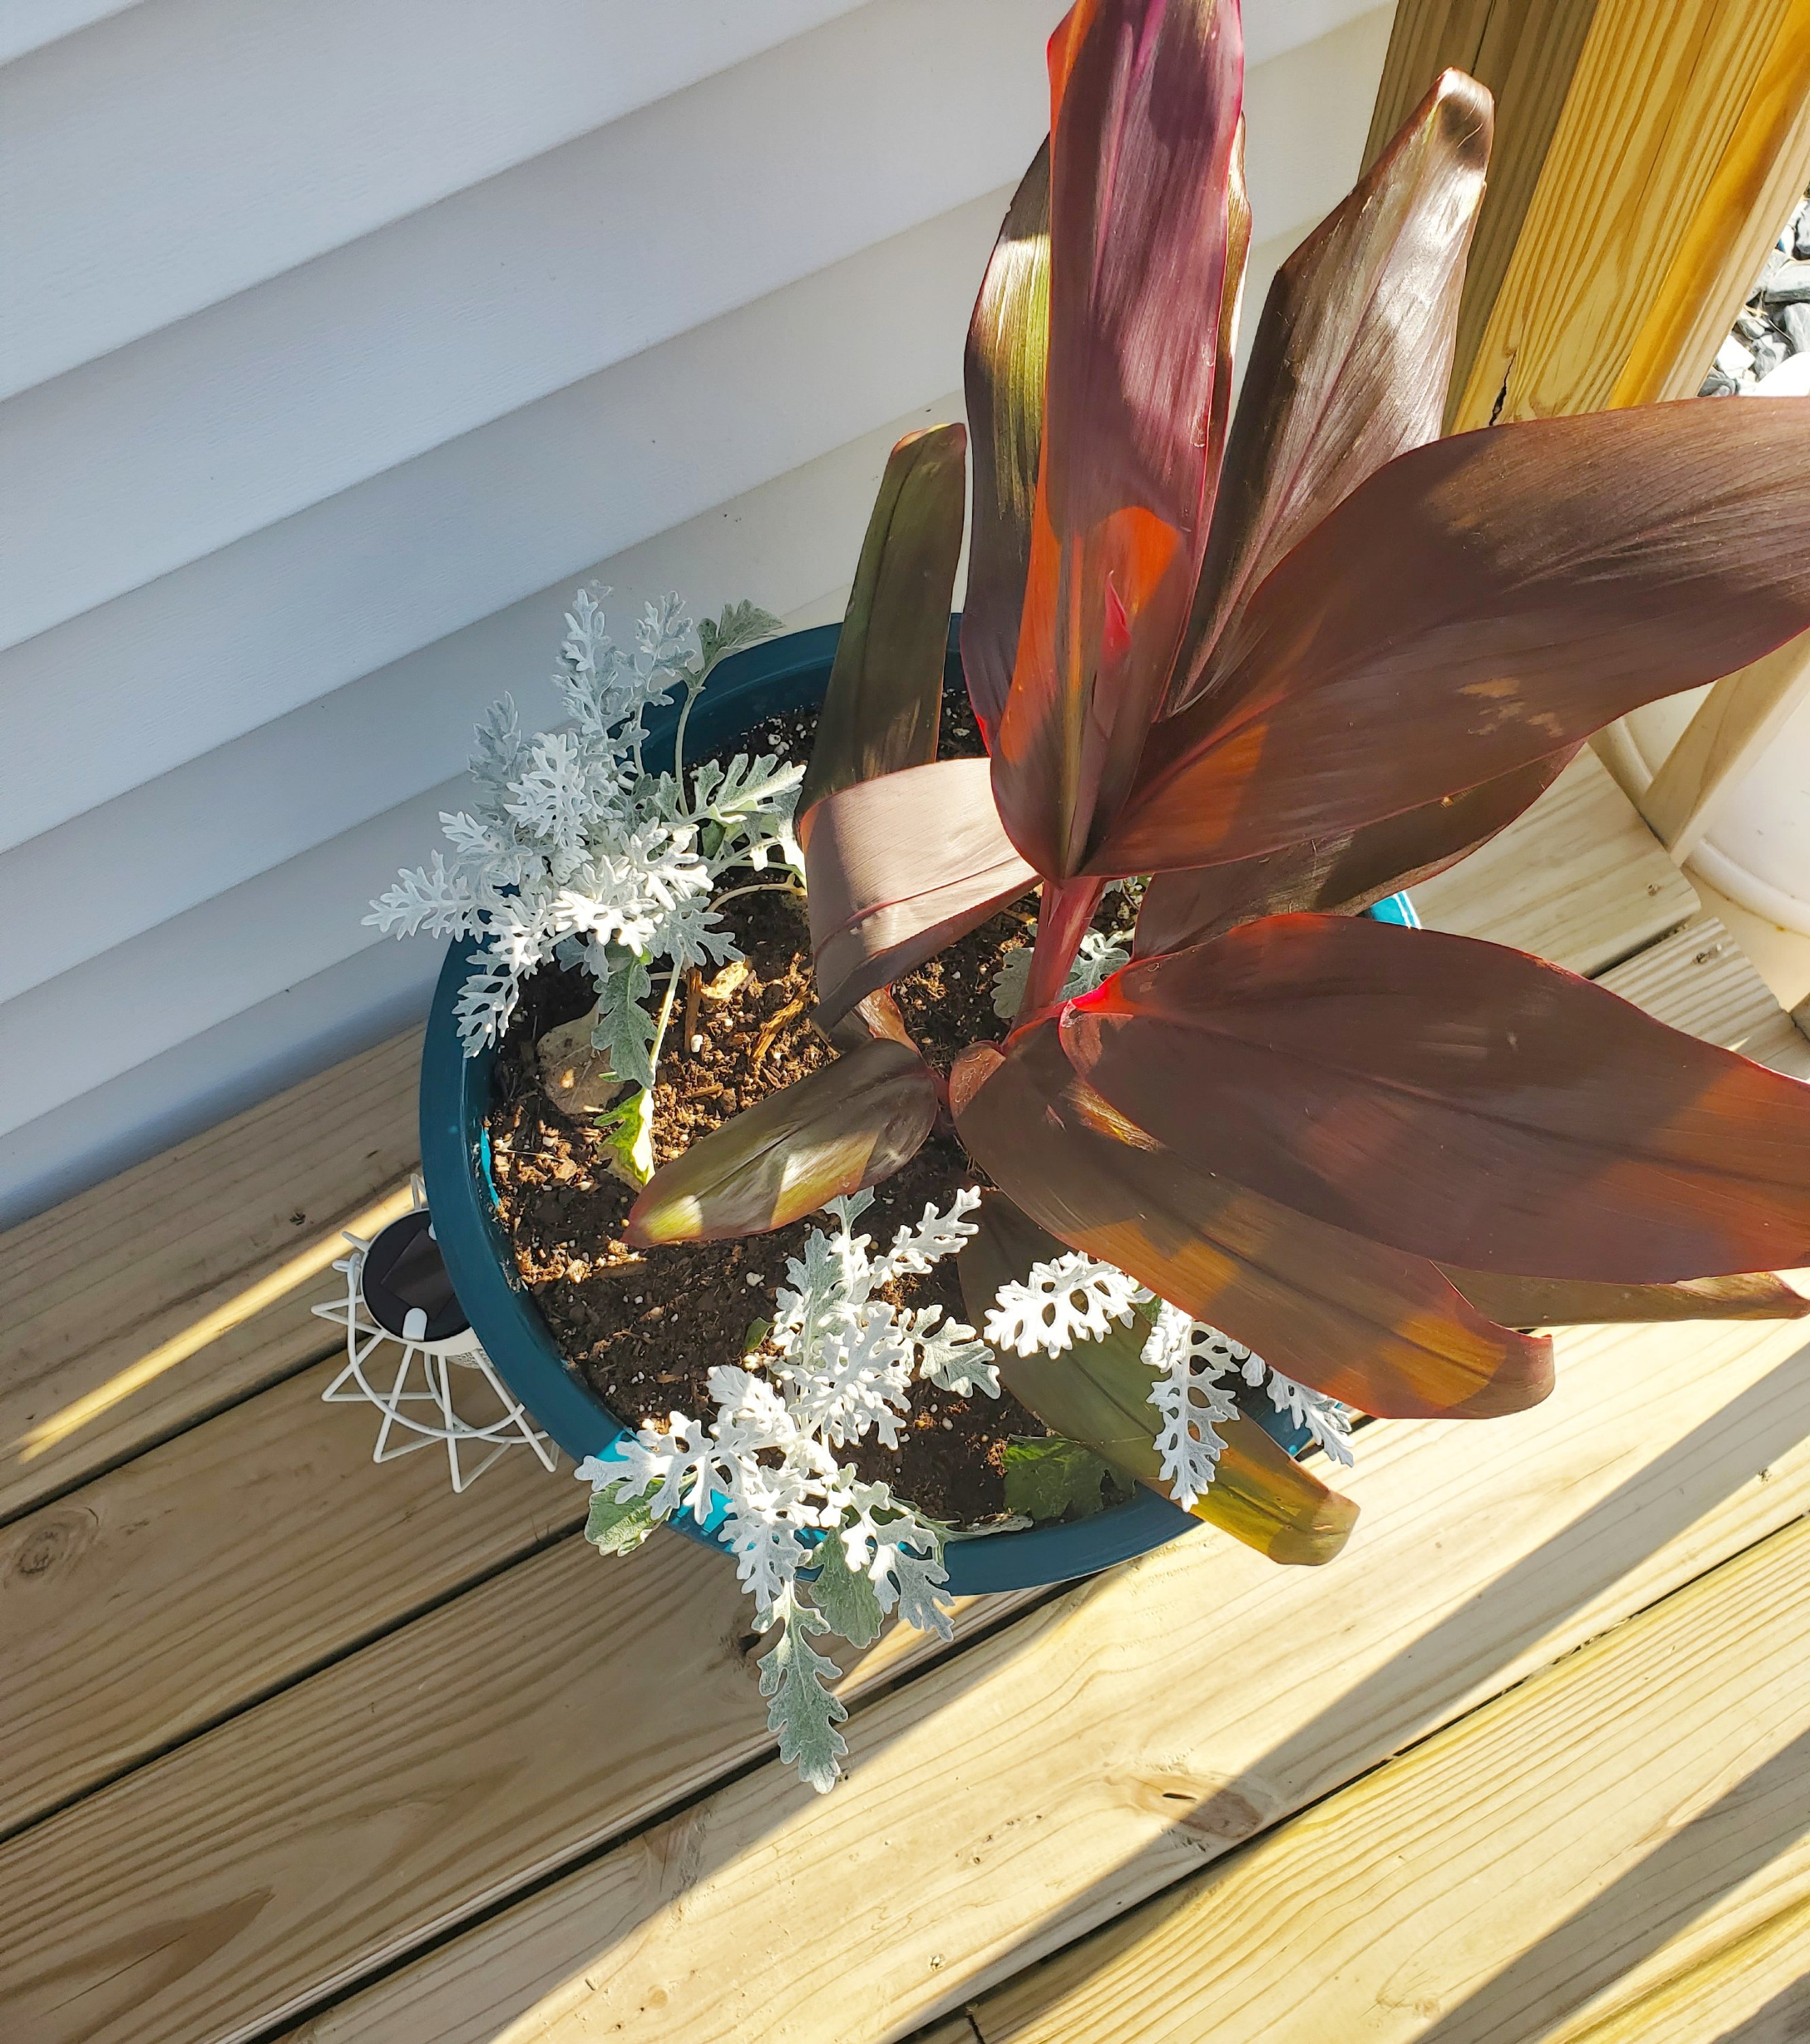
I like my plants colorful! Plus, remember the rule of three, add a centerpiece, and outer plants that will grow and hang and you will be potting like a pro. These were all recently planted, but will soon be big snd overflowing! 🤩
One more cozy add is lighting and sound. This can be super simple too. My lanterns are all inexpensive and have solar lights in them. We also added this umbrella light from Brilliant Evolution recently and it adds such a beautiful glow in the evening! You can use code JESSICA15OFF on their lighting too!
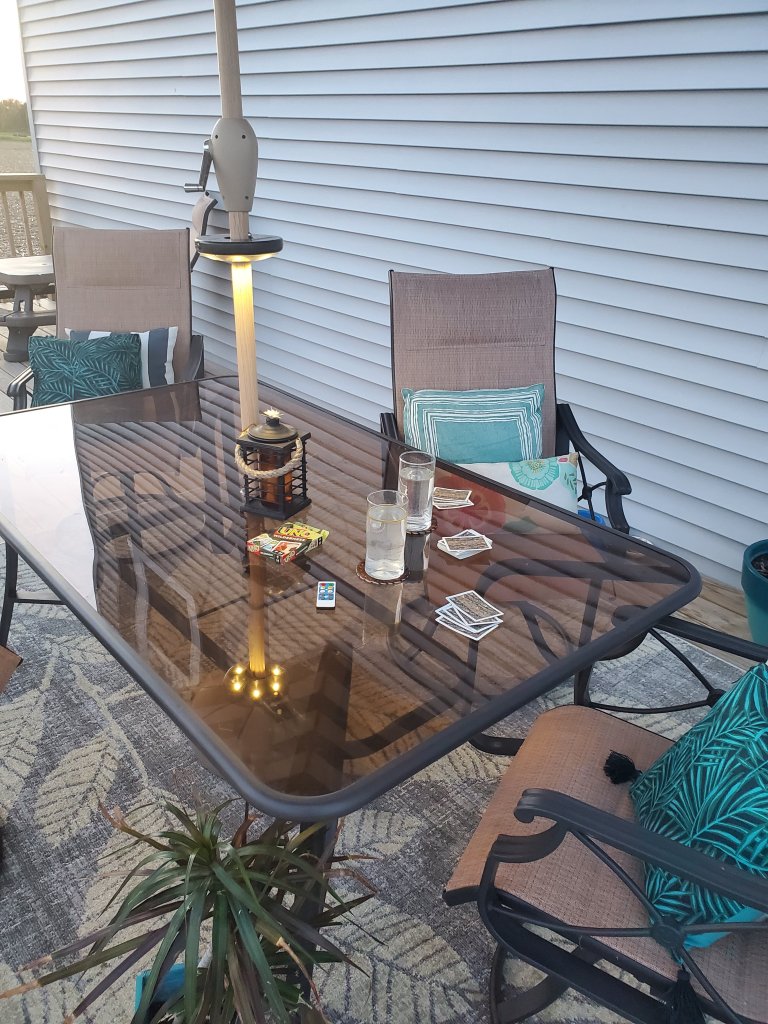
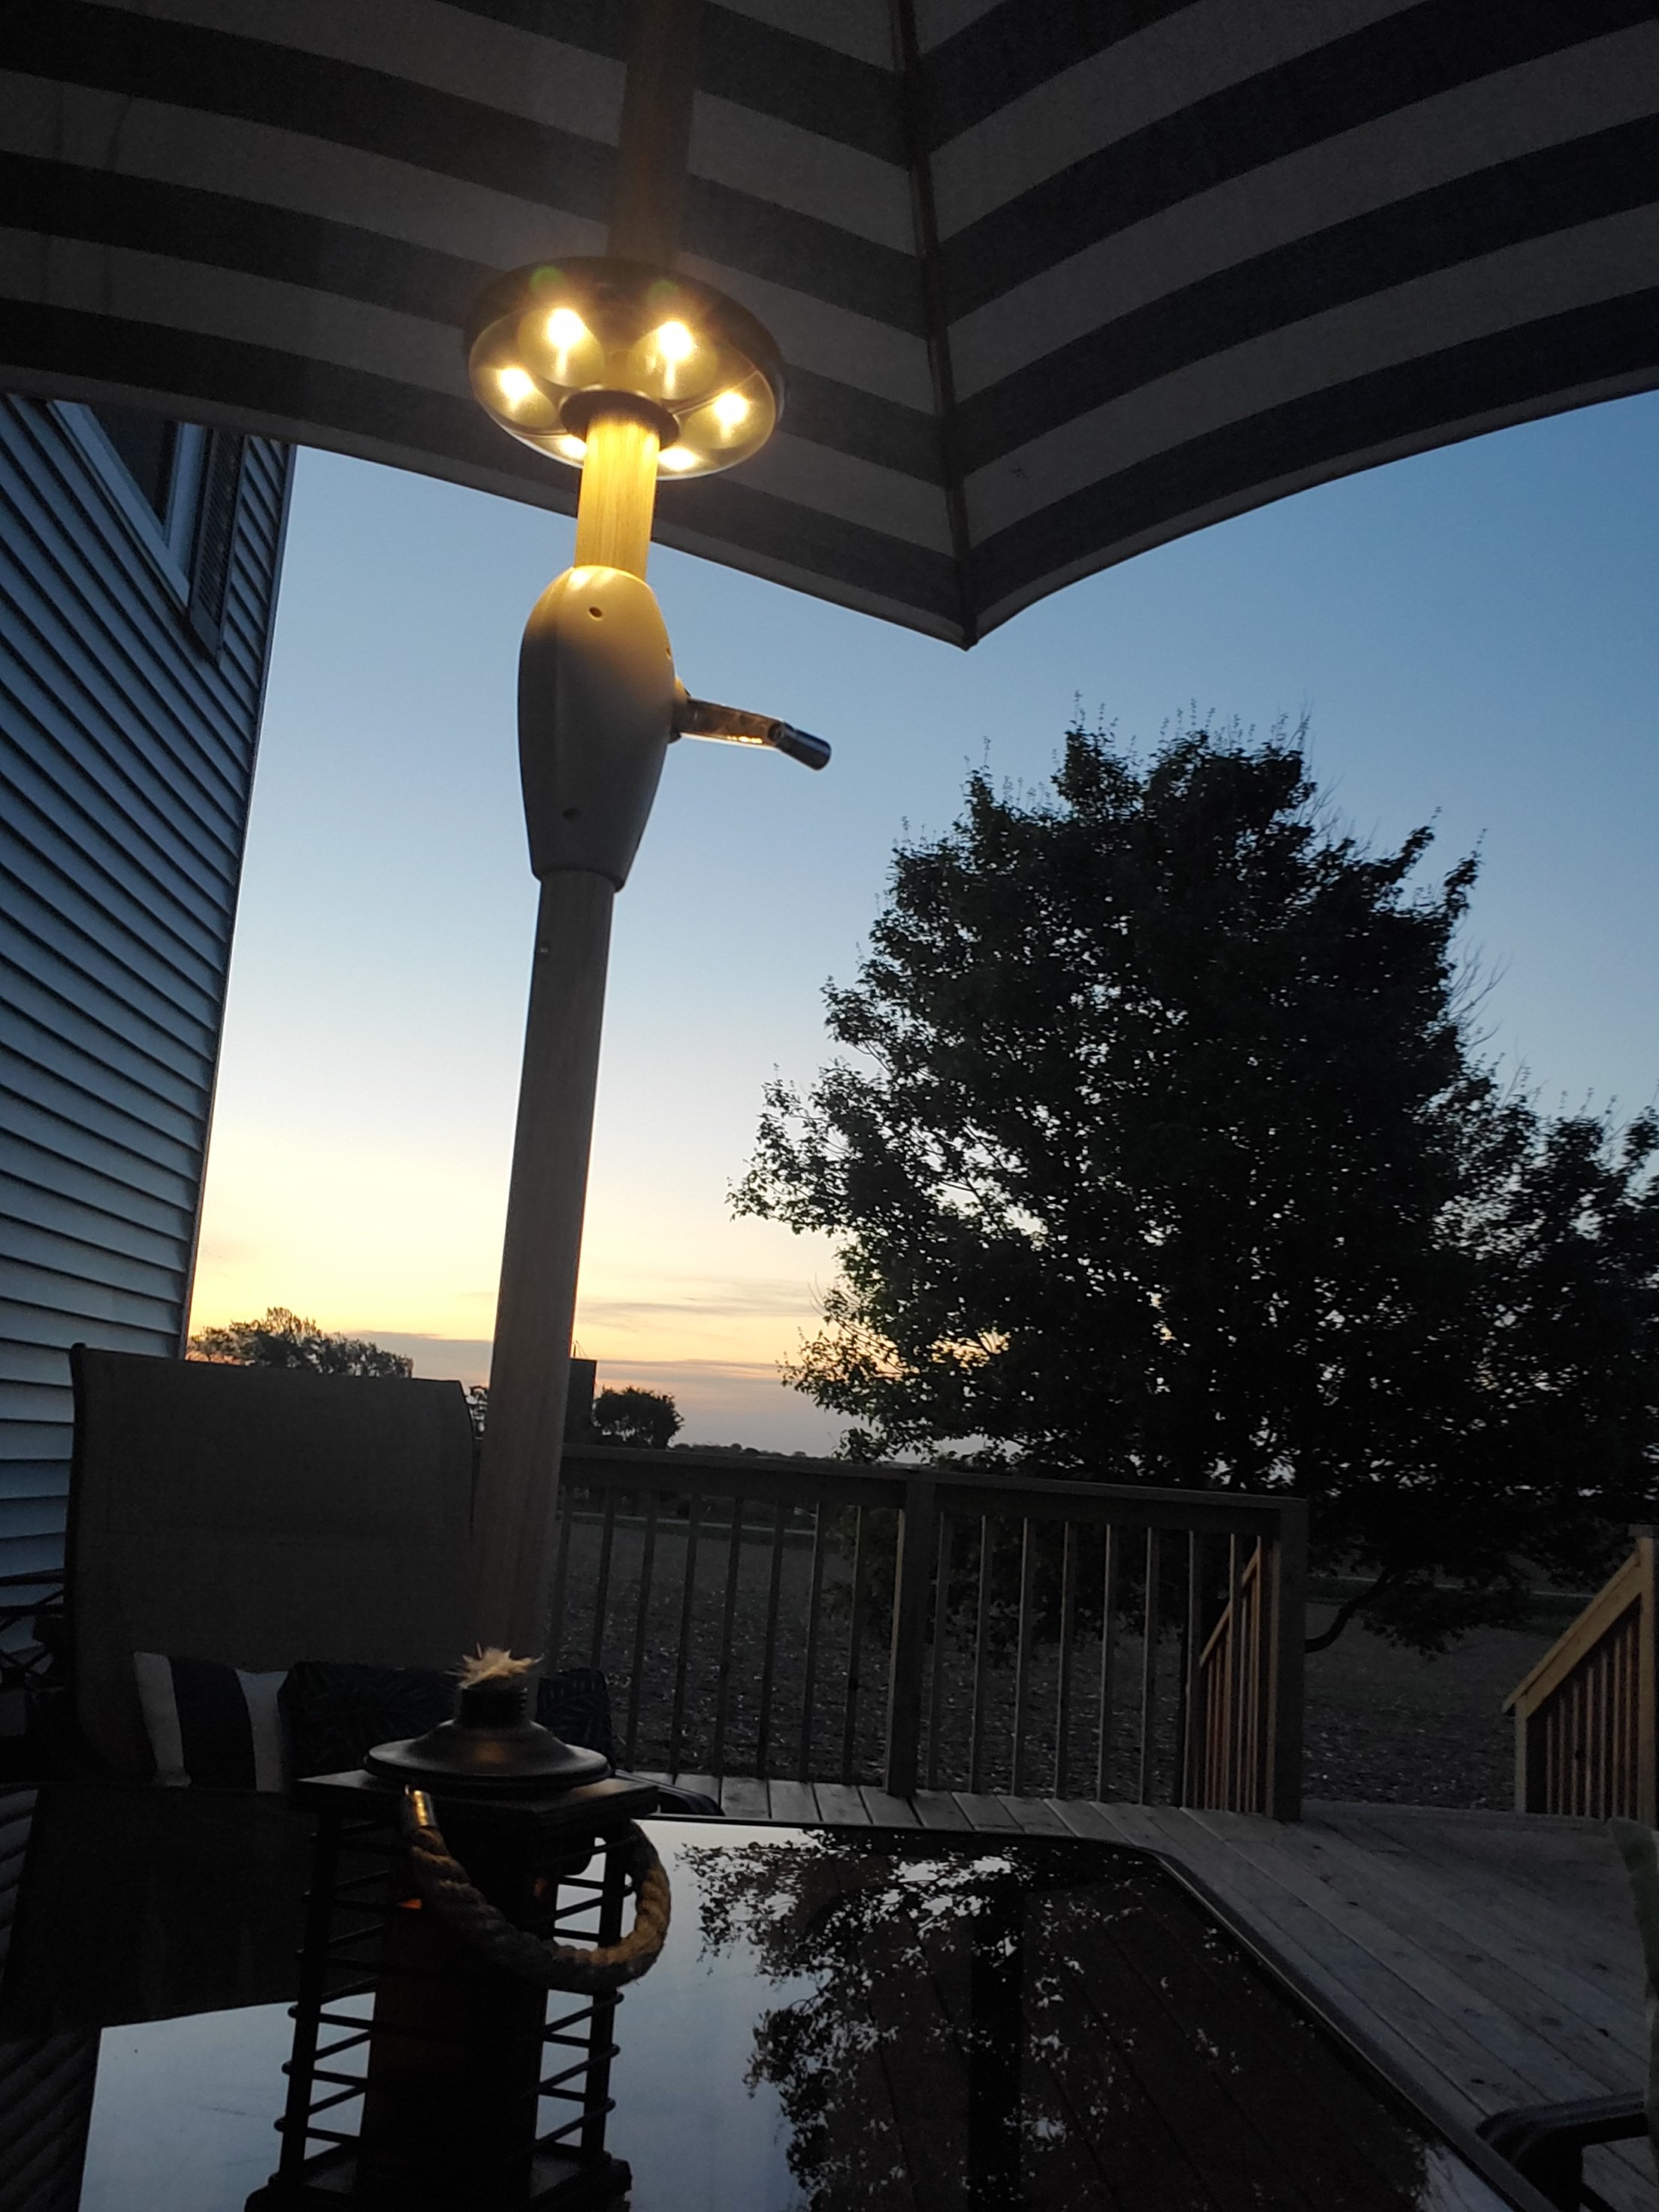

The quickest, easiest DIY to up your outdoor game!
Right now I use a simple Bluetooth speaker sat on the table too, but we are in process of installing a whole system with speakers on the house wall. Either way, tunes add to the vibe!
What else would you add?!
XX,
Jess
School At Home
This year has been a wild one, that’s for sure. It’s been so different from the norm for many of us. But, one things remains the same. We want our kids to learn, and we want them to have the best opportunities possible. So, no matter what type of schooling you are doing, these ideas can be for you!
We are doing online schooling this year. Classes are via computer, but mom facilitates. Optimal? No. But we are making the best of it. My best tip so far? Find a space and make it for learning. Boundaries and expectations help learning go well!
You don’t need a whole room, maybe a corner, or a table, or even a certain table cloth, and when it comes out, its time to learn. I had always worked from home a lot and happen to have space in my office that I was able to convert to a learning space. Don’t worry, even if your space is much smaller, these ideas can help you too!
I have several tips for routine, but this will just be about supplies for today.
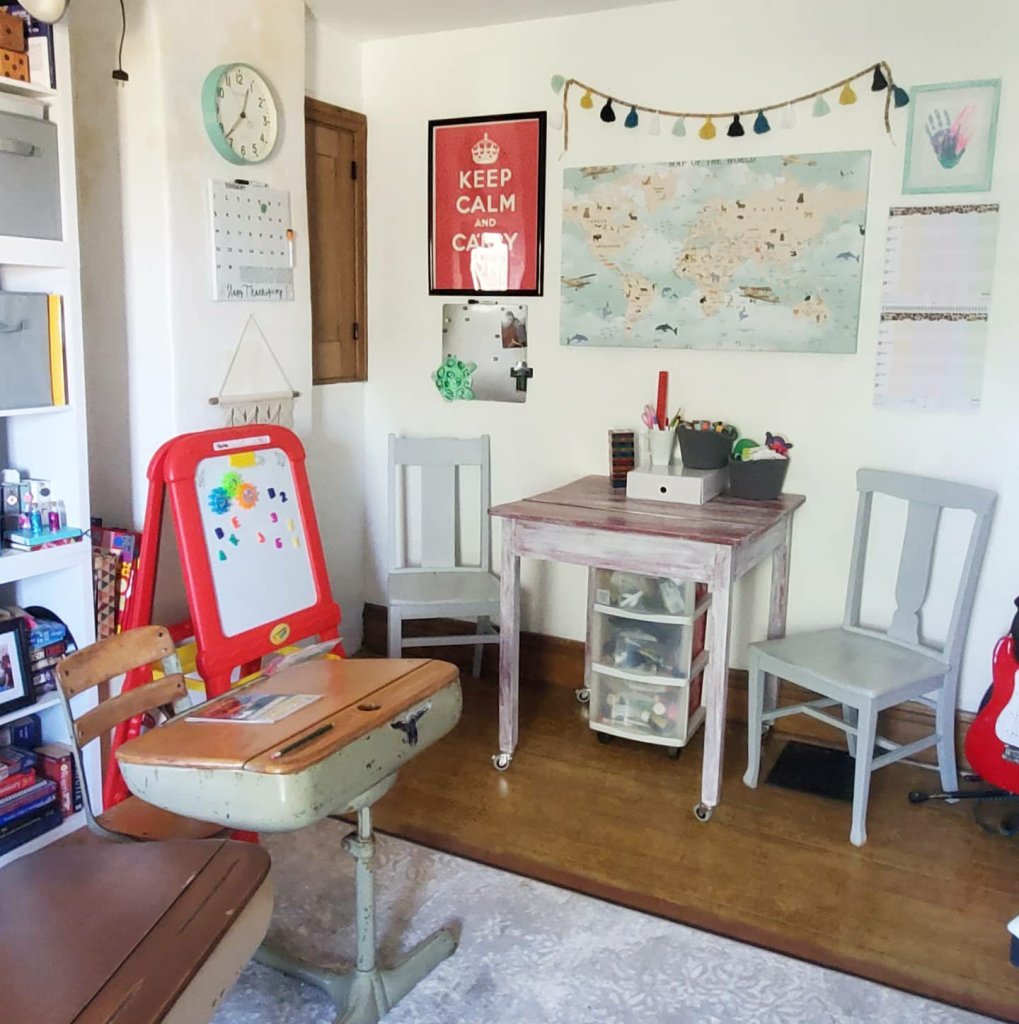
My second?! Keep it fun!! Third tip?! Get a map!
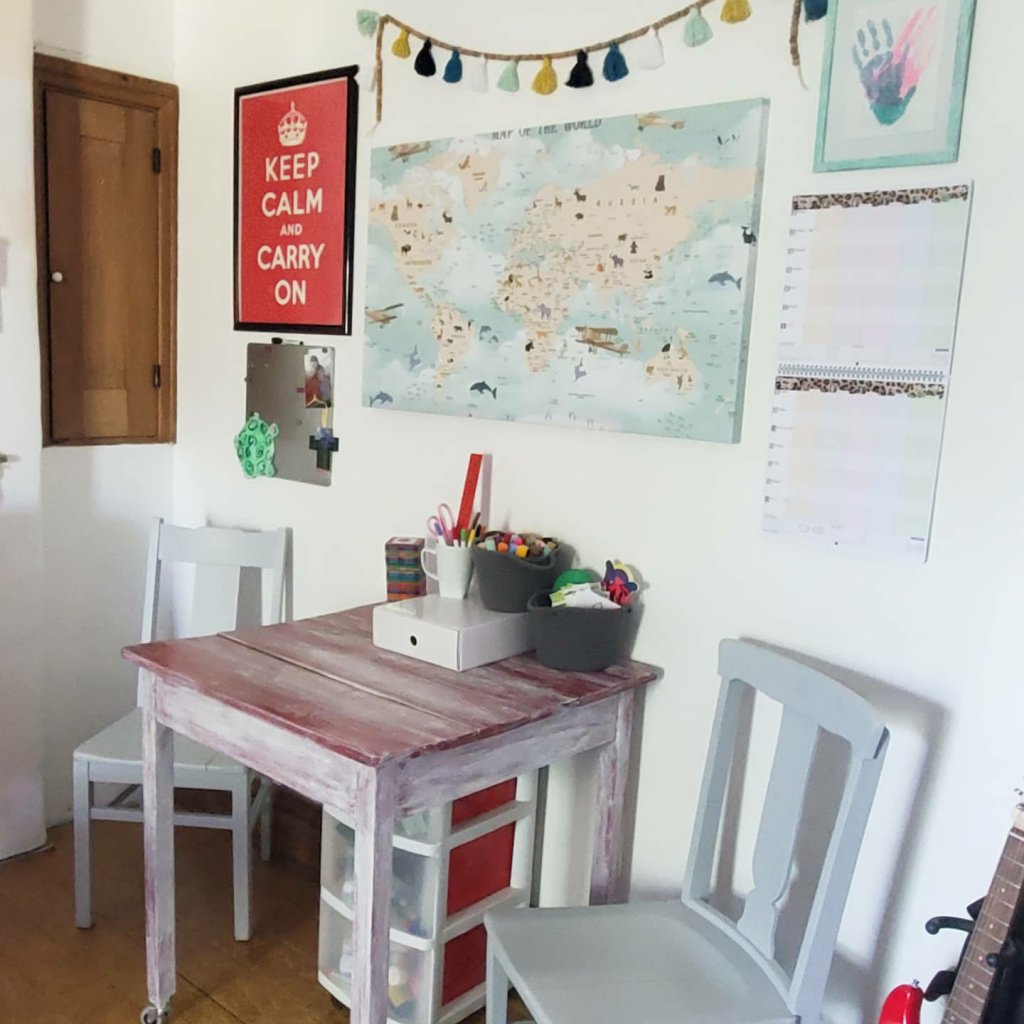
Look at how we combined both with this animal map canvas from Photo Wall! How cute is this thing?!
Photo Wall is amazing for any Wall decor really. They make wall decals, framed prints, posters, and canvases. You choose the art, the size, the material, and can even customize it! These would be amazing in kids’ rooms and nurseries, or even as an awesome accent wall!
Its details like this that really make your learning space fun and keep kids engaged. We knew Brantley needed a map for a lot of his Social Studies work, and looking things up on the computer really wasn’t cutting it. This map not only shows what he needs, but keeps his interest with the animals and details. He’s taken such an interest now! I plan to add a few more maps like this now too! And of course, you can fit them to your space.
Human anatomy? Plants or leaves? Turn them into a fun canvas or poster to make the learning fun!
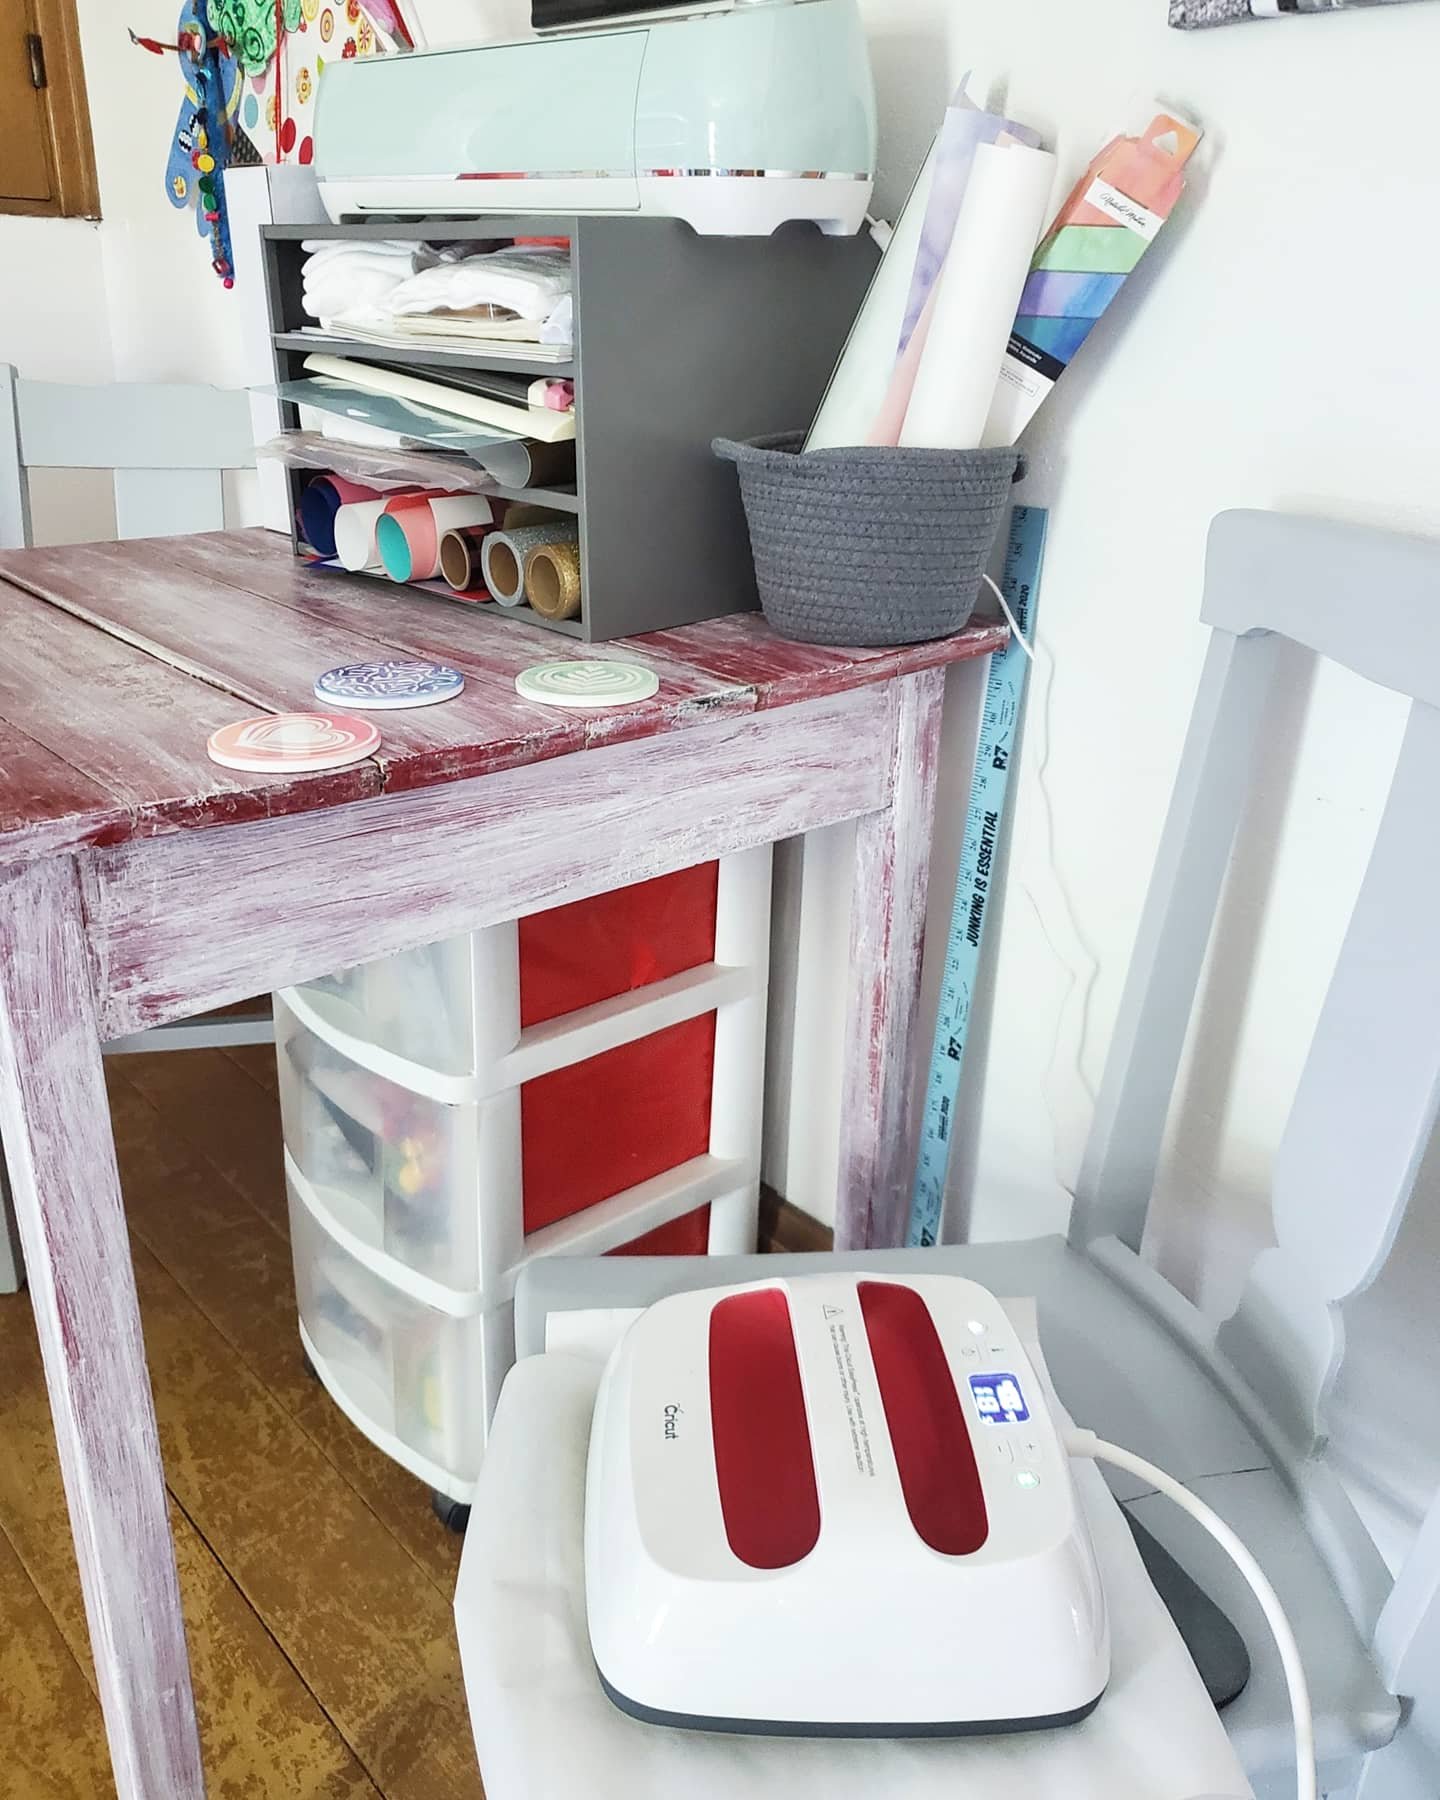
Tip 4 & 5- Have your supplies accessible, and keep them organized. Again, your space doesn’t need to be huge, but if you can find your supplies and access them easily, you will be more likely to do so. Hands on activities teach concepts so much better. Like using the scissors, ruler, markers, paints… engages and sinks in. It could even be a tote of supplies that comes out with the table cloth when learning time is happening!
I’m no pro yet, but I can tell you that I’m learning right along with the kids. You can do it, and even better with some simple tweaks!
And back to my gushing about this map canvas, because it really is my pride of decorating the classroom. 😉 Here is my map link. And use code makemineeclectic25 on your purchase from Photo Wall too! Your walls will truly thank you, in a classroom or not!

What tips would you add for schooling at home?!
XX,
Jess
Why I Love My Cricut
This is a sponsored post written by me on behalf of <a href=”Cricuthttps://lnk2.io/wjcWg2L”>Cricut</a>. All opinions are 100% mine.
I have had my Cricut Explore Air 2 for a few months now, and to say I’m in love is an understatement! I’ve always been a crafter, but this things really helps me step up my game! Here I am going to talk about the 5 things that I love about my Cricut!
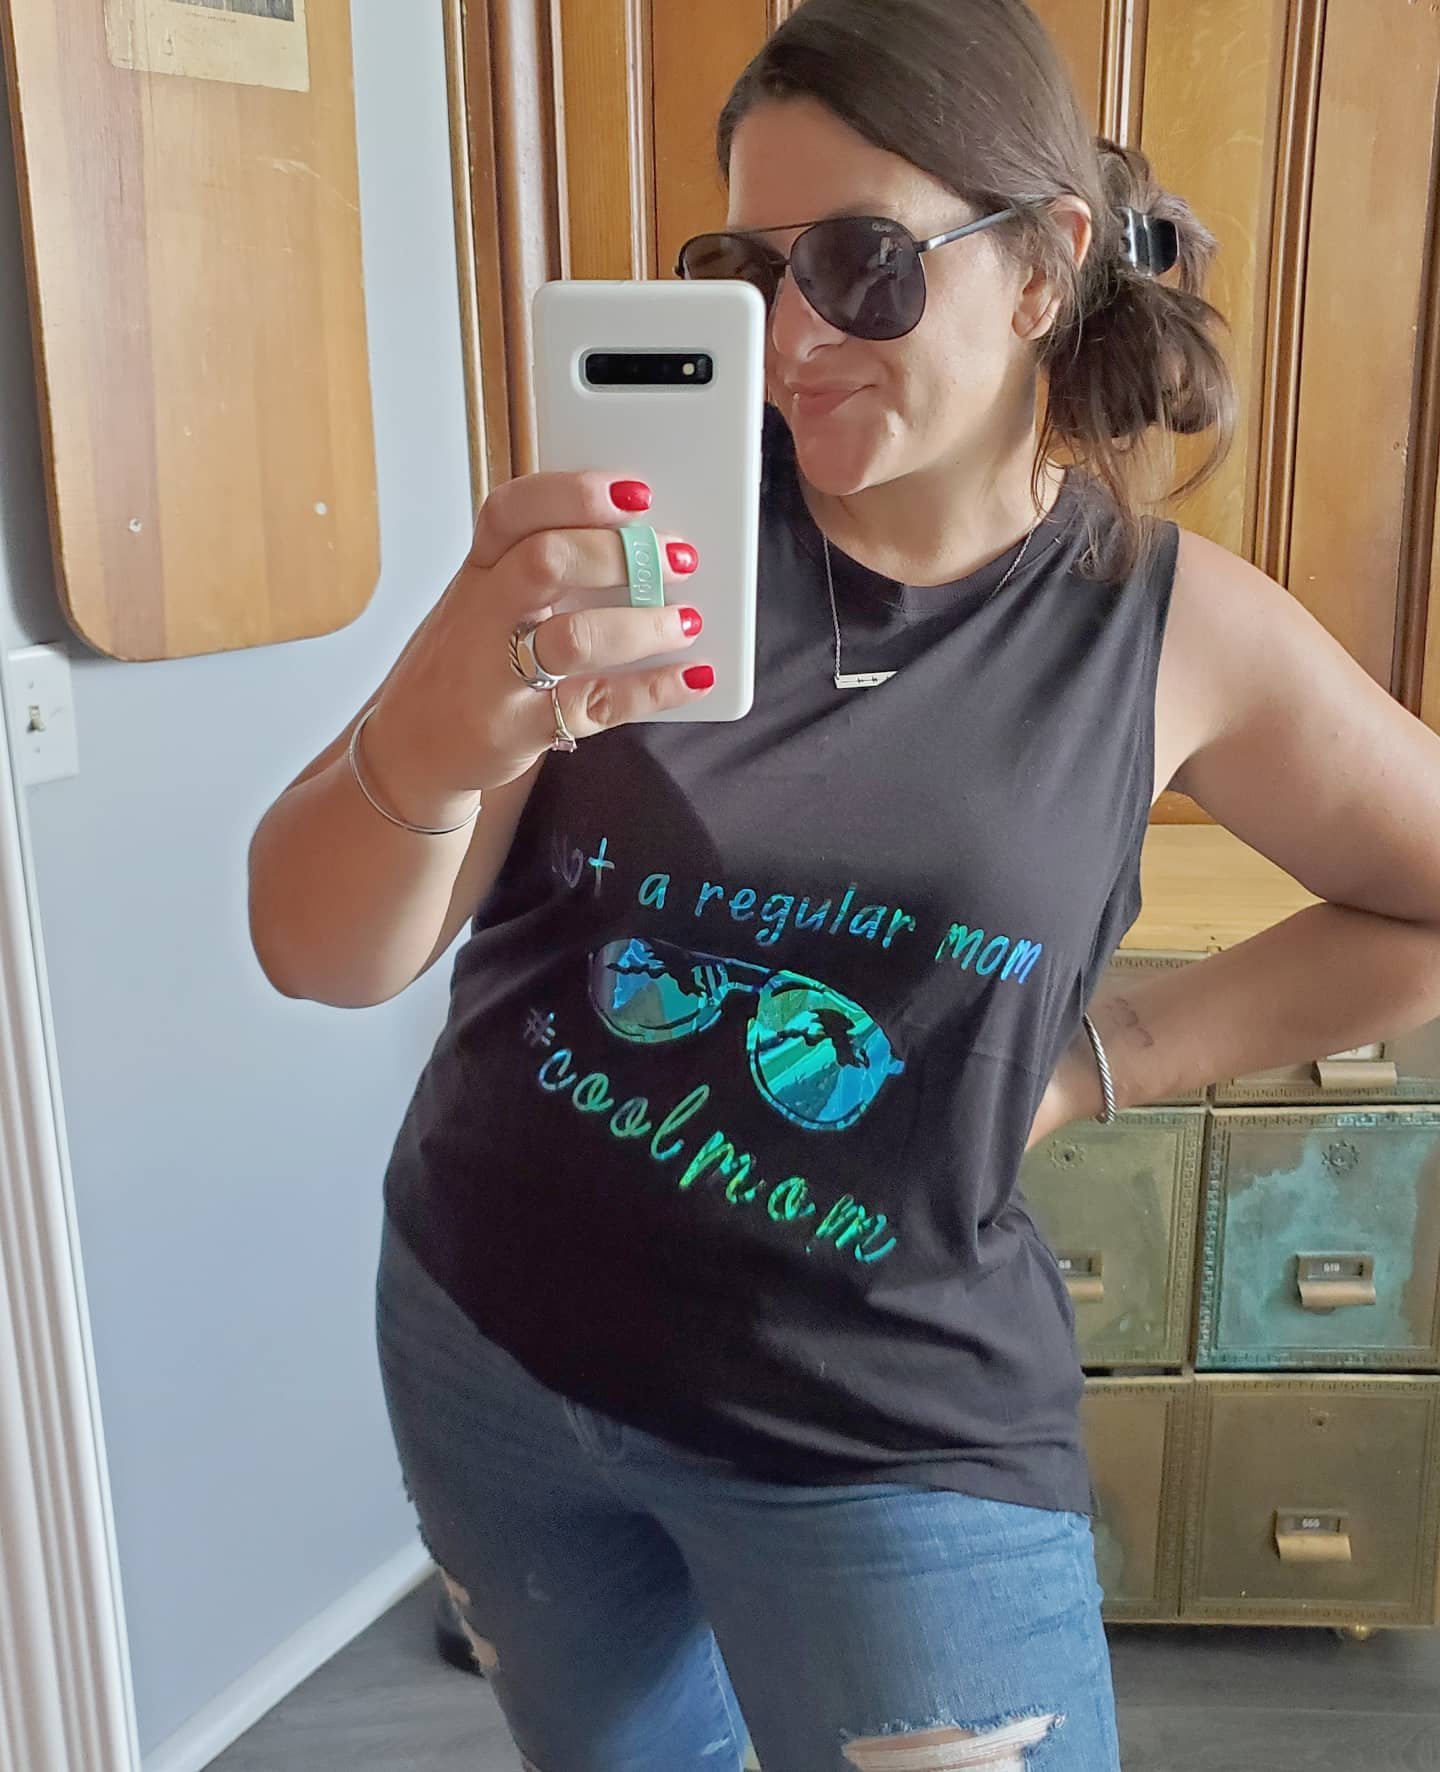
1. Its easy to use! I was truly shocked at how easy this machine is! Not going to lie, I was intimidated at first. I worried where to start and if I would be able to figure it all out. Yup. I was. Best place to start? Pick a project and jump in. They really mean it when they say their motto is “beginners luck every time.” I learn tricks and get braver each time I use my machine, but I definitely agree that picking a beginner level project and diving in head first is a great way to start and will prove to you how easy it is! Check out this shirt I made as one of my very first projects:
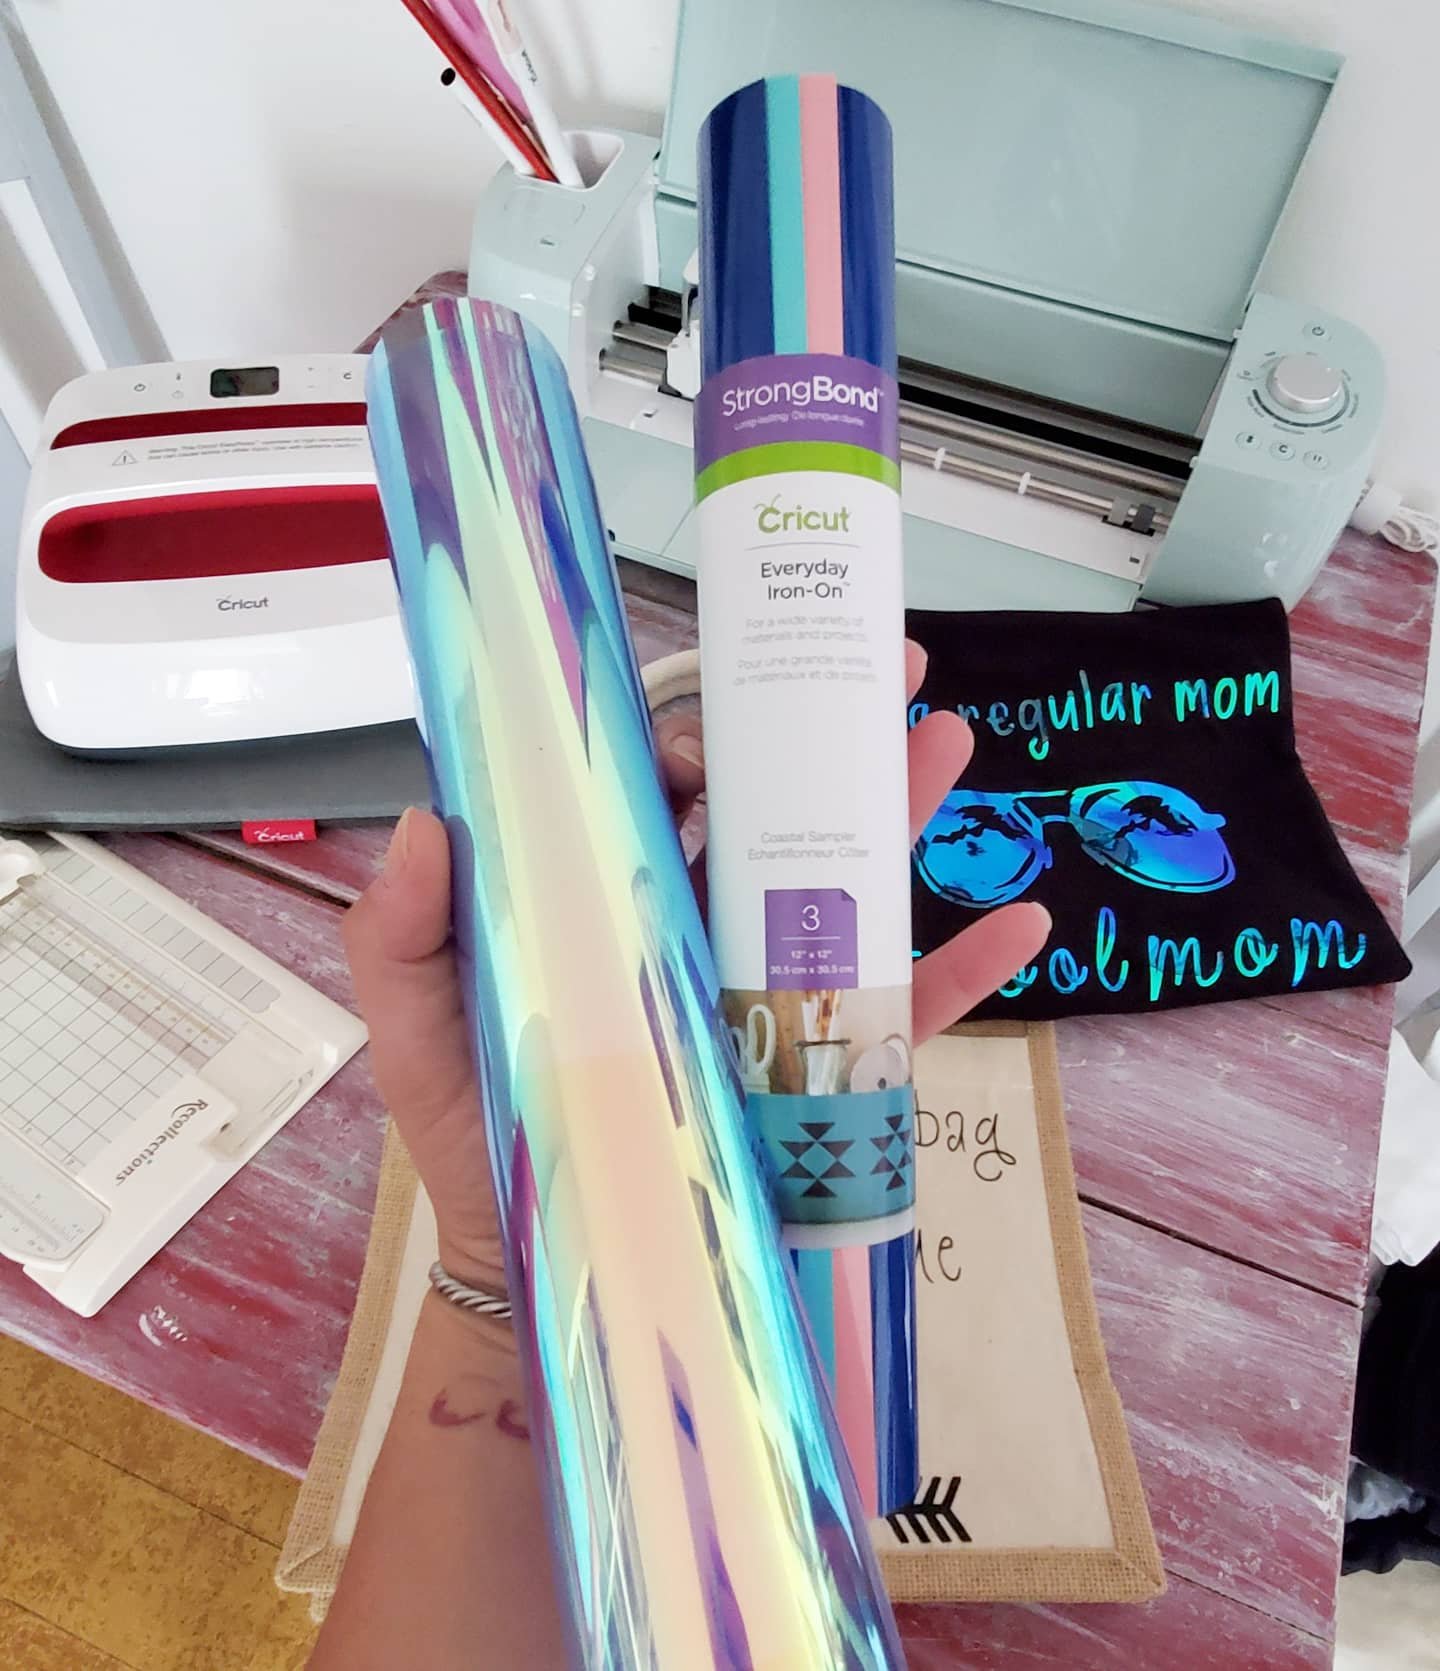
2. Support! That brings me to the second thing I love about my Cricut. Its like having a whole community of creators to support you. Have a question? Worried about where to begin or which type of project to do? They’ve got an answer! Not only does Cricut have a team you can email or chat with, but they have numerous pages where you can reach out to their pros or other crafters with tons of experience. They’ve all started somewhere and learned lots and are at the ready to make sure you love your machine and projects. I would know. I wasn’t sure how to customize the design I wanted to make myself for this bag, and the Facebook page group had almost immediate answers for me!

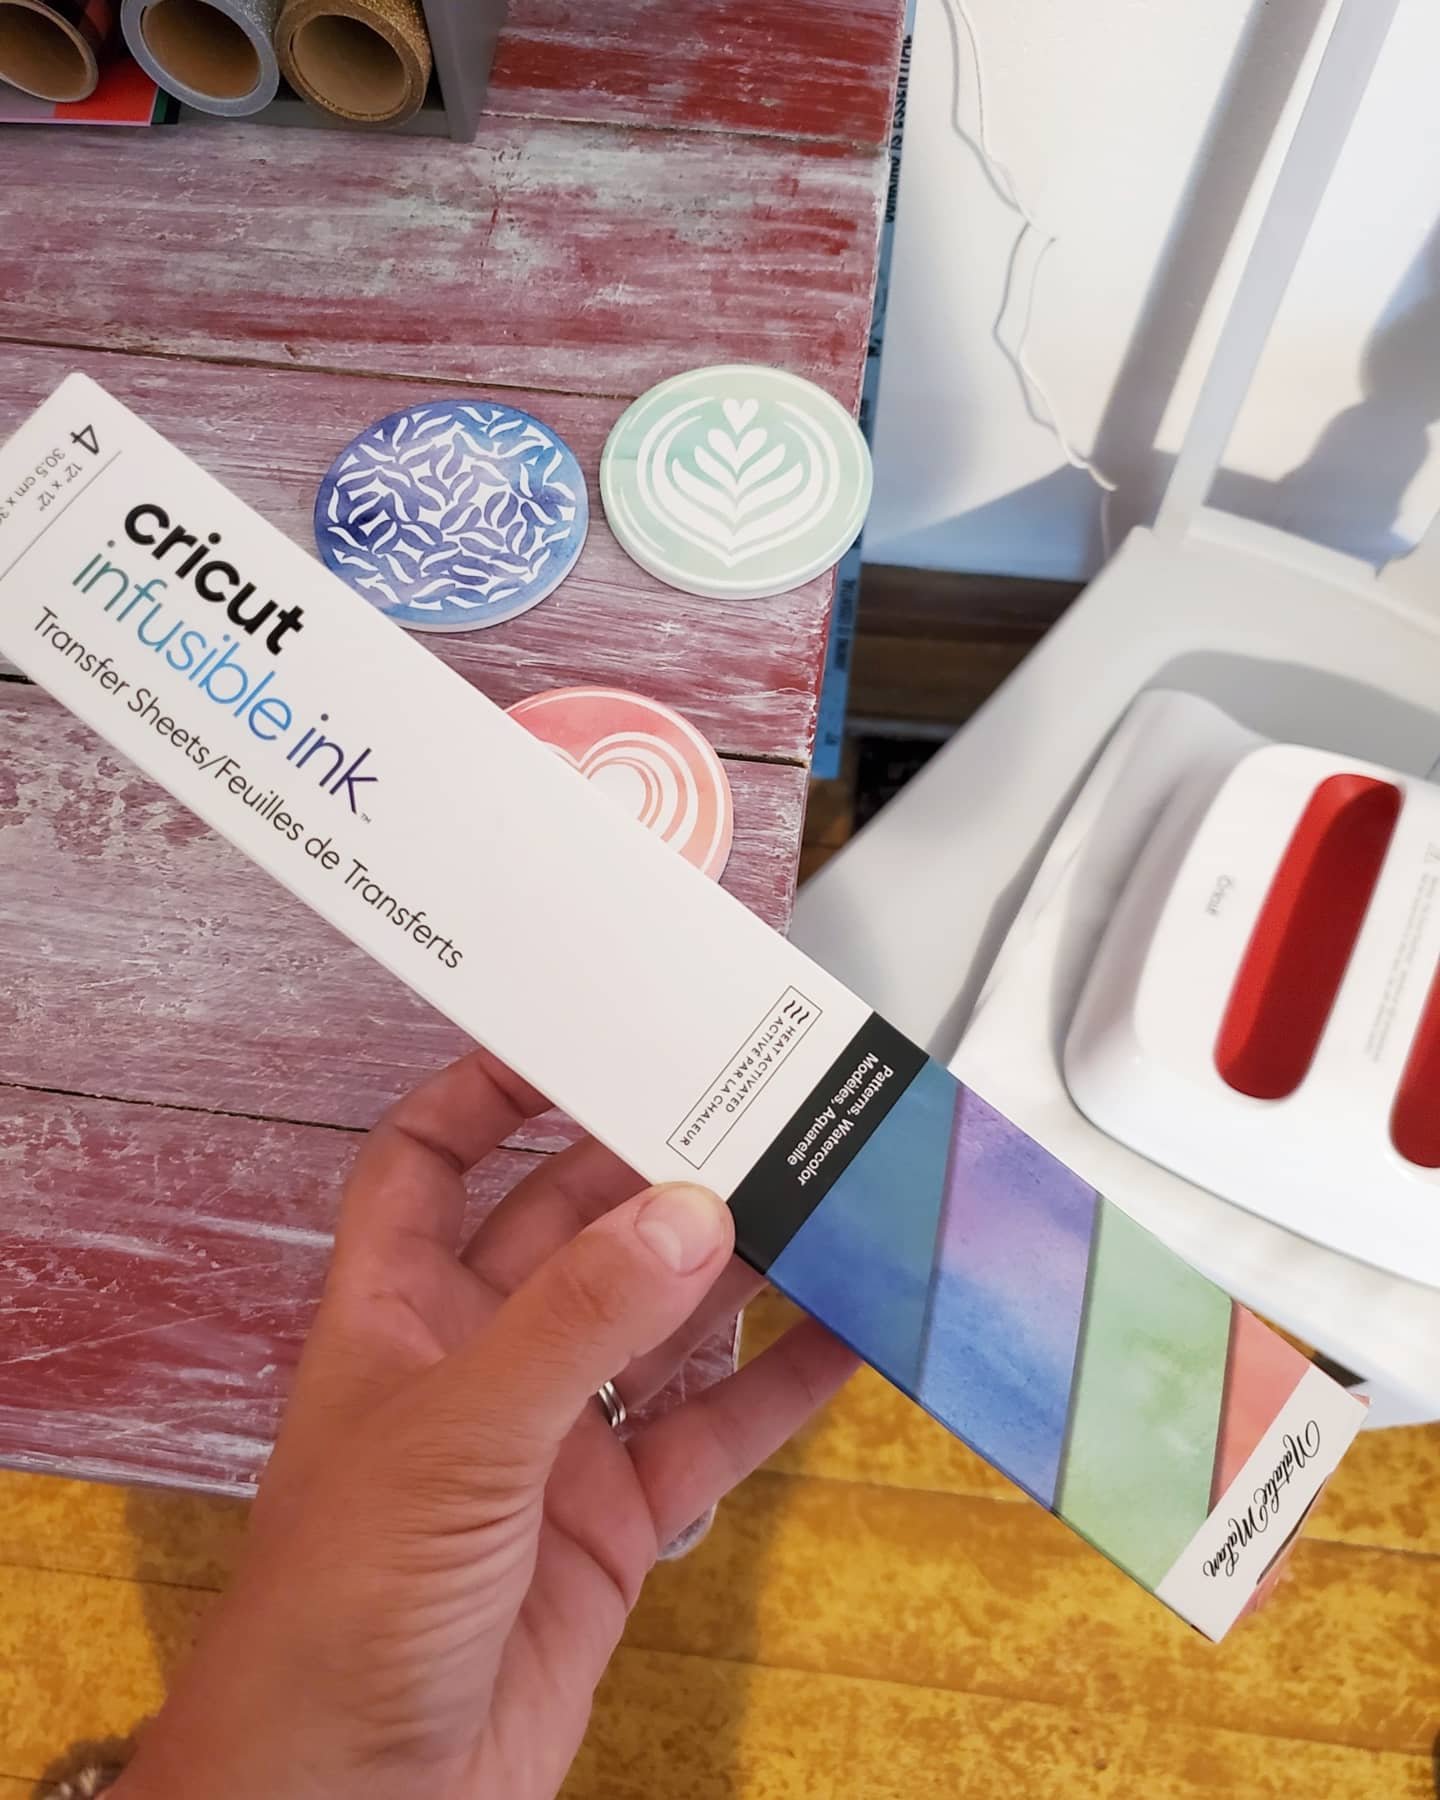
3. Ideas! This also leads me to another thing I love about Cricut, the ideas! I never worry about having a creative block. There’s no way. The ideas of projects to make are endless, for every single occasion you cak dream of. Really. You can find ideas galore on Pinterest, and Instagram, or Cricuts’s Facebook page. And my favorite place for inspiration? The Cricut emails! They send seasonal emails showing the new ideas and templates added to Design Space, their app for making. How did I know about the new infusible ink and coaster blanks to make these? One of their idea emails! Light bulb!

4. The options! Got a bright idea to make? You can! And Cricut can help you do it! The options they supply for you is endless. Or almost. Not only do they help with the ideas, but they make it easy to find all of the supplies you need to make visions come to fruition. They have coasters, bags, shirts, materials, pens, markers, vinyls, decals, iron ons, and the widest variety of patterns in their supplies you could imagine! Sparkles, holographics, leopard, wood grain…their possibilities are never ending! Not to mention, cricut has other machines like the EasyPress, and tools like mats, cutters, Nd weeders, to make all of the options come to life!

5. Capabilities! This machine not only cuts paper and vinyls. I was shocked to learn what all it really can do. Like blown away. It can cut leather, poster board, felt, fabric and even wood. But it doesn’t just cut, it can score. And it can draw! Yup! Shocked?! Me too. You can insert pens and markers into the blade holder and it can draw or write, making handmade cards, letters, signs… mind blown.
The capabilities combined with the Cricut options alone shows you that the possibilities are truly endless. I cannot wait to do another project every time I finish one! And now all of my gifts will be one of a kind made by yours truly!
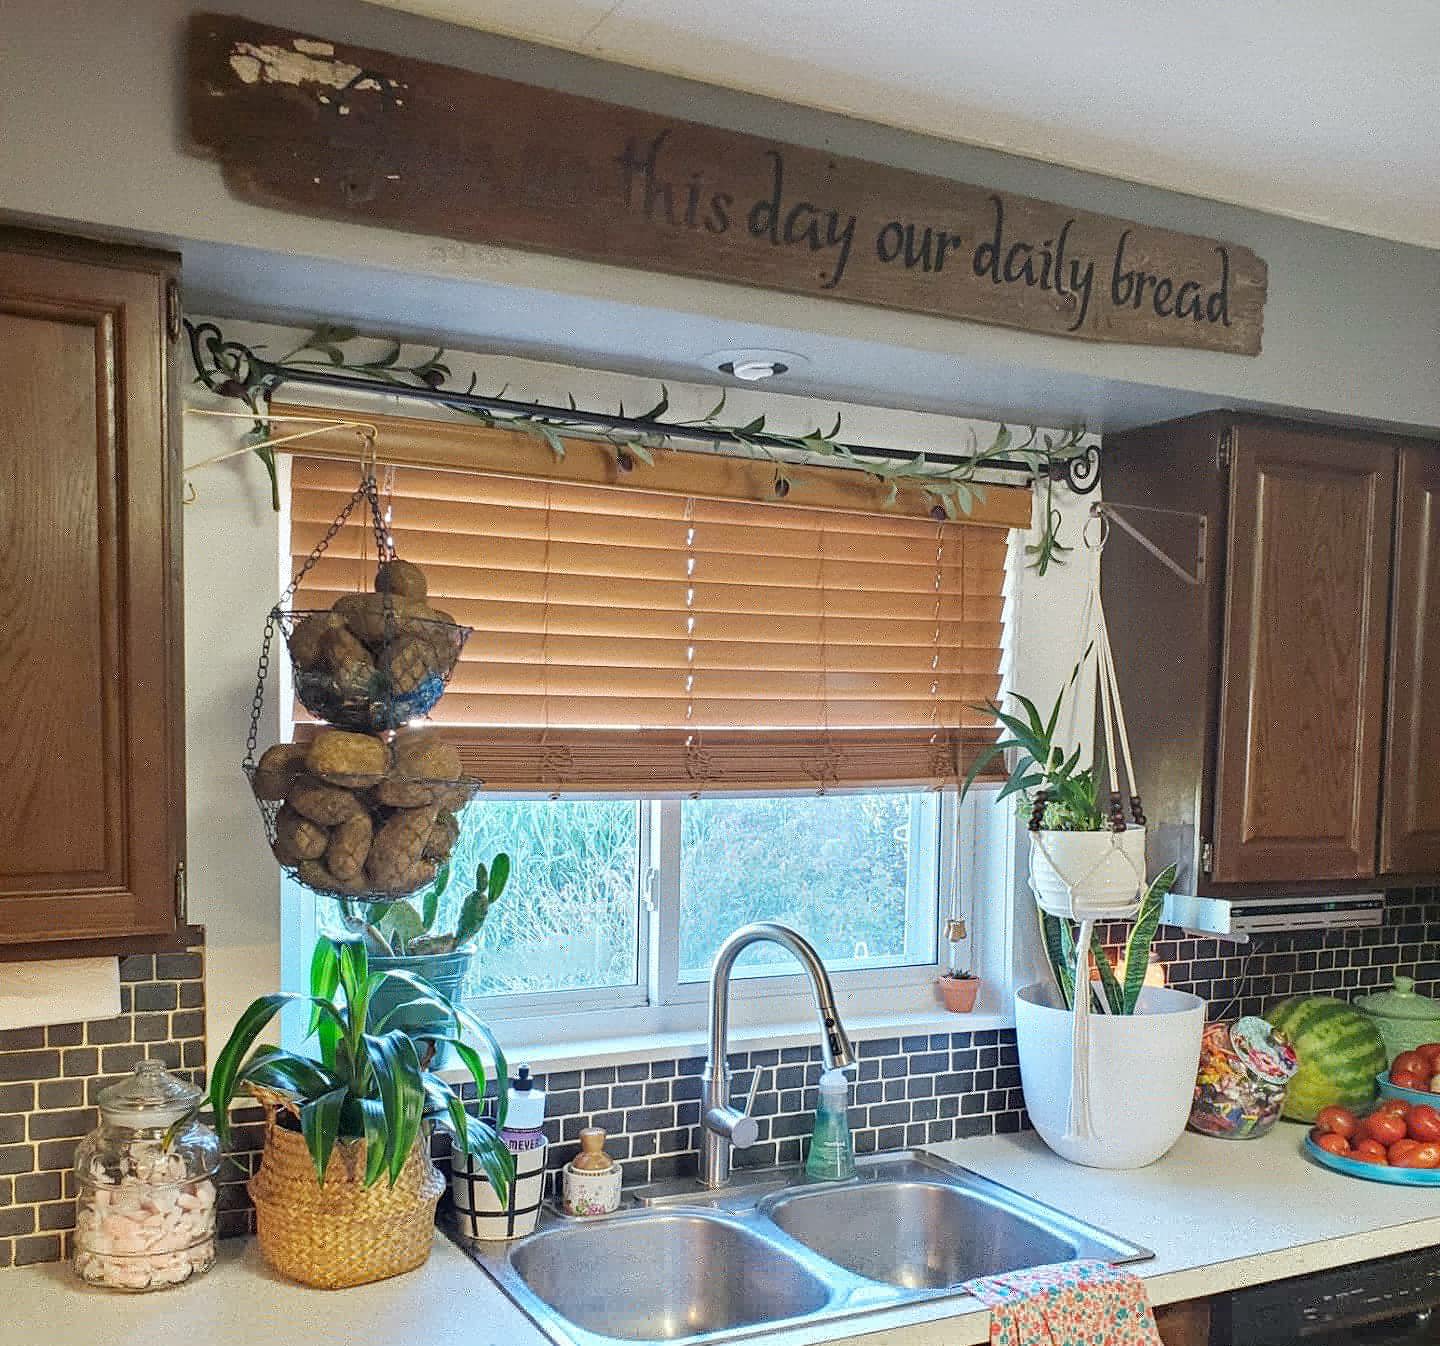
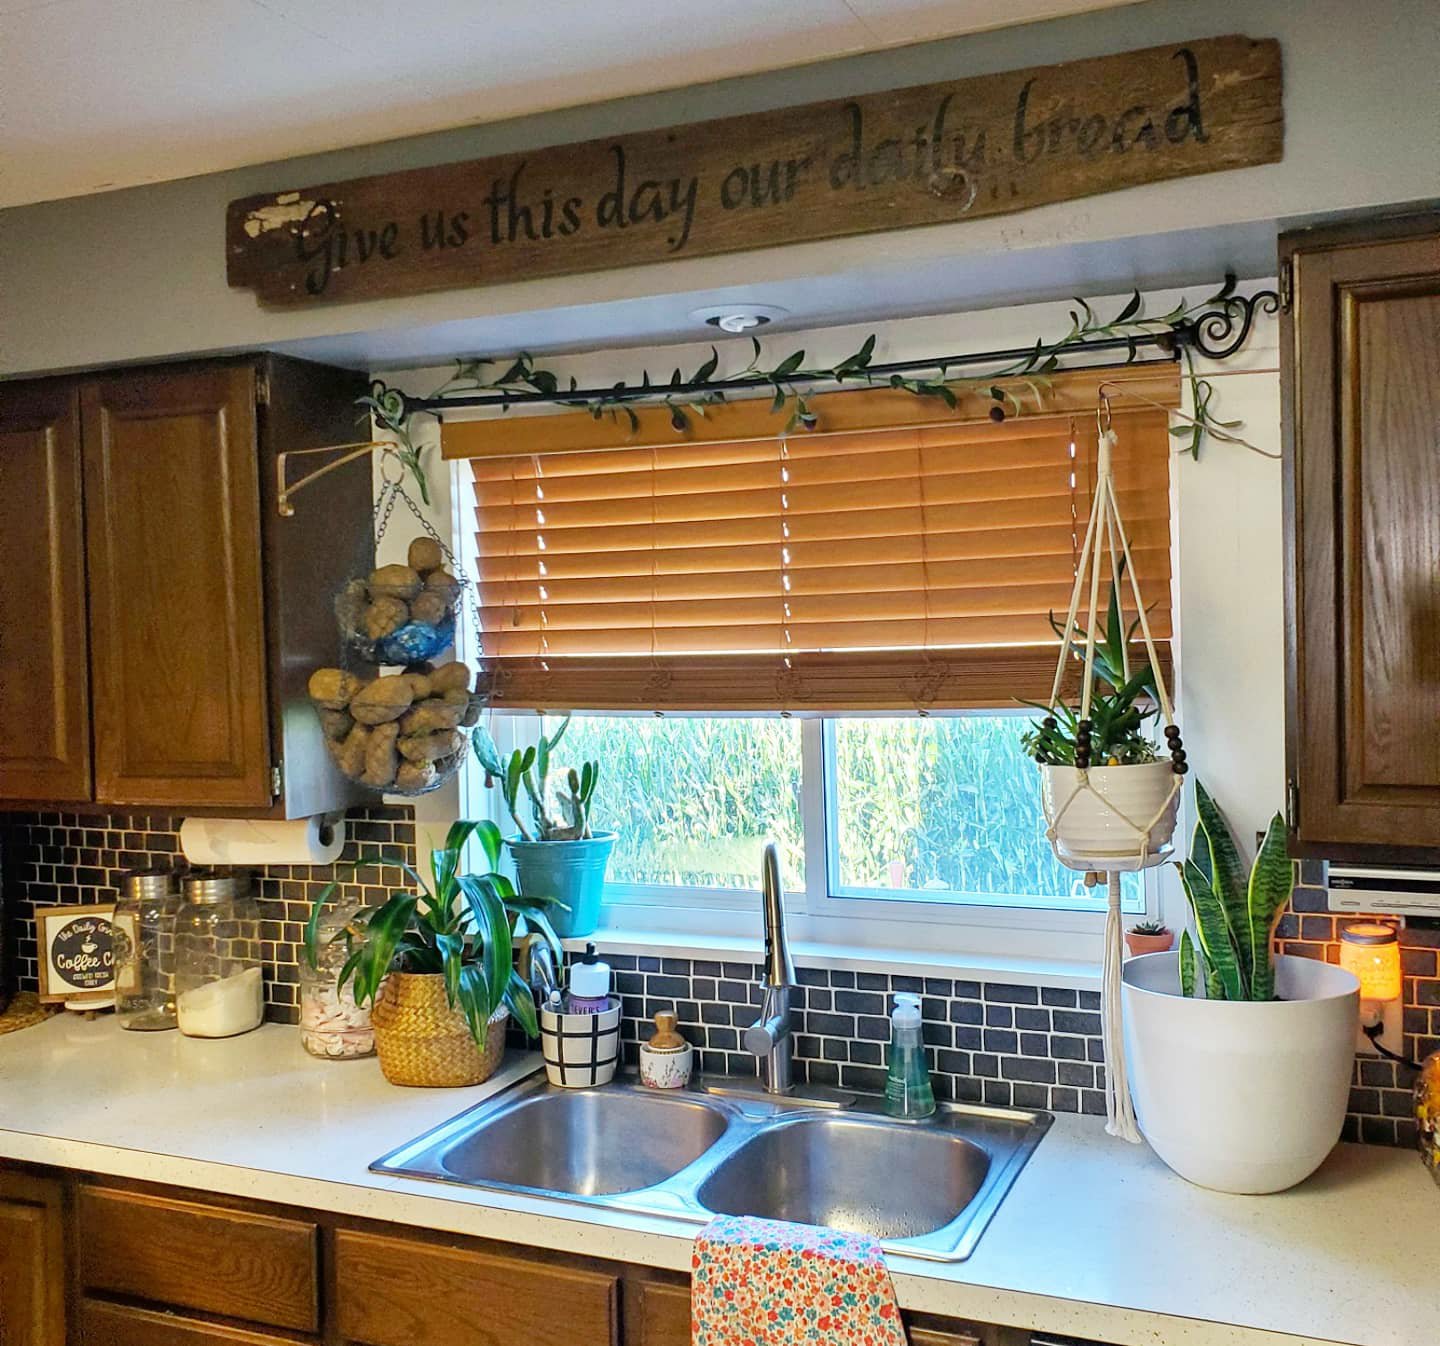
Here’s a quick breakdown of my latest project, a sign for our kitchen.
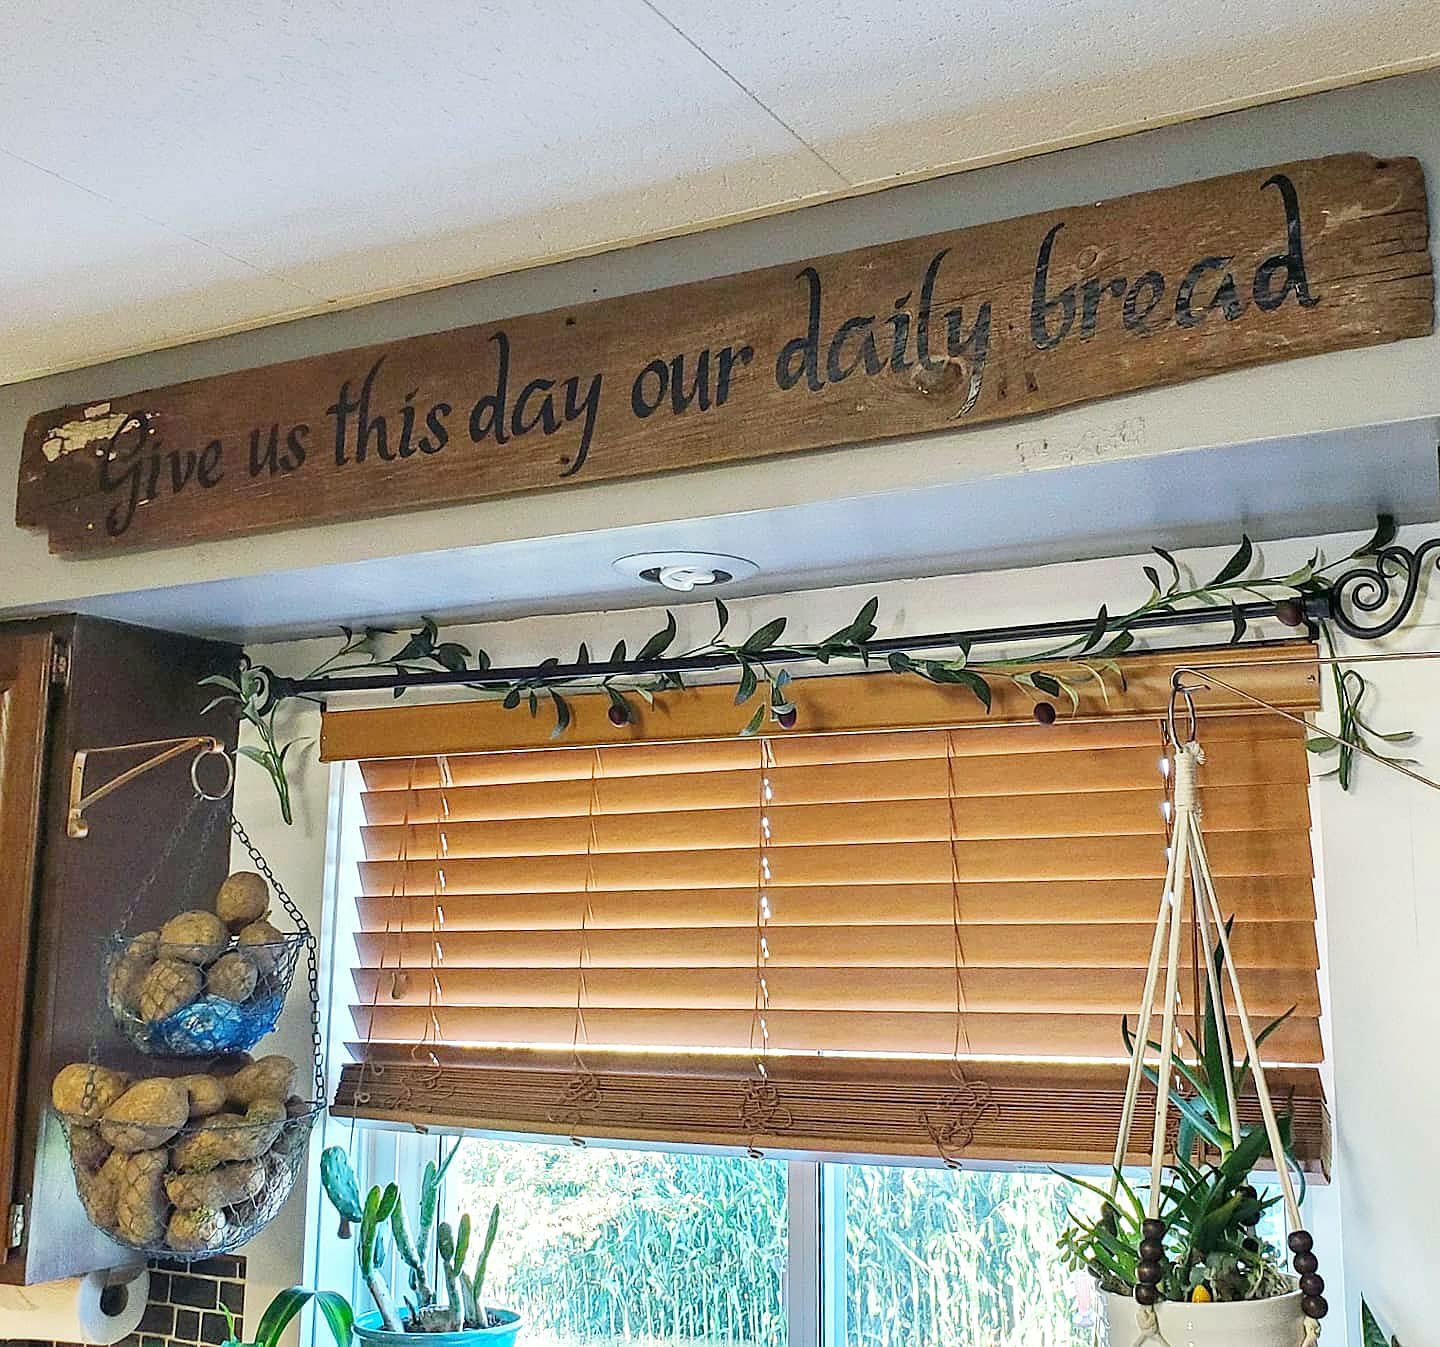
Choose a board and a quote. My board is a faded, chipped, barn board from our barn. (I’m sure to some the white paint left on one corner and the odd shape caused by years of cattle wear are not pretty, but we loved this board! 😉
Then, start on the Design Space app, and find my design template here. My board is 5ft long, but you can edit the design to adjust measurements. Once you send the design to the machine and it cuts it on vinyl, weed the excess pieces out. Use transfer tape to pick up your design and stick it down in place on your board. You could add flourishes to the ends of your quote too! You can change this design and even choose your own color vinyl. I used matte clear coat over the board to ensure no edges lift since I chose an old, rippled barn board for my project. Add a hanger or two on the back and hang. Easy peasy and a great one-of-a-kind, beginner-friendly project!
Have questions? Need help or ideas? Just ask! 😘
XX,
Jess
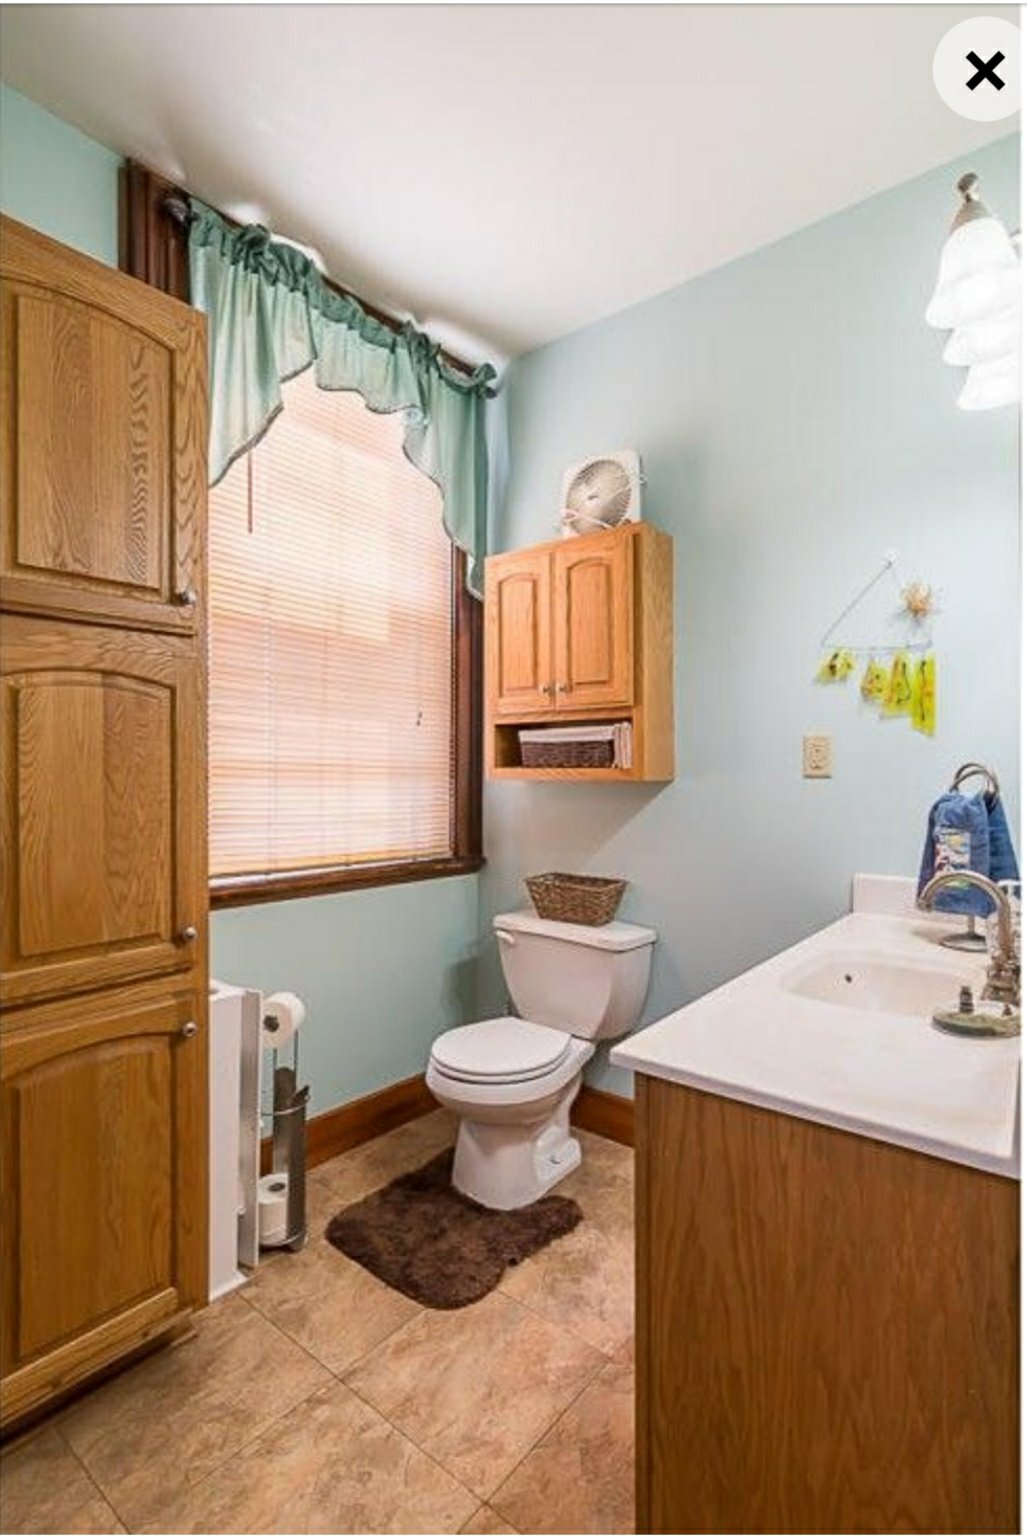
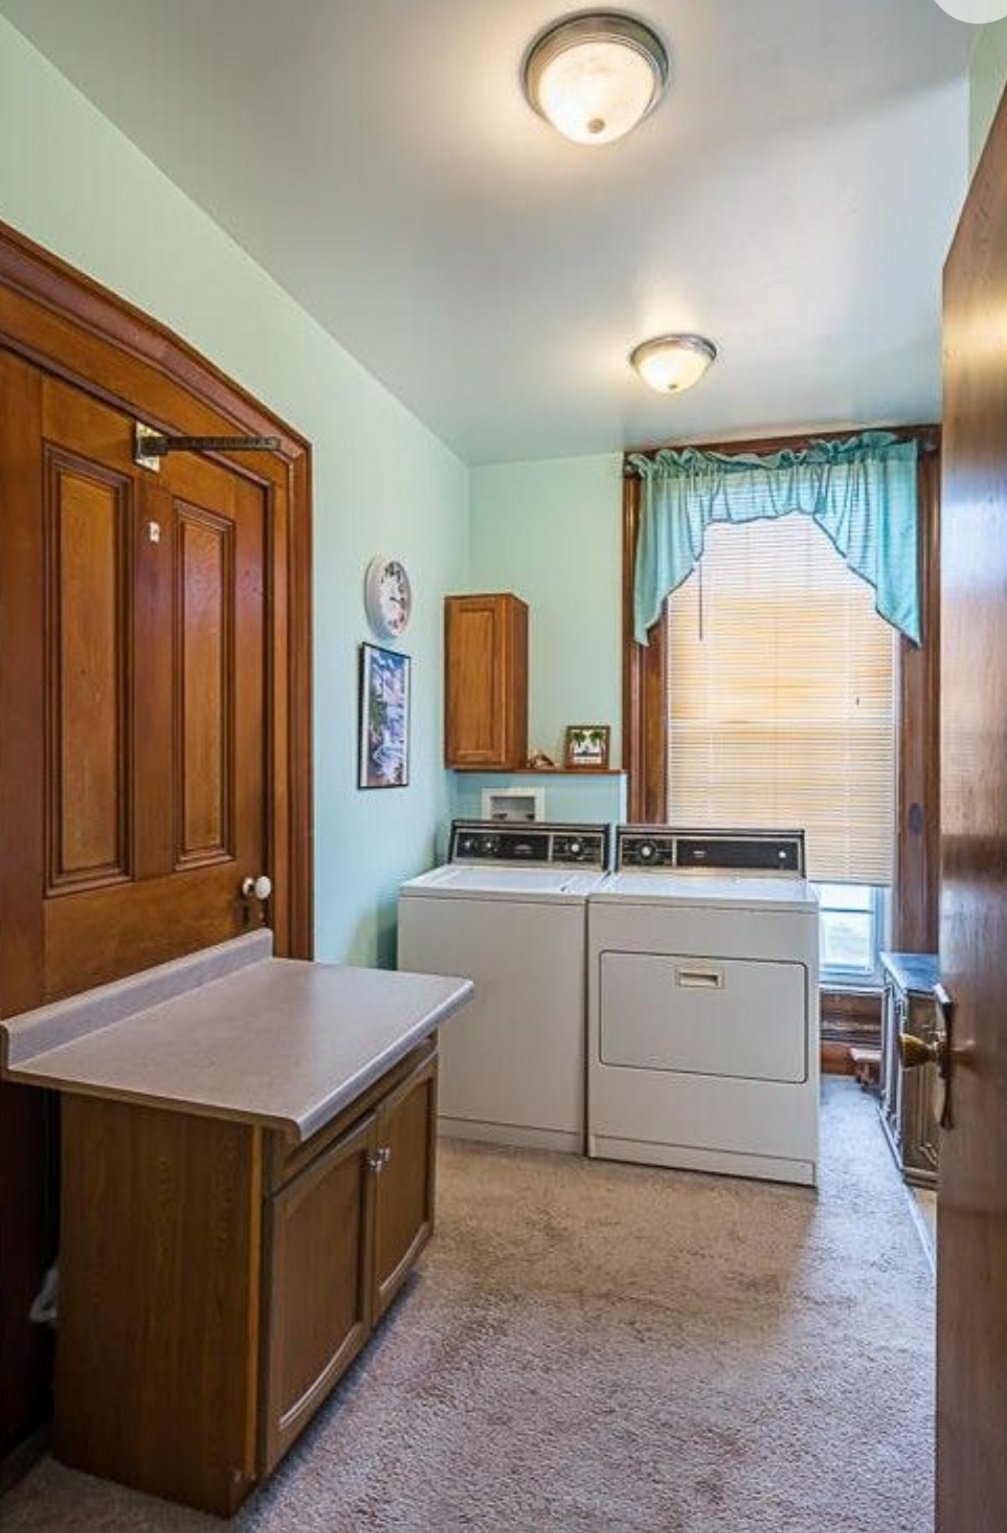
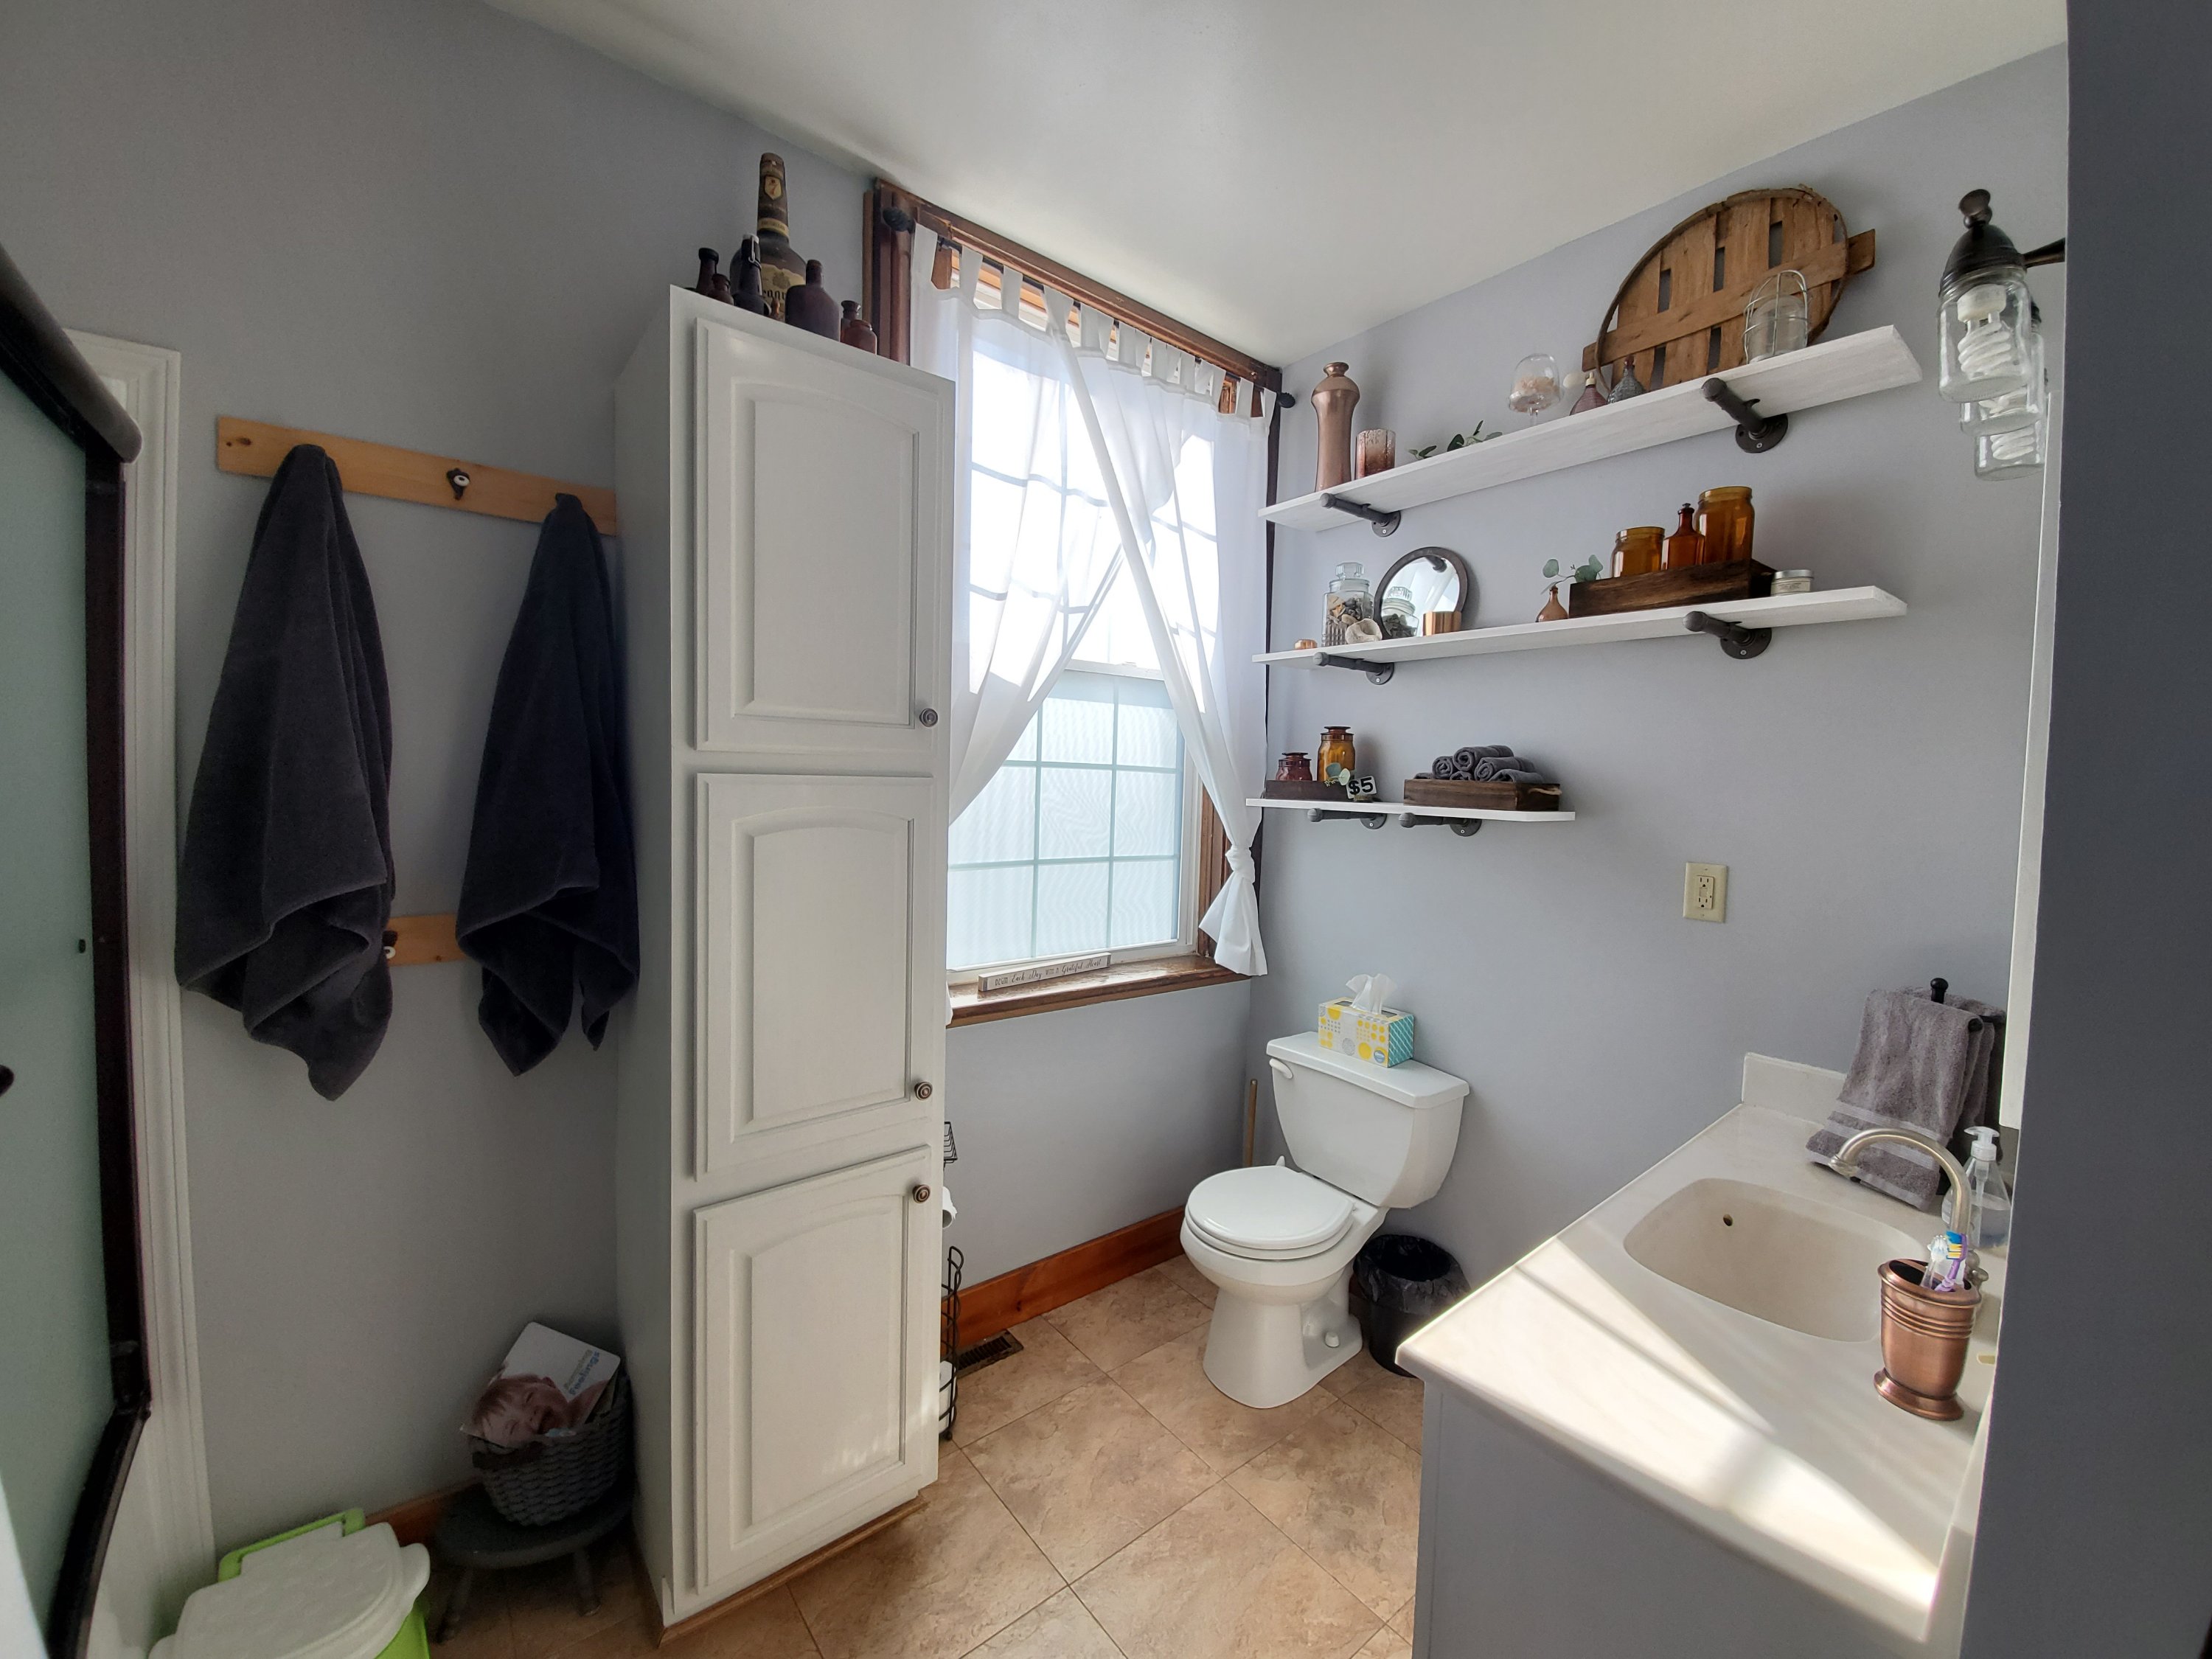
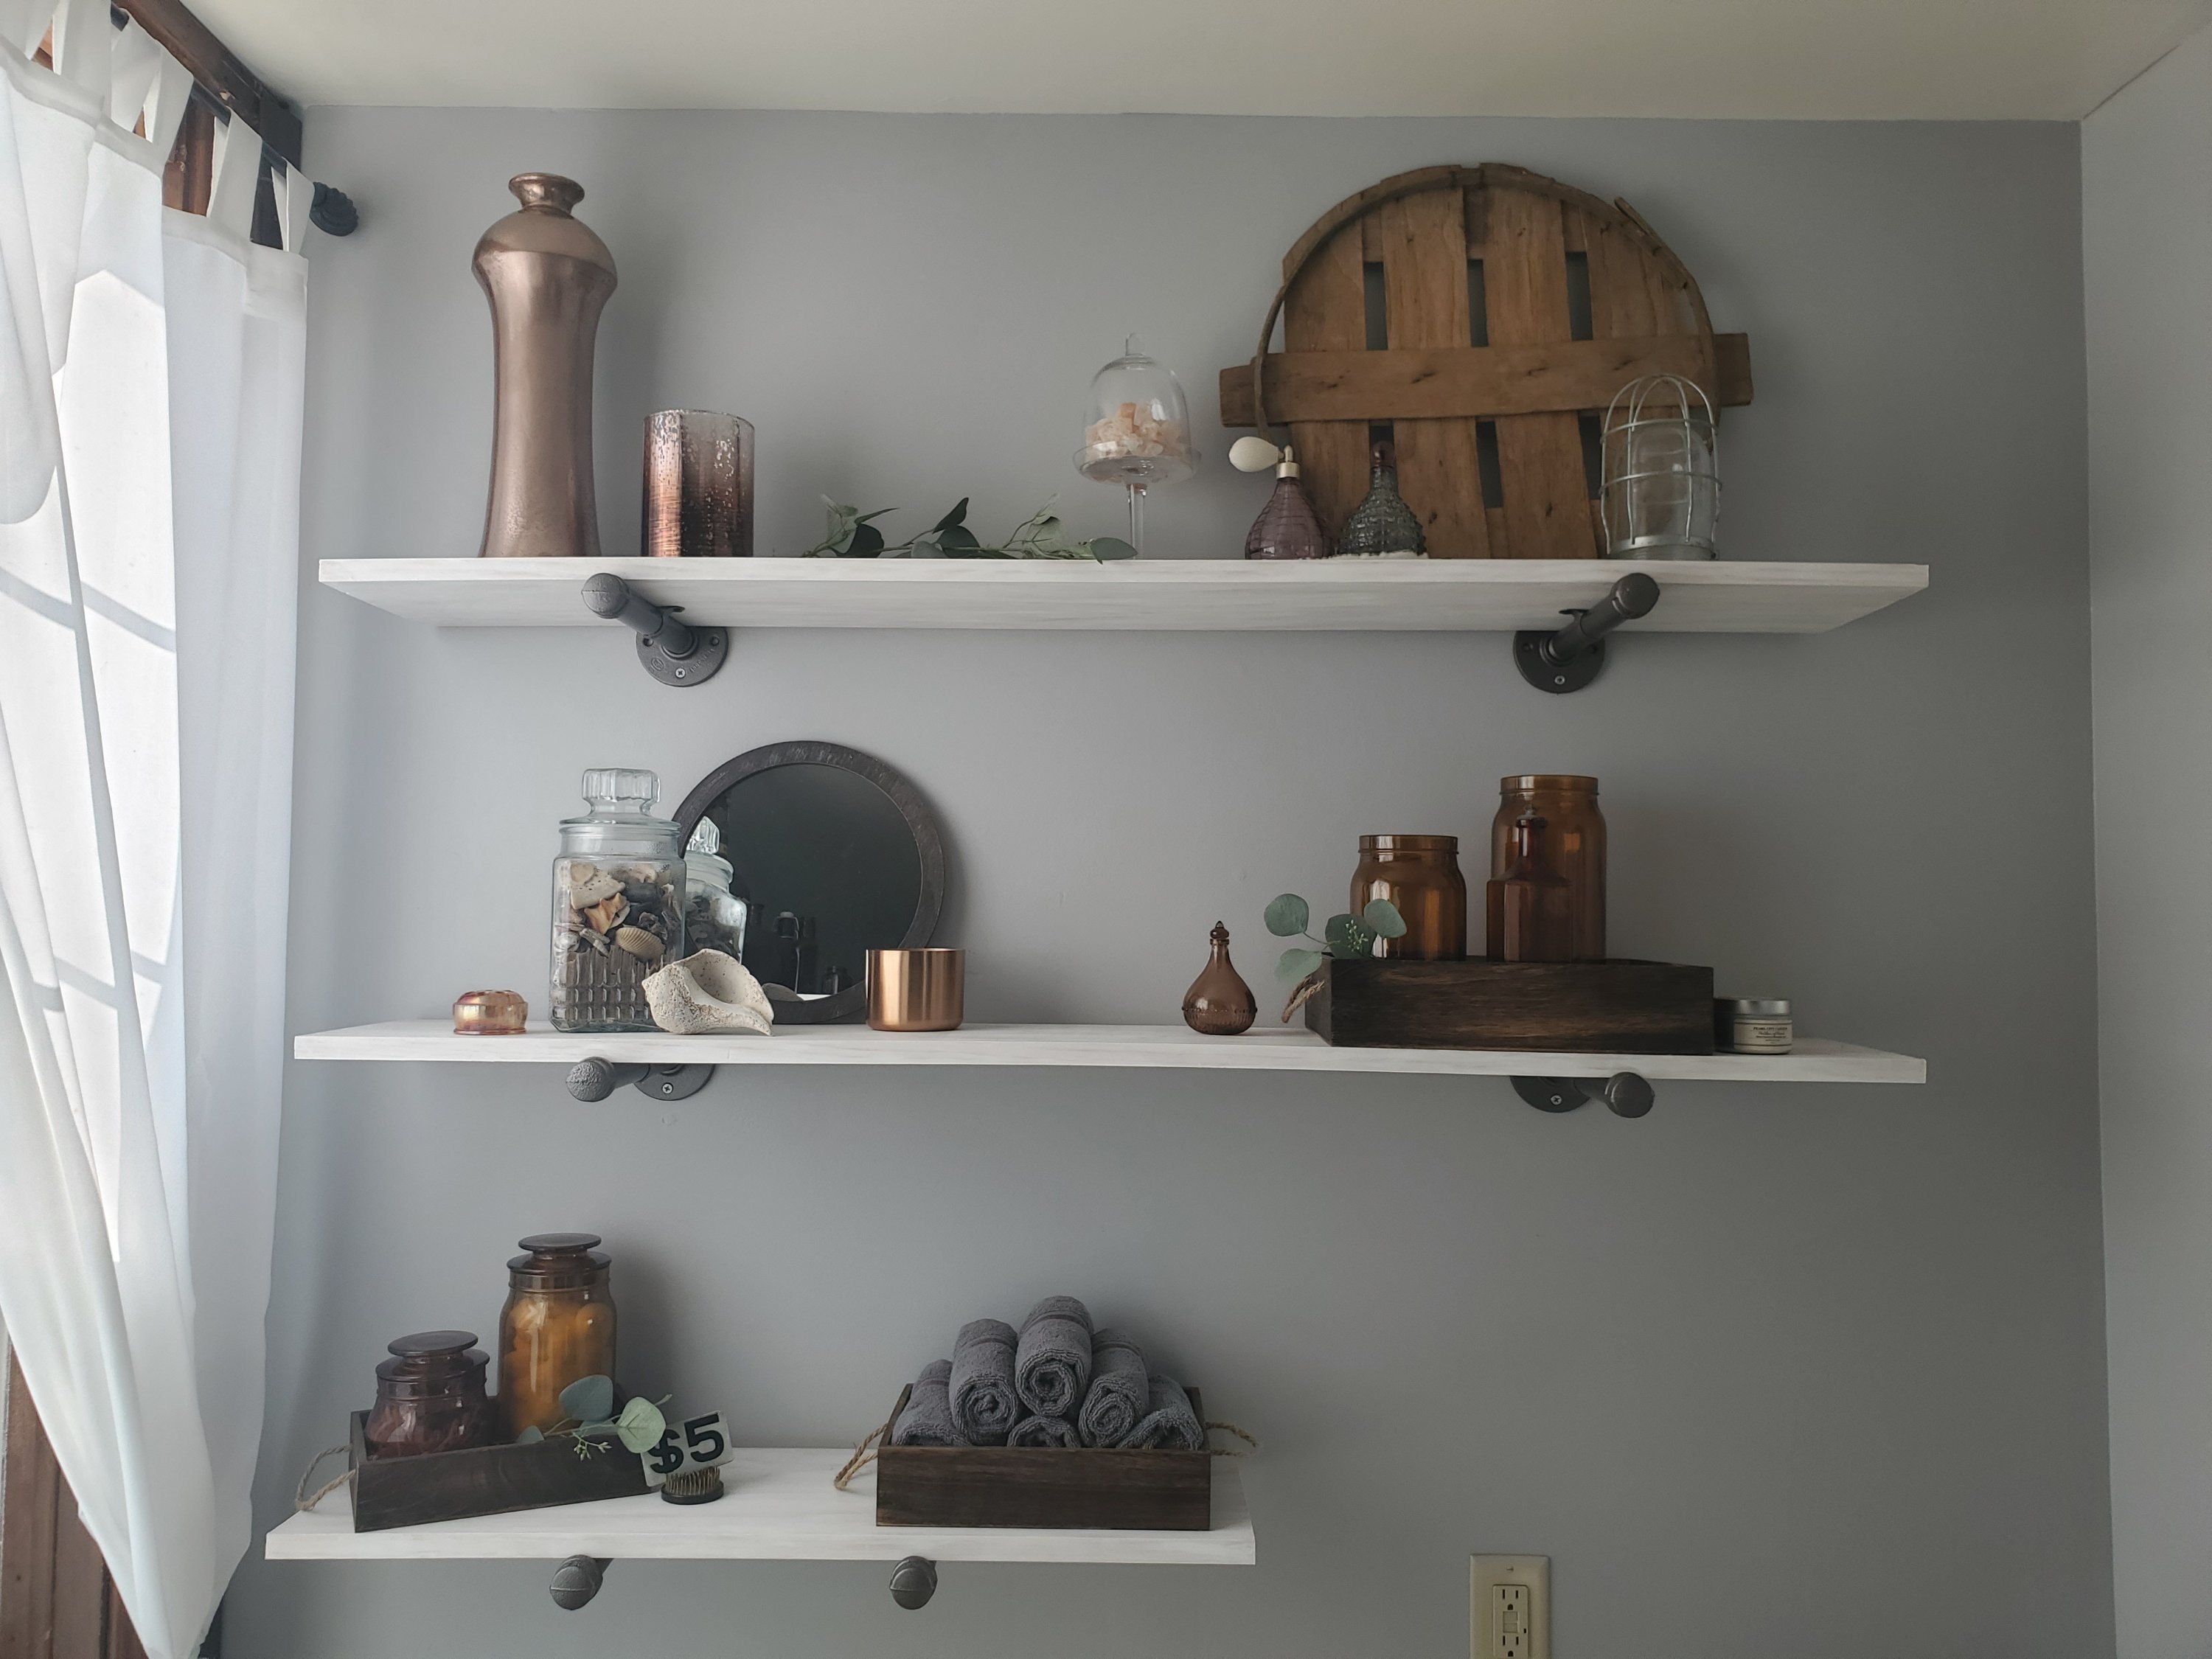
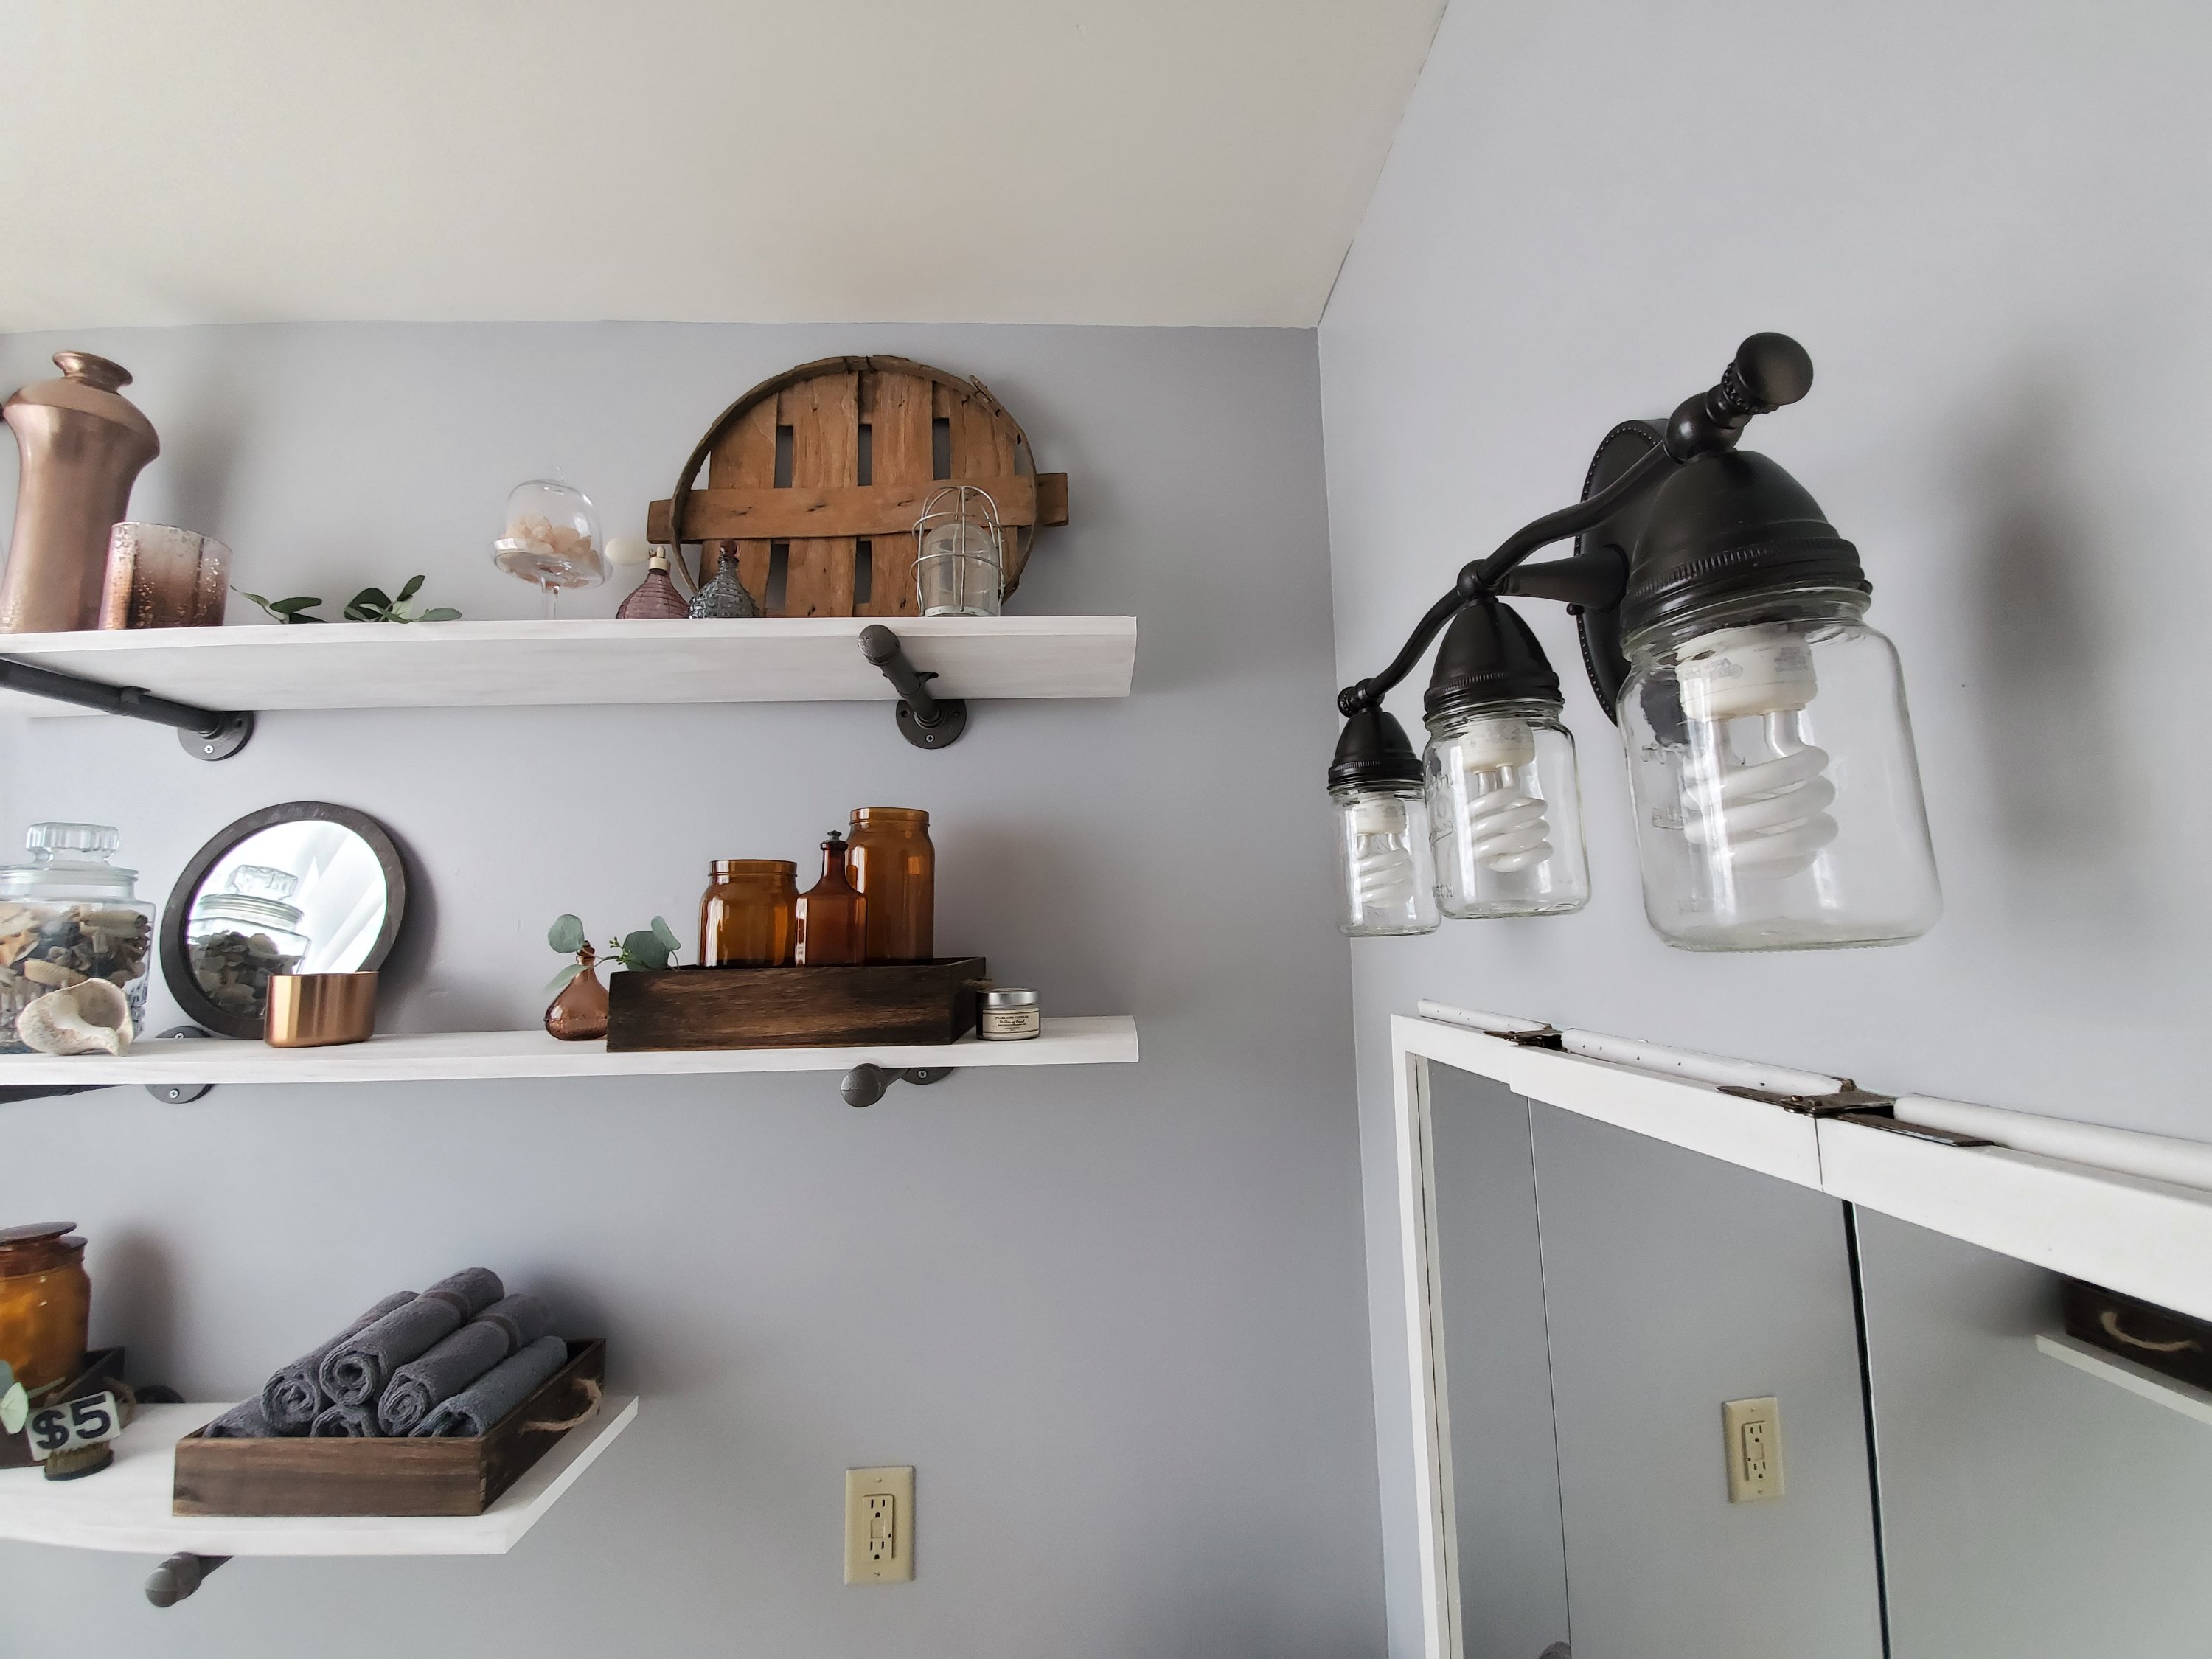
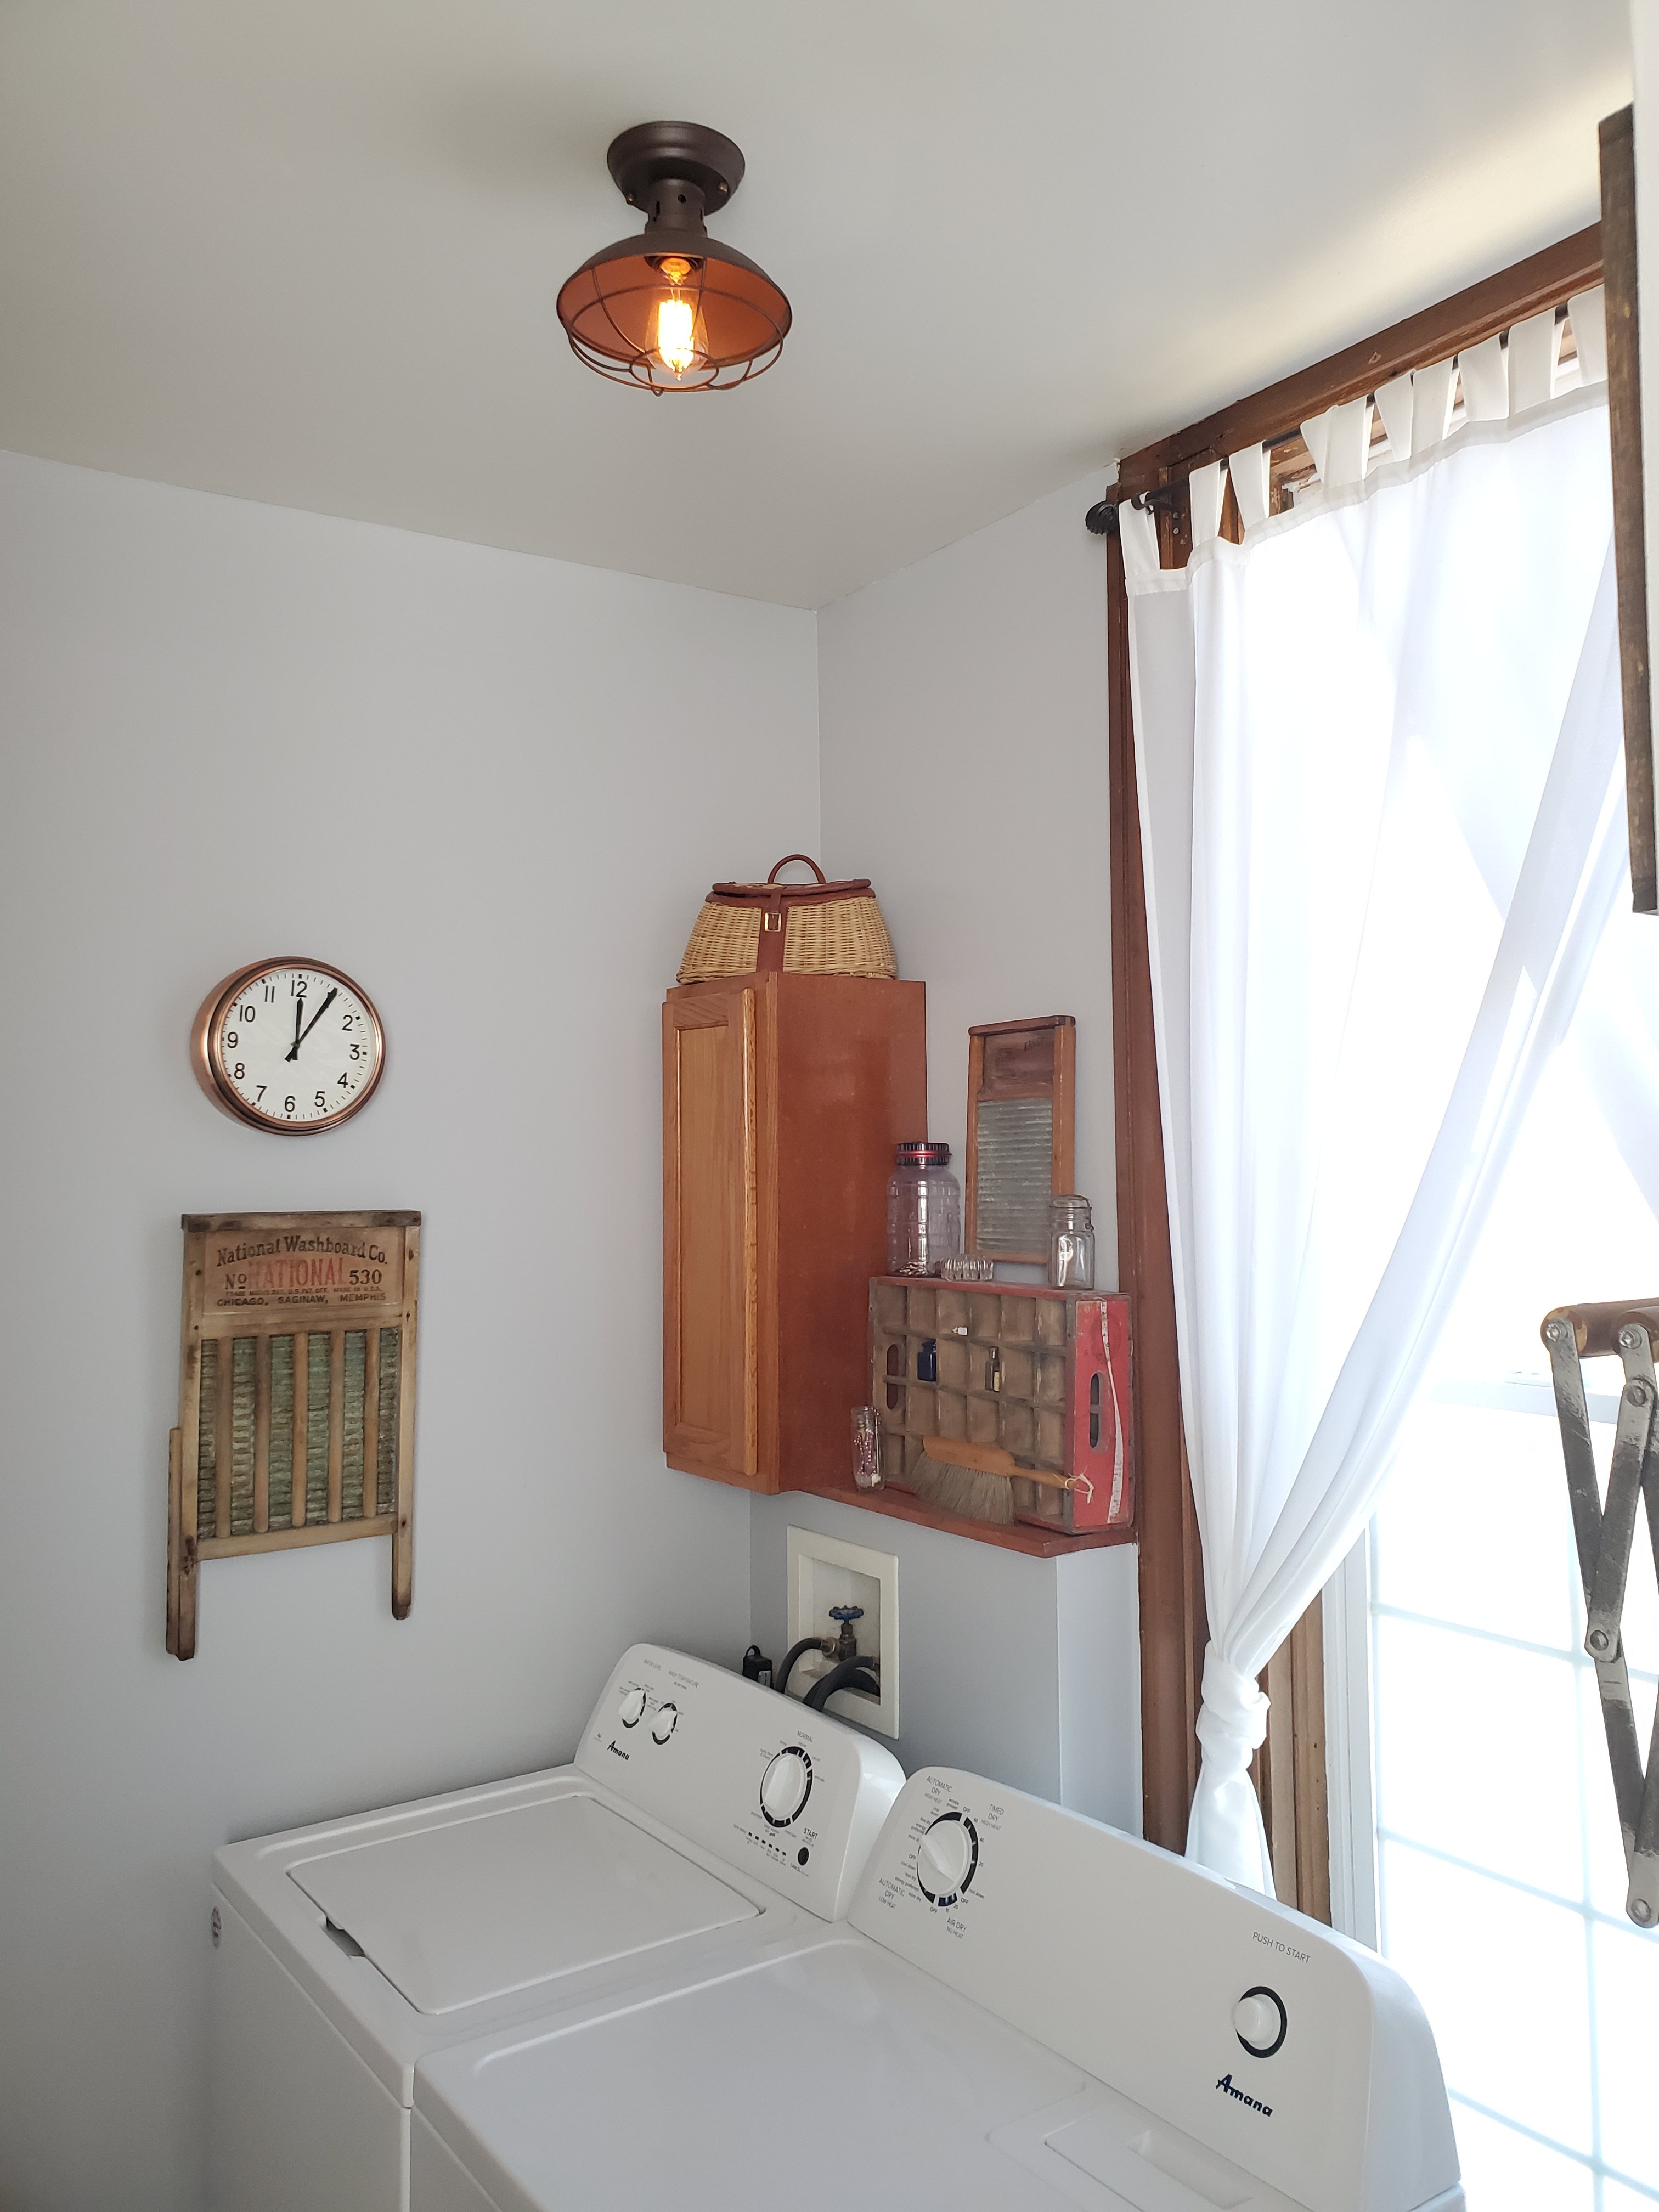
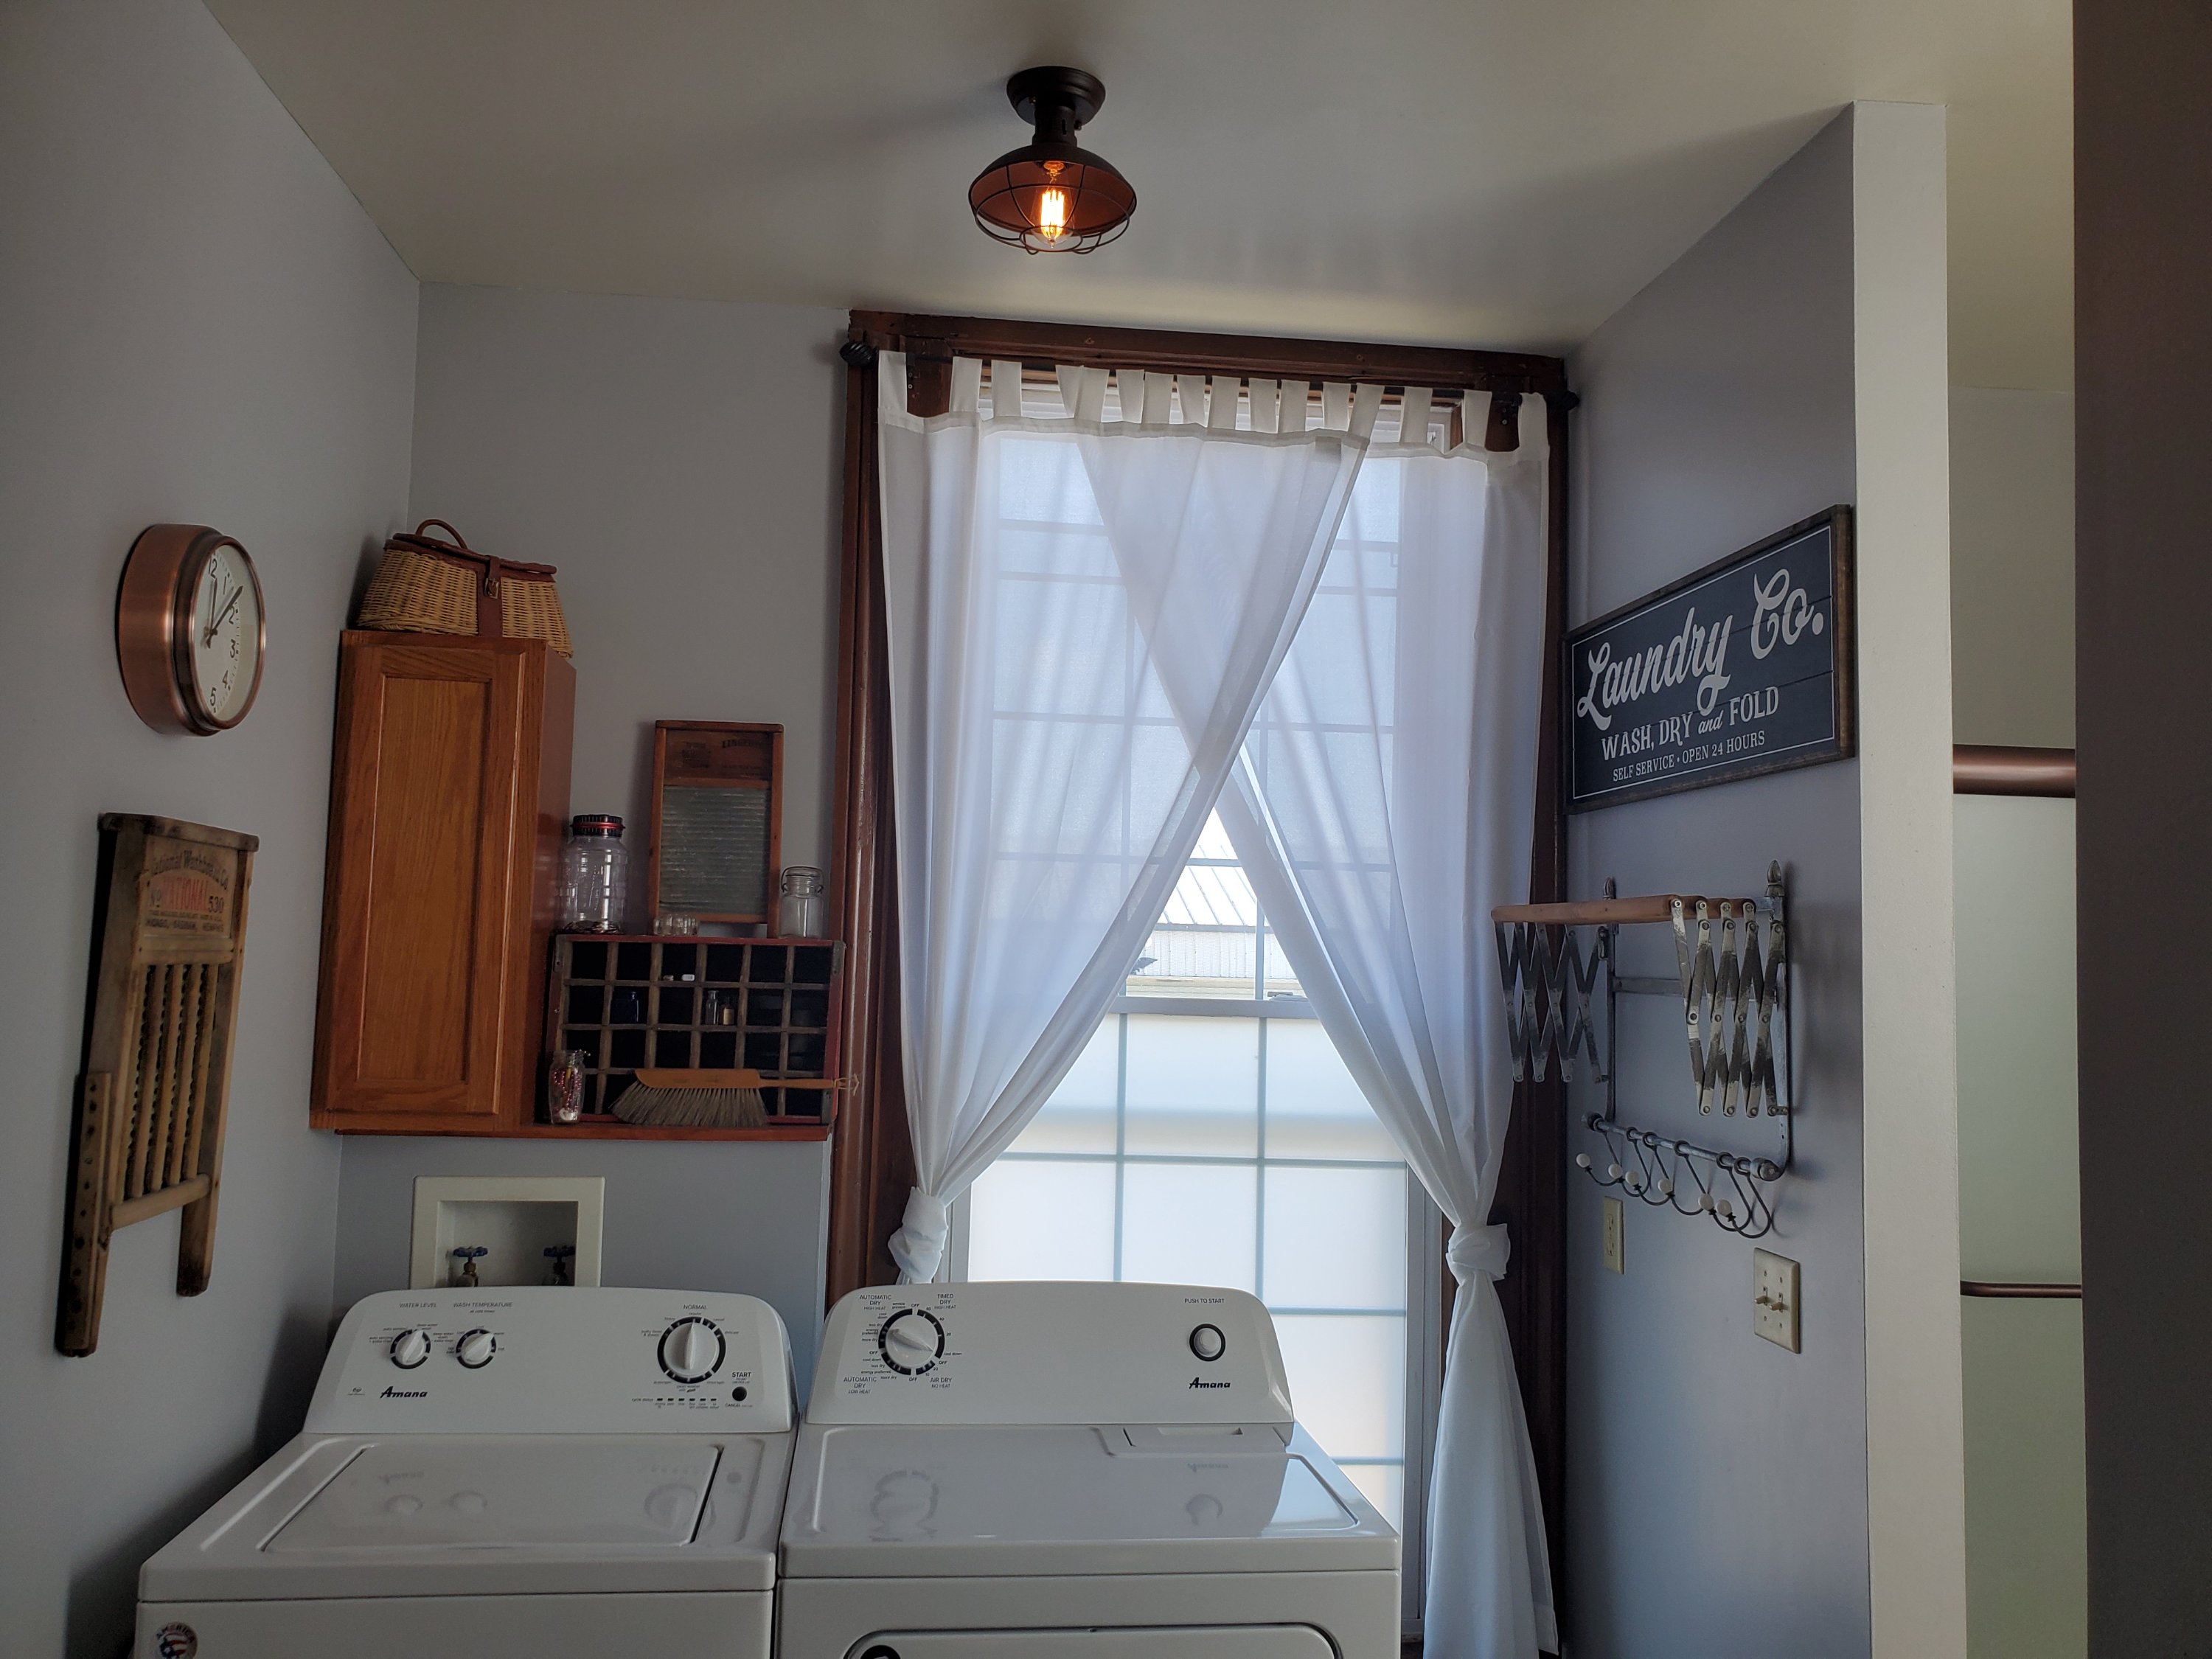
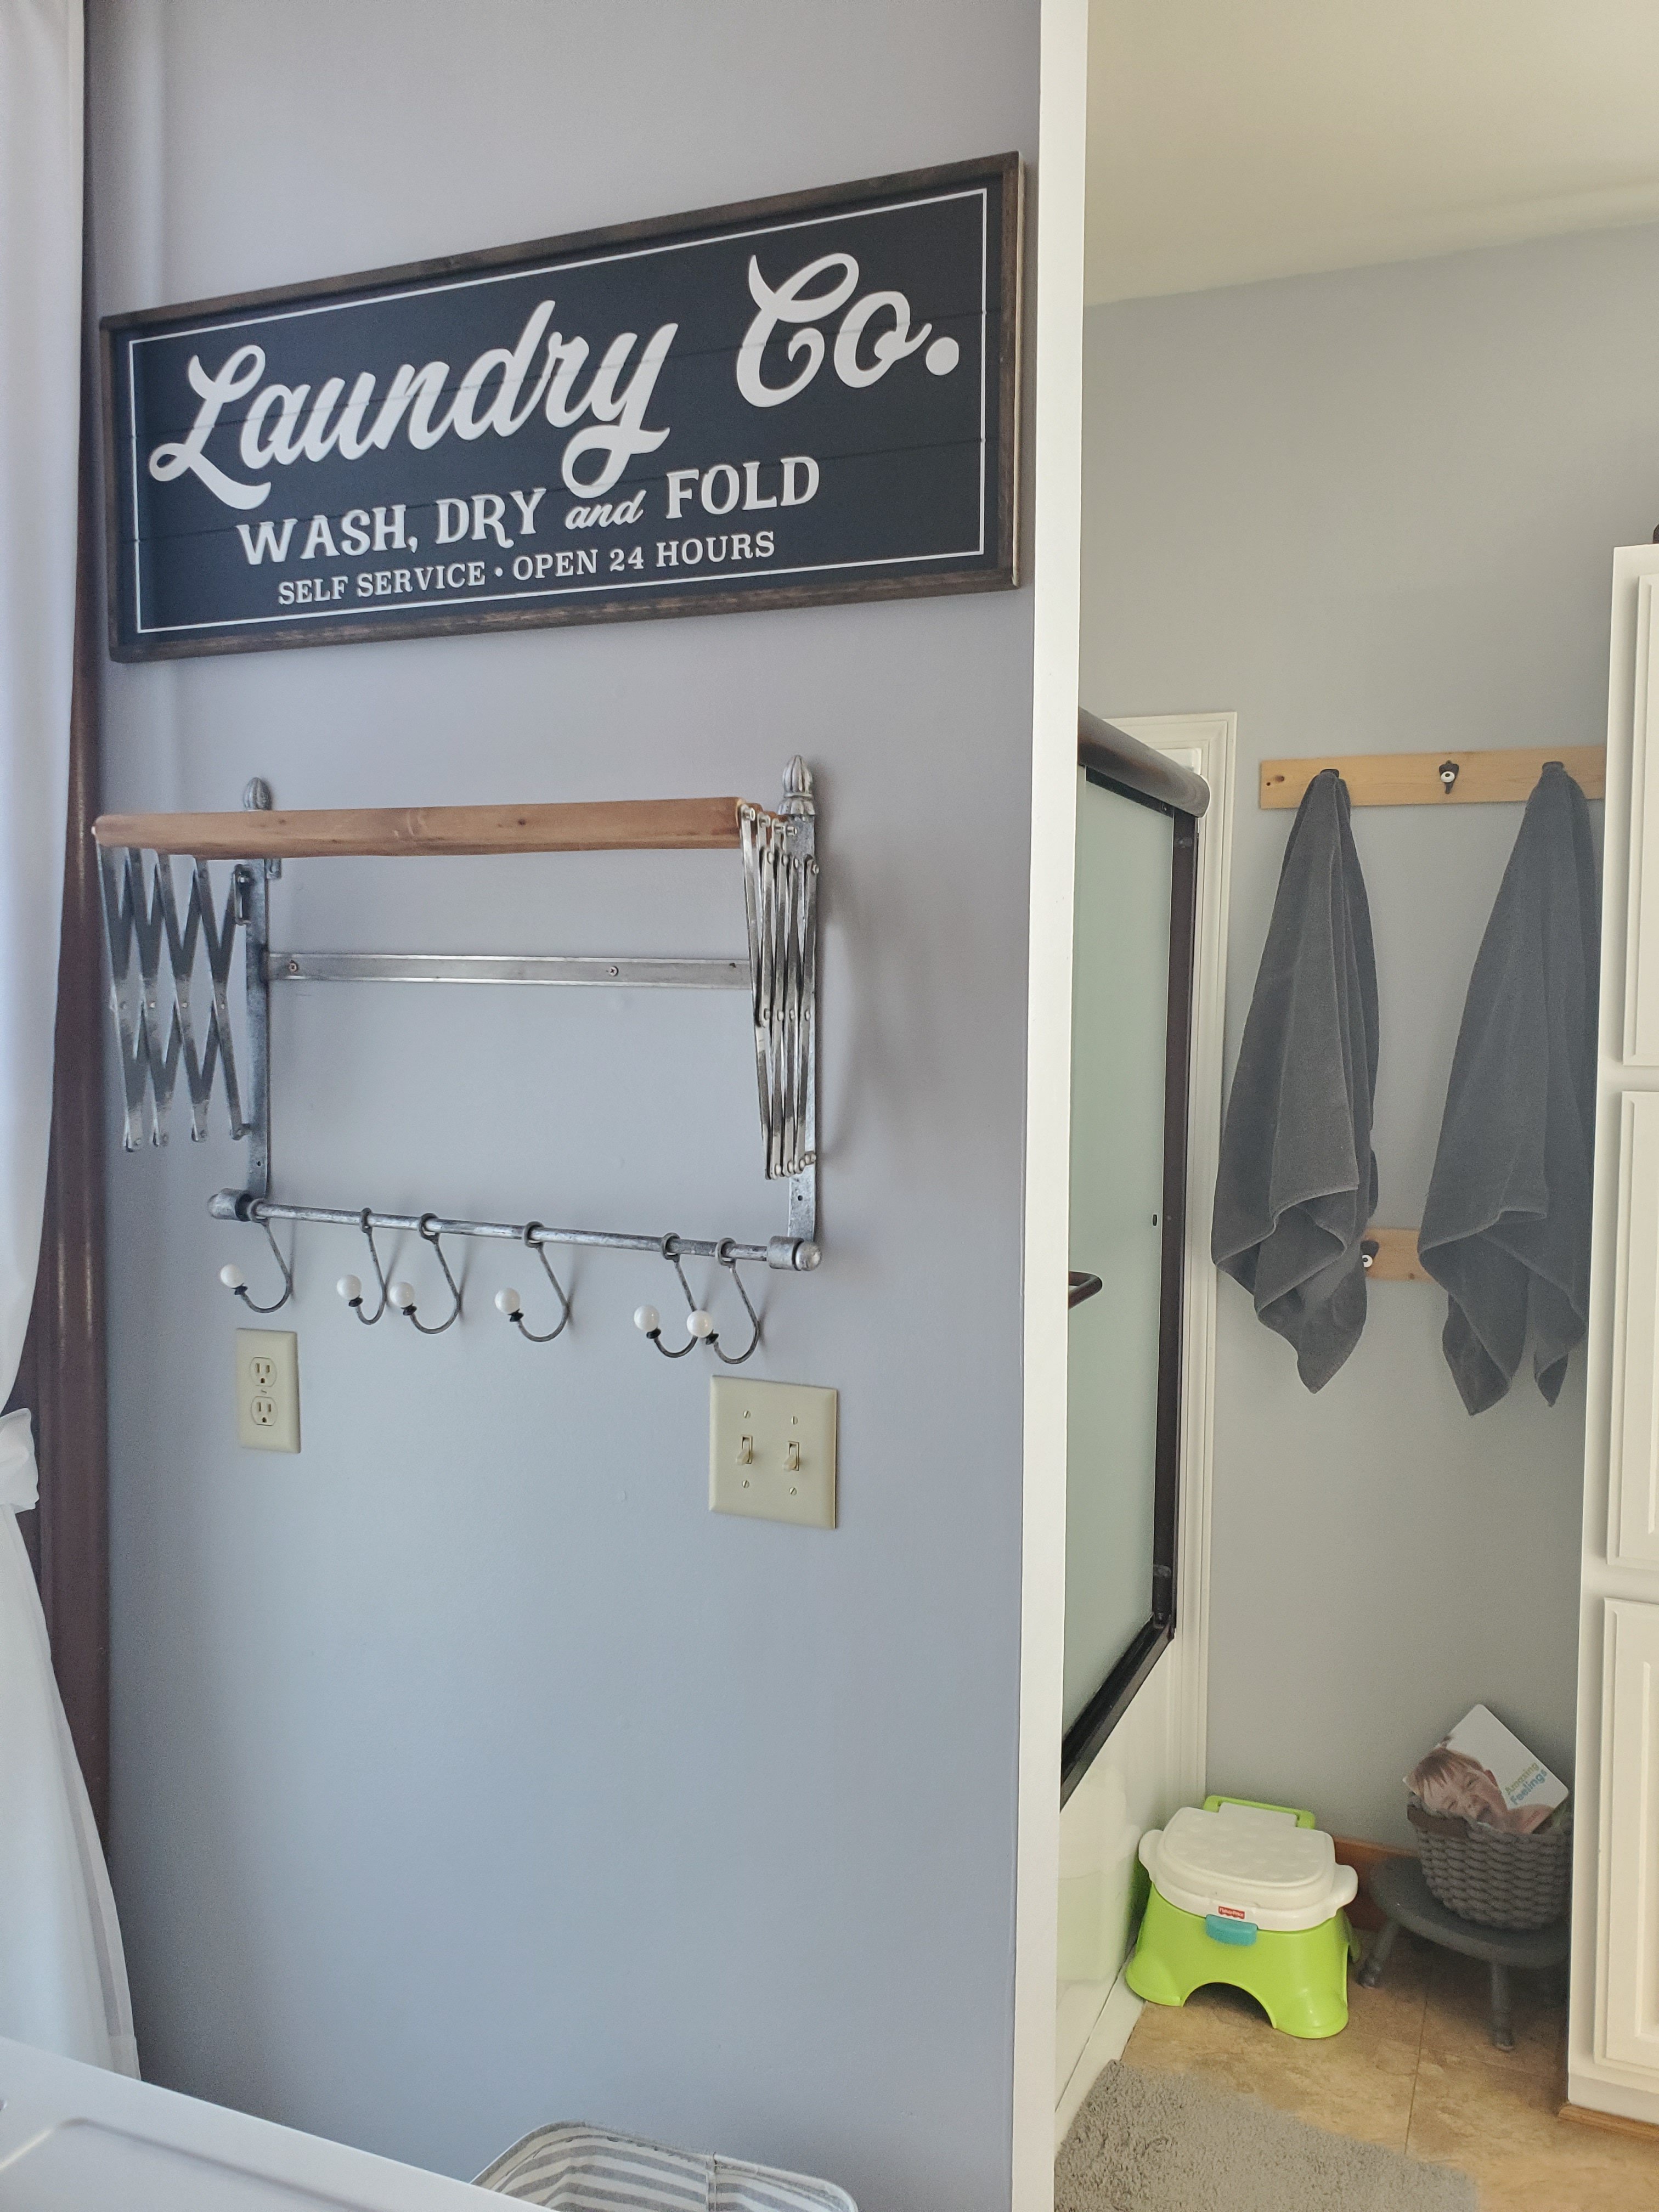
Bath/Laundry Room Update
We knew we wanted a fixer-upper, and we sure got it with this one! But we are enjoying putting in the work and making it into what we want for a home. The bathroom was no exception. We can’t afford a complete gut and overhaul of every room (I wish!), so this is a little refresh.
Before:
After:

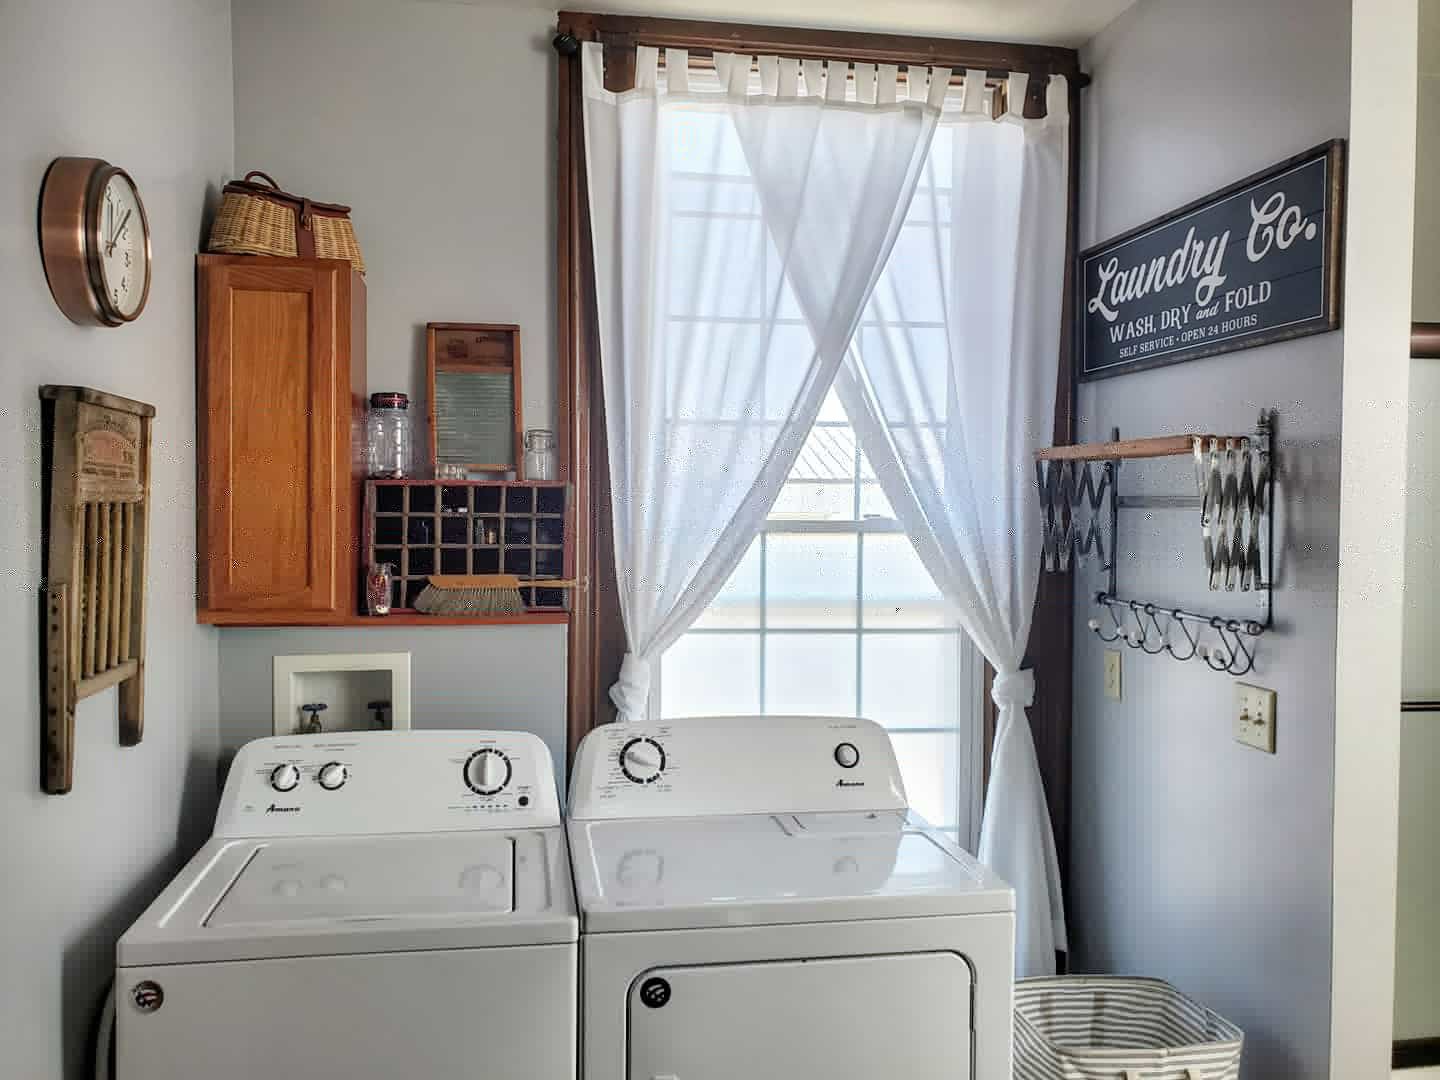
We will put a new faucet in soon and plan to redo the bath and laundry room floors in a few months. But for now, wow. Its clean. Its peaceful. I’m in love.

We made the bathroom hook boards because in old houses you are at the mercy of where the studs may or may not be when hanging things. Attach the hooks in the spacing you want and then attach the boards to the wall where the studs allow.
We also made the shelves ourselves and hand “grayed” the boards by smearing white paint with fingers. Tedious but so worth it. The brackets are plumbing hardware and can be found at Mendards. We painted the parts with a light oil rubbed bronze spray paint.
We made the jar light fixture by painting the old silver fixture with oil rubbed bronze paint and adding the jars. We took solid jar lids and made holes in them to fix the jars to the fixture. Once it’s all painted you can’t see what method you used to attach them.
All on a budget for a quick fix up. We did add a new shower, as ours was a walk in when we bought the house and we needed a tub for the kids. Paint and curtains, and especially shelving, make a huge, but affordable difference!
Here are some fun detail shots.


A few detail links:
What do you think? Any recommendations?
Xx,
Jess
Permalink Comments Off on Bath/Laundry Room Update
Quick and Easy Valentine’s DIY
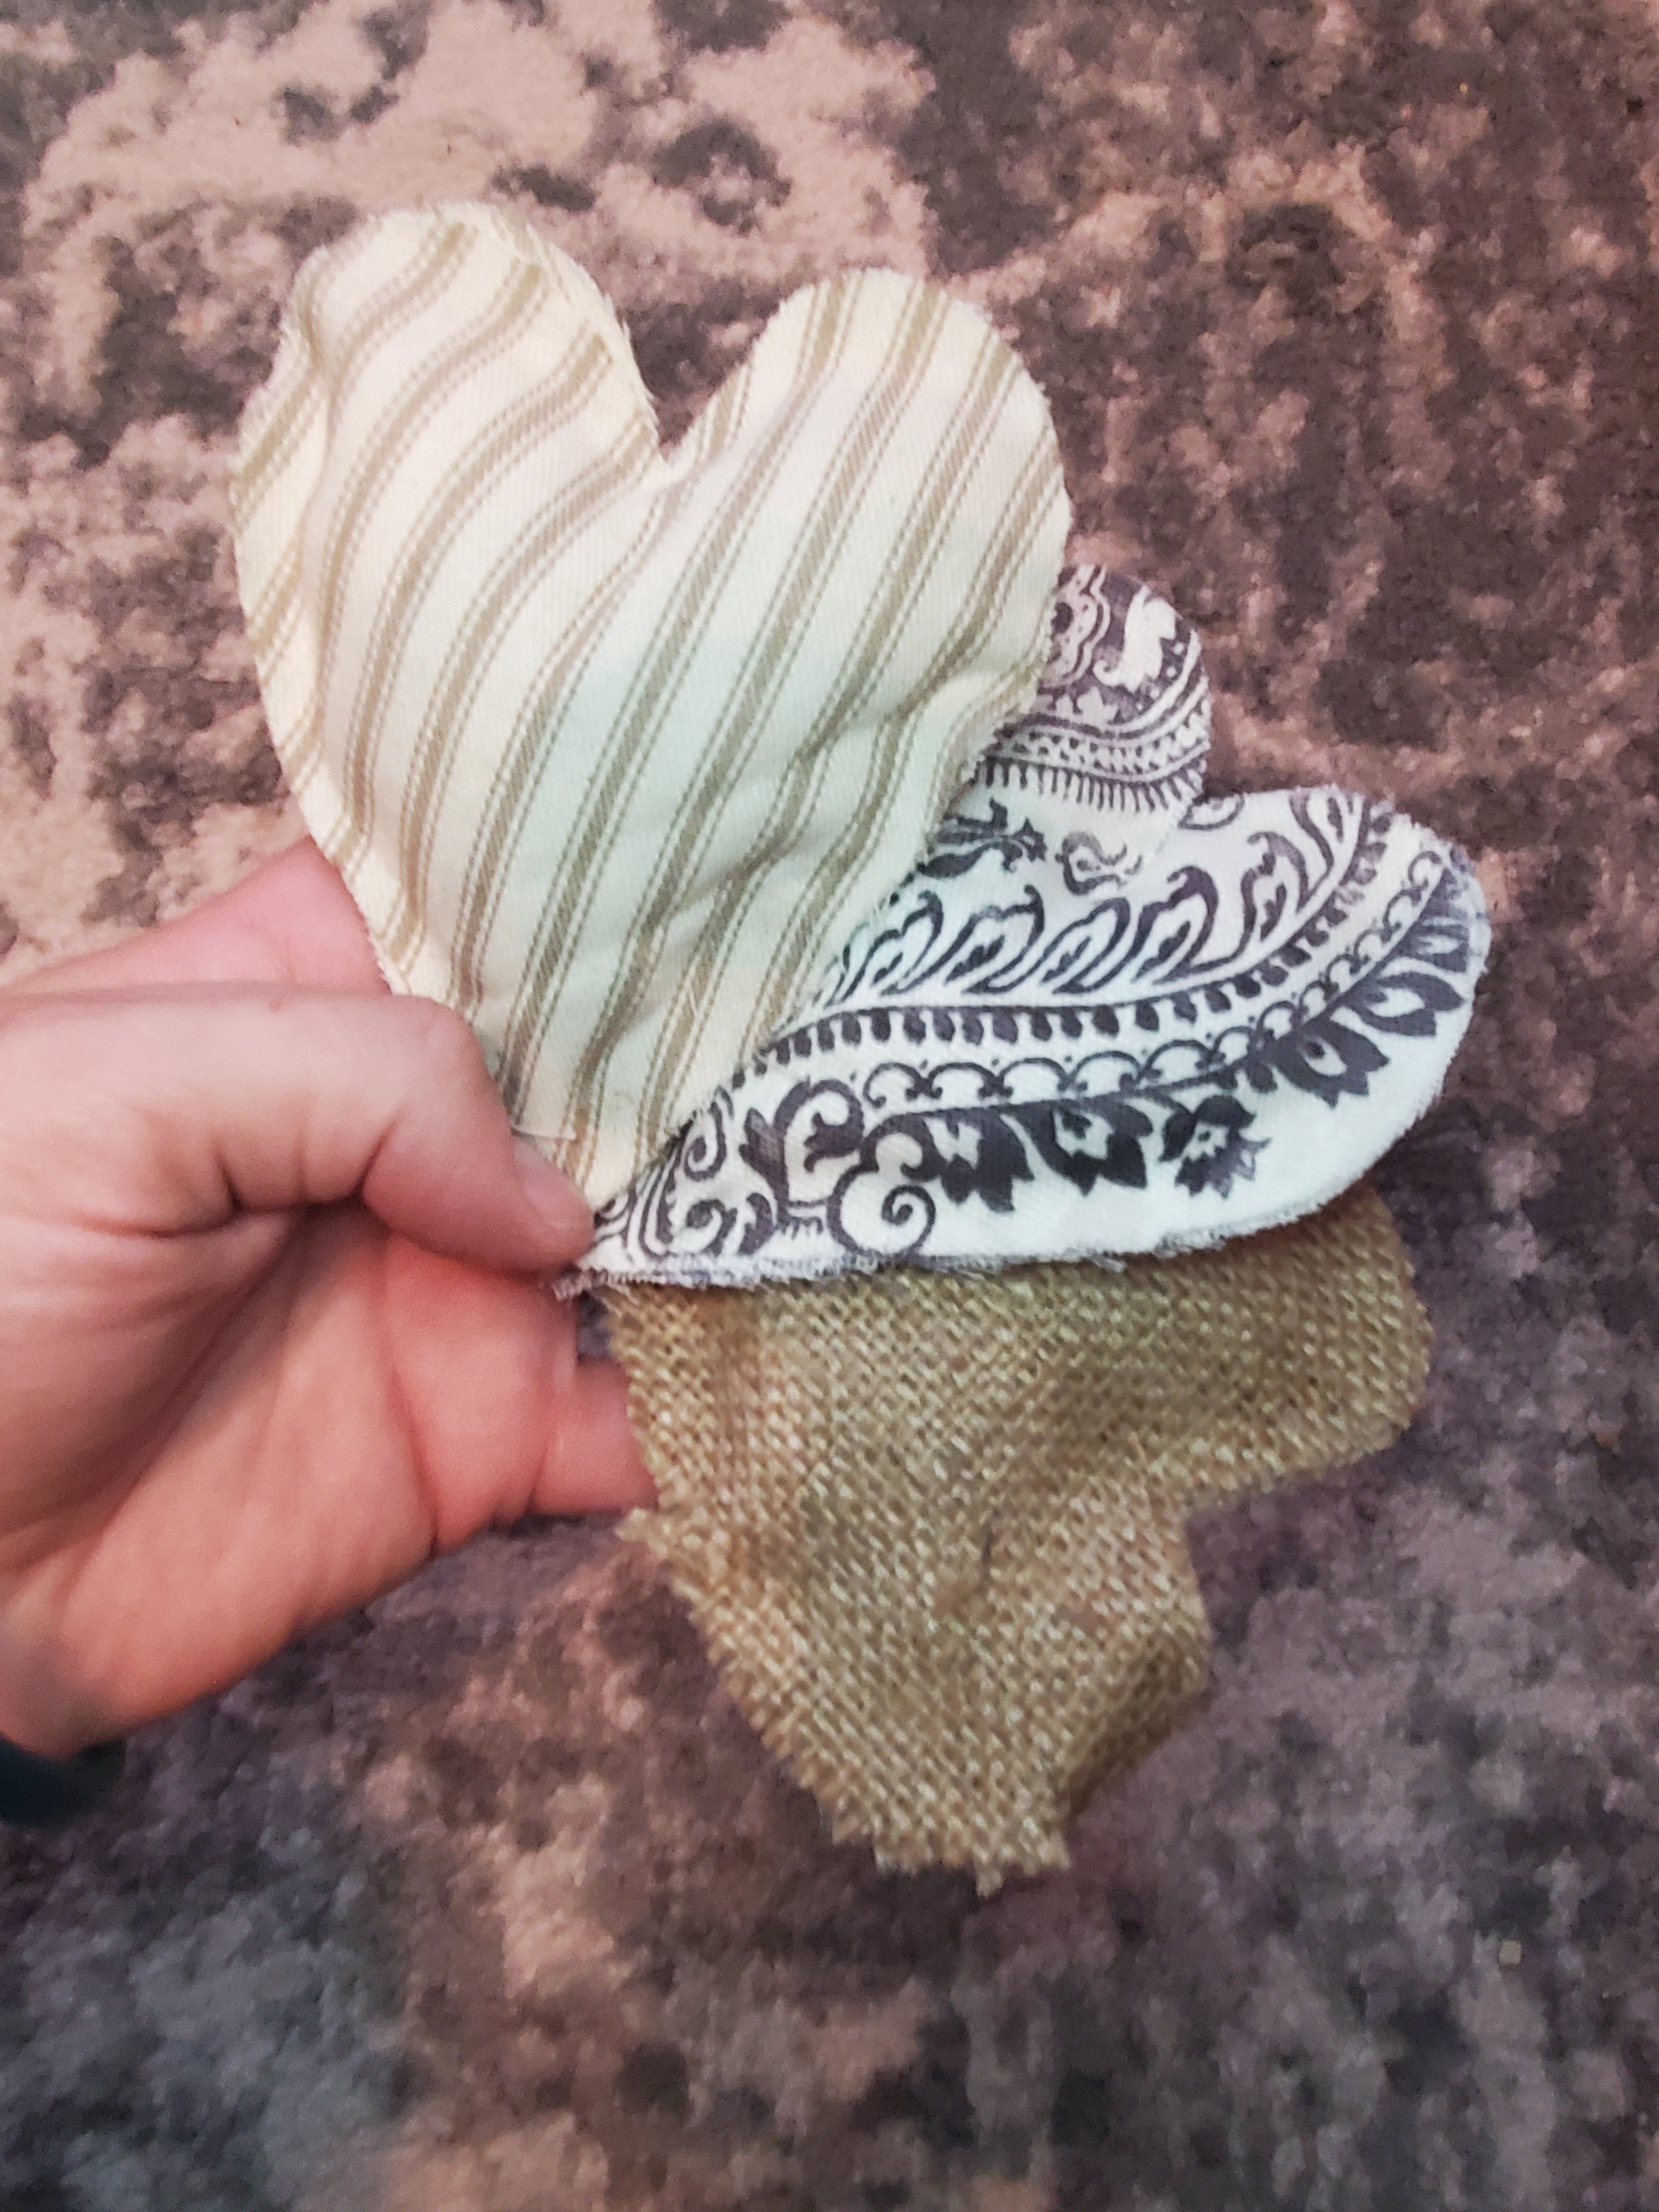
I made these fabric hearts last year and loved them so much I put them out again this year!


It’s so simple that it doesn’t require much instruction, but a fun project for anyone because there are so many possibilities! I used scrap fabric that I had on hand, making this super inexpensive too! I picked a couple fabrics that complimented one another and had a rustic vibe. You could use anything at all! The only other supplies you need are liquid stitch (always handy to have a tube on hand!) and some stuffing. You can get both of these at your local craft store or a Walmart. The stuffing sold here at our Walmart was in too large of a bag and I knew I didn’t want a ton. So, quick fix was to buy a small pillow insert at Walmart. This was about $4 and I have plenty left for more projects.

Start by drawing a heart on cardboard. Try a cereal or cracker box! Then trace this heart onto the backside of your fabric. Do sets of two hearts in matching fabric. Then run a bead of the fabric glue around the heart. Leave a few inches unglued. I left a quarter inch or so around the edge. I used a few binder clips to hold these while drying. You could also set a book on them. When they are dry, stuff fabric into them. Doing it in this order allows you to fill them full and puffy without ungluing. Now add glue to the last few inches and clip to dry. You could always add sequins, embellishments, ribbon, or any extras too.

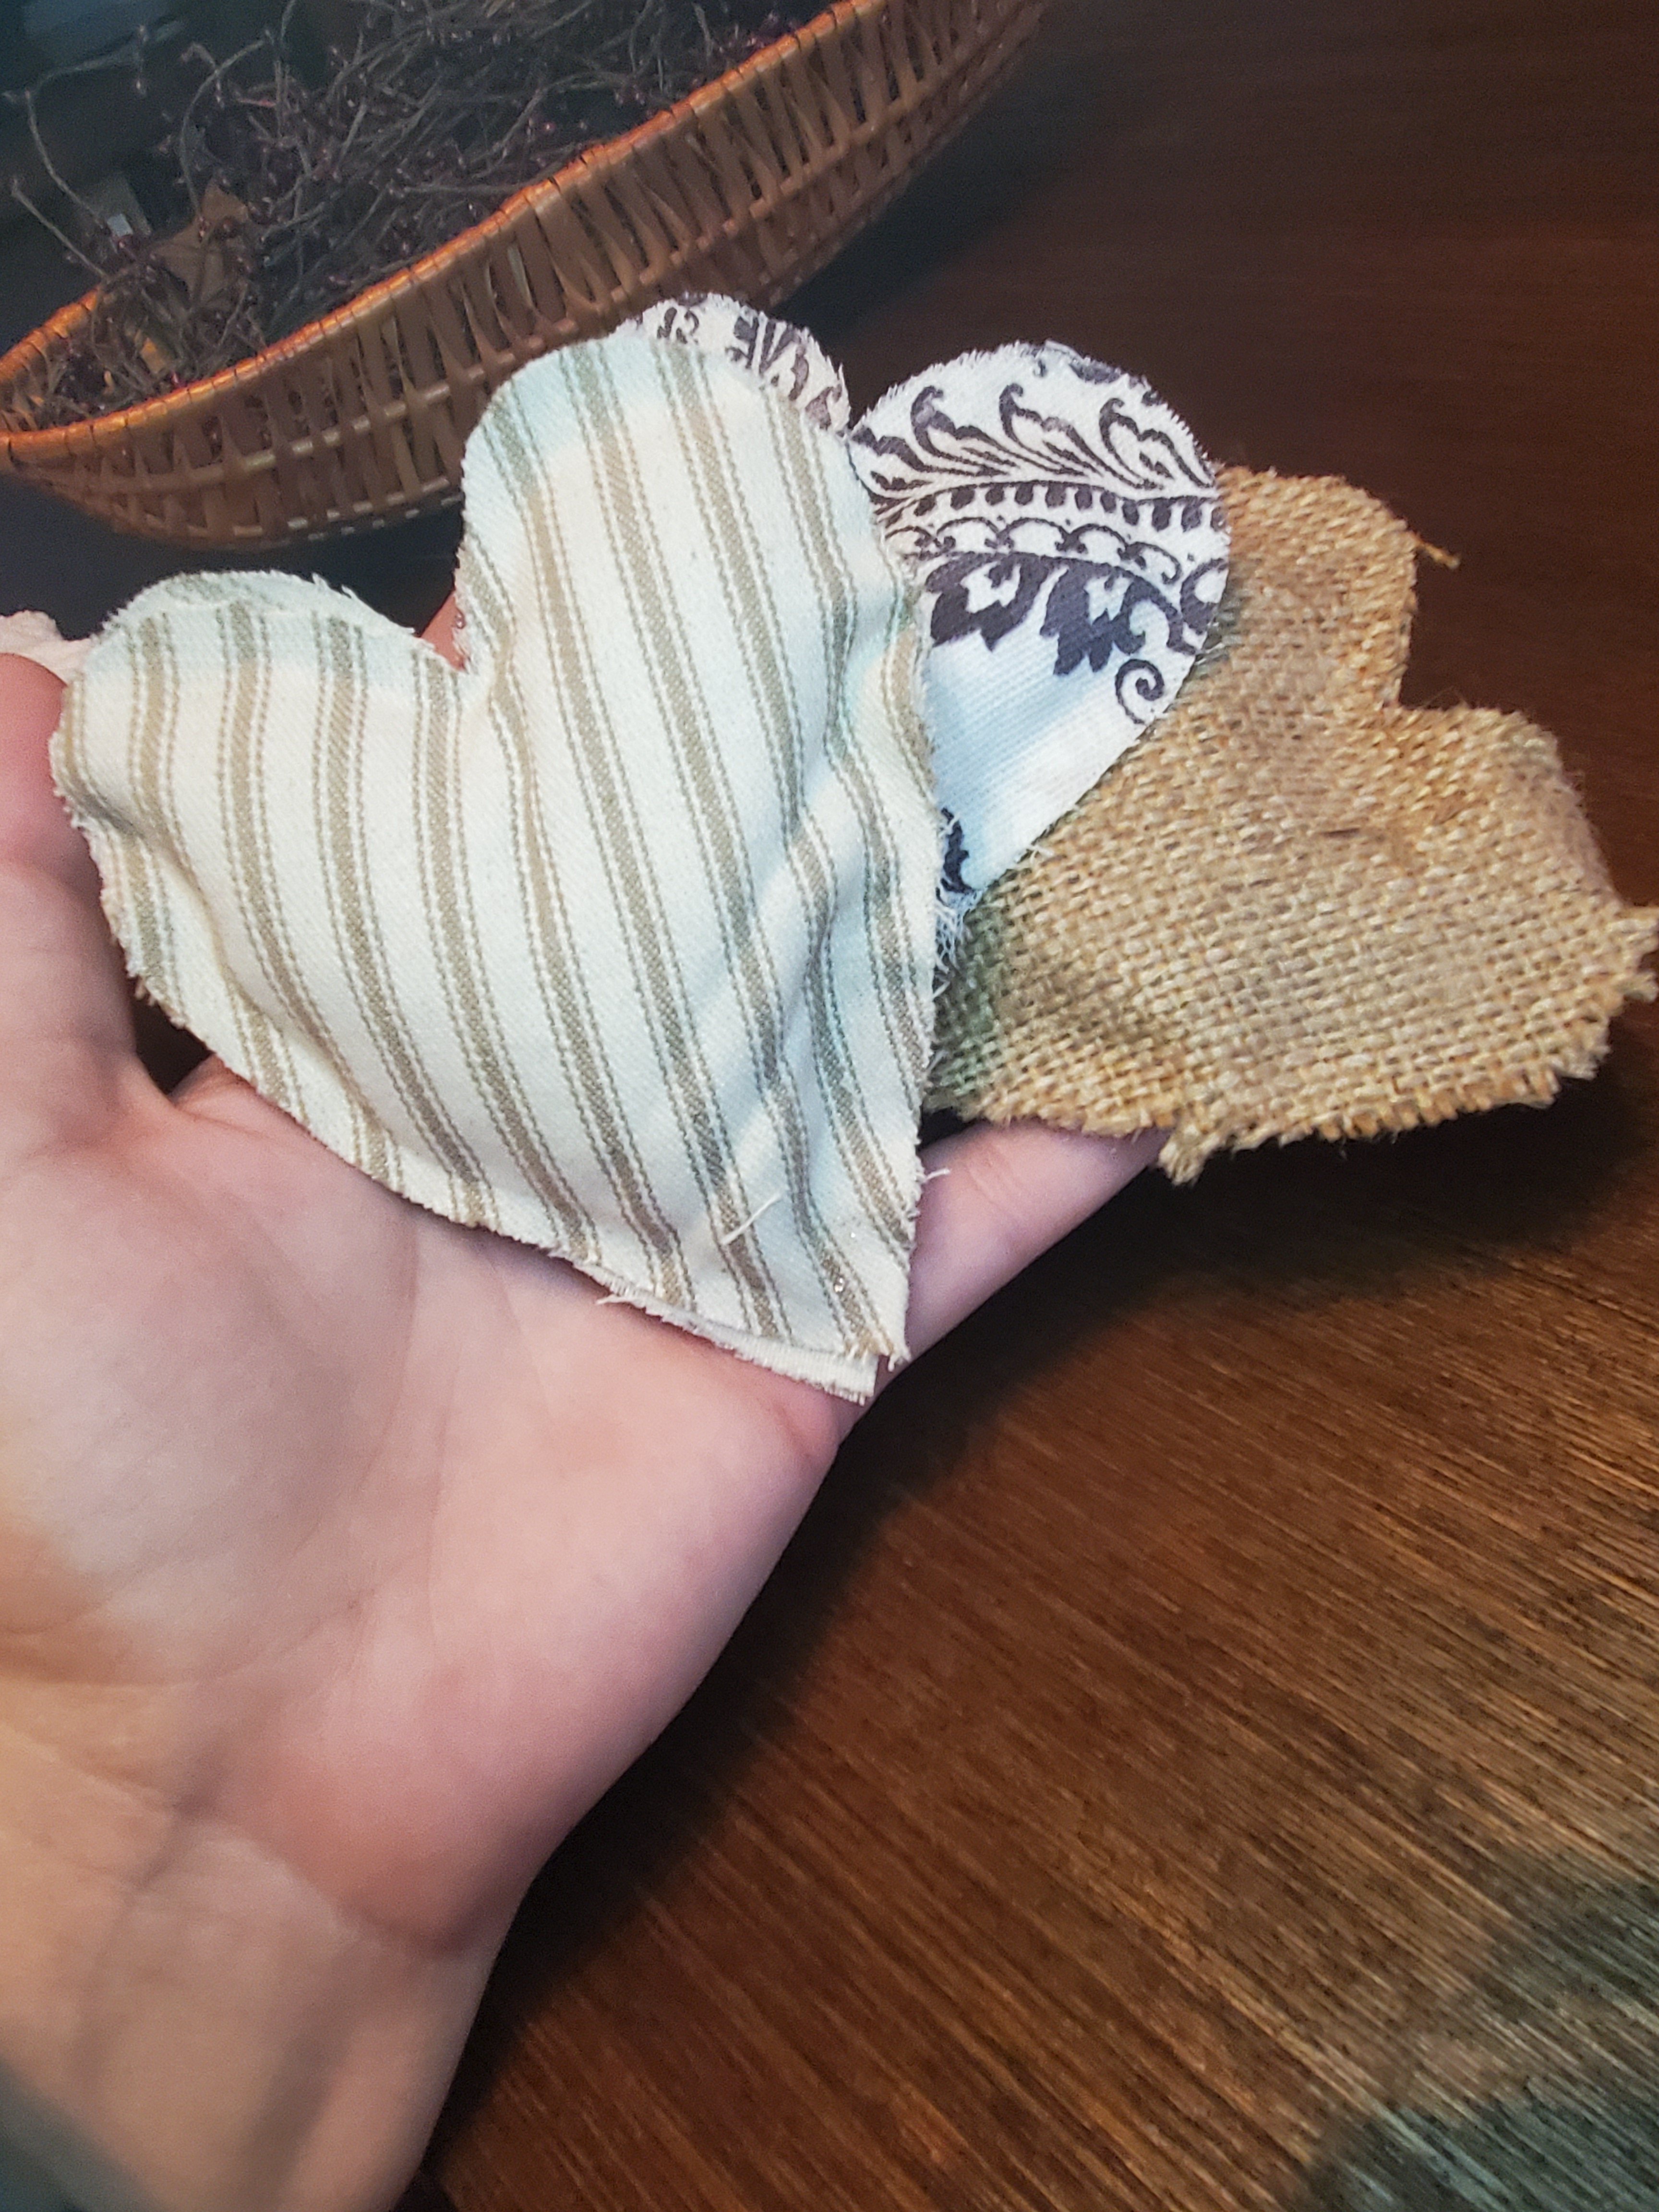
The other little white heart was super simple too. I used a cardboard hear, made little cuts around the outside, and wrapped yard around the heart. The cuts helps hold the yarn in place for the first layer of wrapping. Wrap all different directions. Glue with the fabric glue. Simple!

Viola! Hope you enjoy this quick and easy project!
Xx,
Jess
Permalink Comments Off on Quick and Easy Valentine’s DIY
Kitchen Curtains
I don’t sew. I wish I could, but I am just not good at it. I hope to start practicing and at least be able to make a basic straight line someday, but for now, I don’t sew. So, when I am on the hunt for new curtains and all of the pretty options are out of my price range, what do I do? I get out the iron and the hem tape and I “fake glue” myself a pair.
Remember these kitchen curtains?

The valances above the windows were here when we moved in. They were fine. Actually, they were god quality and in good shape. Just not our favorite color choices. The curtain on the door was brought from my old house. I used it to cover the window temporarily, until we could figure out what we wanted in here. Now the floral curtain is on the door window just beyond that, which leads outside. After all these months of looking at these mismatched curtains, I finally wanted to get busy. I knew I wanted something more neutral, as we plan to paint in the near future. I liked the shape of the valances, and I didn’t mind the deep red roller shade (for now?). Then I happened upon the perfect twist of fun stripes and neutral colors…


Ticking fabric. A little rustic and old school, yet funky and fresh as curtains. The cream/tan combo will go well with the new colors to come. And I tied the faux roller shade with twine.


And I did all of it with iron on hem tape, even the tab tops! What do you think??
More projects to come 🙂
Inspiration and Big News
After being out of town, and a little out of touch, most of last week, I am finally catching up. Reading through a backlog of blogs today I ran across the most gorgeous farm house tour on Apartment Therapy.
The details of this home struck a cord with me, because we happen to have just bought an 1891 farm house. Yes, one more move! We close in about two weeks. We are anxious, nervous, excited, and very busy. This is the first time I will really be moving away, although not far, just to Iowa. This is our dream home, and we are very excited to remodel and decorate once there. Pictures soon to come!
But for now, here are two of my favorite images from Shannan and Cory’s home tour. Check out the rest here.

I love that light fixture! And the pillow is gorgeous! I am so excited to put some of this inspiration to use in the new place!

This was one of my favorite photos because of the crate used to hold towels. We found an old crate of glass bottles at a garage sale for a few dollars, and had planned to use the bottles as wedding decor. Little did we realize that the crate had a Tipton, IA business emblem on the side, which is where we later bought the house! I would love to incorporate our crate in a useful way like this!
What do you think?
Snow!
It’s that time of year again! Snow! Yesterday was a snow day for me. The office was closed, so I was paid to stay home, wrap Christmas presents, watch White Christmas, and drink hot chocolate! Well, I did some boring chores, too. Today it’s back to work, and it is freeezing outside! Here is a quick snapshot of my new snow boots to keep me warm and dry when visiting clients, and one of my drive to see a client today. Those country roads can be soo pretty (and annoyingly slippery!)


Beautiful!
