Spring Cleaning
Like I said, last weekend we did some deep cleaning for spring. Yesterday on my Thursday off, I finally finished (as finished as housework ever gets!) the spring cleaning. I wanted the house to be spotless for my family coming into town to visit this weekend. So, here are some always great to remember spring cleaning ideas:
1. Clean the gutters. Spring is time for rain, rain will flood your basement if the gutters are overflowing! Or like us, you might have to walk through a waterfall to get out the door! So, Tony climbed the ladder, hauled a garbage can along with him, and cleaned the gutters.
2. Wash windows. I love clean windows, they even brighten up a room. But, at least this one time a year you should deep clean them, inside and out. I not only windex-ed them, but also took a Q-tip to the corners and tiny spaces. Fresh spring air is great flowing through clean windows!
3. Scrub the walls and untouched spots. Walls, especially in the kitchen, get grimy. Paint will look more its original color if gently washed clean once in a while, plus it keeps spider webs out of corners and in vents. Also, take a dish-soapy towel to the tops of cabinets and inside the cupboards. These rarely cleaned spots need it now and then!
4. Spray and scrub siding. We are still working a bit on this one. But, taking the hose to your siding will instantly freshen the outside of your house. On the porch I scrubbed stuck on dirt off with a wet cloth.
5. Move all furniture to clean/vacuum. I vacuum all the time. But, sometimes I am lazy and don’t move every piece of furniture. I actually never move the bed or couches. So, this time of year I try to move all things, even the big ones and clean or vacuum under them. You never know how much crud has built up under there.
6. And, finally, go through drawers and cupboards. We have a junk drawer that overflows every once in a while. Spring in particular is the time to go through these drawers, even clothes drawers of closets. Toss things you no longer want to keep, gather up the things you want to sell or take to Goodwill, and neatly arrange back the things you want to keep.
After taking these few steps your house should be spring ready (pretty much!). Take a deep breathe once you are done. Doesn’t that feel good? Fresh? Spring is the time for fresh starts! 🙂
And, while there are no pictures of dirty windows and gross gutter goo to show you, I do have a set of cute martini glasses for sale! They are plastic, and oh so cute!


So, what other good spring cleaning ideas do you all have?
Some Gardening
Last night I picked up a few inexpensive black, square pots for a few flowers for our porch. I think they (although small) brightened up the front porch and made it at least look like someone lives there! We also hung a strawberry plant in the corner, where it can get a lot of sun. (Again, sorry for the dark, rainy pictures!)


It’s at least a start. So, while I was out there I started pulling a few “weeds” from the rocks around the porch. By the way, I am puzzled as to why the last owner planted three big, beautiful, green plants on one side of the steps, but none on the other. So, if you are wondering, don’t ask me! So, as I was pulling this “weed” from between all of the rocks (it looked like misplaced grass) I noticed it was growing from bulbs! Grass doesn’t grow from bulbs, does it? We are curious as to what it is, and maybe whether or not we should be pulling it!? Here is a picture of what I pulled up, so if you have any info I’m all ears!

Let me know what you think! And, just for run, here is a picture of the pretty yellow flowers growing in the back yard!

Lawn Chair Project
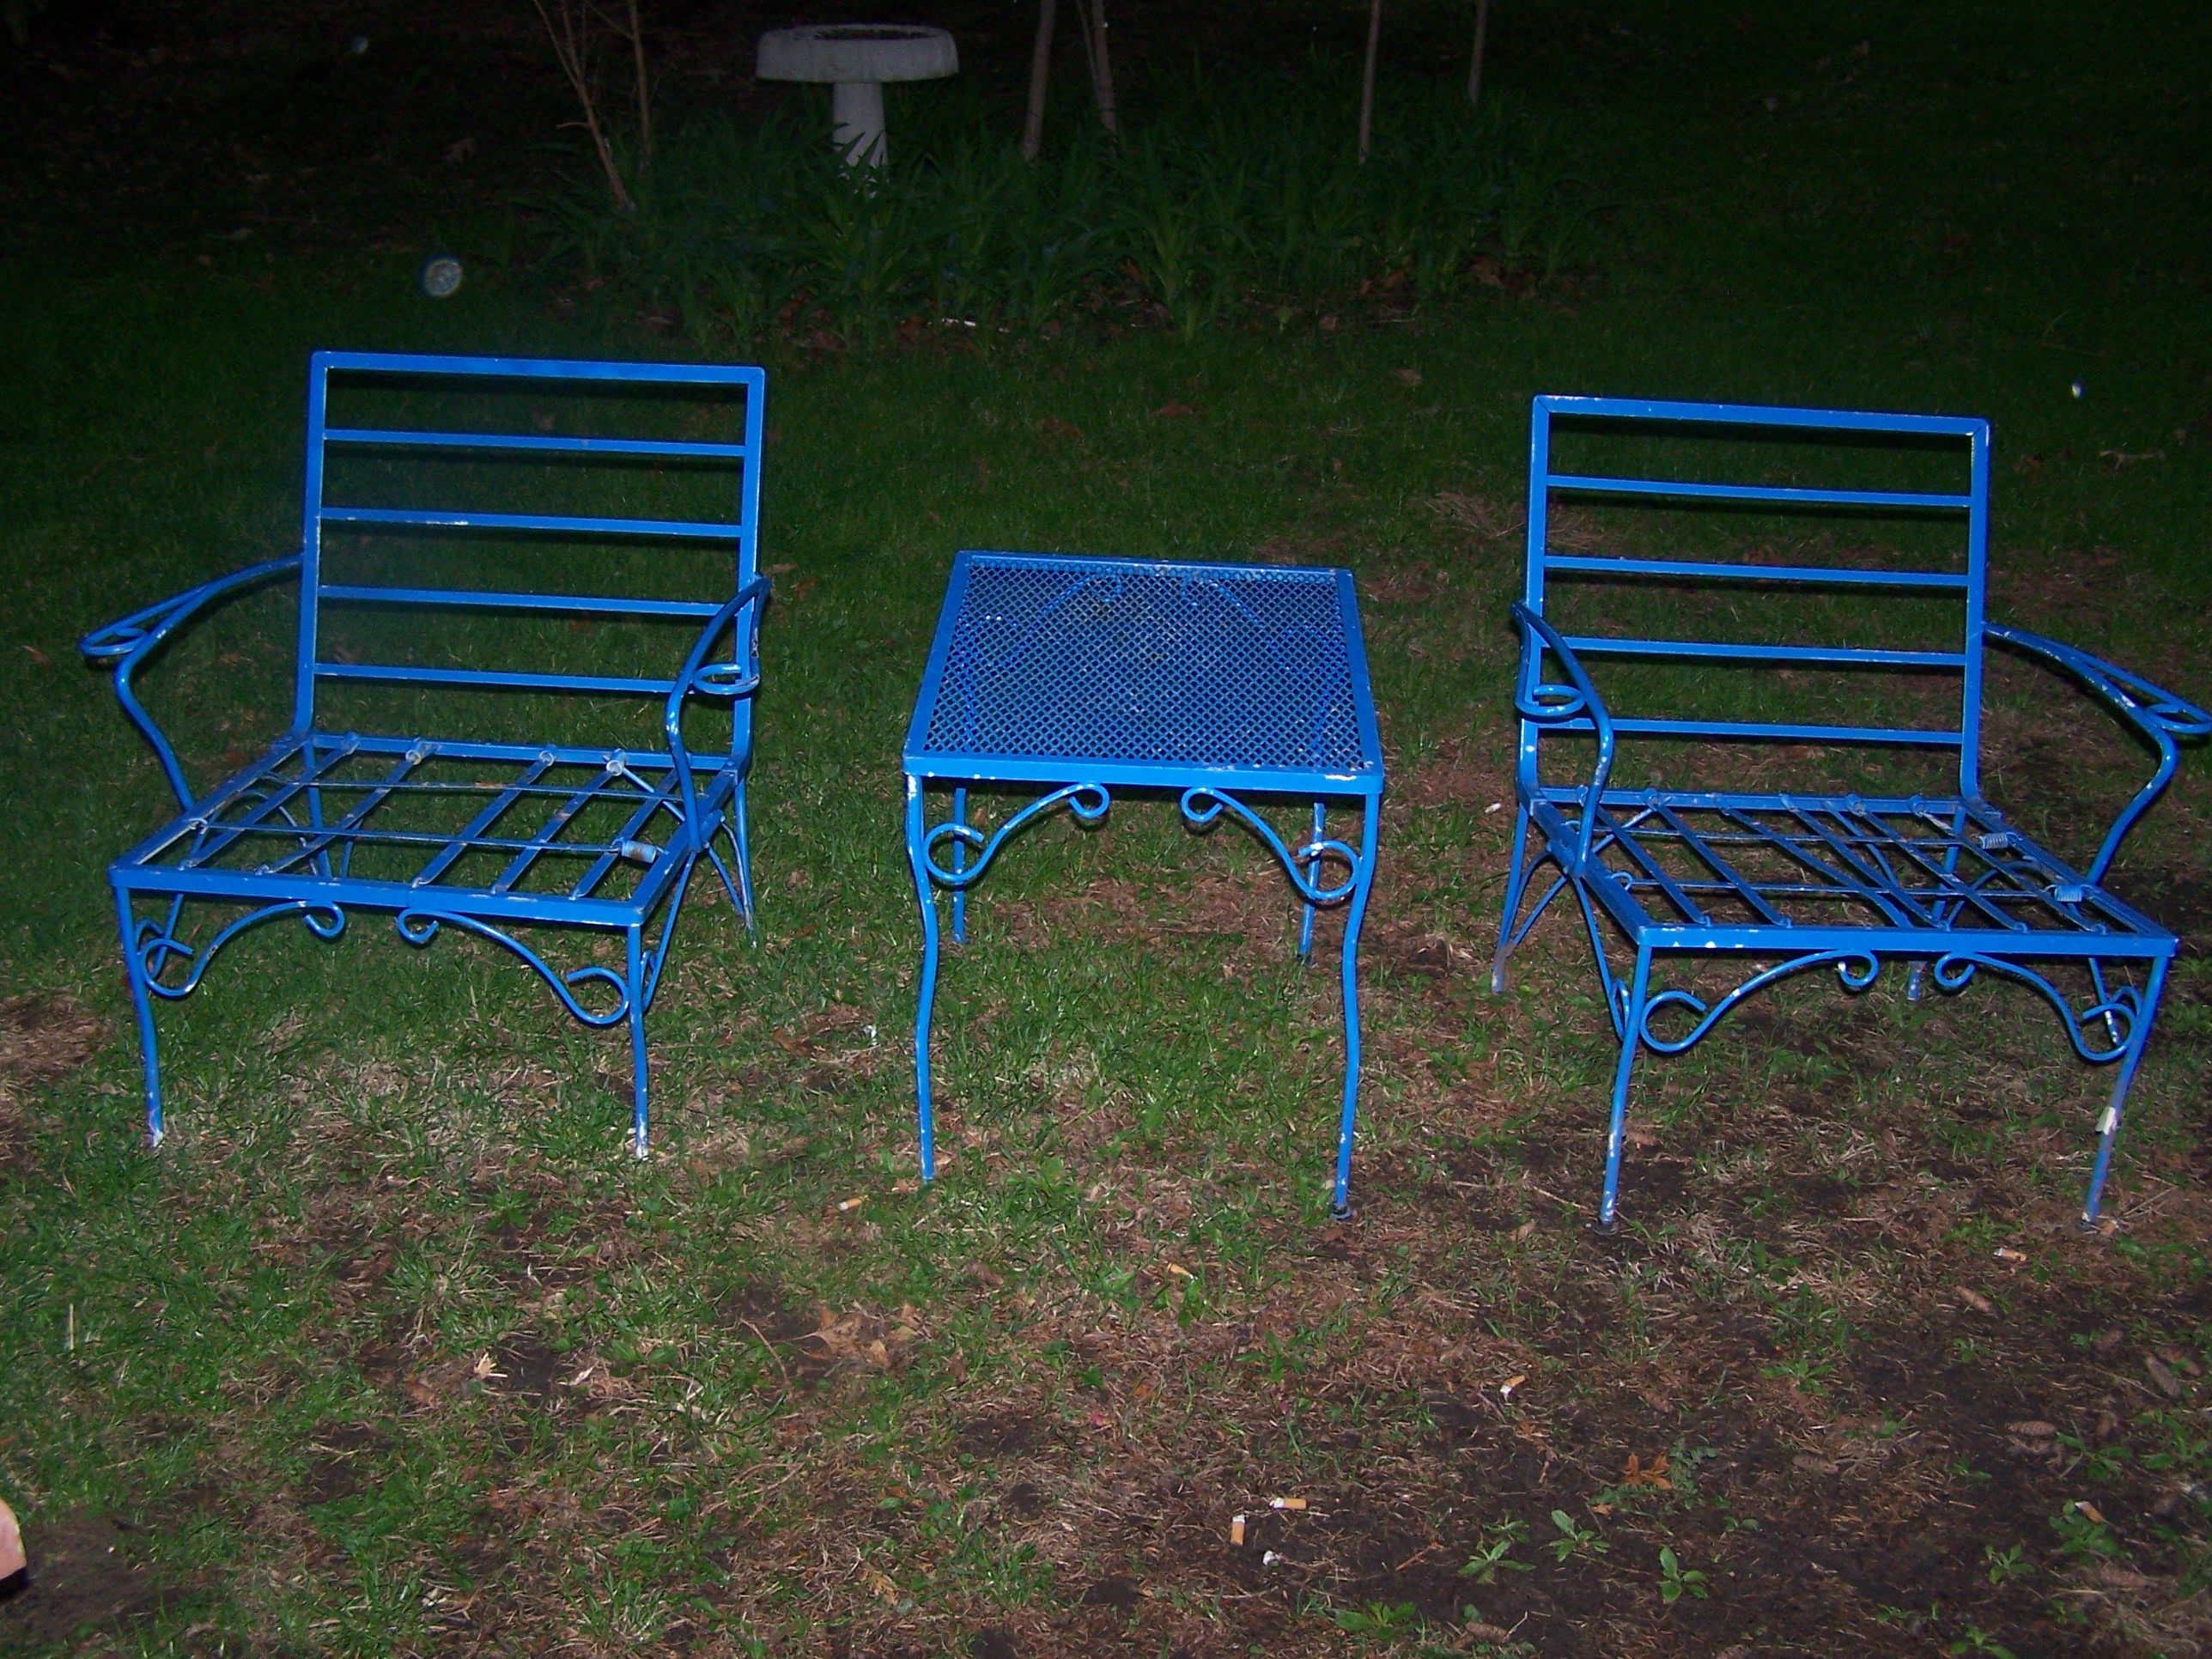
It hasn’t stopped raining here for days, so please excuse the dark, dreary photos. But, I had to share the other garage sale day find with you. Lawn chairs! They were a steal, and they will be fixed up with some paint and cushions, so don’t be alarmed! Right now I think they kind of look like they belong next to some plastic flamingos in, well, not my yard. But, they will.


Really that shade of blue is bright and fun, and has started to grow on me. But, I think it would look out of place in our back yard. I’m not sure what color I am thinking, however. I know we always lean towards black. We are blah. But, black might bring them up to date and they could be dressed up and brightened with some bold patterned cushions. Yes? No? Ideas? Always something to work on, but I love it! 🙂
Also, I wanted to let you all know that I am going to start selling off some of our projects. I love to keep busy and remake fun things, but our house is getting full. So, I am going to keep doing what I love, but start selling the things I make or remake. Right now I have a coffee table in the works, so stay tuned. I will post befores and afters of the items I plan to sell. For now they will be listed on Craigslist, or you can contact me through the blog. But, we are thinking that in the future I might rent a booth at one of our local antique shops. Check back, and let me know if you are interested in anything, or are looking for something in particular! 🙂
Garage Sale Day Find
Garage sale day in our little town was Saturday! This day has to be one of my favorite spring days. Scouring someone else’s junk for that perfect treasure is a great way to kick off the season. I even got Tony in on the fun. We didn’t find much to bring home with us, but a few treasures makes the day worth it. We brought home a few vintage glass marbles and a couple large dice for the collection. But here is our bargain beauty:

This is an antique set of mailboxes from a post office in Champagne Illinois. I came back twice to check it out, and at the end of the day he said it was too heavy for him to carry back home, so he gave me a sweet deal! It took two men to load it into my truck and we took the drawers out to get it into the house, but since it is on wheels it is easily movable in the house. I love it right here in the kitchen. The drawers were the perfect addition to the “landing strip” area. Tony was thrilled to have his own drawer for his pocket junk. I love its mismatched drawers, and the vintage numbers and letters above the handles. I know, I know. Some of you probably think this guy is tacky (my mom didn’t like it!), but we think its great. And, the drawers are big enough to function in the house! Here it is in the landing strip area:

I’m not sure if the school desk should stay now or not. But, for now, this is what the area looks like. Suggestions?
Also- we did pick up one other thing at the garage sales, but that project will have to wait… 🙂
Chair Love Remake
Well, I did some hardcore spring cleaning yesterday. But, I will have to post about that later. For now, I stumbled upon this gorgeously shaped chair. It is beautiful in all its shabby glory, but even more beautiful after Cat remade it. This before and after comes from design*sponge. Cat used the doily technique and spray painted this cute little find:


Tomorrow is all town garage sale day in my little home town, so wish me luck as I try to find such a great chair to spruce up! 🙂
Kitchen Cabinets!
They are done. Yes, they are done! I love love it! Remember, as you look at the pictures, though, that the old white on white counter-tops look won’t last long. We will be getting the new dark counter-tops in a few weeks. Also, notice the new cabinet in between the stove and the fridge- now the dog food can be hidden! (It will also get a counter-top!) A before to freshen your memory:

Here you go:


Well? What do you think? I think it feels so nice and new and clean in there! Remember, things will keep changing for a while. In addition to new counter-tops there will be a hood where the old microwave is, and the cabinet above the fridge will change. We also have a few more projects for in here… like new lights and something to do with antique rolling pins… so let me know what you think, and stay tuned!
Kitchen Sneak Peak
The kitchen is almost done! I’m exhausted, but it was totally worth it. Here is a little sneak peak for you until I am ready for the final reveal:


If you like these little snap shots then stay tuned for the rest…
Bit Of Chair Love
I happened upon this super cute chair on the blog Purple Area. It would make an adorable desk or side chair. I just love the black color and the curved back.

I even like the purple wall here. This would be adorable in a little girl’s room… or even a grown up girl’s room!
A New Headboard
I think this was Tony’s favorite project yet! My mom had an old brass headboard for a king size bed. She was going to throw it out, so I snatched it right up. After a coat of primer and a couple coats of black paint…


He was so excited last night after we got it hung that he said the bedroom looks like a hotel now. I take that as a compliment! I was afraid that the black would be too much next to the black art above, but I think it worked out well. Always a work in progress…

I think the pups approve too!
Progress- The Kitchen!
We have been hard at work painting those kitchen cabinets. Not finished yet, but getting close. I just thought that we would update you on some of the process and the progress.
Here are some before shots of the dark, mismatched, and very worn cabinets:


I started by using a palm sander to sand the stain off of all showing cabinet surfaces. They then looked like this:

Next, I removed all of the old hardware and filled the existing holes with wood putty. I did not need to fill the holes from the hinges, however, because we were lucky enough to purchase new hinges that fit in the old holes. But the handles are completely different sizes and shapes, so these holes and to be filled. I also swiped some of the putty across any cracks and dents I found. By the way, the new wood putty they have out there is more of a foam than putty. It is super easy to use. I sanded the putty spots down once they were dry. For the larger holes I puttied and sanded a second time so that they came out very flat with the wood. Here’s a shot of that step before sanding (after sanding they look much smoother):


I then started the painting process (the lengthy part!). I decided to start with only the bottom cabinets. There would not be enough floor space to paint all of the doors at the same time. I taped off walls, trim and floors with painter’s tape. I also taped down papers on the floor. (Actually, this is kind of weird, but I taped down puppy pee pads. We had a bunch left from when the puppy was still having accidents. She never liked to use them, but instead of throwing them out they made great drop clothes!) I then applied to coats of Kilz primer.


You can see that the first coat goes on kind of streak-y, but the second coat covers much more evenly. We now have the bottom cabinets painted with two coats of white semi-gloss paint, and we are hanging the hardware and doors tonight. More updates to come… but isn’t it starting to look gooood?! 🙂
