Chandelier For The Porch
Here it is. This is the fancy project I completely with the ugly, little, pink basket.
Here is the before picture:

Here is what I made:


I took a 75cent basket from the Salvation Army and spray painted it black. I hung crystals and beads on it and added a length of chain. I added some mini candles in jars and viola! We now have a chandelier above the ice cream table on the porch! I found this idea on Apartment Therapy and think its super cute. What do you think?


Our Backyard
Our yard is a mess. The landlord kept it full of leaves, twigs, branches, logs, compost piles and even garbage. We are tearing all of this up. Slowly but surely we are cleaning up the mess we inherited, and making a pretty, and useful yard. So, over the weekend we plugged away at the daunting yard. We have, of course, started by picking up and disposing of his garbage and old broken items. The other items such as old pots, tools , and yard items were collected and stored neatly away in the already packed shed. Here was where the real fun began. We had already started to rake and remove the massive amounts of leaves from the back yard, but so much more remained.
This weekend is when we started working on a fire pit. This way, once this chore is finished, we can move onto the chore of burning the branches and debris that remain. Tony dug a very nice, large, circular hole, and we started with placing the first ring of bricks. We then layered the bottom with rock (the landlord also had much random rock to be picked up from the middle of the yard!). The pit is unfinished, but looking gorgeous already! Here are some pictures:

Here is some of the mess left in our yard.

Here is a bit more of the mess. We are removing all of the compost, which is those lumps, and the twiggy looking trees are going to be moved from the clump he planted them in.

Here's the start of the fire pit. This project is going to be a fun one for the summer!
Whats In Store For Next Week
Over the weekend I have a long list of fun little projects to tackle. If I get myself into gear and get them done you can plan to see updates next week. I hope to be working on the kitchen curtains, painting some pots, planting flowers, cleaning up the yard, building a fire pit, and working on redoing a headboard for the master bedroom. It sounds like a lot, I know, but I think I have most of it covered! And, my favorite little project…
Check out what I do with this ugly little pink basket!

Check back all next week for updates, photos, and how-tos of my many projects! Have a great weekend!
Other Green Ideas
After posting about saving household items on Wednesday I got to thinking about other green tricks and tips for your home. Often these green ideas are not only environmentally friendly, but also easier on the pocketbook. And who couldn’t use that right about now? Here are a few I think would be easy and helpful to start in your home. Now you can be on your way to “going green”!
- Unplug electric items when not in use. Items like TVs, coffee pots, and cell phone chargers suck electricity even when not in use.
- Use less bottled water. Get a thermos to take with you when you go and get a Britta pitcher to refrigerate tap water for better taste.
- Get energy efficient light bulbs as each bulb burns out. Also, use more lamps than overhead lighting, it not only looks better, but saves energy.
- Make a rain barrel. These collect rain water to be used later to water plants, or clean your yard items or car. These have a net on top to keep mosquitoes out.
- Buy shampoos and other products in the bulk, family sized containers. Not only are these products cheaper for the amount you get, but you use up less plastic waste.
- Hang dry your clothes outside or on a line installed in your laundry area.
- Use cloth napkins and towels for cleaning instead of disposable, paper products.
- Pull your yard and garden weeds by hand instead of using chemicals.

Tomatoskin's photo "Go Green!!!" on Flickr.
Although these are only a few of the many ideas, these are all ideas that are easy enough to get you started in your quest to being more green and saving money. These are all ideas that we are currently trying, or are going to try this summer. Any more ideas?
Another Project Finally Finished
Remember that little stool with the opening lid I got from my grandma a few months ago? It has been on my to do list to redo the stool for a while now, and it is finally finished. See the before here: http://www.makemineeclectic.wordpress.com/2008/12/31/new-little-project/
I took the lid off, which actually made recovering and painting much easier, and ripped up the fabric. I tacked down new fabric and replaced the old black backing since it was still in good shape. Backing helps cover the ugly seems when they are on something like this, as the lid being lifted will constantly expose this back area. I then sanded and painted the wood bottom, put the top back on, and TaDa!


Much better, don’t you think!?
Some Color In The Pocket Office
Over the weekend I made a few tiny but fun changes to the pocket office. First, I added some bright red paper to the blah sides of the drawer set under the desk. It looked as if it had just been stashed under there, but now it looks as if it was intended to be there. I also tried to eliminate some clutter. I took down the picture mobile, arranged some of the hanging photos on the inspiration wire, and changed the art a bit.
I had seen online where framing simple art in a blank CD case can be easy to swap and add a fun punch to your walls for little money. So, I hung three of these CD case frames with some strange art in them above the desk. The art was small, cluttered, and mismatched. I changed the art out to something more simple and in the color scheme. I then hung them vertically to contrast with the inspiration wire. I think this is starting to look much better than my original office a few months ago!

The colored paper on the drawers.

The CD case art I made.

Doesn't it look so much better!?

And, the other side of the office, so you can see the pretty matching boxes.
What do you think?
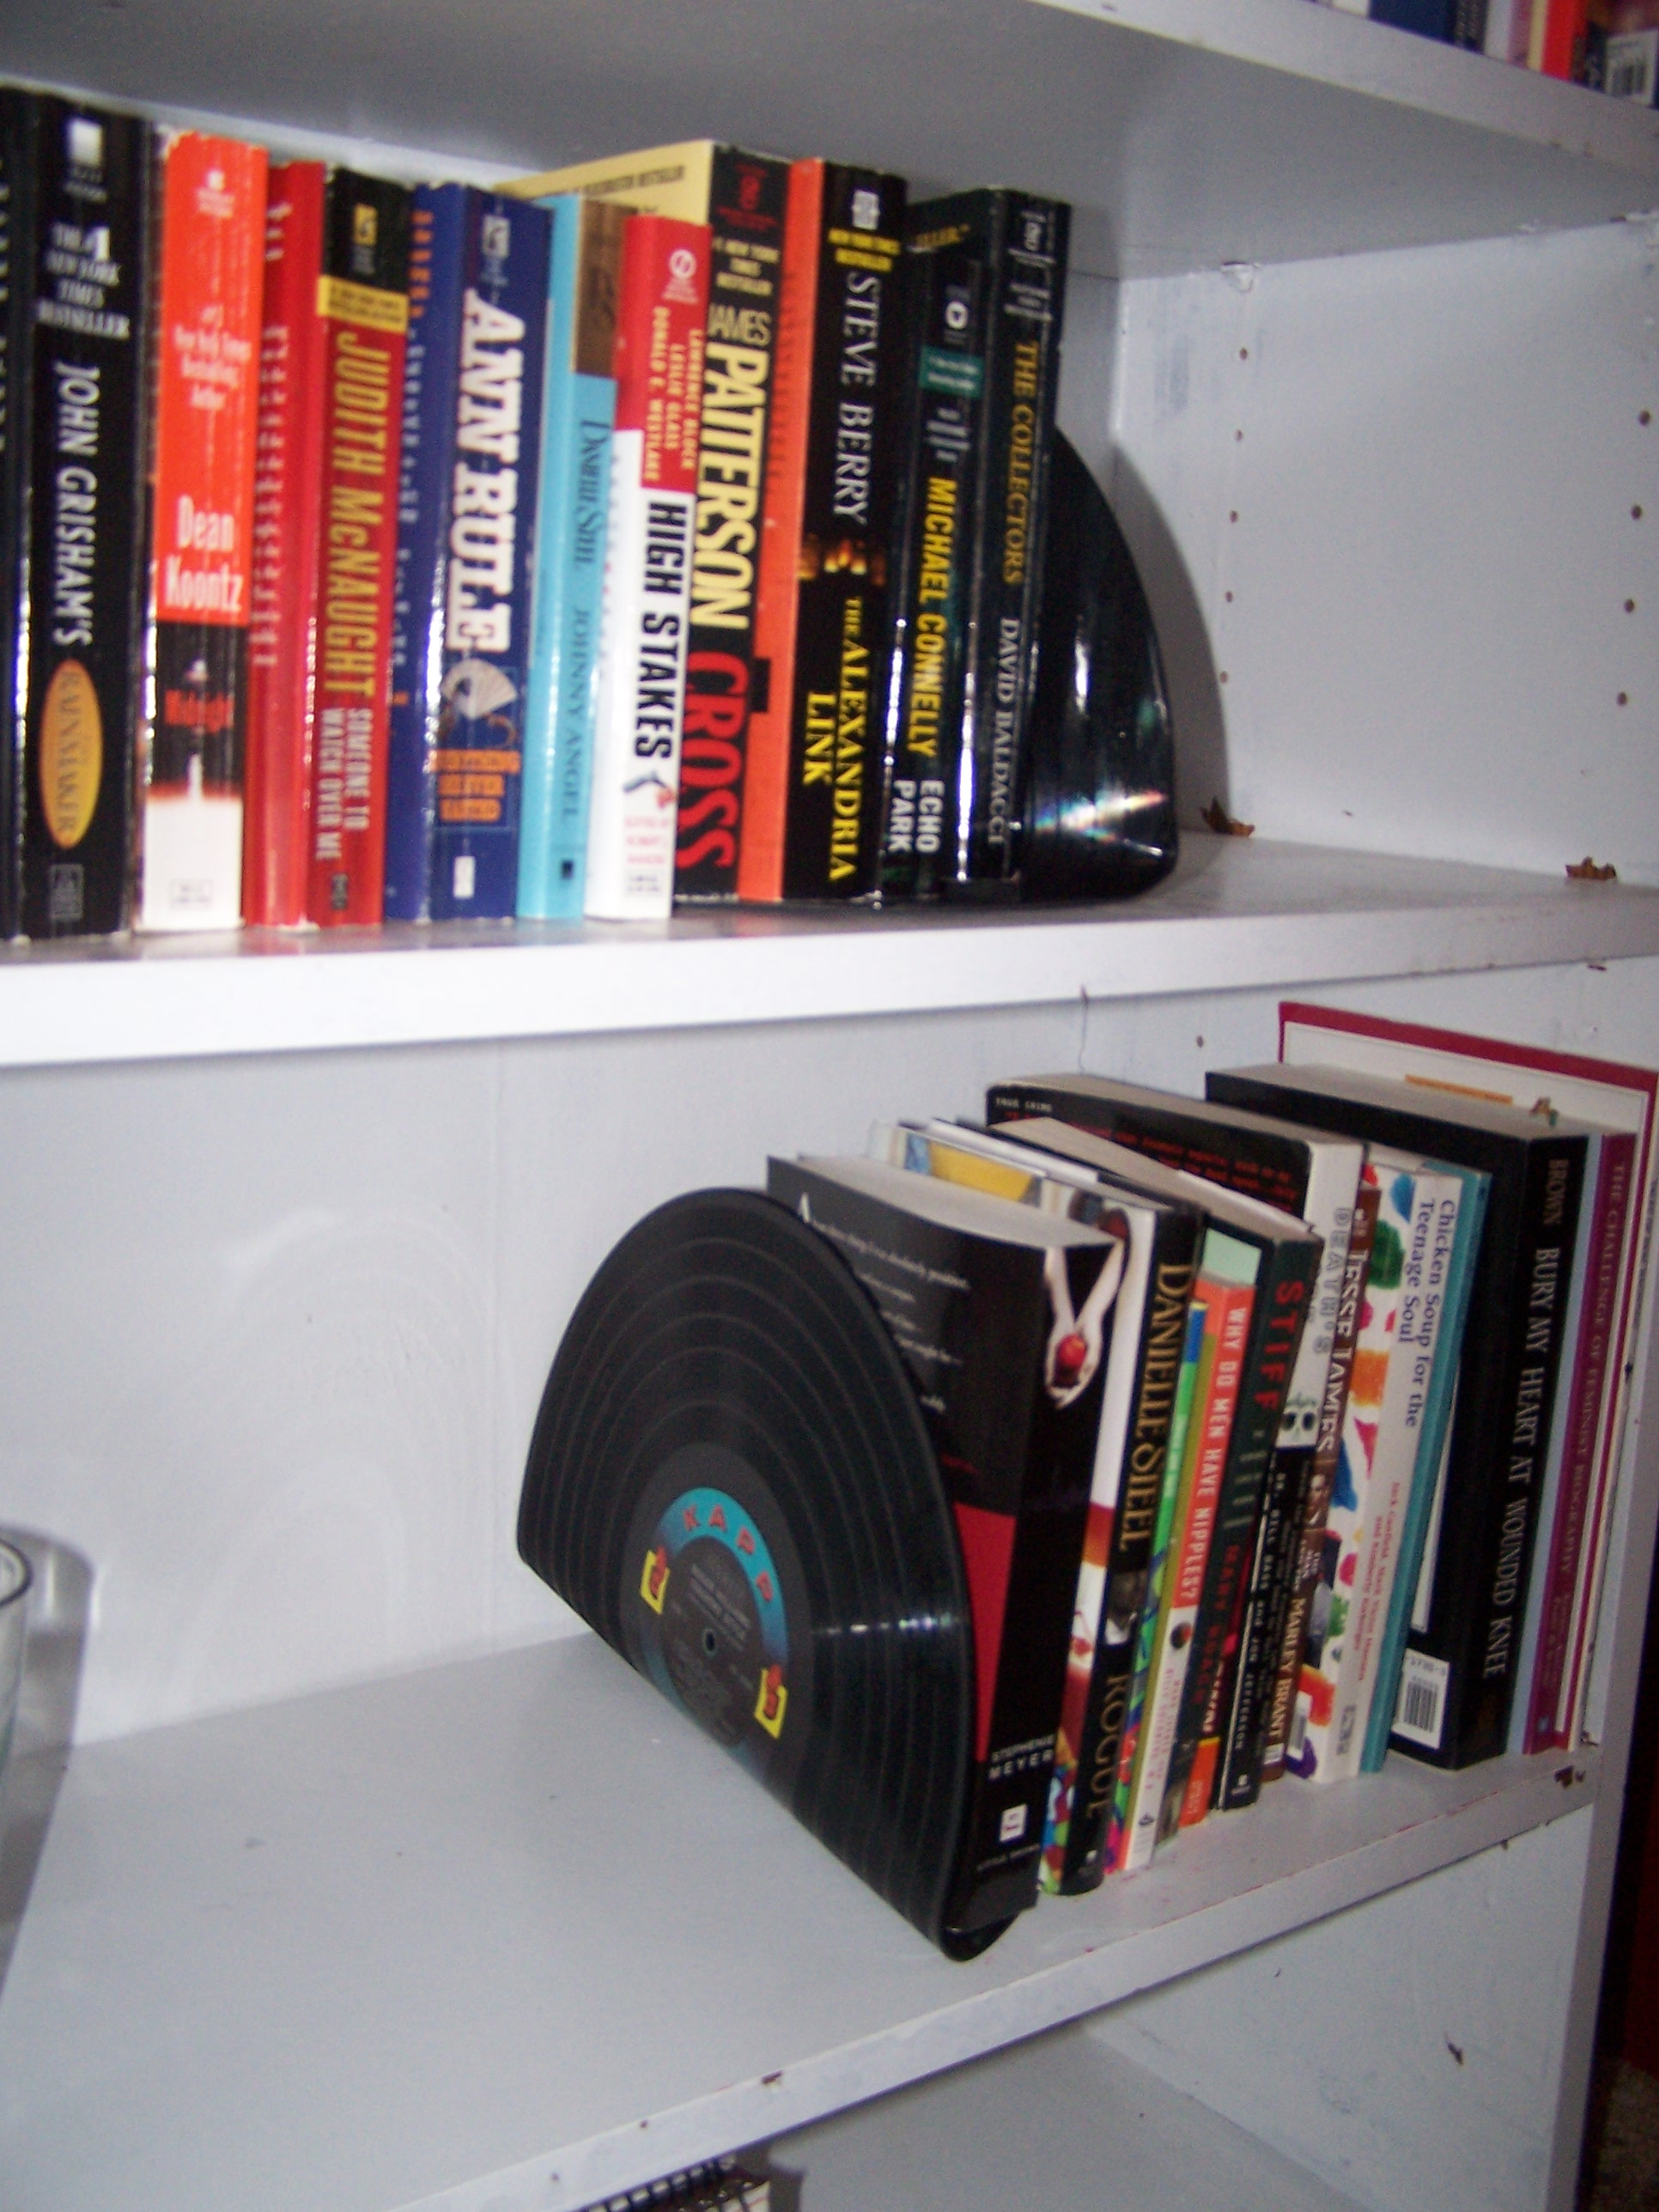
Bookend Project
I have said it before, but I love repurposing items. Especially in these times, finding new life for old items is the greenest option. Some things you hate to ruin by transforming them, but for the most part I believe that reusing old or obsolete items is a far better choice than letting them waste away in some one’s unloving basement, or worse yet, a landfill. Plus, repurposing is often much cheaper than buying new items, as well as healthier for the planet. So, when I get the chance to make a new addition to our home, and at the same time get a new project with old items, I jump on it!
In college I made bowls out of records as a dorm floor project. I still have mine in our office on the book shelf. The other day I saw a project online where book ends were being made out of old records, and decided that would be a perfect addition to the shelves, and even fit in with our music themed office.
I made a stop yesterday at the Salvation Army and picked up two records. They weren’t anything special, just old records in decent shape and with pretty labels. Last night we boiled some water and dumped it in the kitchen sink. The water softens the record and you use a utensil to bend it.
Overall the project was easy and turned out pretty cute!


Cooling off under a box.

Office Storage
I love the matching office supplies my mom got me a year or two ago. There is a pencil cup, tray, two boxes, and a magazine box, and they are all in different forms of black and white damask with little bits of red here and there. I was thinking lately that I just needed a few more storage pieces for office things. I had recently seen a post online about making your own magazine boxes with cereal boxes. Last night I dug into this project as well.
I cut the cereal box top off and cut the sides on an angle. I then recovered the box by glueing some black and white skull material (I have a thing for skulls right now) over all outter sufaces. It was easy and cheap and I think it goes well in the office space. Now I have one more storage box. More to come in the future.

I didn't take a before picture of the empty cereal box, but here is the finished product.

There it sits next to the other box on the shelf of our pocket office.
Also, another little office update. Tony finally installed the frame for the projector picture. The wall at least appears empty for a reason now. I kind of like it. It almost looks a little purposefully quirky when the projector isn’t on.

Bench Project
When we first moved into our new house Tony and I bought a vintage vanity on Craigslist for $20 to go in our spare bedroom. The vanity is used to hold all of my “get ready in the morning stuff”. The vanity came with a little vanity bench. The problem was that the bench didn’t match the vanity. The bench was painted white and had obviously been recovered with some purple material. I had thought about painting the vanity a shabby white, but that wouldn’t solve the whole problem. The styles and sizes of the vanity and the bench didn’t even match. So, I put the bench up for sale on Craigslist, again. After a couple of weeks the bench still hadn’t sold. Well, another project for me!
I liked the chipped white paint of the bench, so I decided to keep it. I also decided that there were too many things, including another, smaller vintage vanity seat already in the spare bedroom. I thought that the front porch could use something, so that was to be the new home of the bench. We have a small, white ice cream table and two chairs on the porch, but nothing else so far. The white would be a perfect match. I have also had my eyes peeled for some of those vintage metal lawn chairs. I want two of them in red, or to paint red. That helped me make my choice for fabric. I chose a white material with a red coral pattern.
Last night I started ripping old fabric off the bench. Come to find out there was not only one layer of awful fabric, but three! Here’s the before photo:

The next layer. Even worse:

And the final dingy layer:

But, here’s what it looks like all spruced up:


I think its really cute now. I will show you pictures of what it looks like on the porch once I get the ice cream set repainted!
Mini Bar Update
We have had the old TV armoire we found on Craigslist home for a couple of weeks now. I haven’t posted about it because we are having a change of heart. We had wanted to strip the wood and stain it black. But, when we got the cabinet home we thought it was so gorgeous we couldn’t bear to do that! I thought that going black and adding some shiny handles and mirrors would add some Hollywood Regency to the cabinet, more suiting it to become a mini bar. I just don’t know if we can bring ourselves to touch the beautiful wood. We did add a stemware rack to the top and filled it with our lovely bar glasses and goods. It is really gorgeous in our dining room, and it has already served it’s purpose. We do still plan on adding another shelf in glass and also a pull out shelf for more mixing and pouring space.
What do you think? Should we restain the cabinet black or leave it as it is?


You can't see it here because there is no stemware in it, but there is a clear stemware rack on the right side.
We really do need your advice, opinions and ideas!!
