Bathroom Update
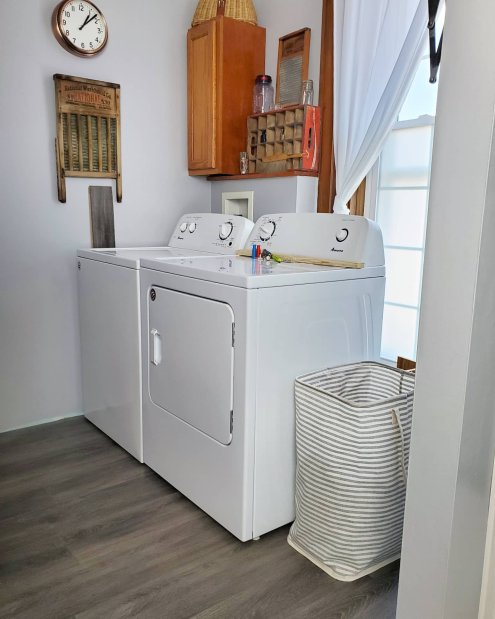
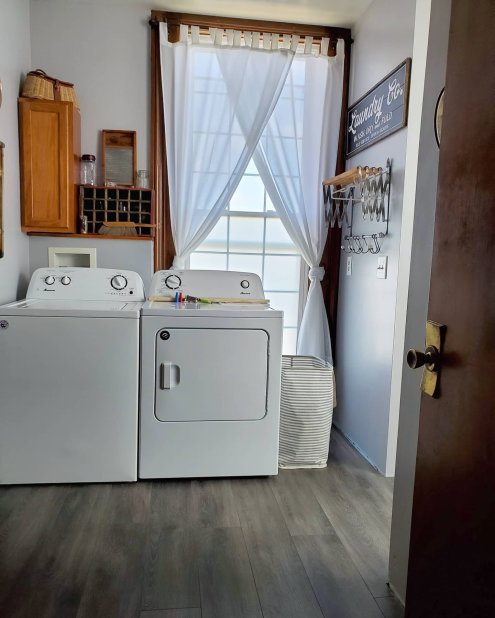
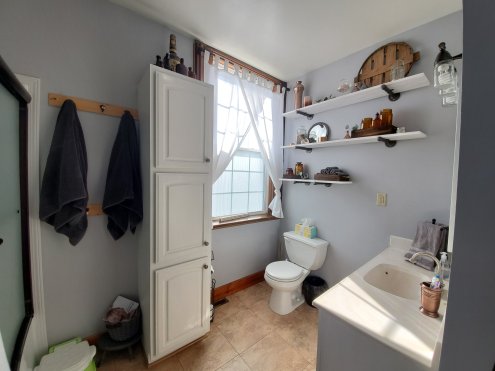
I thought we were going to live with the 85% bathroom update for a while. But we got a little shove to take it to 98% done now. 🤣 What this means is that we redid the flooring! Yay! And we added a mirror and a couple more custom shelves in the laundry room.
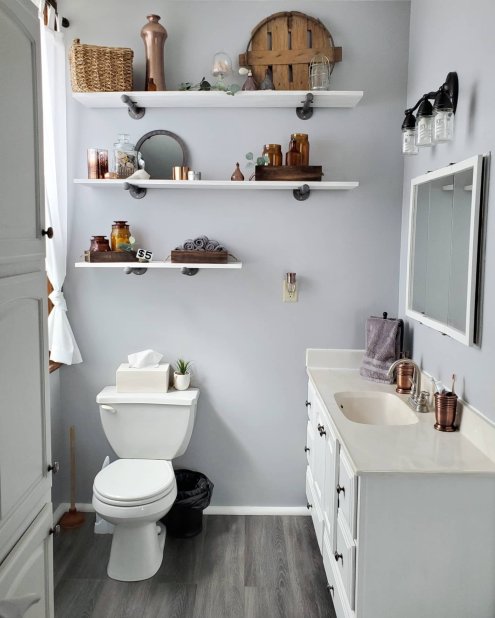

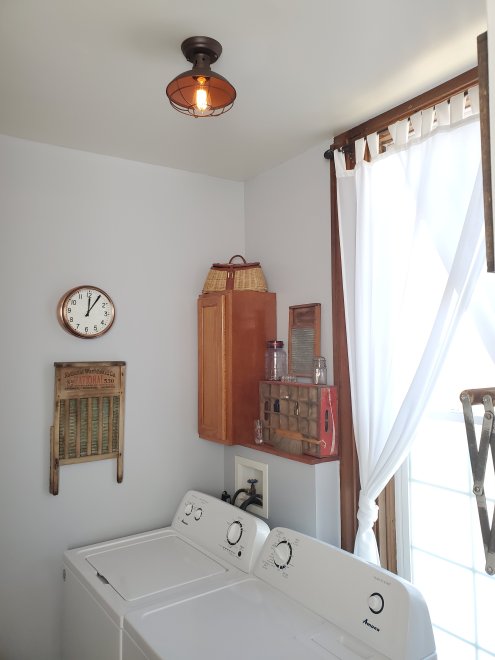
We used snap-in wood and vinyl flooring and it was super easy! Except for dealing with the uniqueness of an antique house with crooked walls and missing trim, etc, but we managed and it’s been amazing and seems super durable already. We ended up going with large quarter round as trim because we need to hide some of those flaws from a very old house. But I love the look here!


The ONLY thing left is to replace the faucet. Soon. We are going to live with the sink and counter top for a while, but I can deal with that.
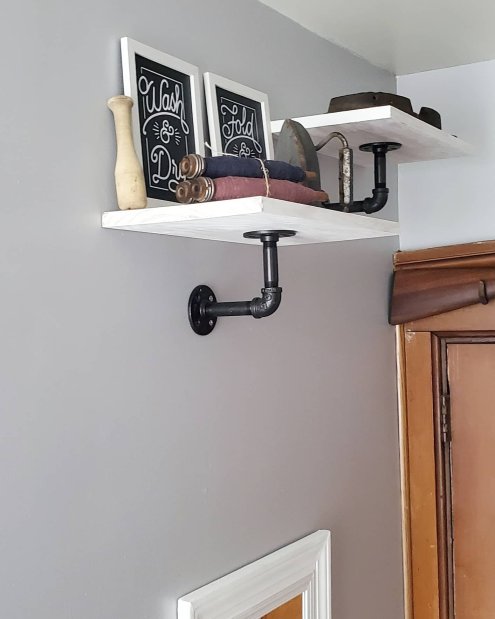
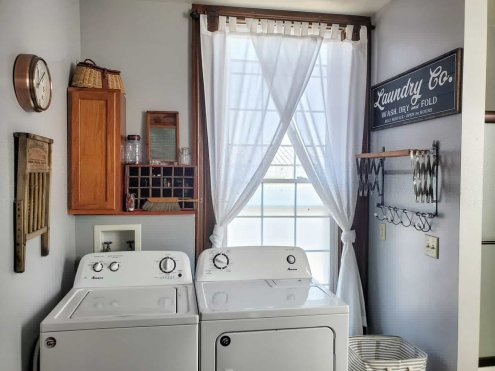
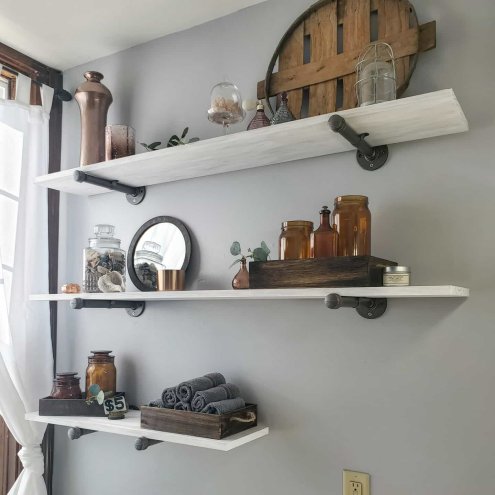
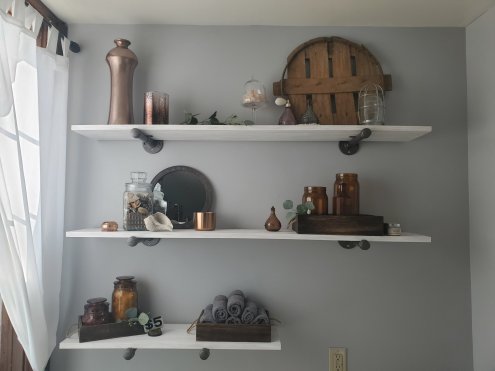
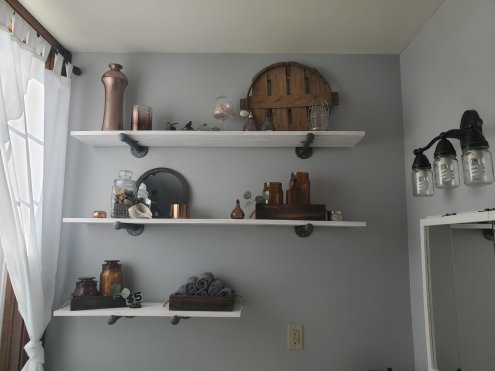
How cute are the little shelves holding laundry items?! We made them the same way, with plumbing pipes and hand whitewashed boards.


Remember, this is a mini refresh, (see the before shots, yikes, 2 posts back!) not a total overhaul, so this girl will still have to dream of one day having a stacking washer and dryer and wall cabinetry. This is gorgeous to me for now! 😉
Xx,
Jess
Permalink Comments Off on Bathroom Update
Bath/Laundry Room Update
We knew we wanted a fixer-upper, and we sure got it with this one! But we are enjoying putting in the work and making it into what we want for a home. The bathroom was no exception. We can’t afford a complete gut and overhaul of every room (I wish!), so this is a little refresh.
Before:
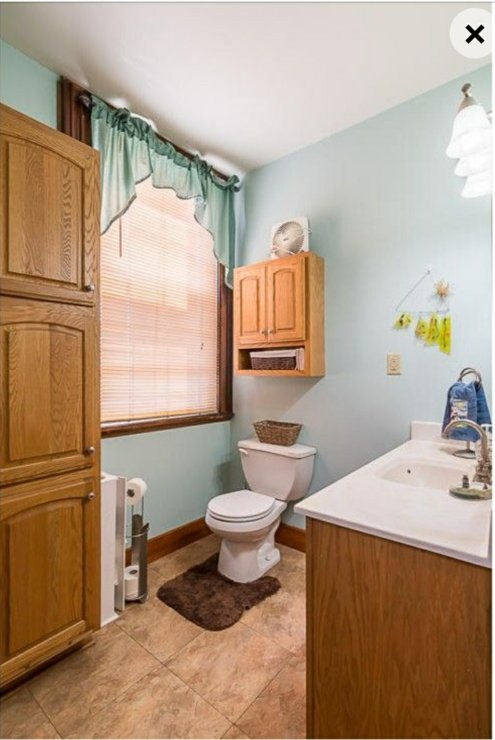

After:

We will put a new faucet in soon and plan to redo the bath and laundry room floors in a few months. But for now, wow. Its clean. Its peaceful. I’m in love.
We made the bathroom hook boards because in old houses you are at the mercy of where the studs may or may not be when hanging things. Attach the hooks in the spacing you want and then attach the boards to the wall where the studs allow.
We also made the shelves ourselves and hand “grayed” the boards by smearing white paint with fingers. Tedious but so worth it. The brackets are plumbing hardware and can be found at Mendards. We painted the parts with a light oil rubbed bronze spray paint.
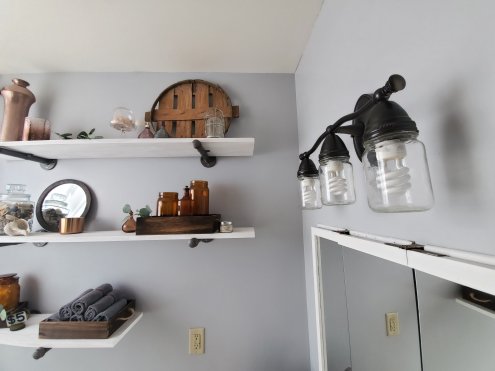
We made the jar light fixture by painting the old silver fixture with oil rubbed bronze paint and adding the jars. We took solid jar lids and made holes in them to fix the jars to the fixture. Once it’s all painted you can’t see what method you used to attach them.
All on a budget for a quick fix up. We did add a new shower, as ours was a walk in when we bought the house and we needed a tub for the kids. Paint and curtains, and especially shelving, make a huge, but affordable difference!
Here are some fun detail shots.


A few detail links:
What do you think? Any recommendations?
Xx,
Jess
Permalink Comments Off on Bath/Laundry Room Update
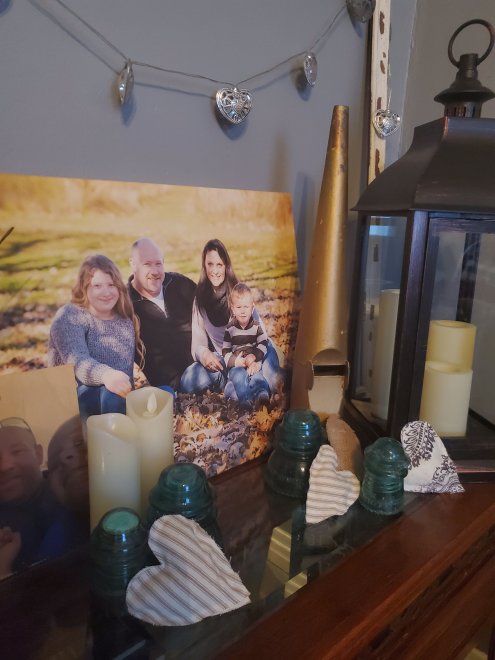
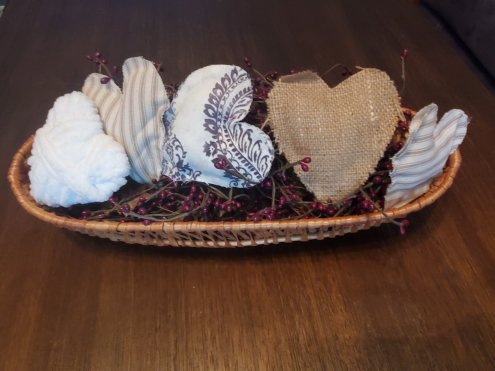
Quick and Easy Valentine’s DIY
I made these fabric hearts last year and loved them so much I put them out again this year!

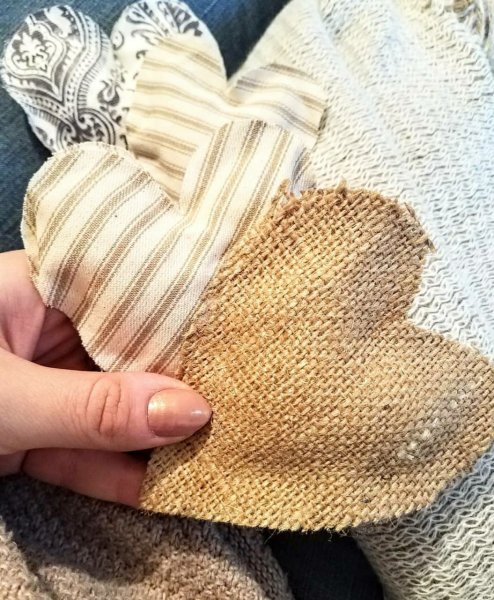
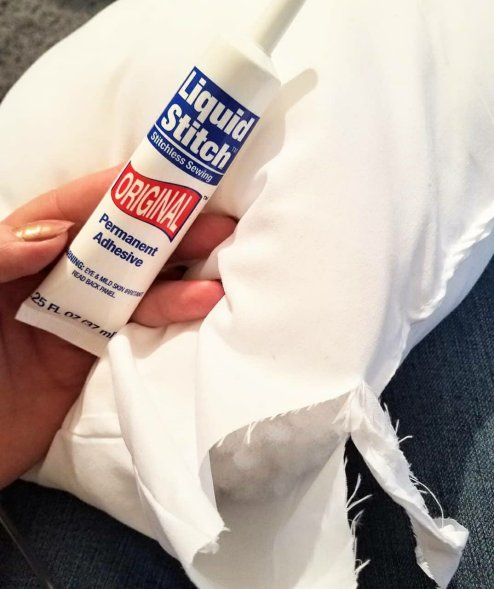
It’s so simple that it doesn’t require much instruction, but a fun project for anyone because there are so many possibilities! I used scrap fabric that I had on hand, making this super inexpensive too! I picked a couple fabrics that complimented one another and had a rustic vibe. You could use anything at all! The only other supplies you need are liquid stitch (always handy to have a tube on hand!) and some stuffing. You can get both of these at your local craft store or a Walmart. The stuffing sold here at our Walmart was in too large of a bag and I knew I didn’t want a ton. So, quick fix was to buy a small pillow insert at Walmart. This was about $4 and I have plenty left for more projects.
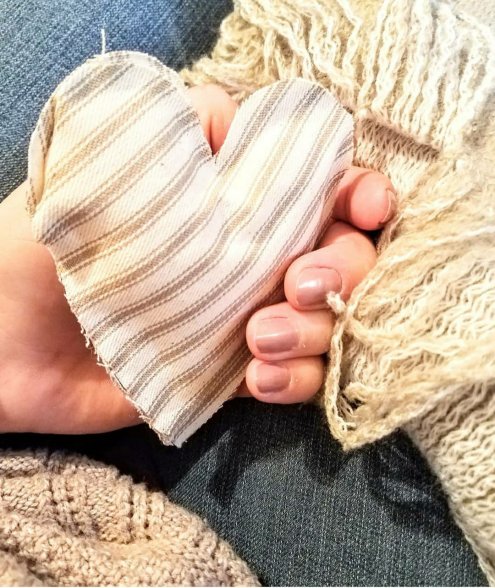
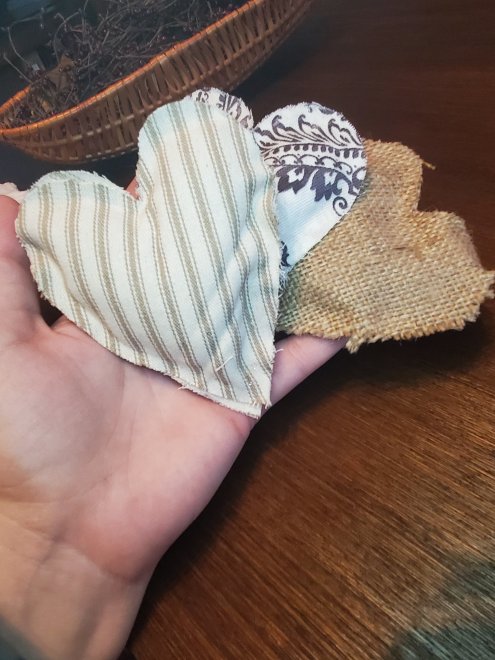
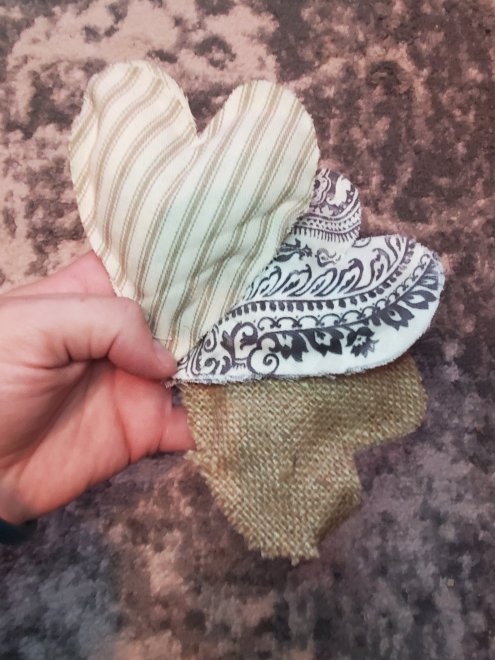
Start by drawing a heart on cardboard. Try a cereal or cracker box! Then trace this heart onto the backside of your fabric. Do sets of two hearts in matching fabric. Then run a bead of the fabric glue around the heart. Leave a few inches unglued. I left a quarter inch or so around the edge. I used a few binder clips to hold these while drying. You could also set a book on them. When they are dry, stuff fabric into them. Doing it in this order allows you to fill them full and puffy without ungluing. Now add glue to the last few inches and clip to dry. You could always add sequins, embellishments, ribbon, or any extras too.
The other little white heart was super simple too. I used a cardboard hear, made little cuts around the outside, and wrapped yard around the heart. The cuts helps hold the yarn in place for the first layer of wrapping. Wrap all different directions. Glue with the fabric glue. Simple!
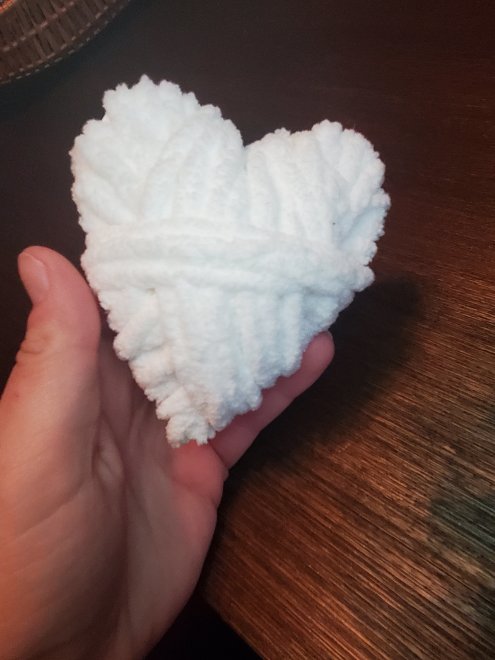
Viola! Hope you enjoy this quick and easy project!
Xx,
Jess
Permalink Comments Off on Quick and Easy Valentine’s DIY
Chicken Spaghetti Casserole
If you know me at all, you know I’m no cook. It’s never been something I enjoy to do, so I have never gotten much better than “able to keep my kids alive” level. 🤣
But, I have a few recipes up my sleeve that make it seem like I know what I’m doing just a little. This is a family favorite. So easy, probably 10 minute prep time, inexpensive, and both adults and kids love it. It makes enough for the 5 of us for dinner plus leftovers. Leftovers are almost even better with this dish! 😉

Ingredients
2 c shredded chicken
1 box spaghetti
2 can cream of chicken soup
1 can original Rotel
1 8oz package sour cream
Large sprinkling of shredded cheese
Tips: use a broasted chicken from the store. Easiest to shred when its warm. Shred then refrigerate if making tomorrow. Shred an overly full 2 cups. There will be just enough left for a couple of legs for kids lunch or to put on a salad, etc.
Instructions: Boil the entire package of spaghetti. Mix with all other ingredients except cheese in a 9×13 casserole pan. Cover in foil. Bake at 350° for 50 minutes. Remove the foil and add a full sprinkling of your favorite shredded cheese. Bake for another 10 minutes.
Viola!
One more tip, a sprinkling of crumbled potato chips tops it excellently. Especially day 2 leftovers! Yumm!

Xx,
Jess
Boys’ Room Reveal
I’ve worked on it for a year and I can finally say it’s as done as it’s getting right now. 🤣 When we moved to this house a year ago and I was pregnant, we decided the boys would share a room. This way I could have an office, and the office would double as a play room/workout room, so that kids could be in there while I worked if needed. I also knew that I wanted an outdoors-y theme that could work for both a baby and a young boy. Brantley already had a farm theme as a baby, with many pieces we wanted to incorporate, and he asked for camo bedding in his new room. If you’ve been here before, you also know that when we moved to this house it needed a lot of work. A lot. We ripped carpet out of this room, added electrical outlets and a light fixture, painted… and we still have more to do…eventually. But for now, here it is!

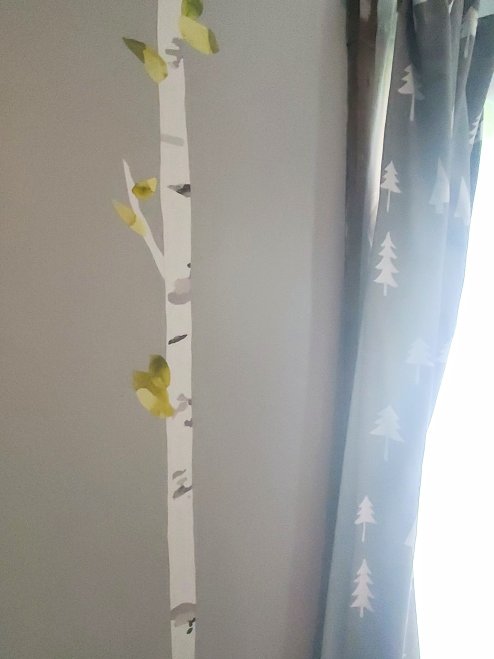
Each of the boys has a bit different theme on their side of the room, but with light gray walls, tree curtains, tree decals, and some animals throughout, it seems to flow for now.

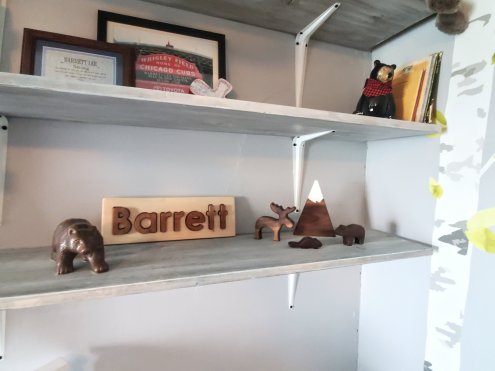
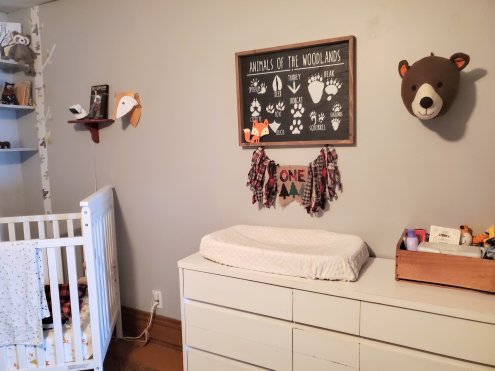
Barrett’s baby shower theme was woodland animals, knowing that I would use the animal and nature idea for his room.
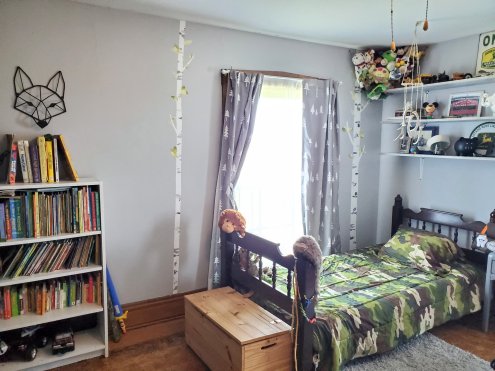

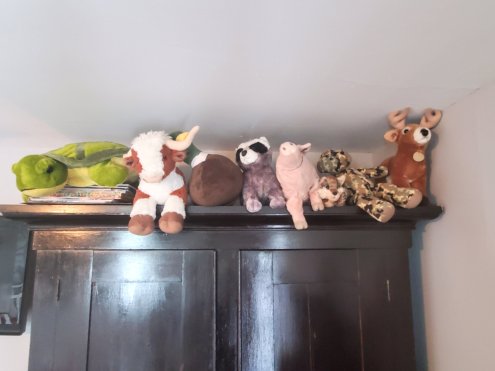
Brantley has kept some of his farm theme and added the camo to just be plain outdoorsy!

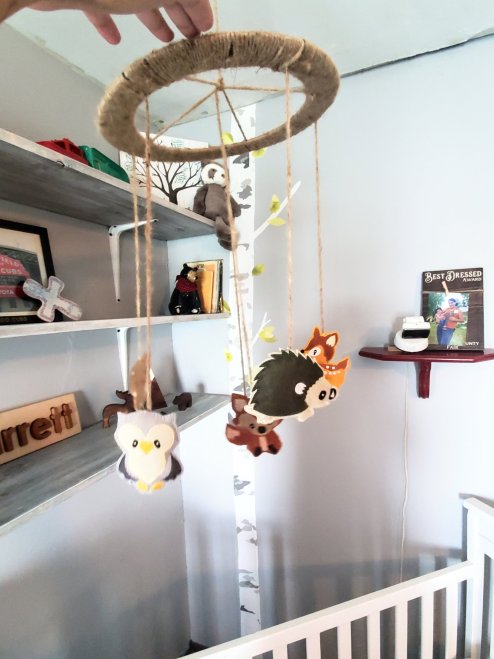
I made both of the boys’ mobiles, which Brantley has outgrown the need for, but are both too cute to get rid of for now.
What do you think? The way we organize clothes will change as the boys grow and we remodel some more. The room currently has no closet. Thanks, old 1862 house. It’s an evolving work in progress. But the boys love having their own space and even love sharing for now. 😆
XOXO,
Jess
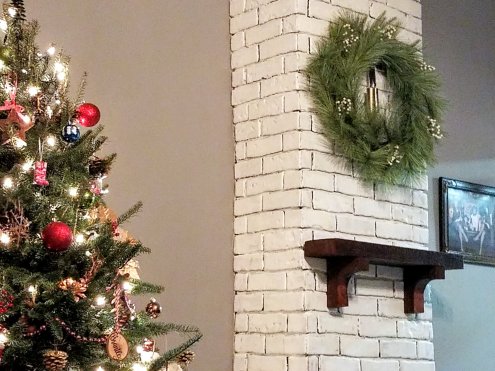
The Fake Chimney
This ancient house once had a chimney, two actually. In fact, one is still partially there. In the living room, you can see the shape of the old chimney up one wall. Usually I love character and uniqueness from times past. In this case, though, they covered this chimney up since there was no longer a fireplace. Then, since you could still see the shape of it, they added faux brick to it. Horrible, ugly, pinkish faux brick. It didn’t stand out nearly so bad when the little old lady who lived here previously had the room dark, dingy, and covered in nude paint and odd decor. But once we painted the walls grey, lightened the room, and completed changed the style, the chimney stood out like a sad, sore thumb.0ec56792a3b0f484bcf03c32a4763bf50bca28e68adedf8191
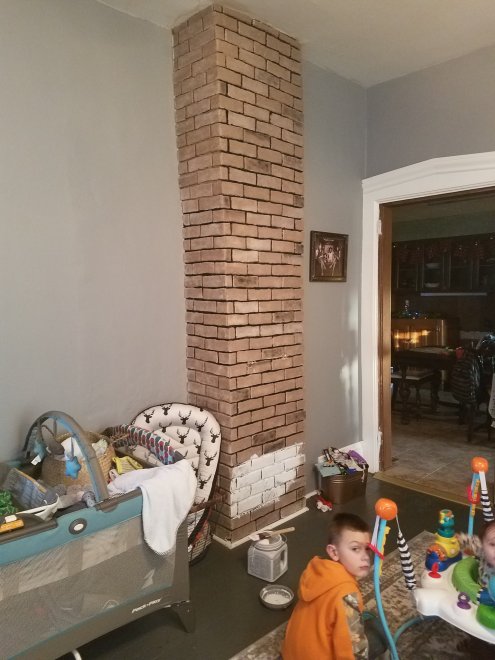
You get the picture here, but unfortunately this is even a mid-project shot. I really wish I had a picture of the drab room when the previous owner lived here to show!
We debated for a while. Do we tear it out? Do we paint it? Do we just take the faux brick off and embrace the odd shape in the room?
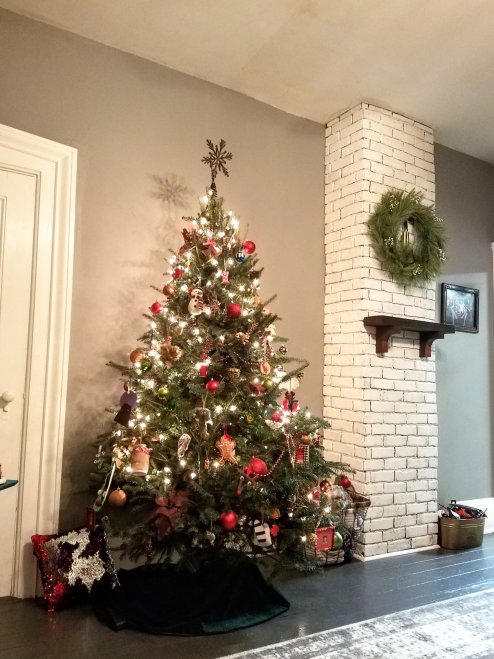
One day I said I was painting the bricks white and because we owned the paint and this was “free”, it would at the very least be a temporary solution and that we could always do something different down the road when we had more time. (Ha!)
No one stopped me, so I went forward with a brush and some paint. My plan was to add a couple of coats and make them completely white. One coat in I found that it was actually a bit difficult to get the paint down in all the crevices. We left the one, imperfect coat to dry for a night. The next day we realized the this “whitewashed” look was it. I didn’t need a second coat at all.

Then I wanted a faux mantel to finish it off. Several weeks of debating with each other ensued. I had a very specific picture in my mind of color, shape and size.
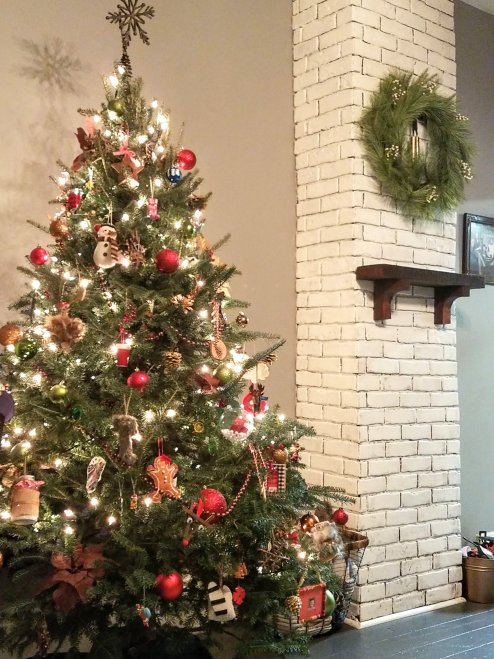
We finally have that little mantel, made of 100-some year old barnwood, added to our chimney. And I LOVE it.
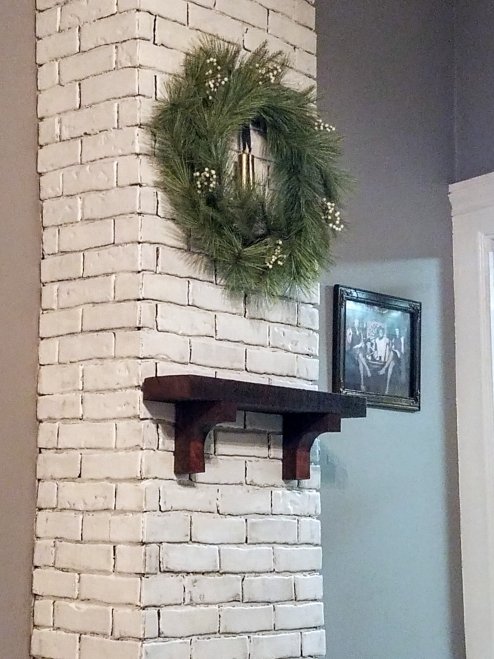
Sometimes tiny, simple, easy projects turn into more lengthy and complex ones. Ok, usually. But, when you are done and sit back and look at your work, that makes it all worth it
Don’t mind the empty wall next to it, at least the Christmas tree fills the space for now. I have plans for huge floating shelves all up and down there as “built-ins” for the room. Any guess how long that will take us? 😂
Teen Bedroom Redo
So, I’ve mentioned that this new-to-us old house is in pretty ugly shape and that we have been redoing all the rooms bit by bit. One of the rooms that hadn’t gotten any love since we moved in was Jordin’s room. Check out these dingy, bland, old lady looking photos:
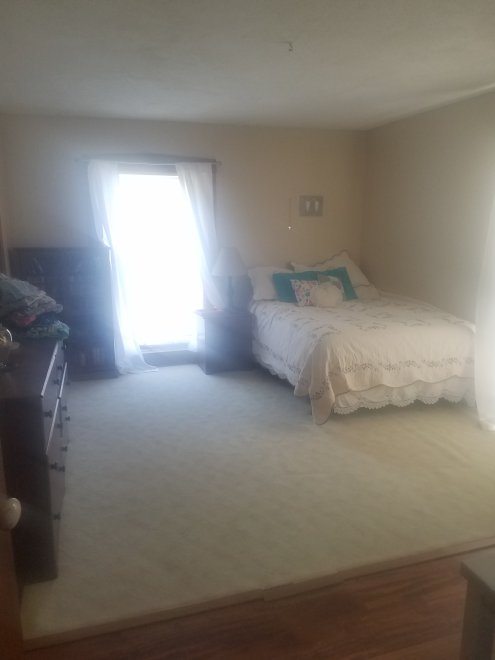
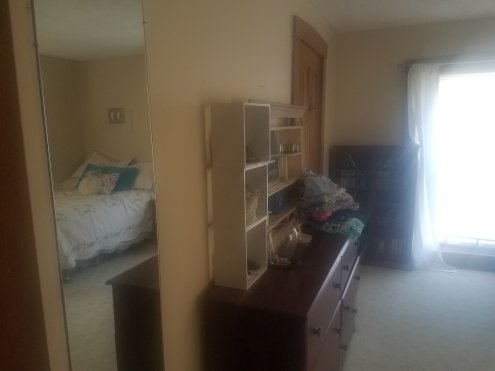
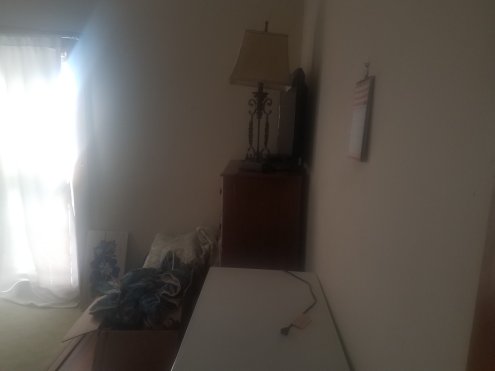
We hadn’t even hung anything on the walls because we knew we wanted to paint. Poor girl! Plus, the rooms all need to have more outlets put in (how is one outlet nearly enough?!) and overhead lights with switches added (hello?!). Needless to say, she was not thrilled in her set up. But, enter her 16th birthday, and we had the perfect excuse to make ourselves get the room beautified and surprise her with completely glammed out digs. Annnd… after:
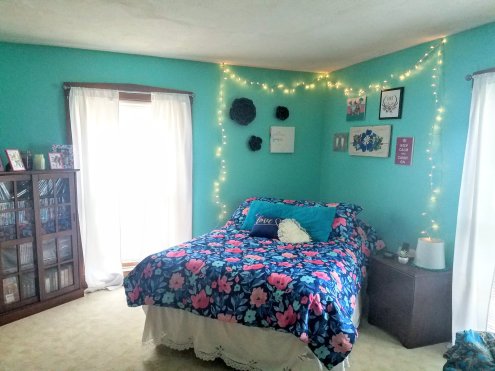
Ta da! Total teen girl. Her jaw dropped. Win!
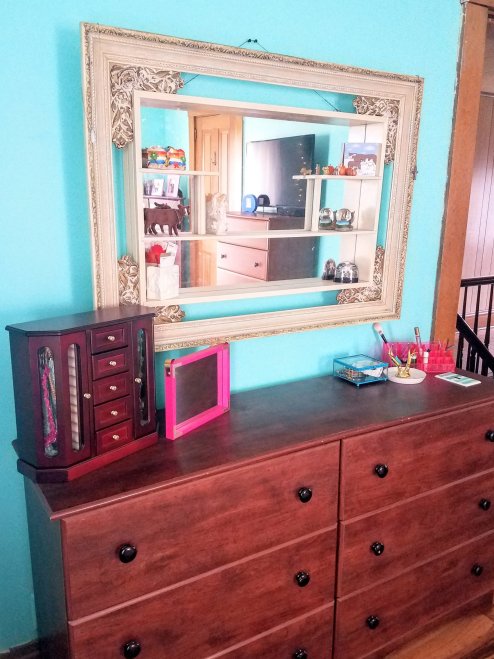
This was the mint turquoise color she had picked for her bedroom at our previous house and she was really wanting it again. It is super pretty, and not quite as bright in person. She also loves pink and peach. I added some navy to calm and tie the colors in and some gold hints for glam factor. Sounds busy. Totally goes.
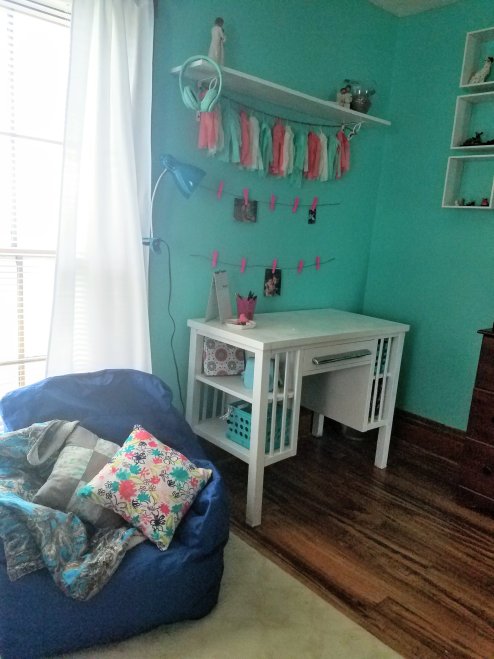

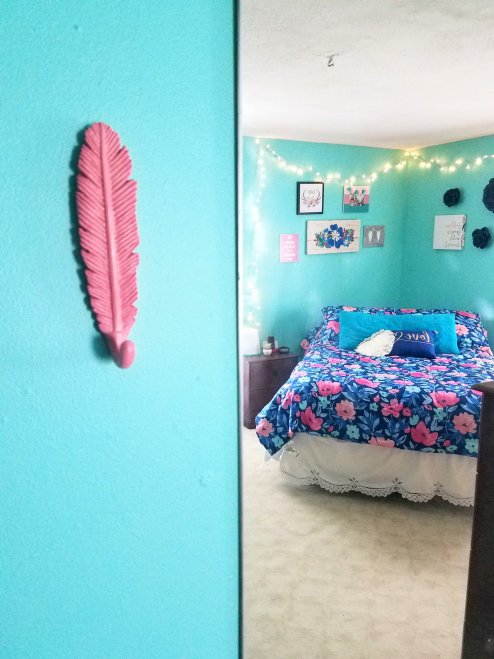

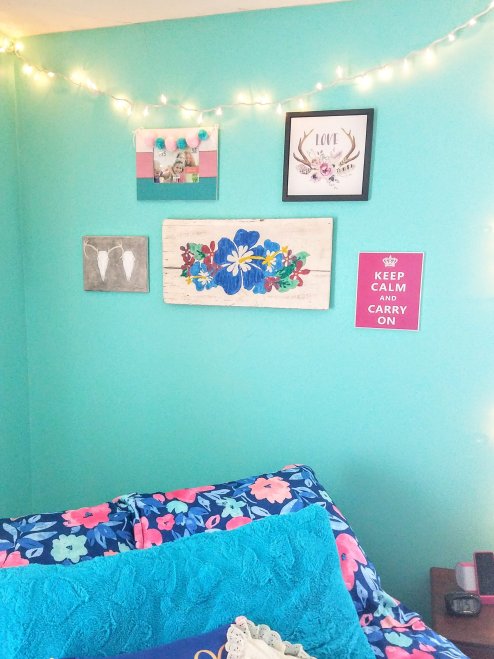
Some old, some new, plenty of Hobby Lobby help. She wanted a little girly and a little rustic. She also wanted “fairy lights” so fairy lights she got.
We can’t change the brown furniture (it was her grandmas), and new carpet isn’t going to happen just yet, so working with what you’ve got sometimes has to just work… but…
Truly I love how it turned out. Dont tell her but Santa is thinking about a rug and a chandelier, along with new knobs for the drawers. 😍
Where Have You Been, Girl?!
Hi all! Yes, yes. It’s been forever. BUT, I am back. And with lots to share.
One more kiddo and a new (to us) house have kept us very, very busy. But this new house has also given us a TON of new projects to show you while we go. So, I’m back and full of fun stuff to document.
The house. If you have been following along here for very long, you know I love me some old houses. And old projects. And old antiques. Everything with a story. Let me tell you, this house had lots of stories. Built in 1860, and sadly remodeled in the 70’s, we have our hands full, both with old stories and new ideas.
So, here she is. All potential and boring right now.

Pretty cool, right?! And a ton of work, a few headaches, blood, sweat, tears… and love. I’m excited to be getting all creative again. As the new little one allows, of course. 😂
As many of you know, this space was created years ago when I got my first house to document and share all of my remodeling and decorating ideas, trials, errors, and adventures. This is where a plan to keep most of my focus now that I am back with plenty to keep sharing. But, I also plan to share some family, kids, health, and even personal stuff. Let me know if there’s something you would like to see!
And finally, I haven’t shared about myself in a very long time. So, my name is Jessica. I am a social worker with a Bachelor’s in Psychology and a Master’s in Forensic Psychology. I love to be outdoors, camp, and travel, decorate, refinish and repurpose furniture, and and hunt for bargains and hidden gems. I live in Iowa with my significant other, Jason, my 15 year old step-daughter, Jordin, my 5 year old son, Brantley, and my 4 month old son, Barrett. Oh, and our little growing crew of pets. Every farm needs chickens and goats, right? We not only love making our new old house a home, but we also love trying out new things along the way. I hope we can inspire you!

Glad you are here! It should be fun, and a little new, so stick around!
DIY Wreath
Winter makes me a little stir crazy. Luckily Pinterest has many many cures for that! Enter my new wreath project. Bonus: I love a project that has quick and easy payoff! 😉
I picked up a wire wreath form at Joann craft store for a few dollars. I also grabbed a remnant of burgundy fabric and a pack of colored leaf print fabric squares. I cut tons and tons and tons of fabric strips about 5 inches long. Then I tied the oodles of strips in knots around the wire wreath form. I also added some strips of burlap to give a rustic look. Simple.

Here is a close up of my strips of fabric.

I also painted a wood letter T to hang in the center if I choose.


And for the winter season I hung a seasons greetings basket in the center that I already had. Cute, no? 🙂
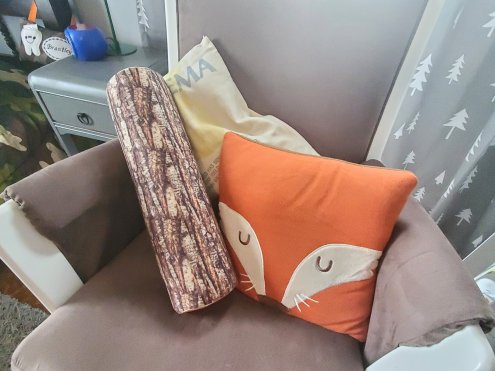
Yellow Chair Love
Maybe it’s because yellow is so pretty. Or maybe it’s because I am already itching for spring. Either way, I am loving these bits of yellow…


