Mini Bar Makes More Progress
I think the mini bar project is almost done (the mini bar we made out of a re-purposed vintage TV armoire). We are going to leave the wood as-is, at least until we see what it looks like next to the black desk (which is still in progress). We are planning on changing out the handles, but haven’t found the perfect Hollywood Regency looking pair yet. Yesterday we got the mirror for the back and the glass for the bottom cut and installed. We also hung a stemware rack under the top and I lined the drawer with some fabulous material. I would like to find a very simple mountable wine rack to hang under the top on the other side, so if you have one of those to recommend…! So, here it is, looking gorgeous!


Chandelier For The Porch
Here it is. This is the fancy project I completely with the ugly, little, pink basket.
Here is the before picture:

Here is what I made:


I took a 75cent basket from the Salvation Army and spray painted it black. I hung crystals and beads on it and added a length of chain. I added some mini candles in jars and viola! We now have a chandelier above the ice cream table on the porch! I found this idea on Apartment Therapy and think its super cute. What do you think?


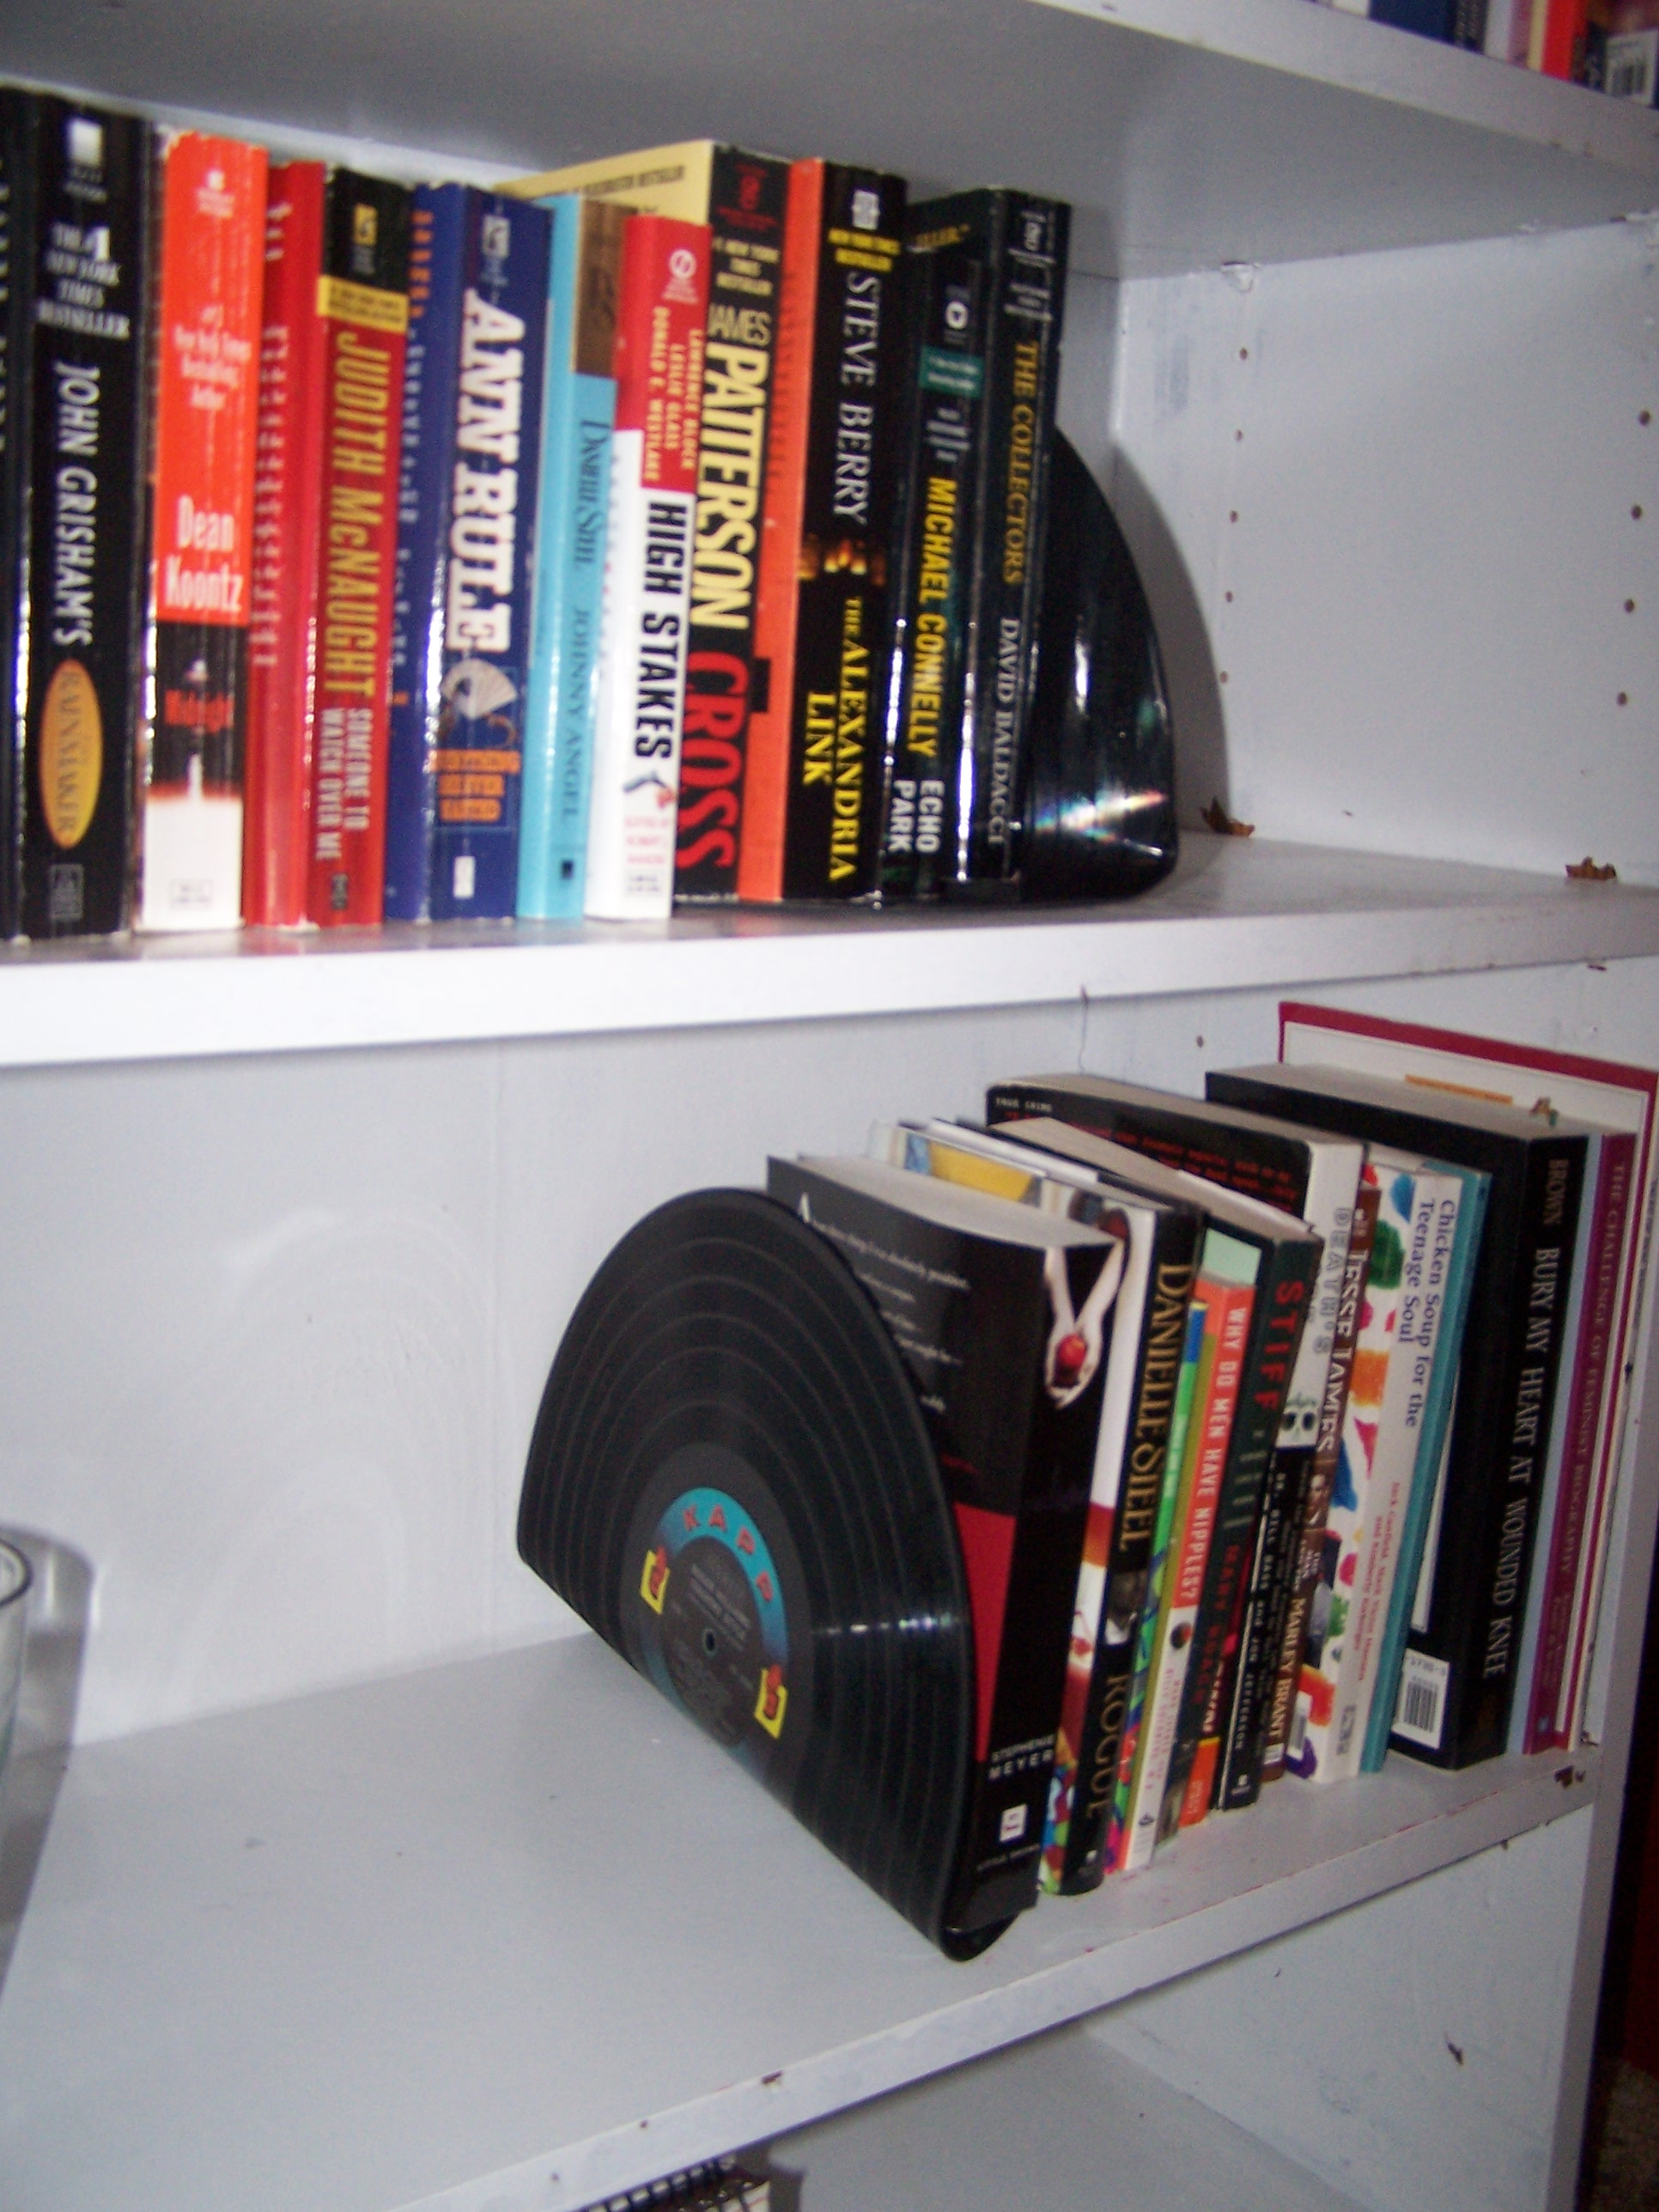
Bookend Project
I have said it before, but I love repurposing items. Especially in these times, finding new life for old items is the greenest option. Some things you hate to ruin by transforming them, but for the most part I believe that reusing old or obsolete items is a far better choice than letting them waste away in some one’s unloving basement, or worse yet, a landfill. Plus, repurposing is often much cheaper than buying new items, as well as healthier for the planet. So, when I get the chance to make a new addition to our home, and at the same time get a new project with old items, I jump on it!
In college I made bowls out of records as a dorm floor project. I still have mine in our office on the book shelf. The other day I saw a project online where book ends were being made out of old records, and decided that would be a perfect addition to the shelves, and even fit in with our music themed office.
I made a stop yesterday at the Salvation Army and picked up two records. They weren’t anything special, just old records in decent shape and with pretty labels. Last night we boiled some water and dumped it in the kitchen sink. The water softens the record and you use a utensil to bend it.
Overall the project was easy and turned out pretty cute!


Cooling off under a box.

Tidying Up
I’m a neat freak. I know it. I’m actually proud of it. I like that my home is always clean, neat, and organized. I feel that everything should have a place. Junk left out of it’s place clutters up your house and really ruins the appearance. I love ugly necessities (like cleaning supplies or utensils) to have a place to be stashed that is concealed when not in use. Not only does this just look so much better, but it also means you will not lose things or forget where you left them. Our cleaning supplies are under the kitchen sink in tubs. We always keep a flashlight right under the sink as well. A few basic tools and utensils that are needed frequently are in a drawer in the kitchen island, and the rest of the tools are in the tool box in the basement. I could tell you where ever item I own is right now. This drives Tony nuts that he has to put everything back in it’s assigned spot, but he will be thanking me in an emergency when I find what we need in seconds!
Anyway, this brings me to the topic at hand. Our mops and brooms. They are too big to fit under the sink, but too ugly to be left leaning against a wall in the kitchen. I had them stashed away in the basement. But, no one wanted to go down there to get them every time there was a mess. I even caught myself on hands and knees wiping up the floor with a paper towel instead of heading to the basement. I knew there had to be a better solution.
We took a trip this weekend to our local hardware store and found a basic hook set. My plan was to hang this strip of hooks inside the basement door for easy access to brooms and mops. The strip was a bit too long to fit from one beam to another along the unfinished basement walls. We compromised and leaned the strip of hooks on it’s side. It actually worked out perfectly, and the long handled tools hang perfectly just inside the door. I’m pleased. 🙂 And, now we can save paper towels and make our lazy selves go grab the mop!

The brooms and mops hanging so nicely just inside our basement door.

The row of hooks that proved to be a simple and inexpensive solution to a daily annoyance.
We were so inspired we even added a couple single hooks to the opposite wall for hanging dog toys and leashes.

These things will no longer have to be draped sloppily over the banister!
Simple fixes make all the difference in a home!
Chair (Bench) Love
This weeks chair love is not only a little early, but a little different. Its not exactly a traditional chair, but a bench. Hey, a bench is a seat too, right? When I saw this little vintage Hollywood Regency style bench on Etsy.com I just couldn’t help but post it. I think this would be adorable as a vanity seat, in a bathroom, or at the foot of a bed. My bed, to be exact!

Gorgeous! If I had any money right now I’d snatch it up! 🙂
New Old Shade
Its official. I am sick of our curtains. All of them. Every room. I knew they were bad from the day we moved in, but now I am at my breaking point. So, on my day off yesterday I did some work and started plunging into our curtain situation.
I thought I would start off small. There was no shade over the large window in our kitchen door. Our neighbors could see right in! I decided to take the old white roller shade from the dining room door (since it also has a curtain) and refinish it to go in the kitchen. I wanted to stick with the black and white theme. I used some swirly scrap-book stencils I had and a paint pen ($3 at Wal-Mart). I laid the stencils out where I liked them, traced, and colored in. Now, viola!


What a simple , inexpensive project with such great results! This weekend I plan to get some black material and sew a valance at the top, as well as simple black curtains to replace the strawberry ones in the kitchen window. Then on to the rest of the house…
P.S. Yes, there is a cute in the shade. The landlord has mis-cut part of the shade. I didn’t want to try out my new paint idea on a new shade and ruin it. We like it well enough that I will soon go through the time and effort to reproduce this on a new shade!


Scrap-booking Question
I have been scrap-booking since I was in high school. I love taking photos and loving preserving memories, so this is quickly became one of my favorite hobbies. Due to being extremely busy I quit scrap-booking for a few years almost completely. The other day I found some very adorable paper and was so inspired I have started scrap-booking again full force. (The paper was from Micheal’s, which I recommend!).
I have come across a small problem, however, that I am hoping you out there in the blog world can help me with. My supplies are currently stored in about 4 different boxes. I rummage through the boxes when I am in search of inspiration or the perfect color of paper. The are constantly getting messy and unmanageable. The boxes are not uniform, either, which makes them hard to store. I am such a neat freak that this is really bothering me. I have seen carrying cases for sale that are meant for scrap-booking, but they are ridiculously overpriced!
My dilemma: I am insearch of an affordable, possibly DIY solution to the scrapbooking mess!

Here are just a couple of my unruly boxes of scrap-booking materials. I love the pink box, as it is an over-sized gift box from Victoria's Secret, but the heavy materials are starting to demolish the box!

Here is just a glimpse of the plethora of supplies needed for scrap-booking. Scissors, stickers, markers, pens, accessories, paper...
I was thinking that sticker sheets and paper might be categorized and sorted in some sort of accordion type portfolio folder (Wal-Mart even carries on in a black and white damask pattern!). But, the 12′ x12′ sheets of paper might not fit in one of those. What do you think? Suggestions?
Here is a glimpse of the pages I have completed recently. Any page ideas? If you would like help with your scrapbook just drop me a line about that as well! 🙂

P.S. It really is too bad that photos don’t do the details of these pages justice, as some of this paper is really gorgeous up close!
Little Coaster Project
Tony has Dallas Cowboys coasters. I have Chicago Bears coasters. Neither were going to be displayed in our nice living room. I love football as much as anybody, but the football paraphernalia is reserved for the basement game room/bar. So, we needed some nice coasters to protect our living room tables. I change my mind frequently, so I wanted something inexpensive or changeable. That’s when I found these. The Dollar Store had a pack of four glass coaster for a couple bucks! Not only are they cheap, but they are changeable. They are the kind of coasters meant for inserting a picture under the glass. I decided to put a piece of black and silver damask wrapping paper in the picture slot. Here was my process:

My supplies. All I used was a scissors and the material (wrapping paper).

I used the blank piece of paper that came in the frame as a guide to cut a rectangle out of the wrapping paper. It then slides into a clear picket in the coaster frame. It was really THAT simple.

This is what it looked like slid into the coaster frame.

Here they all are with the wrapping paper inserted.

They even have their own little wooden holder.
It was so simple and I can change what is in the frames any time I want to. The glass is also very easy to clean off. I wish they were all black, as I am not so fond of the different colors, but it does make it easier to keep track of your drink. And, for a few dollars, who can complain?
Organized Jewelry
Last night I decided that I had had enough digging around for jewelry in the mornings. Or, even worse, just not wearing my fun jewelry because it was too hard to find. So, I organized the vintage medicine cabinet we have hung above our dresser in the bedroom. I took a few old little shot glasses and dishes and a short candle holder and arranged some of my favorite costume jewelry. Now everything is visible and arranged neatly. And, the inside of the cabinet looks so pretty!

Here is the outside of the medicine cabinet. I know you have seen this before, but this is a good angle of the chandelier crystal I used as a pull.

This is the inside of the cabinet all neatly organized and pretty.

Close up of the jars. I love that little one with the skull on it.

FYI: I found these little jars and glasses at the local Salvation Army for about 25cents.
